Fastrack Finescale – Mousa Models Cast Resin Wagon Kits
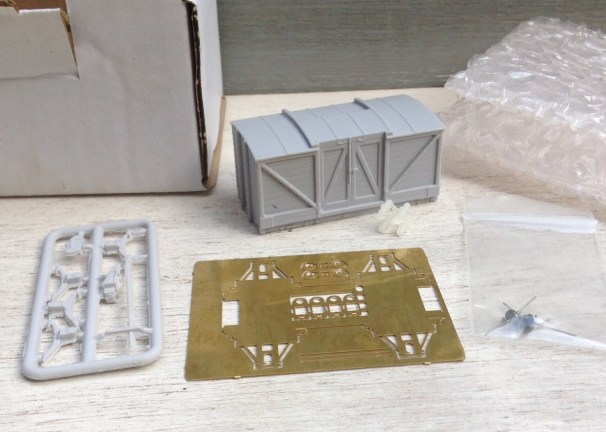
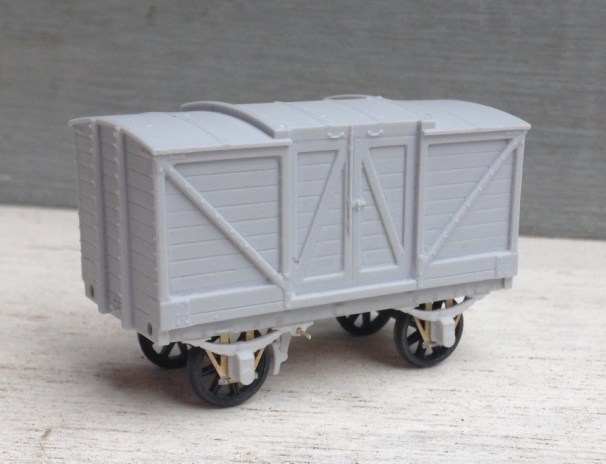
I have been building a couple of Mousa Model‘s kits lately; which has been a bit of a tale of the good, the bad and the ugly. Whilst the bad one will be written about in due course, this is the good one! The remarkable thing about it is its ease and speed of construction – so much so, I timed its construction just to see how fast I could build and paint it. The prototype is a LNWR dia 32 covered goods van, with a door to one side only but also with a roof door. This is the tale of its construction:
0hrs 1 min – Straight out of the box, the body & underframe are separate cast resin parts, as is the fret with the axleboxes, springs and brake gear. The underframe is an etch kit and the buffers are 3-D printed.
0hrs 15mins – The operational underframe has been folded up and fillets of solder run down the joints. Waisted top-hat bearings inserted in the bearing carriers along with the suspension springing wire. The first two carriers have been cleaned up and are inserted in the W-irons ready to receive the first wheel.
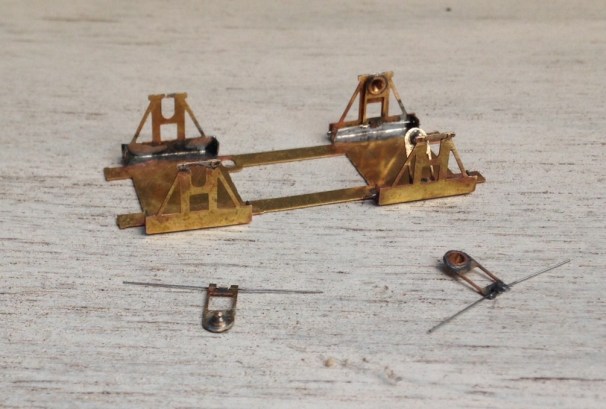
0hrs 25 mins – The remaining bearing carriers have now been fitted and the operational underframe has been stuck to the underside of the cosmetic underframe – wait 10 mins for the araldite to fully go off – so time for a cuppa!
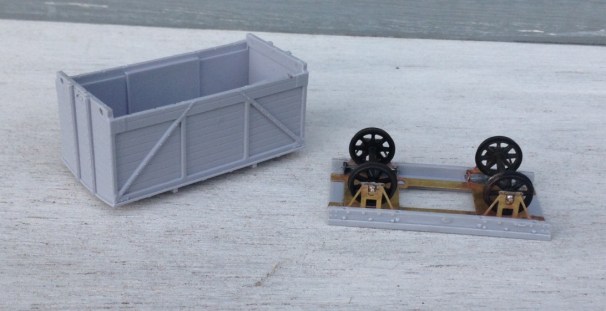
0hrs 45mins – the casting has been cleaned up to remove any casting burs/flash, which was apparent in small amounts around its base but actually the main casting was pretty good. The first two axlebox/spring assemblies fitted – but only after I opened up the rebate to their rear to ensure that the top hat bearings had room to slide and cleared away rather more flash. Being cast resin, the vehicles are pretty light so some weight has been added – 25g per axle is my rule of thumb. One thing I have found with vans is that the weight can detach so I tend to mechanically fix the weight too now, in this case with a couple of 8BA screws.
1hr 0mins – the second set of axle guards and springs now affixed, as is the body to the underframe. I decided that the bolt heads on the solebars were a bit too proud, so took them down a little with some wet and dry paper. A brake block has been attached – the kit provides a choice of timber brake blocks (for early periods) and cast iron – I went for the latter. I also decided, however, to cut away the brake lever as I felt it was both a bit too delicate to survive and also it was not quite straight. Instead, I provided a piece of 0.6mm brass rod to both help secure the brake block in place and to provide a mount for the replacement brake lever.
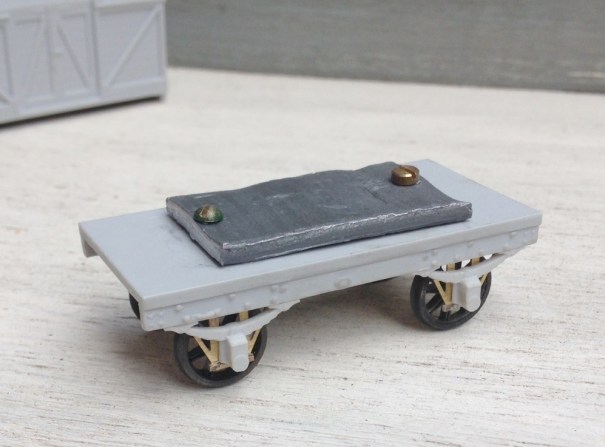
1hr 15mins – the buffer shanks have now been fitted (a tiny amount of fettling was required to the open the holes out slightly) and coupling hooks have been added. The kit does provide etched versions which I only failed to use as I thought I could save 5 minutes of the build by using Exactoscale hooks). A new brake lever and lever guard are etched brass from 51L models and should be more durable than the resin one provided in the kit.
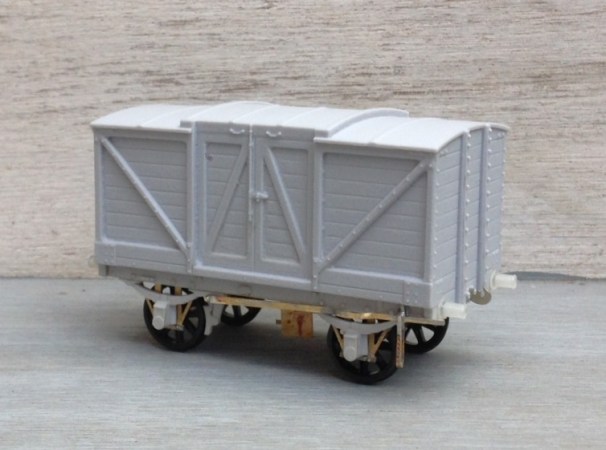
Still 1 hr 15 mins – a piece of PCB has been provided for the eventual fitting of AJ couplings and I took advantage of this to provide a temporary bracket of metal to hold the model by during painting. A good scrub in warm soapy water, followed by a rinse and a second clean with a cream cleaner (washing up liquid leaves a residue, so I always do the final clean prior to painting with a cream cleaner) occurred next. So that is the model built in only an hour and a quarter, which is faster than anything I have built before – including converting r-t-r stock!

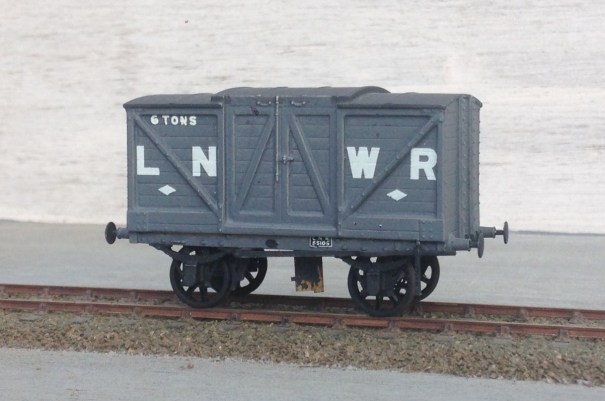
1hr 45mins – after masking the inside of the bearings, the whole model was painted in a mid grey – Tamiya TS 4 (German Grey). I thought this was about right for LNWR grey but as all greys of the time were lead based and thus darkened considerably over time, I tend to be quite cavalier about wagon greys! I did have a bit of an accident such that it ran on the roof but this was salvagable with a little bit of wet and dry once it had dried off. These paints finish to a semi gloss and thus are ideal for taking transfers, in this case HMRS Transfers sheet 16 in methfix because the vans were pretty archaic by the time that the grouping occurred, so I presumed that few would have been repainted in LMS livery.
2hr 15mins (but 10 mins of this was me correcting my messed up roof painting!) – ironwork below the solebar, the draw bar, buffer shanks and brake lever were all picked out in black. All then sealed with Testors dullcoat a couple of times.
So whats left? – I do need to weather it, some AJ’s need to be fitted and the “holding tab” will need to be removed. I am waiting to do a batch of weathering, so it will be a bit quicker; maybe 30 minutes for the vehicle. So I reckon this will be a complete, painted and weathered very good quality van or wagon on the 3 hour mark – well worth doing and no need to moan about when the r-t-r manufacturer is going to produce it!
Posted on April 22, 2017, in Workbench (stock) and tagged Finescale, LNWR, London North Western Railway, Model Railway, Mousa Models, p4, van. Bookmark the permalink. 6 Comments.

Aren’t you supposed to be on your way to a wedding party?
Looks good though
I dunno: 22 quid for only two hours of entertainment. Maybe the “bad” will be better value 🙂
Ha ha!!
Te ad certainly took a lot longer!
Pingback: Dirty Models…….. | highland miscellany
Pingback: Something Fishy……. | highland miscellany