Blog Archives

And now a Midland signal…..
Whilst the NER signal from my last post gets itself painted, I turned my attention to the next few signals – in this case these will be Midland lower quadrants.
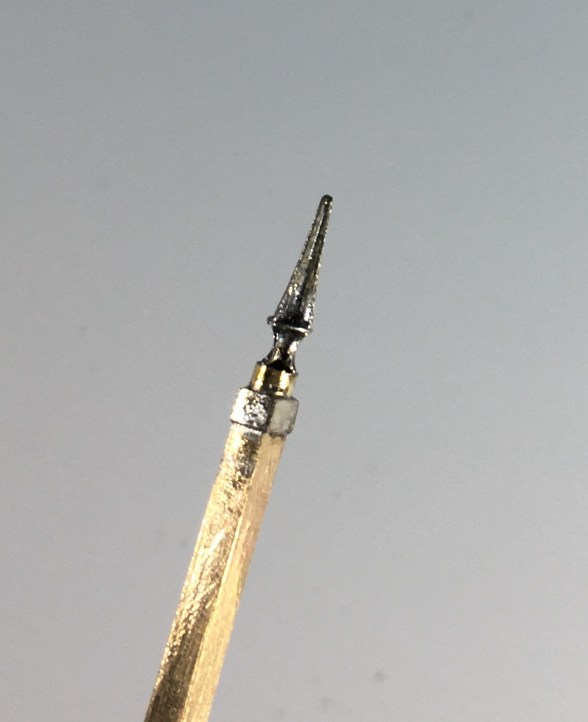
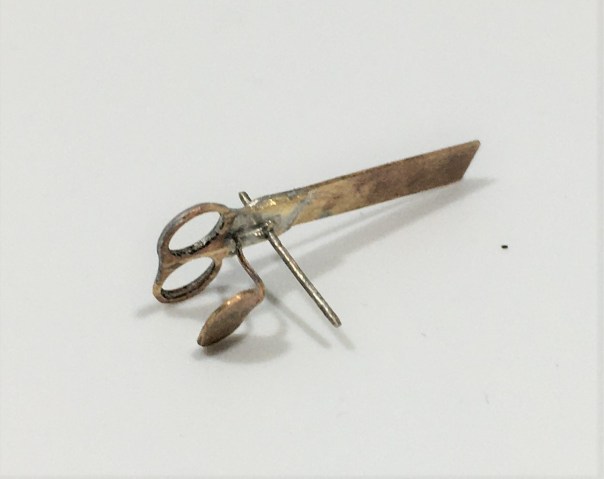
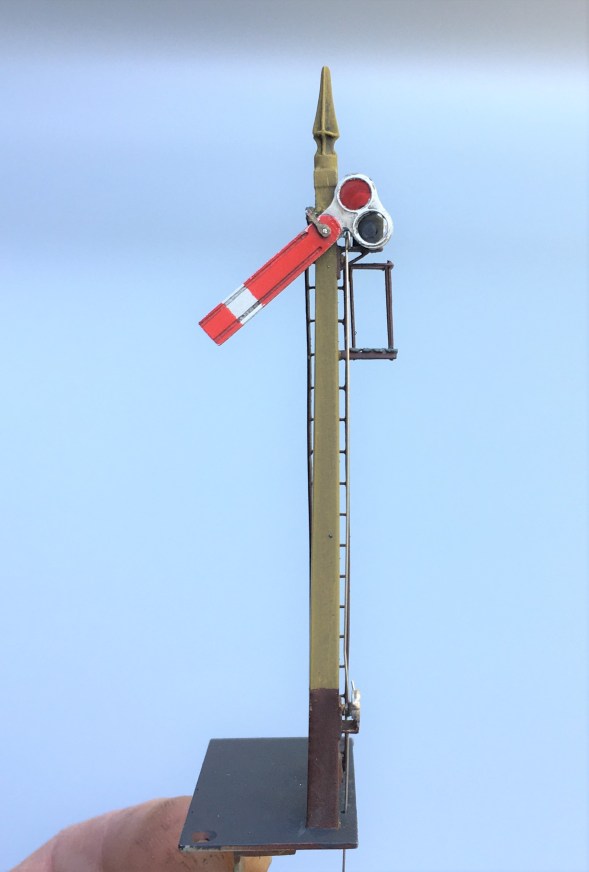
A lot of the character of a signal is in its finial and if this isn’t right then the model won’t convince. In addition, they are also very vulnerable so need to be durable. Therefore, my conclusion is that white metal finials do not cut the mustard – they are too delicate and too clunky. Thus, in this case I decided to make my own – I came up with this which starts with with some interlocking etches:
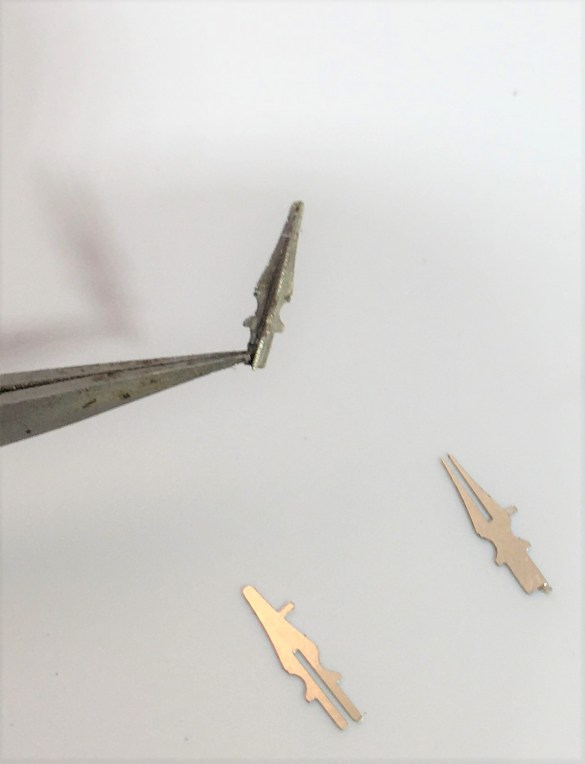
And then a bit of brass tube as a collar at the base
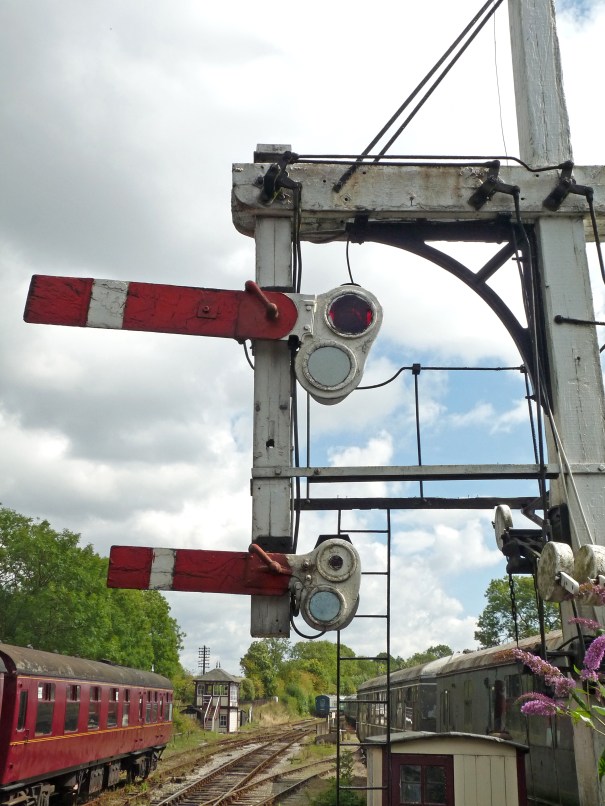
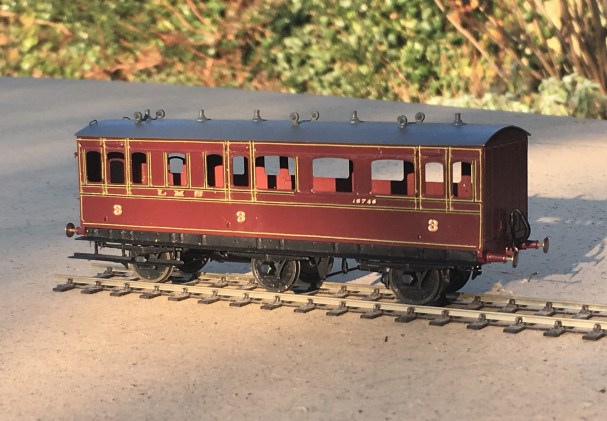
The Midland’s style of signals do have a few idiosyncrasies; one of which is the way that blinders are fixed. Instead of being fixed to the spindle these are secured to the arms and wrap around the lamp. This can be more clearly seen in the photograph below.
The other key change was in the manner in that the arms are secured to the posts. Instead of being pined through the arm and secured at the rear, the Midland used a bracket to the front of the post with a plate that wrapped around to the front of the signal to support the arm to the front. This can be seen in this view of a rather nice gallows signal at Butterley.
The bracket can be seen in this view below and I then created a pin that fitted into the bracket and slotted over the spindle.
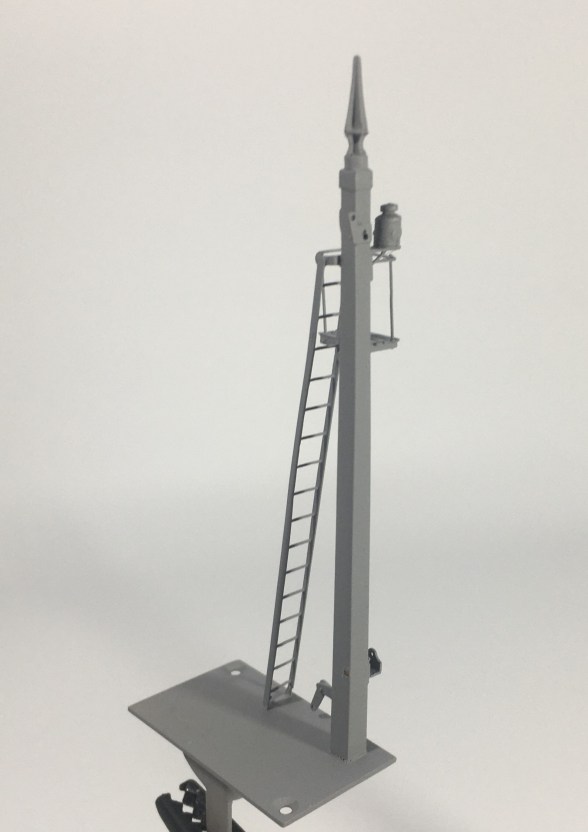
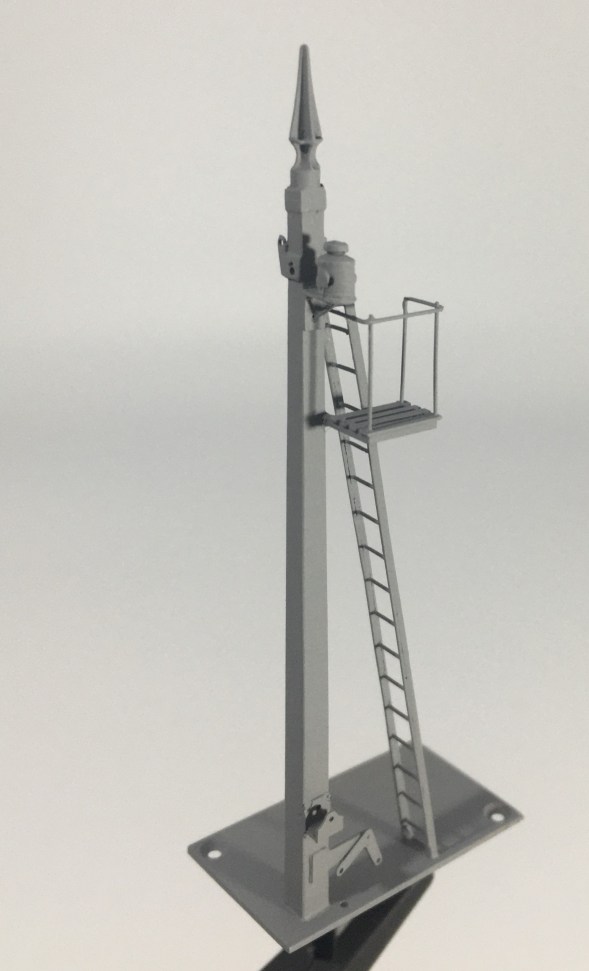
I have bought a new light box for taking photographs in. Whilst I am still getting to grips with it, when it works it does produce much improved pictures of models. These almost look like an images of a 3D model on a computer screen. The pliers at the bottom of these views do rather give the game away!
The Midland were a bit odd in their choice of colours for their signals. The posts were “primrose yellow” but this quickly dirtied to something akin to cotswold stone is what the book says, so this does give something a little different. This is my representation of this with a decent dose of smokey dirt – when you look at contemporary photographs many signals were not only dirty but entirely smothered in smoke. I haven’t gone that far yet, but its going to need to be done!
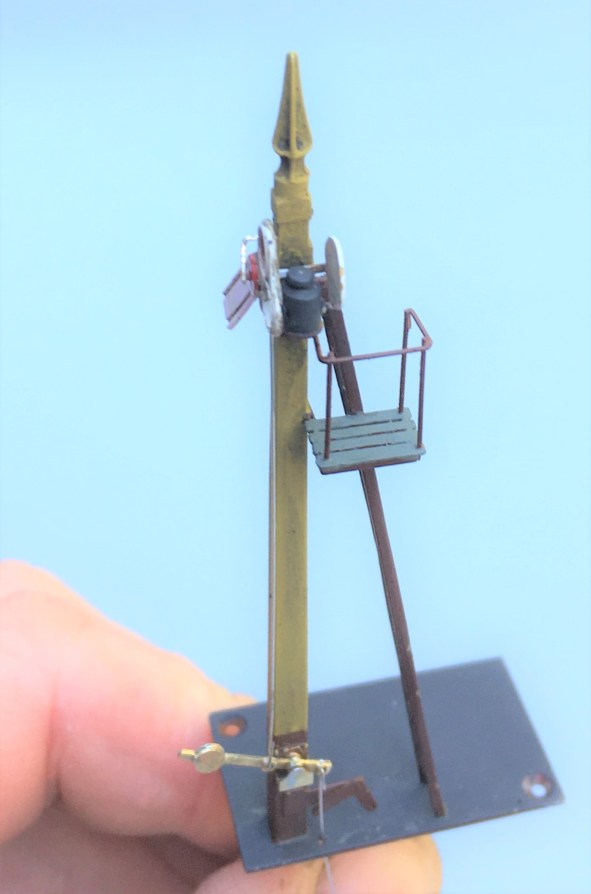
As can be seen, this still needs connecting to the servos and the touching in of the paint on the parts that I fit after the main assembly (the balance lever and the plate that wrapped around the signal arm).

Lining Things Up….
As usual, I set off over the festive break with plans to do all sorts of things and failed to do any of them fully. One aspect that I did get moved forward though was the painting and lining of a couple of my six wheeled coaches.
Back in my youth, lining pens held no fear and I could genuinely dash off a fully lined coach in a few evenings. Thirty years of pushing a computer keyboard has dulled my drawing skills to the point where I am close to terrified to pick up a bow pen and I have not had the nerve to line a coach for a long time. I am confronting this fear in a couple of months by attending a class run by Ian Rathbone on painting and lining at Missenden Railway Modellers. In the meantime, however, I can still line utilising transfers, in this case those provided by Fox Transfers.
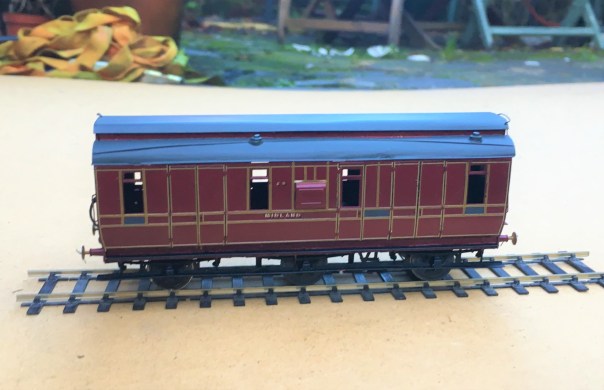
Being preformed in straight lines, these do work best for the square panelled beading of some of the Midland Clayton stock, like my dia 501 full brake. I had taken care in designing this with beading sizes that were correct (and matched the Fox Transfers). They thus work quite well I think.
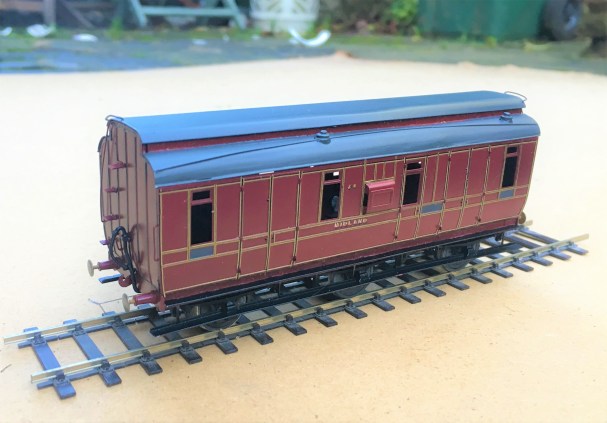
I deliberately left the handrails and door handles off at this stage to make the lining easier but the door hinges still created problems that I will need to touch in with acrylic paints; burnt ochre looks about right. I also still need to block in the black to the head and foot of the sides plus where the lengths of transfer where they crossed – I will do this with a Roting pen as I still feel confident enought to wield this!
So there is still plenty to do, but I am dead chuffed with this and it will soon be finished and ready for service.
Second up is a Lochgorm Models third class saloon that has been waiting for its lining for rather longer. It is a more difficult prospect to line as it has round corners to the panels and, over the doors and windows, shallow arcs. These can’t be formed with transfers as these are straight. I have thus used the transfers for the straight sections and then brush painted the curved sections with cadmium yellow acrylic paint.
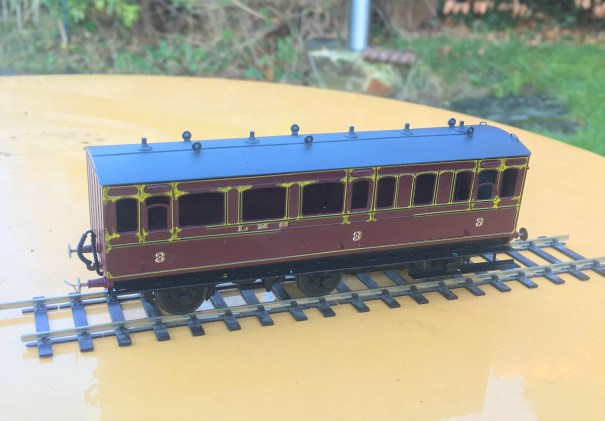
If all goes well, the Roting pen can then be used to infill the black to the centre and form the curves across the windows and doors. Lets see!

News from Miscellany Models
Followers of this blog will have noted that various test builds of my artwork coming together and I am now able to offer a number of these for sale under the name of Miscellany Models.
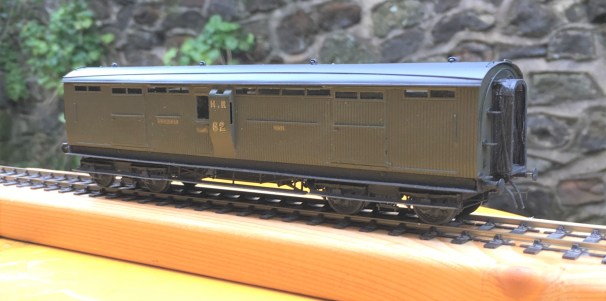
First up is a Highland Railway/LMS/BR diagram 51 full brake – priced at £48.00 for a 4mm and is suitable for OO, EM or P4. These were the last generation of full brake produced by the Highland, built with both cupboard doors and sliding doors as well as alternative forms of guards duckets (all of these are included in the kit). The kit inclusive of fully sprung Fox bogies (see below), roof, corridor connections (also see below) but all castings and buffers will need to be sourced separately. The castings for the bogies are proposed, but are not presently available.
As was common with many pre-grouping coaches these vehicles utilised Fox Bogies (£16.00) and these are being made separately to the remainder of the kit, These bogies have been developed in conjunction with Justin at Rumney Models and are fully sprung, with both the axleboxes and the bolsters sprung. They really do glide across track and look as if they weigh many tons rather than a few grams! They need castings for your favoured axleboxes/springs and bolsters but do include the foot steps and all of the bogies sides, brakes and details. Suitable for oo, EM and P4.
.JPG.3b26712c4490ad68695b10226612a0a9.JPG)
The second coach kit is for a MR/LMS/BR: Dia 530 Passenger Brake – priced at £36.00 in 4mm scale (suitable for OO, EM and P4). This prototype was built in some numbers and by the 1920s they were spread extensively across the LMS system. The kit is for full etches covering the roof, body, underframe and footboards plus parts for the sliding central axle included. It needs axlebox/springs (available from Branchlines or Coopercraft), gas lamps, buffers, brake and gas cylinders.
.JPG.1678157932a192d68328755d825c54f0.JPG)
On the wagon front, there is an etch to detail the NER/LNER/BR: Dia P7 Hopper Wagon – £13.50 4mm (sufficient for two wagons). They cater for a large number of the variants to this numerous and long lasting hopper wagon. Needs wheels and the Slaters kit P7 kit for the donor model. Variants that can be made include the end braked version, improved components for the Morton braked version, outside twin W irons and also the anti-friction wheel device.

All of these are available from my website https://miscellanymodels.com/ and in addition to this from the Rumney Models stand at the following shows – Scalefour North in April, Railex in May, Scalefourum in September and South Hants in November,
All of these have been extensively road tested by me with a couple of test builds for each of them. You can see this unfold on my blog and if you are interested in seeing how they go together do take a look!
Please remember that the availability of these models is an adjunct to my own hobby and this has to be accommodated within the constraints of my day job and general life! In particular I can’t get to post these orders until Saturdays so do please give me a little slack when it comes to getting the goods to you!

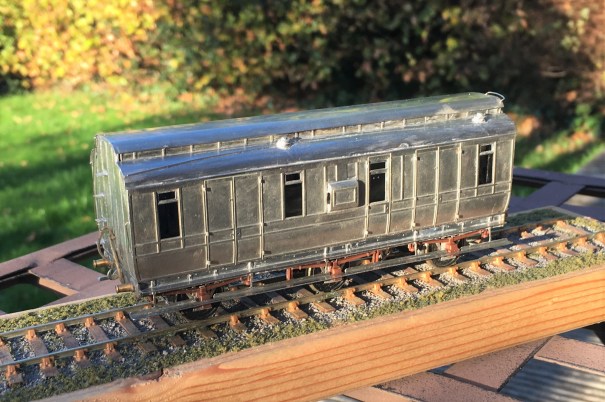
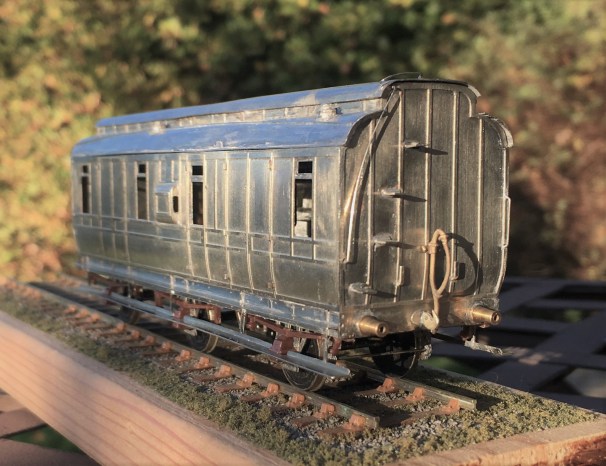
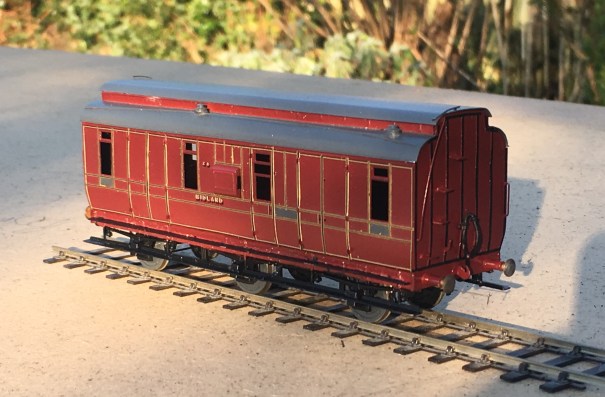
Midland Six Wheeled Full Brakes
Although not Highland vehicles, these full brakes have a strong association with the Highland’s branchlines in the post grouping years. Once the LMS took over the Highland’s system in 1923, they seemed to have been horrified by the state of the coaching stock that they inherited! Portions of the Highland’s fleet were speedily retired and large numbers of foreign company’s stock was drafted onto the system (especially the main line from Perth to Inverness, where the trains became fully corridor connected almost overnight).
When it came to the branchlines, the upgrade came primarily by the cascading of the better Highland stock onto these lines but there were exceptions. Although the Highland had full brakes, it was a line that had a lot of parcels/packages traffic, so it seemed that they needed even more and a batch of these Midland six wheeled full brakes were drafted in.

Many photographs of the Highland branchlines of the 1920s had one lurking in the background so I felt one should get to make appearances on Glenmutchkin. Simple, I thought, Slaters do a plastic kit for one and whilst it is no longer available, it is easy to pick up second hand and it should be a nice quick build. Unfortunately, I had not realised what a rubbish kit it was! It is too short and too narrow, most of the mastering is really crude and the panelling in particular would be a scale 6 inches deep. So the Slaters kit made it back on ebay only marginally quicker than it came off and I set about designing my own kit.
It has taken a couple of iterations and about three years, but finally I have got to the stage where I am happy with it but you can form your own view!
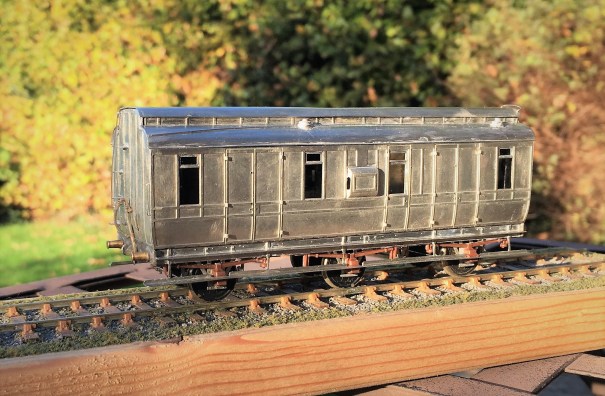
The first iteration used a cleminson chassis but in the light of the success I had with sliding axles on some of my other 6 wheeled stock, I redesigned it to include these and some sprung W-irons in the style of Bill Bedford’s.
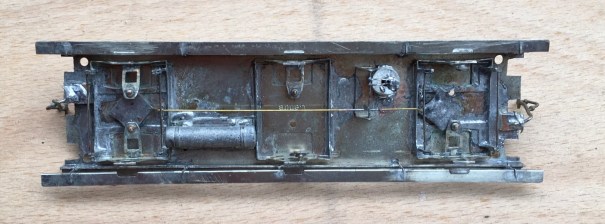
This proved similarly successful and as you can see in the video, it trundles along quite nicely!
Other than the use of these sliding axles, the main unusual feature of the model is the arrangement of securing the roof. I have found that it is essential to bolt these in place to prevent the roof becoming adrift at some point in the future (which has happened to half my stock over time). Therefore, I designed a set of legs that allow the roof to be bolted through the floor from below and in the process also securing the separate chassis tight too. Broken down, the components look like this and having them separated does make painting a lot easier. It is definitely the route I will take in the future.

It is intended that this kit will be made available for sale as a 4mm/1ft model – albeit you will need to source the fittings/castings yourself. I have prepared some fairly extensive instructions (see link below) and this includes the details of what is required and where to get it from. I am waiting for a quote from the etching company to be able to work out the sensible cost for these; so an update post will follow when I list it on the Miscellany Models site.
Miscellany Models Rolling Stock 2 – Midland dia 530 Full Brake v2
In the meantime, here are a couple of additional views of the completed vehicle, awaiting its turn in the paintshop!