Blog Archives

Couldn’t Have Done It Without………3
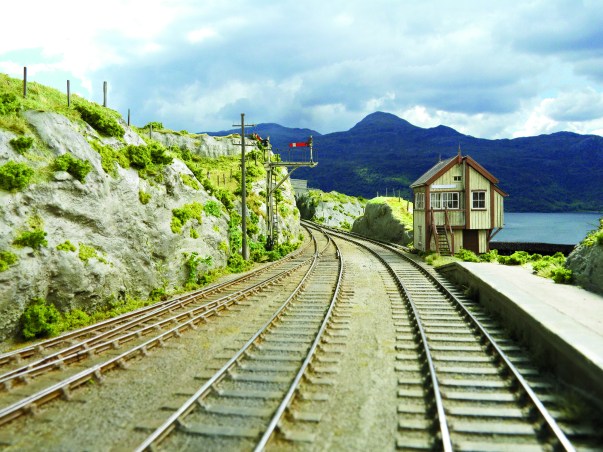
Here is something that I have not seen anyone else singing the praises of; the cast brass version of Exactoscale’s fishplates.
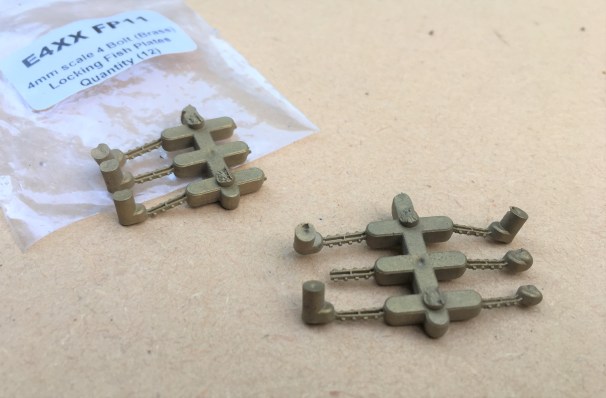
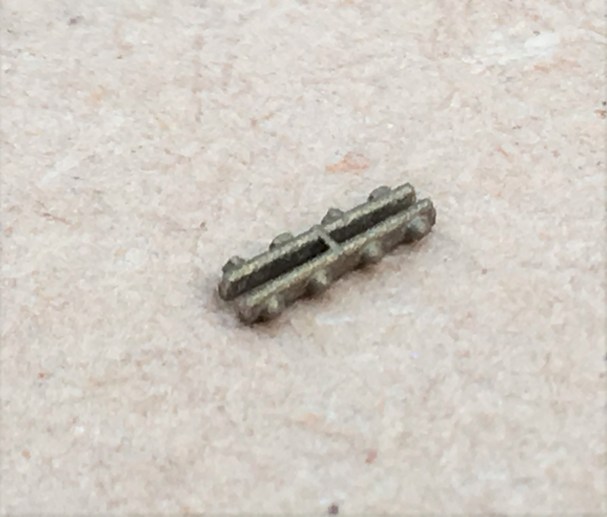
As can easily be seen, these are both cosmetic renditions of a real fishplate from the bullhead track era and can also be used to create a functional joint between rails. These are not that strong and can’t really be relied upon to firmly hold one piece of track to the other. However, what they are strong enough to do is hold one piece of track relative to the other.
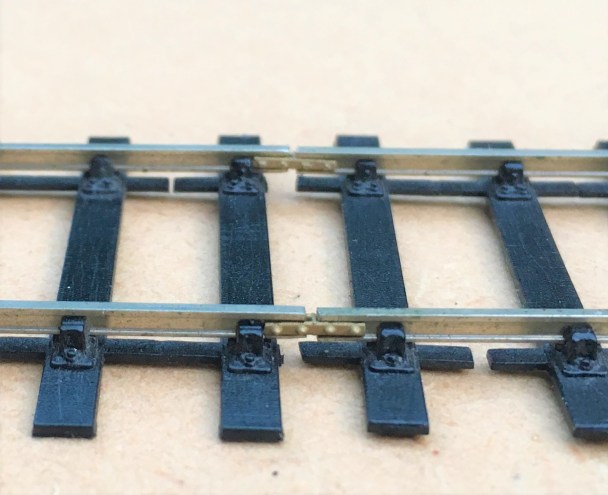
Therefore, they come into their own when track is being laid. Once one piece of rail is glued in place, it is necessary to ensure that the next is exactly in line with it and this is actually not nearly so easy to do as it might seem; especially when we a P4 modeller such as myself is interested in fractions of a millimetre and then makes life difficult for myself by covering the additional piece of track is them covered with weights. These are just perfect for this, they provide enough locational direction to ensure one piece flows to the next.
There is of course nothing new about using fishplates to join model train track together; it has been de-rigueur for Hornby & Peco since the dawn of time. What has happened is that the finescale fraternity have forgotten their roots a little and ignored the simplicity of some of the toy train solutions such as this.

That was the weekend that was….
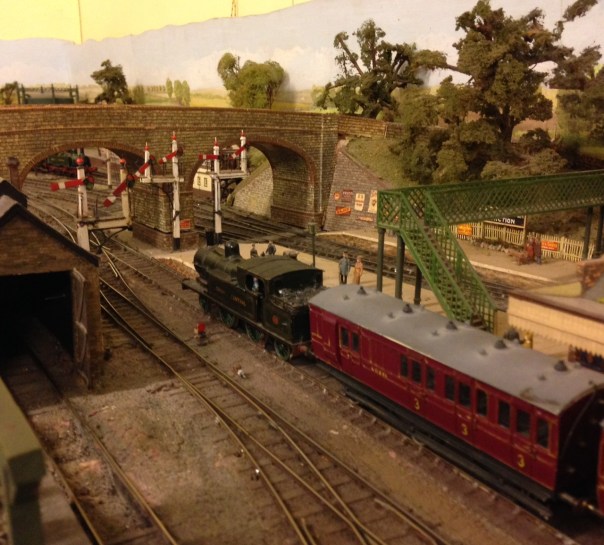
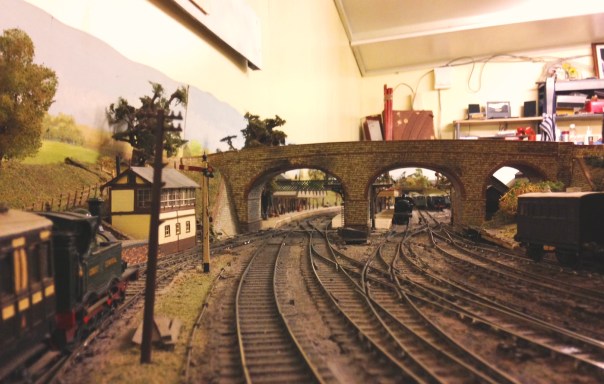
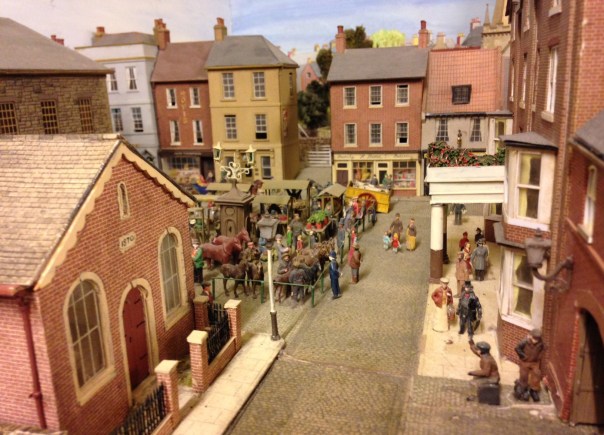
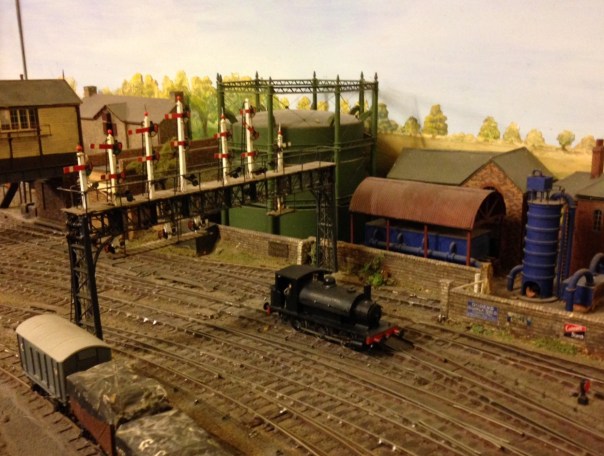
Well the layout made it to and from Scaleforum – possibly I did too!
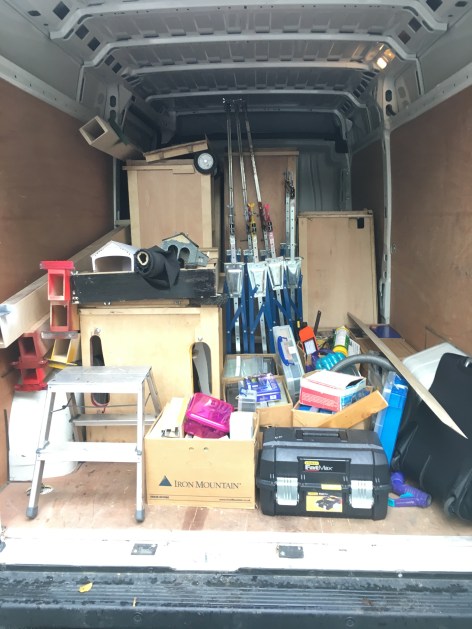
Last Friday, the inside of the hire van looked like this. Whilst the cases worked a treat, the dismantling of the layout from being set up on my own took a long time – much longer than I had hoped or expected.
Once at the venue, I was able to press gang some “volunteers” to erect the layout and this was much easier.
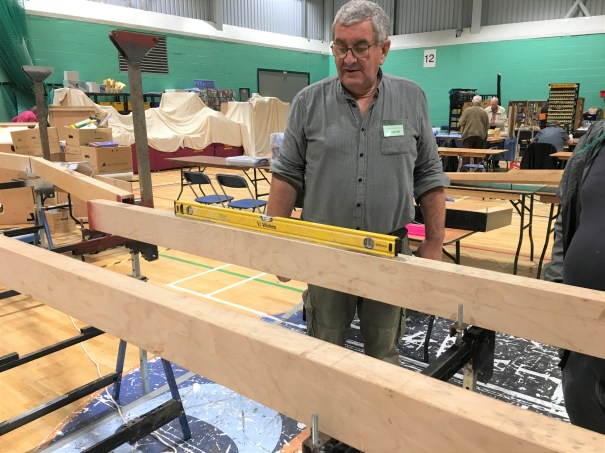
Getting the beams levelled up was speedy even though none of my press team had any experience of my logic! Indeed, with their help, it assembled itself quicker than Portchullin does although the jury is out in my mind as to whether this is simply because it as yet has rather less on it!
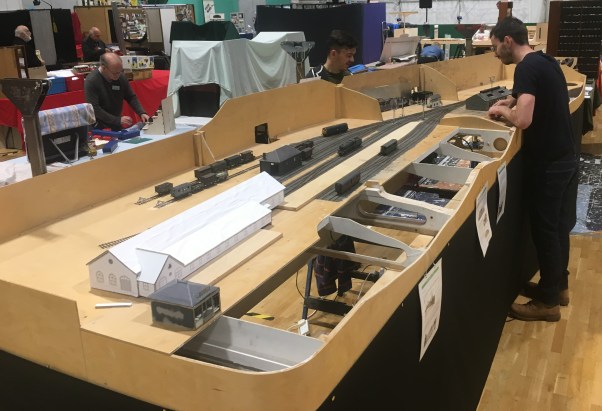
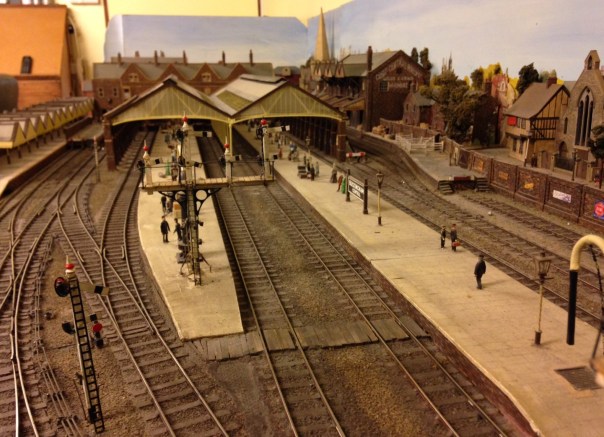
The layout’s size quite quickly became apparent; especially its depth – as can be seen here with Chris in the background for a sense of sale! Please don’t tell my wife this is actually quite big, I have been telling her it is pretty normally sized!
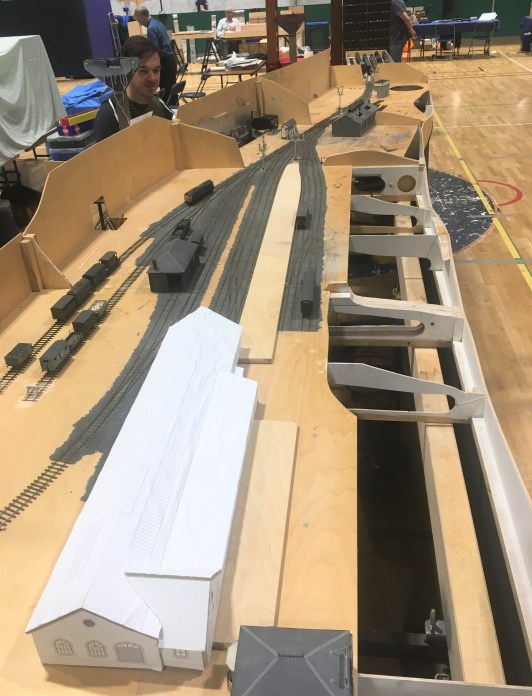
I did not manage to get front side all that often so I have only fairly limited numbers of photographs. Fortunately Samuel Bennett has come to my rescue and has provided a number of photographs to show what it looked like to the visitor.
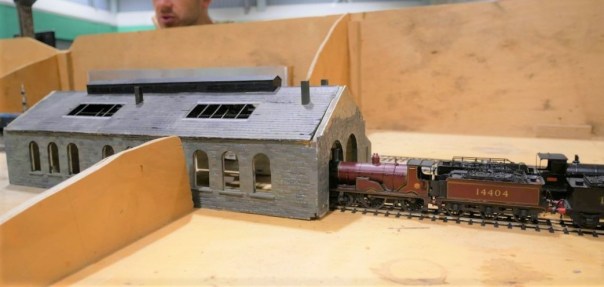
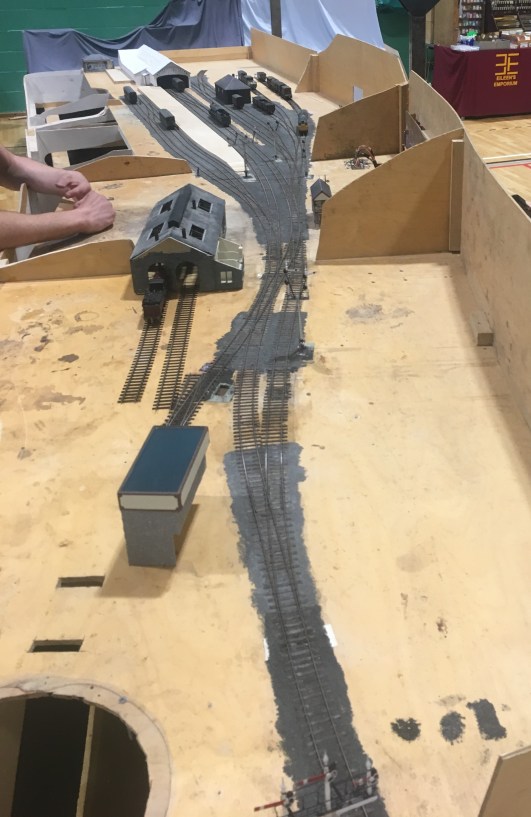
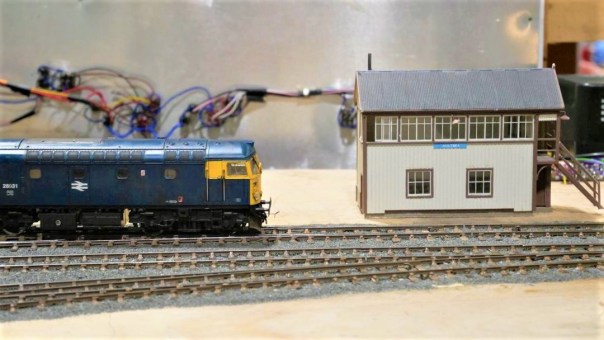
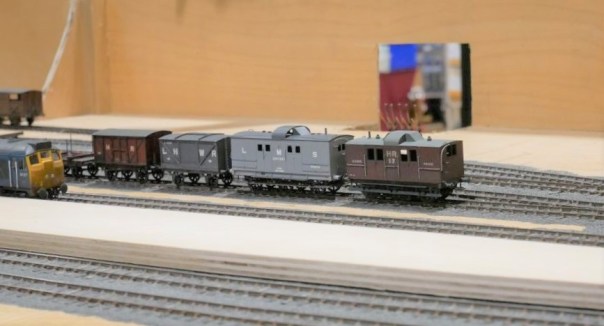
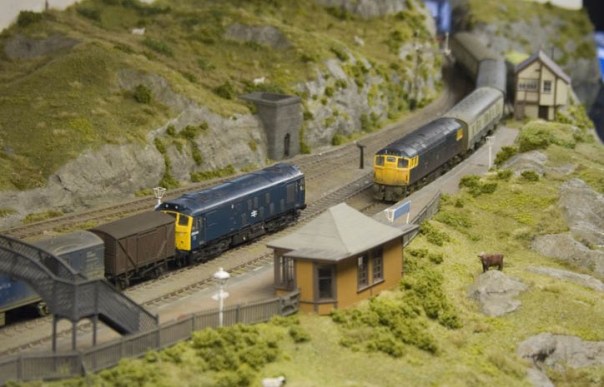
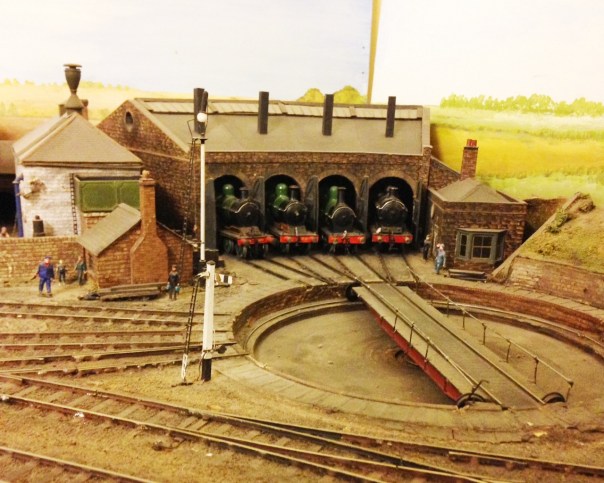
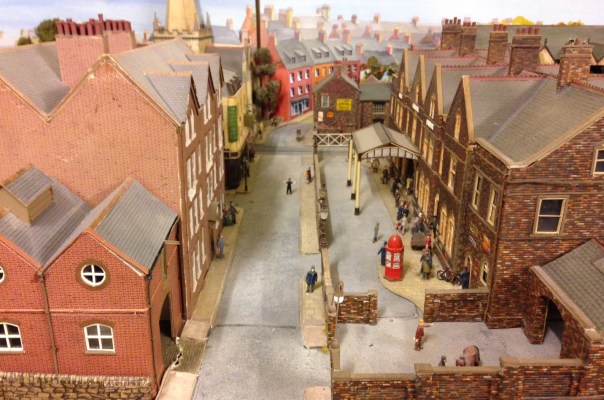
We only had three correct Highland locos chipped up (and one of these decided to sulk after a couple of hours!) so we did break out the blue diesels to make sure we had a fully operational layout. Above there are a few of the locos awaiting chipping on shed and below we have the scene 50 years later!
……..and below is simply confused!
Although the layout did not operate perfectly, it did behave much better than I (and my operating team) had feared! The two page list of faults and issues to resolve with the trackwork, wiring or stock is a fraction of the list that would have existed after Portchullin’s first outing (if I ever had one!).
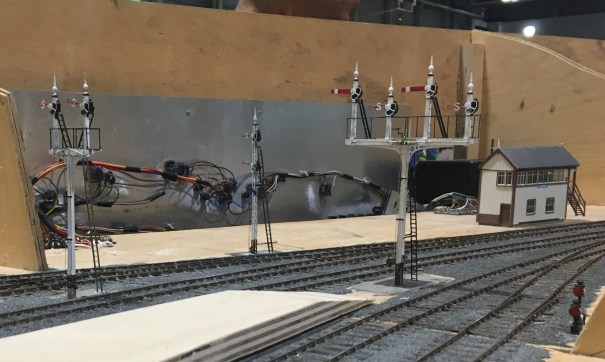
The signals received a lot of comment, even if there was one missing because I managed to damage it as I was packing the layout. There’ll be another post on these soon.

Going Dutch – Two for the Price of One!
Portchullin’s next exhibition may not be the furthest it has travelled but it will definitely be a first for the layout and indeed myself – an exhibition on the continent. In this case Modelspoor 2018 which takes place on the 23 – 25 February in the Euroteco Centre, Houten, near Utrecht in the Netherlands.
To the Anglo-Saxons amongst us, do not be put off by the website being written in Dutch. Basically almost everyone in the Netherlands speaks good English (embarrassingly perfect English typically) and it is a really easy country to travel around, engage with people and see what they have to offer. Although I have not been to Modelspoor before I have heard a lot about it – think Warley * 3 seems to be the gist of it (which may be a bit much in truth!). However, it has a core of “finescale” from across Europe to which I was very flattered to be invited and I hear is worth seeing in any case.
And of seeing Portchullin is a sufficient excuse to high-tail it over to Holland, coming in the van will also be Oly’s Six Quarters layout. In contrast to the fresh air of the west of Scotland, Six Quarters has air laced with Cumbrian coal dust and grime!
There are a number of other very good layouts there, including Jerry Clifford’s Highclere Colliery (under a new name I hear) and Gordon Gravett’s Arun Quay. Se even if you don’t fancy Portchullin or Six Quarters much (shame on you), it is still worth a visit.
So if anyone that reads this blog (well, either of you!) is over in Holland in a couple of weeks time, do pop over and say hello!

Fastrack Finescale – Mousa Models Cast Resin Wagon Kits
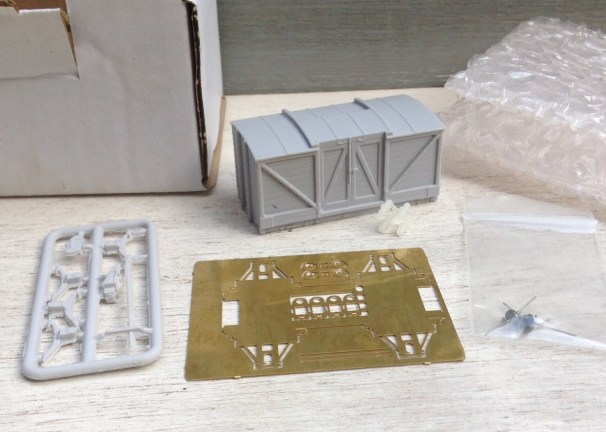
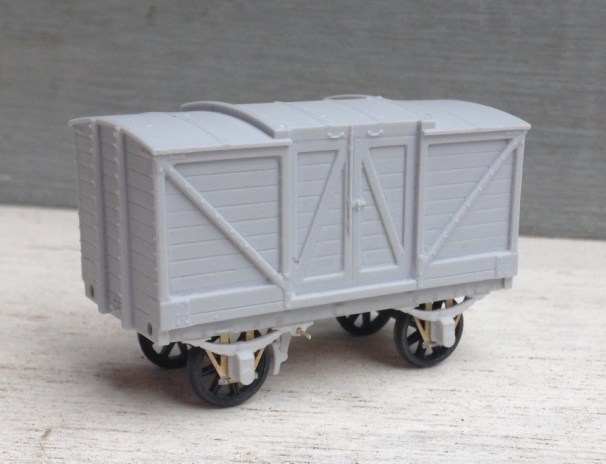
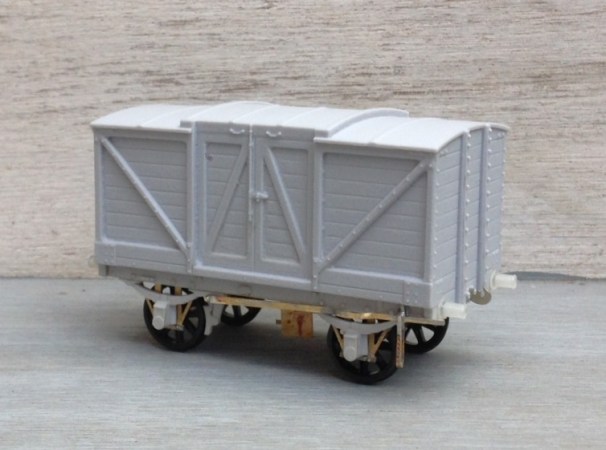
I have been building a couple of Mousa Model‘s kits lately; which has been a bit of a tale of the good, the bad and the ugly. Whilst the bad one will be written about in due course, this is the good one! The remarkable thing about it is its ease and speed of construction – so much so, I timed its construction just to see how fast I could build and paint it. The prototype is a LNWR dia 32 covered goods van, with a door to one side only but also with a roof door. This is the tale of its construction:
0hrs 1 min – Straight out of the box, the body & underframe are separate cast resin parts, as is the fret with the axleboxes, springs and brake gear. The underframe is an etch kit and the buffers are 3-D printed.
0hrs 15mins – The operational underframe has been folded up and fillets of solder run down the joints. Waisted top-hat bearings inserted in the bearing carriers along with the suspension springing wire. The first two carriers have been cleaned up and are inserted in the W-irons ready to receive the first wheel.
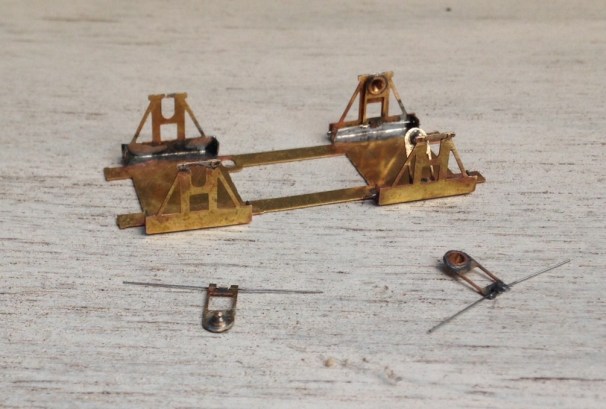
0hrs 25 mins – The remaining bearing carriers have now been fitted and the operational underframe has been stuck to the underside of the cosmetic underframe – wait 10 mins for the araldite to fully go off – so time for a cuppa!
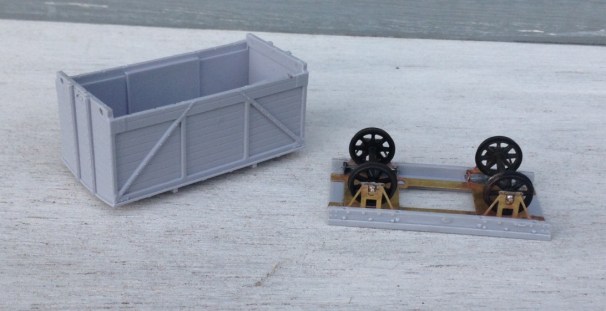
0hrs 45mins – the casting has been cleaned up to remove any casting burs/flash, which was apparent in small amounts around its base but actually the main casting was pretty good. The first two axlebox/spring assemblies fitted – but only after I opened up the rebate to their rear to ensure that the top hat bearings had room to slide and cleared away rather more flash. Being cast resin, the vehicles are pretty light so some weight has been added – 25g per axle is my rule of thumb. One thing I have found with vans is that the weight can detach so I tend to mechanically fix the weight too now, in this case with a couple of 8BA screws.
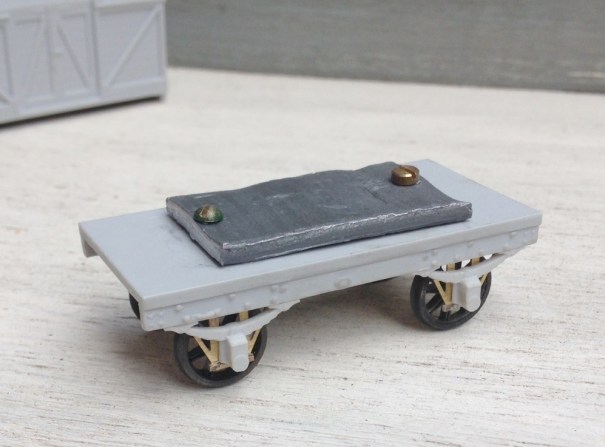
1hr 0mins – the second set of axle guards and springs now affixed, as is the body to the underframe. I decided that the bolt heads on the solebars were a bit too proud, so took them down a little with some wet and dry paper. A brake block has been attached – the kit provides a choice of timber brake blocks (for early periods) and cast iron – I went for the latter. I also decided, however, to cut away the brake lever as I felt it was both a bit too delicate to survive and also it was not quite straight. Instead, I provided a piece of 0.6mm brass rod to both help secure the brake block in place and to provide a mount for the replacement brake lever.
1hr 15mins – the buffer shanks have now been fitted (a tiny amount of fettling was required to the open the holes out slightly) and coupling hooks have been added. The kit does provide etched versions which I only failed to use as I thought I could save 5 minutes of the build by using Exactoscale hooks). A new brake lever and lever guard are etched brass from 51L models and should be more durable than the resin one provided in the kit.
Still 1 hr 15 mins – a piece of PCB has been provided for the eventual fitting of AJ couplings and I took advantage of this to provide a temporary bracket of metal to hold the model by during painting. A good scrub in warm soapy water, followed by a rinse and a second clean with a cream cleaner (washing up liquid leaves a residue, so I always do the final clean prior to painting with a cream cleaner) occurred next. So that is the model built in only an hour and a quarter, which is faster than anything I have built before – including converting r-t-r stock!

1hr 45mins – after masking the inside of the bearings, the whole model was painted in a mid grey – Tamiya TS 4 (German Grey). I thought this was about right for LNWR grey but as all greys of the time were lead based and thus darkened considerably over time, I tend to be quite cavalier about wagon greys! I did have a bit of an accident such that it ran on the roof but this was salvagable with a little bit of wet and dry once it had dried off. These paints finish to a semi gloss and thus are ideal for taking transfers, in this case HMRS Transfers sheet 16 in methfix because the vans were pretty archaic by the time that the grouping occurred, so I presumed that few would have been repainted in LMS livery.
2hr 15mins (but 10 mins of this was me correcting my messed up roof painting!) – ironwork below the solebar, the draw bar, buffer shanks and brake lever were all picked out in black. All then sealed with Testors dullcoat a couple of times.
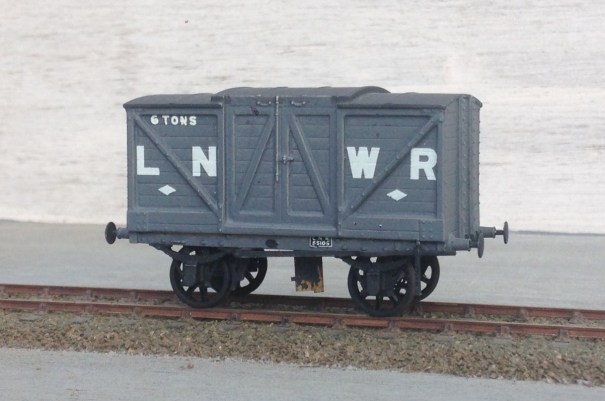
So whats left? – I do need to weather it, some AJ’s need to be fitted and the “holding tab” will need to be removed. I am waiting to do a batch of weathering, so it will be a bit quicker; maybe 30 minutes for the vehicle. So I reckon this will be a complete, painted and weathered very good quality van or wagon on the 3 hour mark – well worth doing and no need to moan about when the r-t-r manufacturer is going to produce it!

Buckingham Central
As we had to travel to Nottingham today to return my son to uni, we took the opportunity of accepting a fairly long standing offer to see Peter Denny’s Buckingham branch which now resides with Tony Gee.
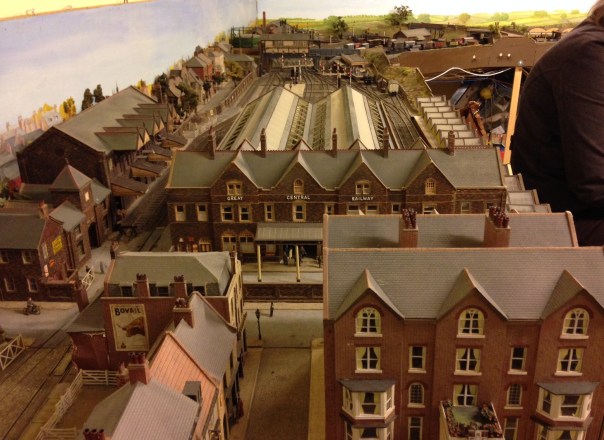
Most of you will, I suspect, be aware that Buckingham was about the first EM gauge layout ever constructed (apparently, there was one other at about the same time) and can thus be said to be pretty much the daddy of the finescale model railway.
The layout has origins that go back as far as 1947, so is approaching 70 years old. There are a number of elements that go back to this era still on the layout, including the tank loco shown above which was built from the very earliest of plastics; I hope I look as good as that when I hit 70!
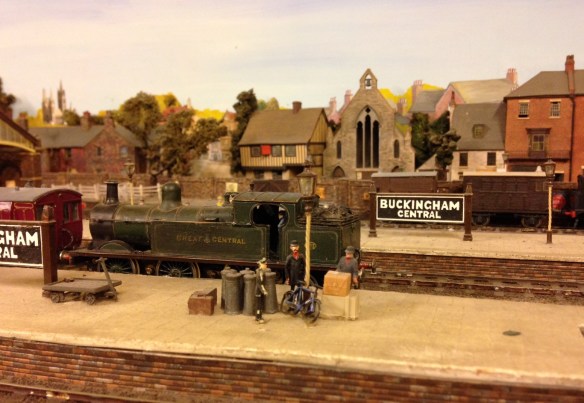
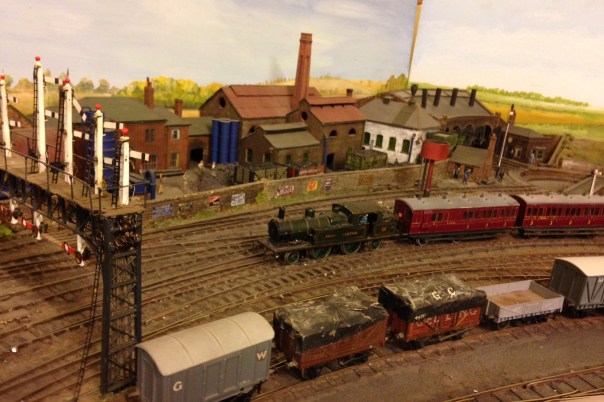
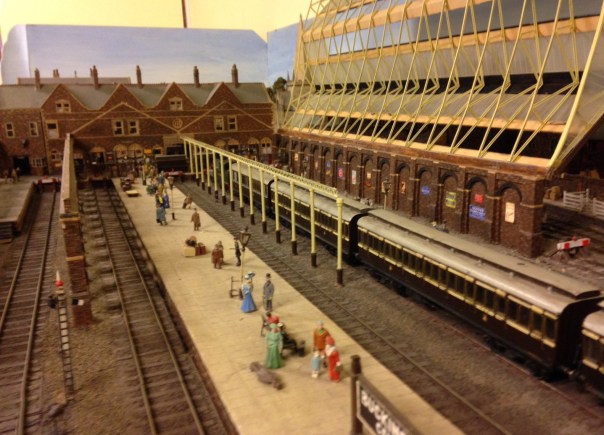
Whilst there have been several generations of layout, the core has always been an imaginary line to Buckingham from the Great Central mainline to London. Buckingham is, of course, a much bigger town in this imaginary world and justifies a fairly significant service of commuter, local, parcels and goods trains. In the view below, we see a “businessman’s express” for London readying for departure from Buckingham and then below that the peace and quiet of the station once it has gone.
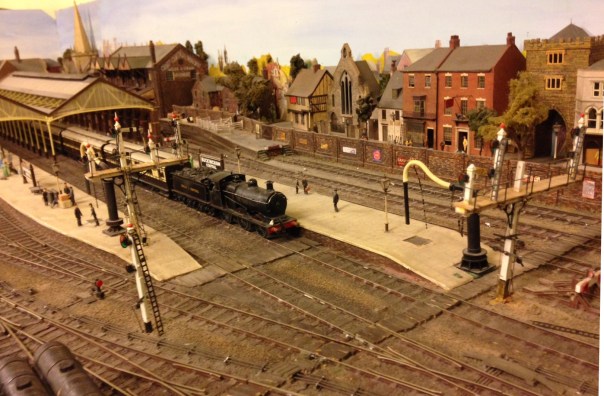
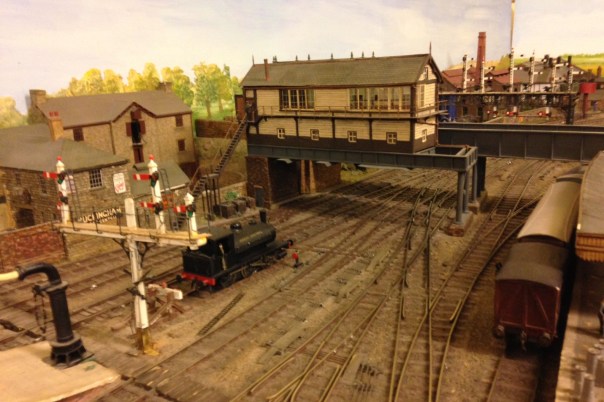
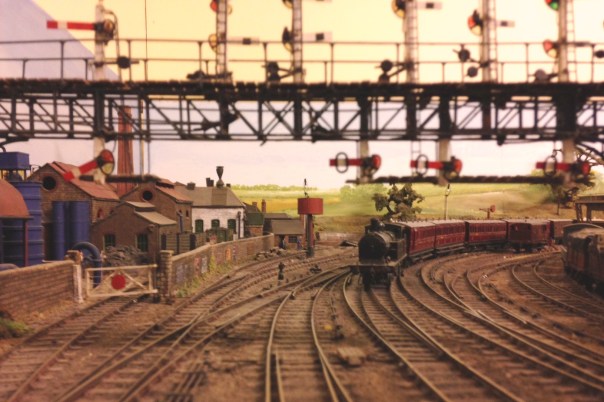
As befits an important station, there is a complicated station throat, controlled by quite complex signalling and a fine box over the line.
The other principal station was Grandborough Junction (the third station, Leighton Buzzard Linslade, was dismantled at the time of our visit). This was a busy junction and had a pair of branches going off it and crossing countryside.
I particularly remember an article on “filling corners of your railway” – where he showed a gas works at one point and then an engine sheed – well here is that engine shed! Mindful of my turntable sagas (see November posts), I was half disappointed that this one worked so well – although it did have a very fierce growl when it operated!
Peter Denny was also a prolific writer so the layout adorned the pages of most of the british magazines – and even apparently a Japanese one! Certainly, it was a layout that I regularly read about in my father’s collection of back issues so it was a happy chance to see something that had a formative impact on the early days of my hobby. I still have a big book entitled Miniature and Model Railways – signed Happy Christmas Mark – from Gordon 1977! – that has a section on Buckingham which I perused before leaving to remind myself of the layout!
A lot of his articles were on building things for the layout – remember, this was built in the late 1940s, 50s and 60s and the alternative (when available which was rare) were tinplate. Here are some examples of the quality of Peter’s modelling.
The story as to why Peter Denny selected the Great Central Railway as his prototype is worthy of retelling too – as they made me chuckle. Apparently, he originally wished to model the Great Western and took his first completed model – a siphon (which is still on the layout) – to the Model Railway Club proudly one evening. There it was met with both admiration but also the sucking of teeth as various prototype details were pointed out as being incorrect. Now, woe betide me to say anything critical of Great Western followers but on the back of this, Peter decided he needed to find a prototype that less people knew about so that he would not get pulled up on technical details again! He rather liked the brown and cream coaches, so he did a search and found that the Great Central had them too – so a swap of allegiances was promptly implemented!
Resources were clearly a lot more challenged when Peter was modelling, most of the models make plentiful use of timber and card – it puts some of my efforts with much more sophisticated techniques!! Peter even used CSBs (see wagon below – well, nearly CSBs any; what do you think of that Will/Russ?).
But above all else, Buckingham is a layout for operating and is both very complex and quite simple at the same time. There is a substantial amount of electrical logic such that lines only become electrically active when they are correctly signalled. Even attempting to run a train in the opposite direction to that which is signalled is prohibited. All this uses hand built switches, many of which are mechanically linked to the single or turnout. As you would imagine, this creates a somewhat complex warren both above and below board!
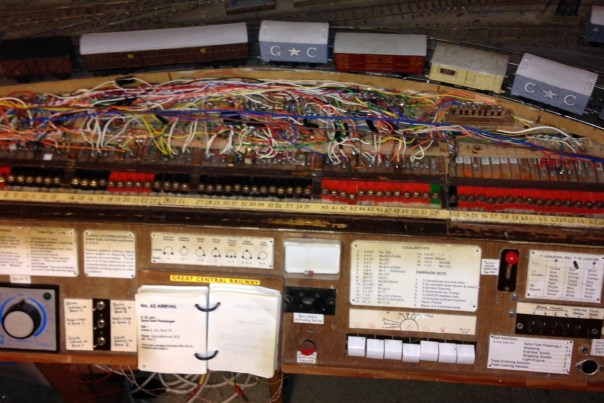
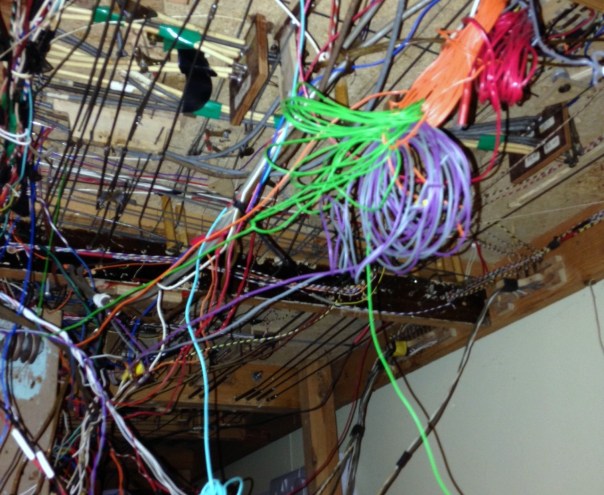
DCC anyone…………..
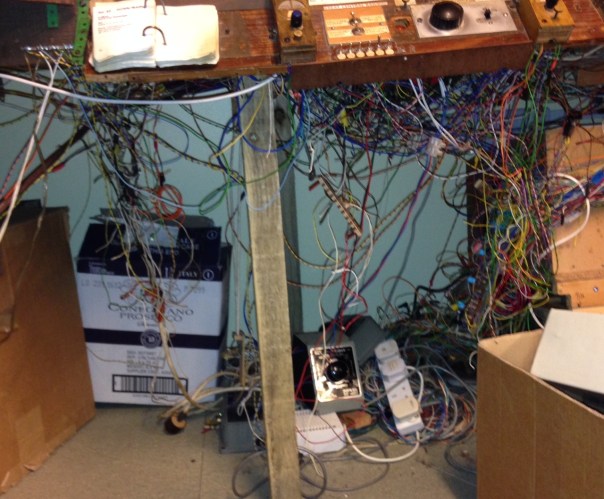
Even now, Tony is not fully aware of what the layout can do and there are plenty of teasers that need to be overcome to get it to operate properly – “aghh yes, this lever needs to be pulled over really hard to make the contact” but the next time “don’t pull that one over fully, or it doesn’t quite work“. It essentially needed to be caressed and humoured to operate – but operate it did even for ham fisted Tatlow!
We spent a happy couple of hours playing with the trains; dealing with arrivals, sorting out loco’s for the return work and shunting the platforms and yard. I thoroughly enjoyed myself – so thank you Tony and I’ll definitely come again!
I have now added a trackplan in an addition post here.
