Blog Archives

Baseboards: Attention!
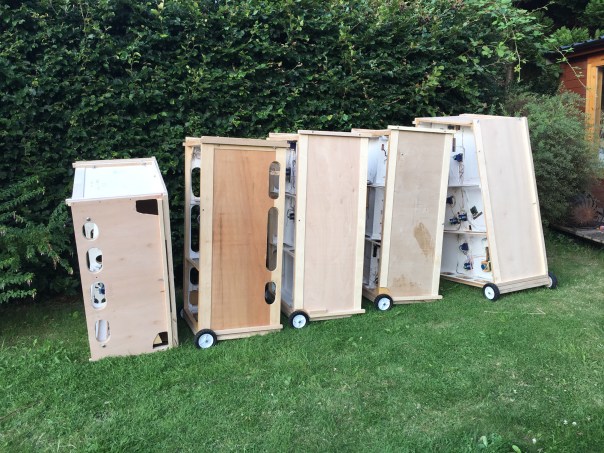
With the need to load the layout in the back of a van to get it to Scaleforum looming, I have been pressing ahead with the creation of travelling boxes for the boards.
Despite being pretty simple, they do take a long time to make but those for the main visible boards are at least all now complete – and here they are on parade!

Boxing Clever
One of the worst parts of Portchullin is the lack of thought I gave to transporting the layout about. One of its attractions is the curve which makes it unusual but this makes the boards big, cumbersome and above all awkwardly shaped to transport. It also made them difficult to create packing solutions for and the limited solutions that I adopted have never been good enough which has plagued the layout throughout its life.
It was a mistake I am anxious not to repeat with Glenmutchkin and now that it is beginning to accumulate some finished elements, it is definitely time to deal with this and create some cases to enclose the boards when they are either stored or transported. My requirements for these were that they provide rugged protection to allow the layout to be transported without risk of being damaged. I also wanted them to be easier to move, in particular on my own, and to pack away themselves without taking up significant amounts of space.
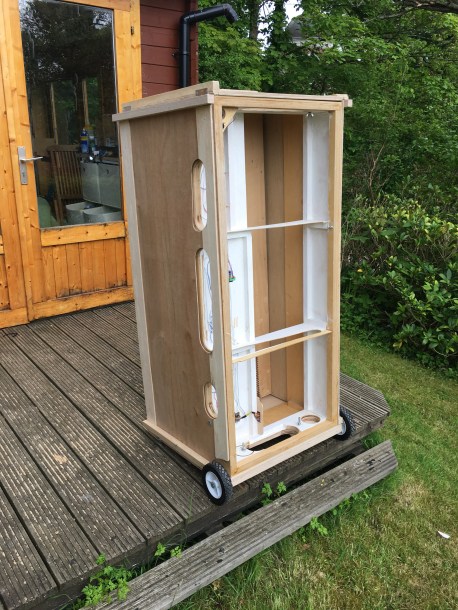
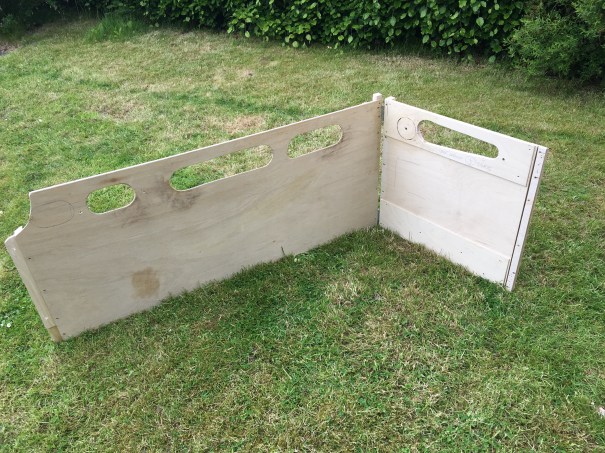
There are (presently, there are plans……) six scenic boards and the crate for the first two – for the smallest boards – is now complete. The concept I came up with is to use end pieces that secure the two boards on top of each other, face to face. To this, I have added larger panels to close in the sides and prevent these exposed parts from damage. To try and speed up assembly and also reduce the space that they need, each end is hinged to and end piece but conceived such that they fold onto each other so that they pack into the minimum possible space.
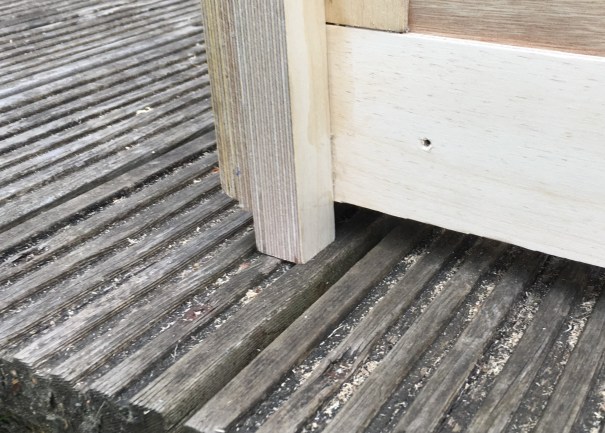
One of the other features I included was nicked from the St Merryn team was to introduce packing pieces to make sure that the ends stand clear of the rail ends. A simple feature that I had not seen described before.
To make the combined case and boards easier to transport I have introduced some trolley wheels – the operating crew are pretty excited with this and can hardly believe how much they are going to be spoilt! The other little trick I am please to have employed is to introduce slight feet to enable fingers to get below the box to lift it.
I have concluded that only the two smallest boards can be paired up in this manner as they are already quite heavy and will get more so as I add the remainder of the features to their topsides. Thus the remaining board cases will be slightly different.
 for Portchullin")
A New Ending (and Beginning) for Portchullin
Don’t worry, it is not as dramatic as all that, I have not burnt it or anything……………………oh hang on a minute, I have – well a bit of it anyway!
One of Portchullin’s quaint little foibles was it did occassionally like to derail trains as they left the fiddleyards; especially the fiddle yard representing Kyle. There were various reasons for this; including some proper cr*p woodwork on my part, the hand shunting that occurred every time a train was turned around, the effects on thermal expansion that was not catered for and, something that I had not seen until recently, a bit of a dogleg at the baseboard joint. Add to this the rather Heath Robinson approach to the legs for the fiddle yard boards, electrical connections and facia support and it was fundementally a b*ggers muddle. So something had to be done and, a mere 8 years after the layout’s first exhibition, it now has!
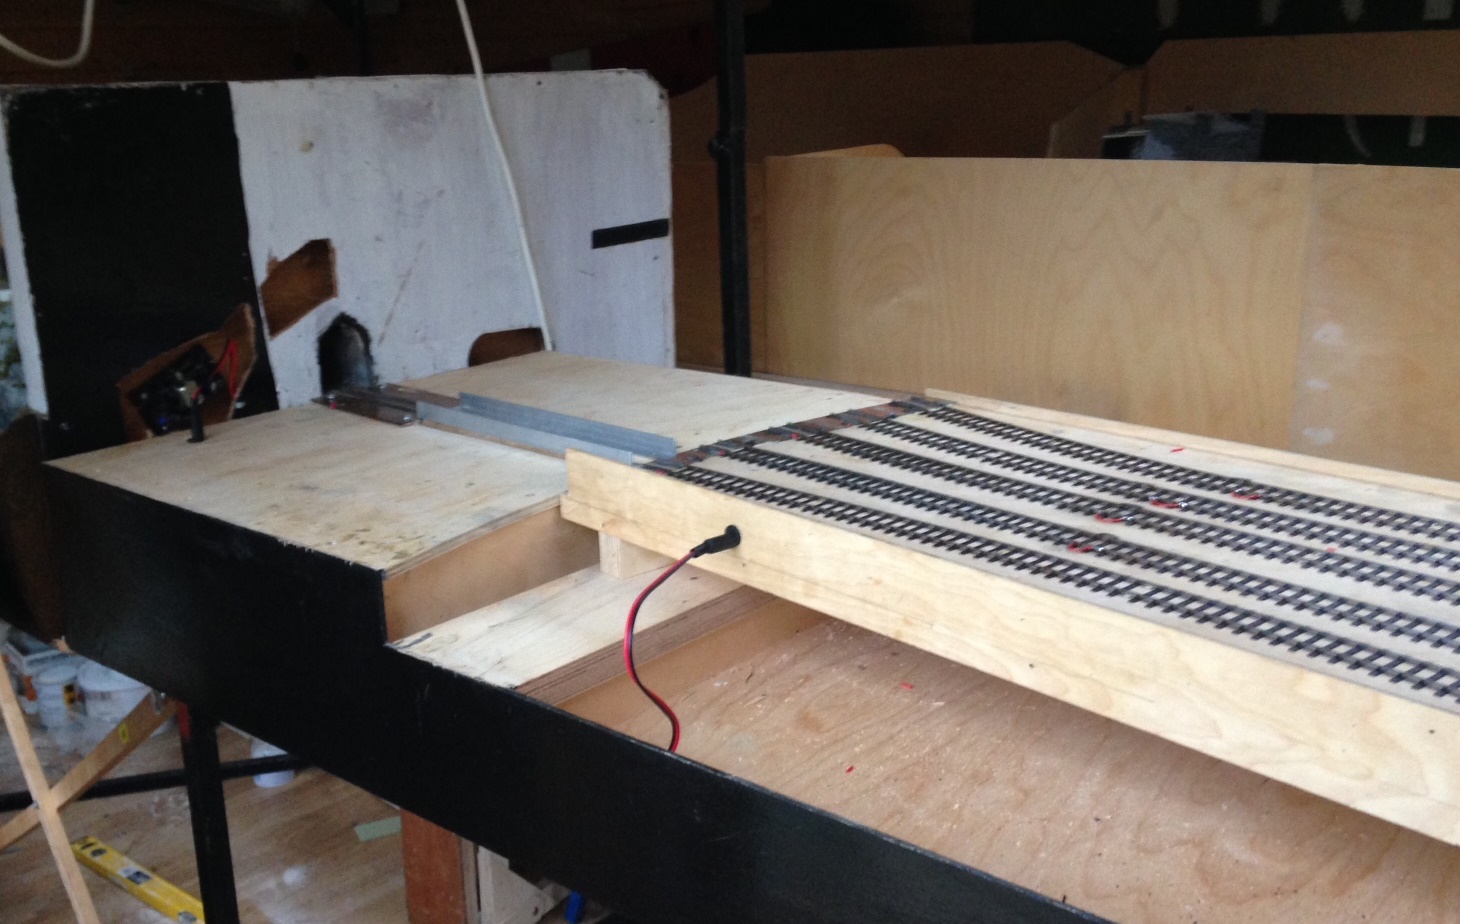
So with lots of thanks to Tim and Julian at the Electric Loft Ladder Company again, we have a new fiddle yard at the Kyle end and redesigned legs at the Inverness end. The design adopted is an adaptation of the sector plate that was in use before but with a refinement that it uses cassettes for the locations that the loco arrives and departs at. The idea being that these are both storage points at the end of the fiddle yard roads but also the means to move/turn the locos ready for their next duty. This is a development of the system used by Simon Bendall on his layout Elcot Road, but with a rotating sector plate rather than a traverser.

Other halfway novel ideas are the use of the tray below the traverser as a storage tray for stock (and maybe tea!) and the projection of the sector plate beyond the end of the fixed board to make the ensemble smaller to transport. The facia also folds up rather niftily as well – photos of this will follow once I have taken them!
The new fiddle yard has not yet been tested but will very shortly get its chance to prove if it is a good’n. Portchullin will be out at the Barnstaple MRC’s show in Bear Street, Barnstaple – you can find details here. If you are in North Devon at the weekend, stop by and say hellow?

Boards Back Home
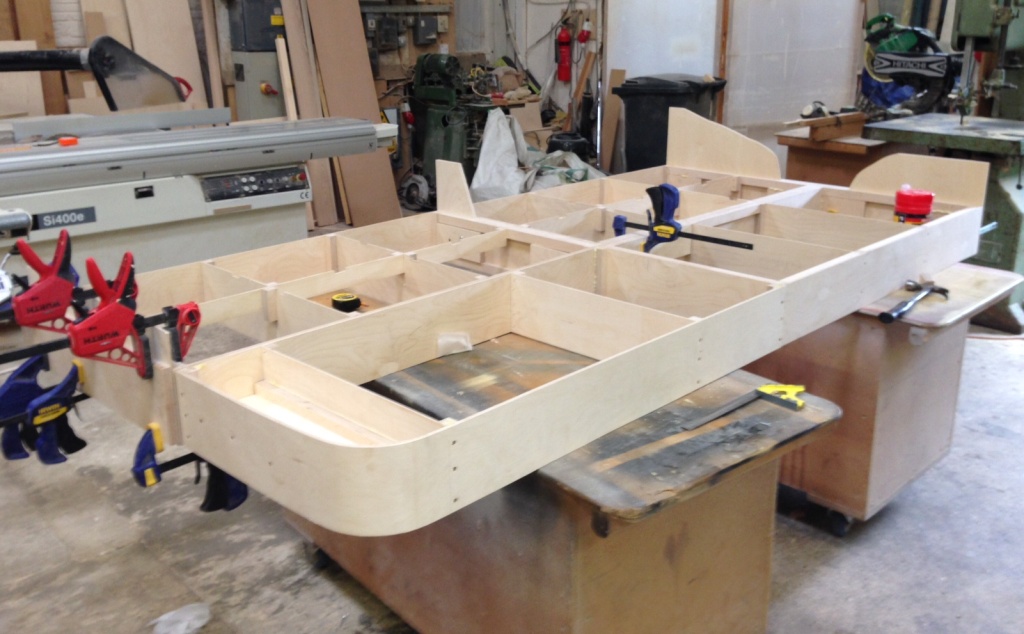
Just prior to Portchullin’s last two exhibitions, Tim of S&T Joinery brought around the last couple of boards so that all of the scenic boards are now back at home. Obviously, this meant that we had to do a test erection!
And very pleased I am too, especially with how flat they are. A rear contrast to the rolling hills affect that I managed on Portchullin. I am obviously hoping that this is going to result in much better and more reliable running.
The design of the leg and the supporting beams can now be seen more clearly. it does take a bit of time to get these level (caused I believe by the absence of levelness in S&T’s workshops! However, once the beams were level, it was a matter of moments to place the boards on them and connect them up. So I think we will do some setting out at the weekend.
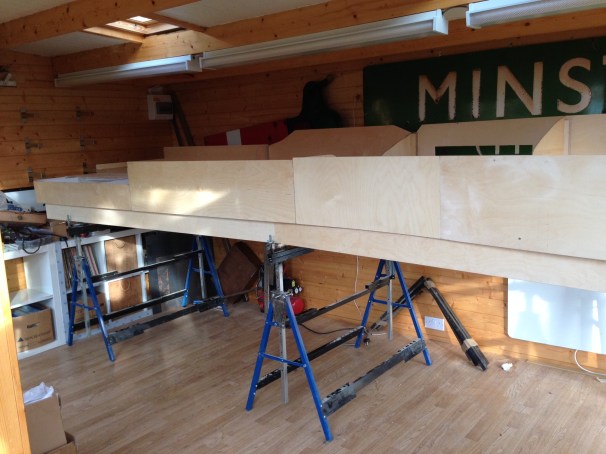
In some respects the photos don’t quite do justice to these boards and also how large they are collectively. The width in the top view is 1200mm and overall the length of the boards together is 5250mm. As will become apparent in future posts, I am going for the “railway in the landscape” feel and I don’t want it to fee cramped either.
And if anybody wants an electric loft ladder, this is where you go http://www.st-joinery.co.uk/
First Four Boards Complete!
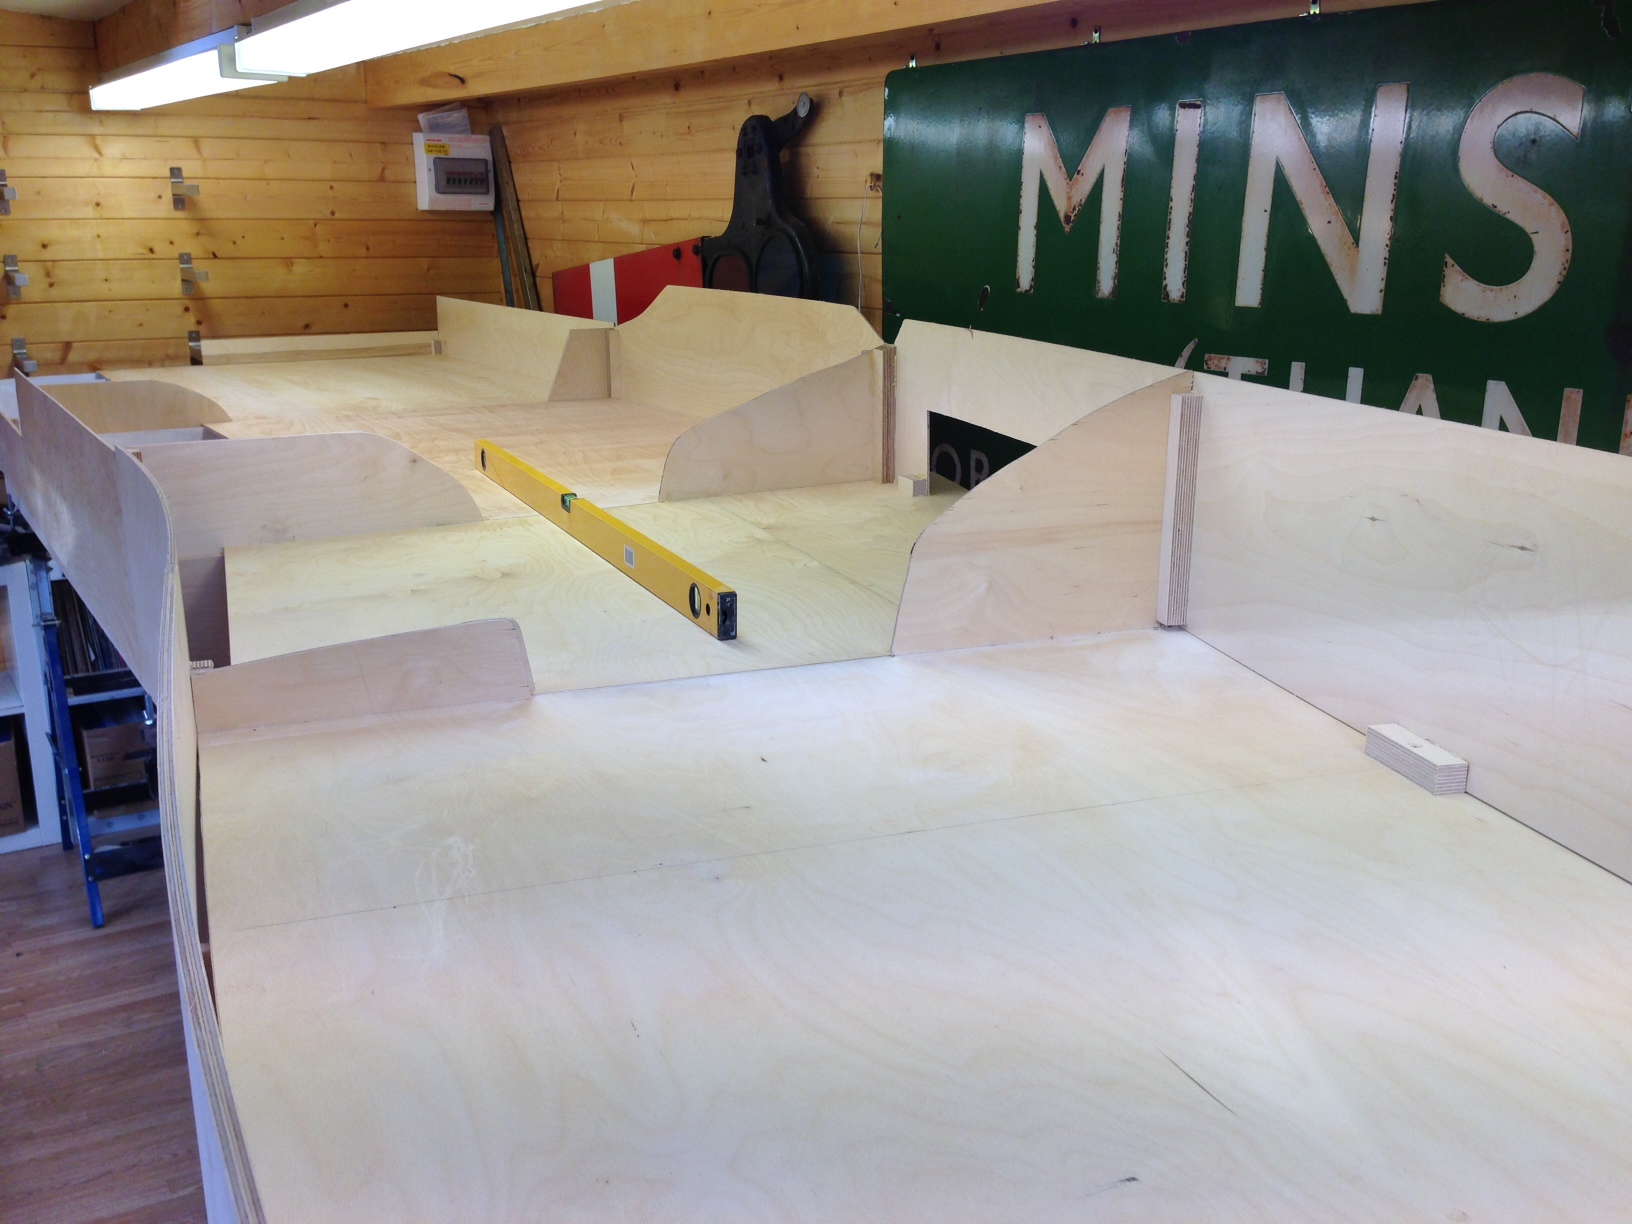
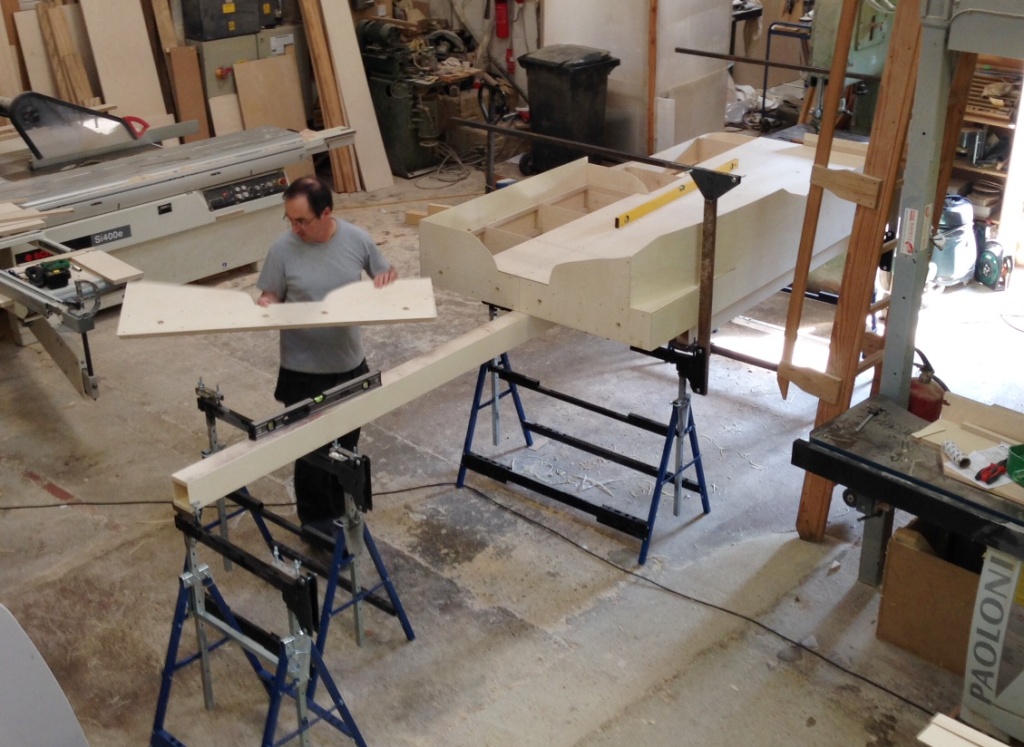
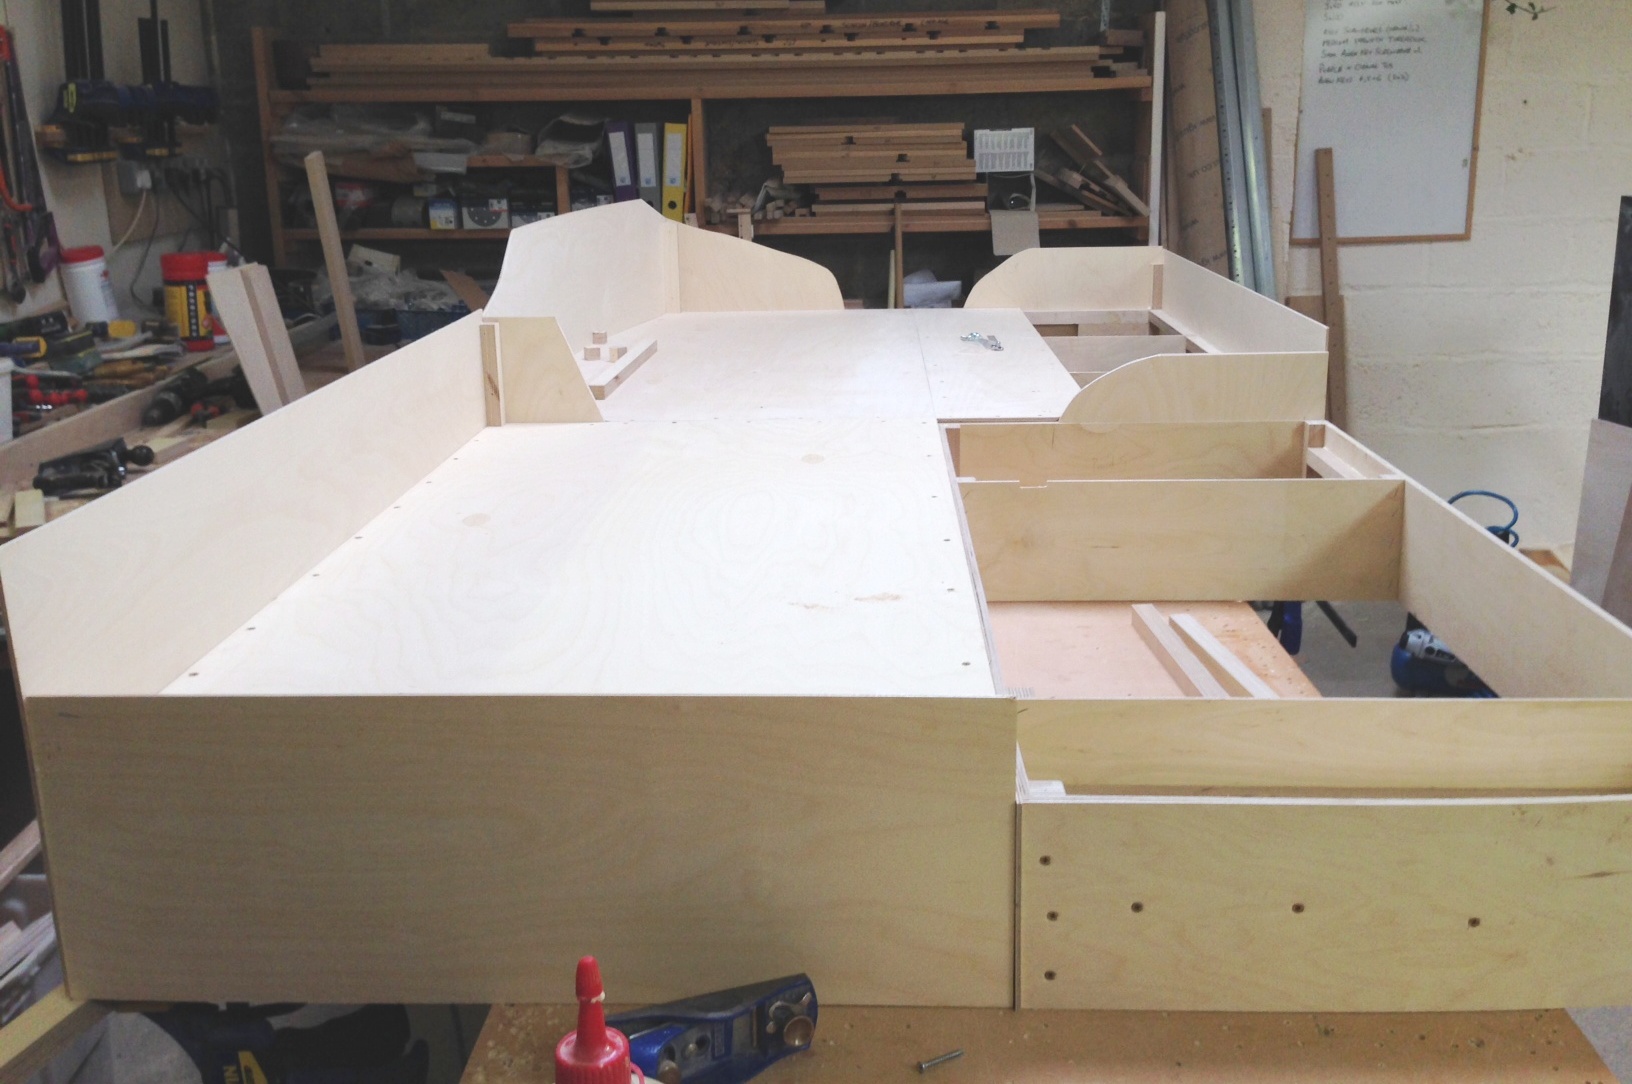
Julian and I have been putting a bit more time in on the baseboards, to the point where the first four are complete with the exception of their varnishing/painting.
You will also see in the pictures that the beams that support the boards have also been completed. These span between the brackets that were shown here which in turn are supported by bolts that have been affixed to the builders trestles. This means that each point of contact can be adjusted for both overall level and also cant. The idea is that this is done prior to placing the boards on the beams, so that the whole thing can be levelled as one and the boards then just get plonked on. So long as the floor is not too wonky (like that in Tim & Julian’s place!), this does not take long and it is very idiot-proof assembling the layout perfectly each time.
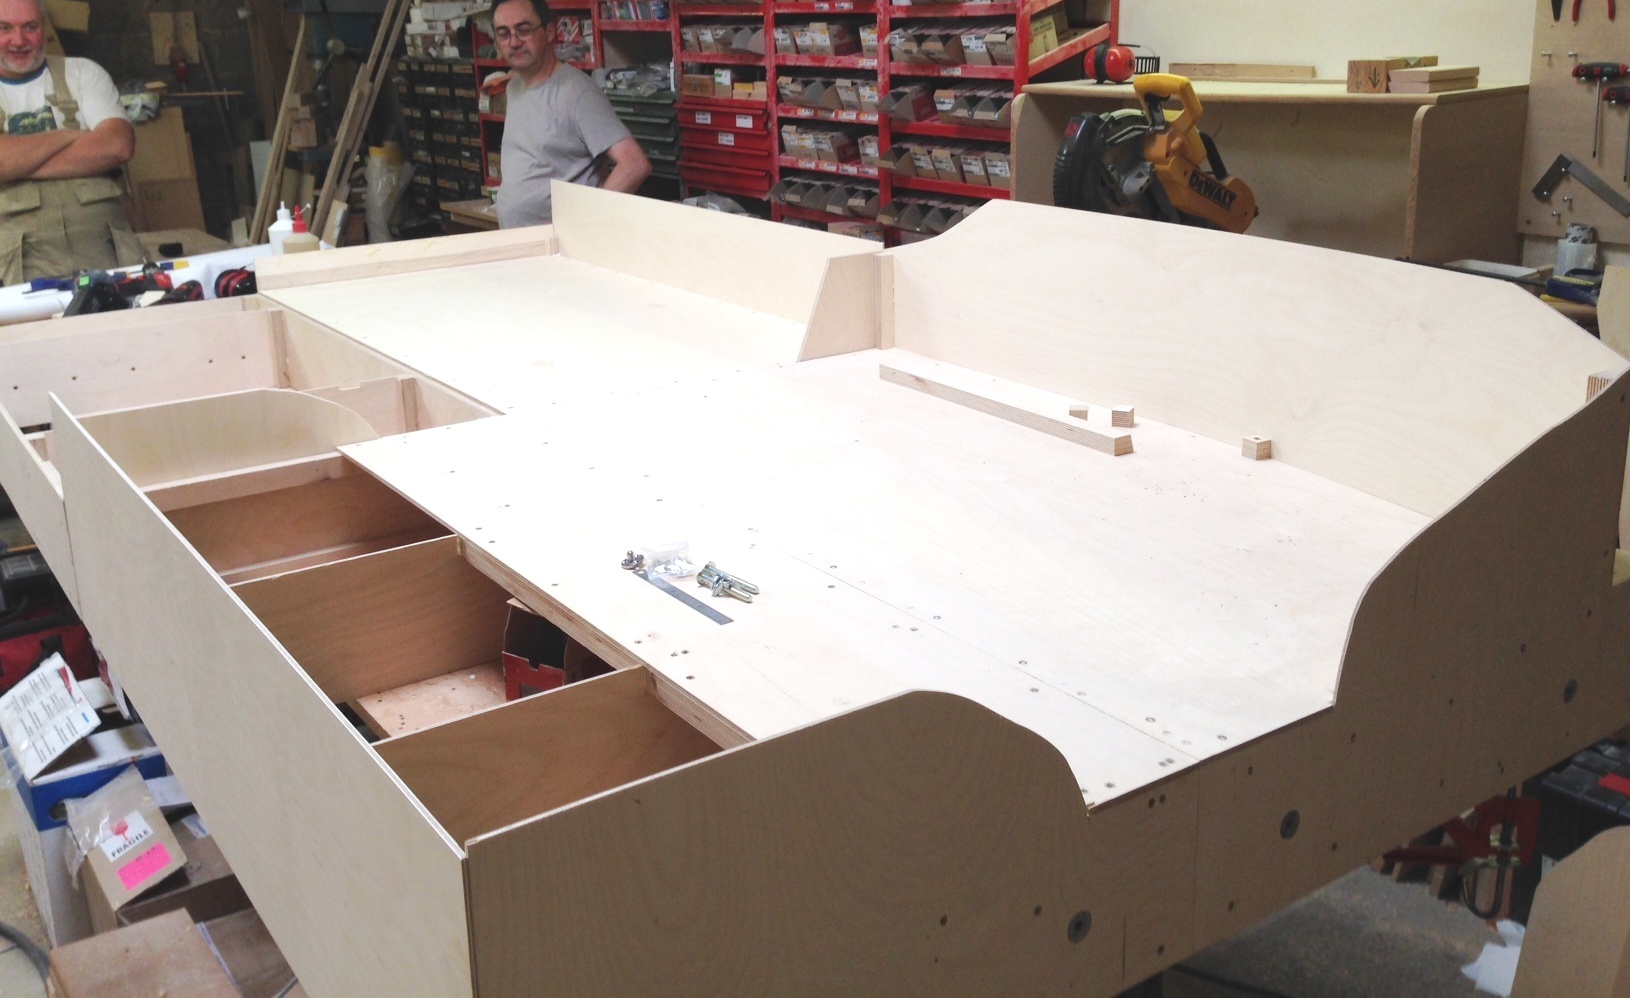
Also visible in the views are the gallows brackets that will support the lighting and facia. These are fairly meaty as they have to span over 1300mm from front to back, so the moment on them is quite high. What we have just found is that they are a tad low due to the beans being a bit higher than I had expected. A bit of adjustment will be required in due course; especially as the layout level is also a bit high.
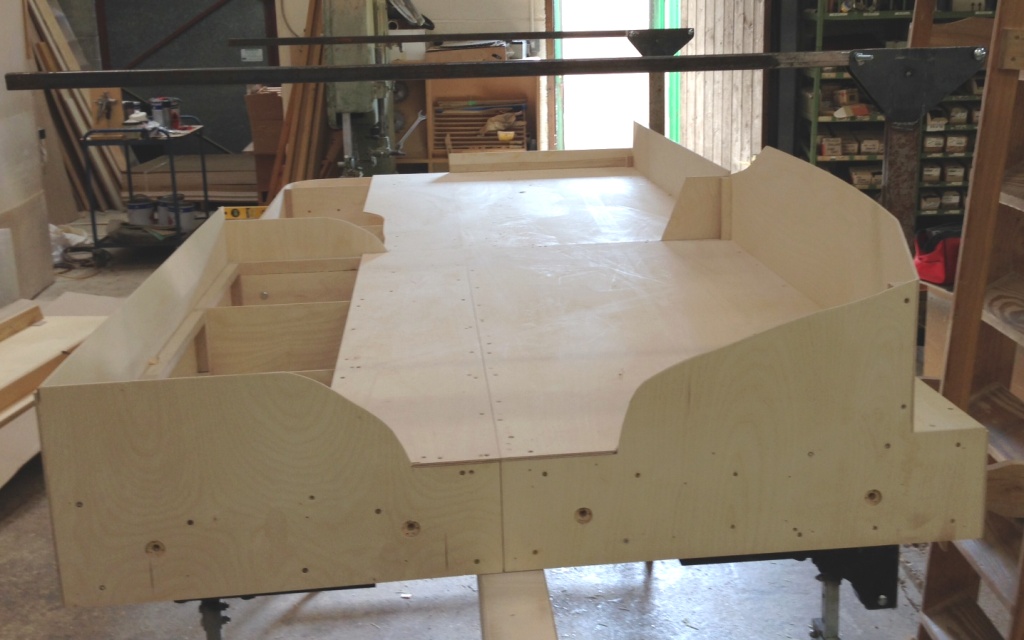
But the acid test of the new boards is shown in this view. On Portchullin one of the problems is that the boards rise up slightly at the joints – a problem I see a lot on layouts. This is dead flat; so we won’t see the trains doing any Casey Jones runs over the mountain ranges!
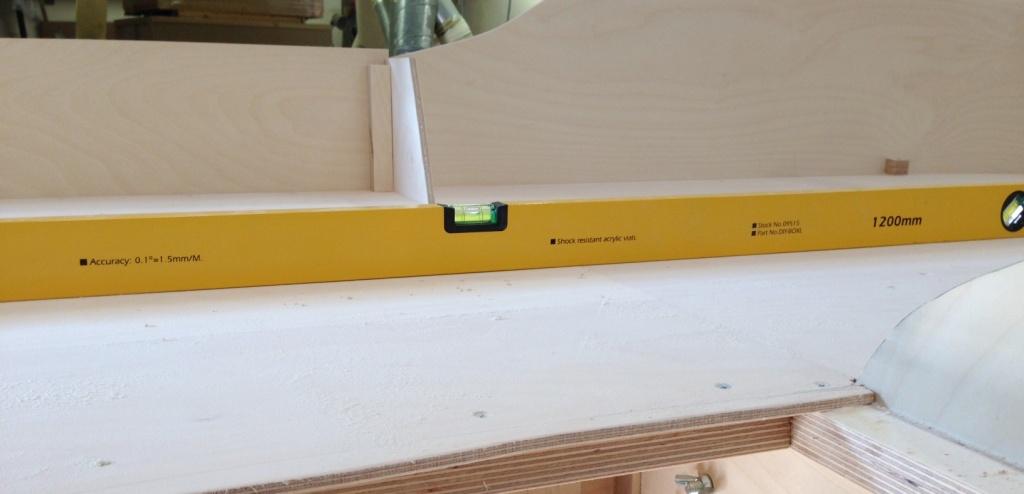
The next visit will get on with the last two boards, which will take up the rather obvious space where Julian is working. These will only be a single width in size as the boards are tapering in to 700mm wide at the end on the left in the view below. To give a sense of scale, the yellow spirit level is 1200mm and the dark one 750mm. (see Mr Ullyot – two spirit levels now………..)
So thanks again to Tim & Julian and if any of readers are looking at electric loft ladders; give them a call. S&T Joinery.
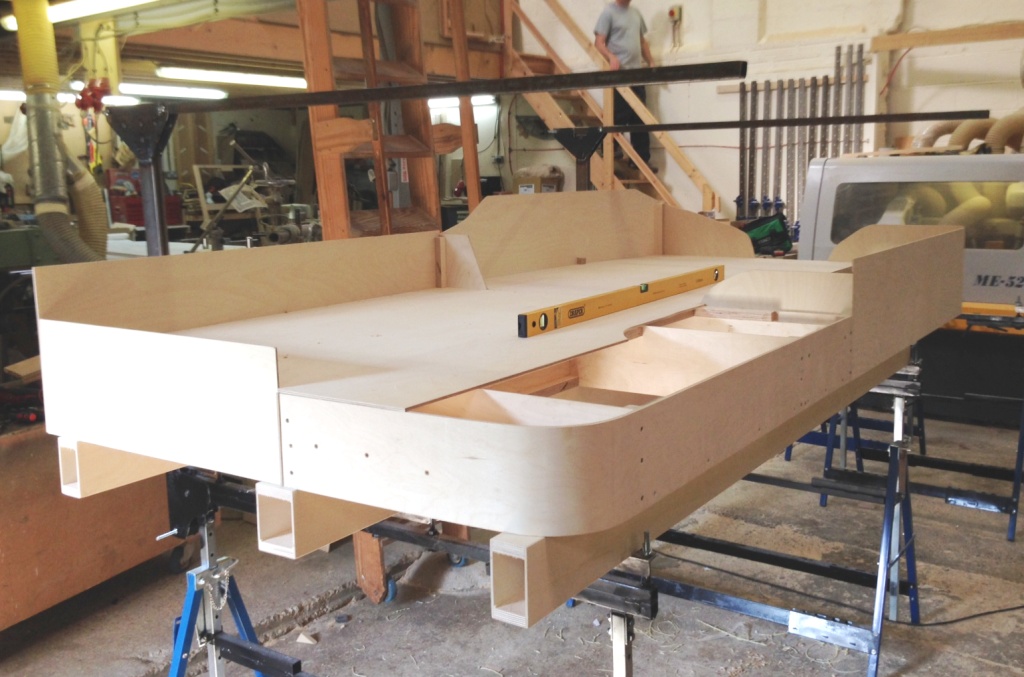
Baseboards coming along……….
Tim and Julian’s business has been doing rather well so far this year, which has meant that they have not had time to accommodate me at their joiners shop and hence baseboard construction has been slow. However, I did manage to get down today and we have got the first four boards quite close to finished.
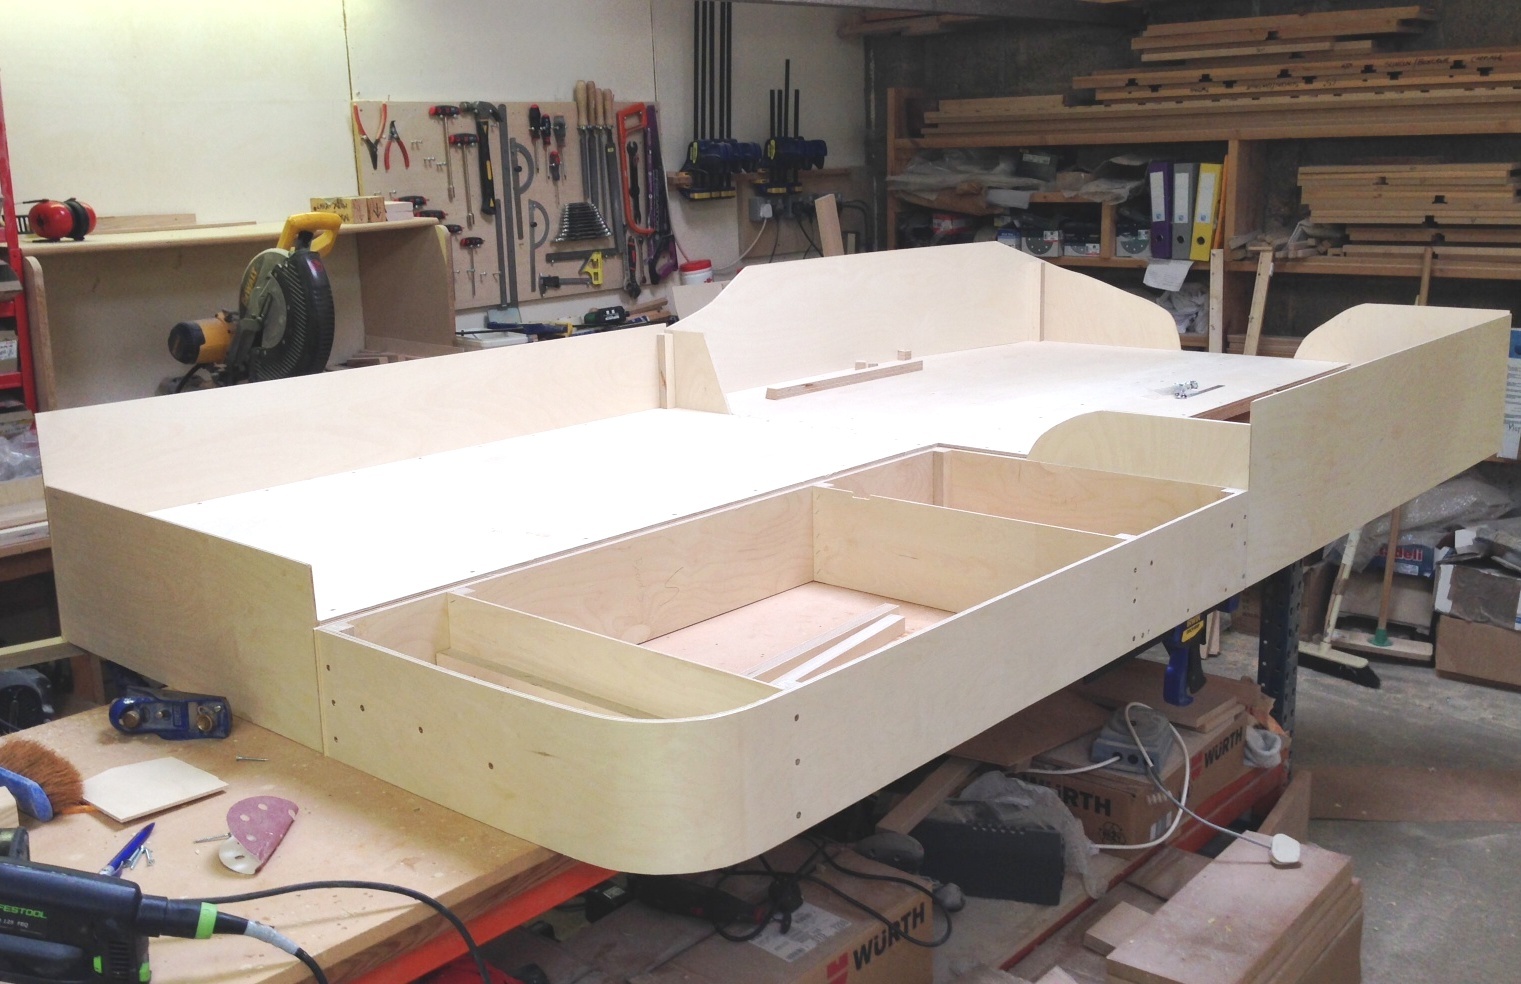
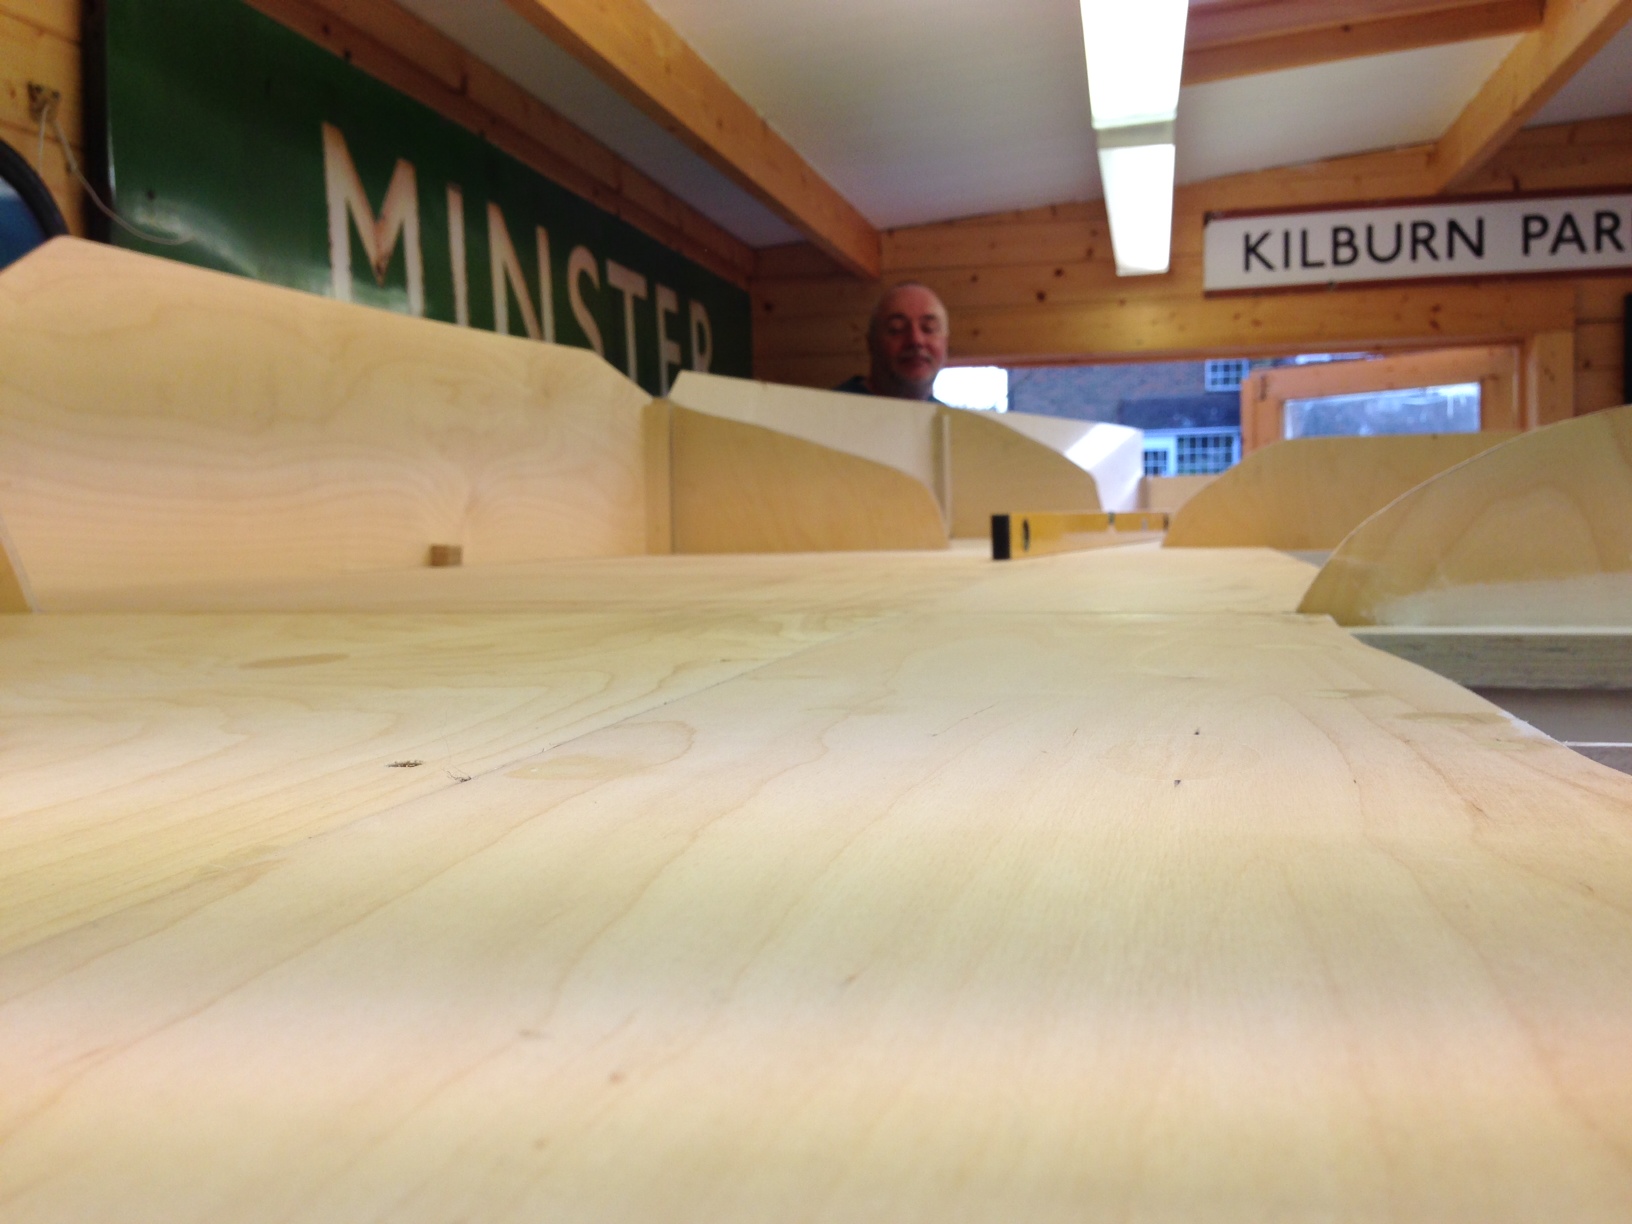
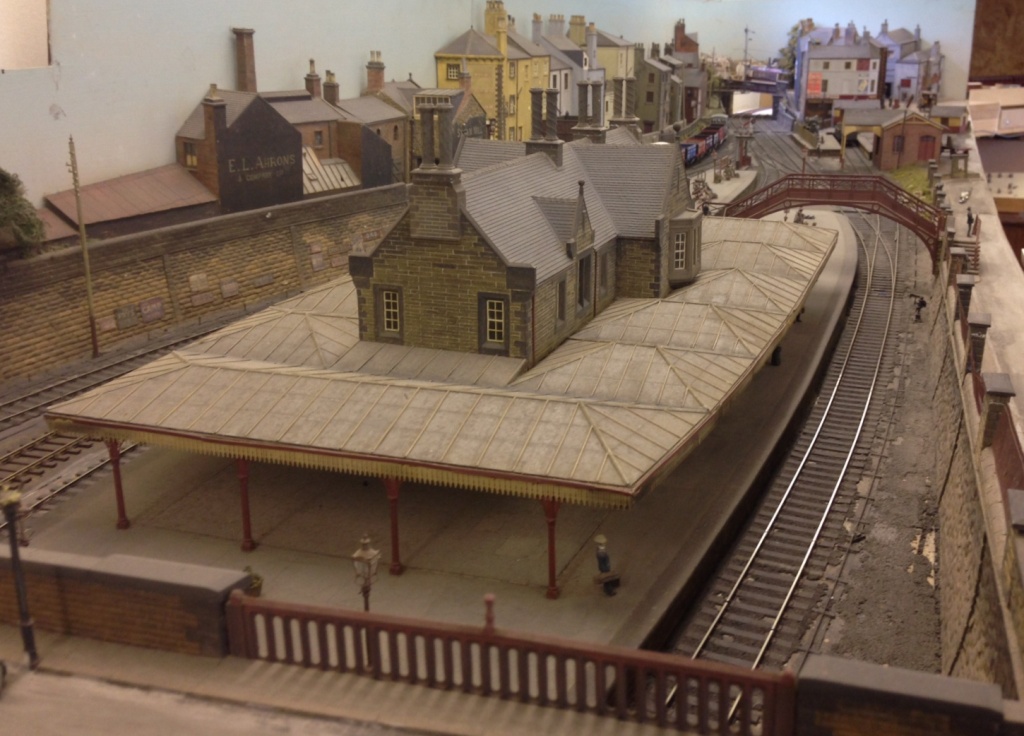
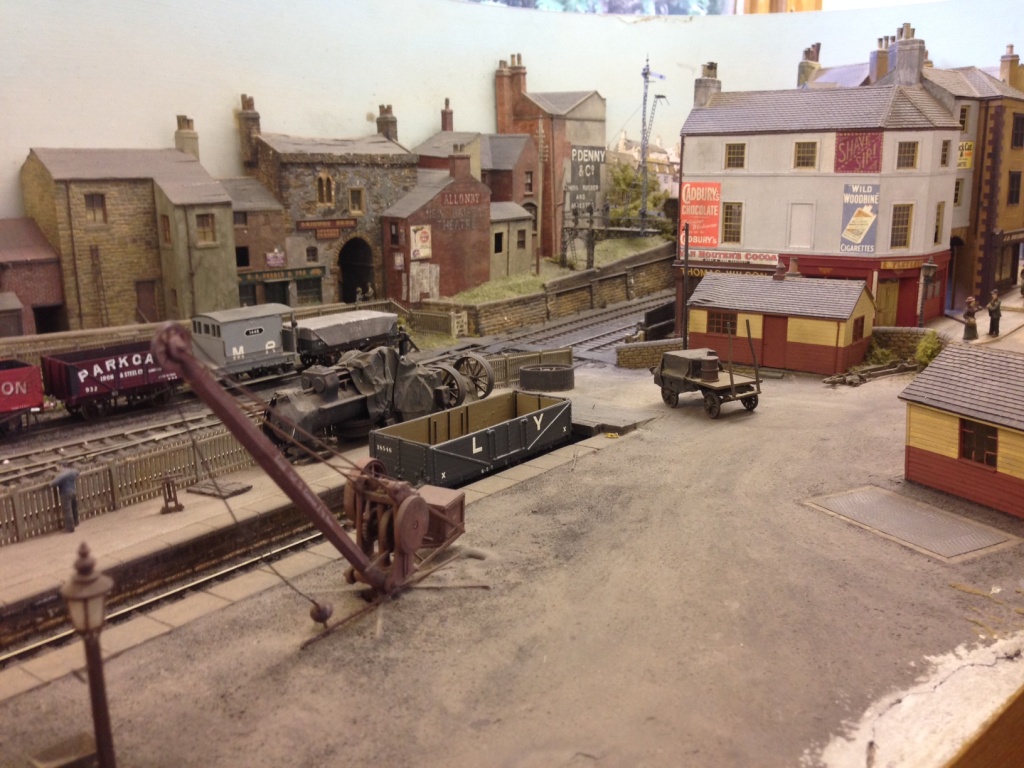
This view will look straight at the train shed, with the bay to the right (it does come onto the nearest board; this is a bit not yet done. The remainder of the platforms be to the right and the goods yard will be behind the trainshed/platforms. If you want to be reminded of the trackplan, it can be found here or here.
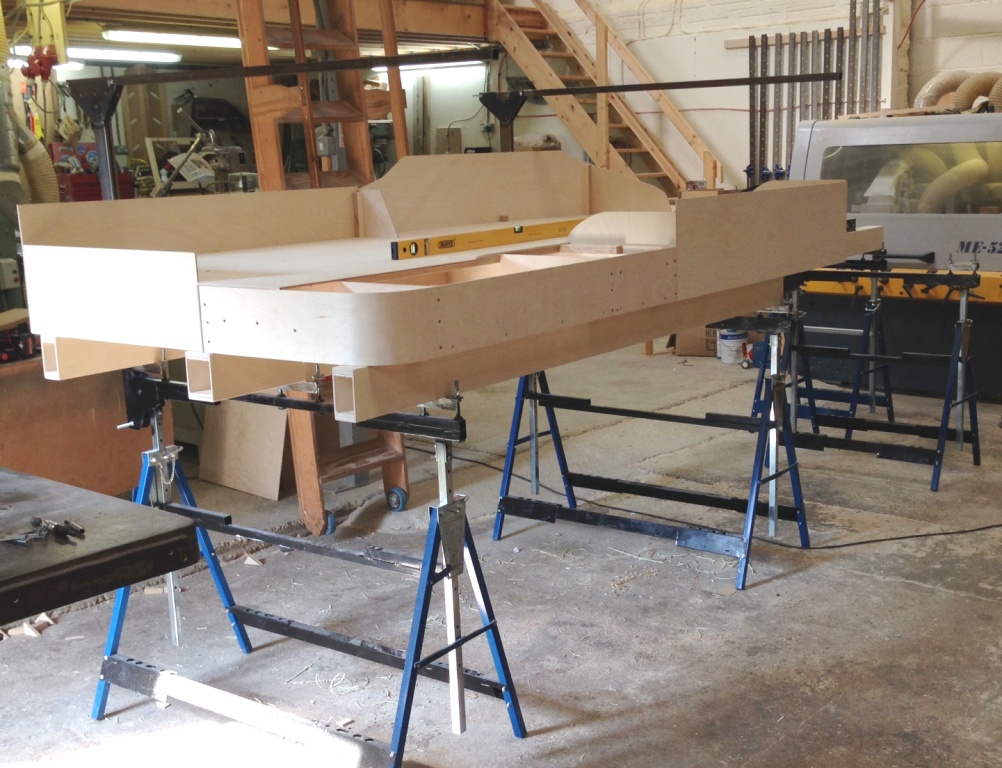
Tim and Julian look on the four boards and give them a comparison for size. The overall depth is 1200m deep and the length of the boards in visible is 2.6m. This view would be from the bridge (see the trackplan links), looking back over the yard and the end of the platforms. The ground will be raised here, but falling away to the left.
A view from the buffer stops, well it would be but you wouldn’t be able to see them for the end of the trainshed. The ground will slope down substantially to the right and be above rail level to the left.
I hope to get these four boards finished in my next visit and also the beams that they will sit on (and will be attached to the legs already made).
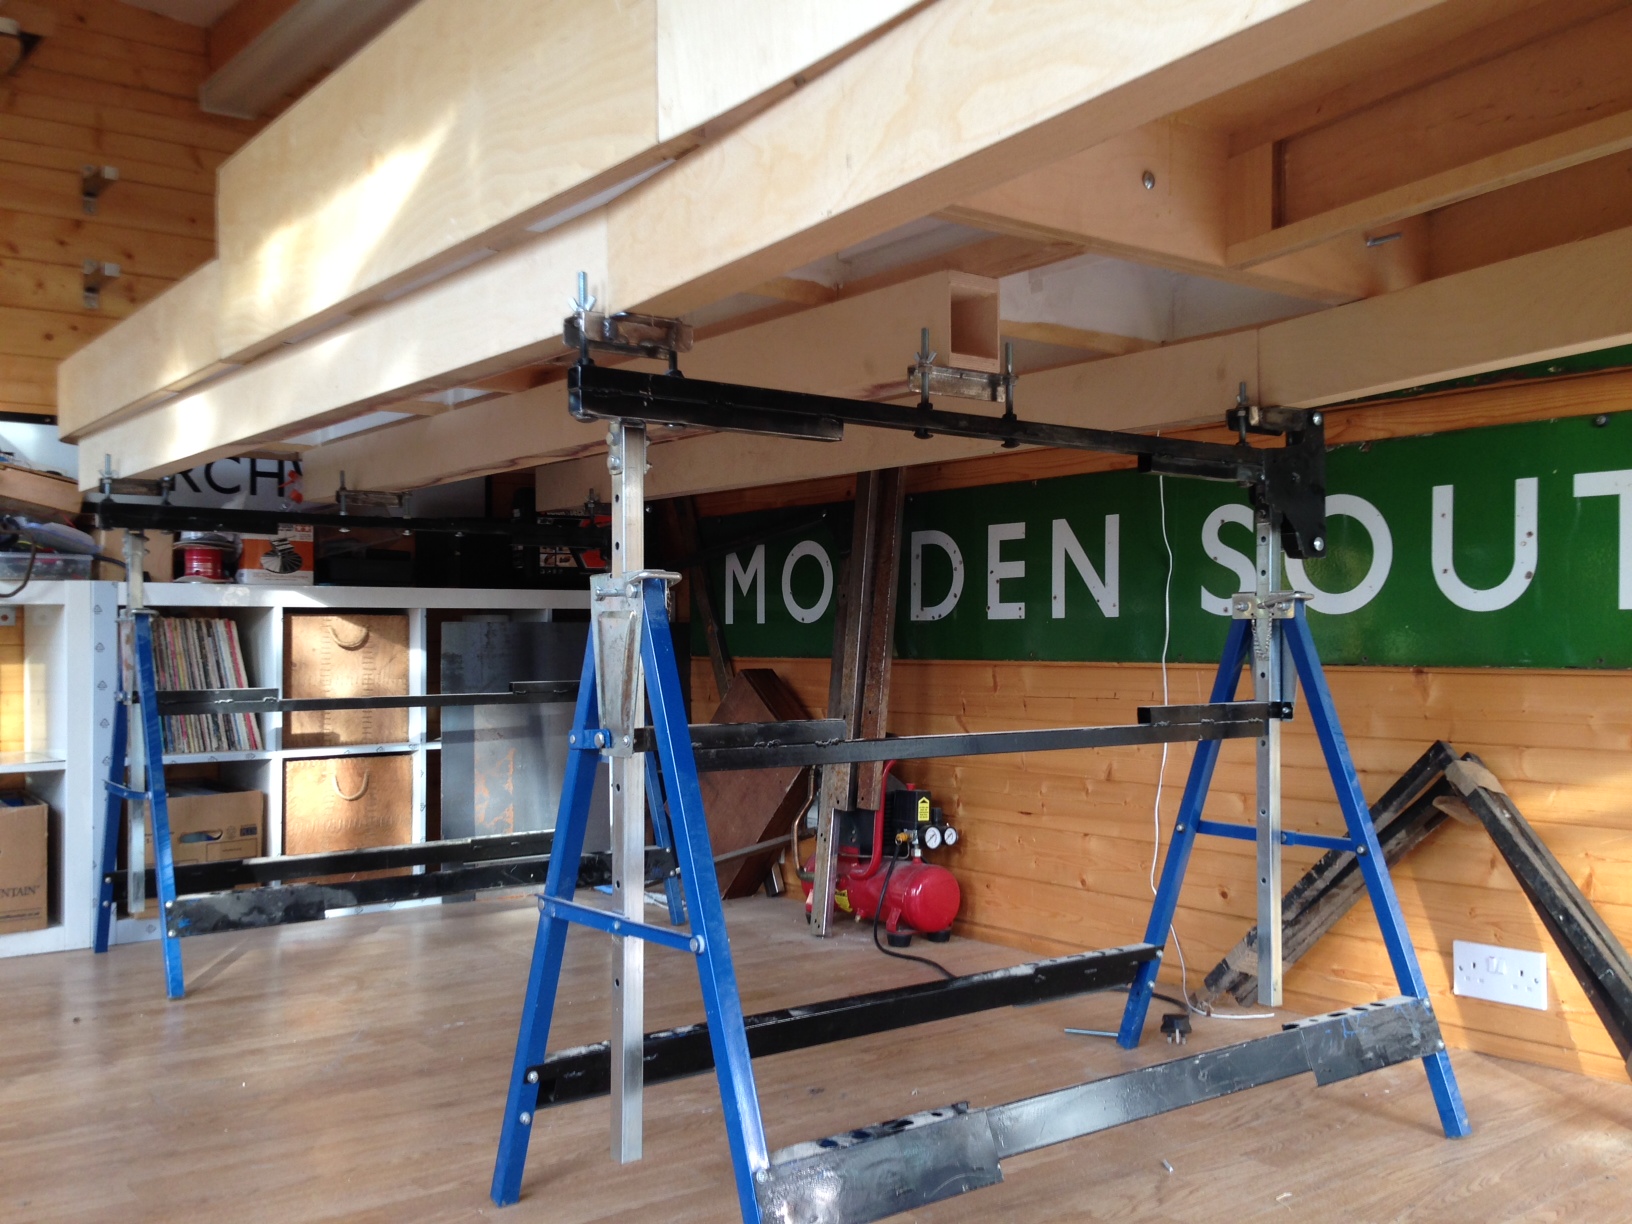
Baseboard Supports
I have been putting more work into the baseboard supports this weekend.
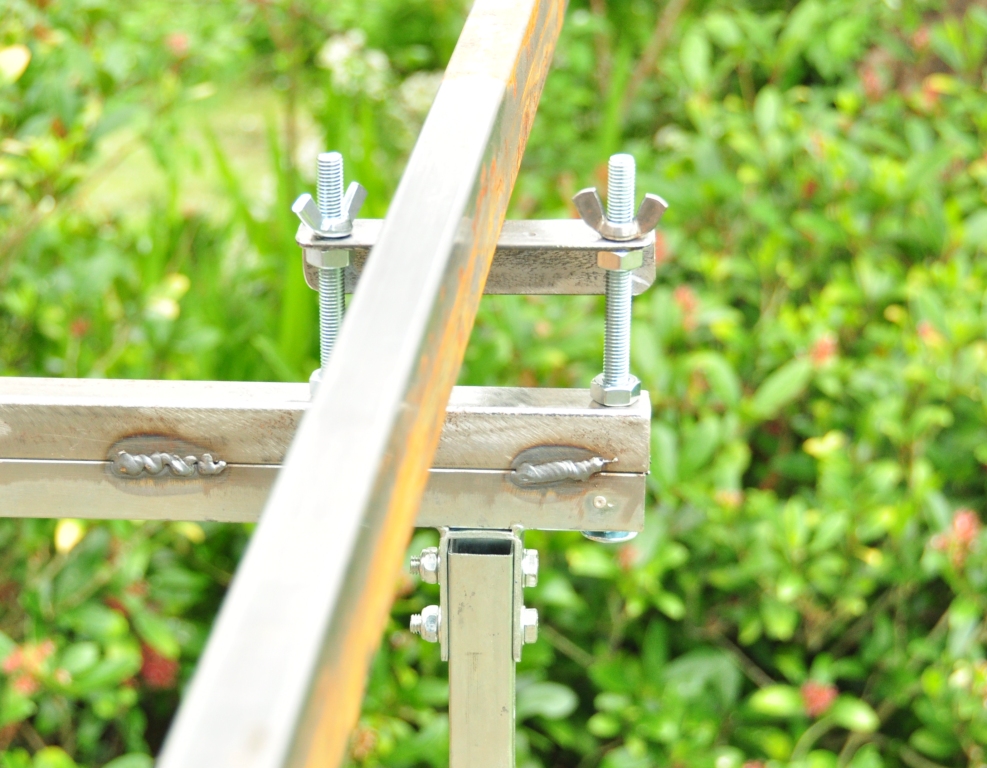
Rather than to go for adjustable feet, I have elected to make the junction between the beams and the trestles adjustable. This was formed fairly simply by utilising a pair of bolts that are permanently secured to the trestles and then clamp a plate between a pair of nuts. This plate will then be fixed to the underside of the beams.
Simple enough idea, but I went for M10 bolts because I wanted to be sure they did not get bent or broken as these components are moved around. This meant that there was a lot of drilling and cutting to do – so much so that I broke three drills (two of which were 10mm so fairly chunky) and melted my Black & Decker! Not quite such a cheap solution as I had in mind but this is what was created:

More Baseboards and A Peek at Benfieldside
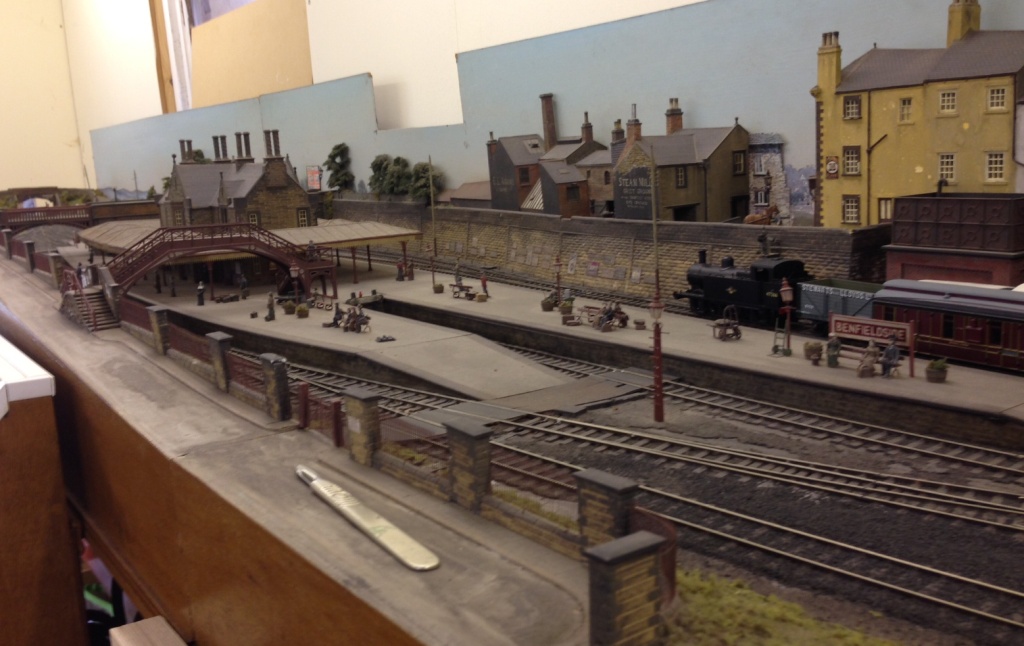
I managed to get most of another day done on the baseboards at Tim & Julian’s workshops. The bulk of the first four are now done; although the decks are still to be put on these. A slightly fuzzy picture to show the progress is below:
In addition to this, I had a look at their layout Benfieldside. As noted in past posts, they have recently acquired this from John James, who was the custodian of it for some years. Its original building was John Wright.
A great layout; I think anyway!
I have managed to restore the first two signals – well entirely rebuild one! I will post some pictures in the next few days with a bit of luck.
Where did we get to…………?
When last I updated you on Glenmutchkin, we were making the legs. These have been reassembled and look like this:
They are not yet finished as I wish to make a mount for the support girders; so it will soon be time to prevail on my brother again!! However, I have been tinkering with plans and have come up with the baseboard layout and a rather tidier rendition of the basic plan:

A little unusually, I am making the layout two boards deep as I am trying to get a lot of “depth of field” in the model. Portchullin works very well in this regard to the right side where there is a bank and you do not see the back of the layout but less so in the station building area or across the bridge. The depth of field is intended to try and overcome this but I will be having quite high hillsides behind again for much the same reason.
I am hoping that I have been able to book a bit of time in some friend’s joinery shop this week to make a start on the building of these. Five of the boards are relatively simple; the last two (nos 3 & 7) a lot less so. One of the chief areas that Portchullin lets itself down on is the quality of the baseboards – compensation/springing is a must on steam locos for example! My friends (Tim & Julian) pointed this out with some vigour and told me that they really knew being joiners…………well you can see where that led for the next layout!
Every favour has a price though; so I am down to build something in return for them!
Cutting and Shutting
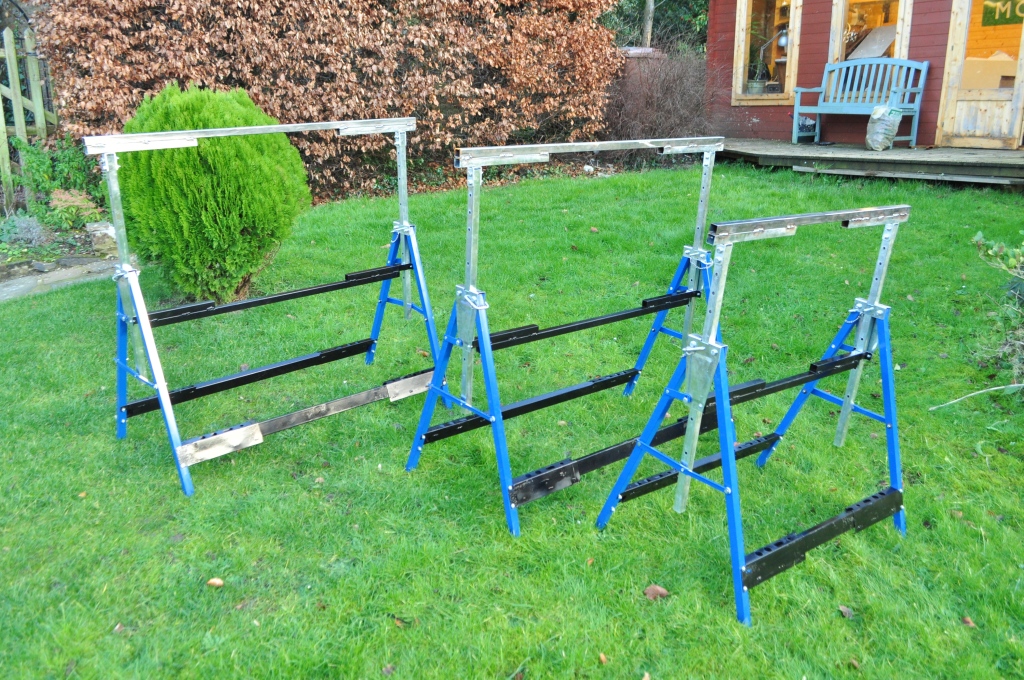
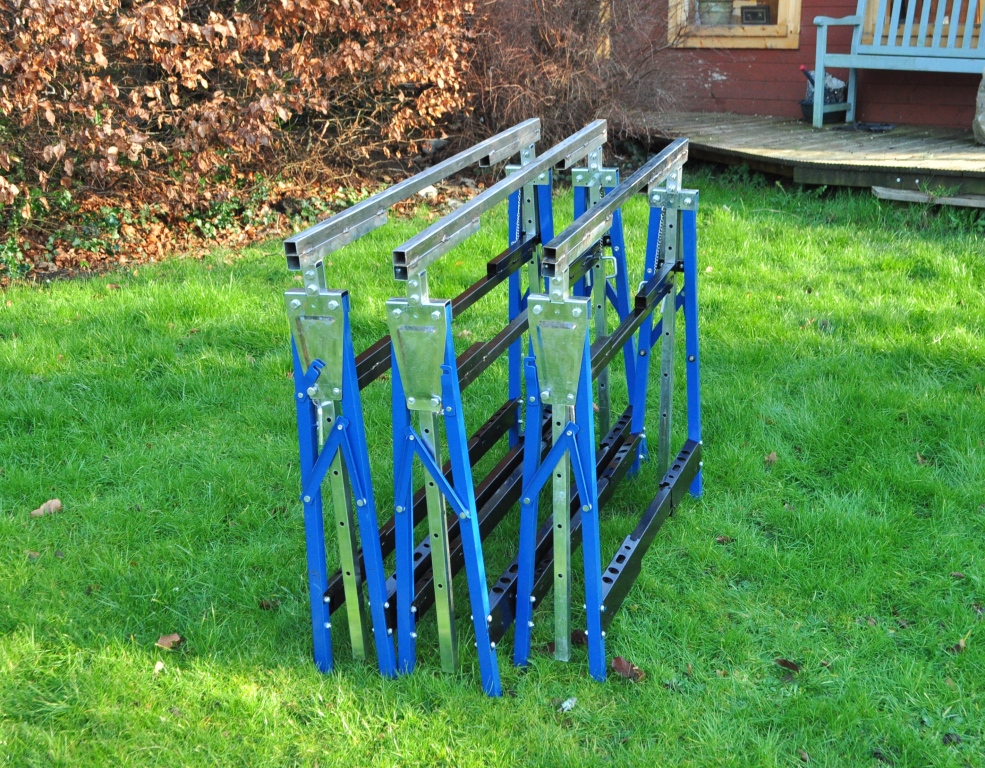
I wished to use builder’s trestles for the supports for Glenmutchkin as they fold down, are very sturdy and durable (and are fairly cheap). But, I also wished to go for a fairly full depth on the layout and they only come in the one depth (about 26 inches). This meant I needed to cut and shut them, to make them into a stretch trestle.
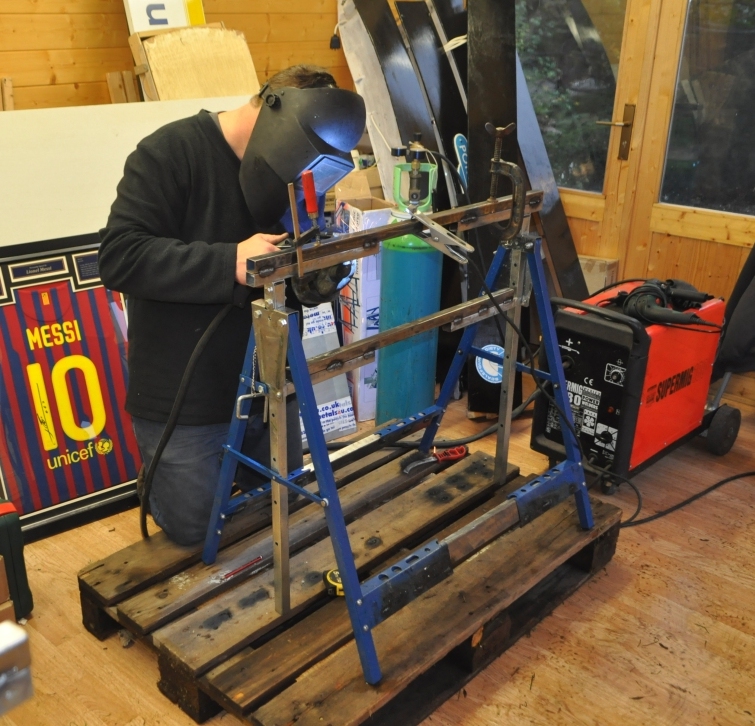
Fortunately, my father in law was over at the weekend, and he has had 40 years in the motor trade so could tell us a thing or two about how to cut and shut (sorry Bernard!). So, coupled with my brother and his welder, we have managed to cut and shut the first three trestles (the others do not need the same treatment).
Here is my brother James hard at work on the smaller of the three.
I need to sort out a better means of storing Portchullin’s lighting pelmets. One of the lessons I have learnt from Portchullin is that it has too many odd shapes and insufficient thought on how it should be stored/transported.
