Blog Archives

At last, a Finished Signal!
Well, that took a while longer to make than I had hoped! Not least because it is not the only signal I am working on at the moment.
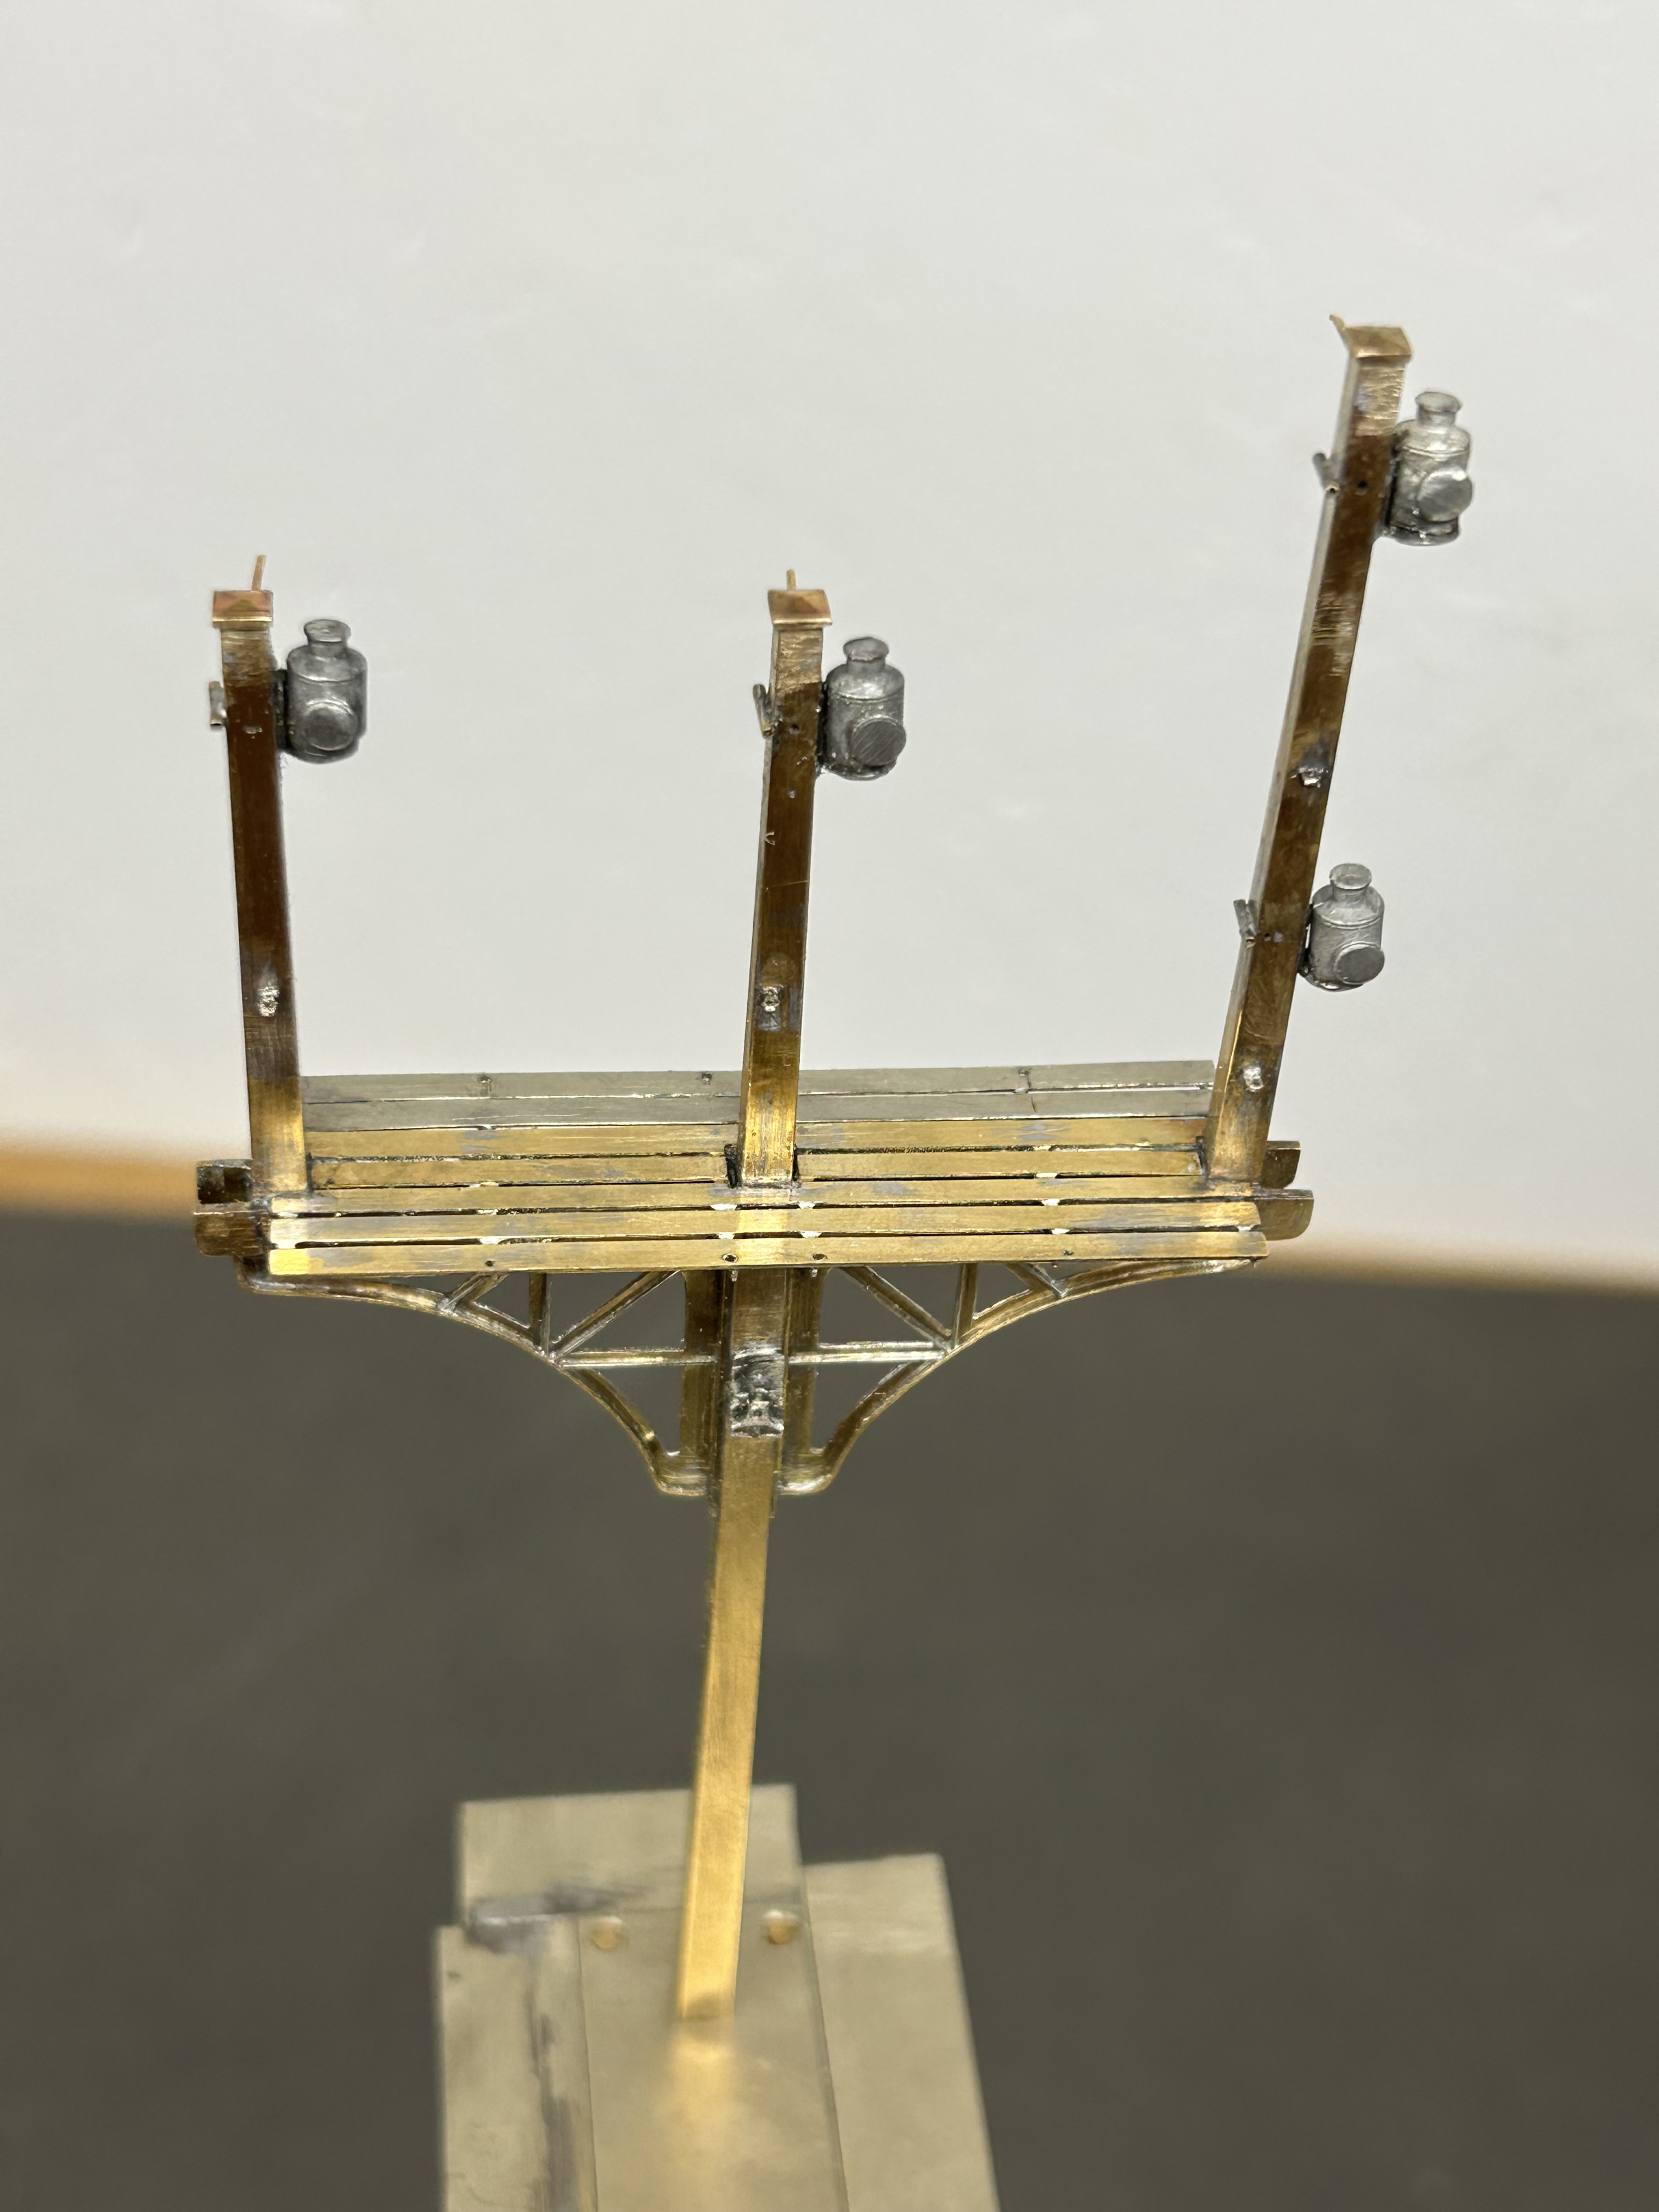
Although the drawing did not show a landing in front of the balance weights, i felt that it was likely one would be provided given that these need maintenance at times. Hence this was formed from some L section and an etched slats and provides a useful point to secure the ladder too.
The issue with signals with dolls is that each doll is in effect its own signal; it has a ladder, arm and lamp assembly. But worse than this is that it is also necessary to get the movement to transfer over to the doll so there is even more than a seperate signal per doll. There are a number of ways the prototype used to get the movement to transfer and in this case the signal uses L shaped elbows. Sadly these are more challenging to make as there are more working components and to be prototypical they out to be little more than a couple of mm in size.
A key trick in making signals is to spray paint as much of the signal as possible. Because the components are generally fine any excess thickness of paint will quickly make the modelling crude. As a result of this, I now generally try to make the ladders detachable. In this case there is a rod attached to the top of the doll that a tube at the top of the ladder slips over, with prongs at the base.
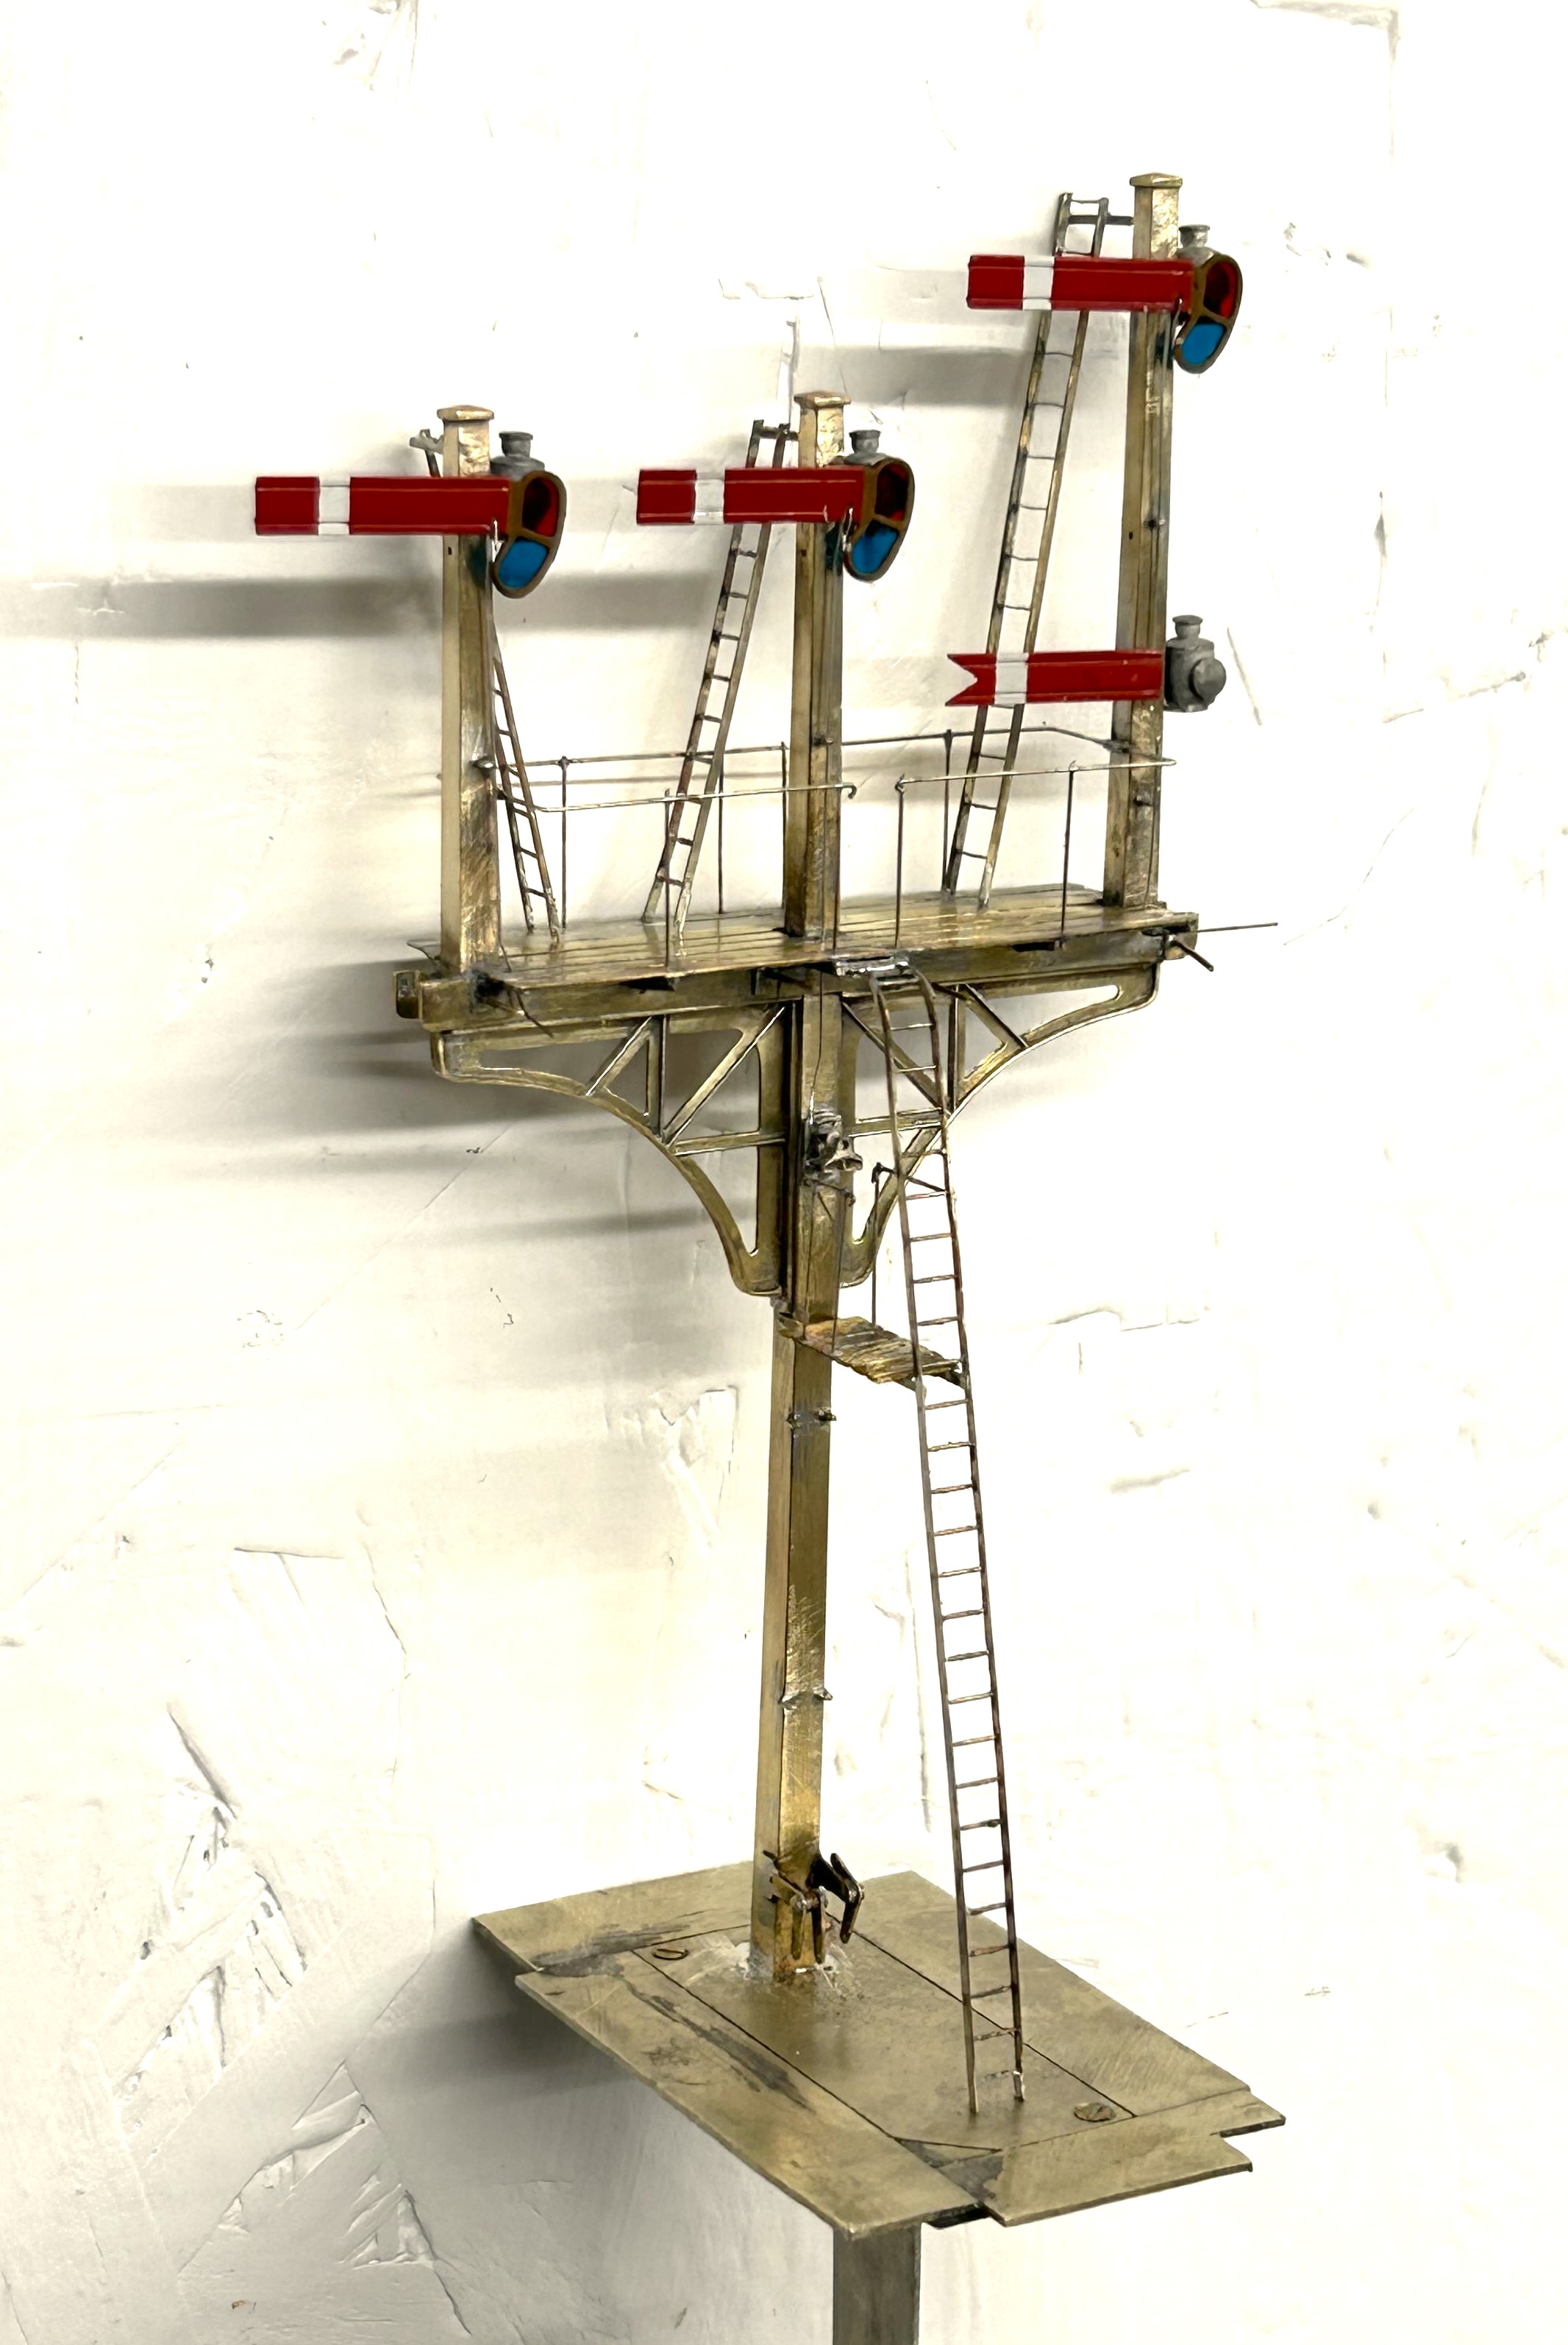
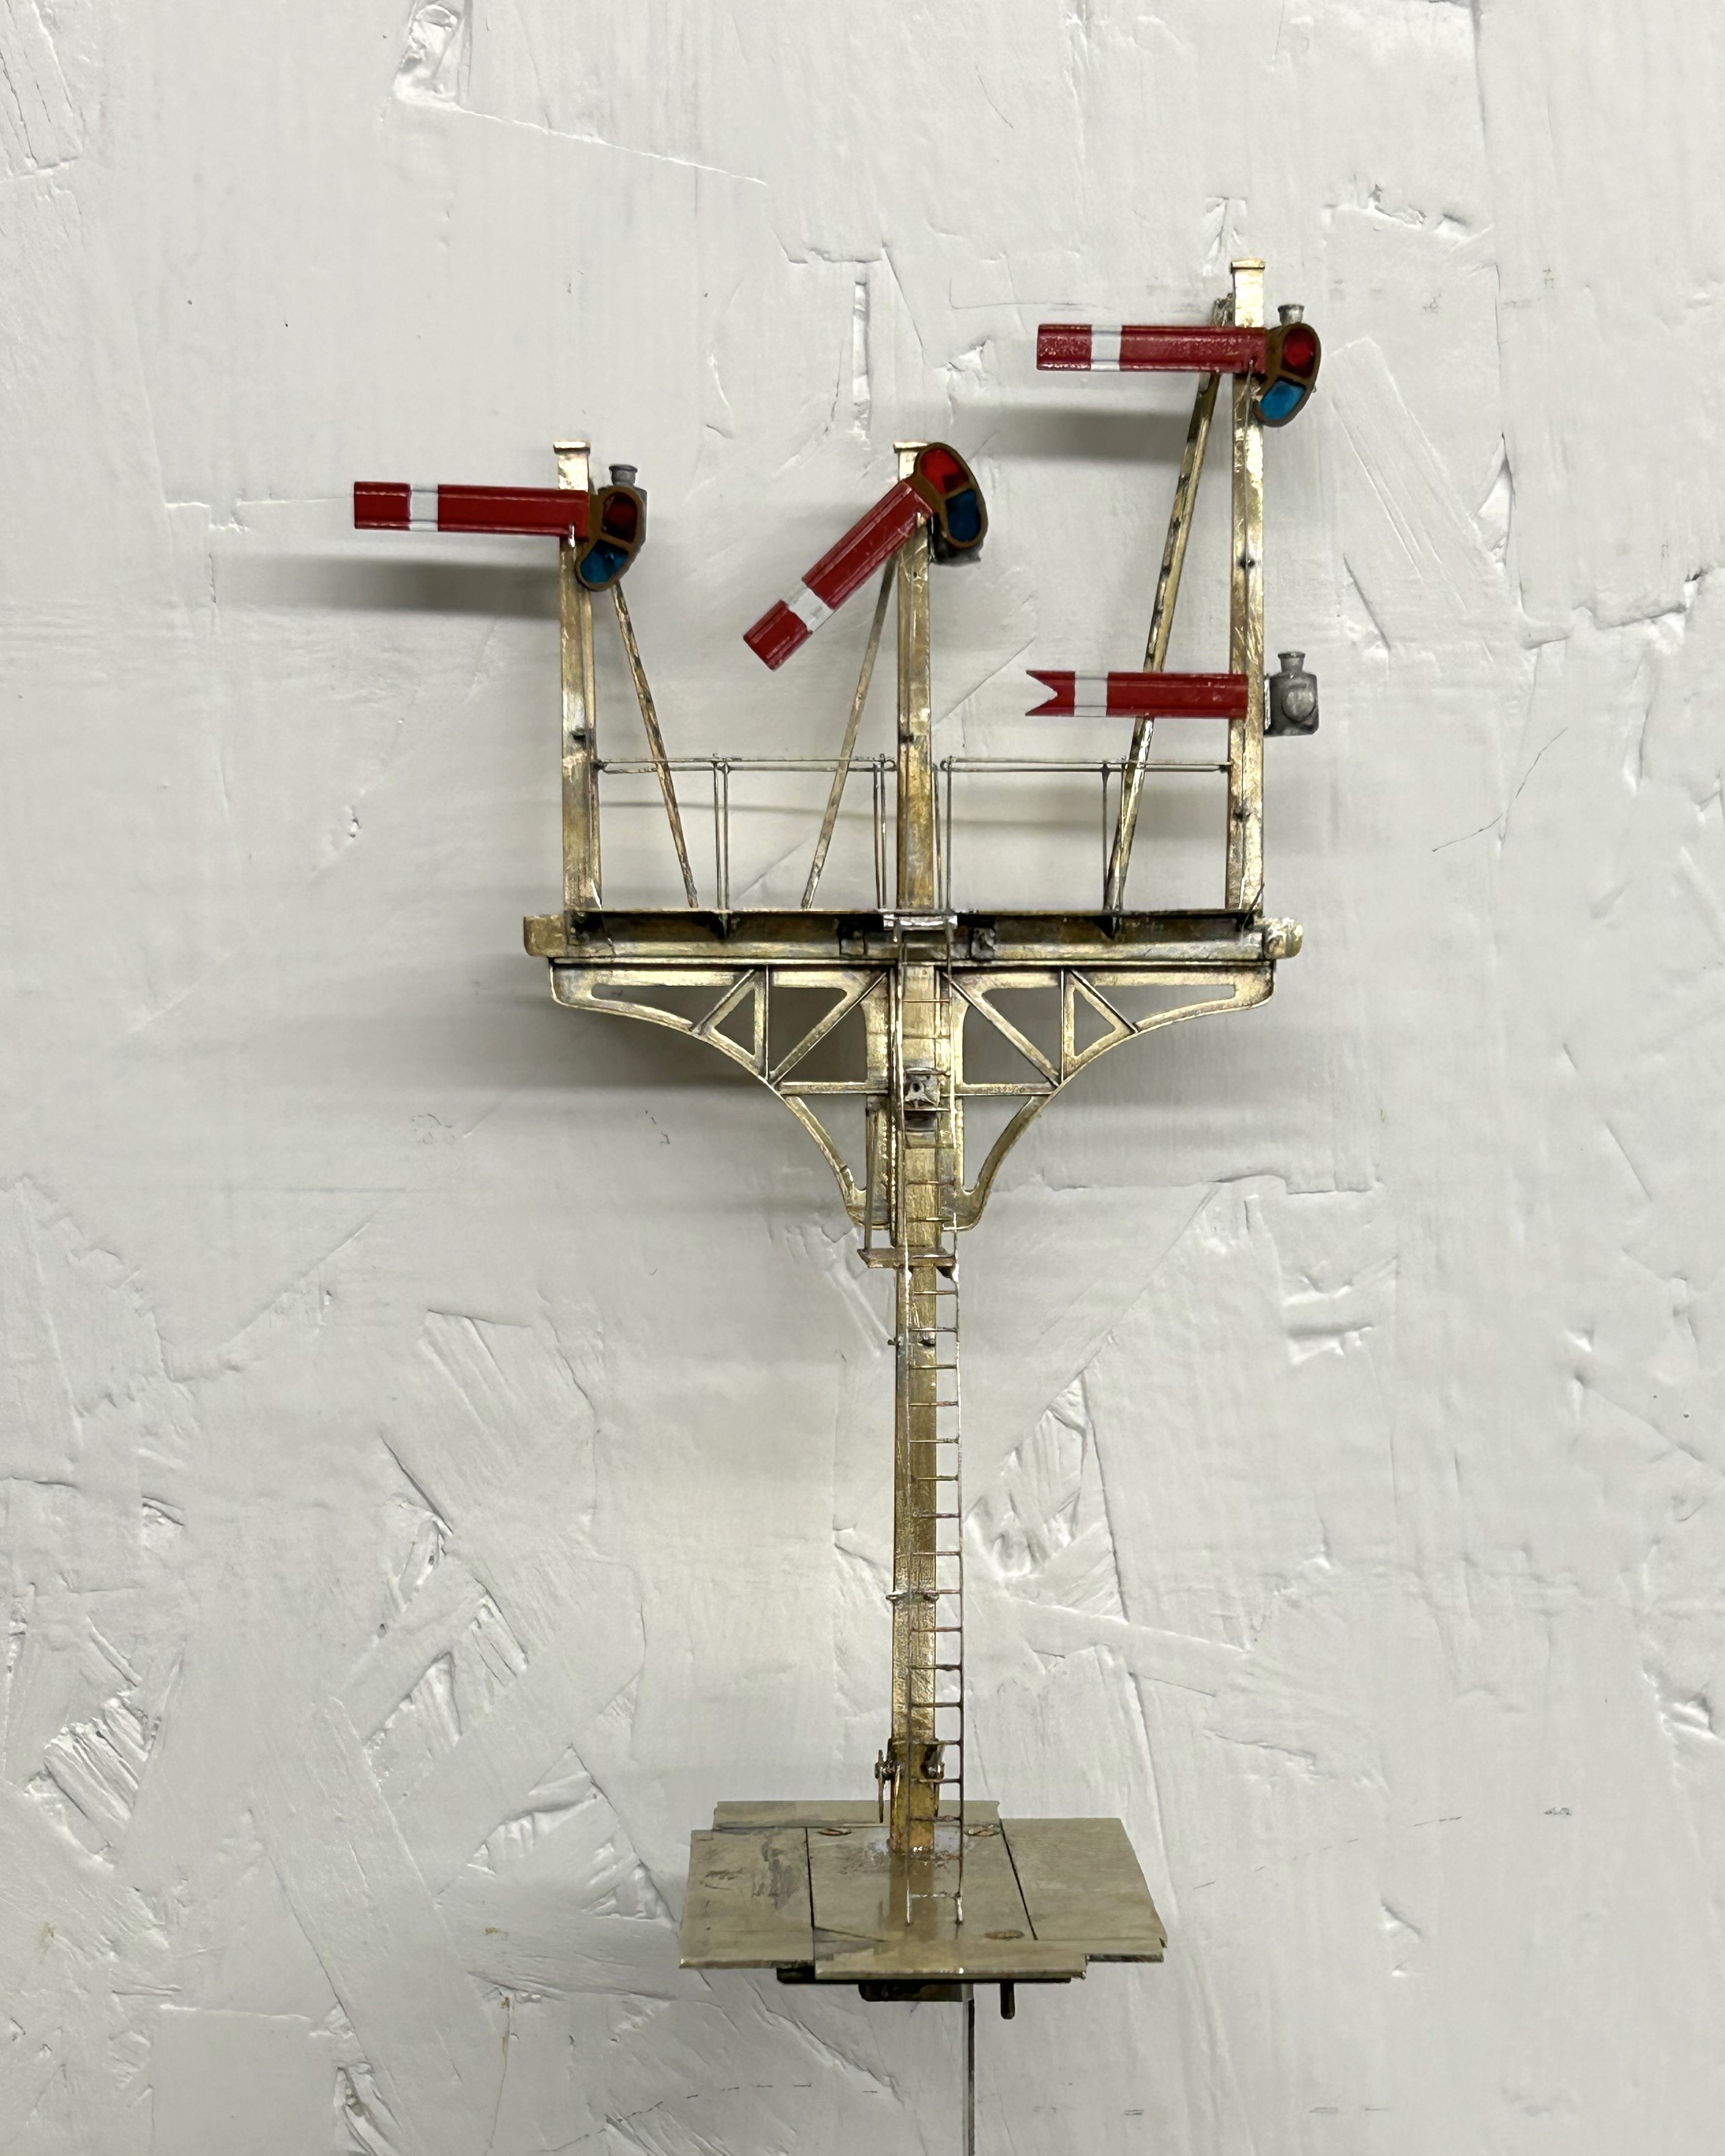
So here it is a finished (except for a tie rod which I fortgot to paint so is to be fitted shortly).
And as is de rigeur for a blog post on the building of signals, here is a video of it in operation.
")
More Seasons Greetings (and Signals)
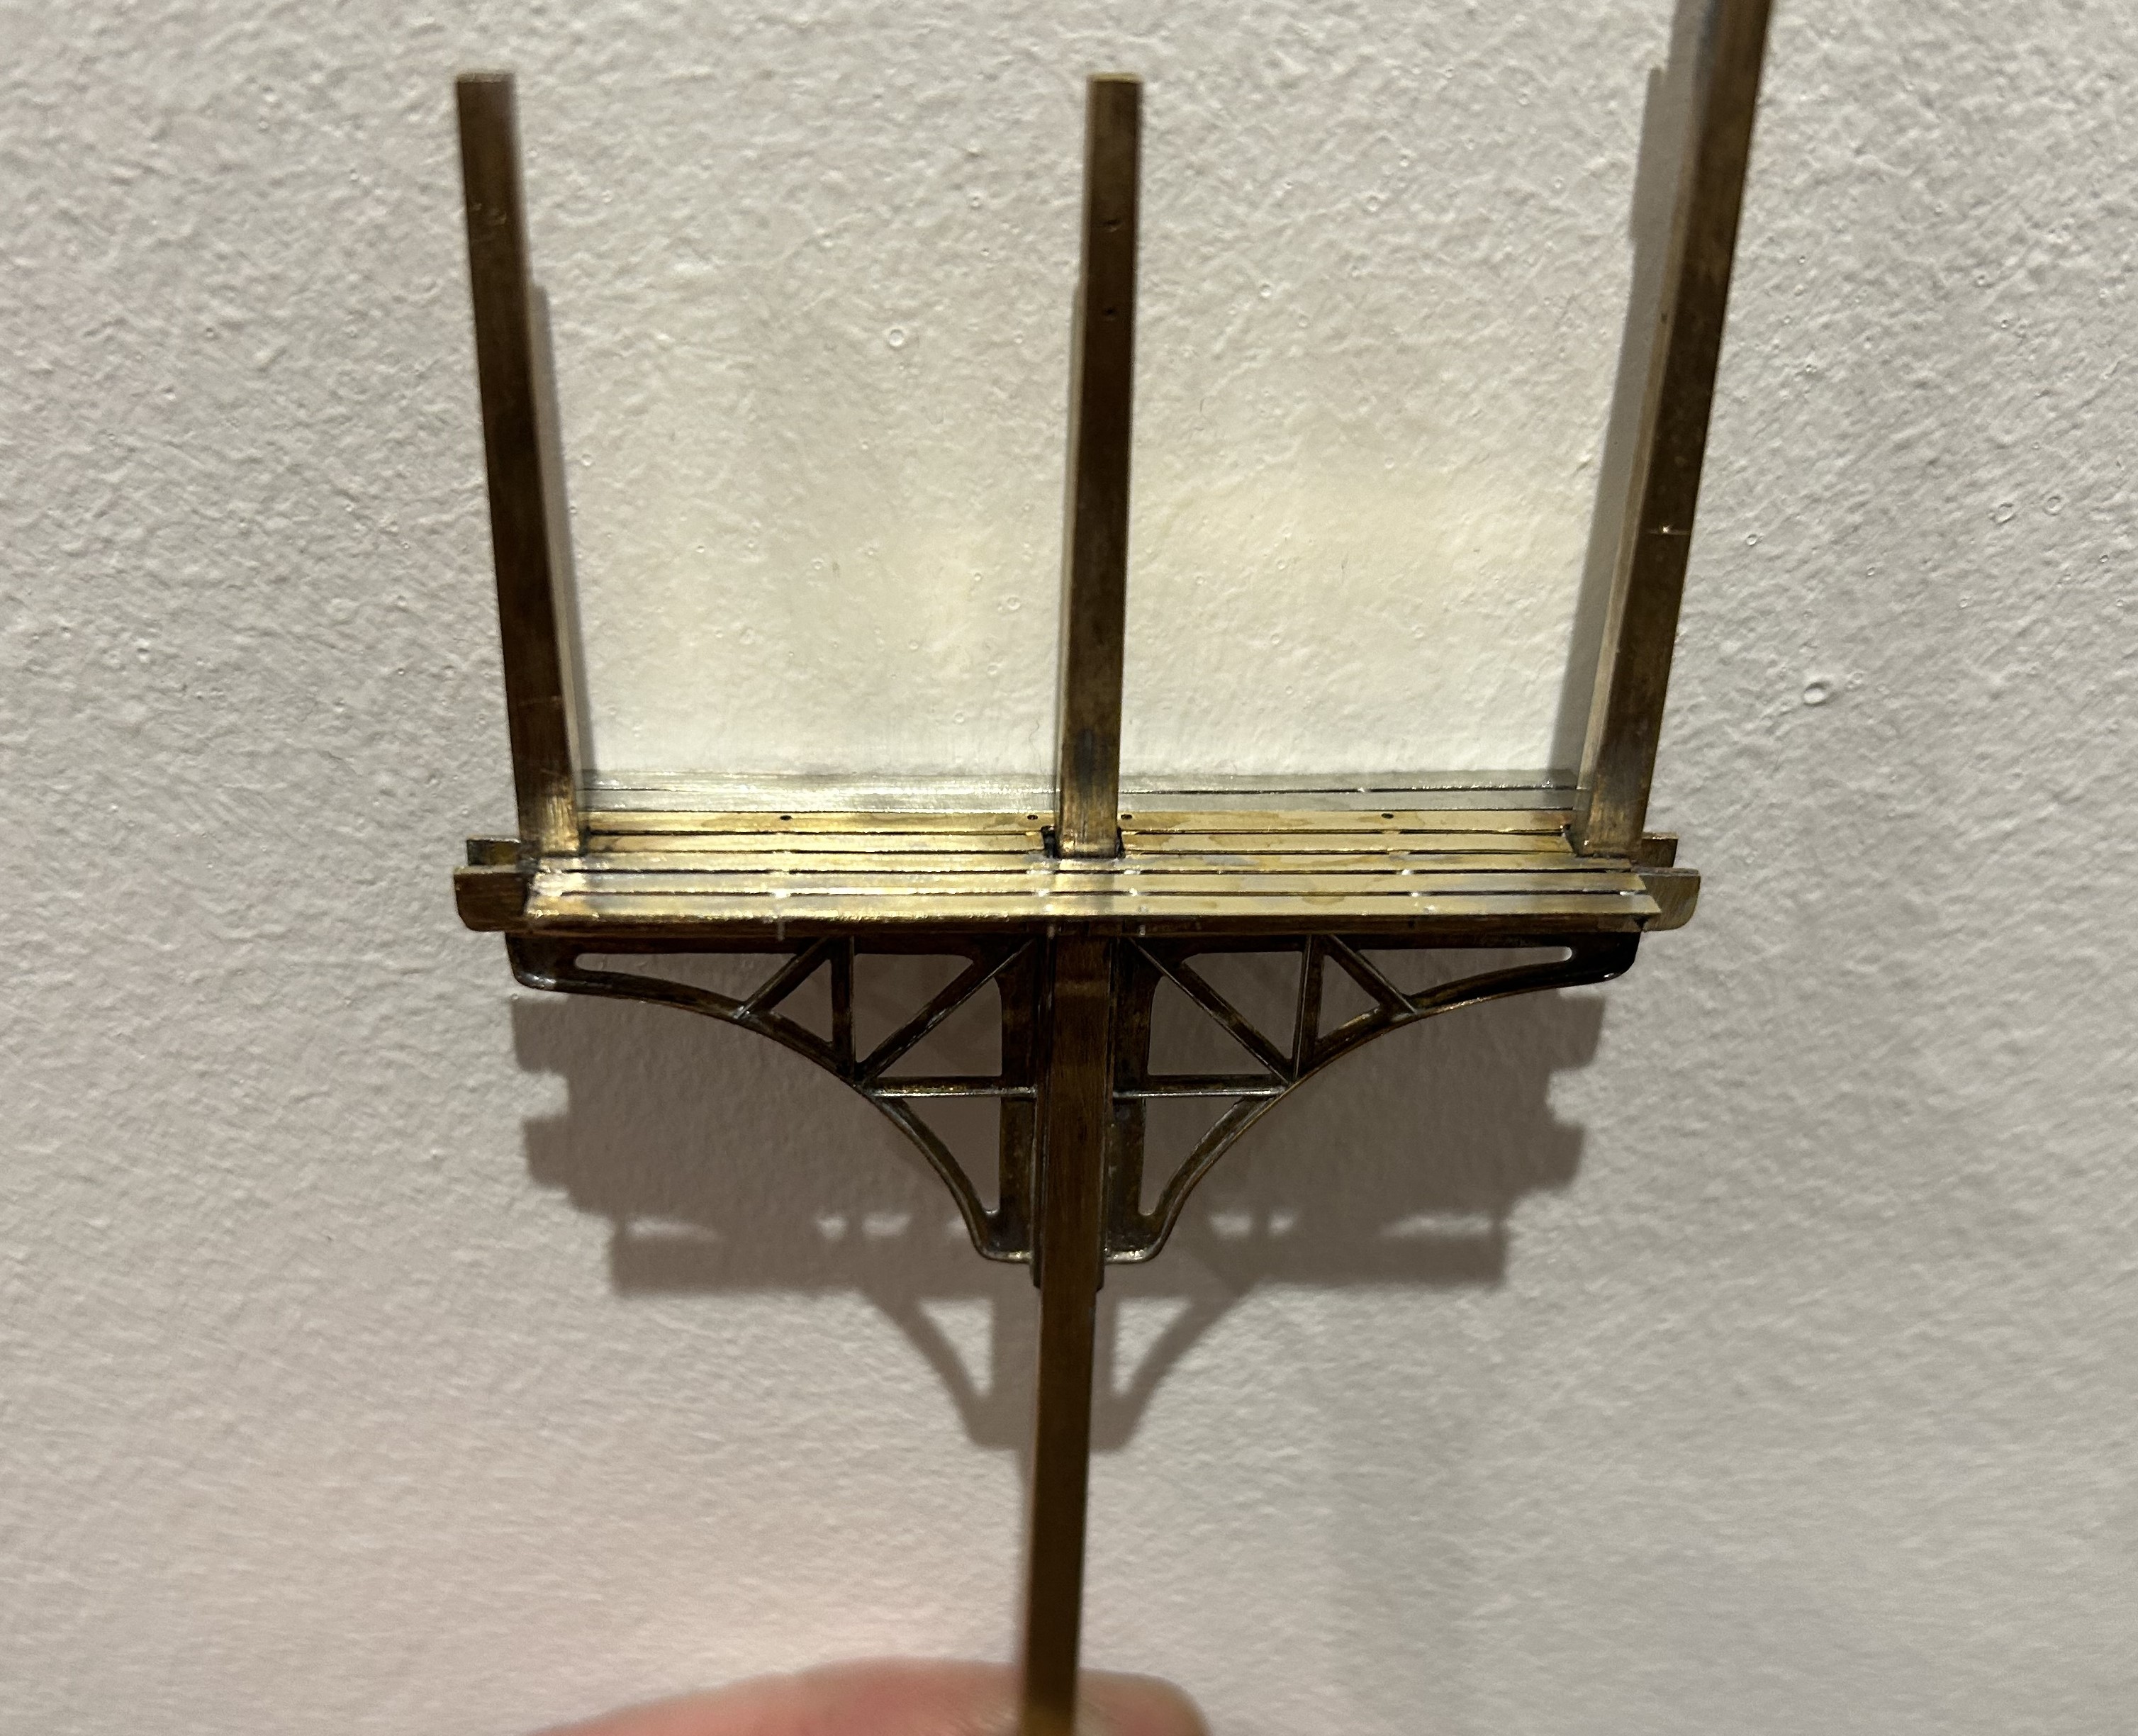
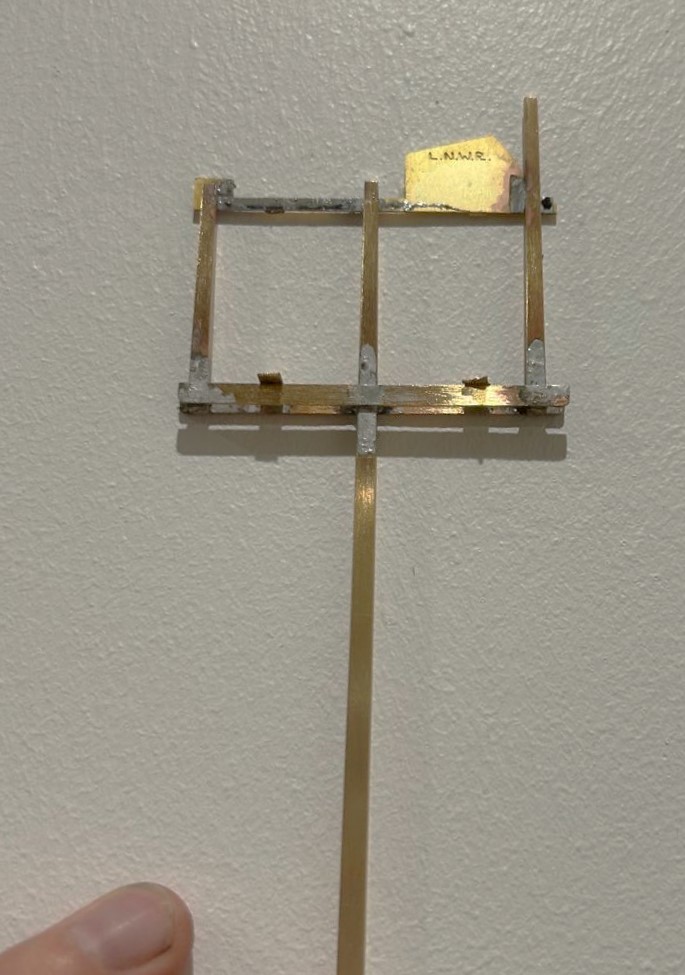
Having got the post and dolls in place, the next step was to fit the brackets.
The LNWR were unusual in not using cast brackets; instead they fabricated theirs from sheet and angle iron. Those supplied by MSE are a flat etch and therefore feel a bit one dimensional.

I therefore sweated on brass wire to one side of the strutts on both faces and also a plate on its outer edge. This helps give this a third dimension that was lacking before.

The next issue to be confronted was the landing where the MSE etch only provides a landing to the rear of the posts whereas this (and it appears many other LNWR signals) have landings both sides. I therefore had to produce support brackets and an enlarged area of landing. Foolishly, I forgot to drill holes for the guard rails before assembly, which meant that i had drill them in-situ. This is awkward due to the proximity of the dolls – it cost a couple of drill bits as a result and as a useful reminder to get it right next time!
Next, I diverted my attention to the the mount for the servos. I now always form these with a lower base which is permenantly attached to the baseboard and into which a second detachable base plate is inserted. The two are a tight fit such that once a little scenary is applied to the top, the joint is invisible. These are secured together with 12BA screws to allow it to be detached both during the build and for maintenance but generally it is secured in place. This is because signals are prone to damage when being moved about and would need recommissioning to get the movement correct each time they are reinstated.
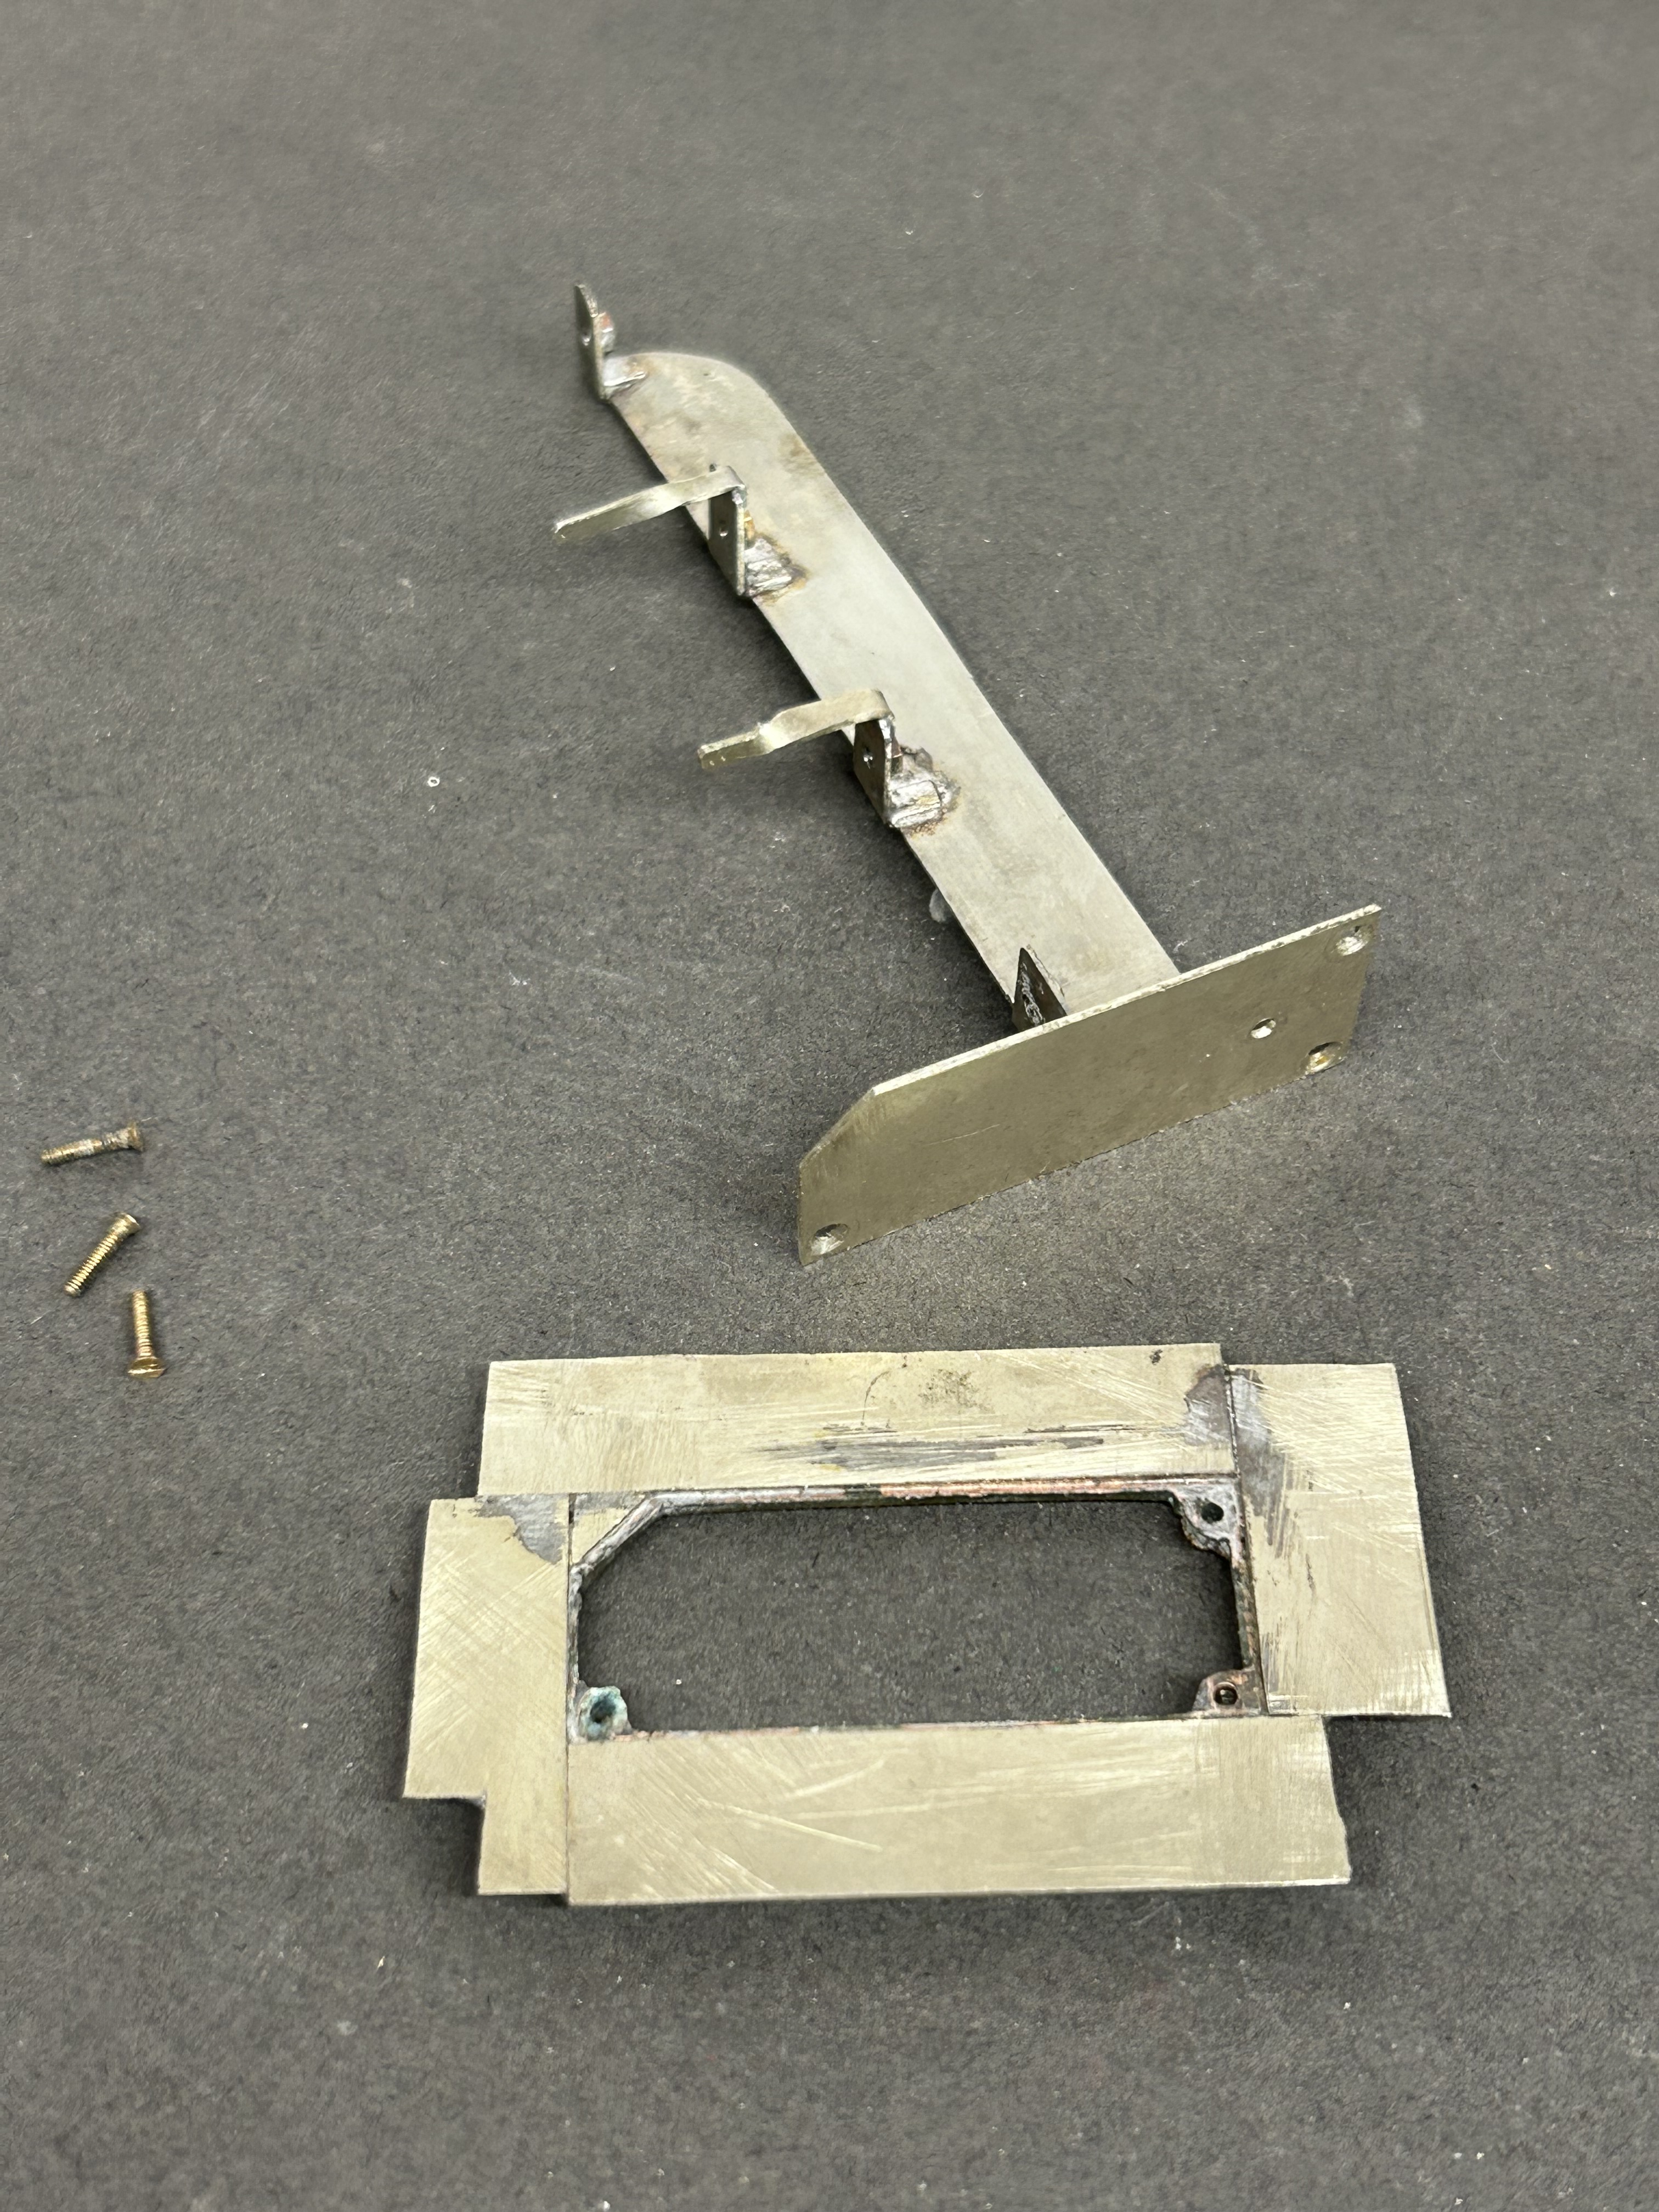
I drilled the underside of the post and tapped it 10BA in order to hold it in place. This enables me to secure it onto the base but subsequently remove it as I build it. I do solder it in place at the end of the build, but the ability to remove it during the build is helpful. The fact that the bolt holds it in place also makes it easier to get the post vertical, rather than trying to hold it vertical simultaneously with the soldering.
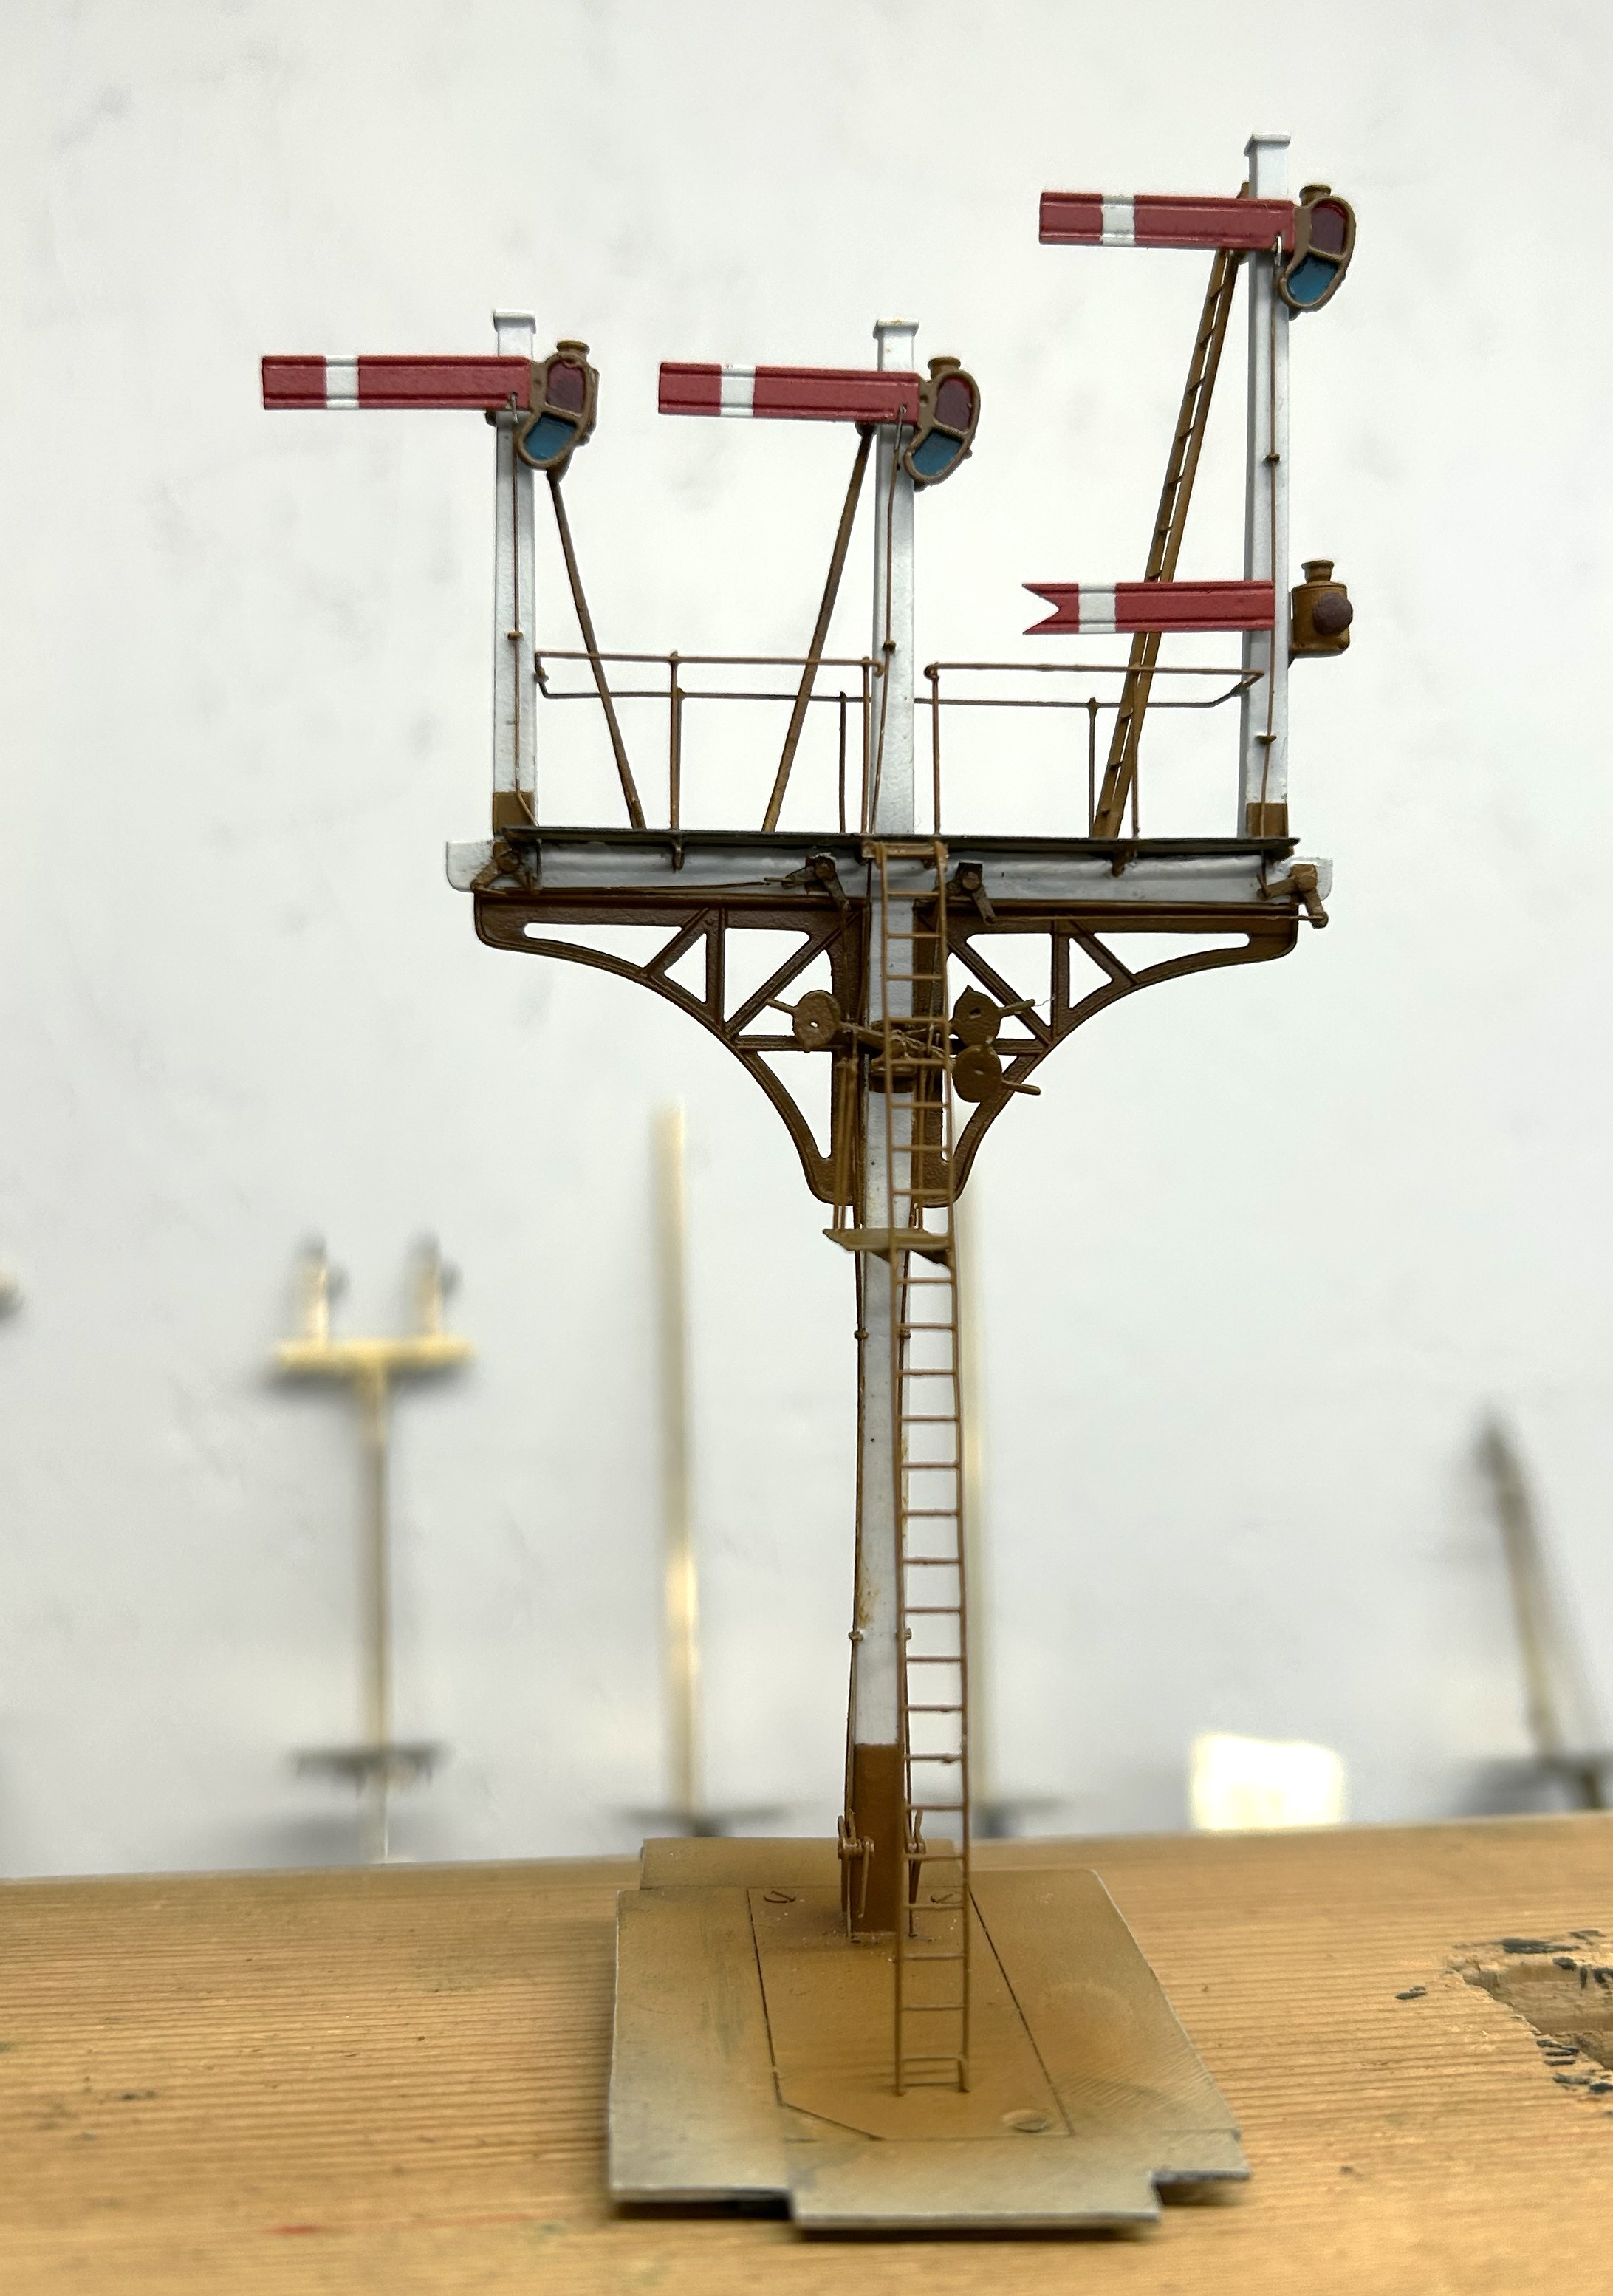
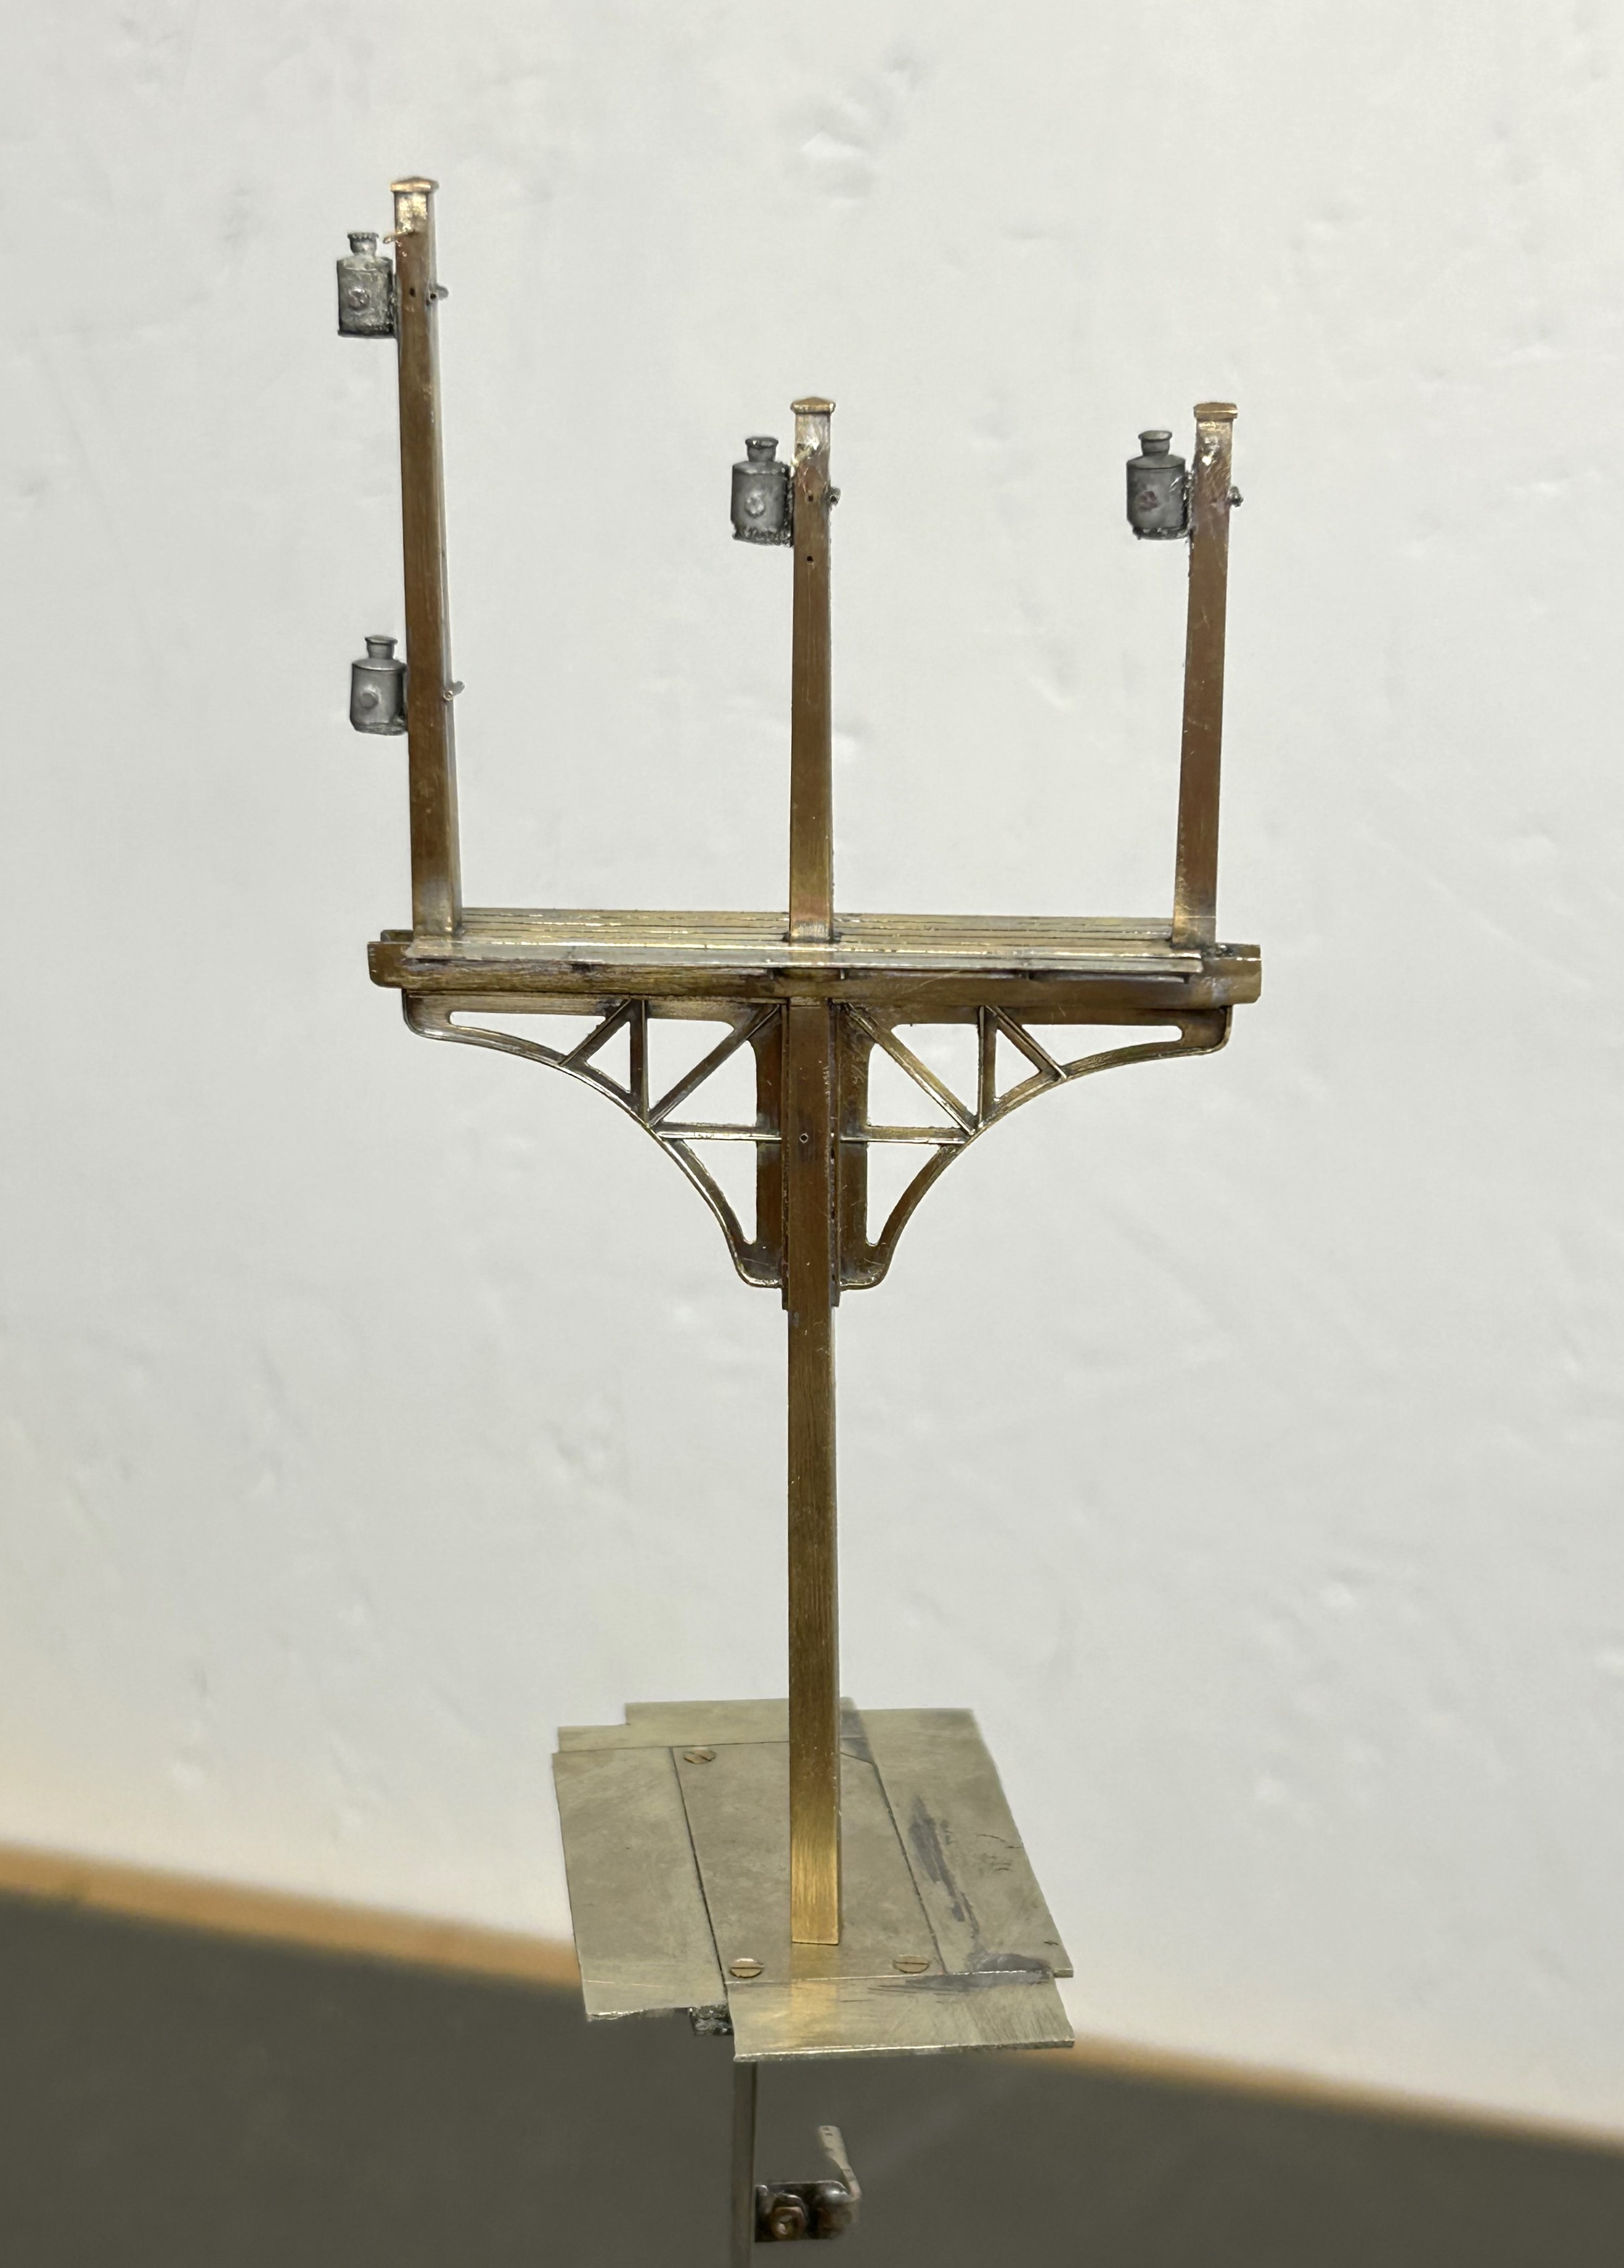
Whilst MSE do provide a white metal casting for the finials, I opted to fashion my own with brass as I find them crisper. To ensure these do not fall away as later tasks are completed, I use a high melting point solder for these and also include a pin drilled into the top of the post. Lamp brackets, lamps, the balance weight mount and some supports for the ladders were next.
I now have a recognisably signal beginning to form but the difficult bit, the movements are still to go.
")
Seasons Greetings (and Signals)
Work (at least real work) is now over for 2025 so I can get a bit of time in for turkey, mincepies and, of course, some signals.
I have built up a number of promises to make people signals; more than enough to keep me fully entertained for not only Christmas but quite a lot of time afterwards! It is time to start delivering on these promises.
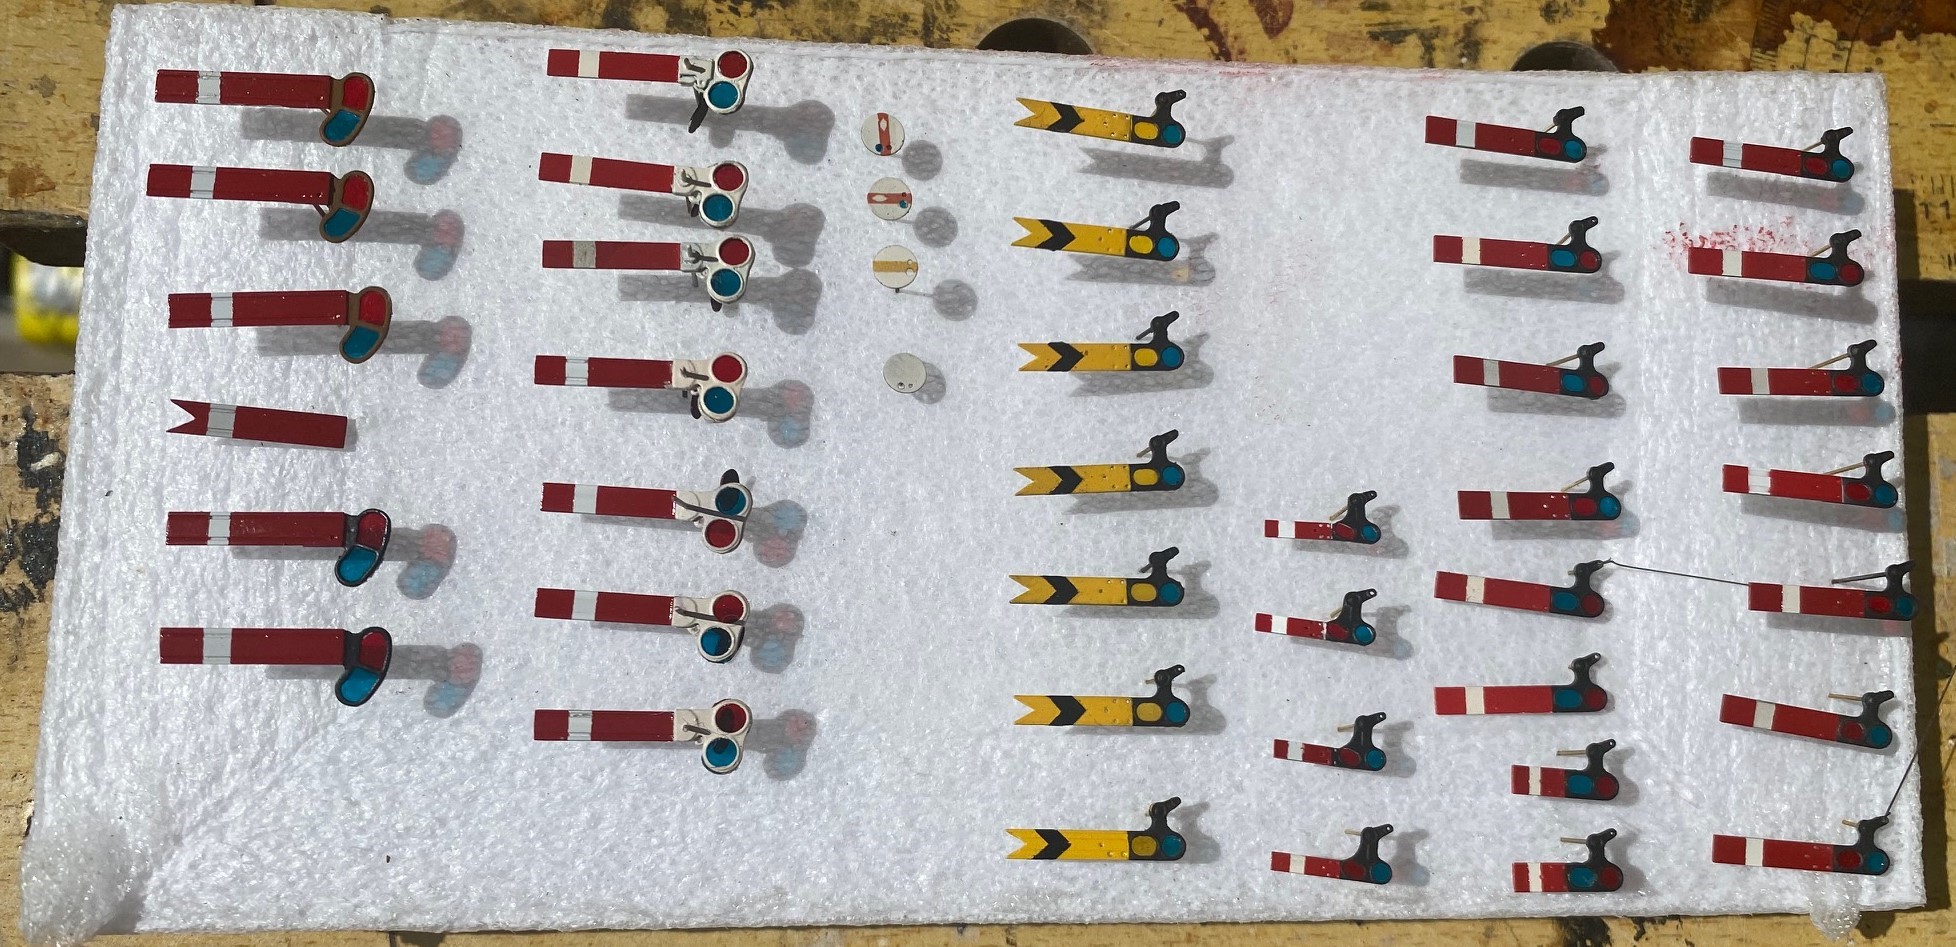
First uo has been to paint the arms. I know do these in advance as there is a lot of effort to paint them well and the best finish is by masking and spraying most of the colours. I can’t seem to brush paint to a good enough standard. I do, however, form the black shevron on the distant signals with black transfers as it is difficult to mask this neatly and the bars on the ground signals are a transfer from 51L.
I should be busy with this lot…………
In another departure, i have borrowed a milling machine to assist me in making the tapered timber posts. I form these from 4mm square brass section, a selection of files and a lot of elbow grease. It is a chunk of work for one signal but I have six taper posts and eleven taper dolls to do – I am not sure i have enough elbow grease to do this many!

I propped one end of the post to form the correct taper with the mill travelling level. it was not without problems as the brass tended to flex (upwards oddly) where it was not supported. I ended up using the mill to take most of the weight off the metal and then went back to the files to finish the task off. It does reduce the effort, but it is still hardwork – and i have only done half of them so far!
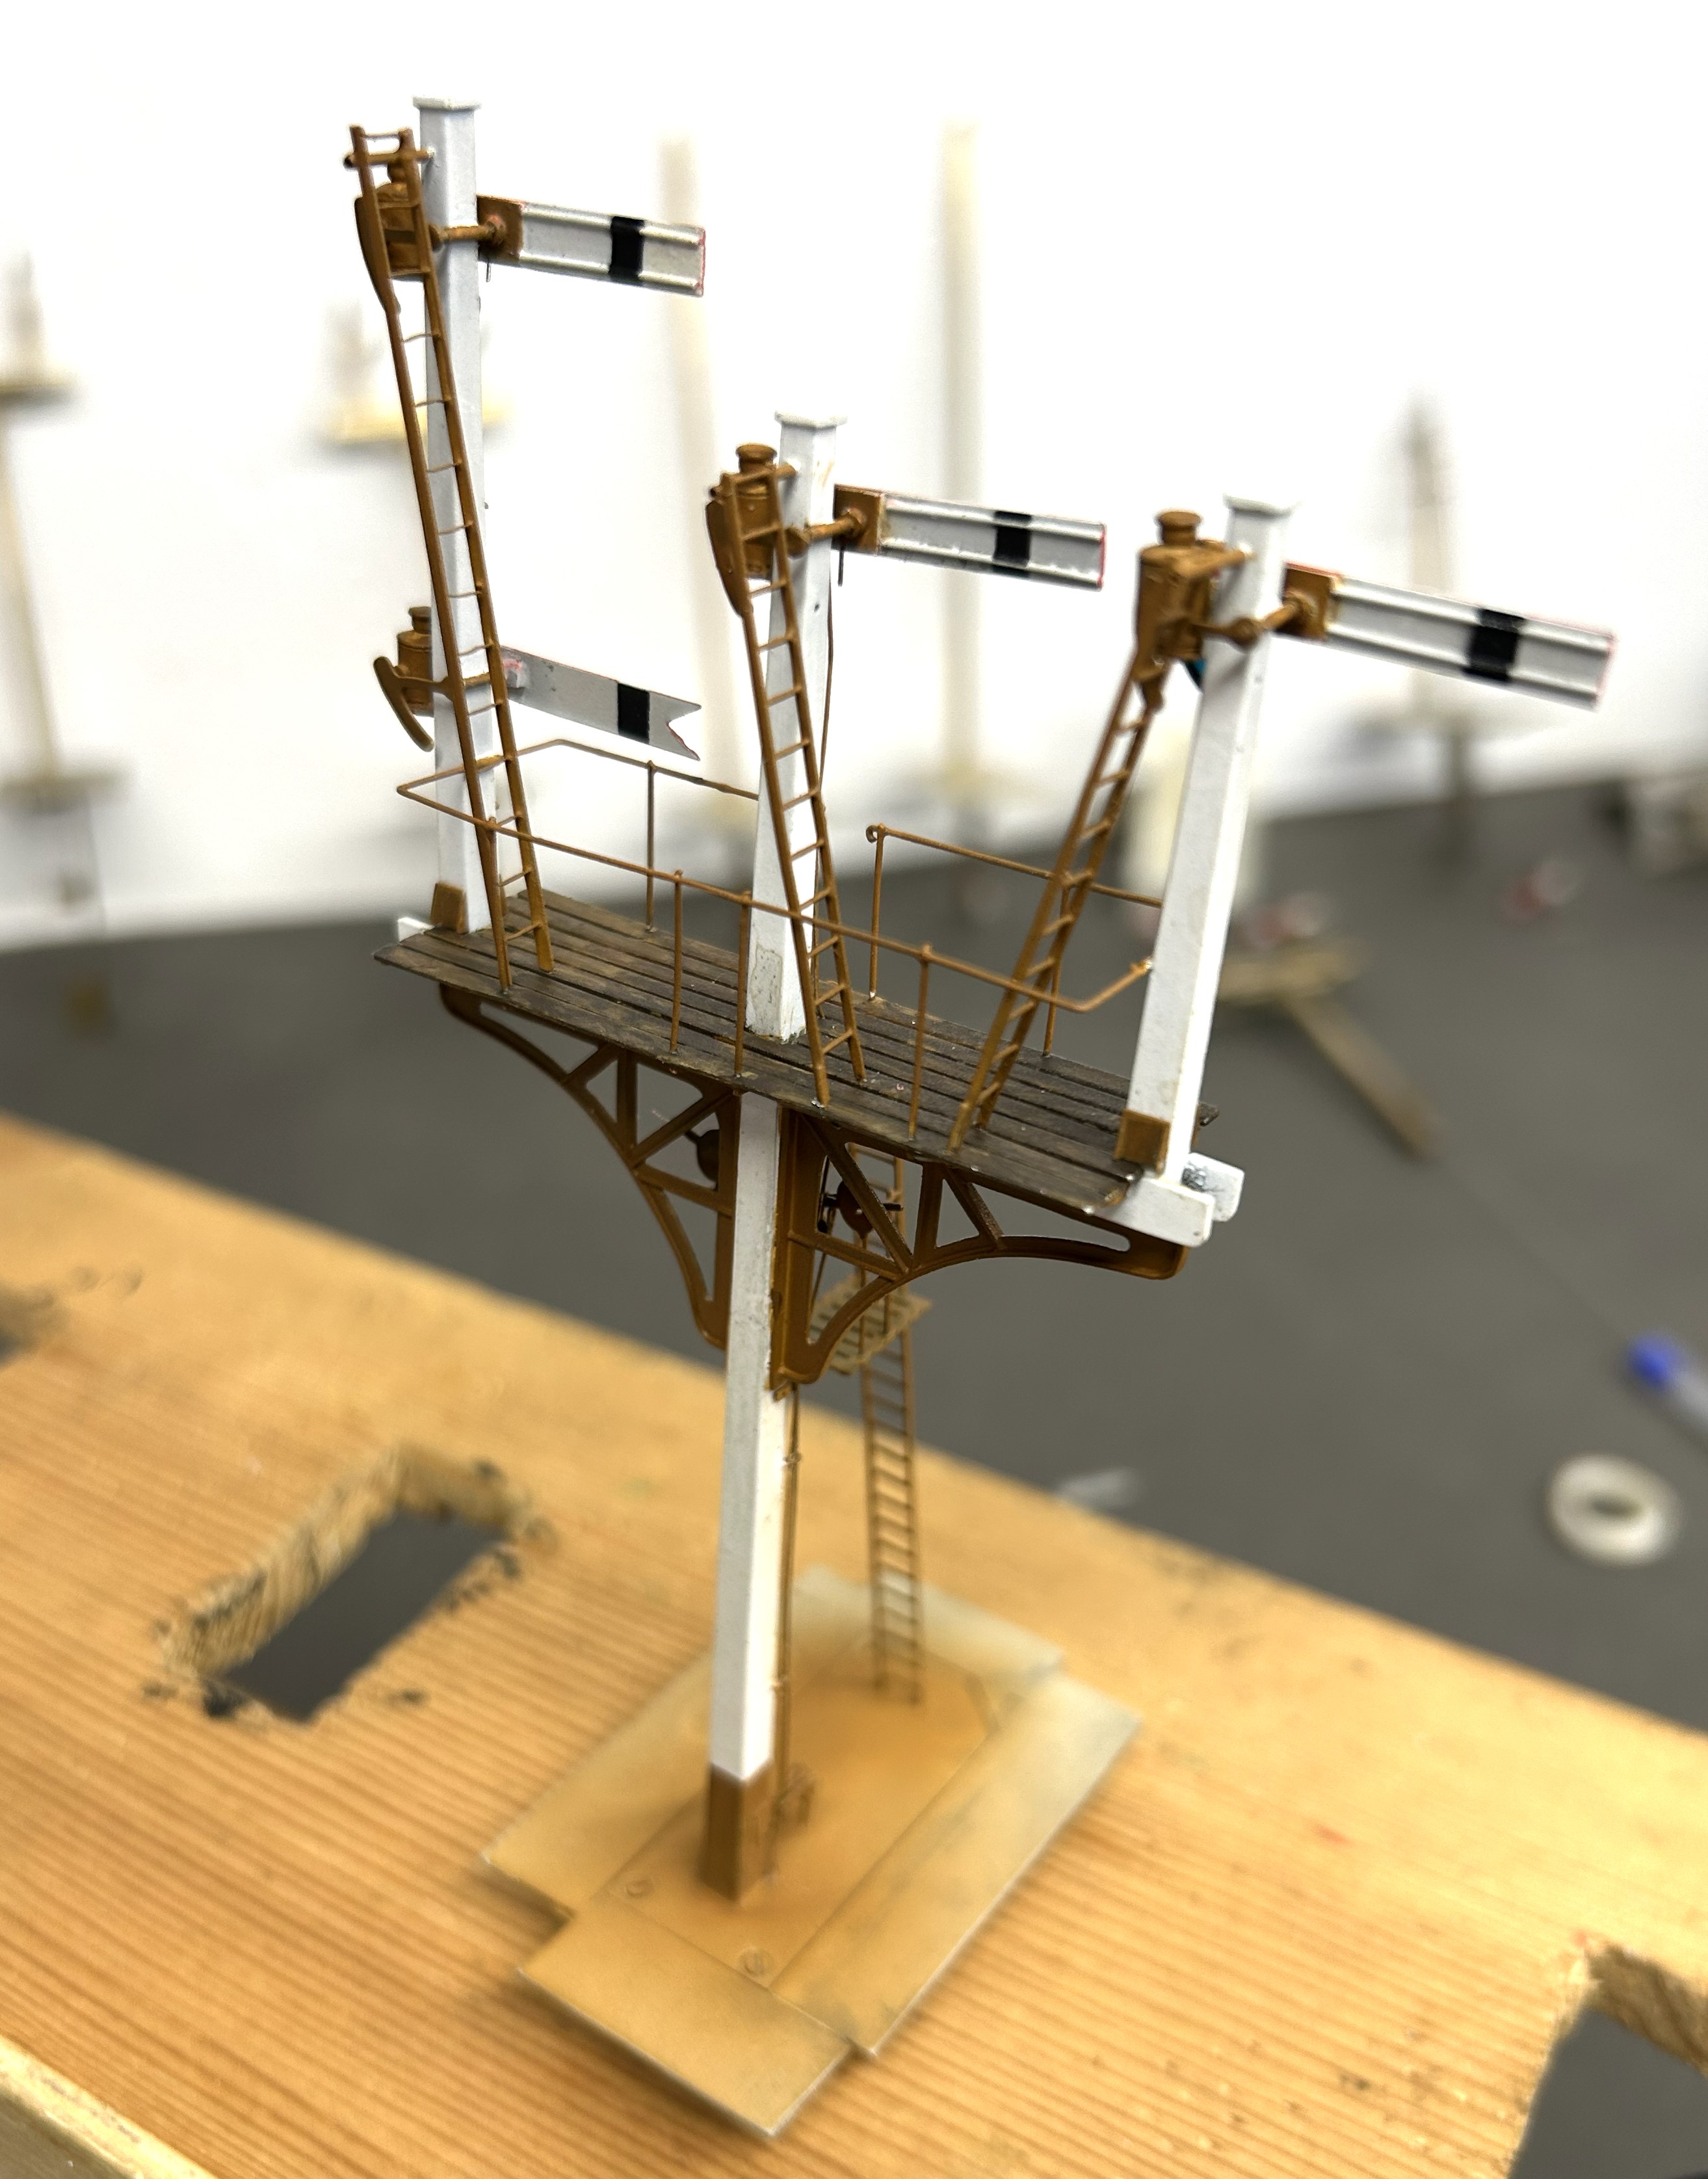
The first signal up is a LNWR three doll signal with three moving arms plus a fixed distant. Nearly as shown in this official drawing.
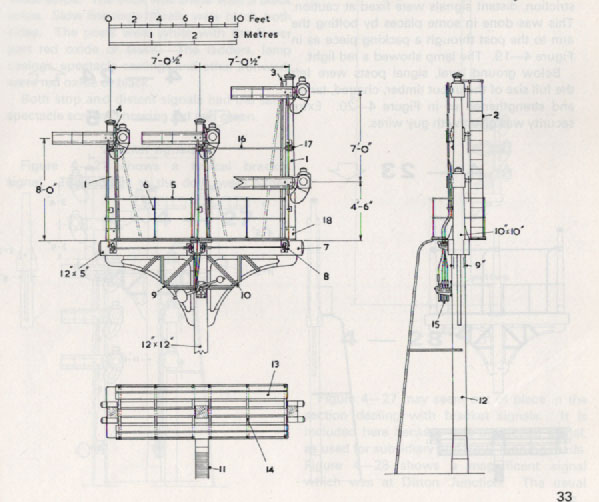
The basic posts and dolls are now in place; with various scarp etch temporary strutts to keep it square. Still a long way to go though!
So i wish you all a great Christmas and a Happy New Year.

A Fold of Cattle Wagons
Your pub quiz fact for the day is that the collective name for Highland cattle is not a herd, as it would be for most cattle. Instead, and only for Highland cattle, the collective name for a group of cattle is a fold. If that does come up in a pub quiz, you owe me a pint!
Cattle were an important part of the highland economy and hence were a good source of income of the Highland Railway. In my slightly distorted version of real history, there were 4 million head of cattle to transport per annum in the Glenmutchkin area (which is remarkable given the cattle population of the entire UK at the time was only a little bit higher!). Thus, a fold of cattle wagons was obviously a pre-requisite for Glenmutchkin and this is what I have been working on of late.
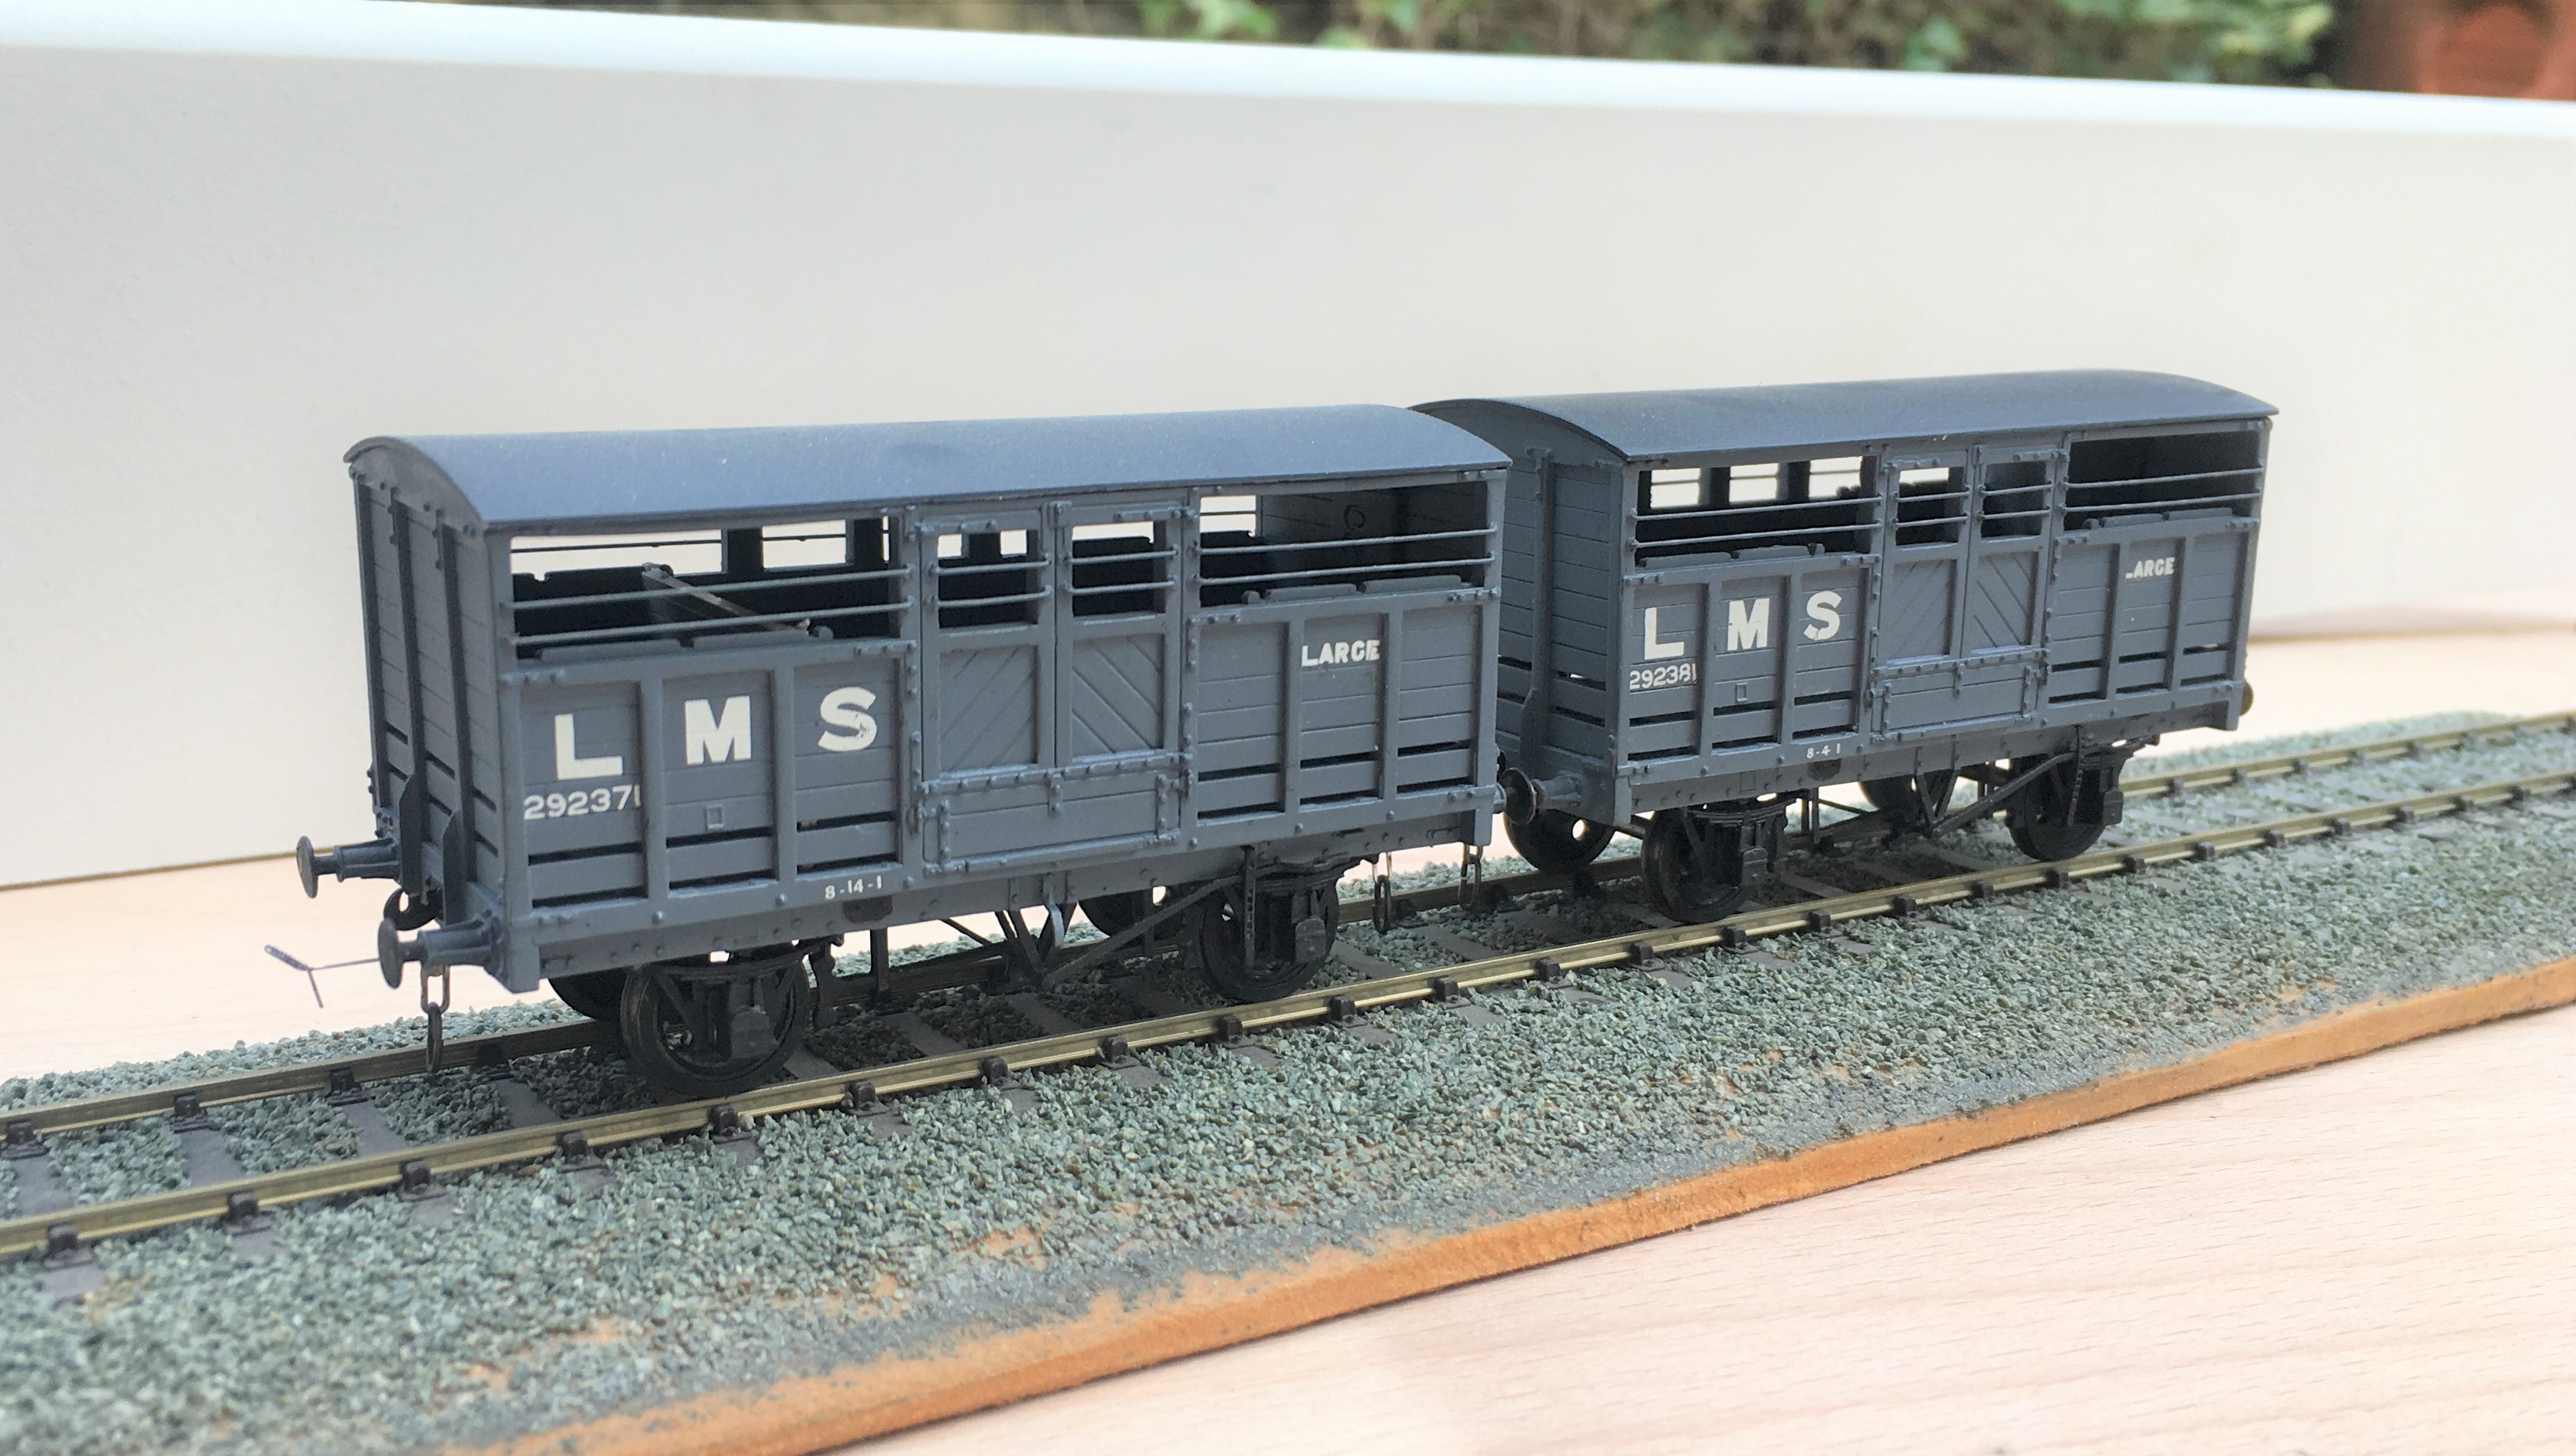
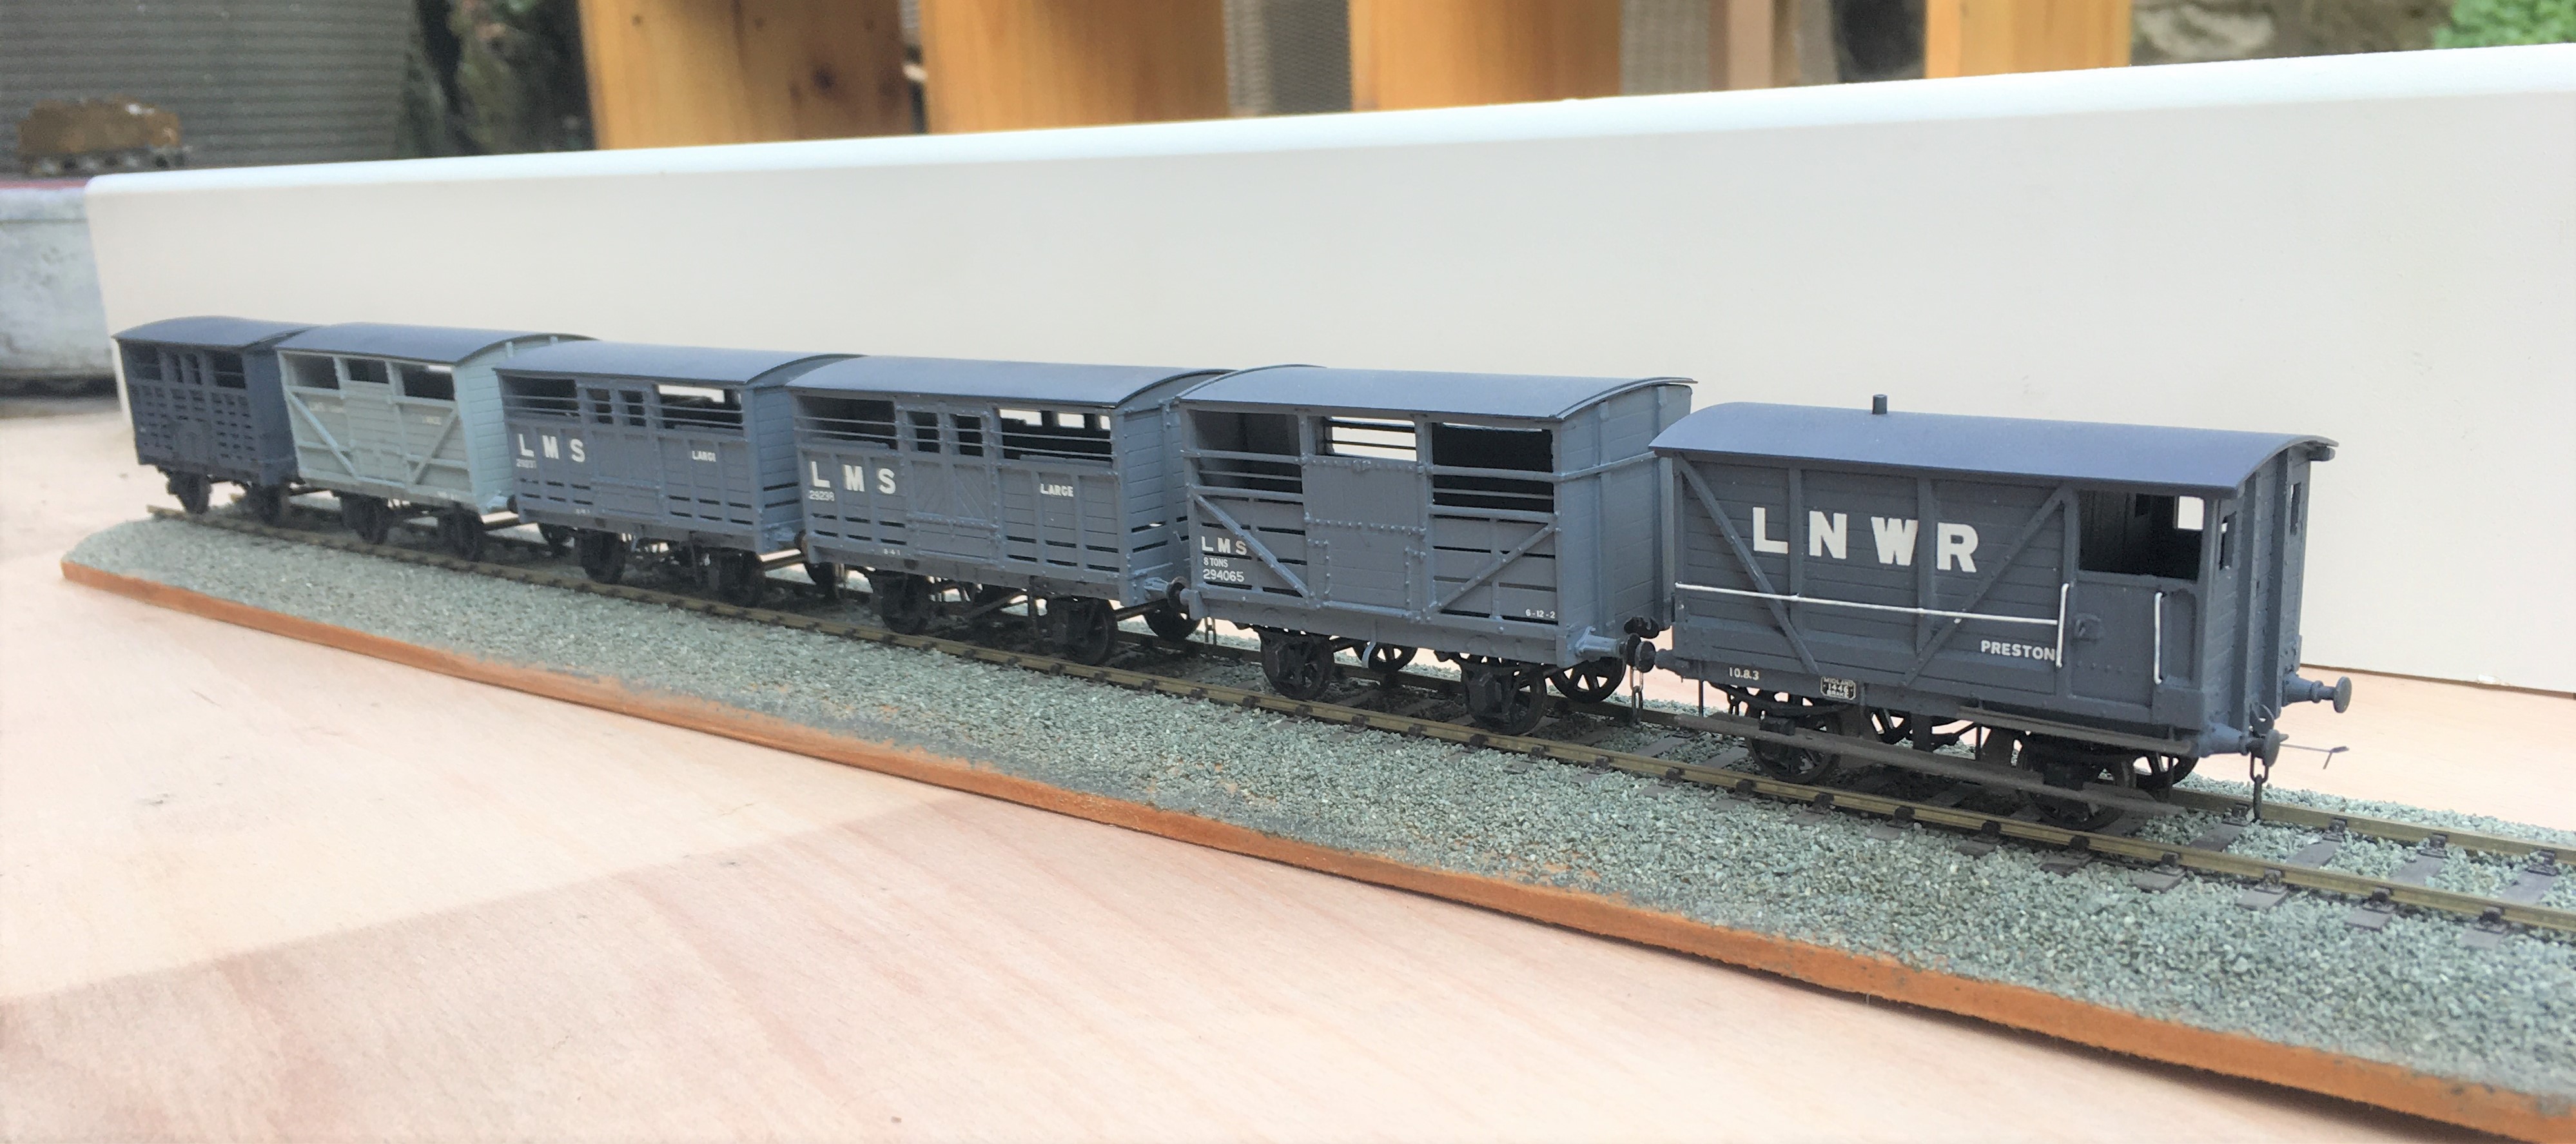
First up are a pair of LMS standard cattle wagons; to diagram 1661. These date from 1925; so they would have been fairly new at the time that my layout is set in. These were built from Parkside plastic kits with only moderate modifications around the break gear and, of course, some sprung w-irons. Being a relatively recent kit, it is generally very good and whilst it is possible to convert it to some alternative variants, these came later than my modelling period so I was not tempted. I am concerned that I have painted them rather to dark though, so I will be weathering them on the light side.
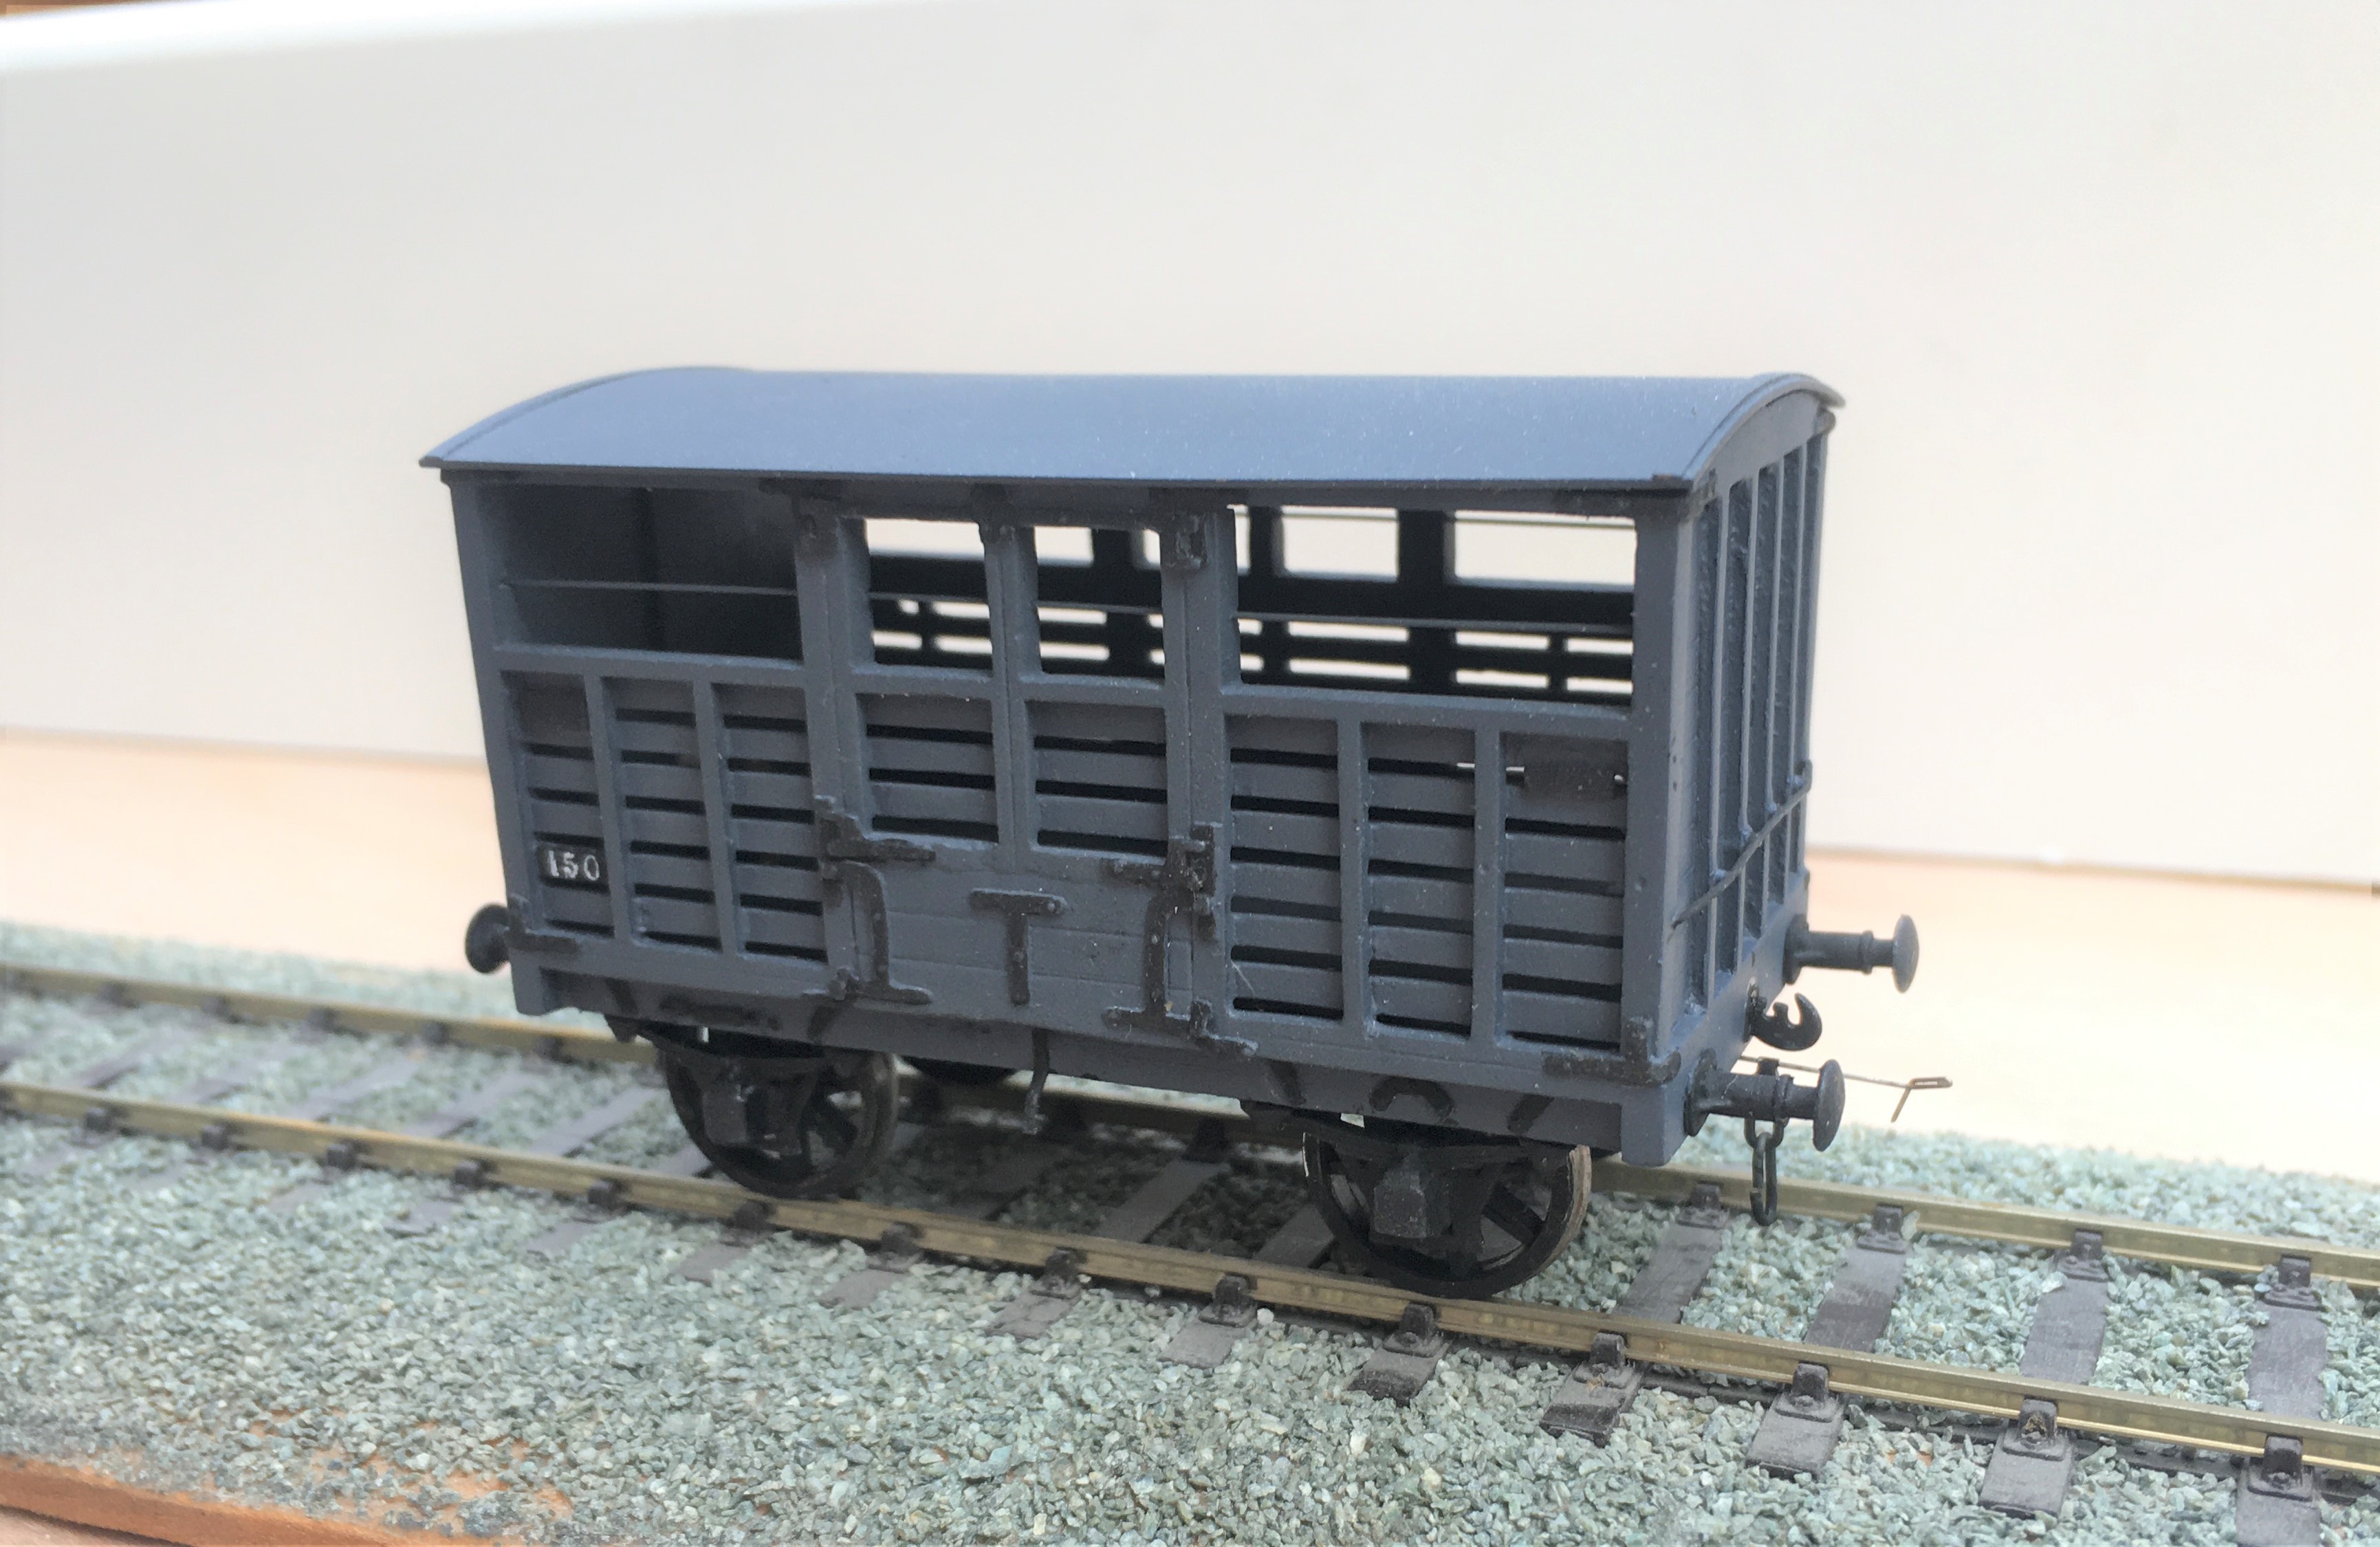
Next up is a Great North of Scotland Cattle wagon, from a Model Wagon Company white metal kit. This is a much older kit and didn’t it felt it! For reasons I am not certain of, the two sides were not the same length so in practise the body is a bit trapezoidal – but can you tell? The casting was also covered in flash which was a particular problem in the gaps between the wooden slats – this meant I spent a few hours I would sooner not have spent scraping it out to keep these clear. The GNoS vehicle was a much more basic vehicle and, strangely, did not get any large ownership lettering so they remained rather anonymous, Instead, they had simple cast plates, which I made from a locomotive number plate and dry brushed white on the letters. I have glossed over the fact it does not have the right number or even a consistent number from one side to the other – sod the “getting it all right” mantra!

I have also built a further Highland cattle wagon, built from a Model Wagon Company kit. This is the Drummond era version and I have already built a number of these so this was relatively routine – its just as well as there are still a couple in their packet waiting their turn!

The final cattle van is a David Geen kit for the L&Y large cattle wagon. Whilst still a whitemetal kit, it is of somewhat better quality than both the Model Wagon Co kits so was rather easier to make. Even then, it did need filling at the corner joints and I felt the need to swap the brake levers for replacements – why to even the better manufacturers use the same material for all of their kits?
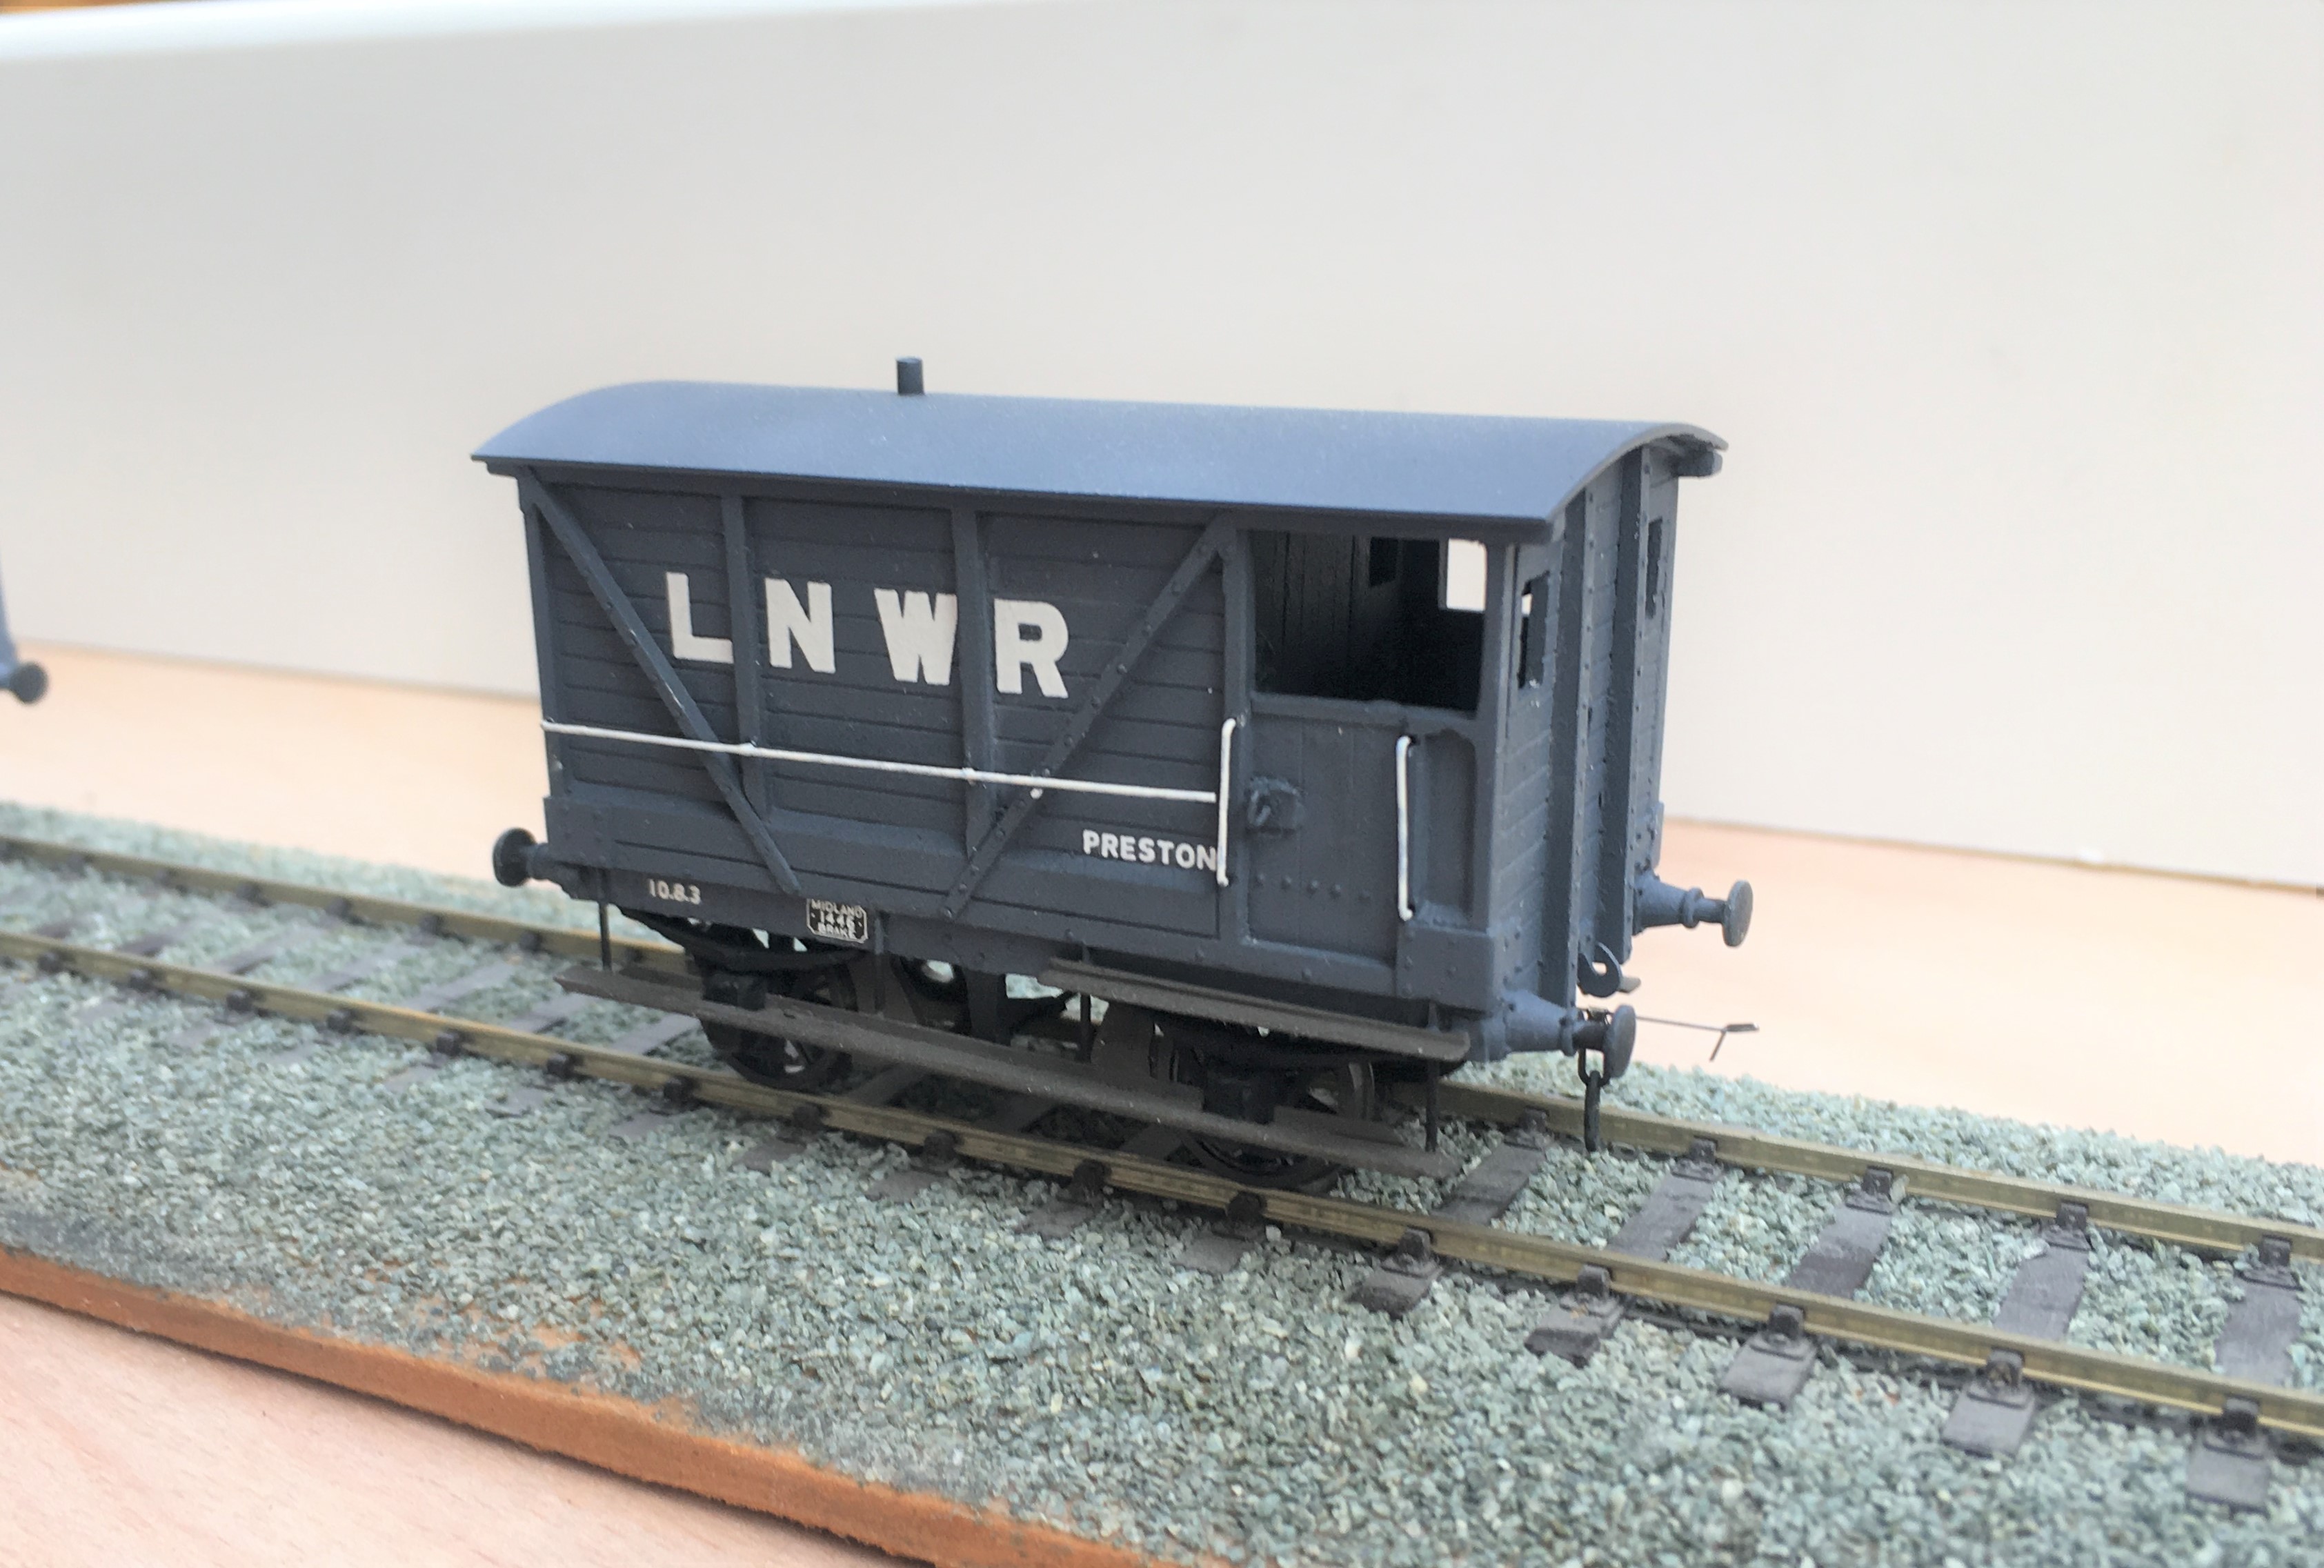
To finish of this little rake, I obviously need another brake van. This is not so obvious because this is brake van no 11 in the collection and I know I have at least one more spirited away! Whilst this was a kit build, it was first a kit unassemble as this was a vehicle I had first built in my teens. Generally fairly well but a couple of bits had got damaged over the years so I felt it needed rejuvenating.
And here they all are on parade.
Now all I need is rather a lot of heilen coos to fill them up with. I have been working on this but it seems that resin casting is a tad more difficult than I thought……………..
Oh and yes, they are all way to clean; another weathering sess’ is required guys………..

Euston Departure
Being fundamentally an LMS man, I have recently joined the LMS Society. The cover photograph of the first Society newsletter that greeted me was so fabulous I thought it was worth sharing.
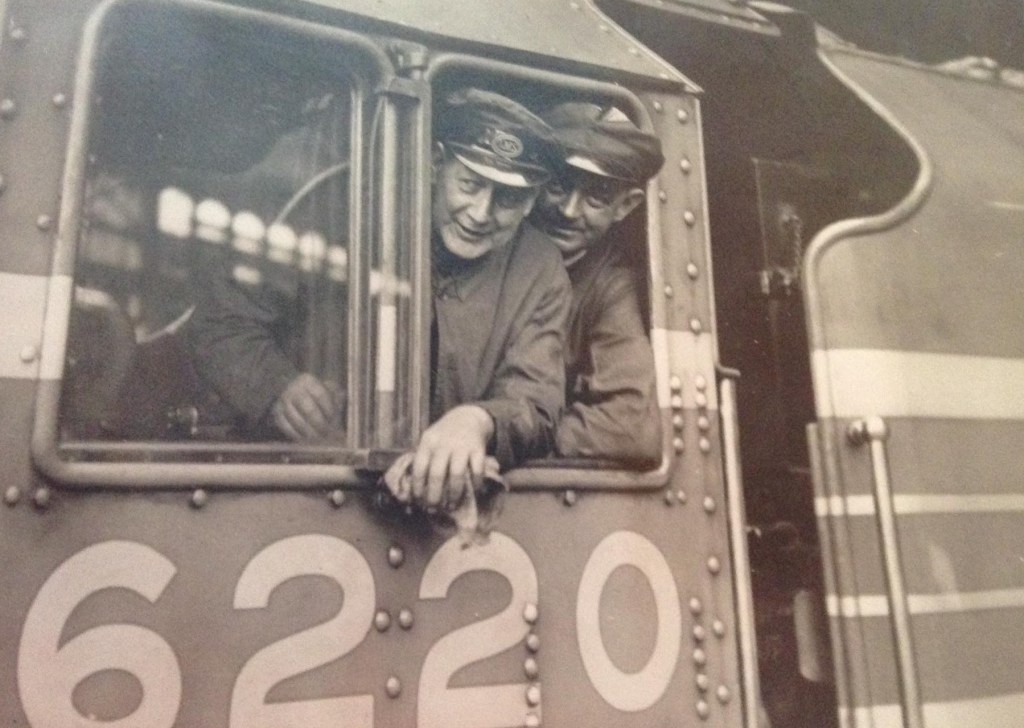
This is 6220 Coronation awaiting the right of way from Euston, sometime between June 1937 and the outbreak of the war. Driver Fred Bishop is peering out of the cab roof ventilator in what must be an official photograph posed shot for publicity purposes.
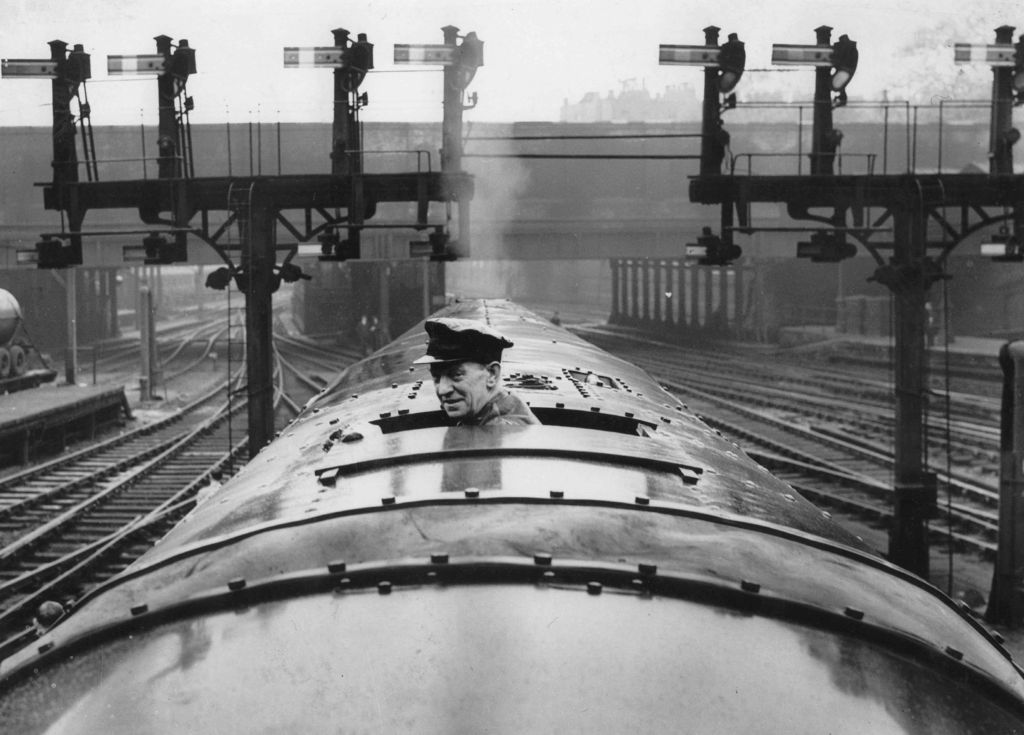
Coronation was the first of the Coronation / Duchess class introduced to pull the LMS’s premier train, named the Coronation Scot, and inaugurated on 29 June 1937. This was launched in competition with the LNER’s comparable train which was launched a week later and called the Coronation. Both trains were named in honour of the coronation King George VI.
On its inaugural press run Coronation became the world speed record holder with a speed of 114 miles per hour on Madeley Bank south of Crewe. Unfortunately the jubilation of taking this record became consternation as the footplate team realised the train was still making 110 mph only a mile and a half from Crewe. Urgent braking brought the speed down but the locomotive still passed through the station’s reverse curves at 57 mph, well in excess of the 20 mph limit. The resultant bouncing alarmed the passengers and destroyed a quantity of crockery in the dining coach! It discouraged more record breaking attempts for a while, although famously the LNER’s Mallard retook the accolade in July 1938 with a record that still stands today.
Whilst I am not against the A4’s, surely the blue Coronations with their stripes and a matching train behind had the ultimate wow factor of the pre-war railways?

What tends to get forgotten these days is that in the 1930s the top link drivers on the crack trains were major celebrities of their day. Had Ant & Dec existed back then, you would have found some of them in the jungle alongside annoying footballers and has been musicians! Fred Bishop was one such driver and his auto-biography (Queen Mary of the Iron Road – Jarrods, 1946) was a well known book of his time. It seems a long way from the grime of the inside of a locomotive cab being worked hard!
Only the first batch of Coronations were painted in blue; the second set of streamliners were in Crimson Lake with gold lining and were aimed at hauling prestigious but not bespoke trains. This (I think) is King George V and is in this livery.

Whilst they may have only really existed in this form for three years (as once war was declared, many were painted black and they were de-streamlined after the war), the LMS streamliners do hold quite a soft spot in my heart!
Hornby already produce a very good model of the locomotive and are shortly to produce a number of the matching coaches; maybe I will be able to resist, maybe I won’t!
photographs with thanks to Ian Beattie and Jim Smellie

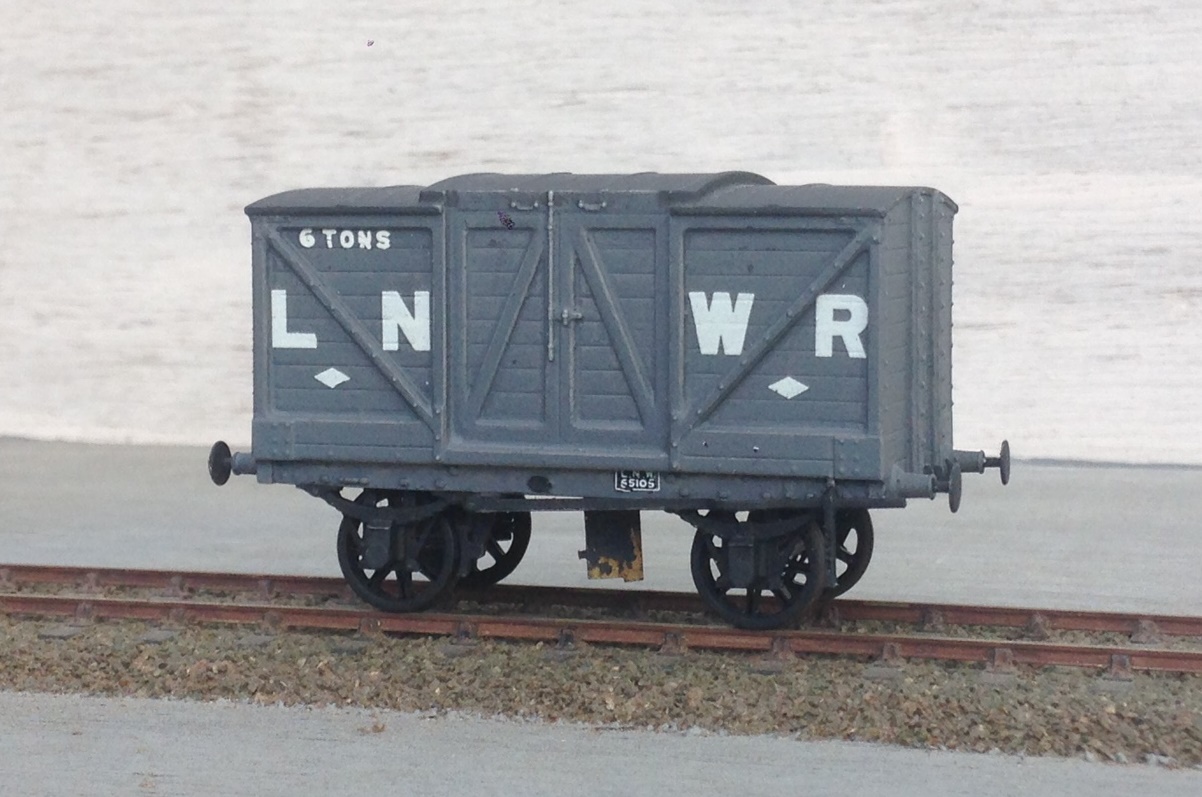
Fastrack Finescale – Mousa Models Cast Resin Wagon Kits
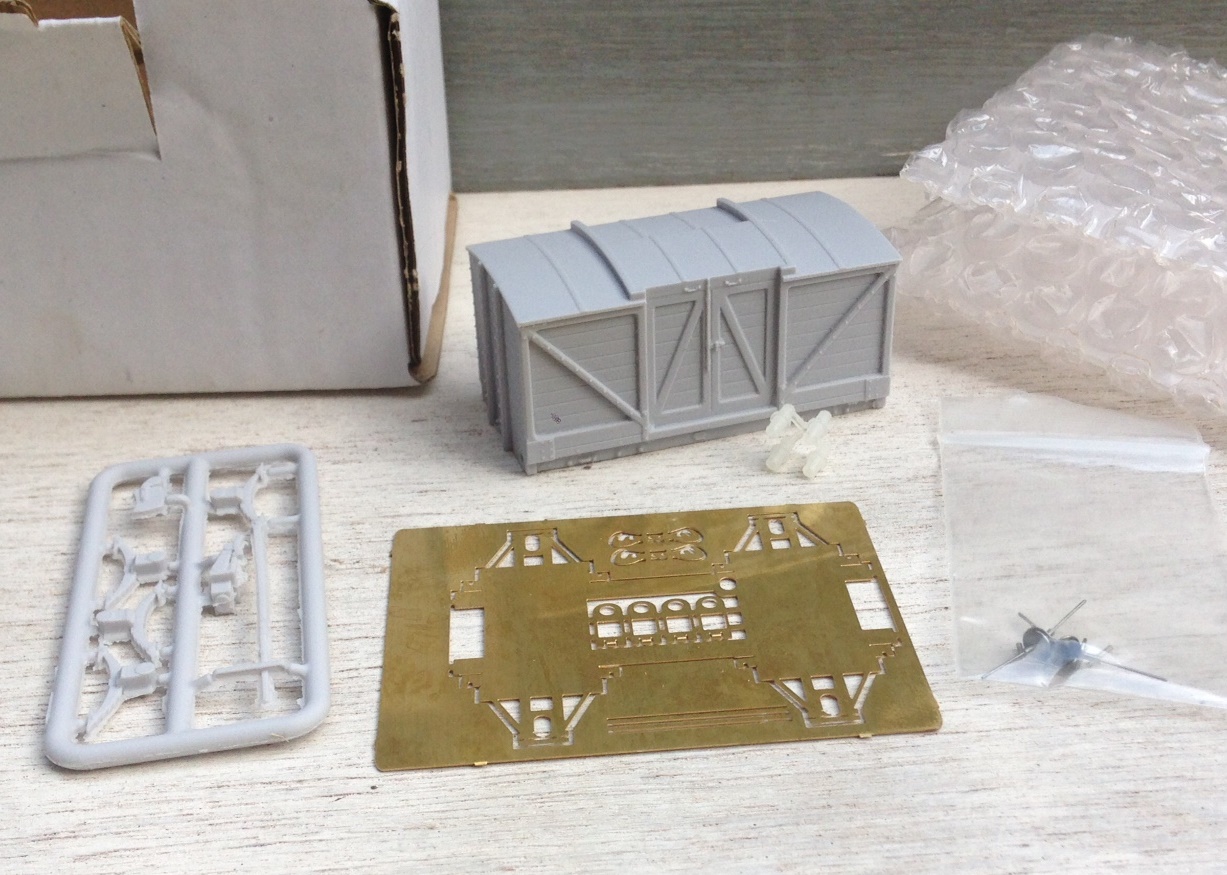
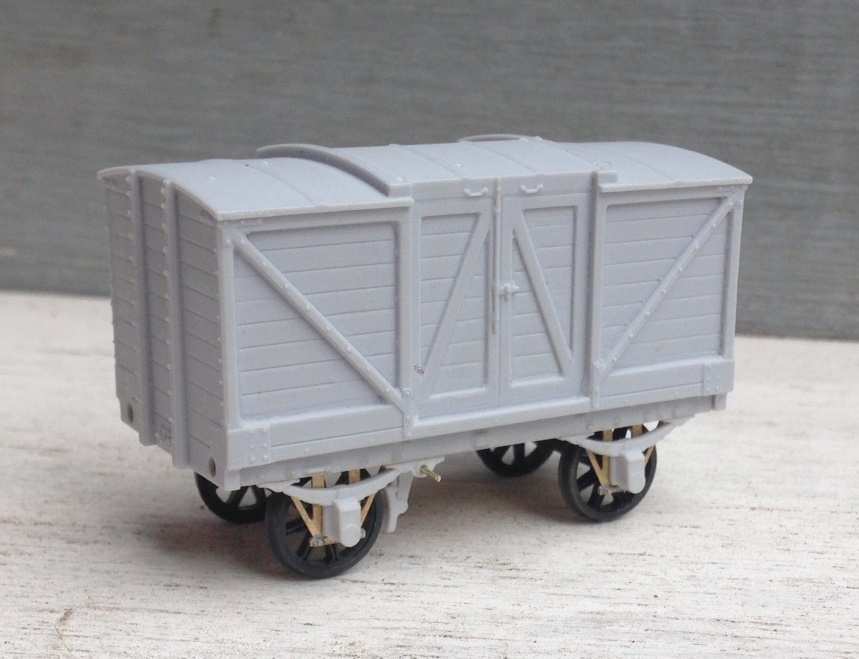
I have been building a couple of Mousa Model‘s kits lately; which has been a bit of a tale of the good, the bad and the ugly. Whilst the bad one will be written about in due course, this is the good one! The remarkable thing about it is its ease and speed of construction – so much so, I timed its construction just to see how fast I could build and paint it. The prototype is a LNWR dia 32 covered goods van, with a door to one side only but also with a roof door. This is the tale of its construction:
0hrs 1 min – Straight out of the box, the body & underframe are separate cast resin parts, as is the fret with the axleboxes, springs and brake gear. The underframe is an etch kit and the buffers are 3-D printed.
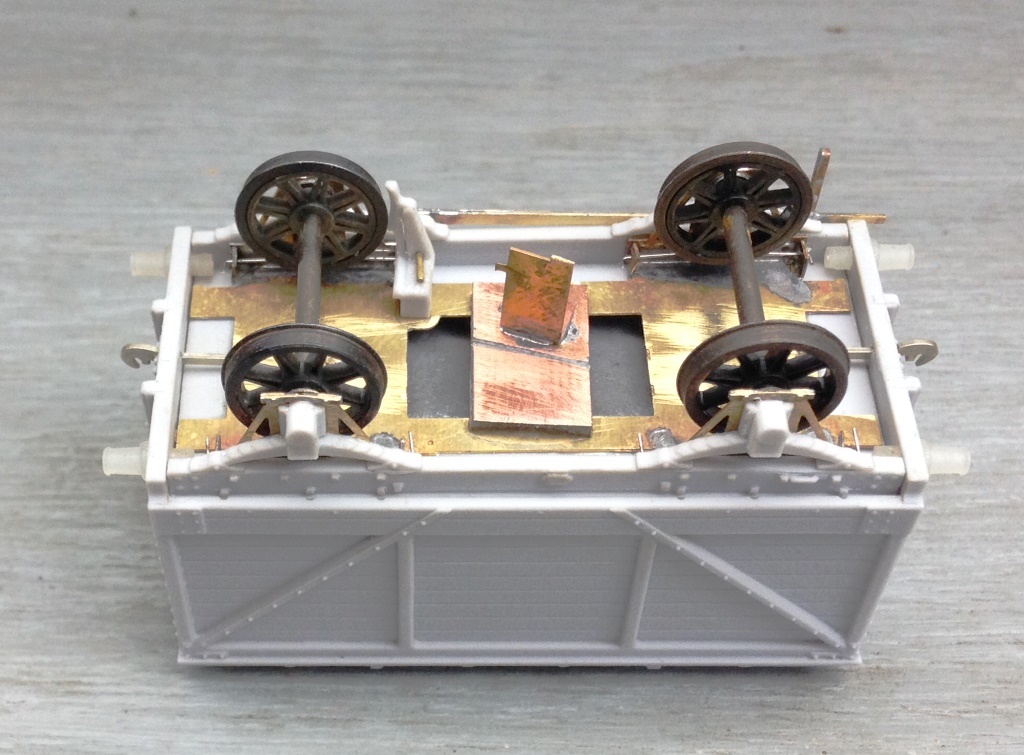
0hrs 15mins – The operational underframe has been folded up and fillets of solder run down the joints. Waisted top-hat bearings inserted in the bearing carriers along with the suspension springing wire. The first two carriers have been cleaned up and are inserted in the W-irons ready to receive the first wheel.
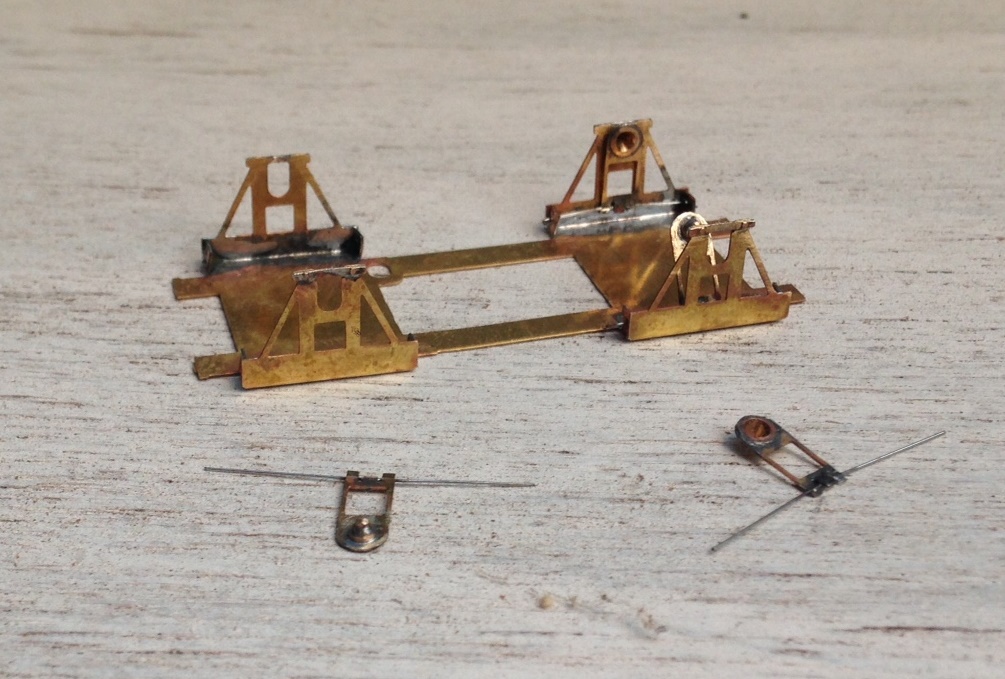
0hrs 25 mins – The remaining bearing carriers have now been fitted and the operational underframe has been stuck to the underside of the cosmetic underframe – wait 10 mins for the araldite to fully go off – so time for a cuppa!
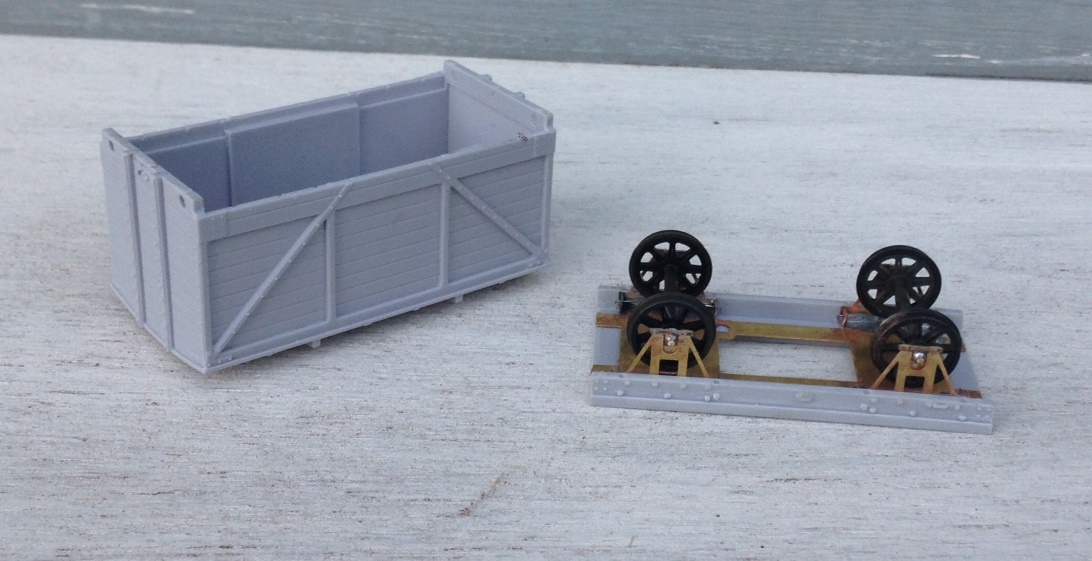
0hrs 45mins – the casting has been cleaned up to remove any casting burs/flash, which was apparent in small amounts around its base but actually the main casting was pretty good. The first two axlebox/spring assemblies fitted – but only after I opened up the rebate to their rear to ensure that the top hat bearings had room to slide and cleared away rather more flash. Being cast resin, the vehicles are pretty light so some weight has been added – 25g per axle is my rule of thumb. One thing I have found with vans is that the weight can detach so I tend to mechanically fix the weight too now, in this case with a couple of 8BA screws.
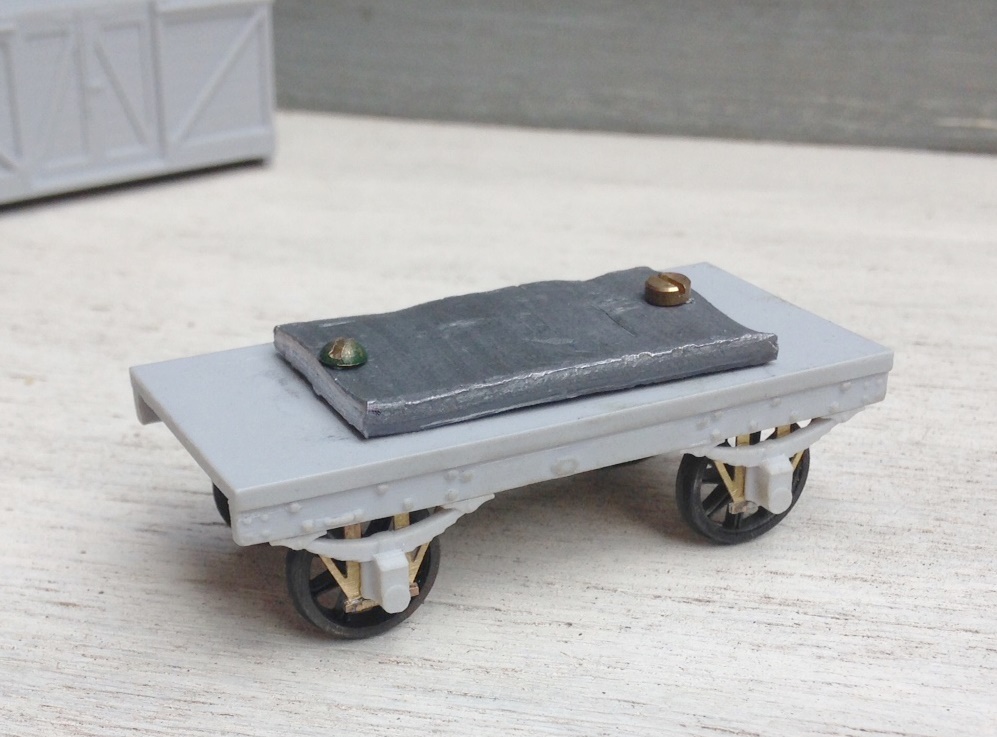
1hr 0mins – the second set of axle guards and springs now affixed, as is the body to the underframe. I decided that the bolt heads on the solebars were a bit too proud, so took them down a little with some wet and dry paper. A brake block has been attached – the kit provides a choice of timber brake blocks (for early periods) and cast iron – I went for the latter. I also decided, however, to cut away the brake lever as I felt it was both a bit too delicate to survive and also it was not quite straight. Instead, I provided a piece of 0.6mm brass rod to both help secure the brake block in place and to provide a mount for the replacement brake lever.
1hr 15mins – the buffer shanks have now been fitted (a tiny amount of fettling was required to the open the holes out slightly) and coupling hooks have been added. The kit does provide etched versions which I only failed to use as I thought I could save 5 minutes of the build by using Exactoscale hooks). A new brake lever and lever guard are etched brass from 51L models and should be more durable than the resin one provided in the kit.
Still 1 hr 15 mins – a piece of PCB has been provided for the eventual fitting of AJ couplings and I took advantage of this to provide a temporary bracket of metal to hold the model by during painting. A good scrub in warm soapy water, followed by a rinse and a second clean with a cream cleaner (washing up liquid leaves a residue, so I always do the final clean prior to painting with a cream cleaner) occurred next. So that is the model built in only an hour and a quarter, which is faster than anything I have built before – including converting r-t-r stock!
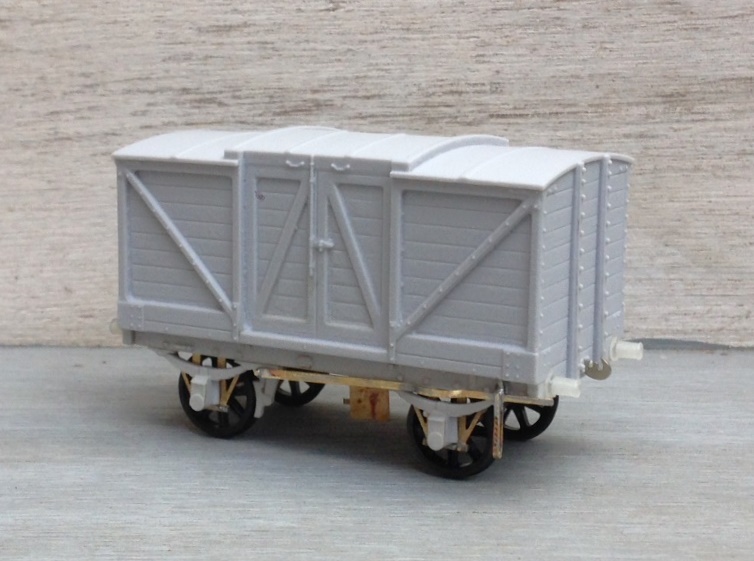
1hr 45mins – after masking the inside of the bearings, the whole model was painted in a mid grey – Tamiya TS 4 (German Grey). I thought this was about right for LNWR grey but as all greys of the time were lead based and thus darkened considerably over time, I tend to be quite cavalier about wagon greys! I did have a bit of an accident such that it ran on the roof but this was salvagable with a little bit of wet and dry once it had dried off. These paints finish to a semi gloss and thus are ideal for taking transfers, in this case HMRS Transfers sheet 16 in methfix because the vans were pretty archaic by the time that the grouping occurred, so I presumed that few would have been repainted in LMS livery.
2hr 15mins (but 10 mins of this was me correcting my messed up roof painting!) – ironwork below the solebar, the draw bar, buffer shanks and brake lever were all picked out in black. All then sealed with Testors dullcoat a couple of times.
So whats left? – I do need to weather it, some AJ’s need to be fitted and the “holding tab” will need to be removed. I am waiting to do a batch of weathering, so it will be a bit quicker; maybe 30 minutes for the vehicle. So I reckon this will be a complete, painted and weathered very good quality van or wagon on the 3 hour mark – well worth doing and no need to moan about when the r-t-r manufacturer is going to produce it!
