Blog Archives

News from Miscellany Models
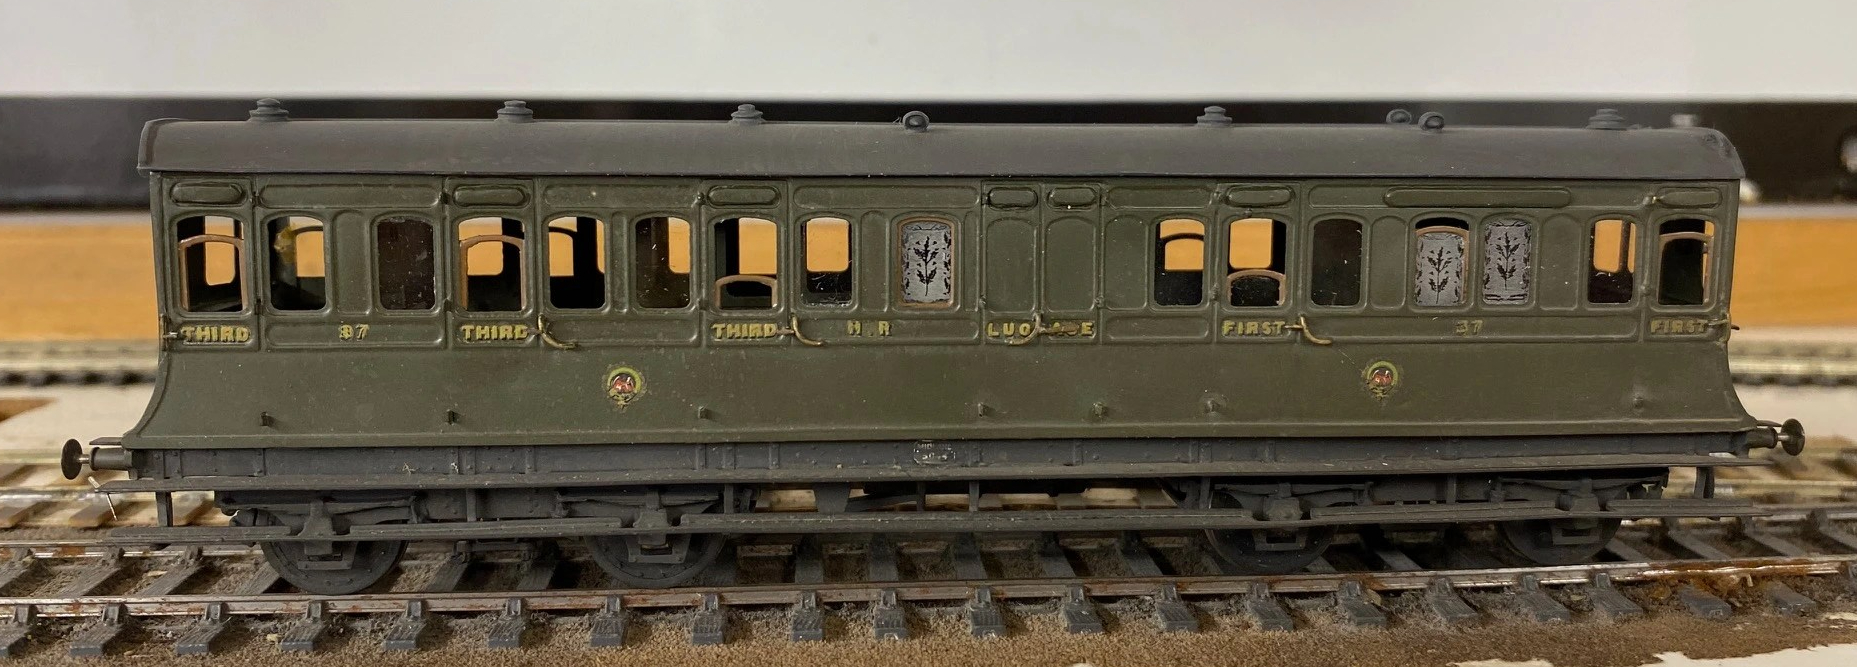
With the assistance of Duncan Petford, Miscellany Models are now offering engraved glass windows featuring the thistle emblem that the Highland used to obscure the windows of toilet compartments. They come in packs of five, for £7 postage included and are available here.
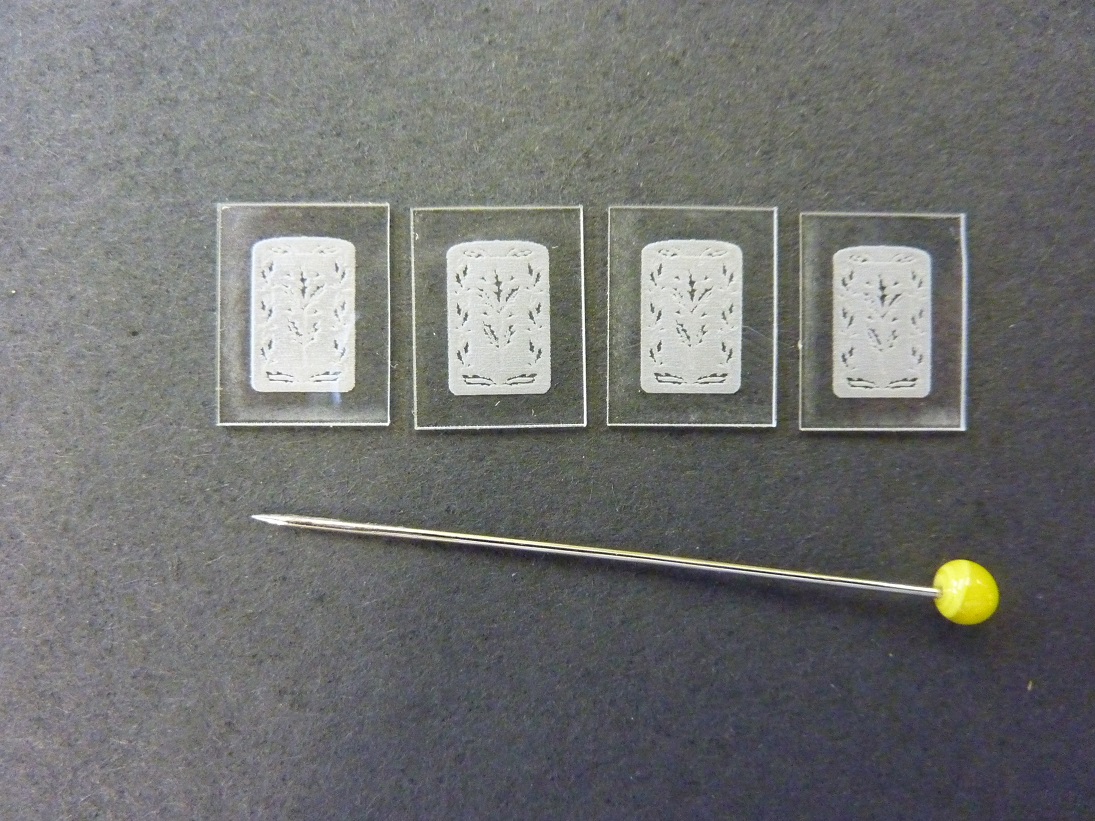
These are laser engraved on 1mm perspex and really lift the appearance of a Highland coach, as you can see:
Sadly, I have also had to increase the prices for most of the products. The costs of the last few deliveries from my etchers have been eyewateringly expensisve, so I need to defer a degree of this. The good news is that this is an indication that more products will soon be featured too – so Highland and LMS modellers keep an eye out.

Lining Things Up….
As usual, I set off over the festive break with plans to do all sorts of things and failed to do any of them fully. One aspect that I did get moved forward though was the painting and lining of a couple of my six wheeled coaches.
Back in my youth, lining pens held no fear and I could genuinely dash off a fully lined coach in a few evenings. Thirty years of pushing a computer keyboard has dulled my drawing skills to the point where I am close to terrified to pick up a bow pen and I have not had the nerve to line a coach for a long time. I am confronting this fear in a couple of months by attending a class run by Ian Rathbone on painting and lining at Missenden Railway Modellers. In the meantime, however, I can still line utilising transfers, in this case those provided by Fox Transfers.
Being preformed in straight lines, these do work best for the square panelled beading of some of the Midland Clayton stock, like my dia 501 full brake. I had taken care in designing this with beading sizes that were correct (and matched the Fox Transfers). They thus work quite well I think.
I deliberately left the handrails and door handles off at this stage to make the lining easier but the door hinges still created problems that I will need to touch in with acrylic paints; burnt ochre looks about right. I also still need to block in the black to the head and foot of the sides plus where the lengths of transfer where they crossed – I will do this with a Roting pen as I still feel confident enought to wield this!
So there is still plenty to do, but I am dead chuffed with this and it will soon be finished and ready for service.
Second up is a Lochgorm Models third class saloon that has been waiting for its lining for rather longer. It is a more difficult prospect to line as it has round corners to the panels and, over the doors and windows, shallow arcs. These can’t be formed with transfers as these are straight. I have thus used the transfers for the straight sections and then brush painted the curved sections with cadmium yellow acrylic paint.
If all goes well, the Roting pen can then be used to infill the black to the centre and form the curves across the windows and doors. Lets see!

News from Miscellany Models
Followers of this blog will have noted that various test builds of my artwork coming together and I am now able to offer a number of these for sale under the name of Miscellany Models.
First up is a Highland Railway/LMS/BR diagram 51 full brake – priced at £48.00 for a 4mm and is suitable for OO, EM or P4. These were the last generation of full brake produced by the Highland, built with both cupboard doors and sliding doors as well as alternative forms of guards duckets (all of these are included in the kit). The kit inclusive of fully sprung Fox bogies (see below), roof, corridor connections (also see below) but all castings and buffers will need to be sourced separately. The castings for the bogies are proposed, but are not presently available.

As was common with many pre-grouping coaches these vehicles utilised Fox Bogies (£16.00) and these are being made separately to the remainder of the kit, These bogies have been developed in conjunction with Justin at Rumney Models and are fully sprung, with both the axleboxes and the bolsters sprung. They really do glide across track and look as if they weigh many tons rather than a few grams! They need castings for your favoured axleboxes/springs and bolsters but do include the foot steps and all of the bogies sides, brakes and details. Suitable for oo, EM and P4.
.JPG.3b26712c4490ad68695b10226612a0a9.JPG)
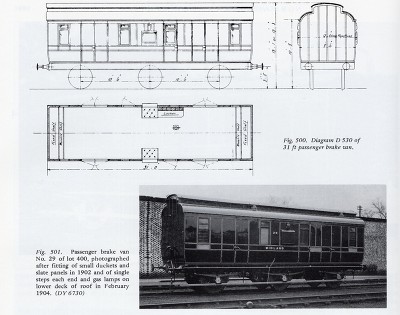
The second coach kit is for a MR/LMS/BR: Dia 530 Passenger Brake – priced at £36.00 in 4mm scale (suitable for OO, EM and P4). This prototype was built in some numbers and by the 1920s they were spread extensively across the LMS system. The kit is for full etches covering the roof, body, underframe and footboards plus parts for the sliding central axle included. It needs axlebox/springs (available from Branchlines or Coopercraft), gas lamps, buffers, brake and gas cylinders.
.JPG.1678157932a192d68328755d825c54f0.JPG)
On the wagon front, there is an etch to detail the NER/LNER/BR: Dia P7 Hopper Wagon – £13.50 4mm (sufficient for two wagons). They cater for a large number of the variants to this numerous and long lasting hopper wagon. Needs wheels and the Slaters kit P7 kit for the donor model. Variants that can be made include the end braked version, improved components for the Morton braked version, outside twin W irons and also the anti-friction wheel device.

All of these are available from my website https://miscellanymodels.com/ and in addition to this from the Rumney Models stand at the following shows – Scalefour North in April, Railex in May, Scalefourum in September and South Hants in November,
All of these have been extensively road tested by me with a couple of test builds for each of them. You can see this unfold on my blog and if you are interested in seeing how they go together do take a look!
Please remember that the availability of these models is an adjunct to my own hobby and this has to be accommodated within the constraints of my day job and general life! In particular I can’t get to post these orders until Saturdays so do please give me a little slack when it comes to getting the goods to you!

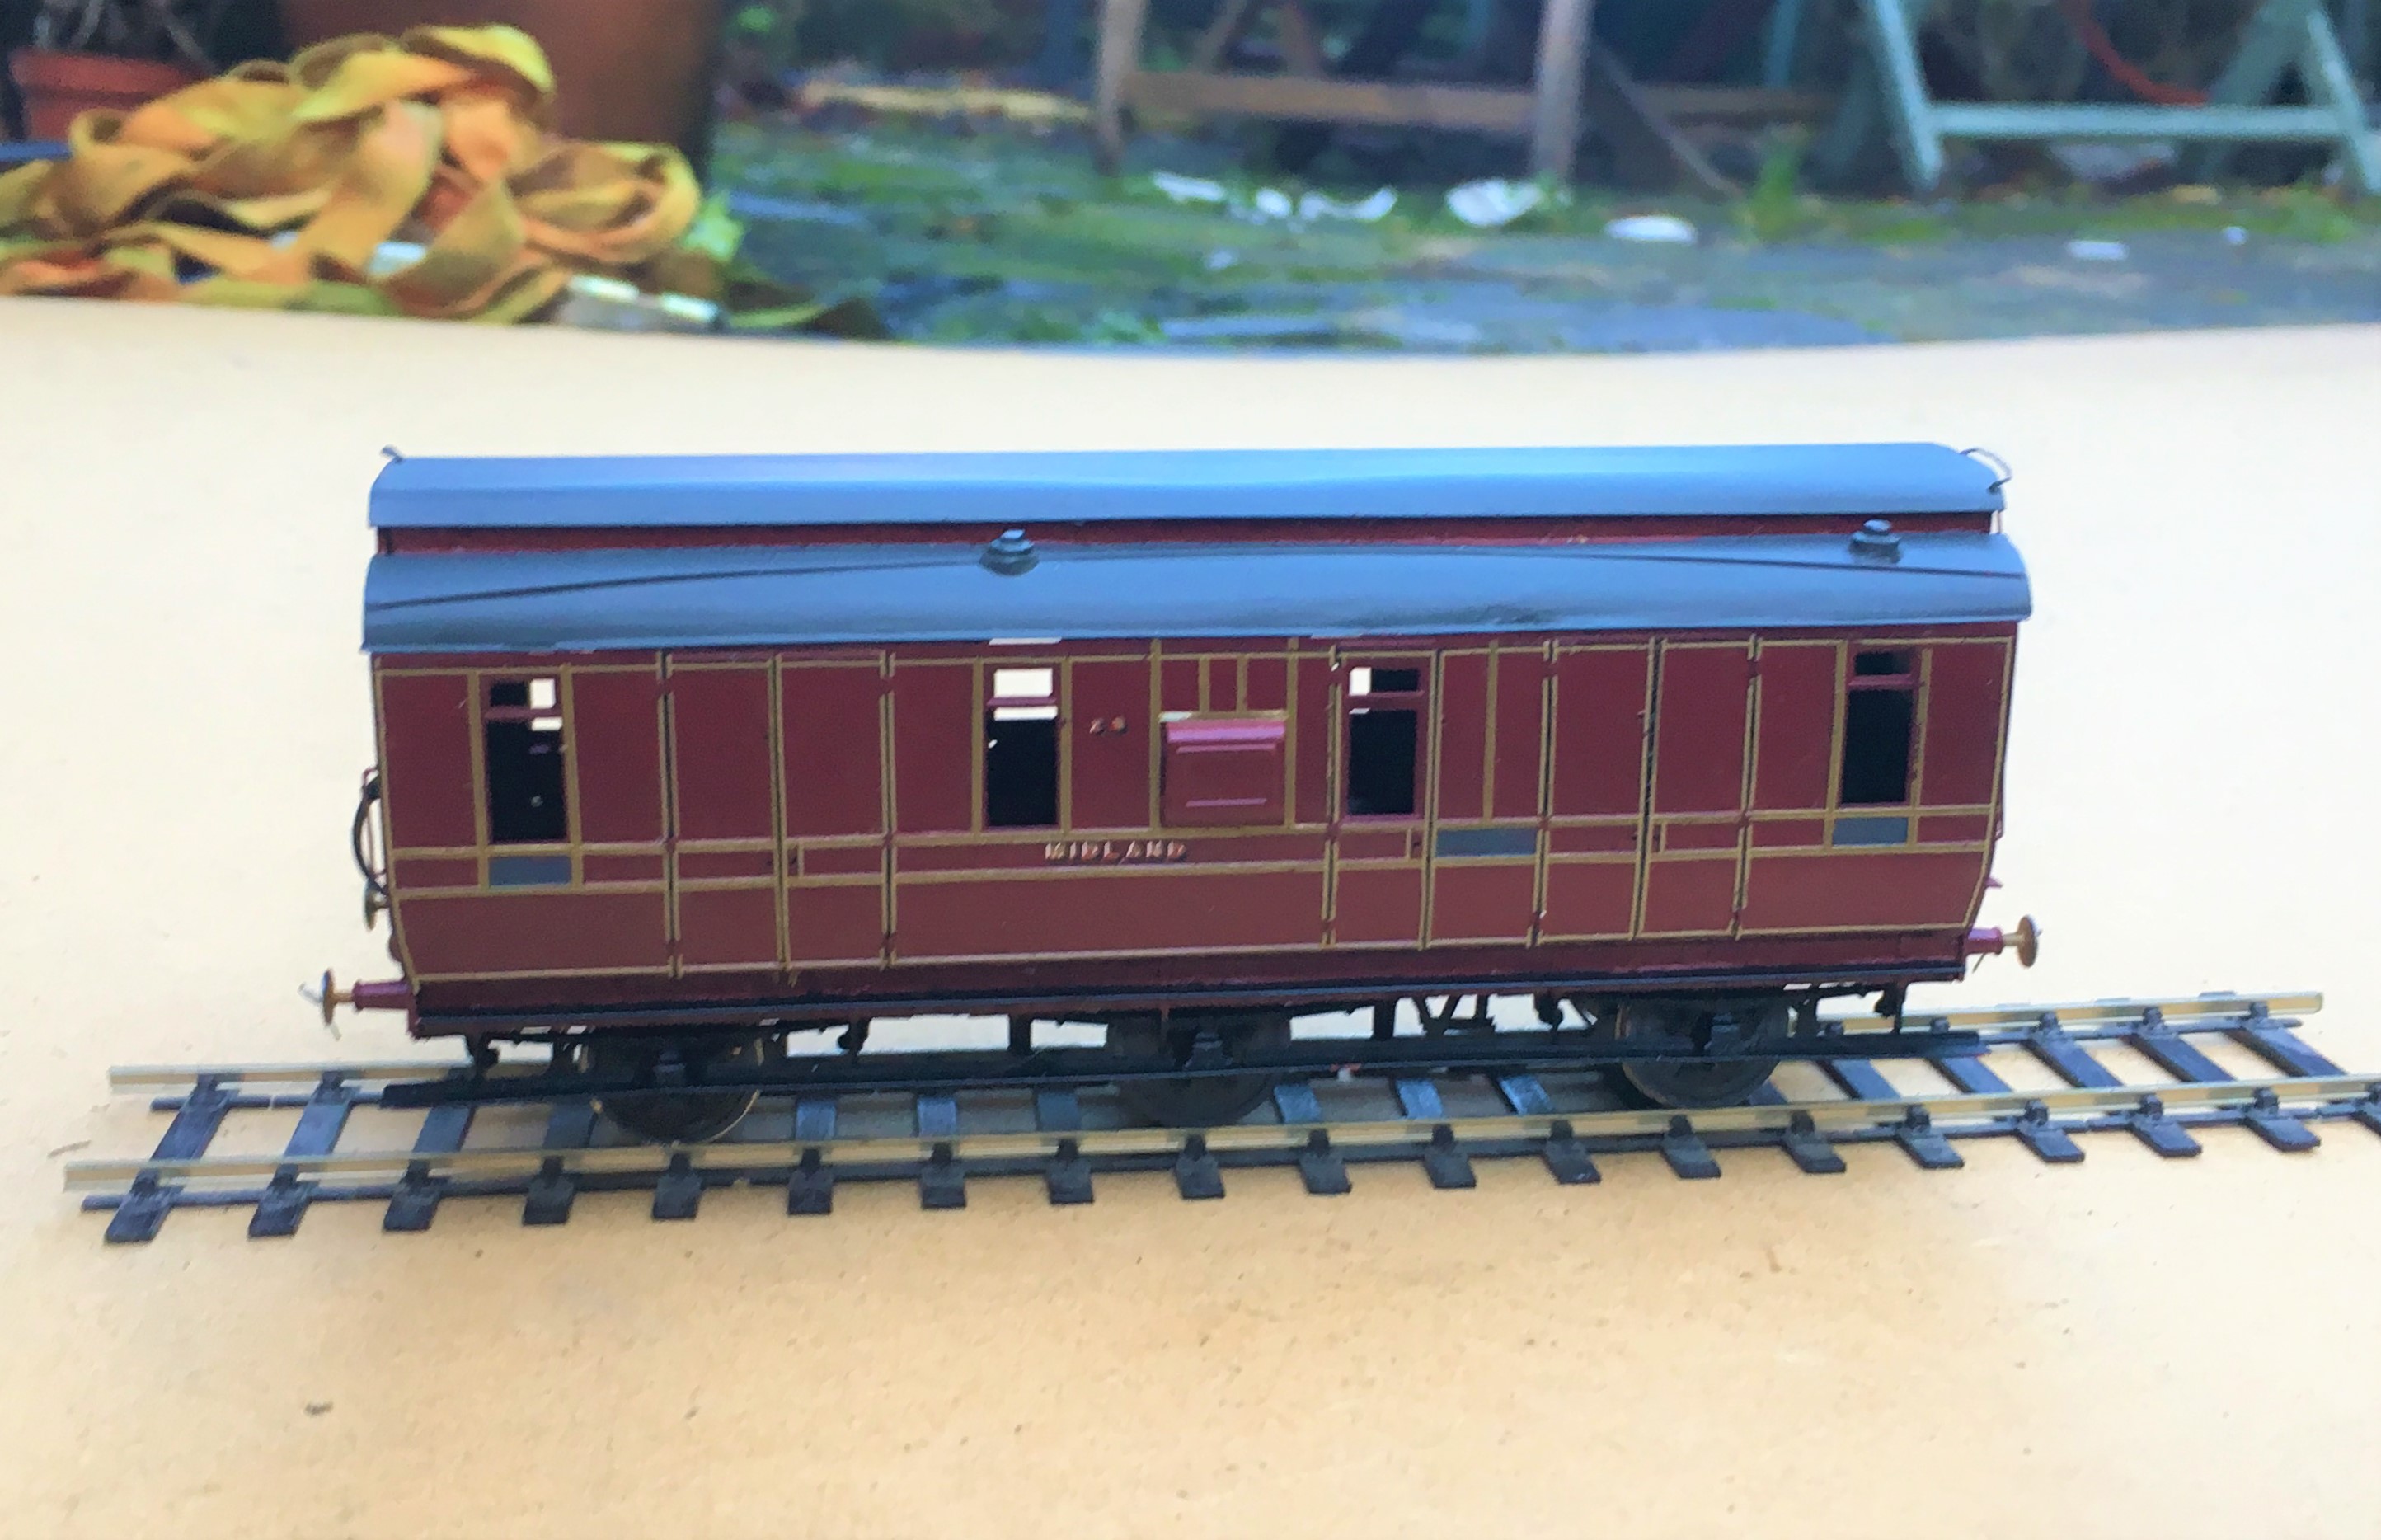
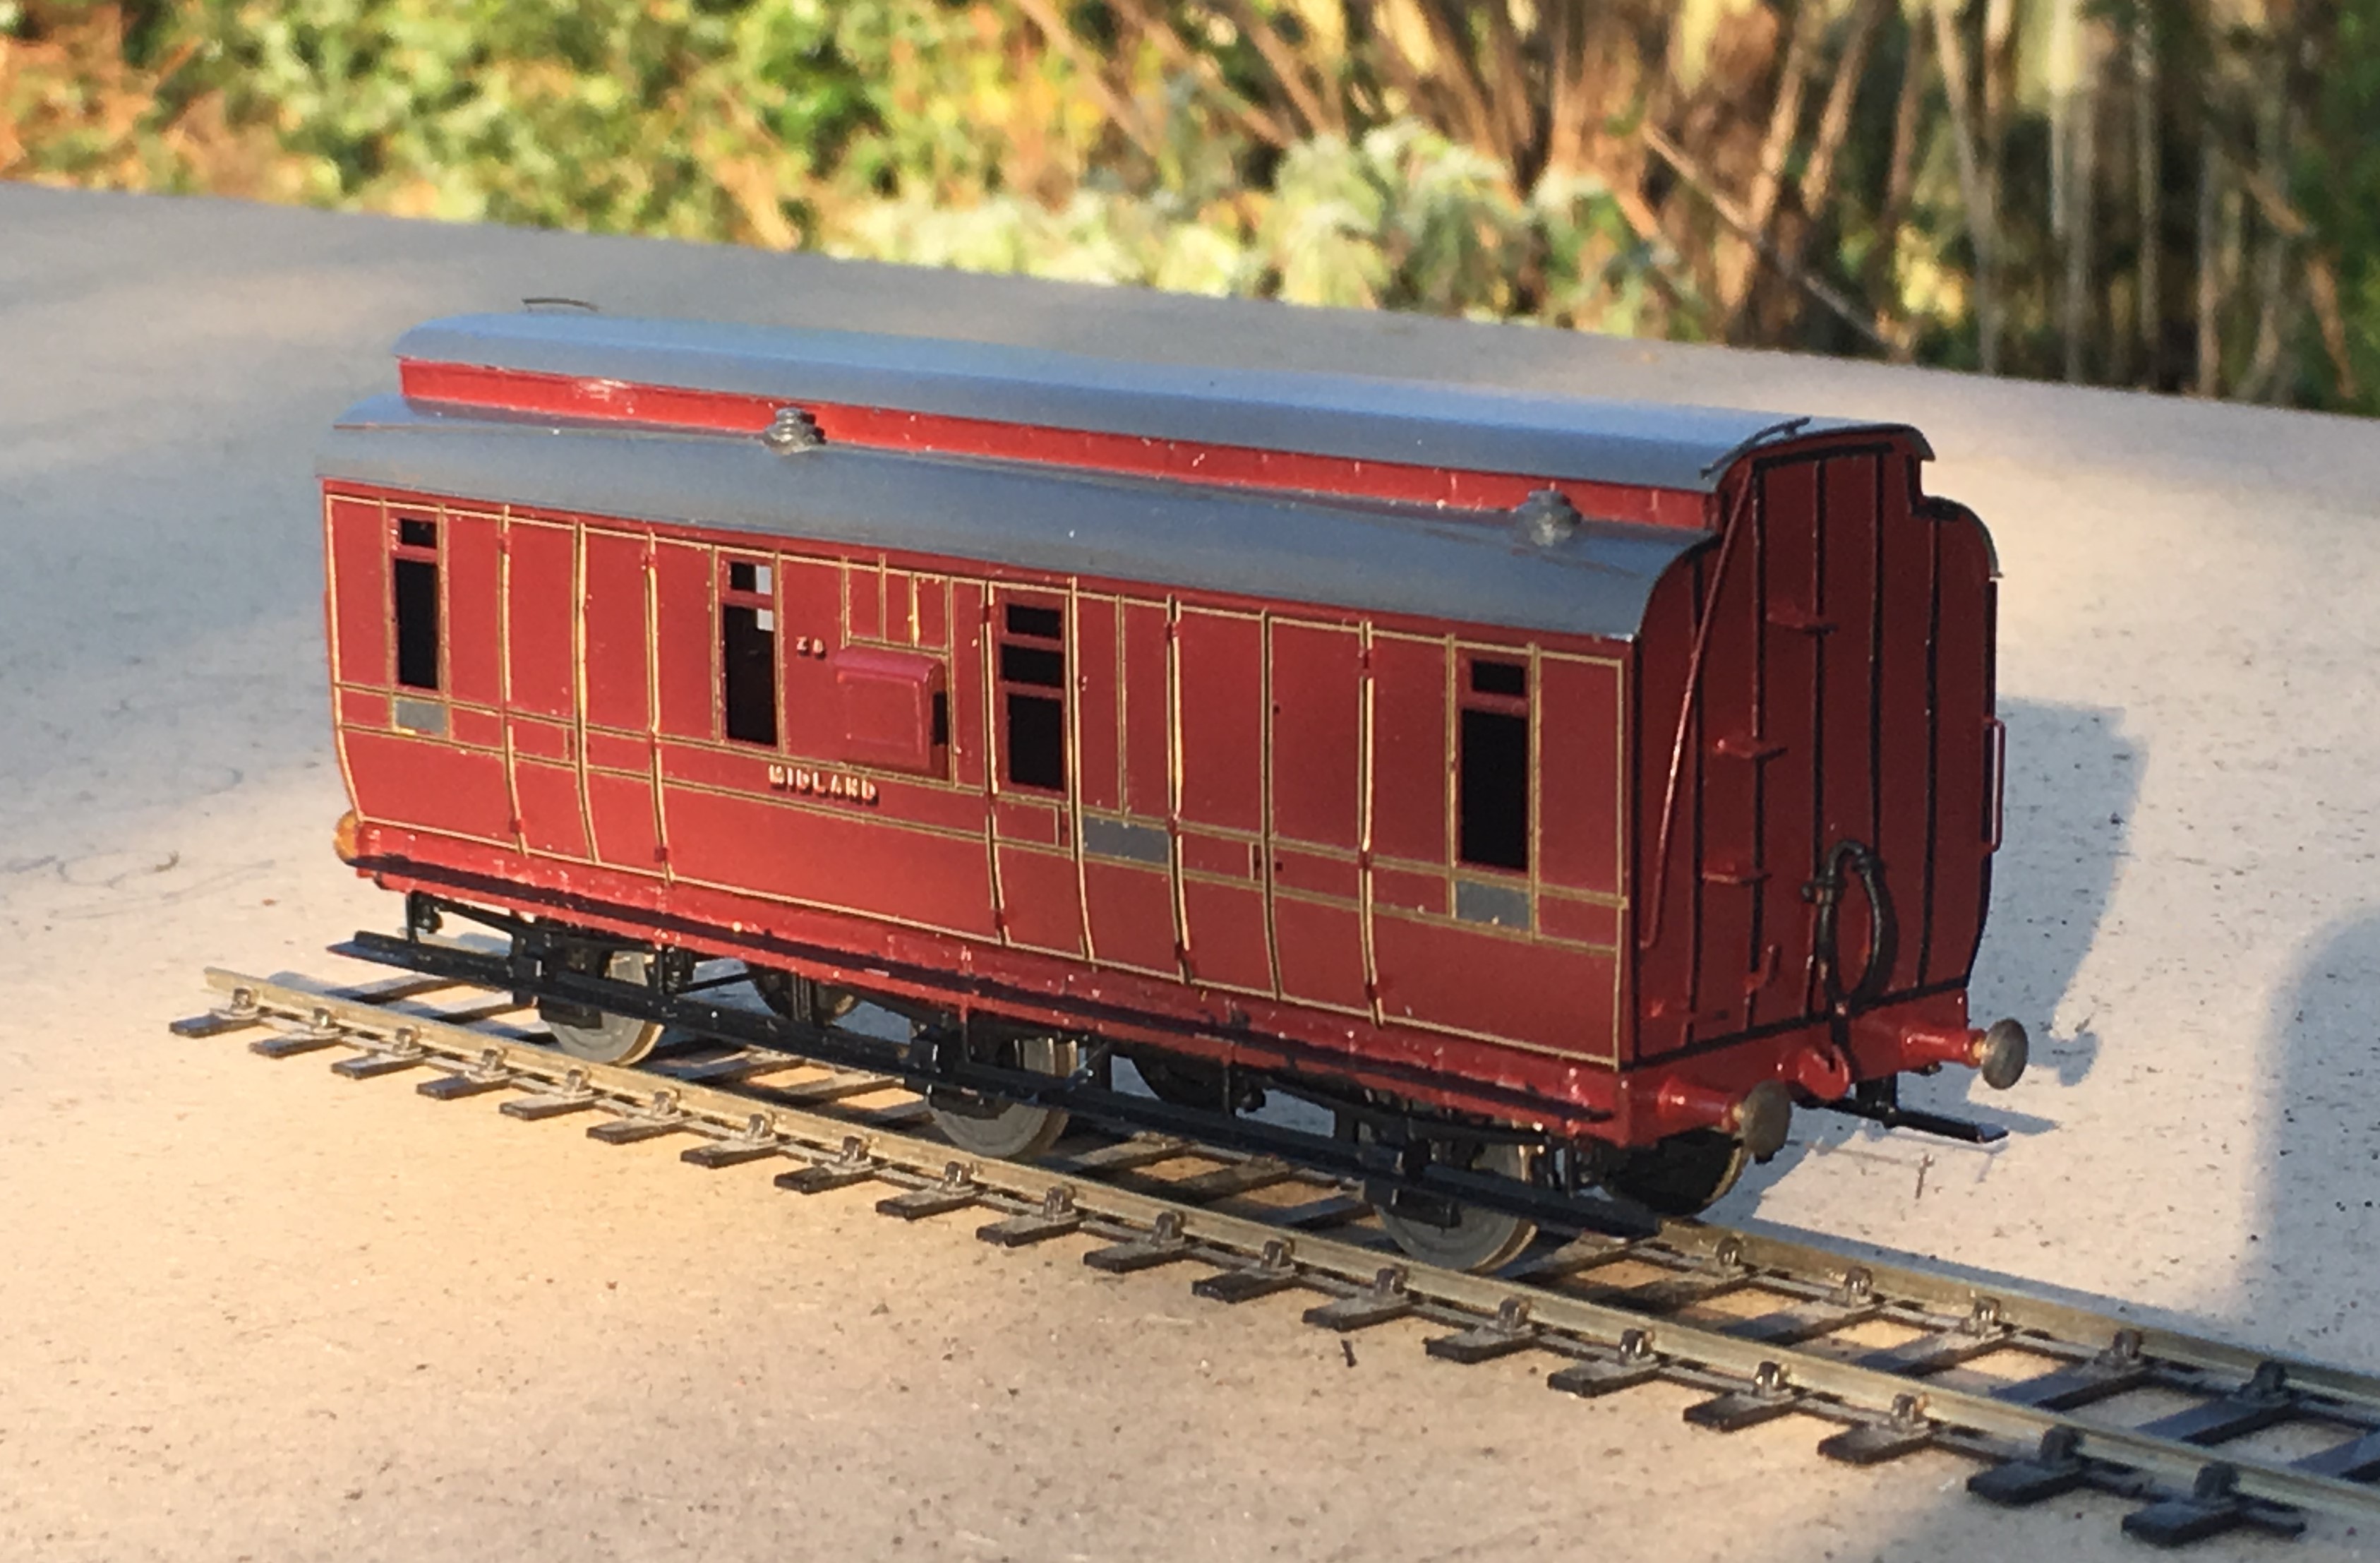
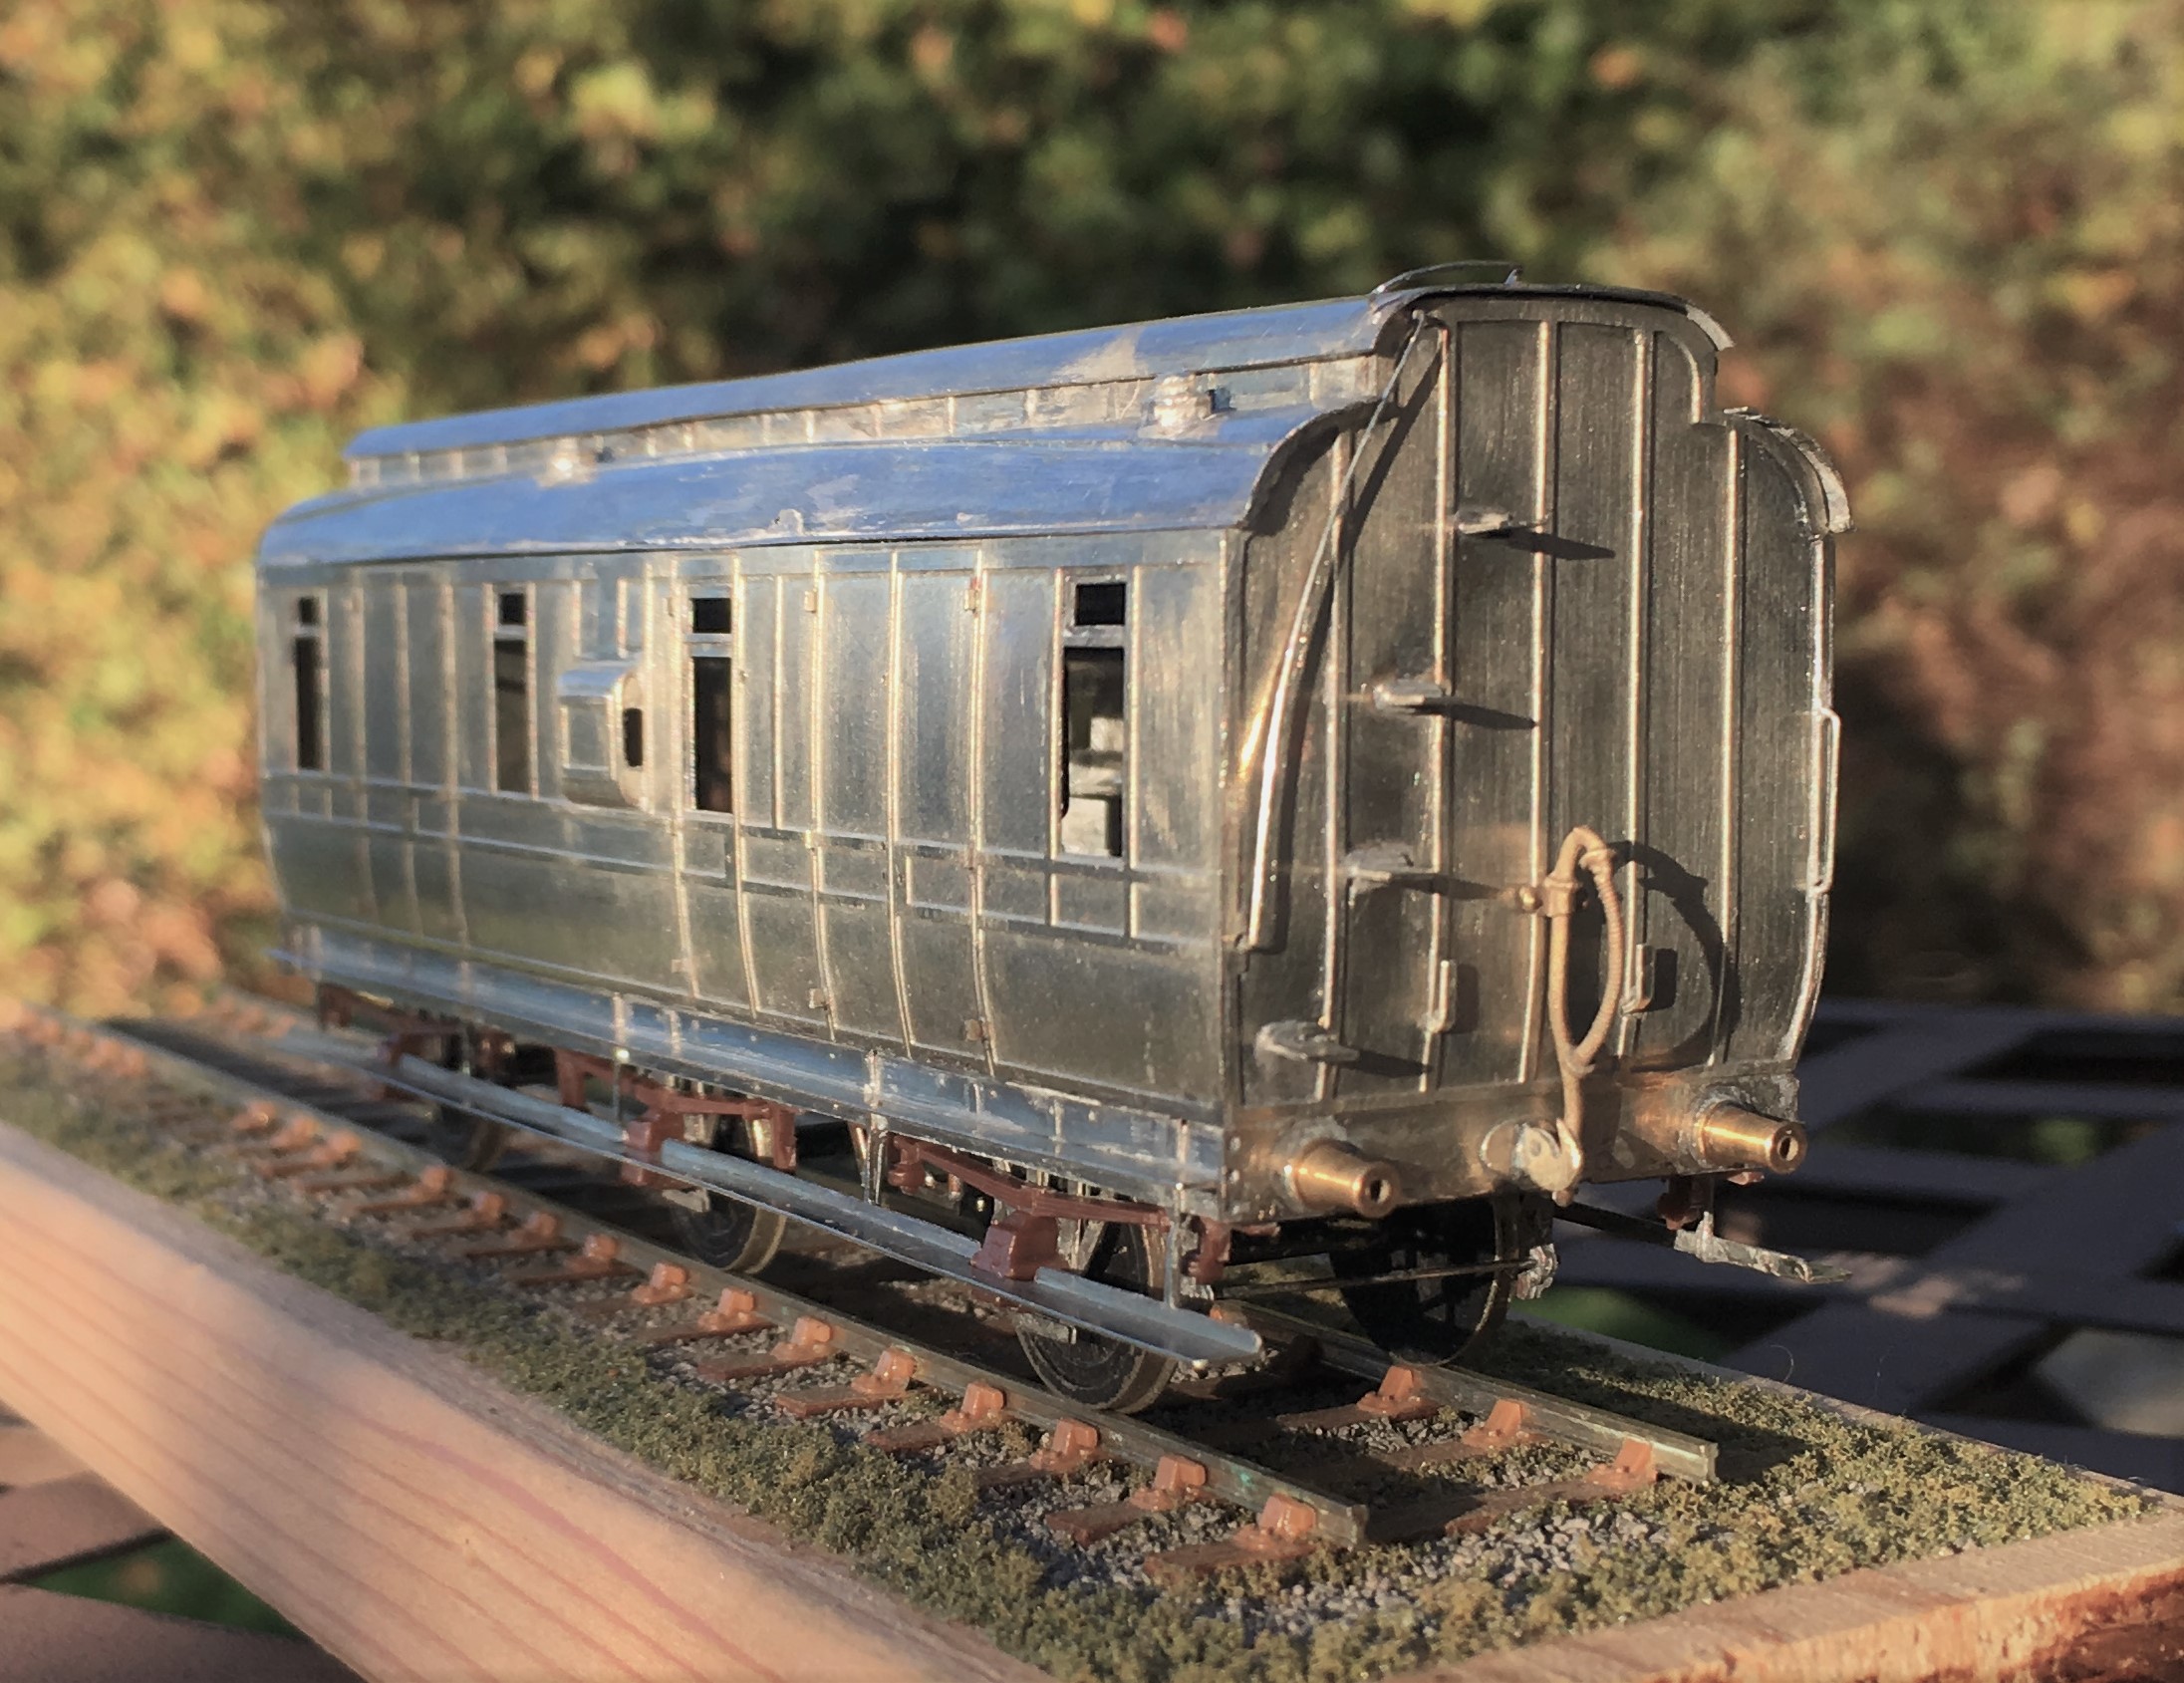
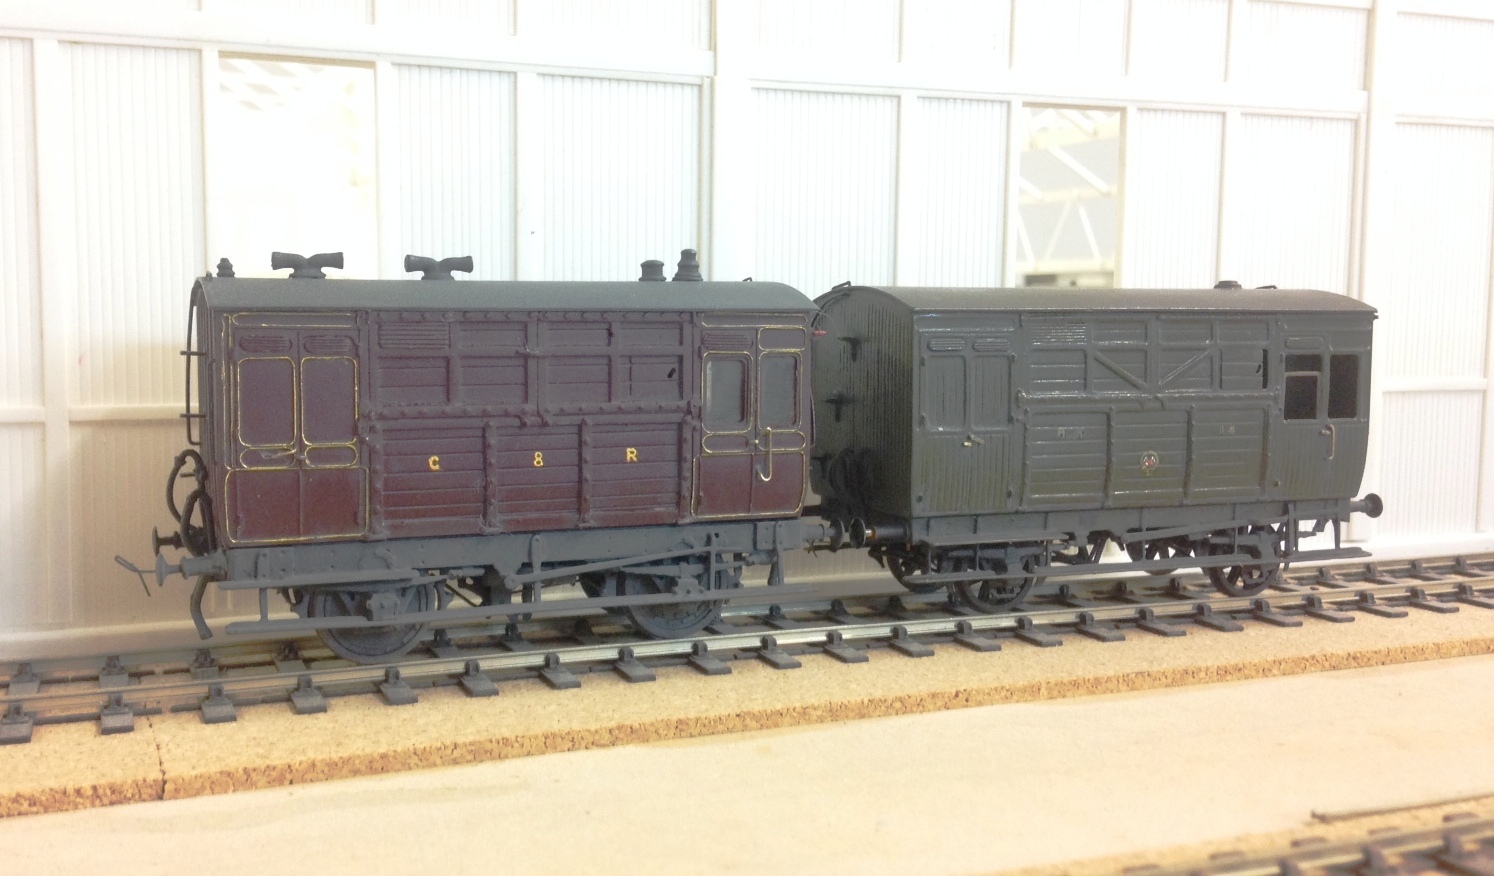
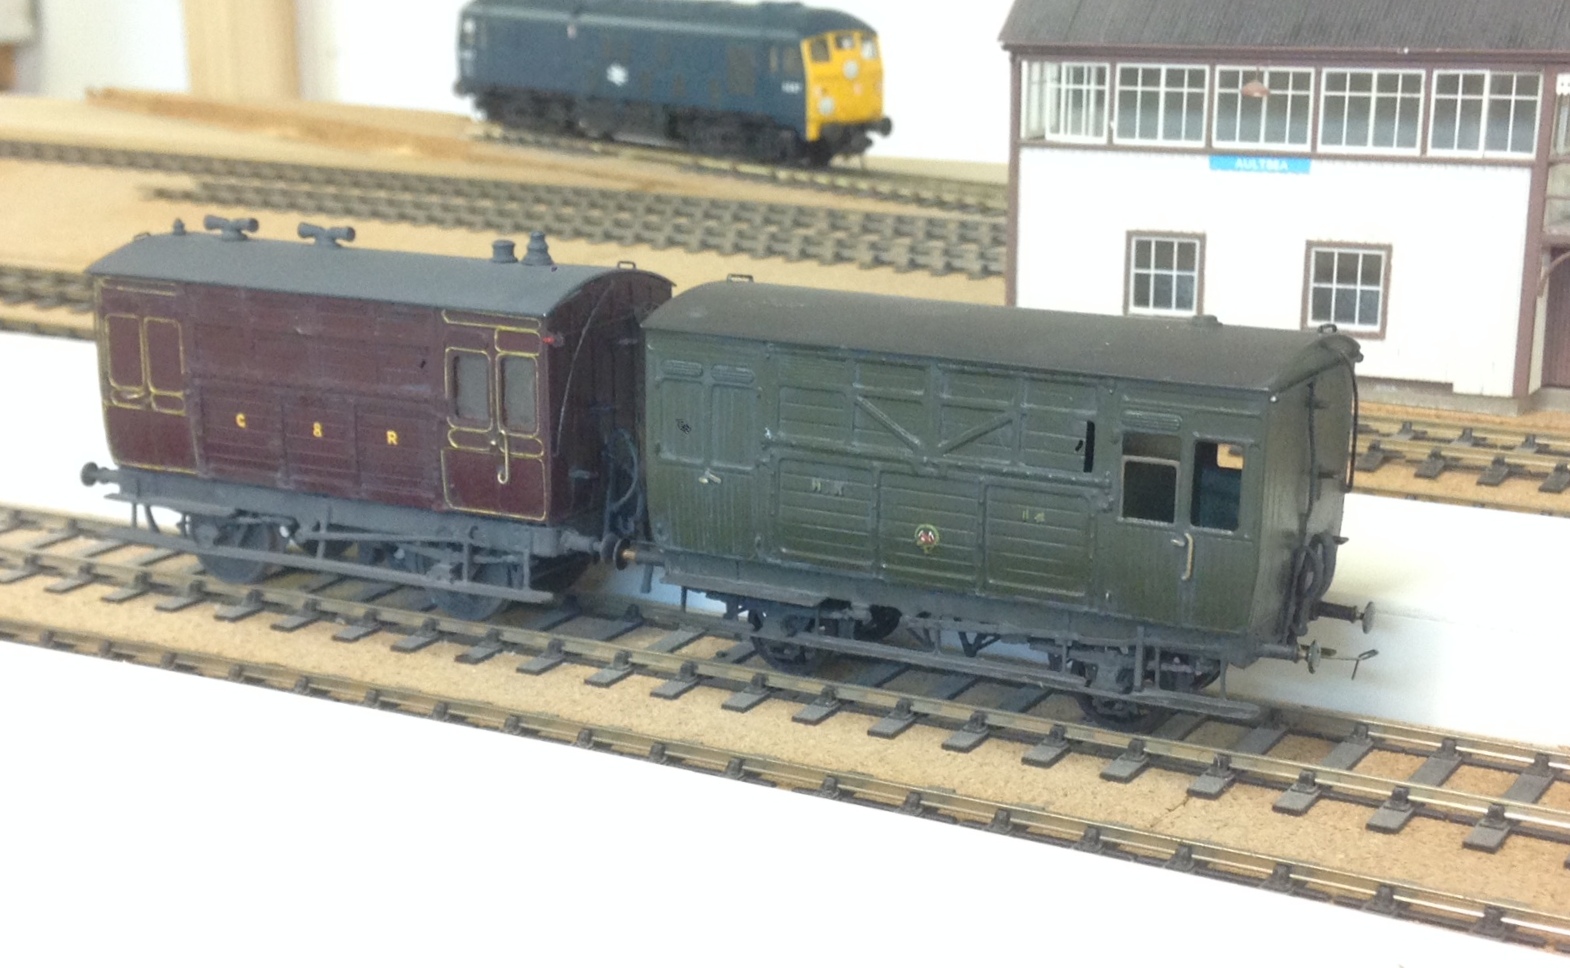
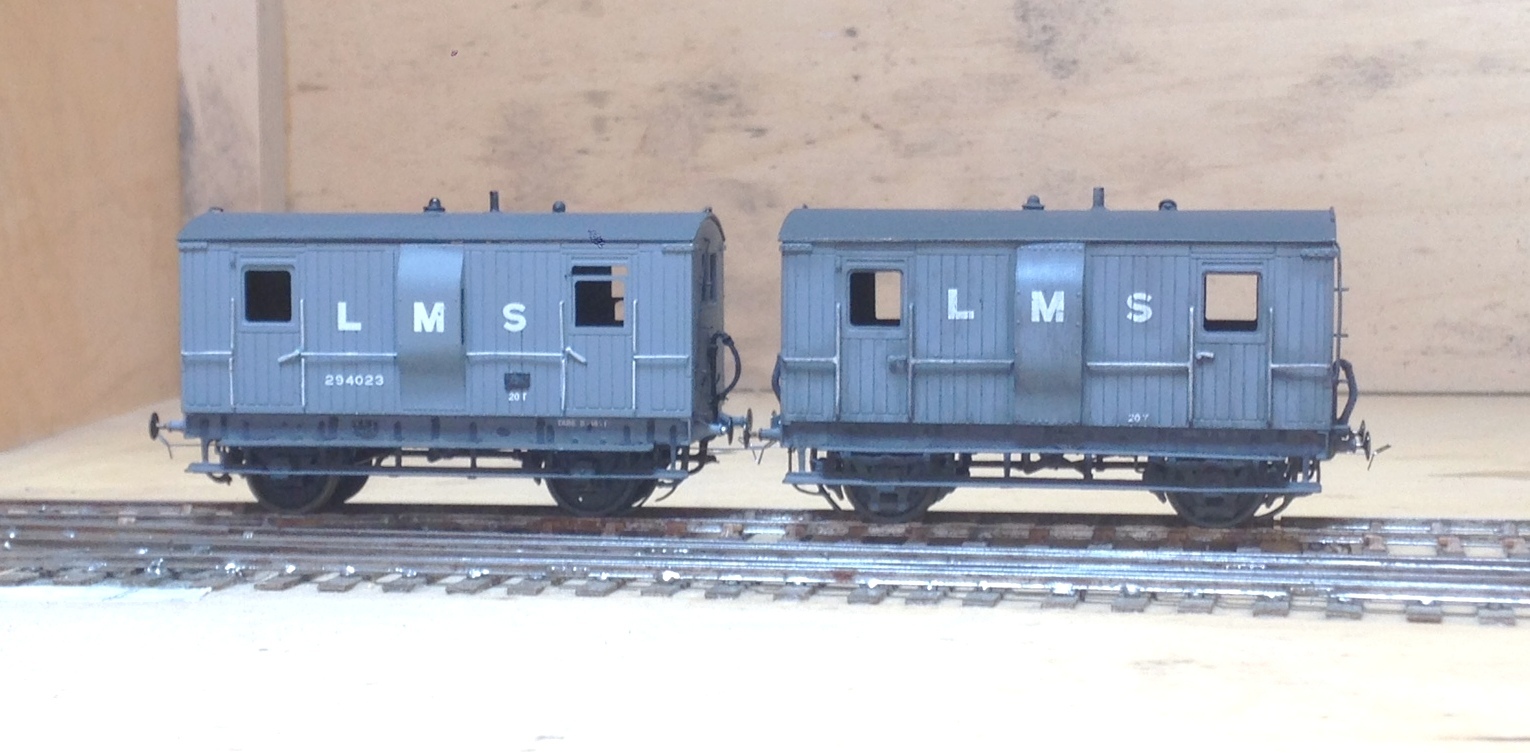
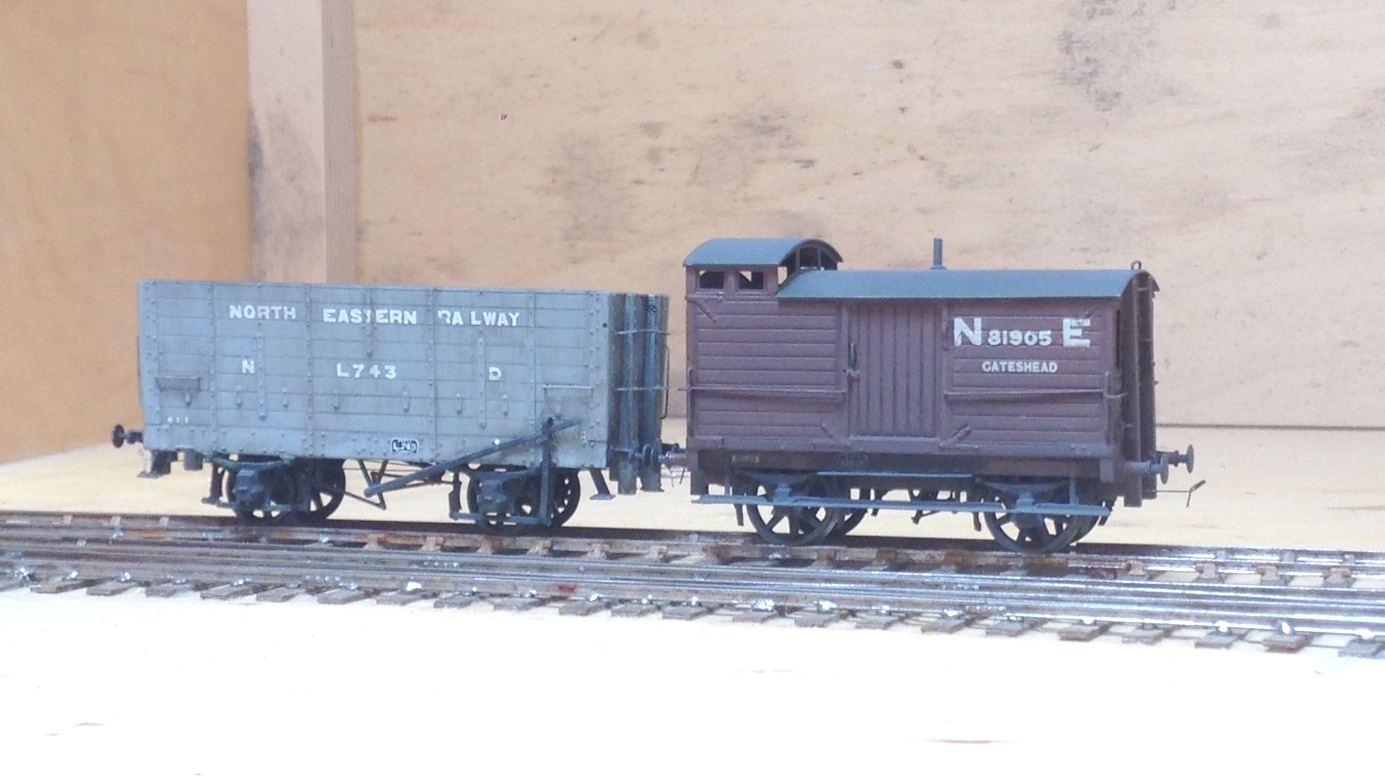
Midland Six Wheeled Full Brakes
Although not Highland vehicles, these full brakes have a strong association with the Highland’s branchlines in the post grouping years. Once the LMS took over the Highland’s system in 1923, they seemed to have been horrified by the state of the coaching stock that they inherited! Portions of the Highland’s fleet were speedily retired and large numbers of foreign company’s stock was drafted onto the system (especially the main line from Perth to Inverness, where the trains became fully corridor connected almost overnight).
When it came to the branchlines, the upgrade came primarily by the cascading of the better Highland stock onto these lines but there were exceptions. Although the Highland had full brakes, it was a line that had a lot of parcels/packages traffic, so it seemed that they needed even more and a batch of these Midland six wheeled full brakes were drafted in.
Many photographs of the Highland branchlines of the 1920s had one lurking in the background so I felt one should get to make appearances on Glenmutchkin. Simple, I thought, Slaters do a plastic kit for one and whilst it is no longer available, it is easy to pick up second hand and it should be a nice quick build. Unfortunately, I had not realised what a rubbish kit it was! It is too short and too narrow, most of the mastering is really crude and the panelling in particular would be a scale 6 inches deep. So the Slaters kit made it back on ebay only marginally quicker than it came off and I set about designing my own kit.
It has taken a couple of iterations and about three years, but finally I have got to the stage where I am happy with it but you can form your own view!
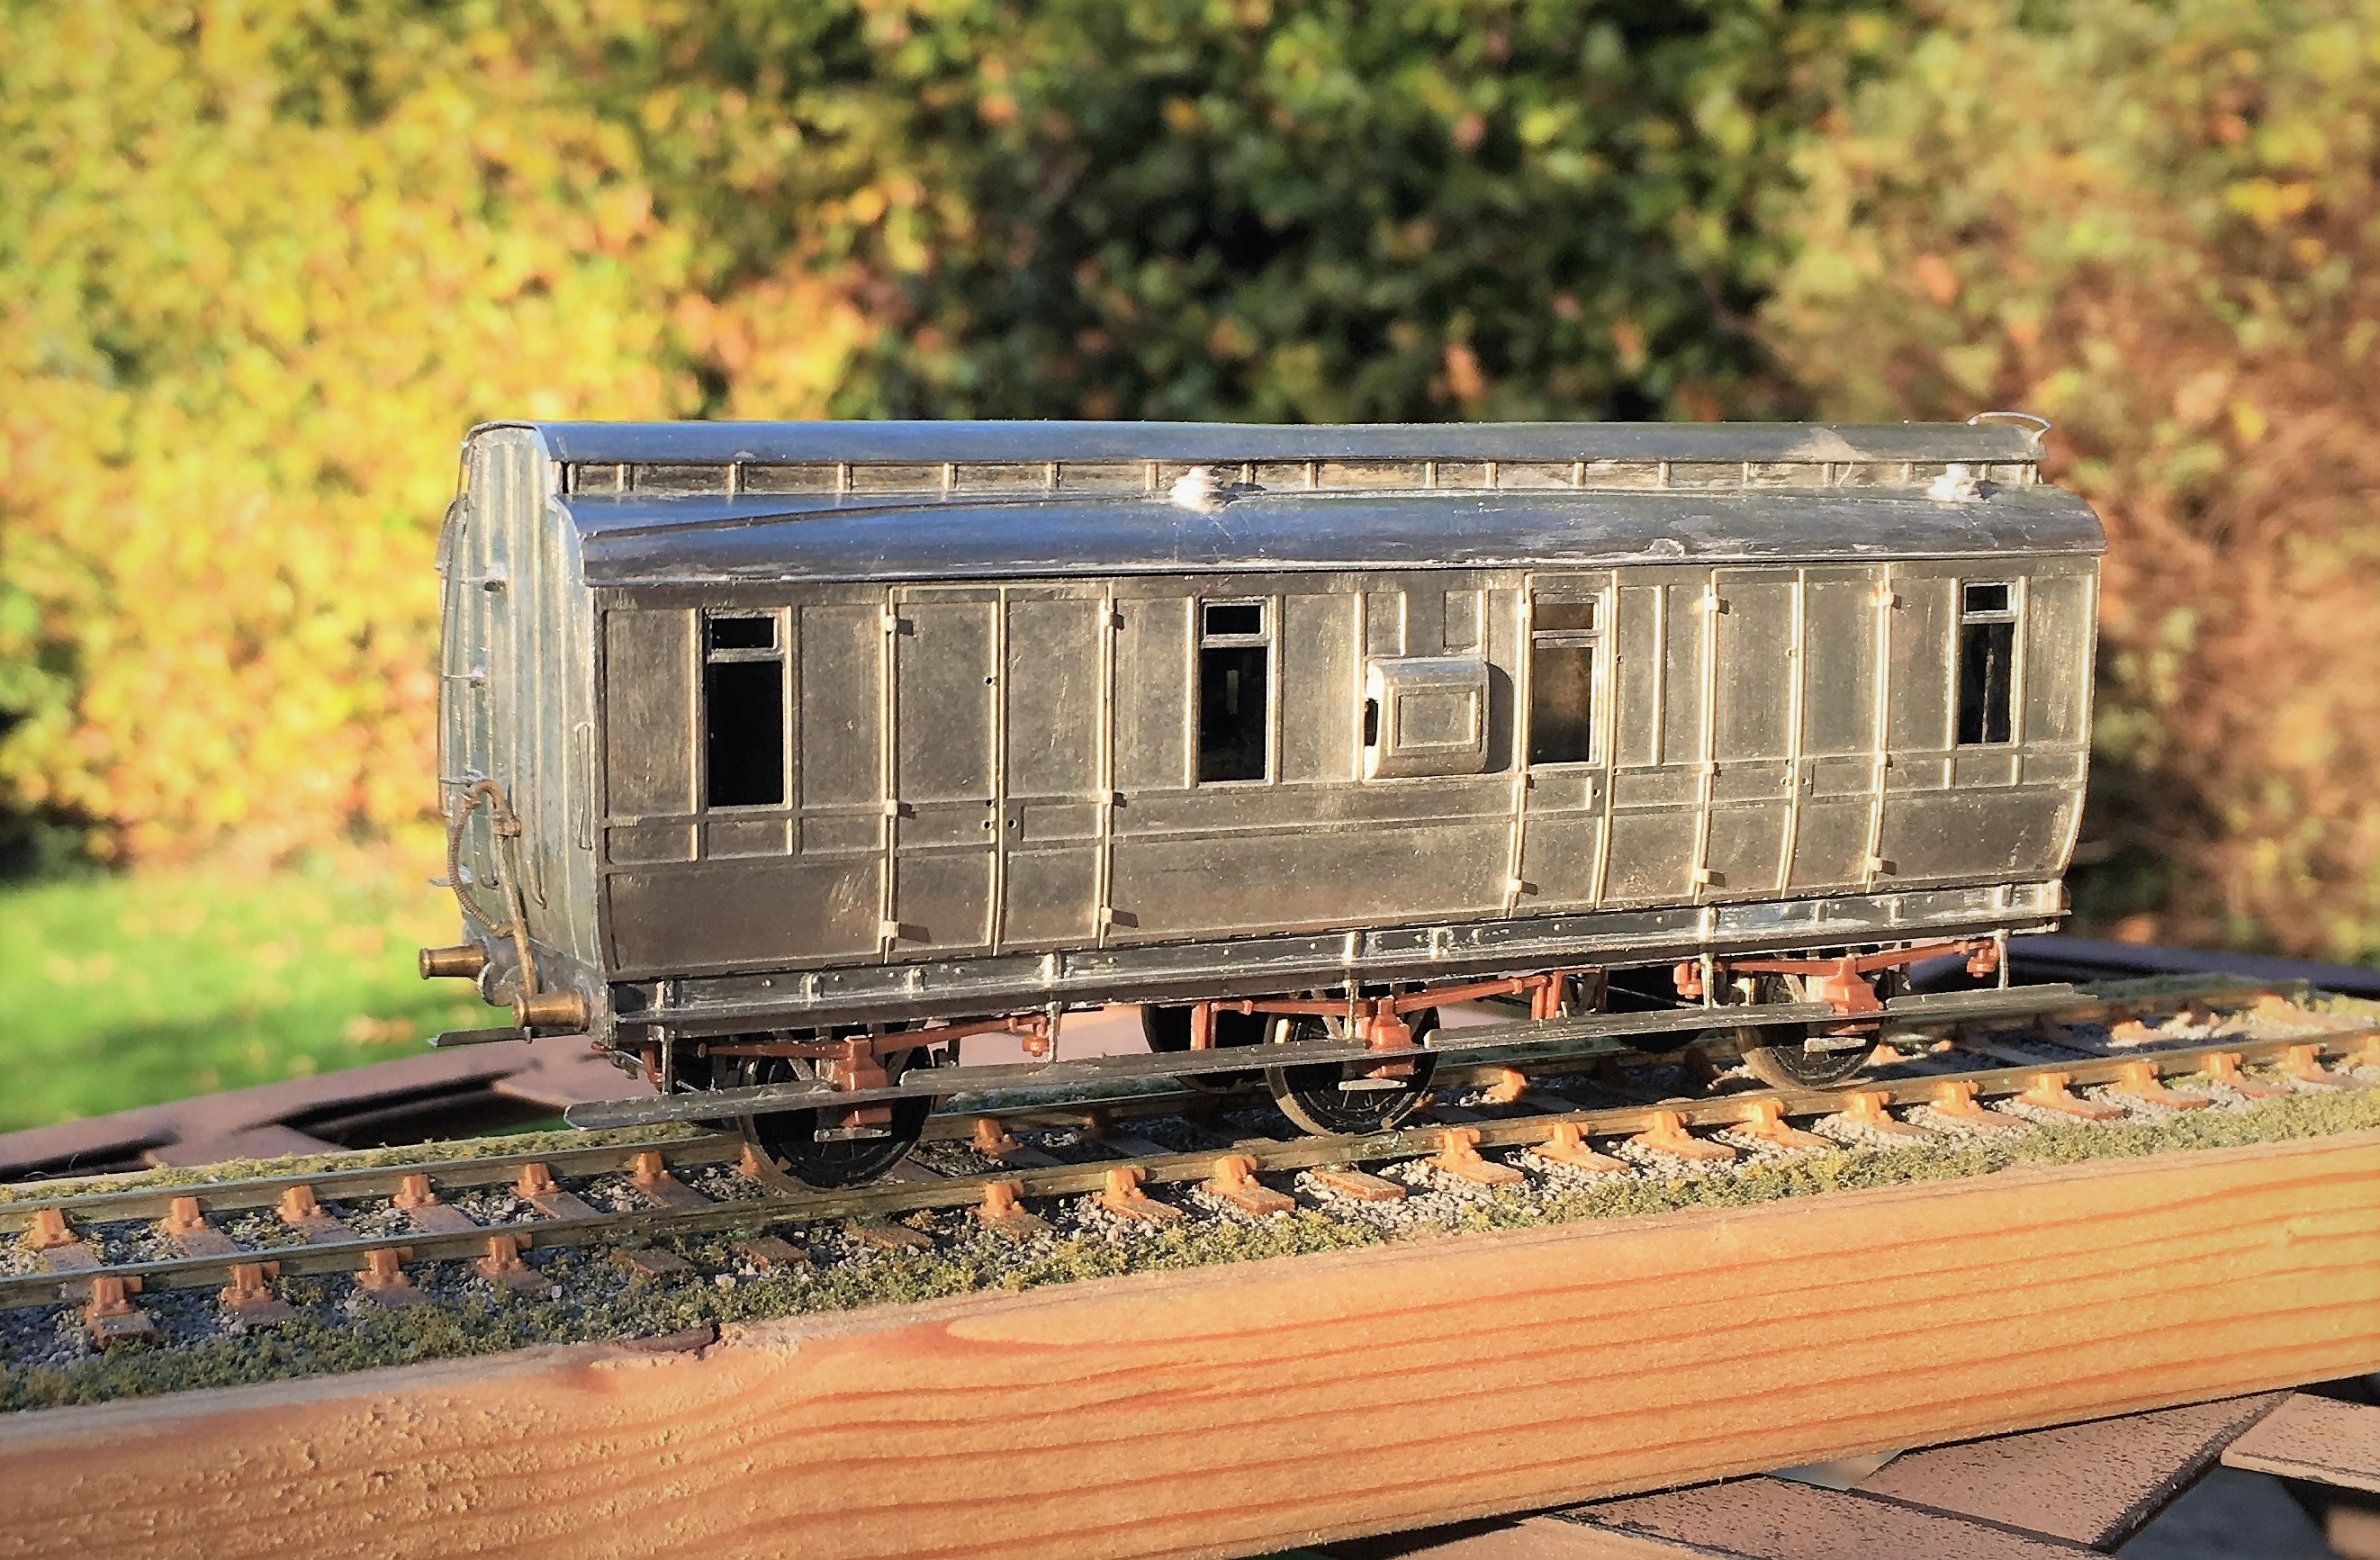
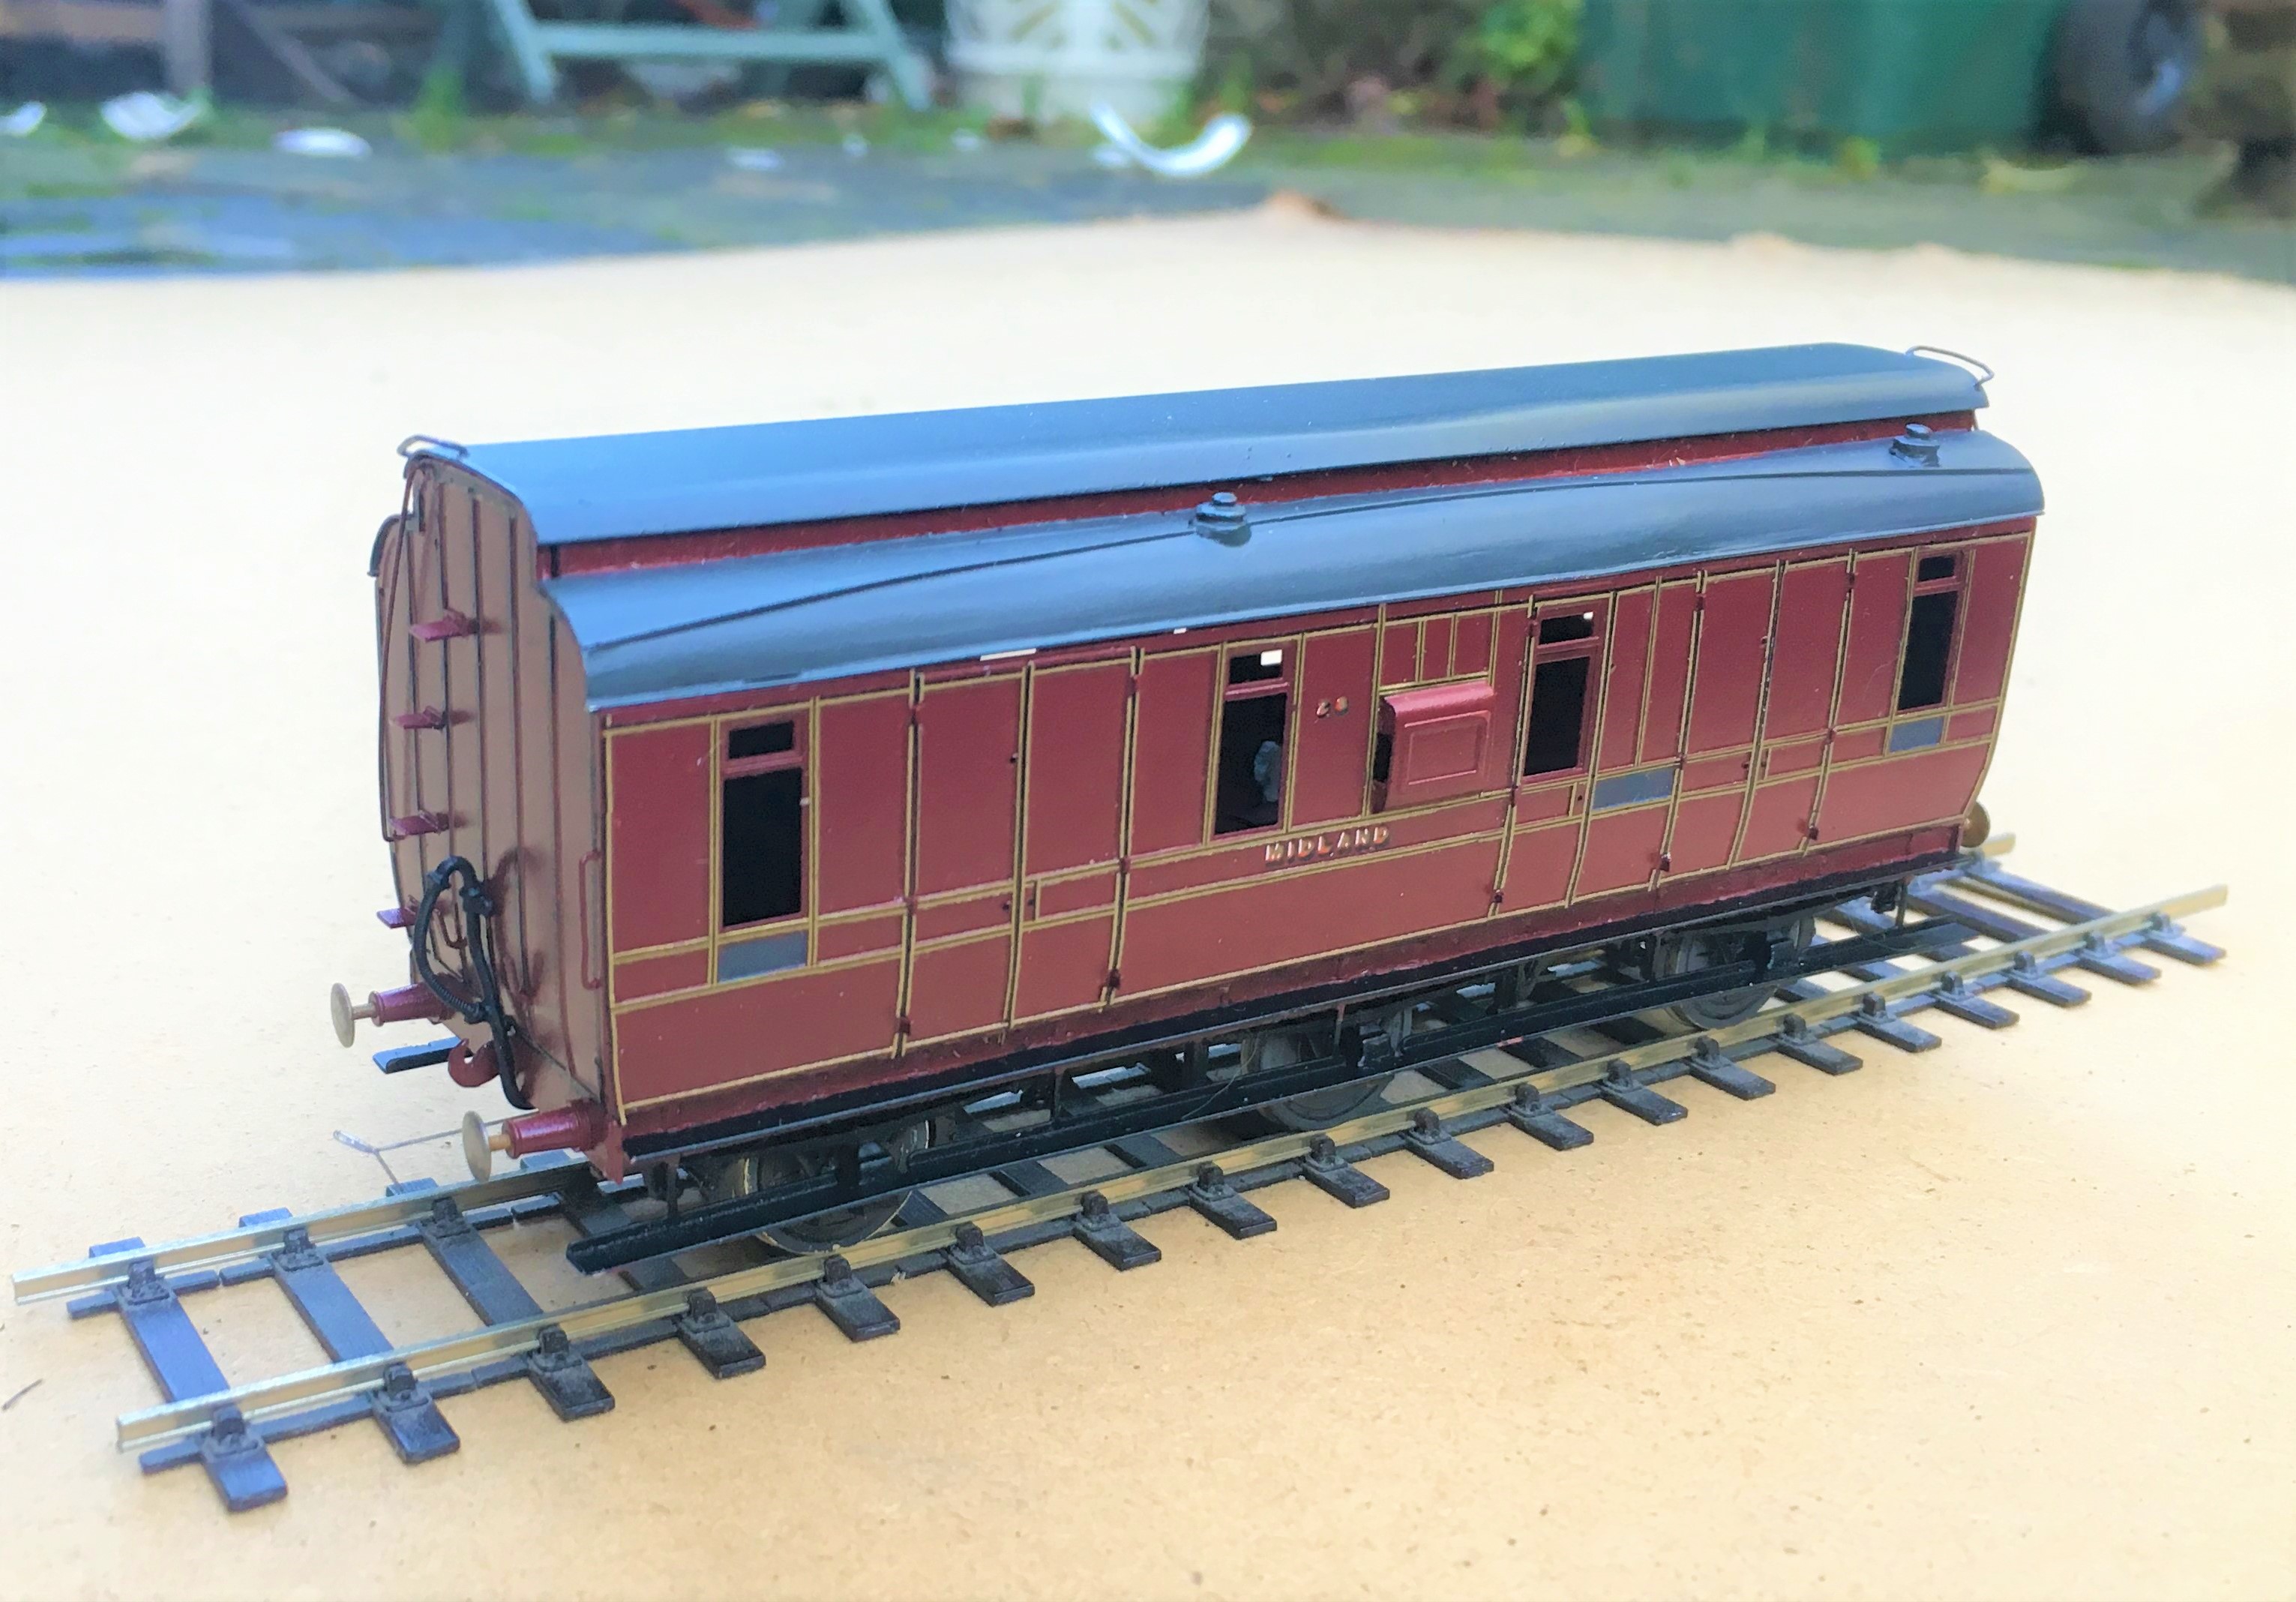
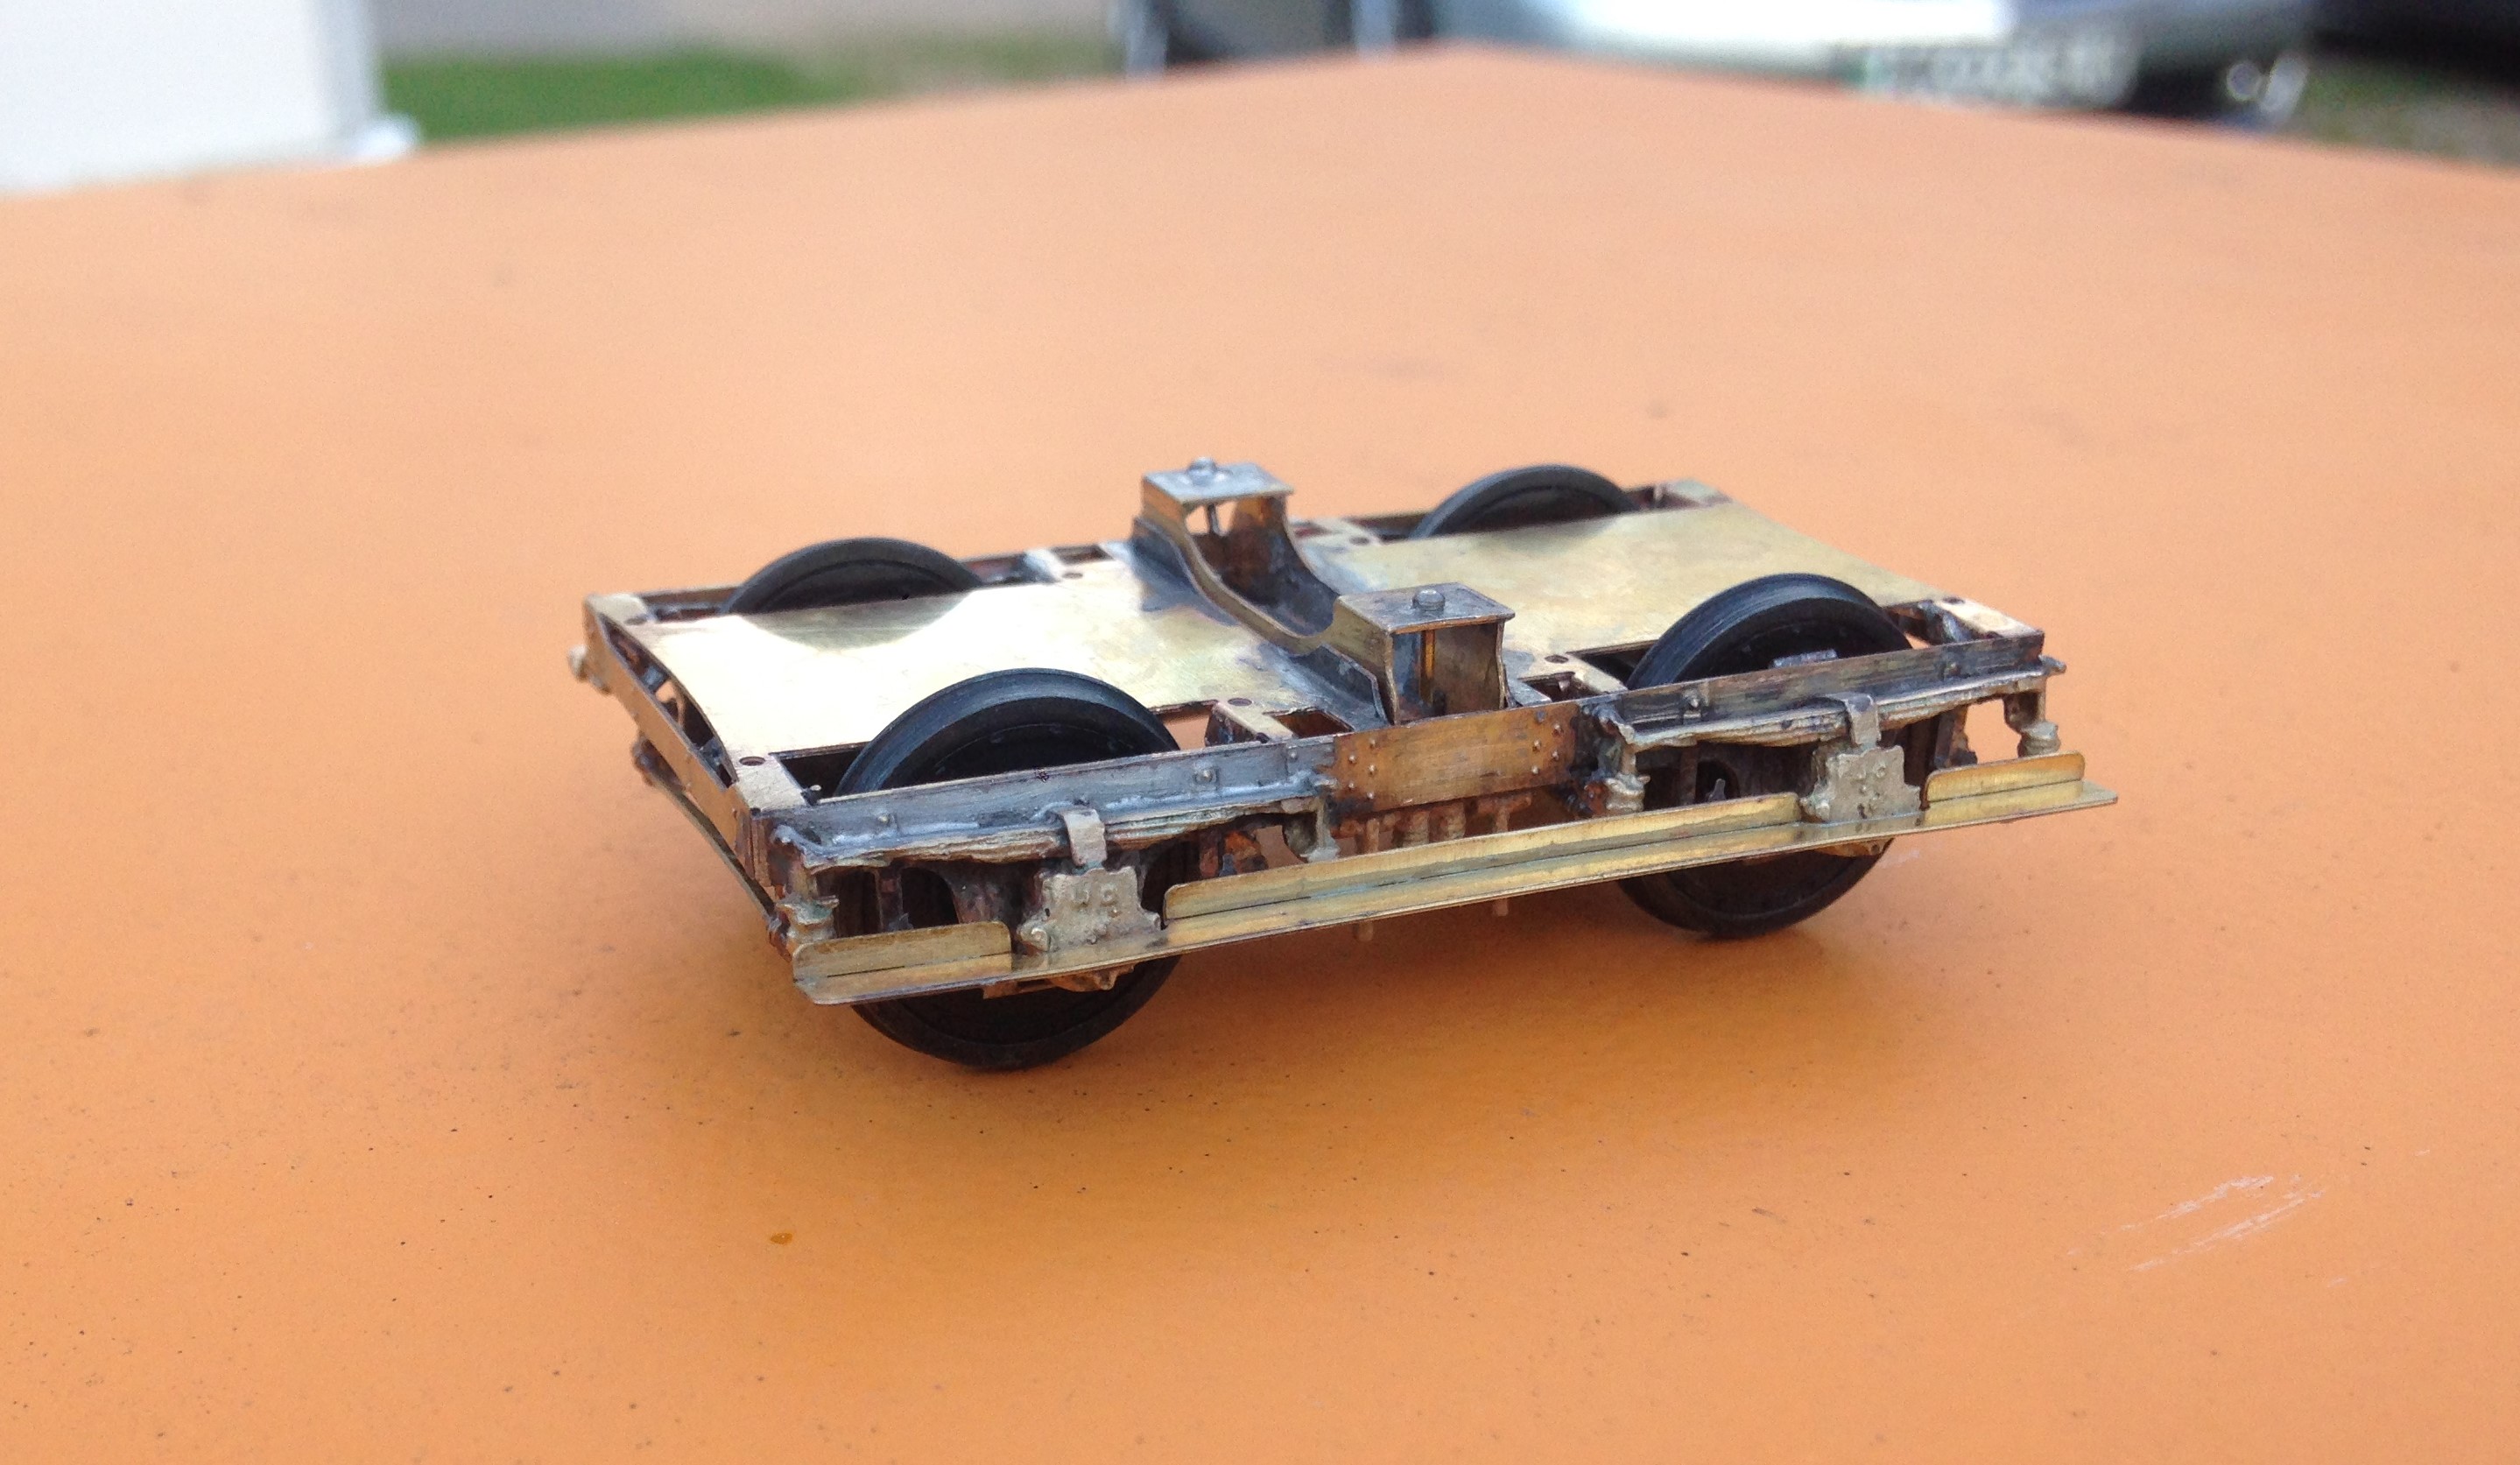
The first iteration used a cleminson chassis but in the light of the success I had with sliding axles on some of my other 6 wheeled stock, I redesigned it to include these and some sprung W-irons in the style of Bill Bedford’s.
This proved similarly successful and as you can see in the video, it trundles along quite nicely!
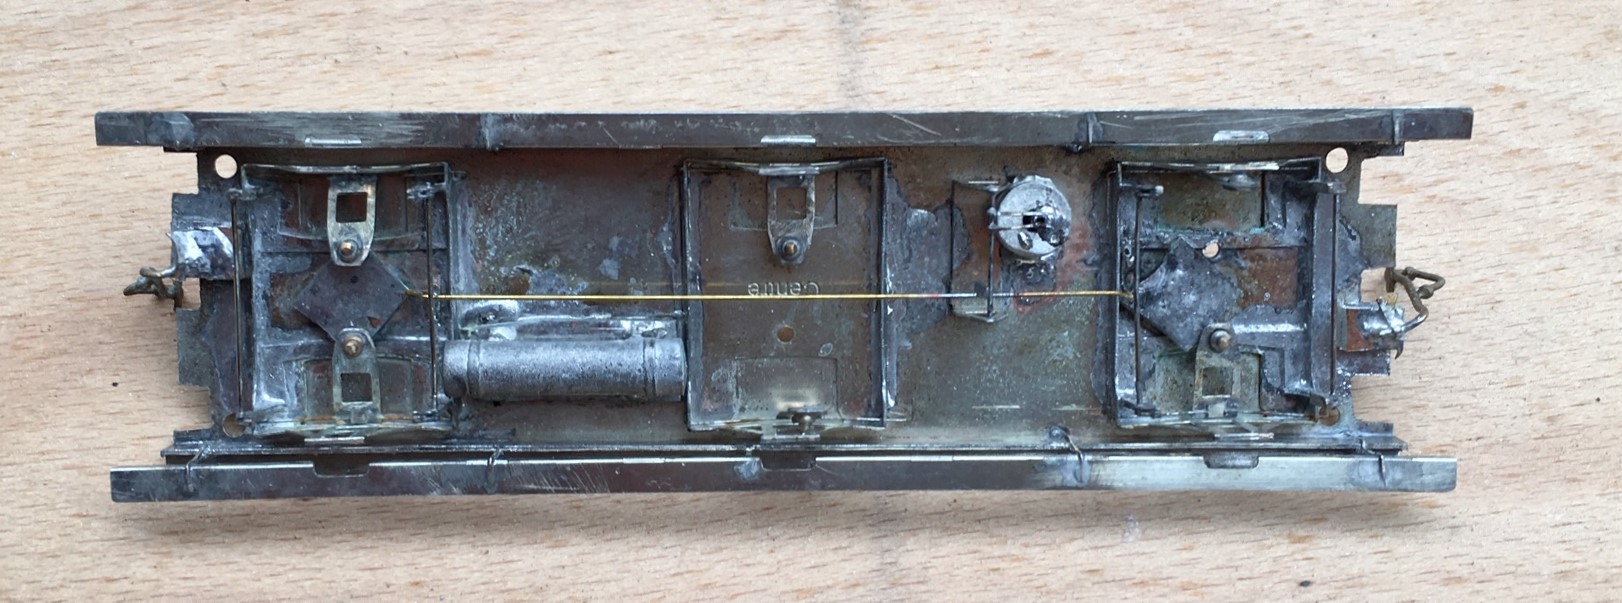
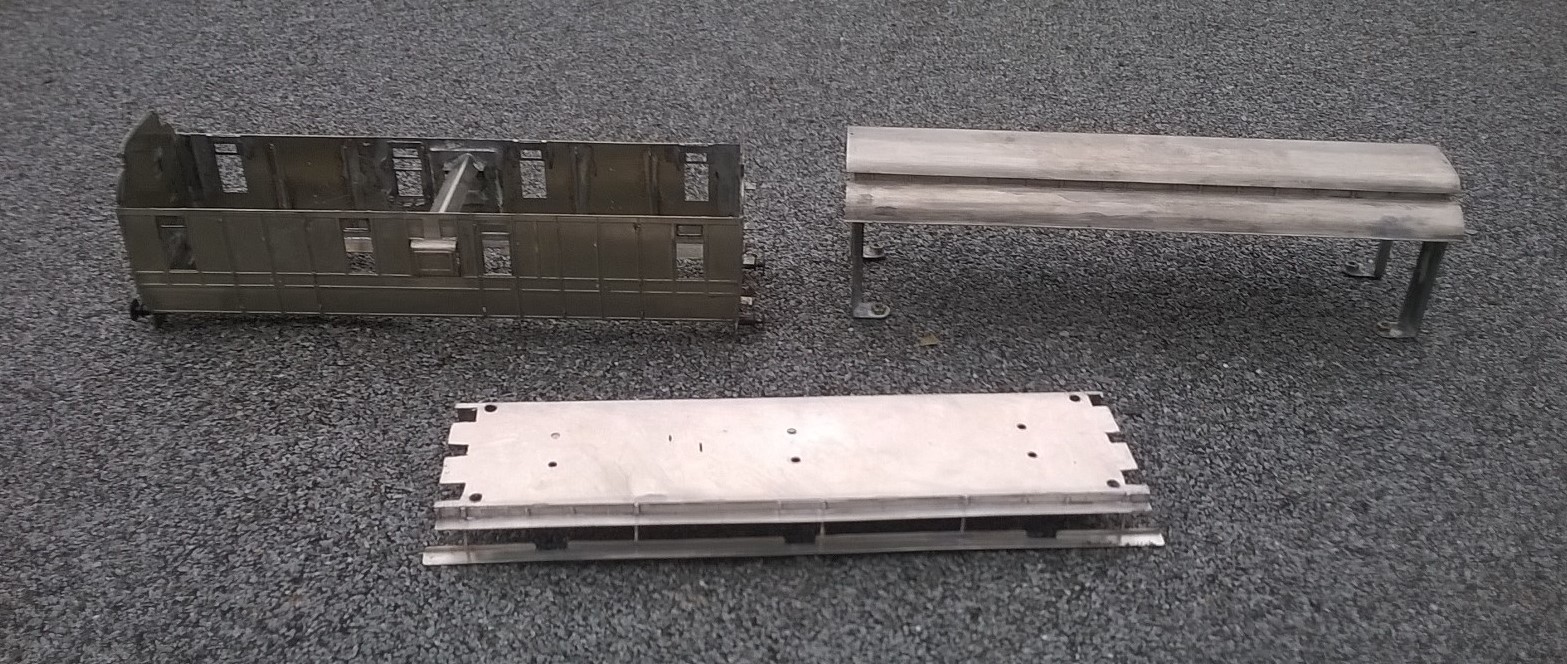
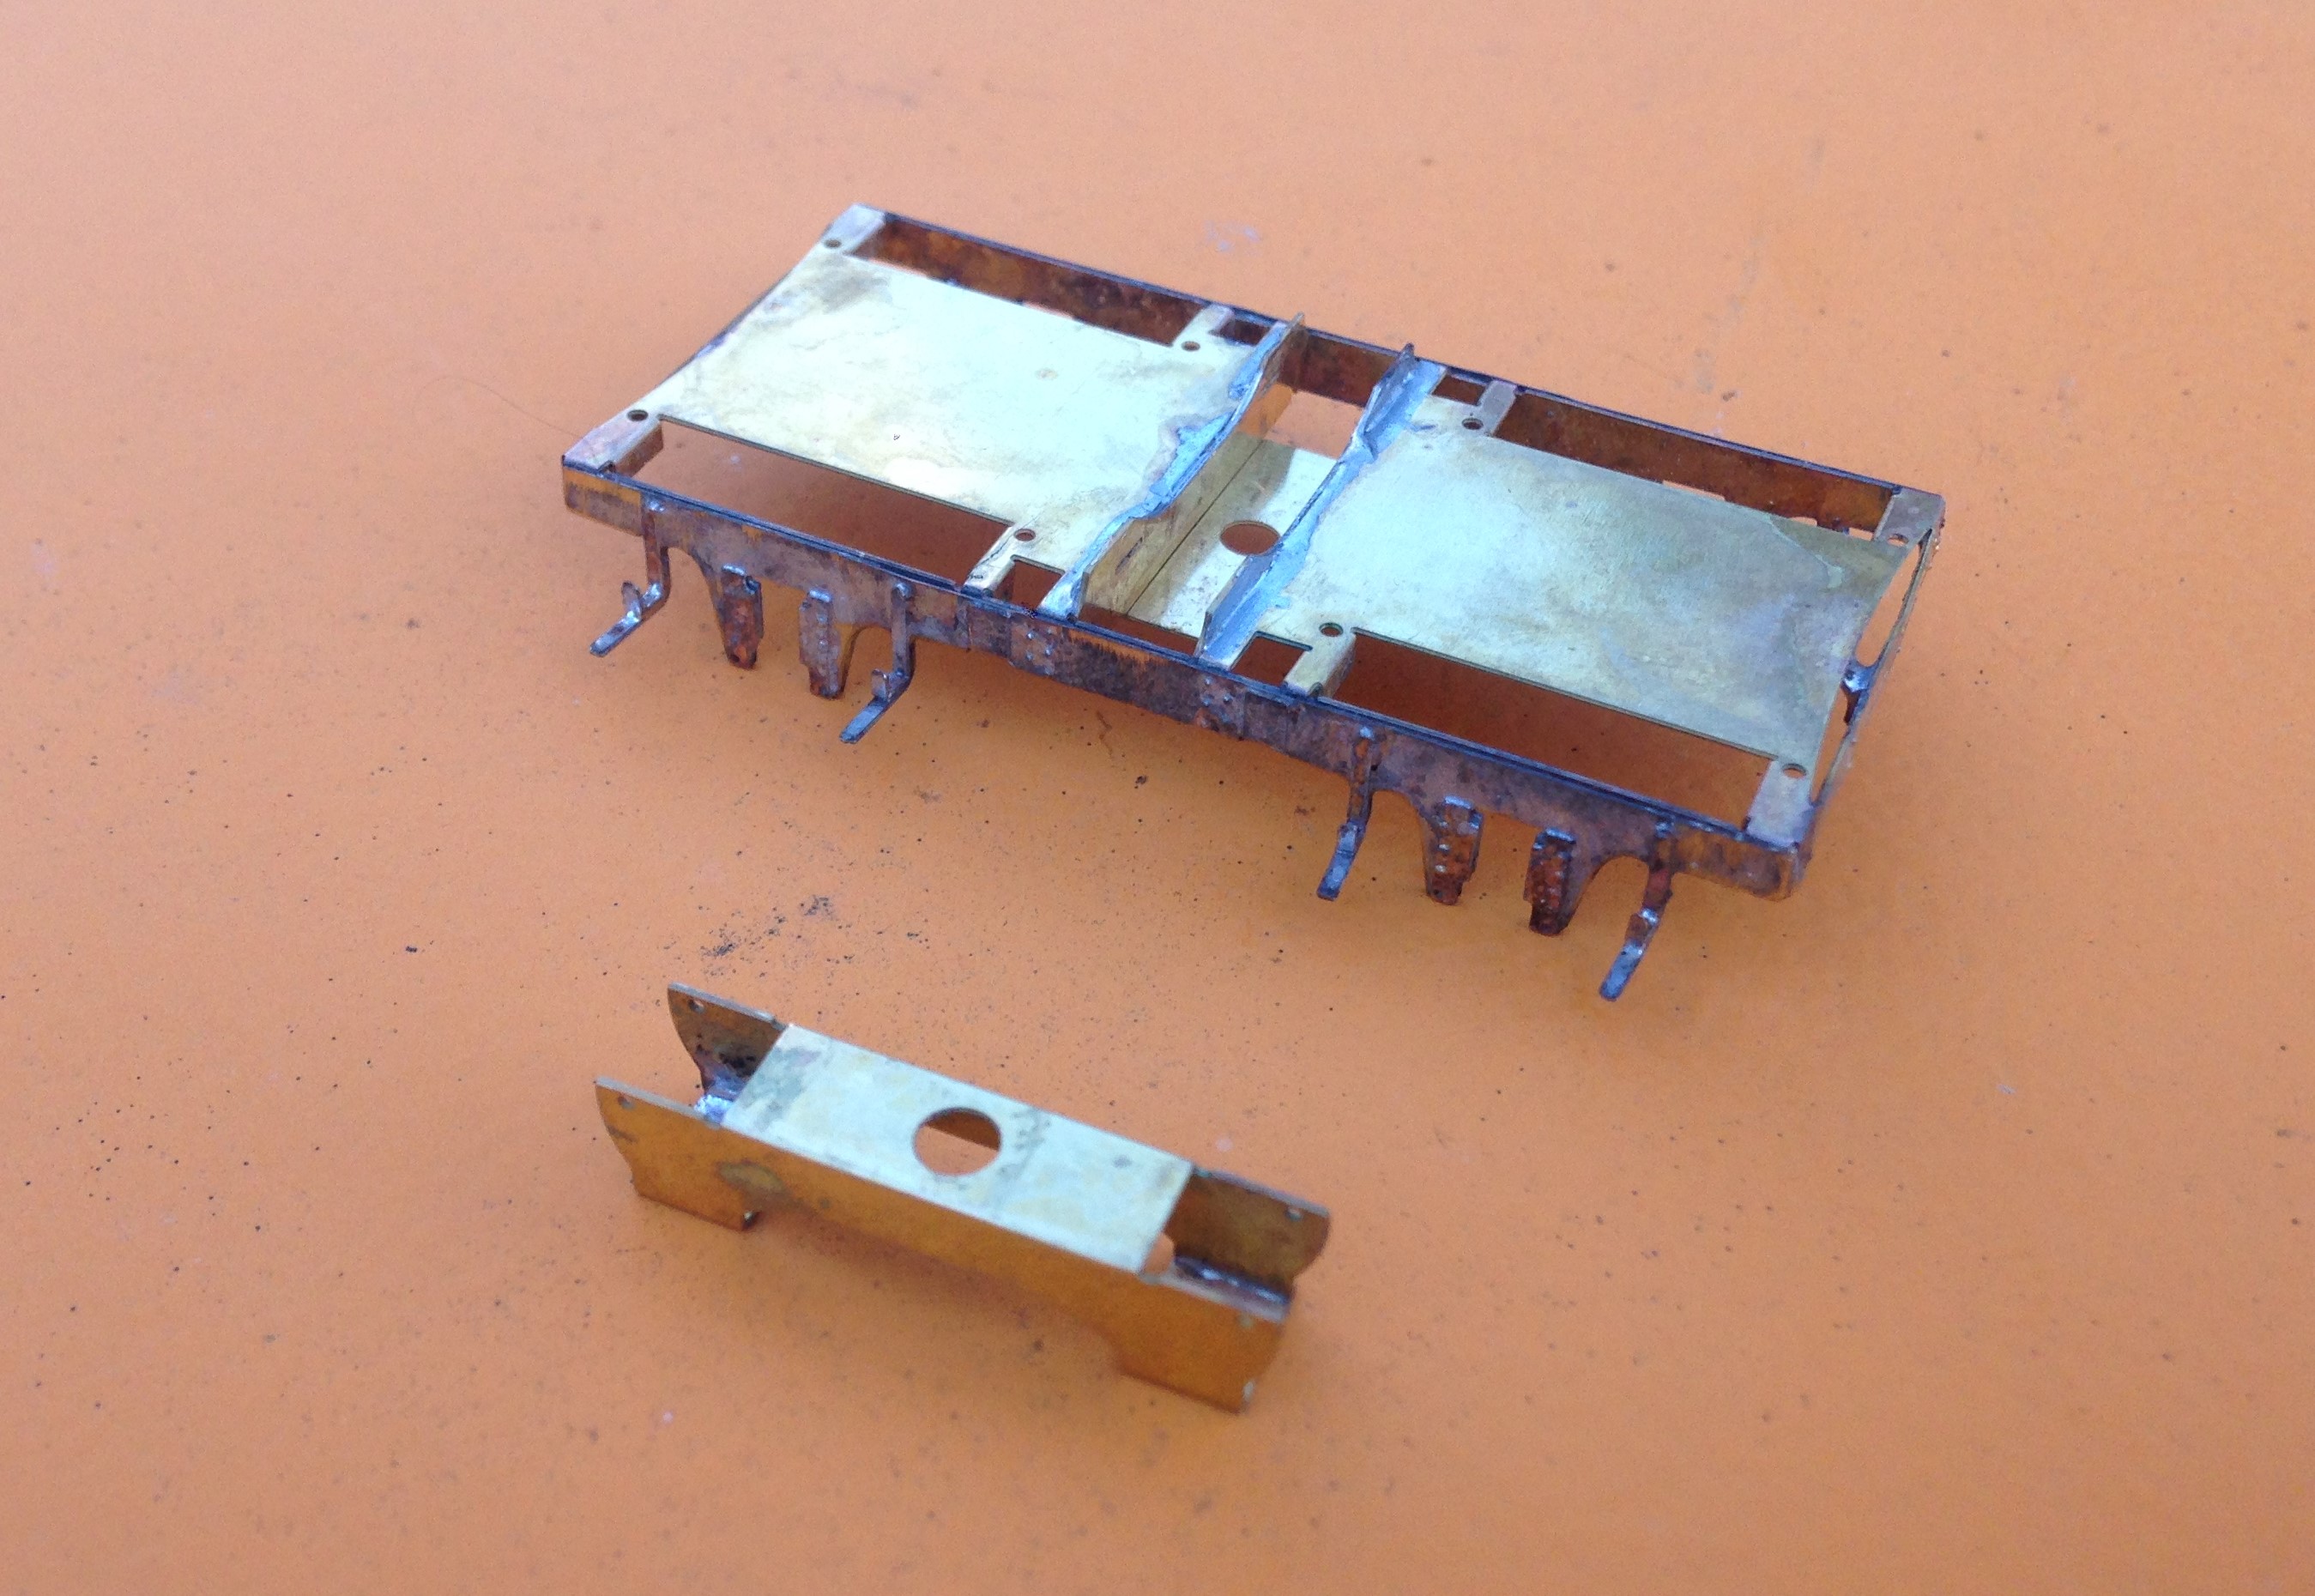
Other than the use of these sliding axles, the main unusual feature of the model is the arrangement of securing the roof. I have found that it is essential to bolt these in place to prevent the roof becoming adrift at some point in the future (which has happened to half my stock over time). Therefore, I designed a set of legs that allow the roof to be bolted through the floor from below and in the process also securing the separate chassis tight too. Broken down, the components look like this and having them separated does make painting a lot easier. It is definitely the route I will take in the future.
It is intended that this kit will be made available for sale as a 4mm/1ft model – albeit you will need to source the fittings/castings yourself. I have prepared some fairly extensive instructions (see link below) and this includes the details of what is required and where to get it from. I am waiting for a quote from the etching company to be able to work out the sensible cost for these; so an update post will follow when I list it on the Miscellany Models site.
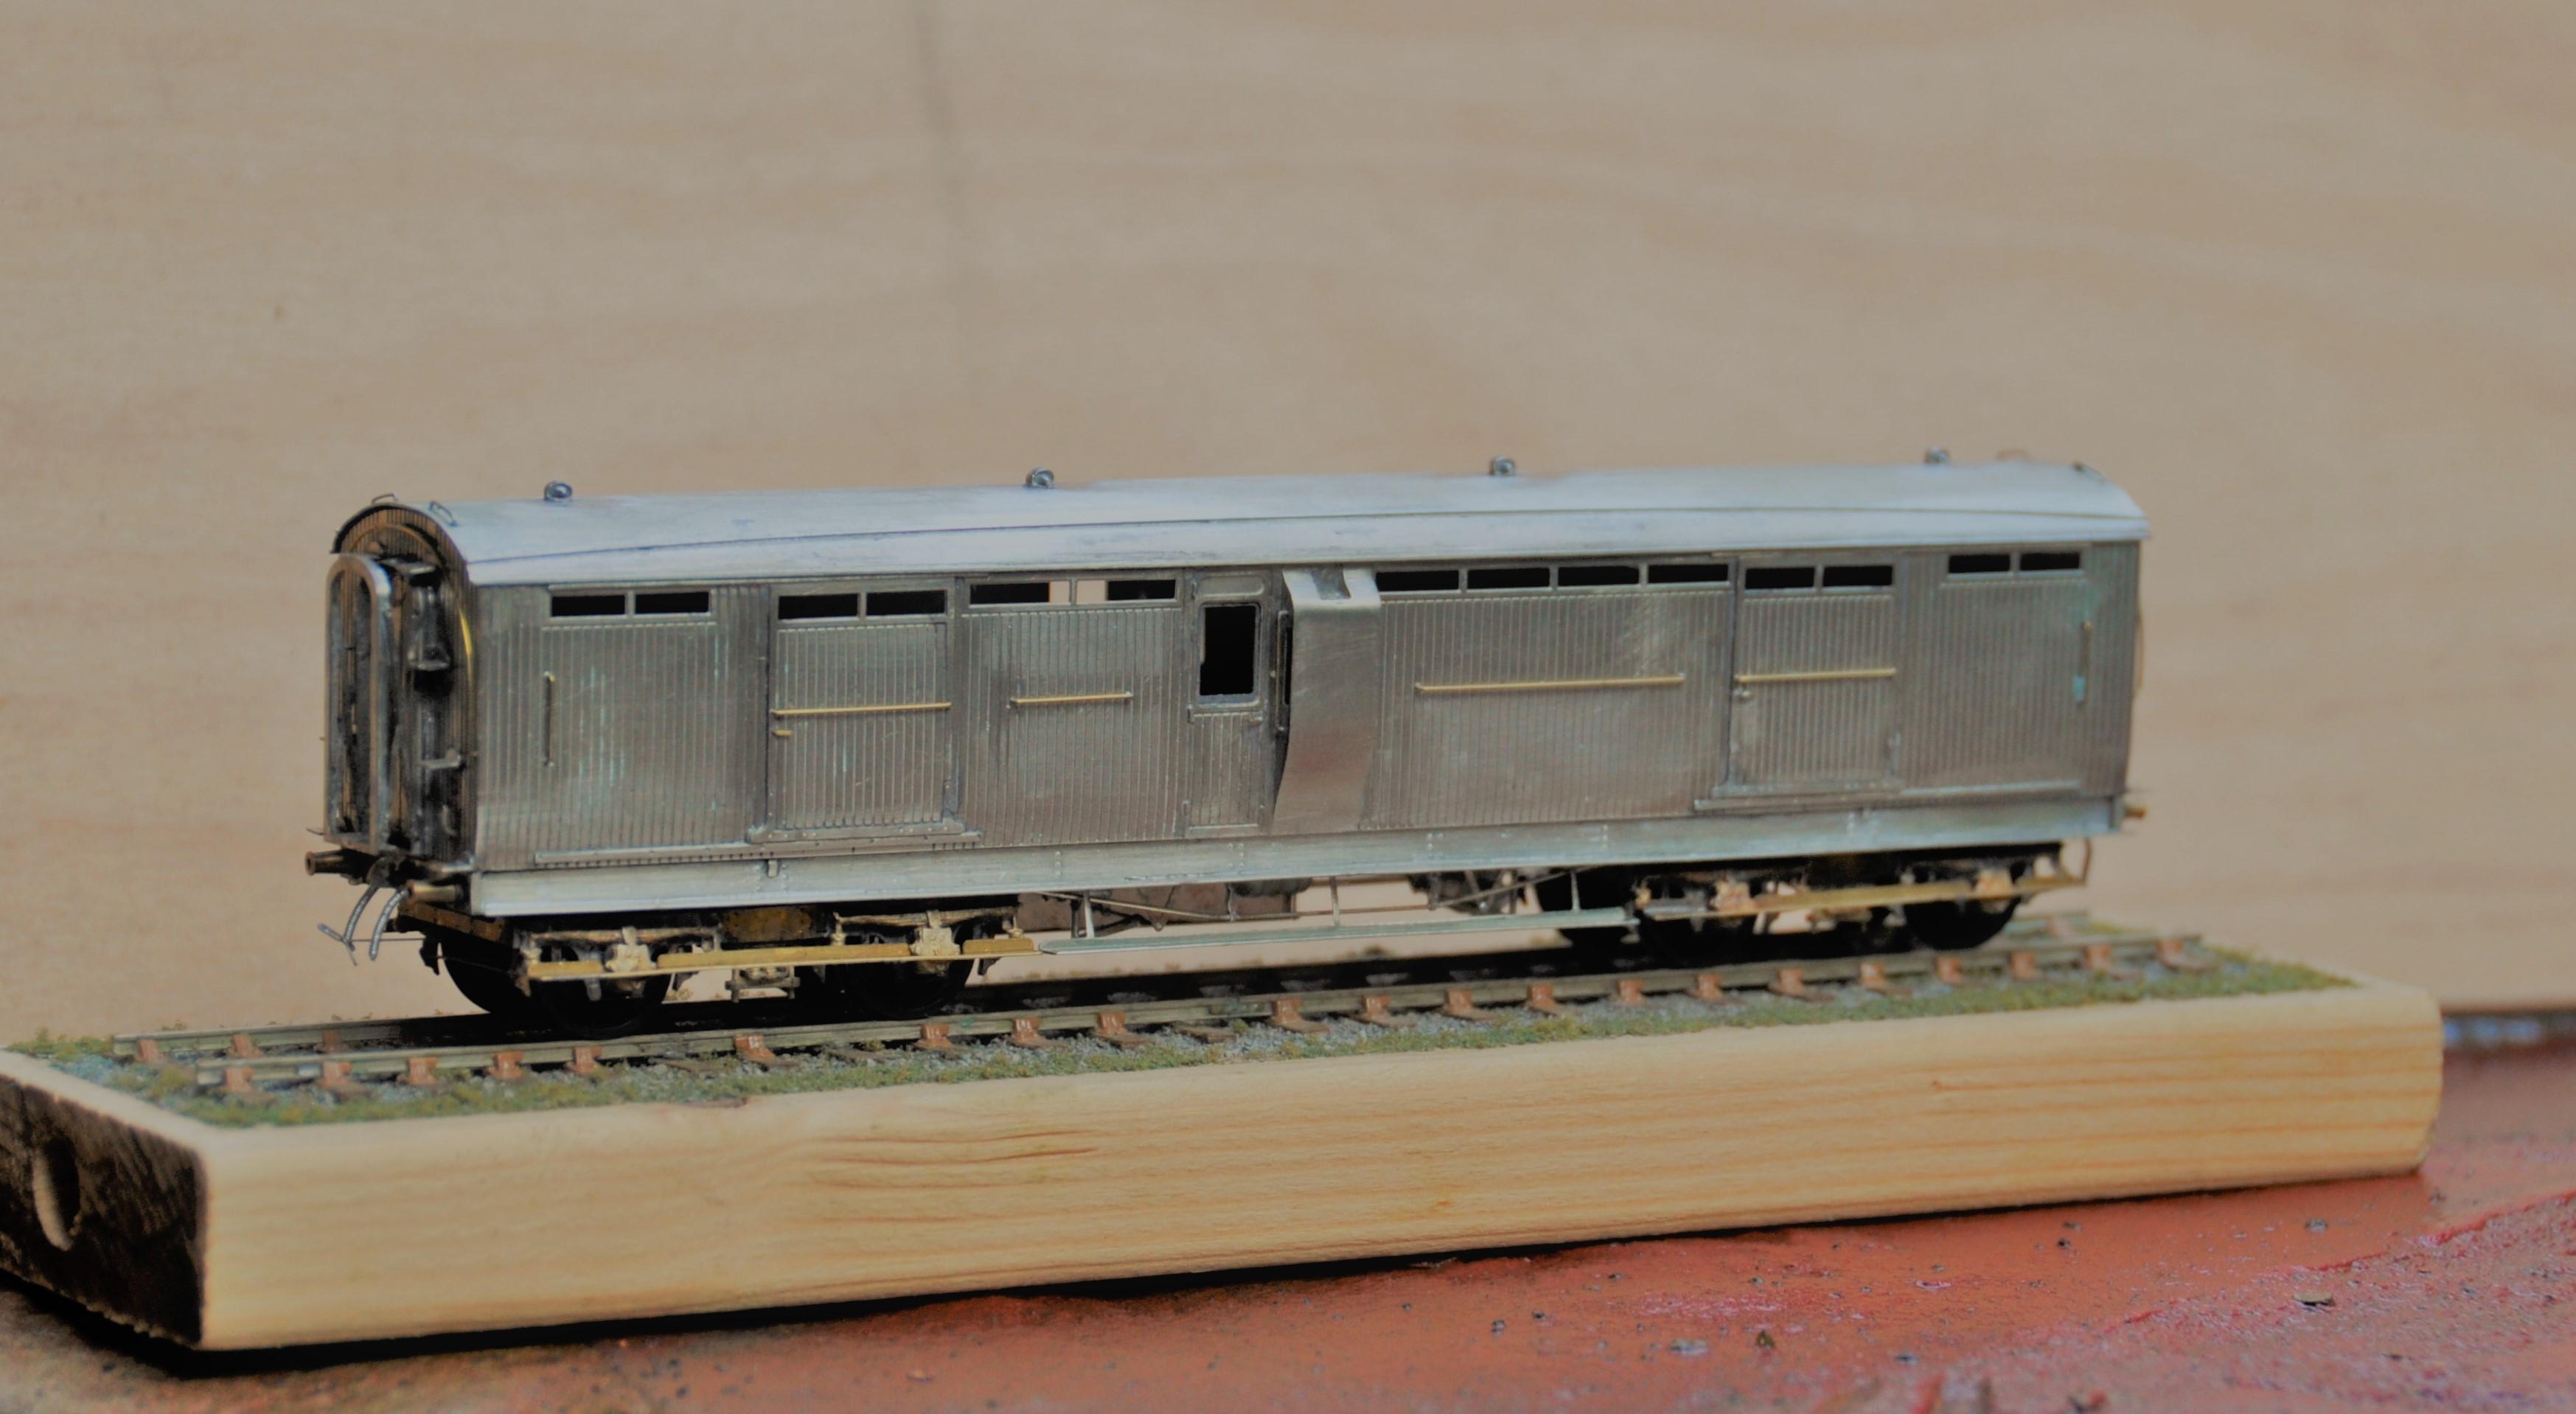
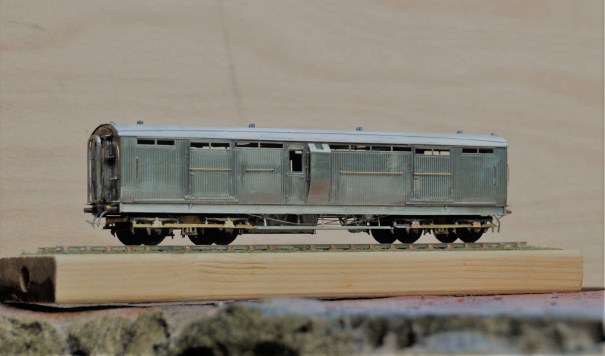
Miscellany Models Rolling Stock 2 – Midland dia 530 Full Brake v2
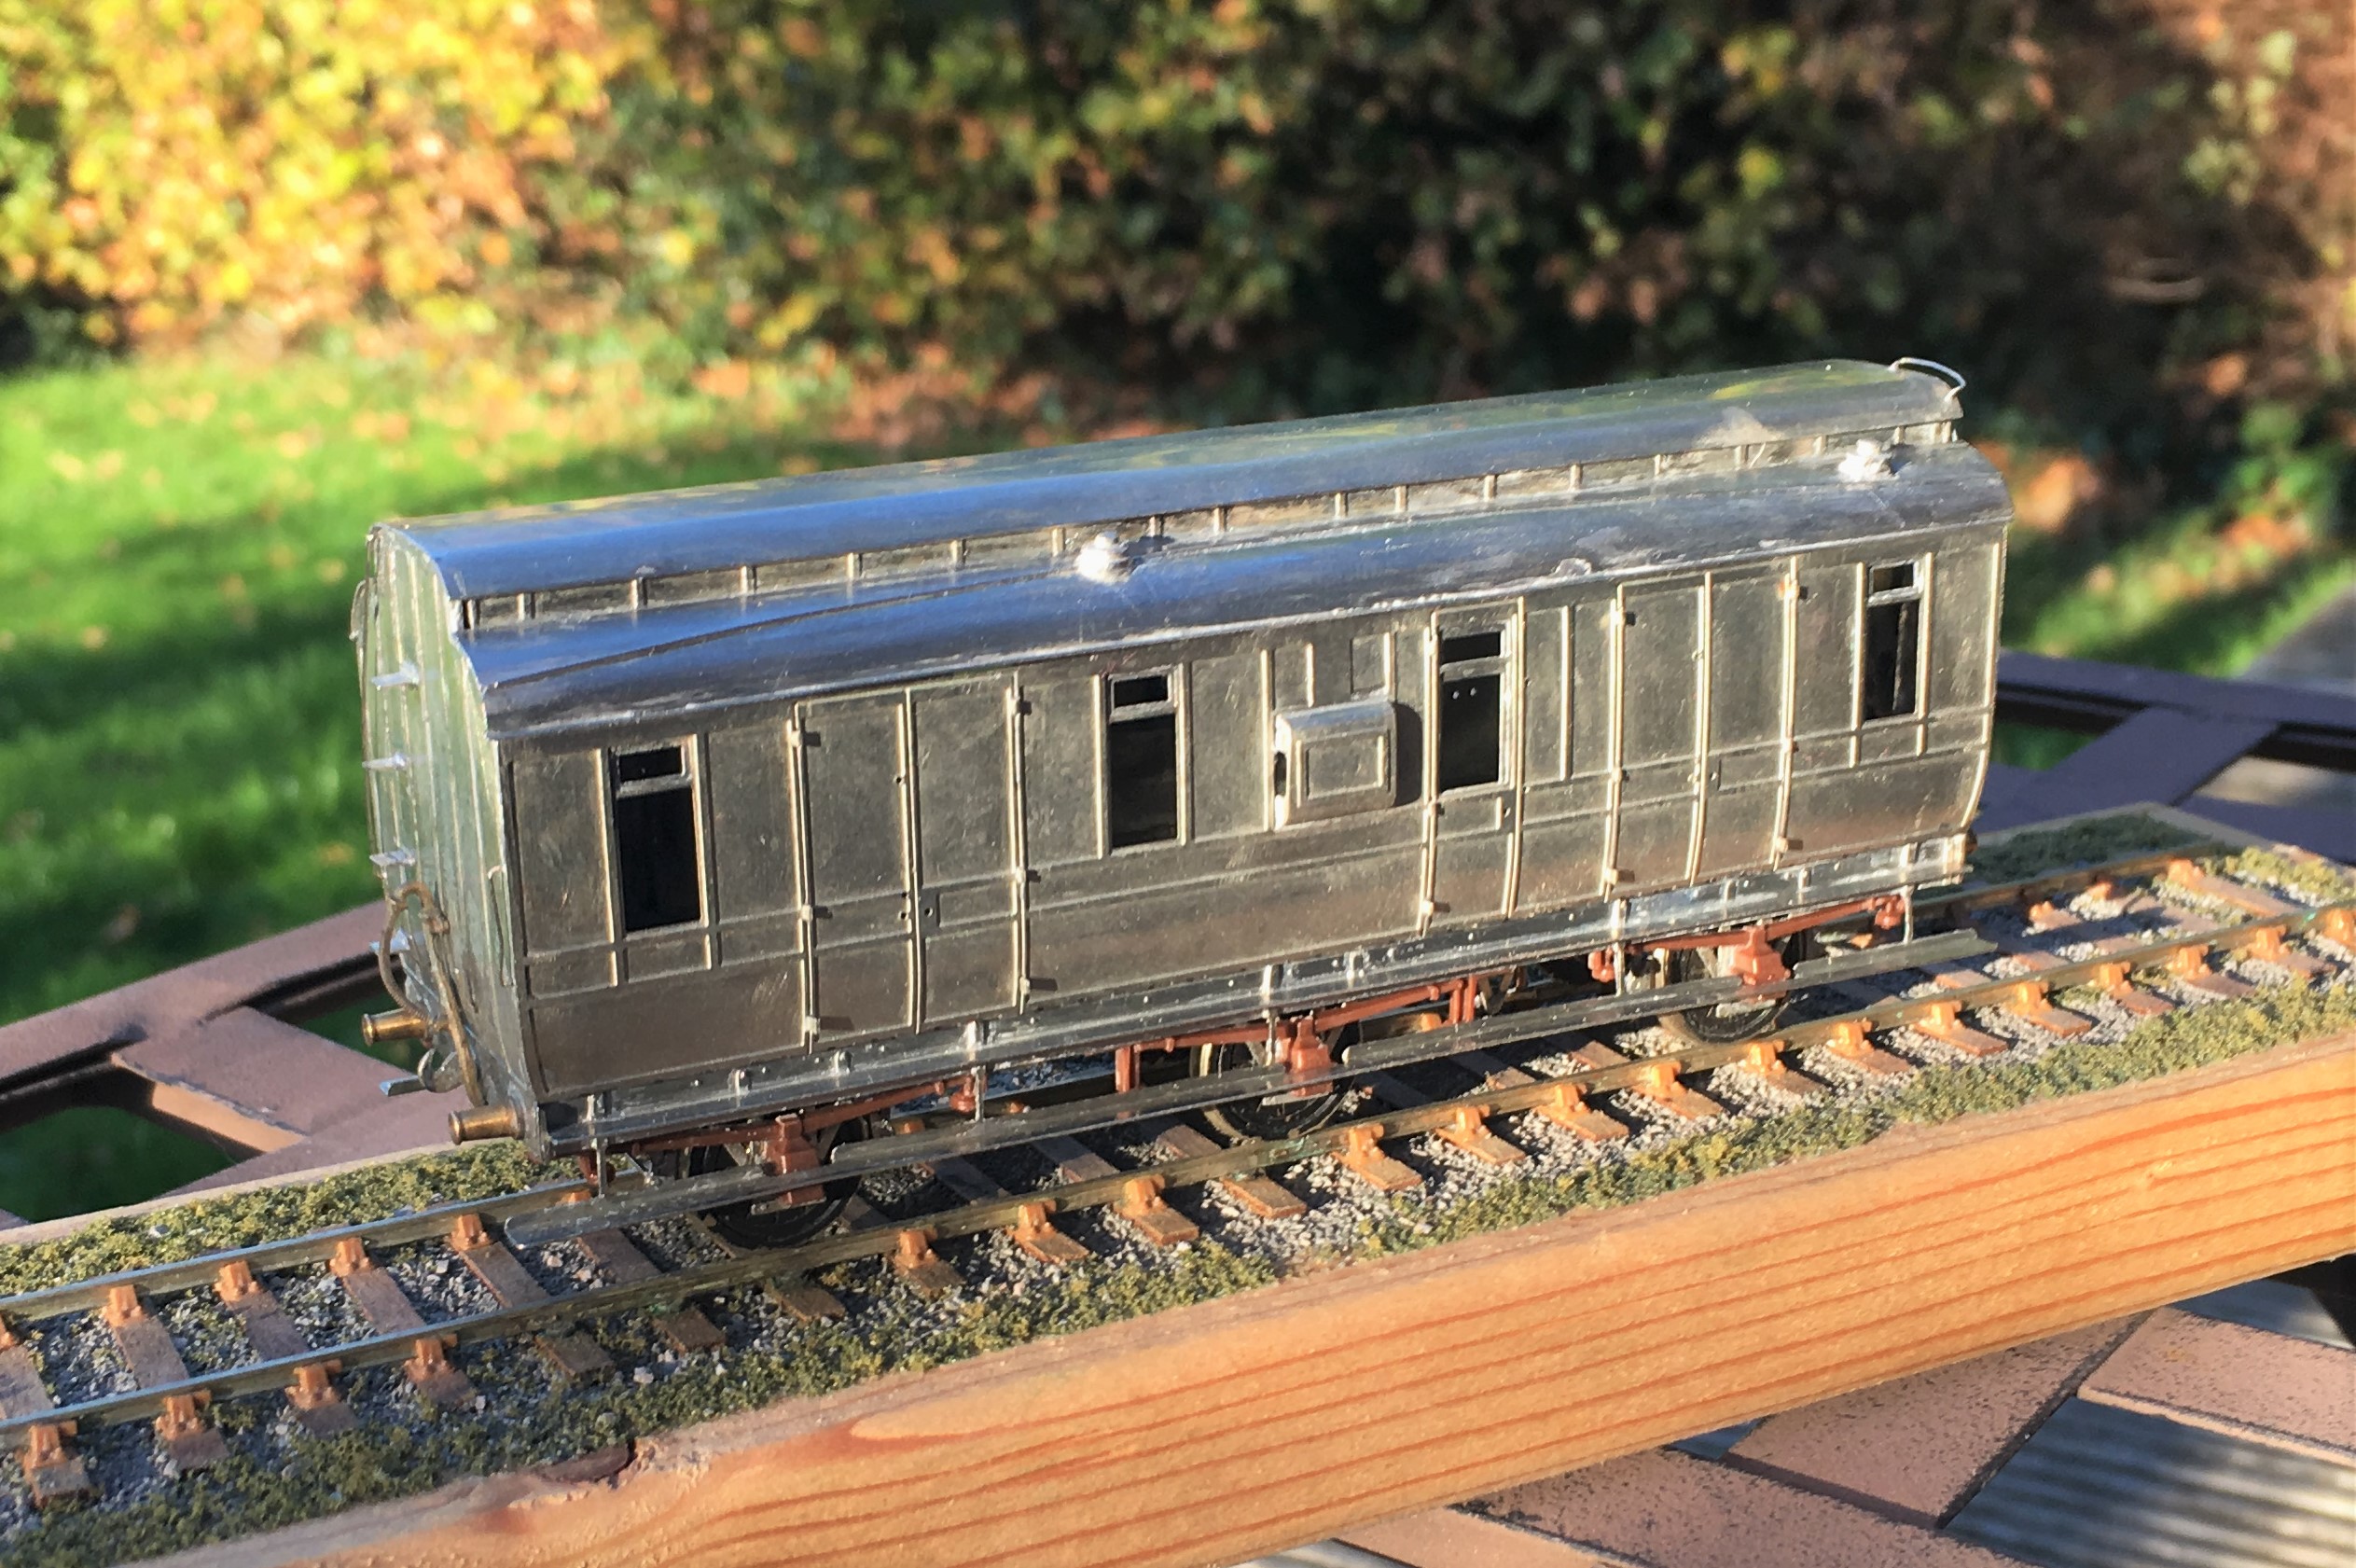
In the meantime, here are a couple of additional views of the completed vehicle, awaiting its turn in the paintshop!

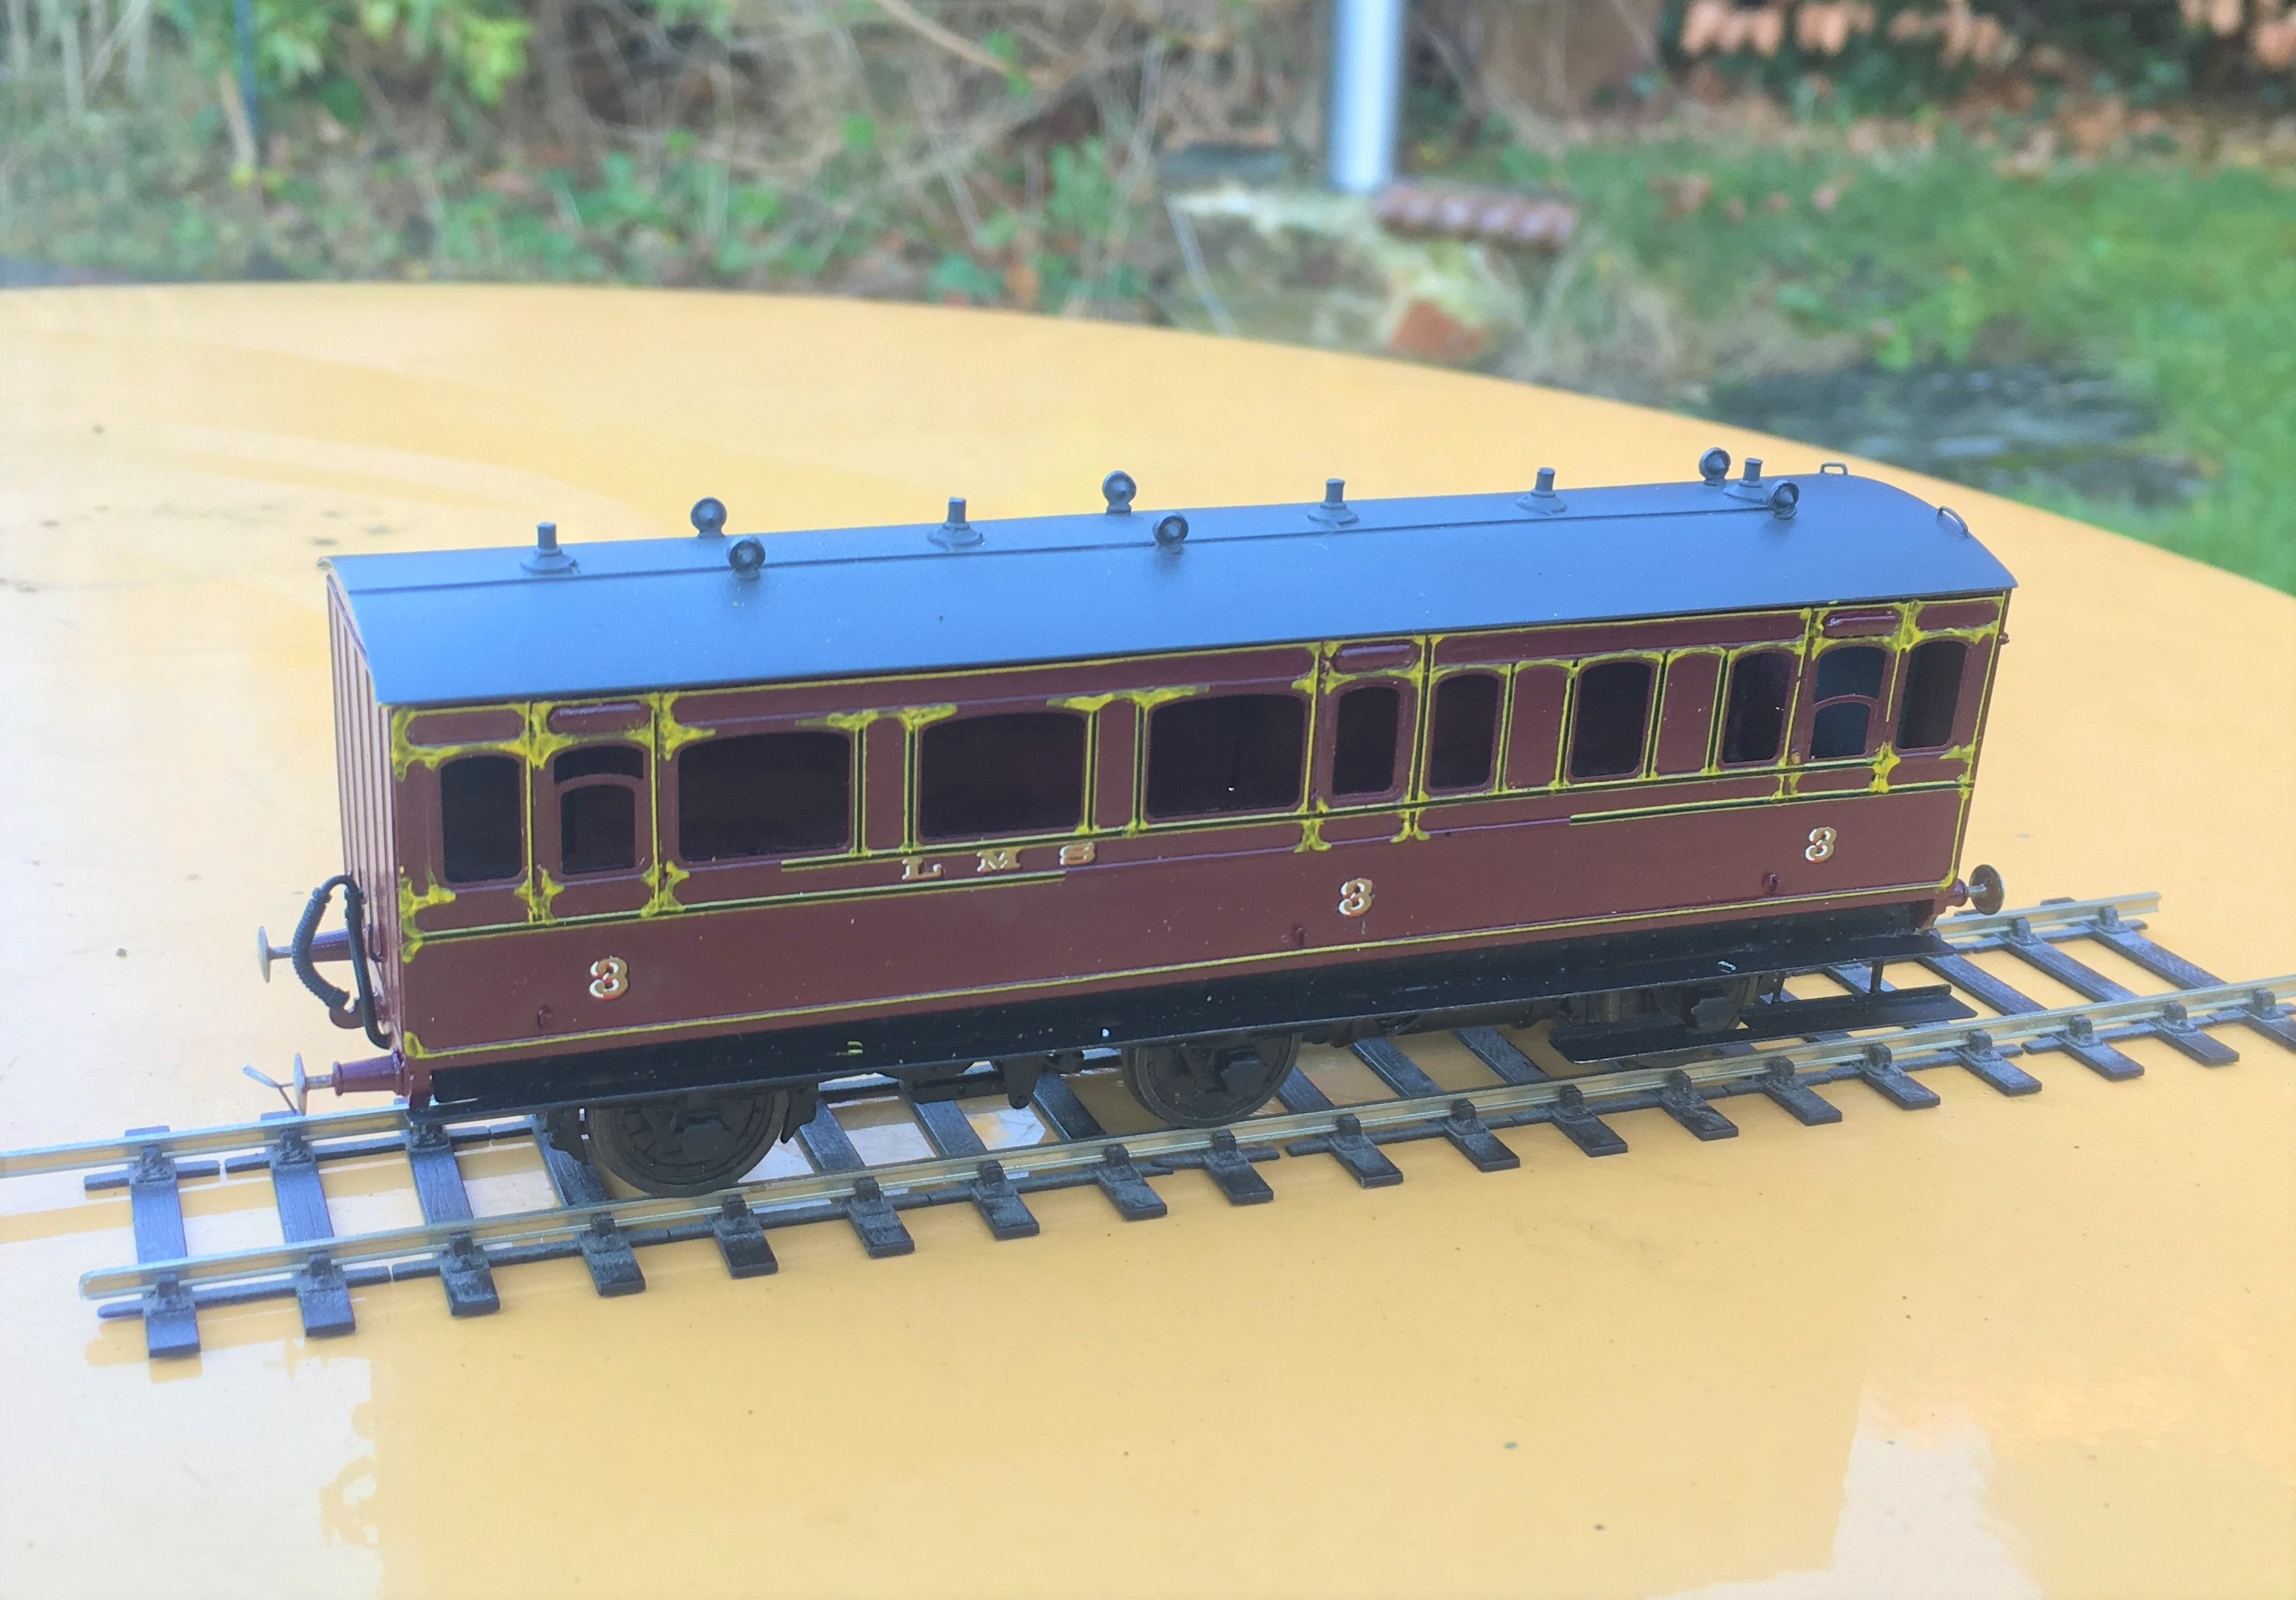
Dia 51 Test Build Part 3 – and then there were two…..!
Following the first test build of the dia 51, I took account of what I had learnt from this and completed various amendments to the artwork. There was nothing truly major, so I was fairly confident that the corrections would get the model to the point where the artwork was done. But of course, to prove this, another test build was required and this is where we got to………..
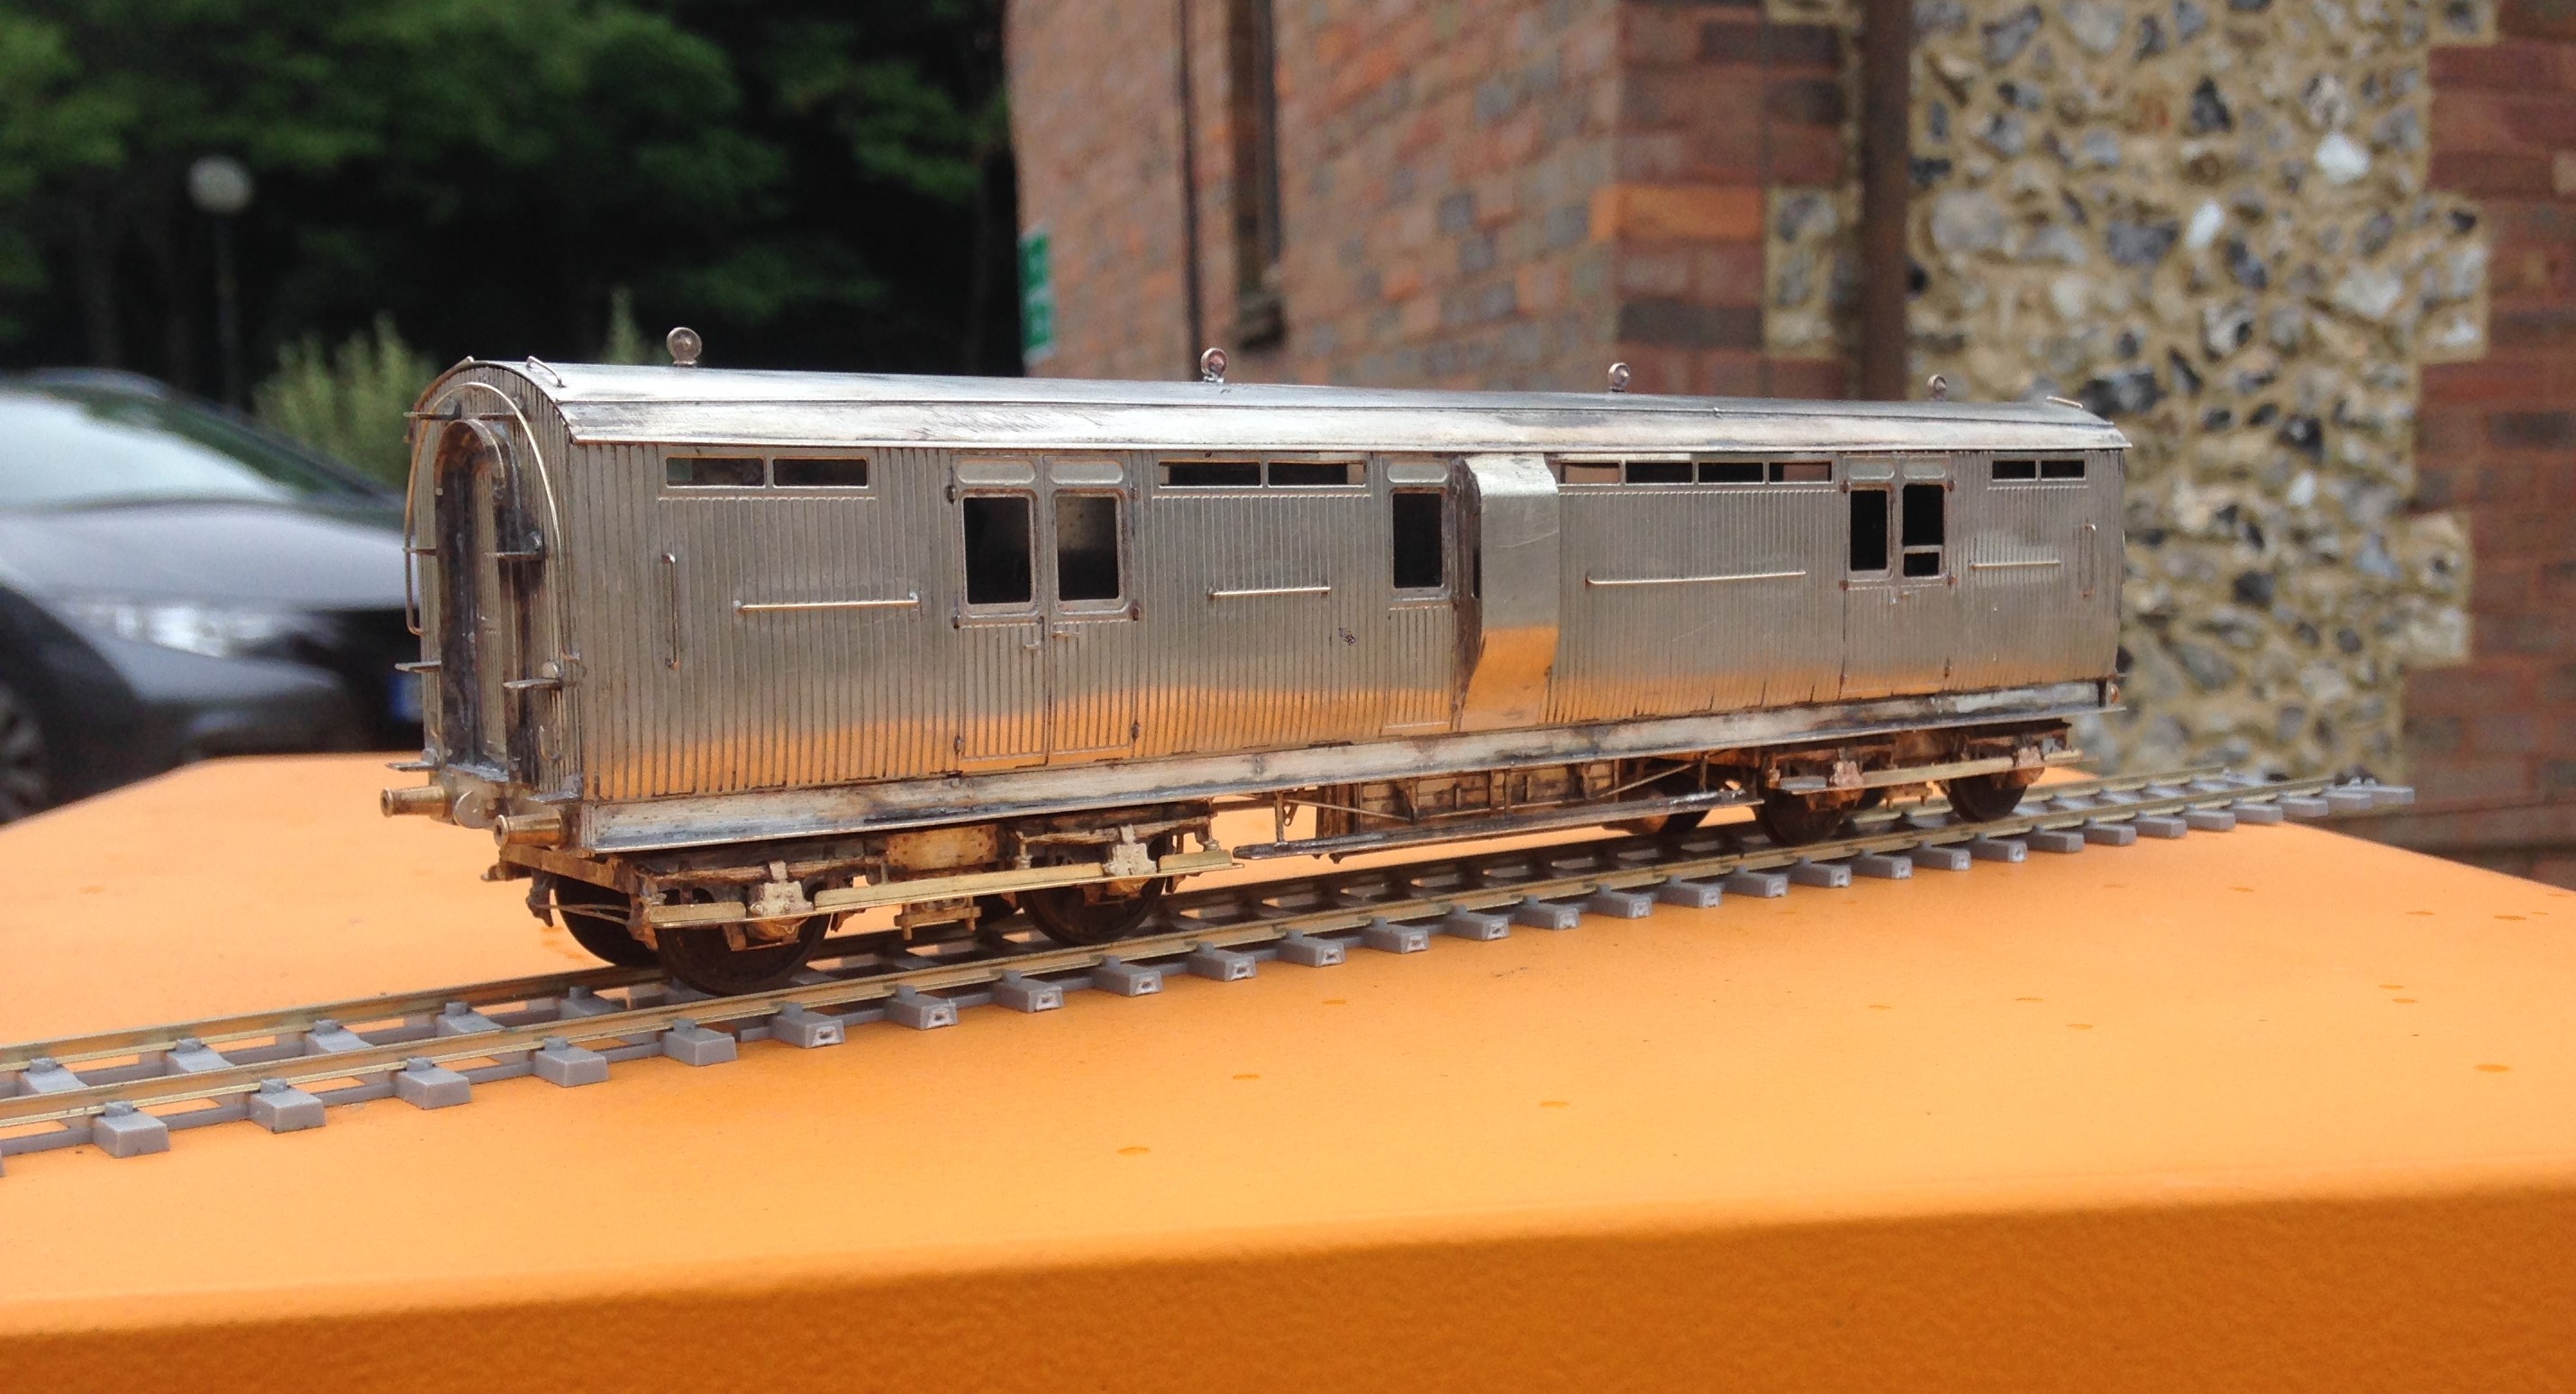
And this is what it looks like……..quite handsom I think and certainly quite differnt from all the pother stock I presently have.
The eagle eyed will spot that the vehicle is slightly different in that this one has sliding doors, whereas the previous had cupboard doors. The kit is intended to cover both options and does successfully do so.
The ducket also has cut outs for a lamp at its head (a feature of Highland duckets). This proved quite challenging to model and I will avoid doing it again because it seemed to fall out of favour prior to the end of the Highland era so having only one or two would be right for my timeframe.
There remains a bit more work on the bogie to do; they can be made up to work very well but are a little more difficult to build than I had hoped. Once this is cracked, I will be making the dia 51 available for sale.

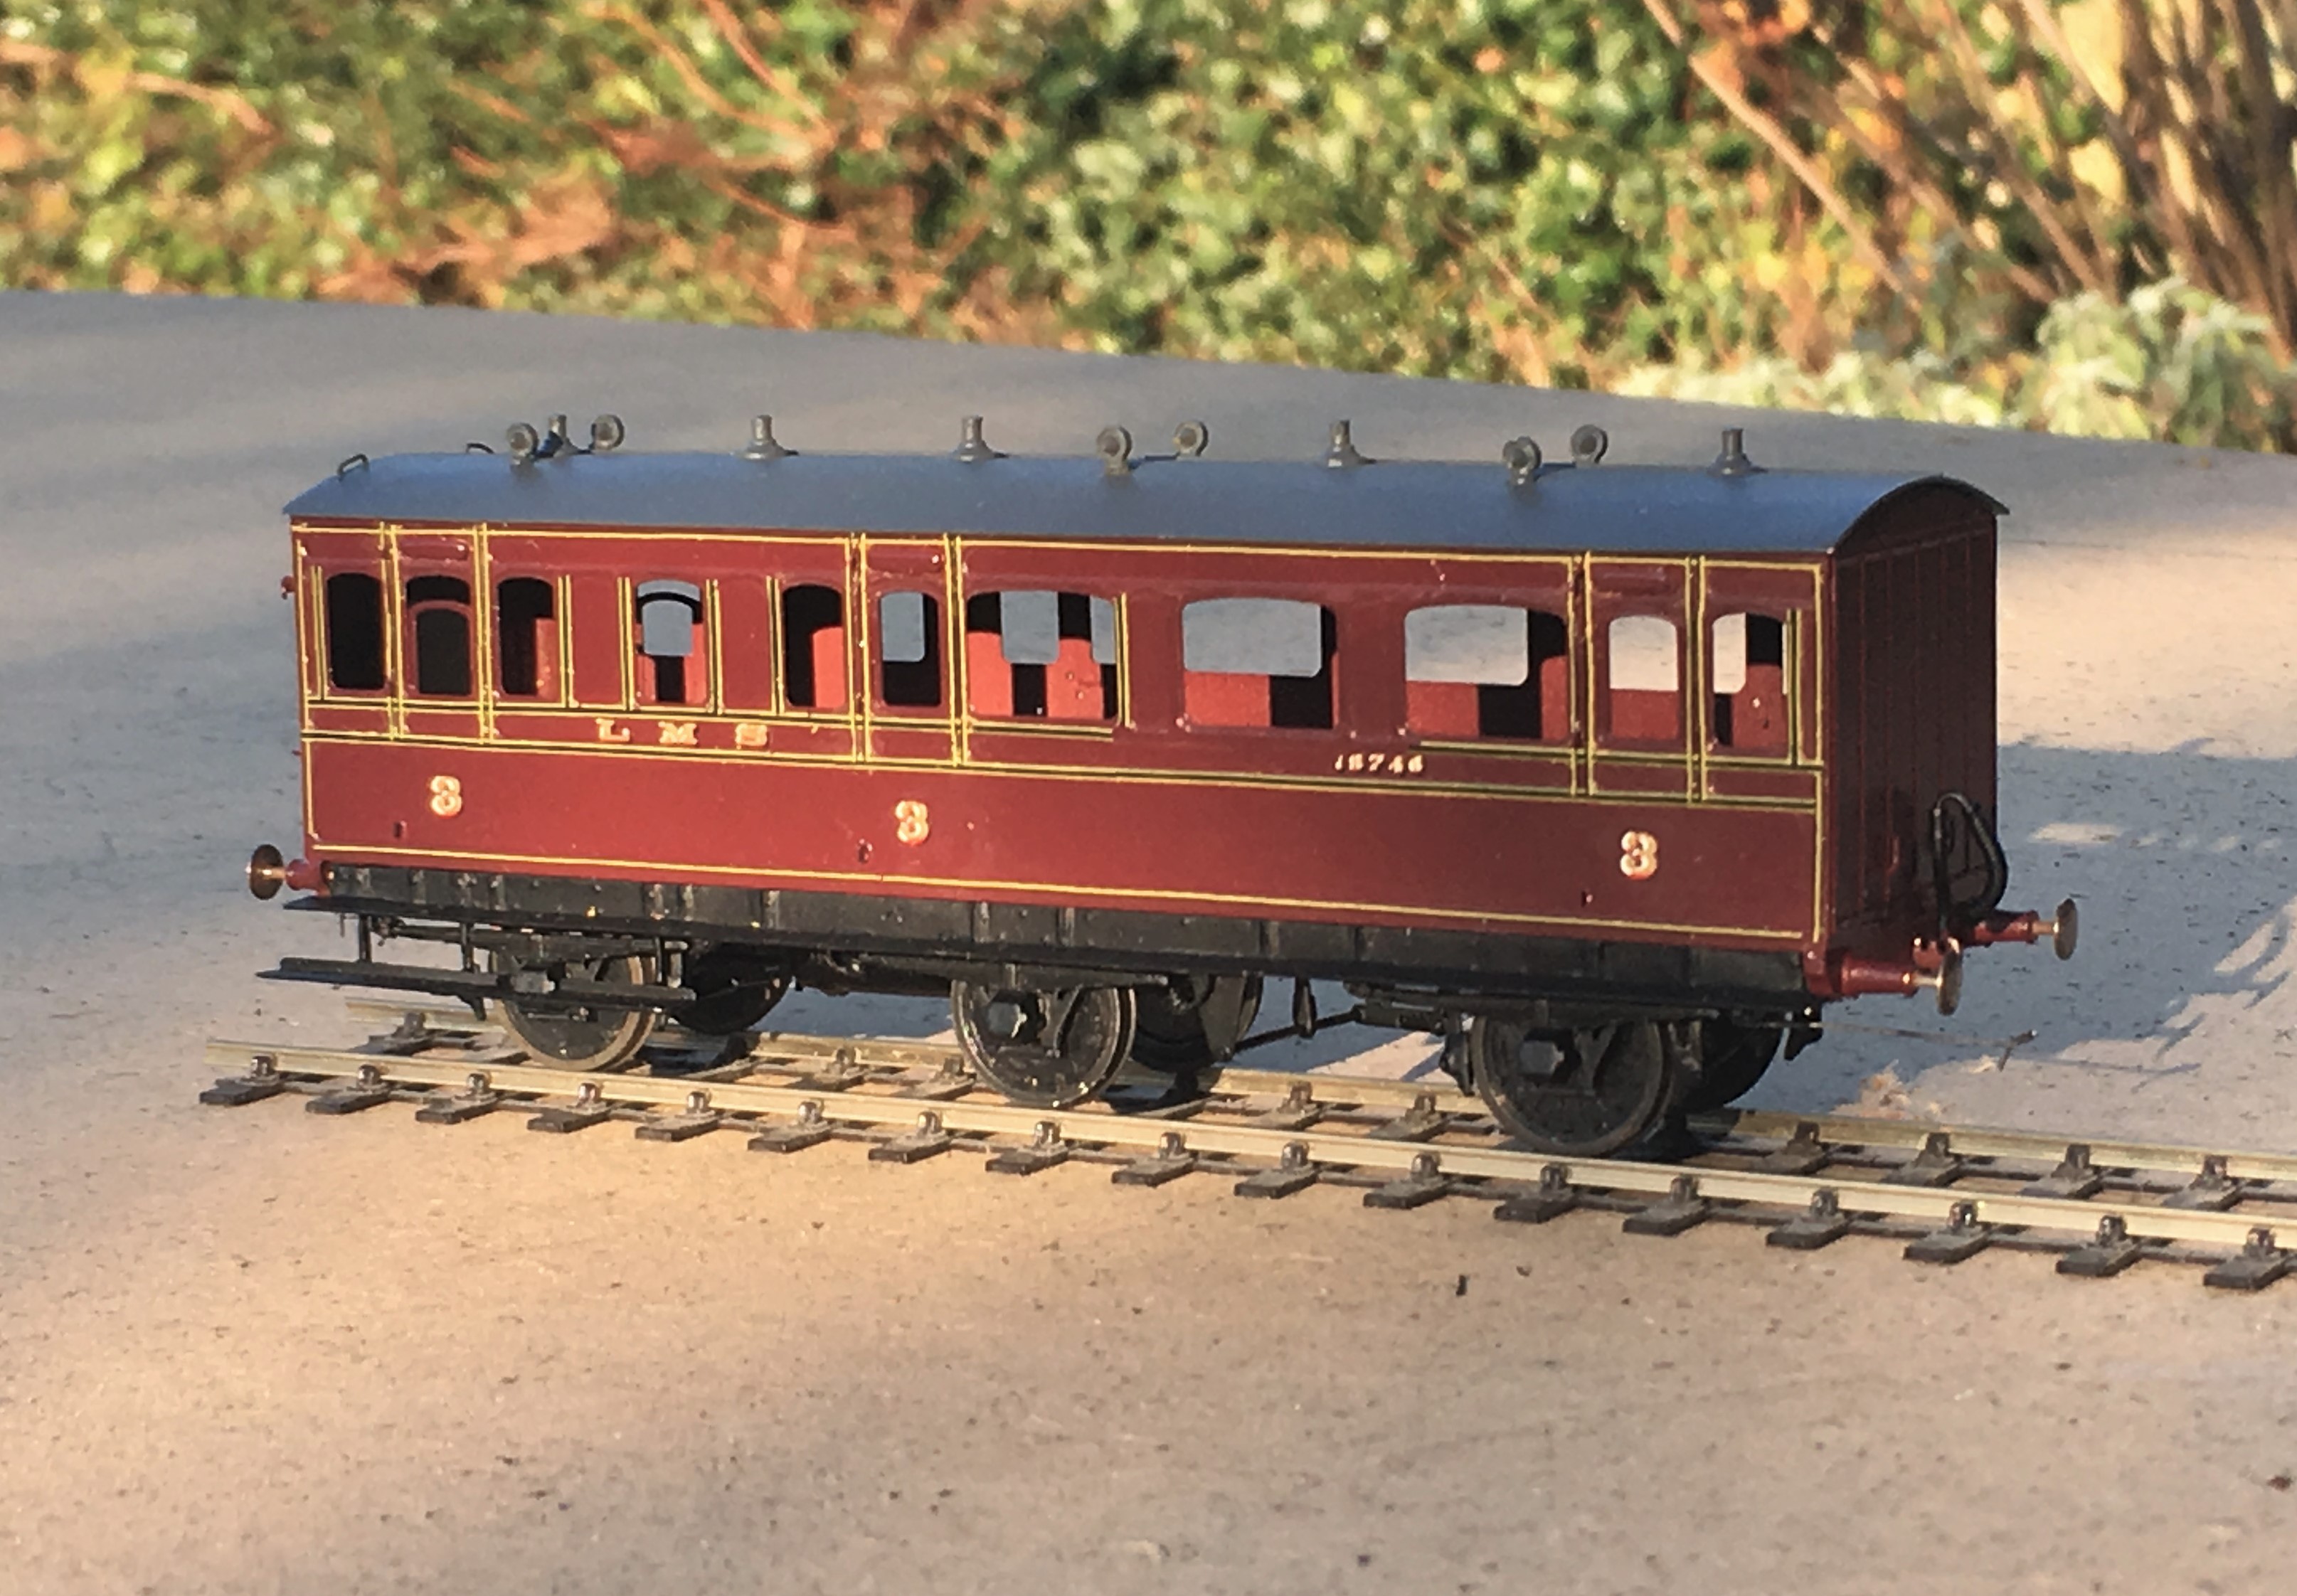
Dia 51 Test Build – Part 2: Nearly There
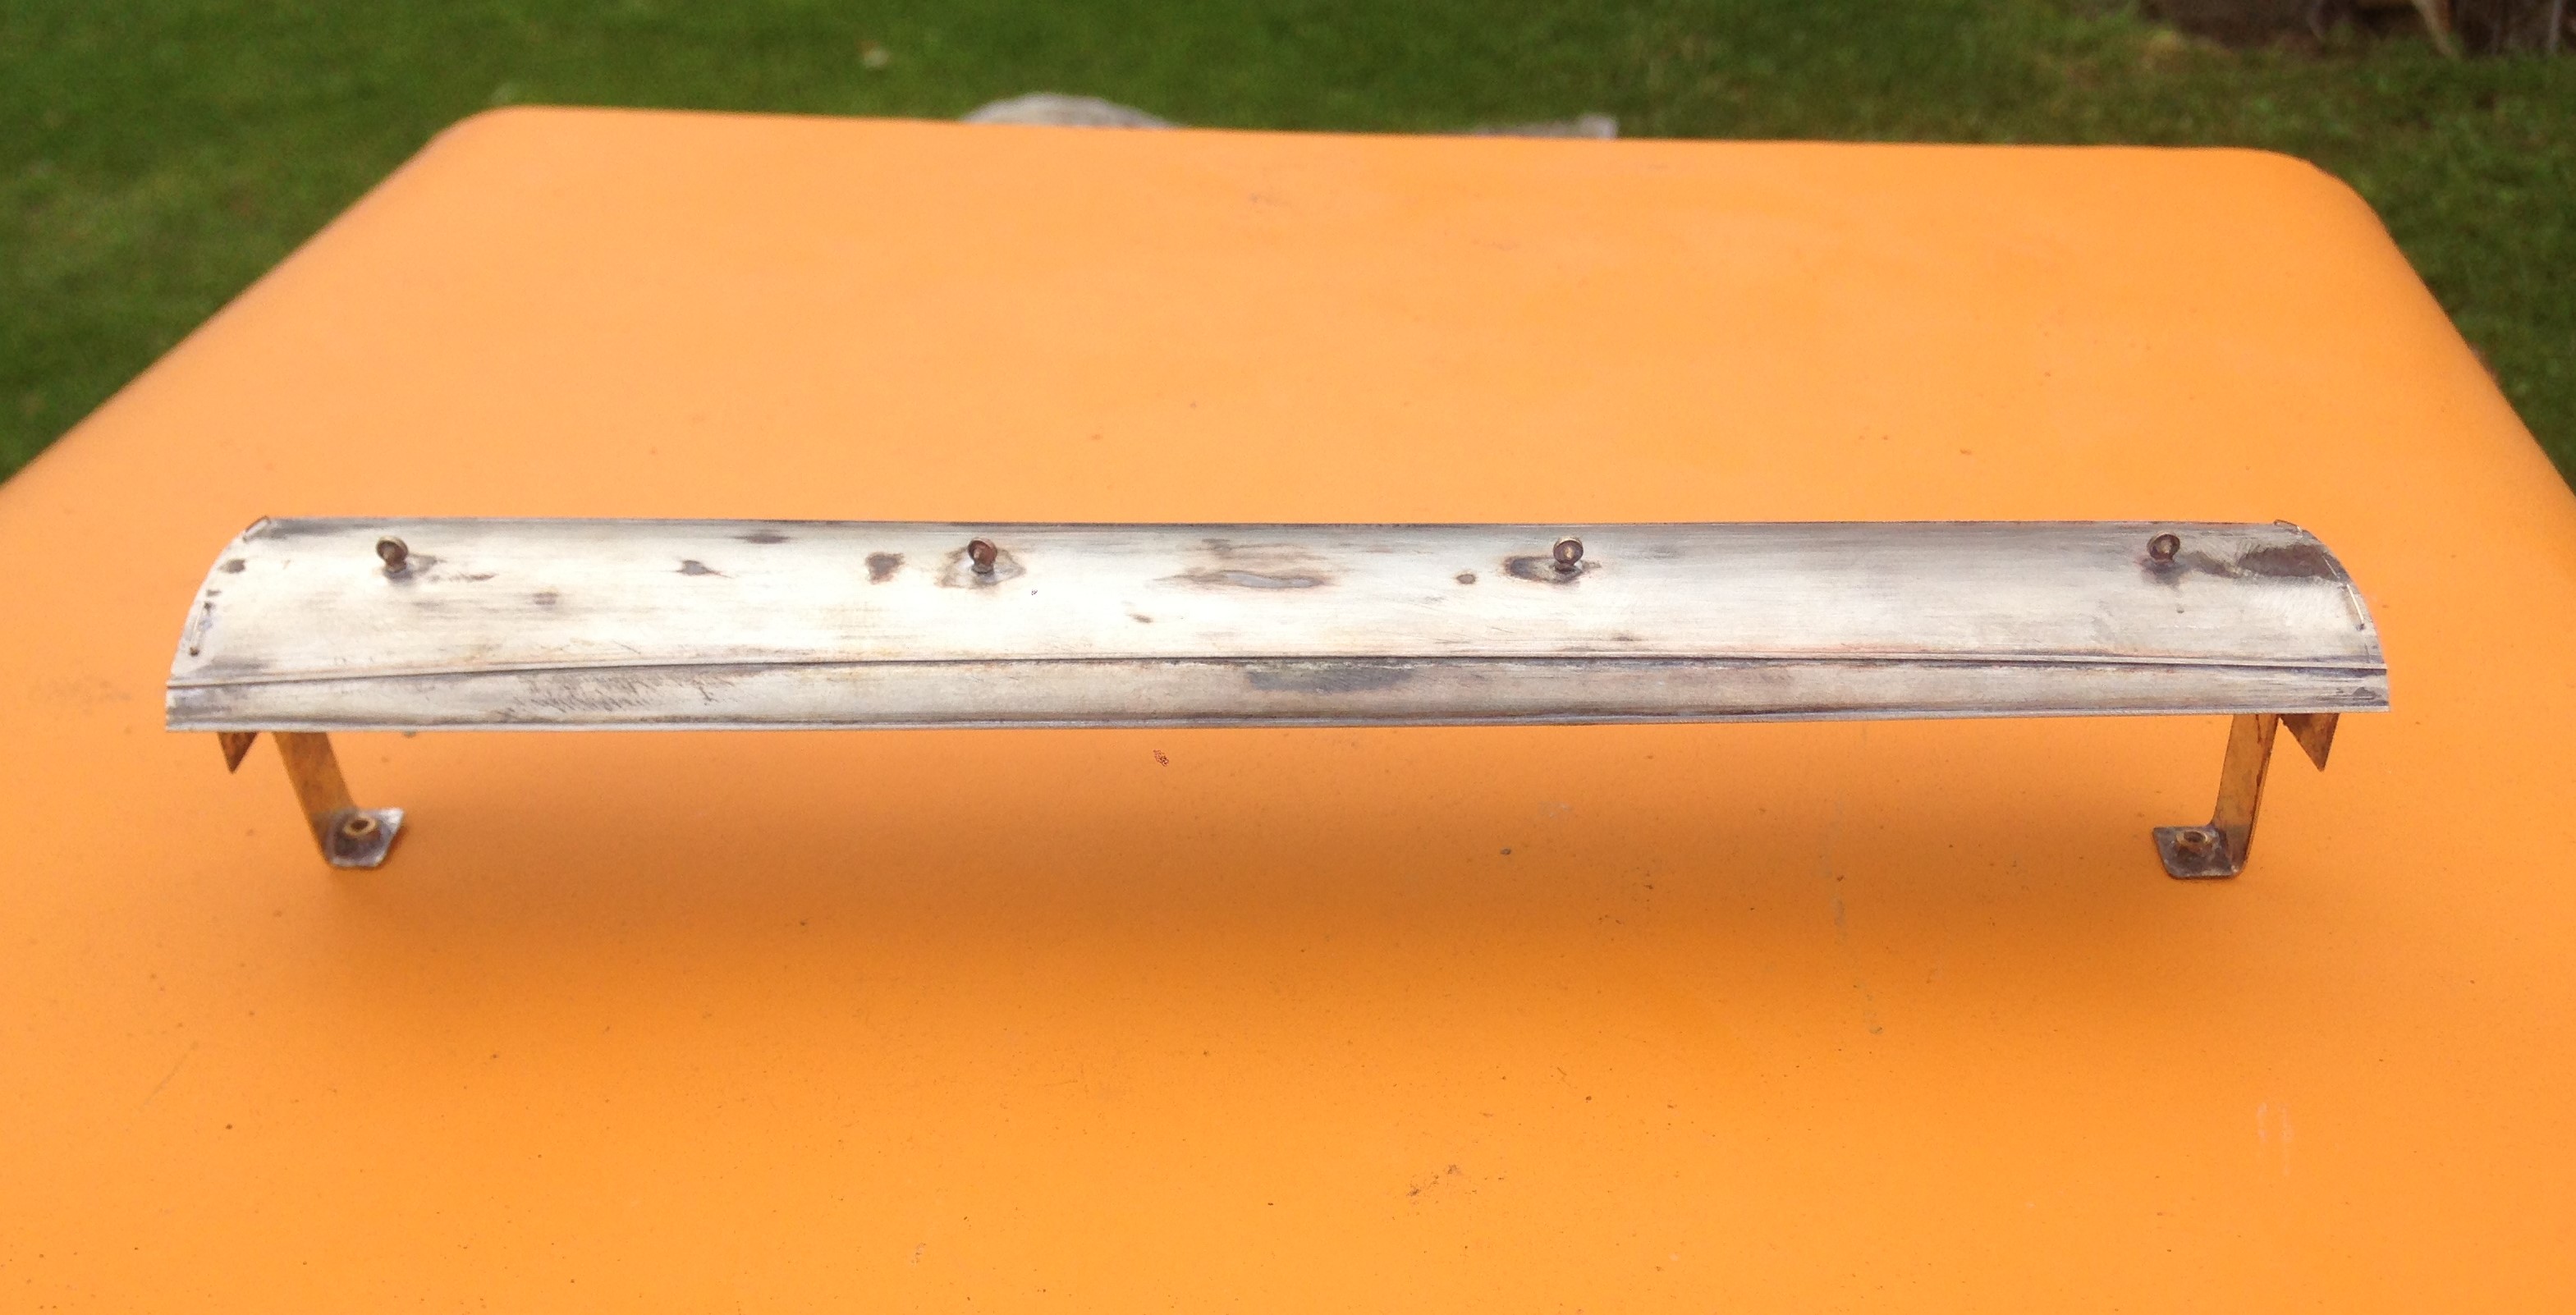
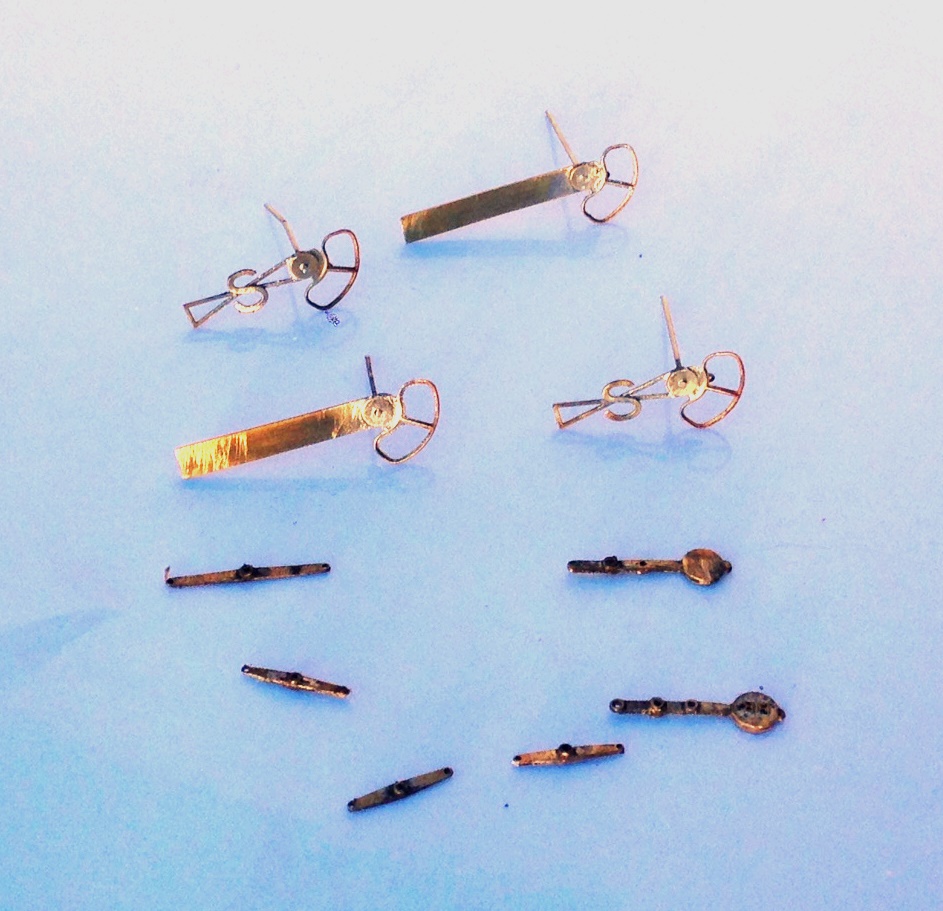
I no longer affix roofs firmly to the body of my coaches as makes both the building and the painting much easier. The downside of this is that there is the challenge of keeping the roof on tight without there being any visible joint between the two as this looks terrible. The solution I now use is to clamp this to the floor with 10BA bolts by way of brackets as can be seen in the photograph below.
As built, these coaches had full length step boards but they lost most of these through their life. They were electric fitted from the outset. The chassis below is close to finished except I have run out of vacuum cylinders so these will need to be added, along with the vacuum pipes.
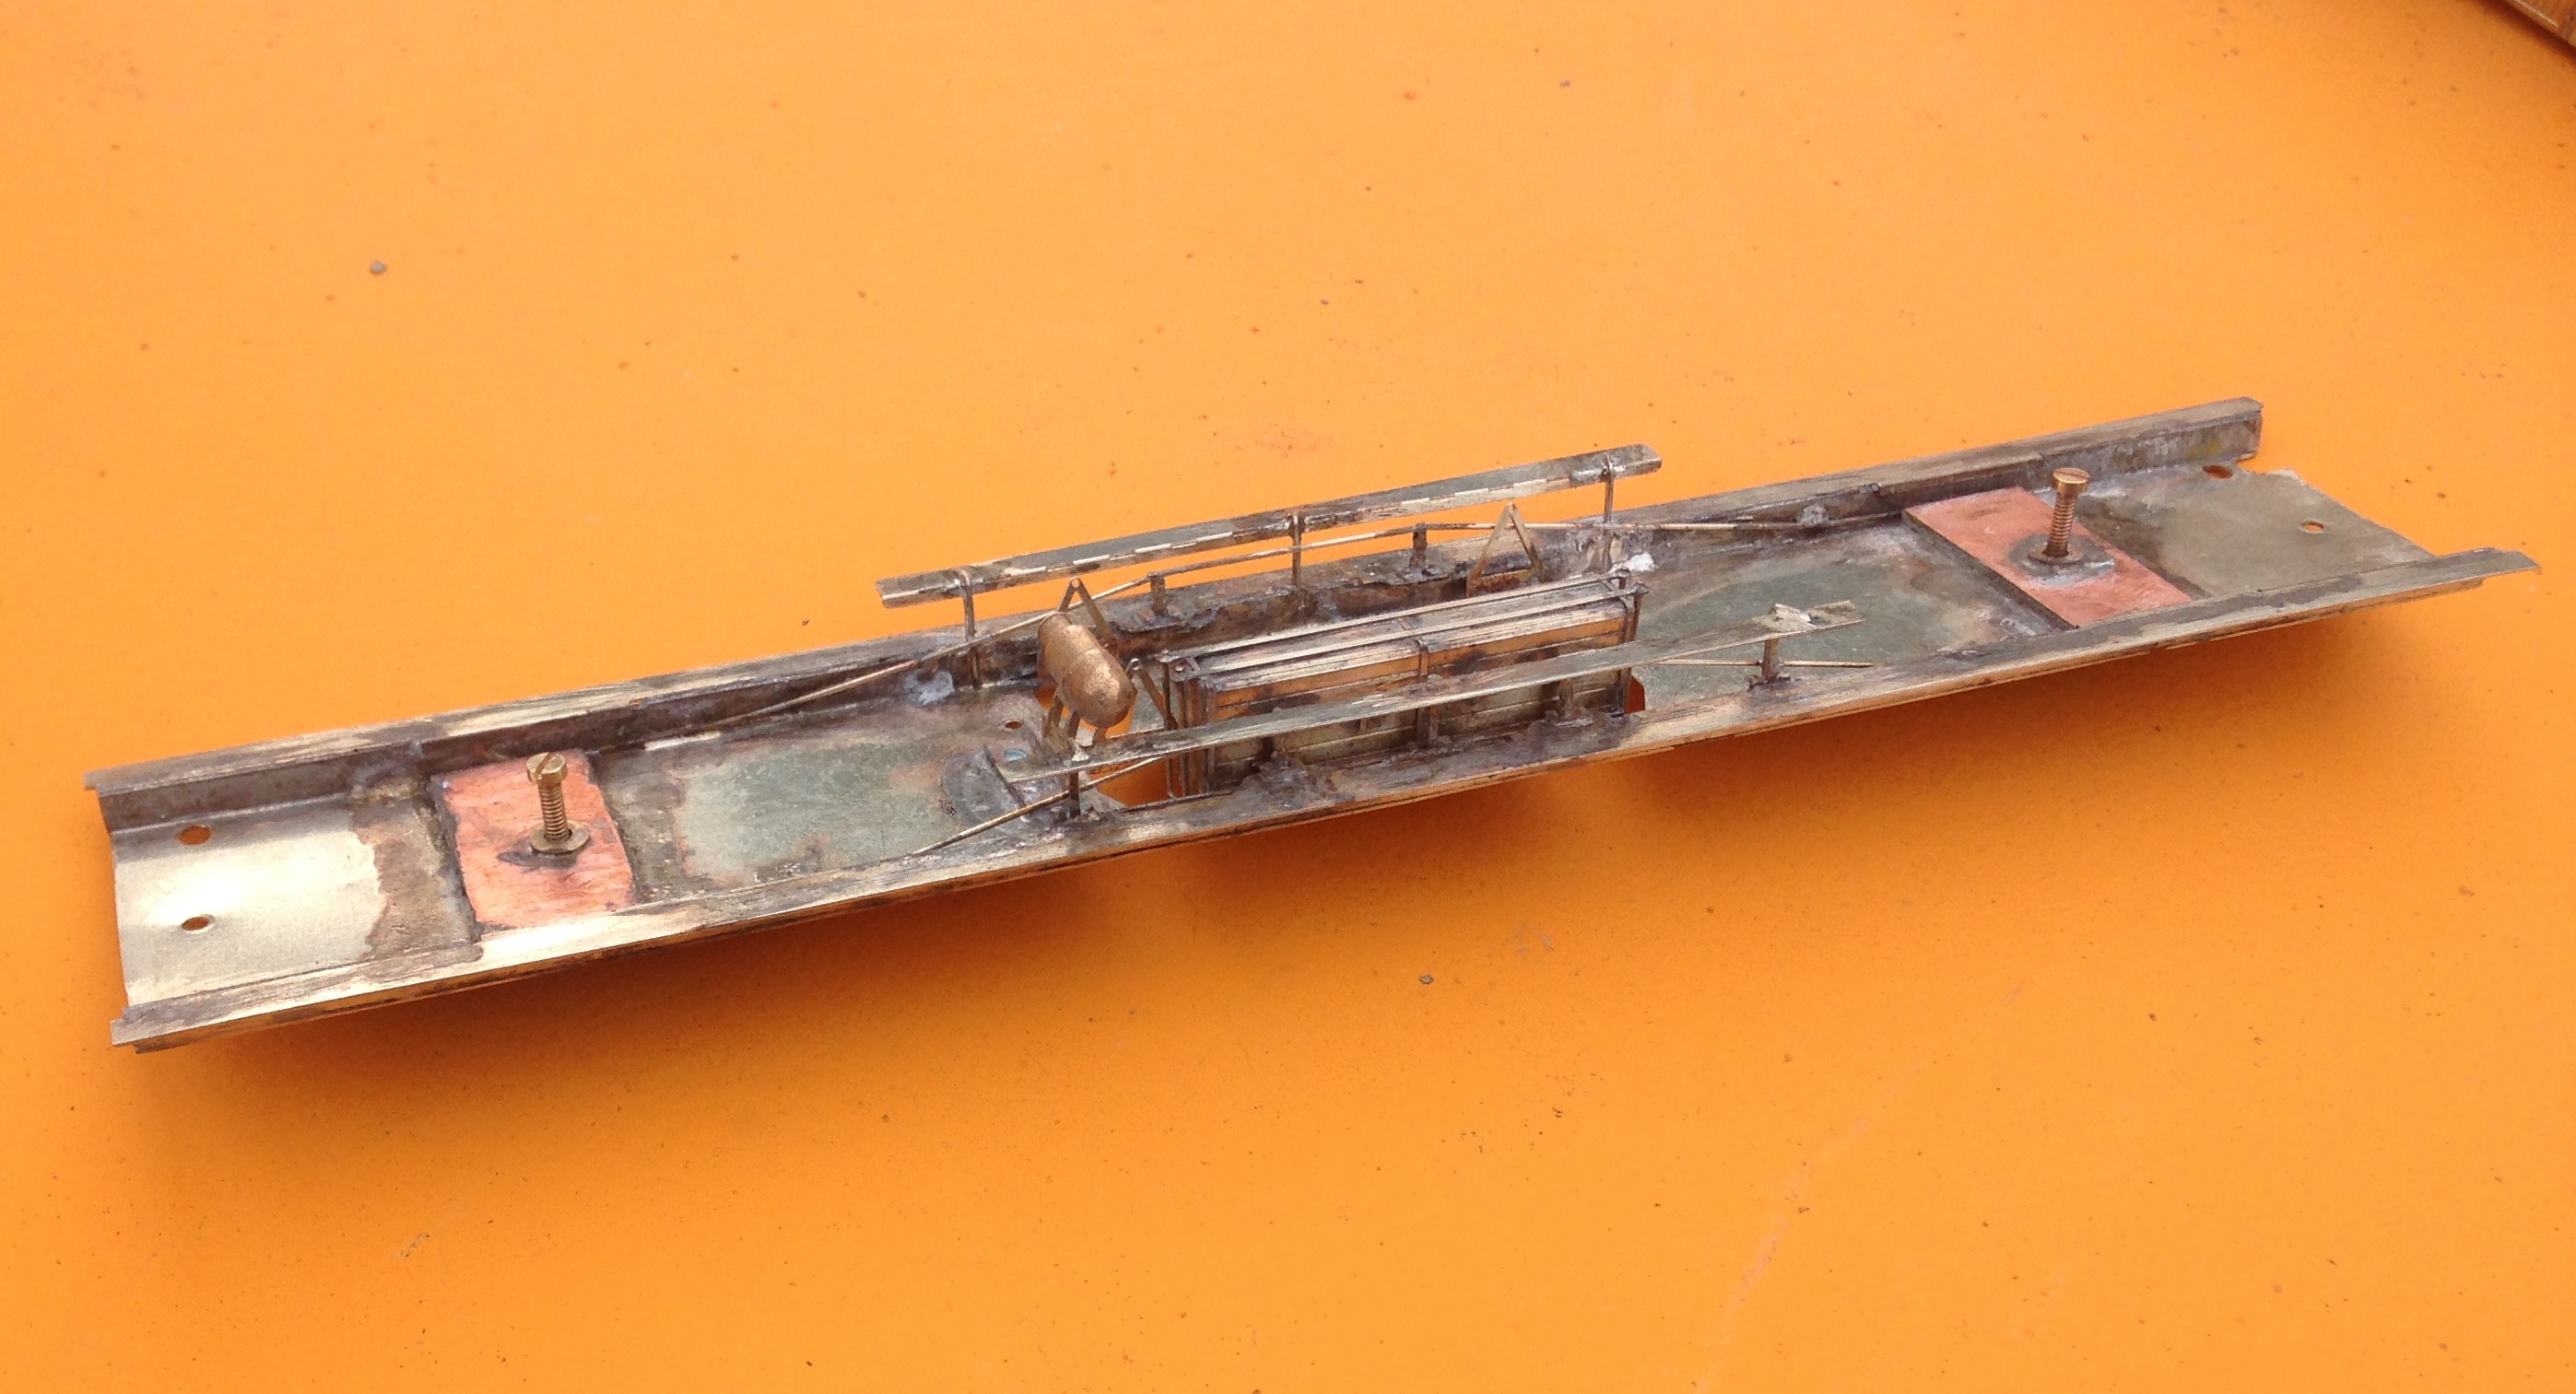
The bogies are also a key part of the proposed kit and are something that I have been working on with Justin Newitt of Rumney Models – the idea being to combine the sprung bogie design that he has prepared with cosmetic etches for the sides and then the castings from Lochgorm Models or perhaps our own in due course. The bogie is quite sophisticated with both primary and secondary springing – the latter is on the bolster and is as below.
The primary springing is on the axleboxes and has bearing carriers, much like the Bill Bedford sprung W-irons. There are still some wrinkles to iron out so it is not there yet but they do make up into some pretty neat bogies; don’t you think?
The only area of the first test build that truly did not work was the corridor connections and it is going to be a case of back to the drawing board for these but other than the final few bits to be completed, the build is finished and I think the vehicle is handsome.
So, off to the paint shops soon, but there is a bit of a holiday to squeeze in first!

Dirty Models……..
Now, I wonder if that heading will gather a few extra viewings………..?
As I have mentioned before on this blog, every few months I catch up with a group of mates to have a joint modelling session. The general gist of these is a combination of banter, a bit of modelling, more banter, a visit to the pub, even banter, a bit more modelling and all nicely rounded off with some more banter.
Last week saw us on the south coast to do some weathering – or rather some of us. One of our number was preparing for their imminent marriage whereas Oly (one half of OTCM) felt his budding TV stardoom was a sufficient excuse to hang up his airbrush. We do fear that Oly may not return to the fold; preferring instead to do his modelling with Brad, Leonardo and Denzil once he makes his silver screen debut in the autumn – don’t forget your roots Oly……….
We were all concentrating on different things; Peter constructed the better part of a bridge for his Aultbea layout and Chris was weathering some rather neat little shunters. For my part, I concentrated on weathering some of the stock that I have been building lately (and sometimes not so lately!):
First up is a pair of horseboxes. On the right is my HR version based on a Microrail kit – still in need of some glazing. On the left is the Caledonian’s equivalent based on a kit from by Spratt & Winkle. Both are in their pre-group livery as can be seen. As such stock was used in passenger trains, I have sought to give them an aged but largely cleaned feel – with the dirt largely present around ironwork and difficult to clean spots.
Having mucked up the weathering of some brake vans at the previous weathering session, I was also keen to get these corrected. This is where I have got with them.
As can be seen, I do not follow the school of thought that the pre-group or 1920’s era stock was constantly pristine. If you bother to look at contemporary photographs, little is clean and some of it is downright grubby. Railways in the steam era were very dirty places; it is inevitable where so much coal, ash and smoke prevail. Furthermore, I can not see even the most houseproud of railway companies regularly (or probably ever) cleaning their goods stock and most of these show stock that is care worn and soiled. This is the feel I am seeking to capture; not the utterly neglected and on its last legs look of the final days of steam but of railway materials that earn a living the hard way.
The pair of brake vans above are to HR diagram 39 from 1922 and are from a Lochgorm Models kit. There is some doubt whether they were delivered in 1922, as there are no known pictures of any of them in HR livery. However, I applying the “its my trainset rule” a number of modellers have painted them in Highland colours; including Paul Bannerman whose example is below.
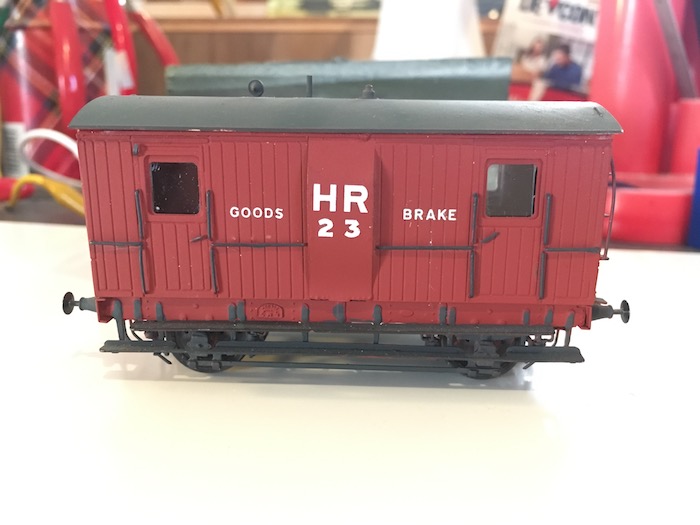
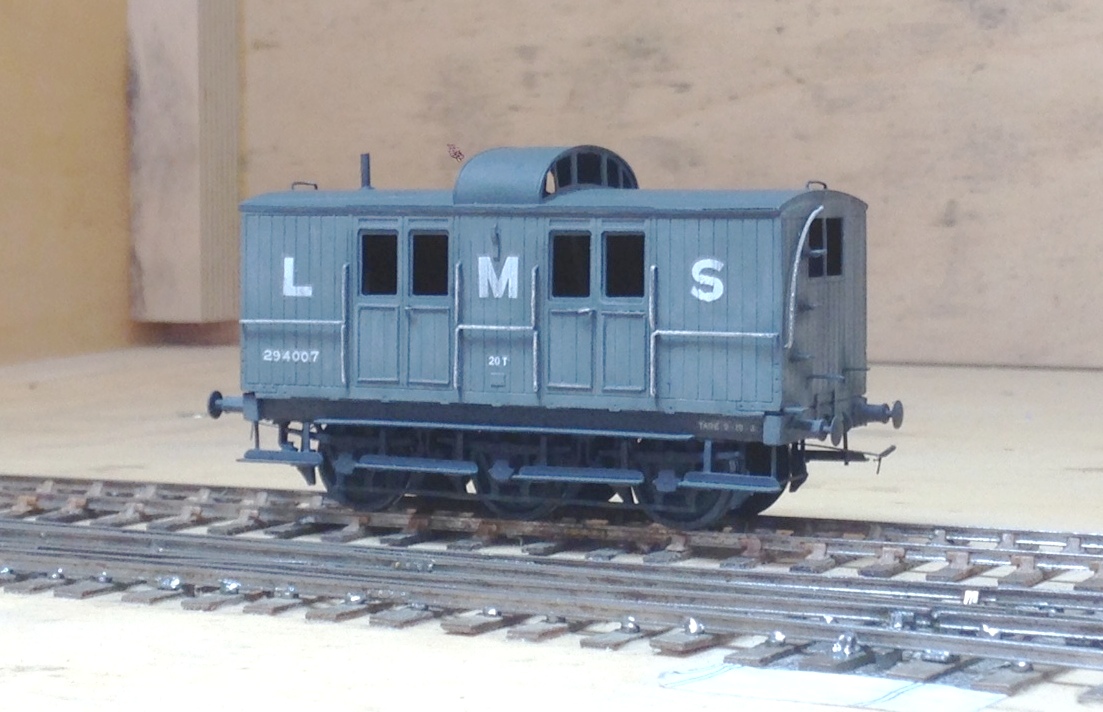
The other highland brake van I weathered was the diagram 38 brake van. This originates from a Microrail kit and may well still be available from David Geen occasionally at shows as he does own the rights to the artwork. I have modified this with the early pattern roof look outs. These allowed the guard to look over the train around the twisting curves that characterised parts of the Highland’s system. However, there were complaints about whacked heads as the guards came up and down the steps to look onto the lookouts and as a result they were modified with approach cutouts on the roof – take a look at the Lochgorm’s page above to see an example.
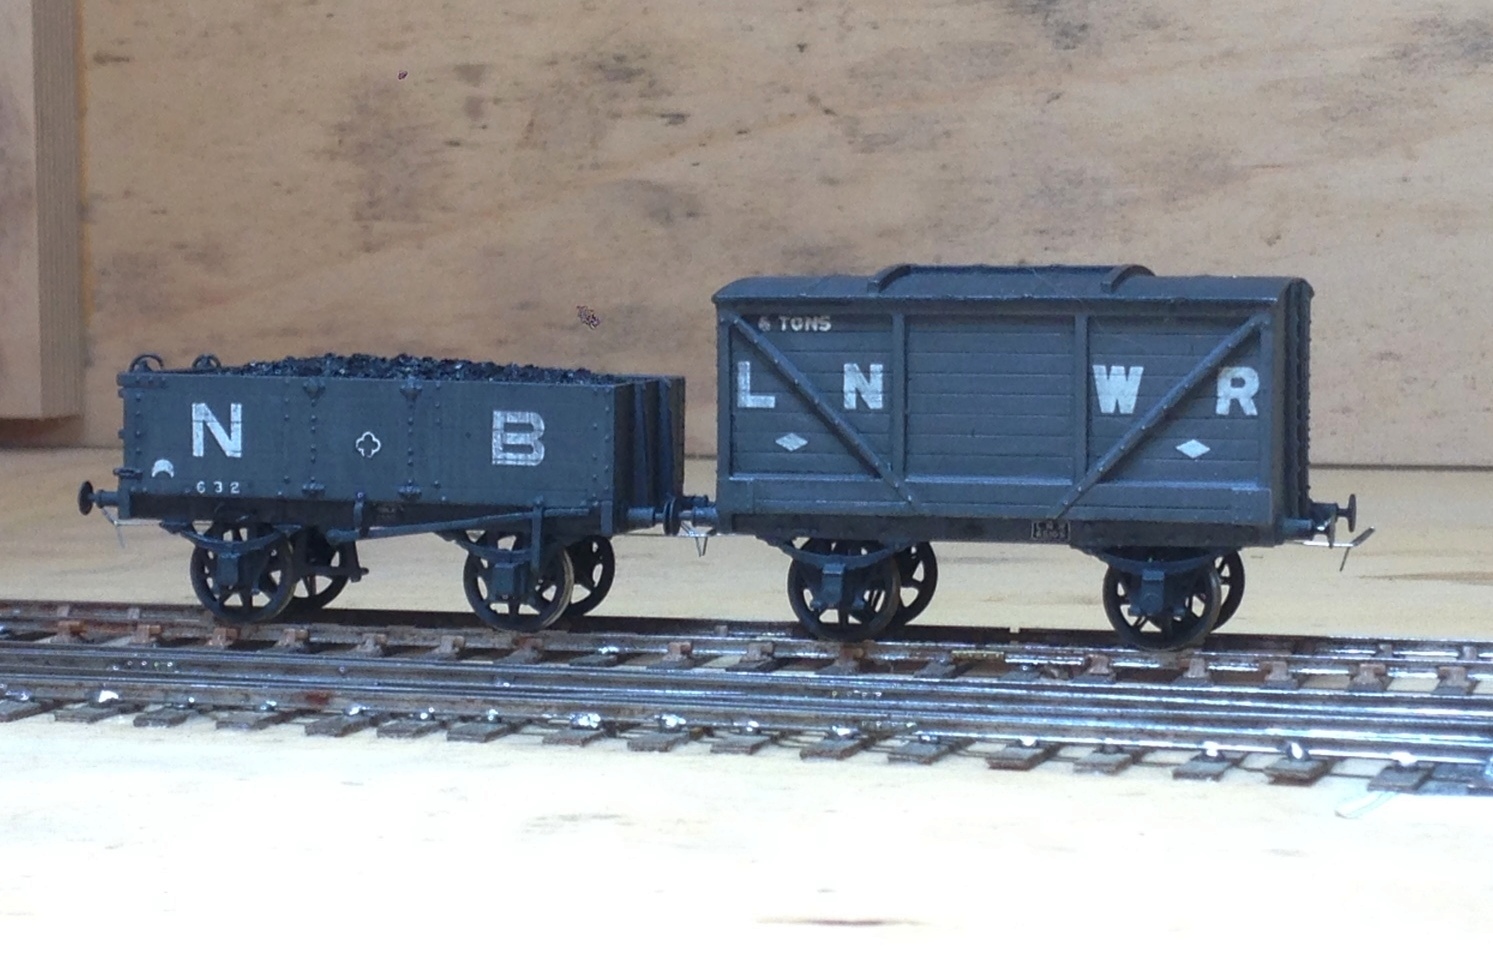
Next up on the weathering front were some wagons and NPCS. The first pictures being the weathering to a couple of the items I have described in the pages here – the Oxford Rail NB jubilee wagon and the Mousa Models LNWR van.
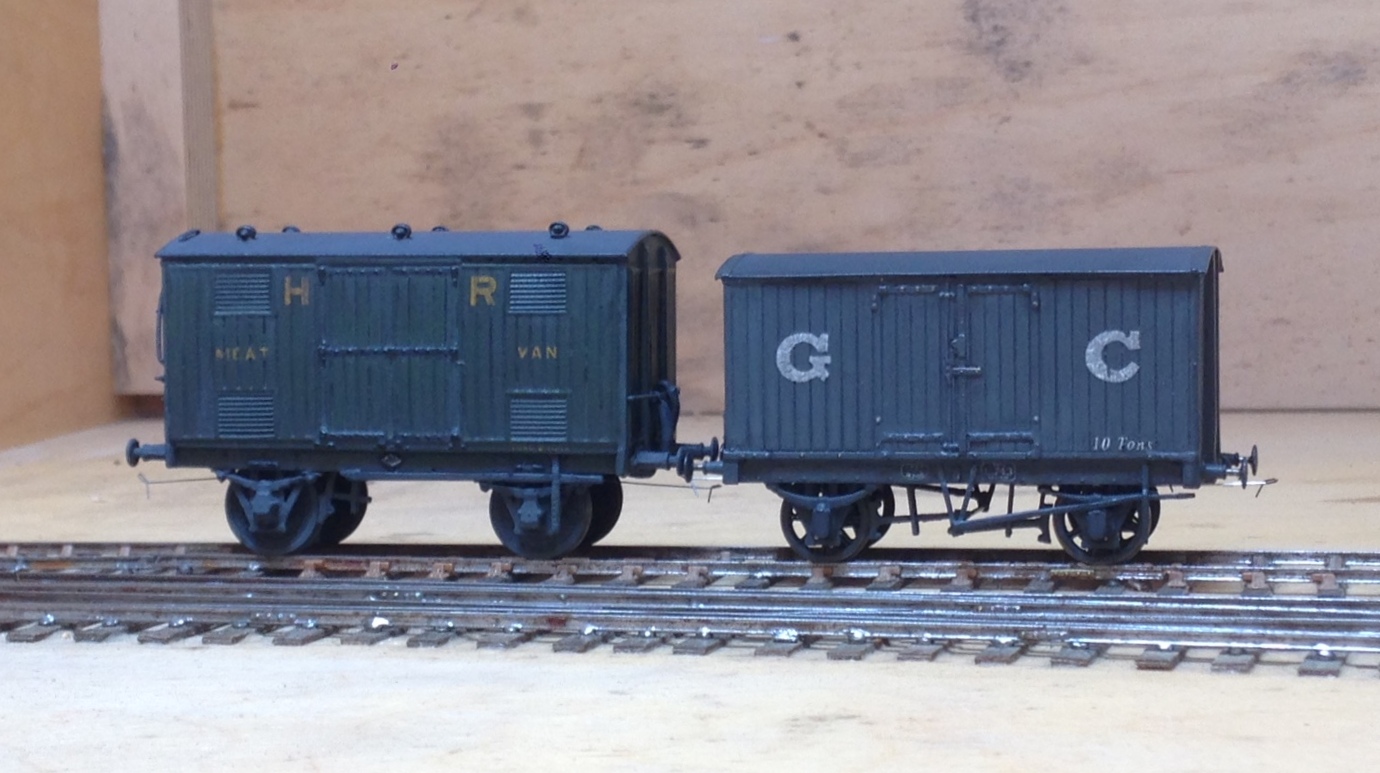
And then some rather more ancient models of mine, a Highland Railway meat van from a Sutherland Castings kit and a GC van from another Mousa Models kit.
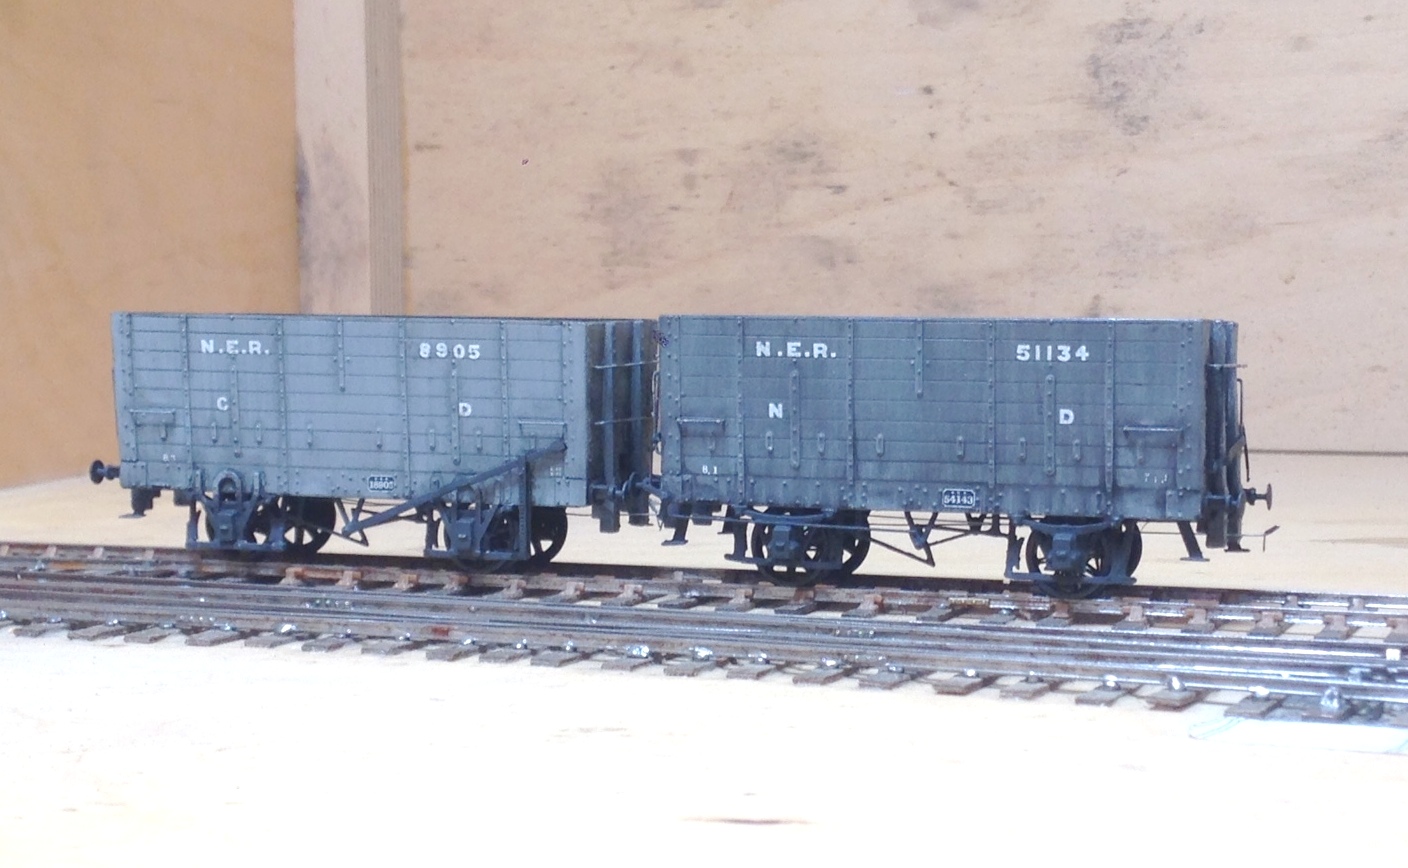
Finally, a group of wagons for Benfieldside. The hoppers have been seen before and the brake van we will hear more of another day.
")
Christmas Layout Wiring (Not!)
I promised a number of people that I would be making sure that the layour had at least the main elements wired up over christmas, so that it could at last run. But then it was a bit wet and cold so I did not fancy it out in the summerhouse so I applied rule no 1 – its my trainset!
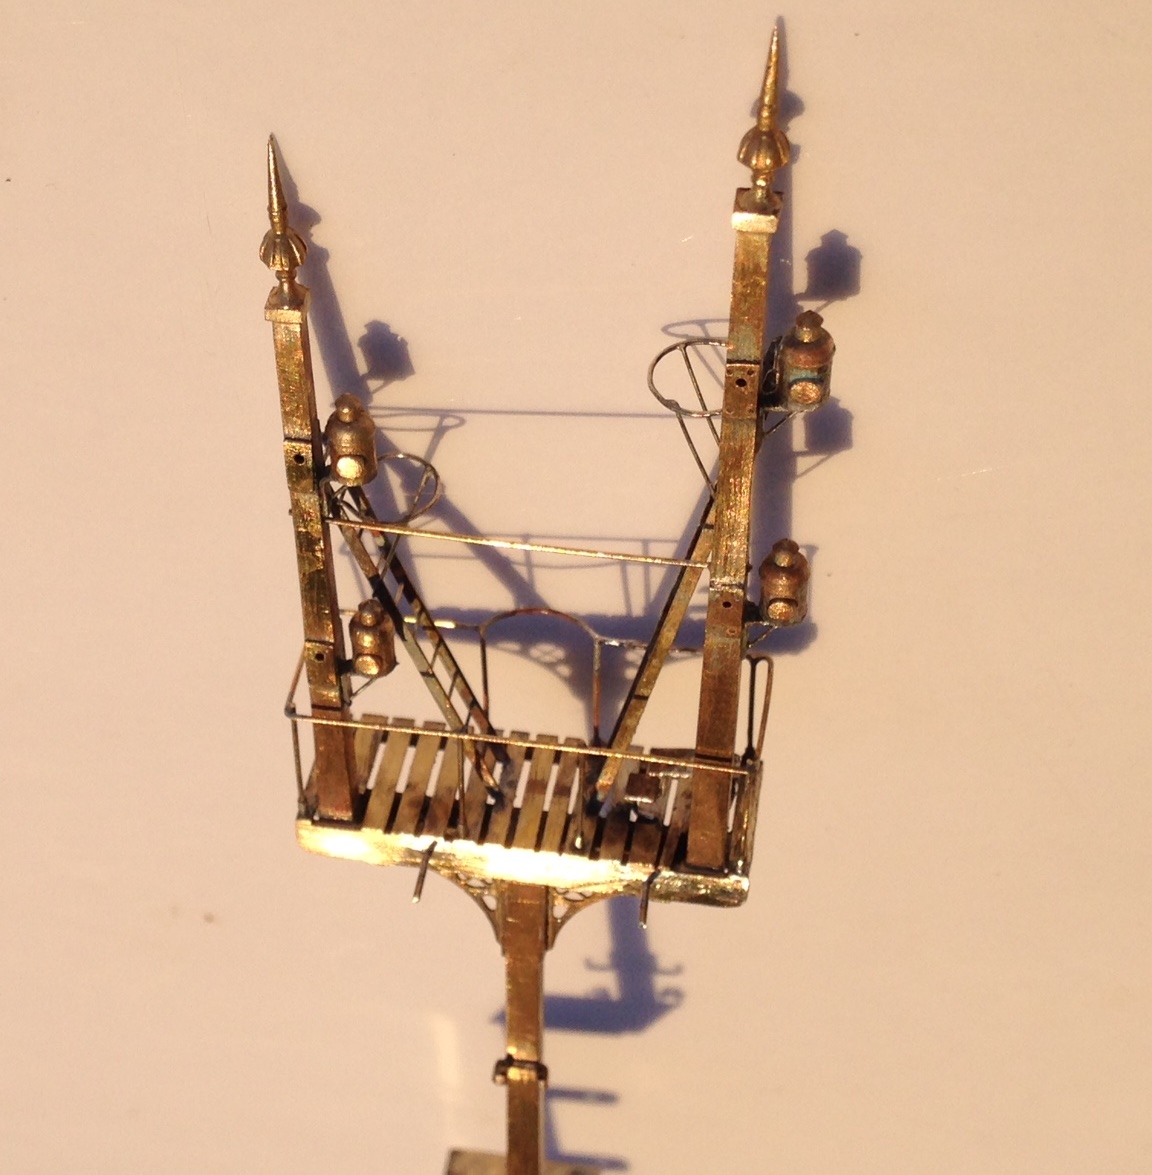
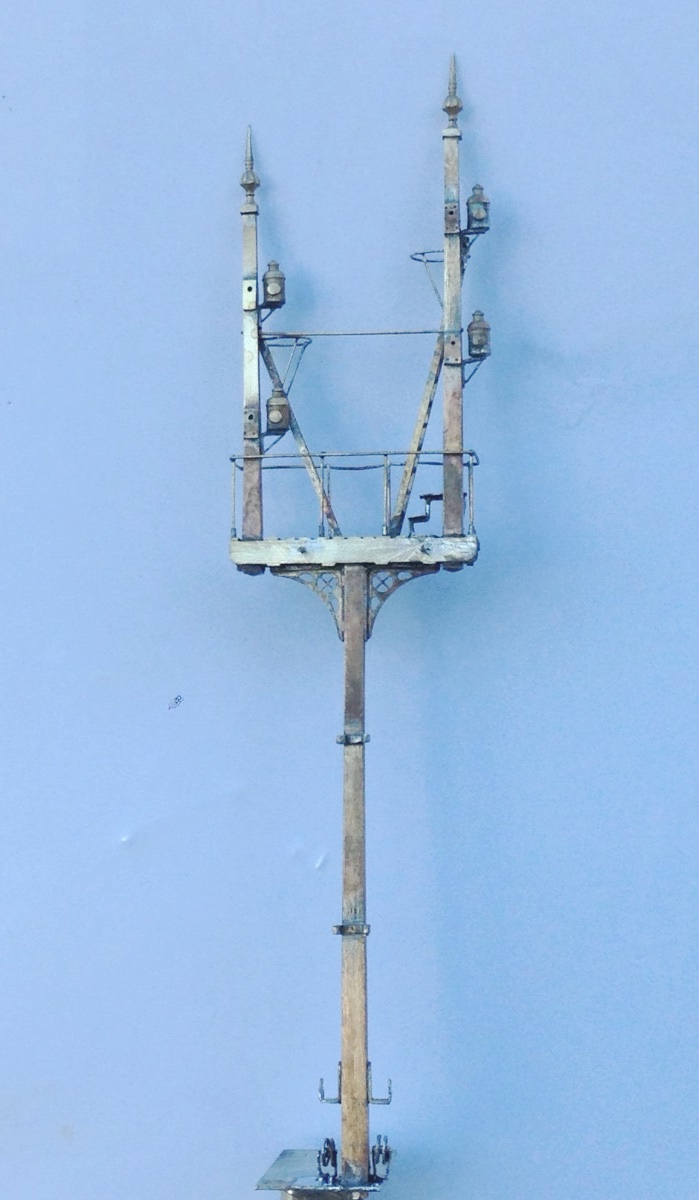
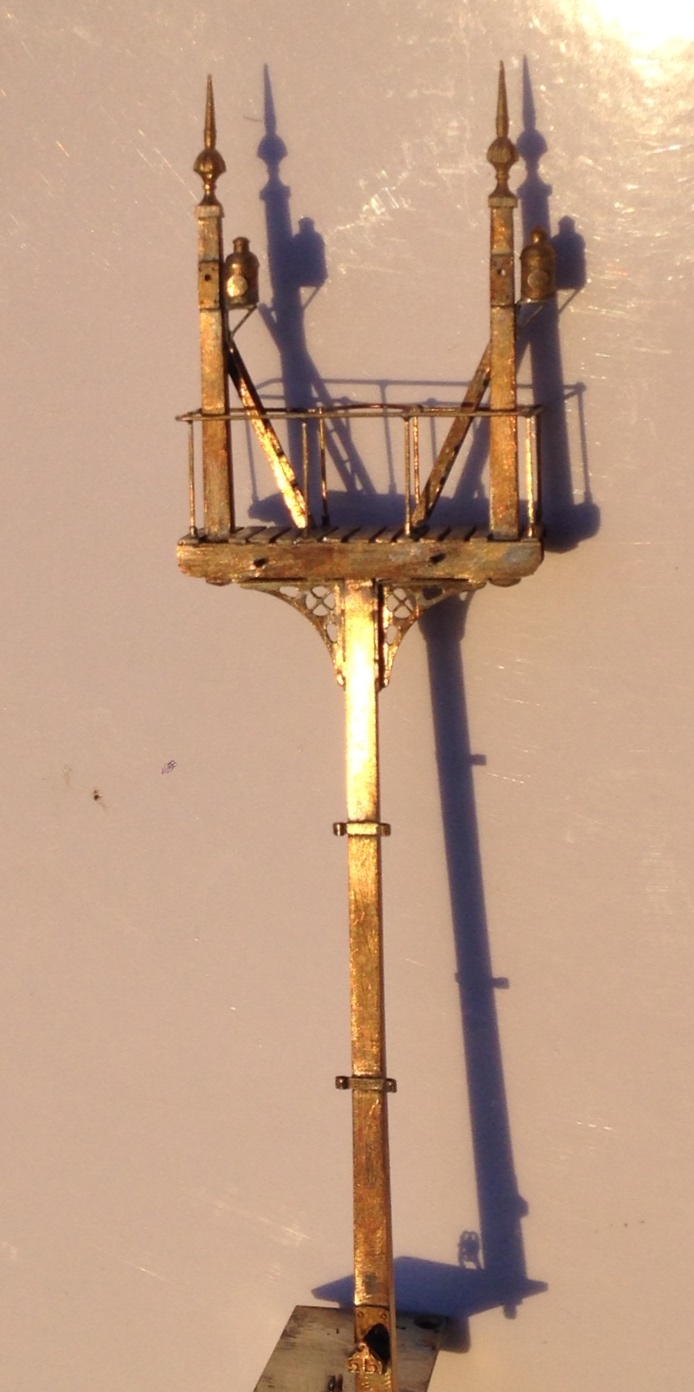
Instead, I stayed at the bench and made a pair of the signals that still remain to be made for Glenmutchkin. The signalling plan has developed very slightly since I originally showed it back here and is shown below (actually this is the artwork for the control panel facia).
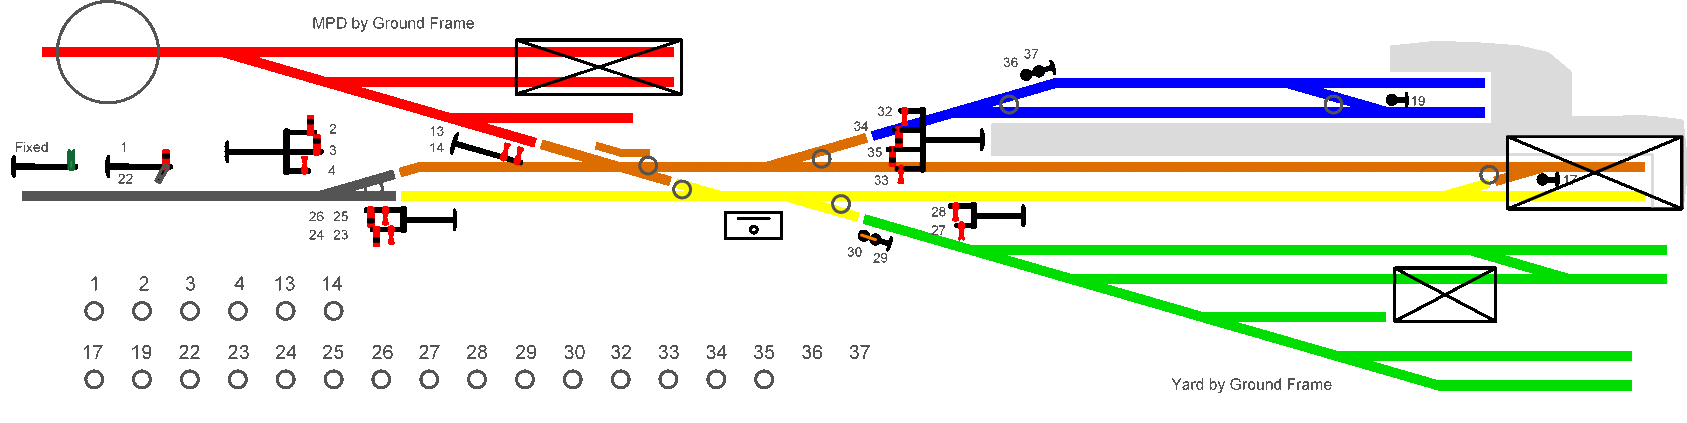
The signals that I built were those that control the main loop prior to the shed link – levelrs 27 & 28 – and then the outer starter (that covers both the main loop and the main line) – levers 23, 24, 25 & 26. Only a pair of two doll signals, I thought, they shouldn’t take more than a day or two? Phew, well that wasn’t right; the more you look at the prototypes, the more you find there is to model!
Having created much of my own etchings and castings for MacKenzie & Holland signals I have obviously made good use of these. In this case, the small brackets, arms, ladders and castings.
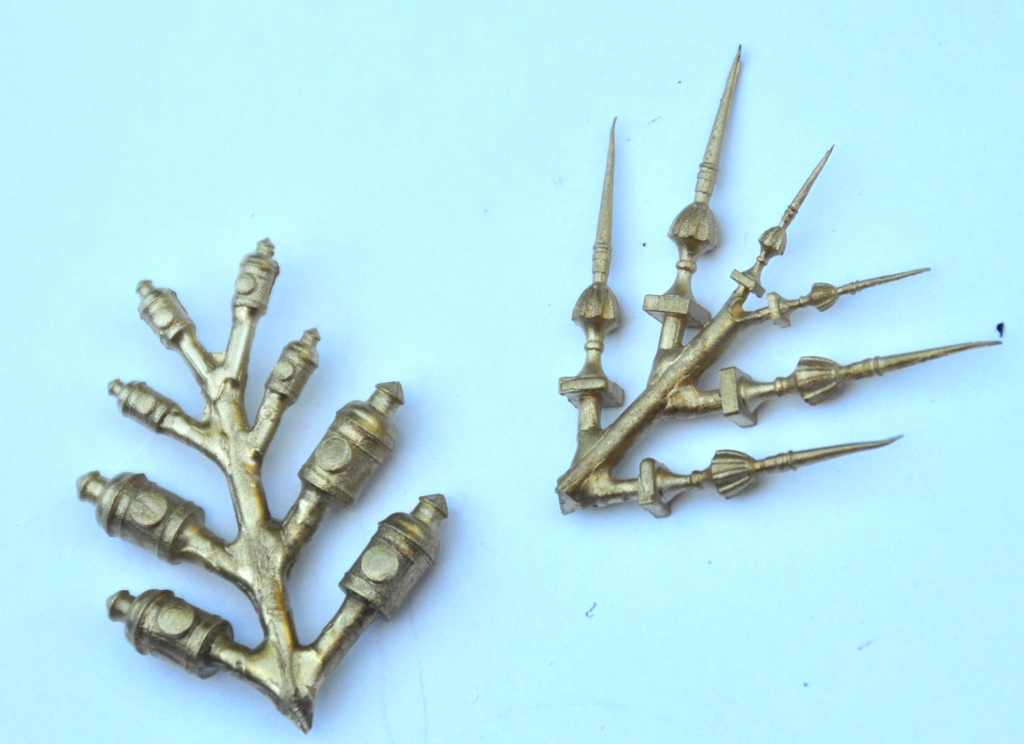
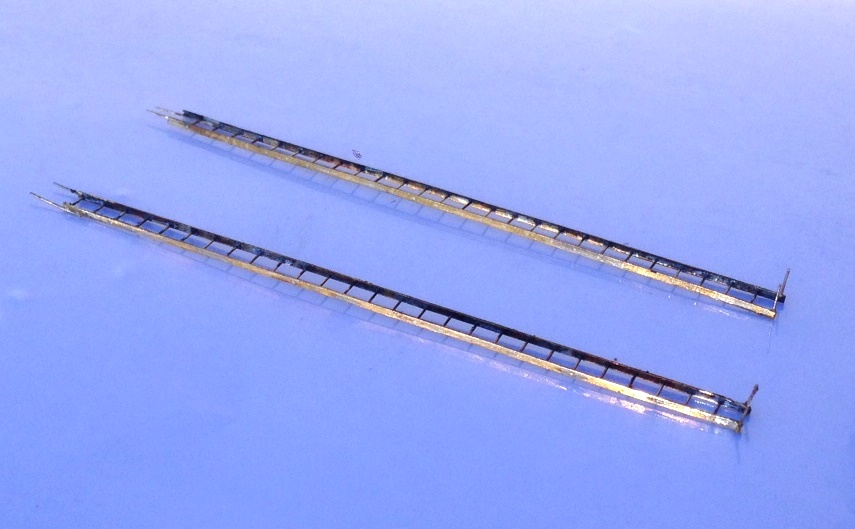
Both of the signals have used the small brackets to create smallish landings. The smaller of the two signals has only one arm per doll, the larger two. The dolls and the posts are made up of square brass section which is filed to a taper – a certain amount of elbow grease is needed to acheive this! The posts are then sandwiched between some transom beams that also clasp the doll post – this is all soldered with a high melt solder to stop it ungumming later.

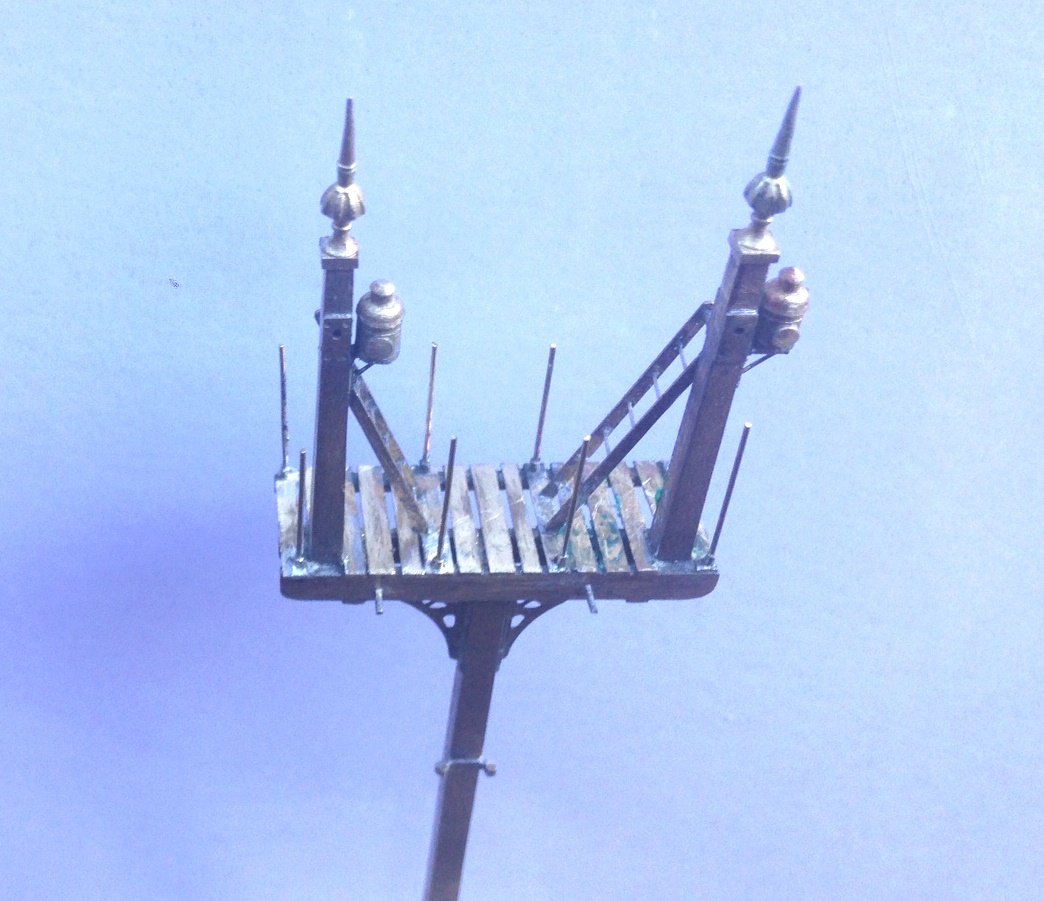
The brackets are then offered up from below, with scrap etch forming the bearing plates to pick up the transomes. In the etch I also included smaller brackets to pick up the free end of the landing, along with the landing itself. This gets you to the stage shown above.
But this is not the half of it on a signal, there are the finials, lamp brackets, lamps, cross stays, access steps, access ladders, pivot plates, handrails, operating cams, safety hoops and ladder still to do………..
 .
.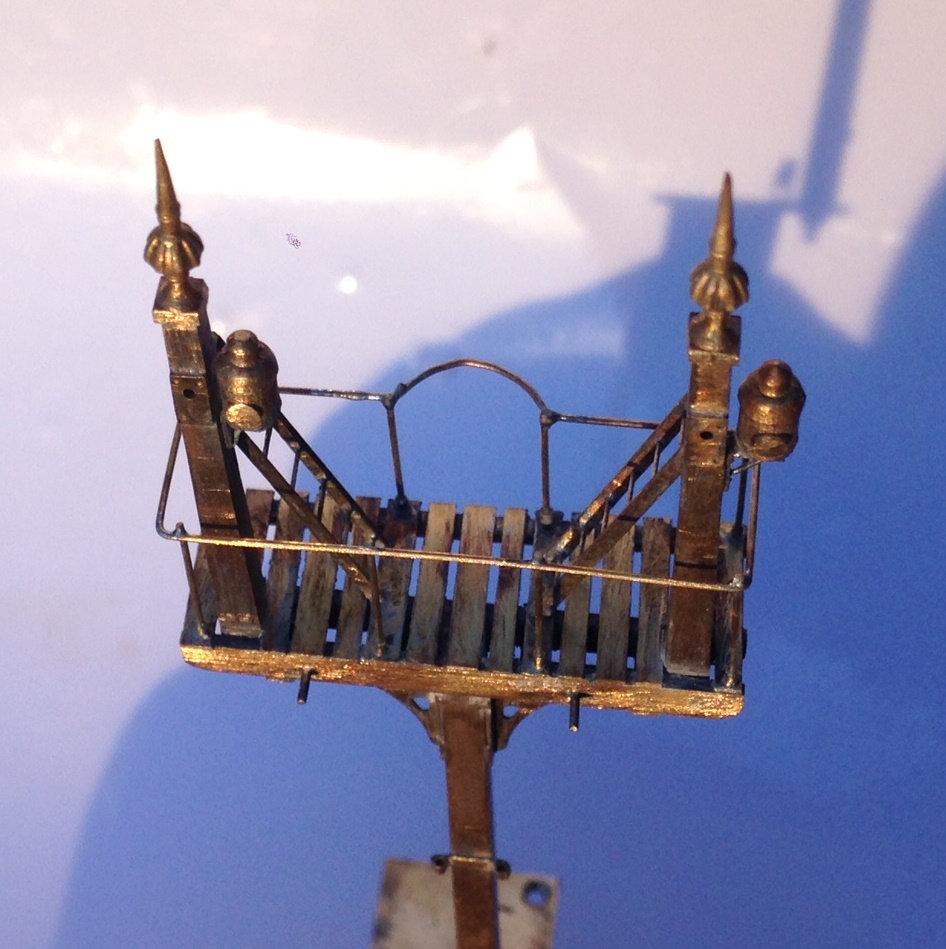
In a departure from my previous practise, I made the main ladders detachable (they will be held with the wire that can be seen in the pictures being turned over in secret pockets. I am also going to paint this prior to the final assembly; which will mean some touching uo of the painting later but I hope will make it easier.
And of course, I had to sign them with these rather nice custom name plaques from NBR 4mm Developments.
This is the first time that I have used the brackets in signal making and I was pretty chuffed with how they have come out. This is where things presently stand and we head for the paint shops tomorrow…….

Going Long…….Part 1; the Underframe.
In comparison to the coaches that I use on Portchullin, most coaches from the 1920s (my chosen period for Glenmutchkin) are shorter and in many cases, even without considering the six wheeled vehicles, a lot shorter. This was driven by the technology and in particular the materials available to the railways of the time. There were exceptions though, and my present build is dealing with one of these – an East Coast Joint Stock 12 wheeler.
In the early 1890’s, the journey north was all about speed and culminated in the Railway Races to the North where the rival east and west coast companies competed to get their services to Aberdeen first. This came to an abrupt end in July 1896 when a west coast train took curves too fast at Preston and left the rails. Although the loss of life was relatively limited (for the time), excessive speed as a result of the desire to “speed to the north” was firmly blamed. As a result, the competing companies agreed no longer to race each other and instead sought to compete on the basis of the quality of their service and the luxury of their trains.
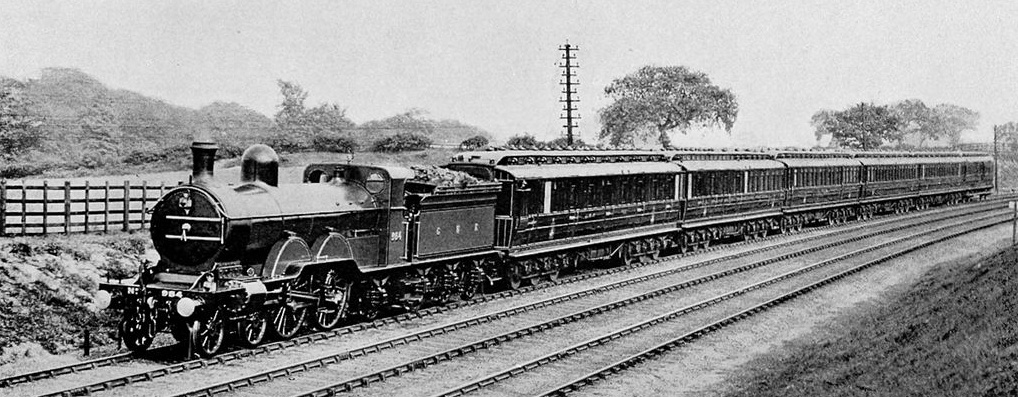
A GNR small altlantic hauling an ECJS express at the turn of the 19th Century made up predominantly of 12 wheeled stock
One product of this competition were some really fine 12 wheel coaches built for the East Cost Joint Stock Company (which was a joint company with the GNR, NER & NB contributing to the cost for trans-company trains). Built from 1896 onwards, these were several different lengths (this particular example was 66’11″) but all were long, seeking to use length and mass to iron out any track irregularity. To support this length of coach, six wheeled bogies were used, although these were rather infant in their design and used big transverse leaf springs as bolsters. In addition to being really characteristic and obvious – so they need to be modelled – I suspect they gave a somewhat bouncy ride!
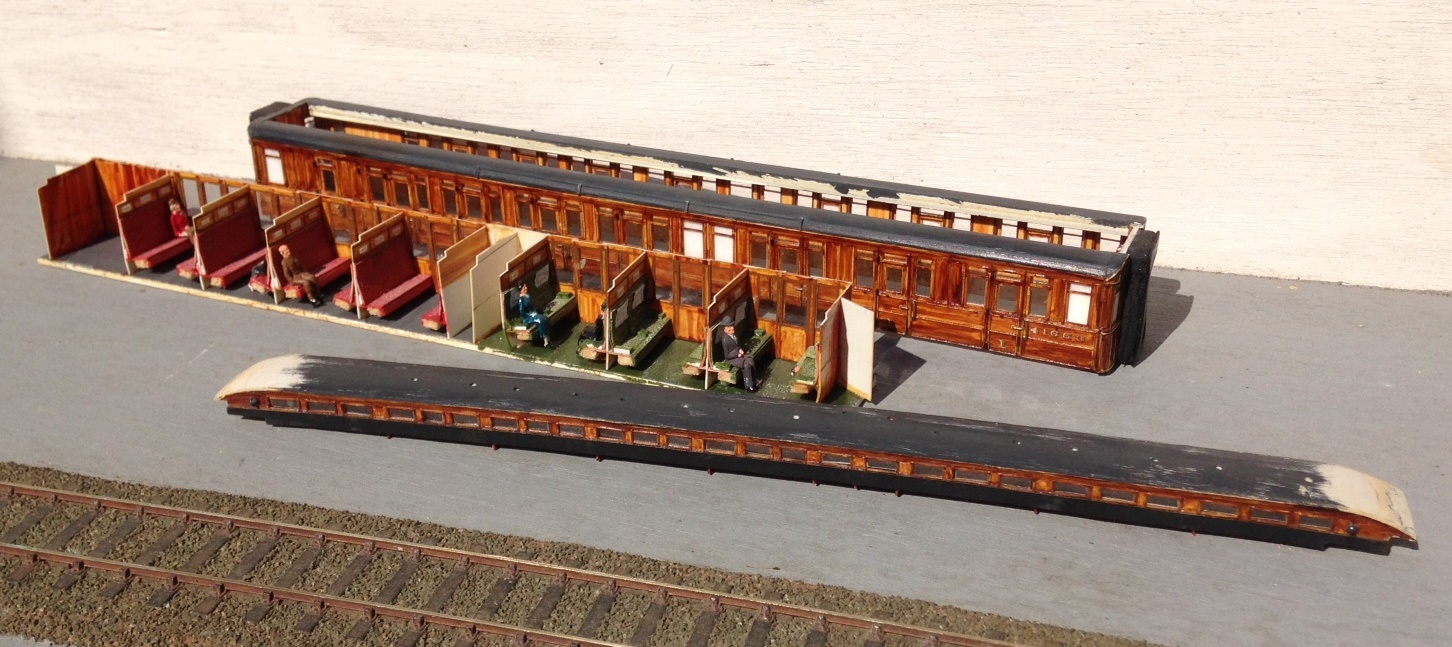
Barry Fleming’s scratchbuilt body and part completed roof
I have been given a big headstart on this build by virtue of being given a nearly complete body/roof for a luggage composite (diagram 6 for those in the know). This was scratchbuilt by the late Barry Fleming in the 1980s and is a class bit of modelling! Barry gave it to my father, along with a couple of other coaches, to complete but as he has not managed to get this particular one, he has passed it to me to have a bash!
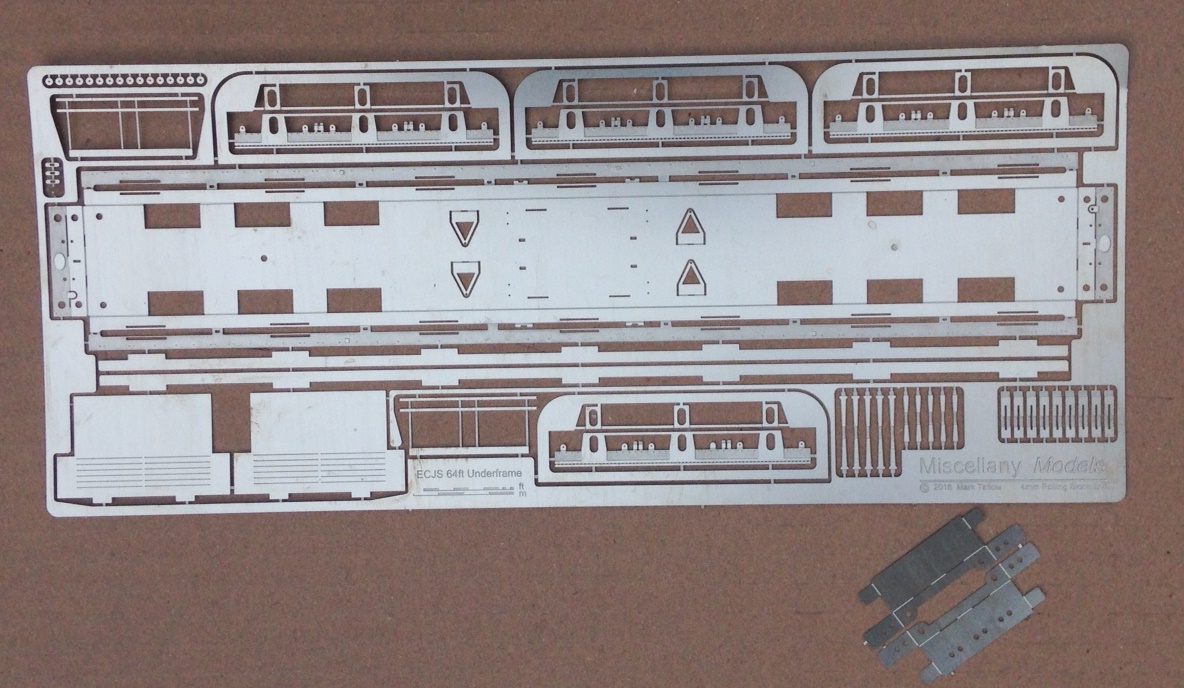
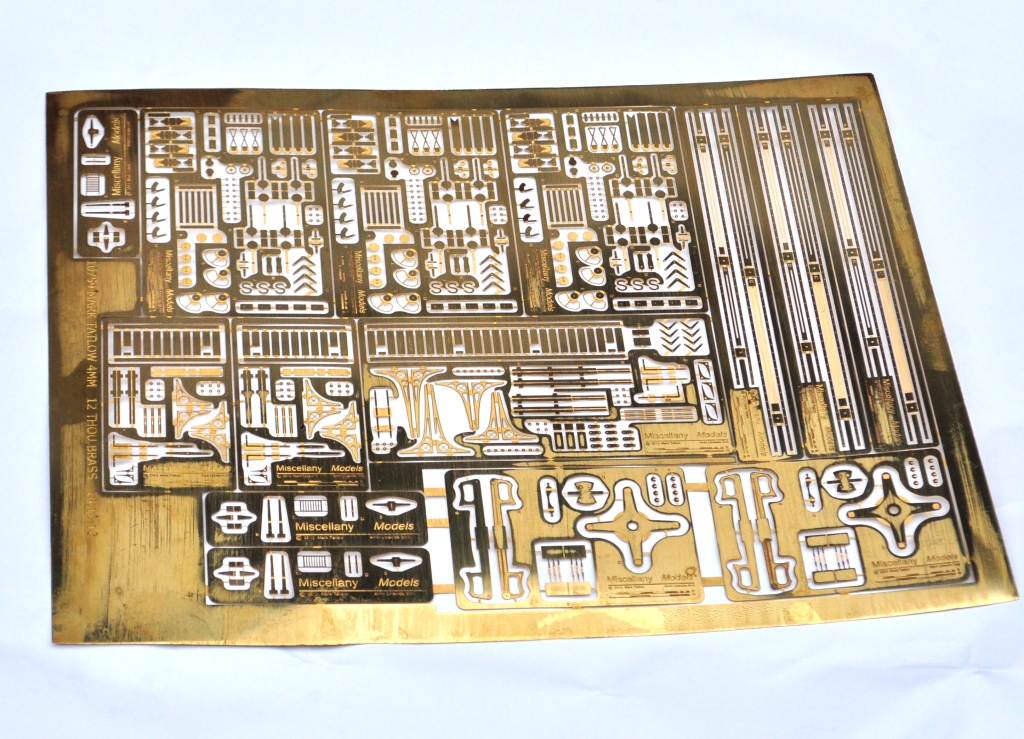
My etchings back from PPD
One of the reasons that this model was put to the back of the queue previously was that almost none of the parts required to complete it – in particular the bogies – were available, so it was all going to be a scratchbuild. As I was pouring over the drawings and pictures in the bible on things ECJS it dawned on me that the missing parts would be best dealt with as an etch and given my developing skills in etch designing, I might was well have a go. This is the product, an underframe, some cosmetic bogie sidesand some underframe details fresh back from the etchers.
The basic underframe has fold up solebars and buffer beams. Each of these also has integral fold over layers to laminate on the cosmetic exterior. This just about worked for the solbars but definitely did not for the buffer beams which distorted due to their thinness. I will make these seperate pieces next time, but might use folding jigs.
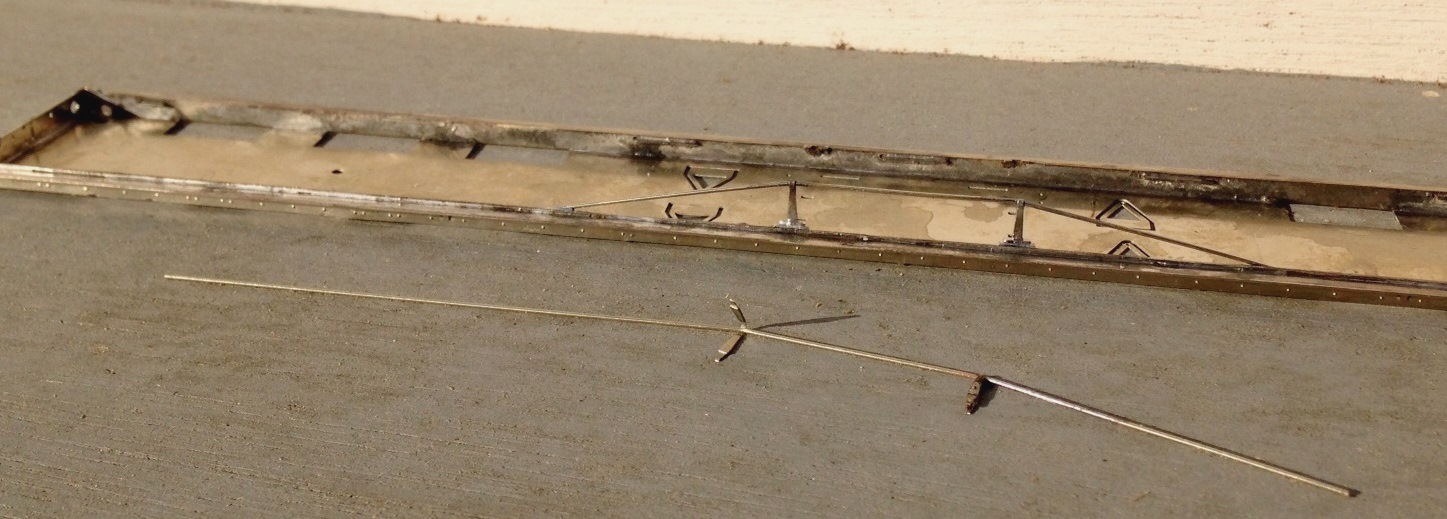
Coaches of this era tended to have four truss rods, each with a pair of queen posts. Stealing an idea from Alistair Wright’s designs, I made the queen posts up by a long etch that has a half etch length to wrap around the wire used for the tie rod. By folding this over the wire and then laminating the two parts together, a robust and simple post can be created. As it is two layers soldered together, it has the strength to allow it to be filed to a round shape to create the appearance of the original.
Although originally gas lit, by the time I will be modelling this vehicle it was electrically lit. Whilst I probably could have bought cast batter boxes, I decided to include them in the etch and very pleased I am too – they have come out much more crisp than any of the castings I have seen and were really easy to both draw and make. The remainder of the fittings seen here were bought in castings though, typically from Comet Models (now distributed by Wizard Models).
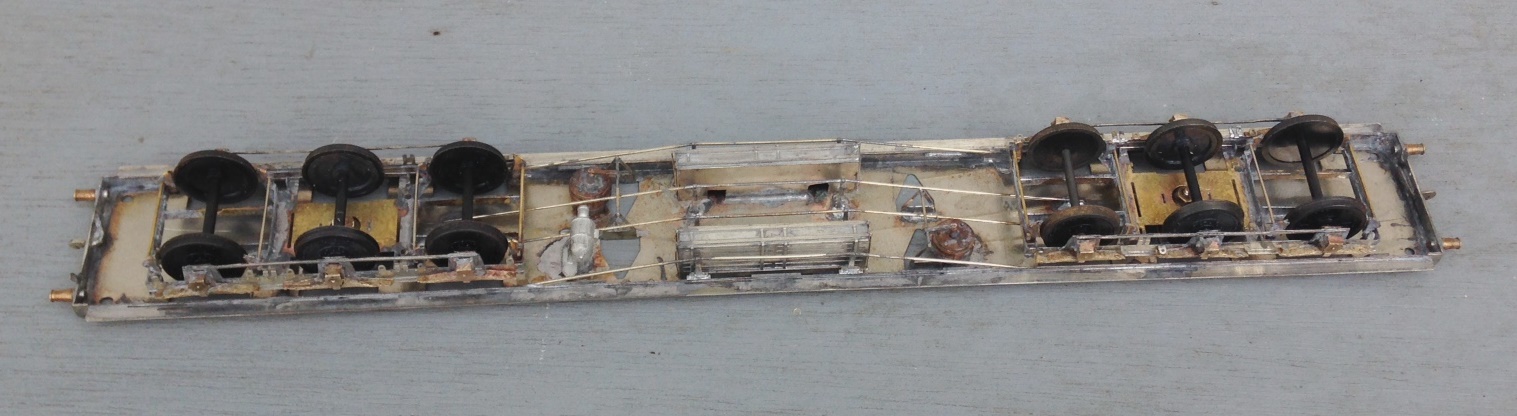
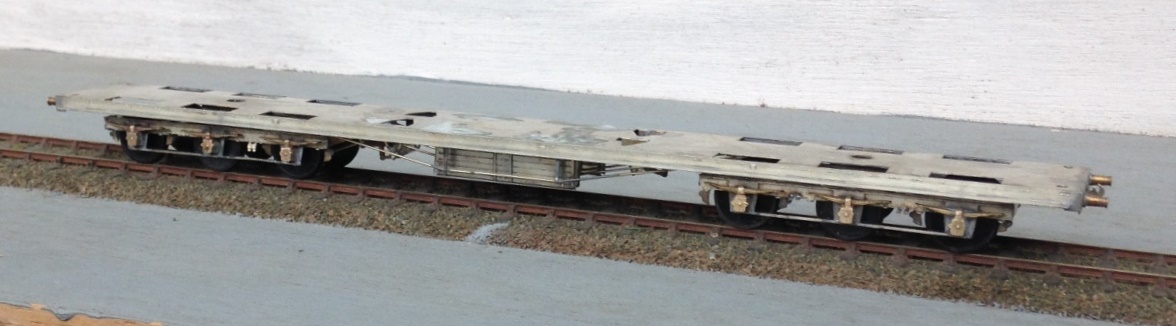
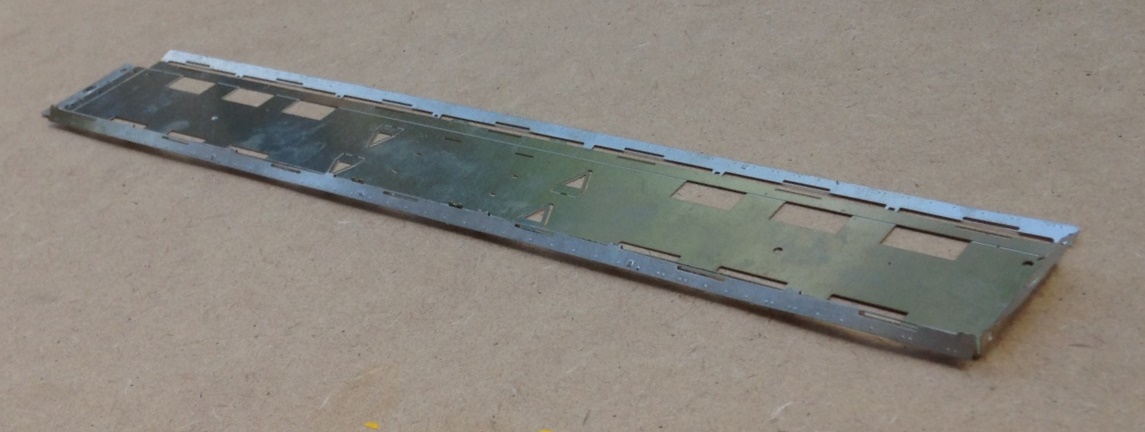
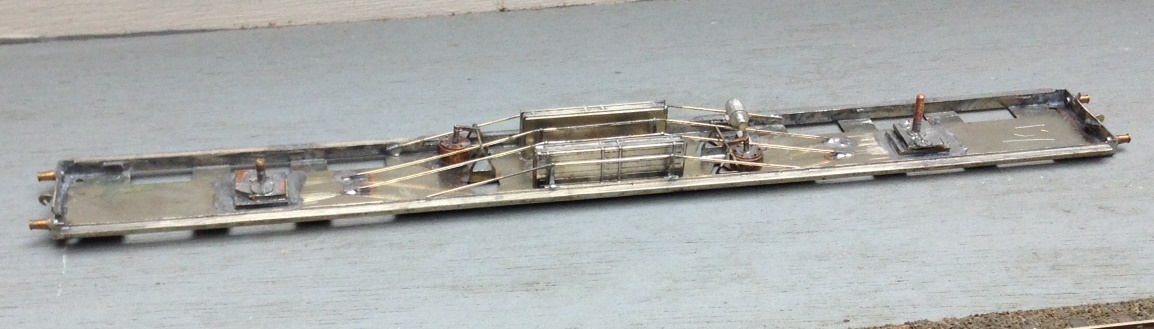
And this is where the underframe has presently progressed to.
I will describe the building of the bogies in the next installment, they are not for the faint-hearted!
Scrap Tank Test Build Part 9 – Finishing the Body
I have now had the castings back for the various fittings for the Scrap Tank; the masters being in part my own 3D prints and some turnings that I commissioned from Jeremy Souter. This is what they look like:
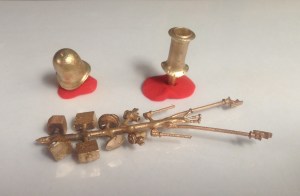
I did not seek to do everything for the whole model as some parts are available from other suppliers and I did not want to duplicate their work. Thus, I needed to get the safety valve/safety valve bonnet from Alan Gibson, a smokebox door from Lochgorm, a whistle from Markits and smokebox door handles from Comet.
Once these, along with the remaining handrails, were fitted, the body is complete and it certainly appears to be taking on the character of the real thing so far as I am concerned!
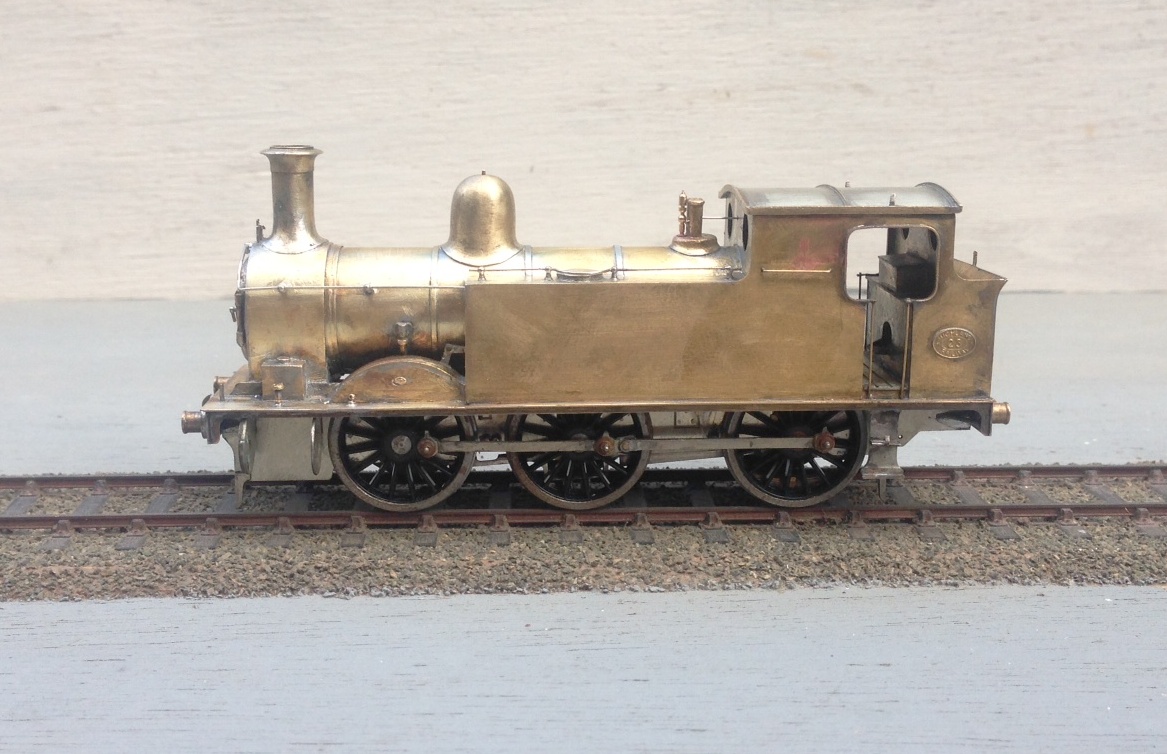
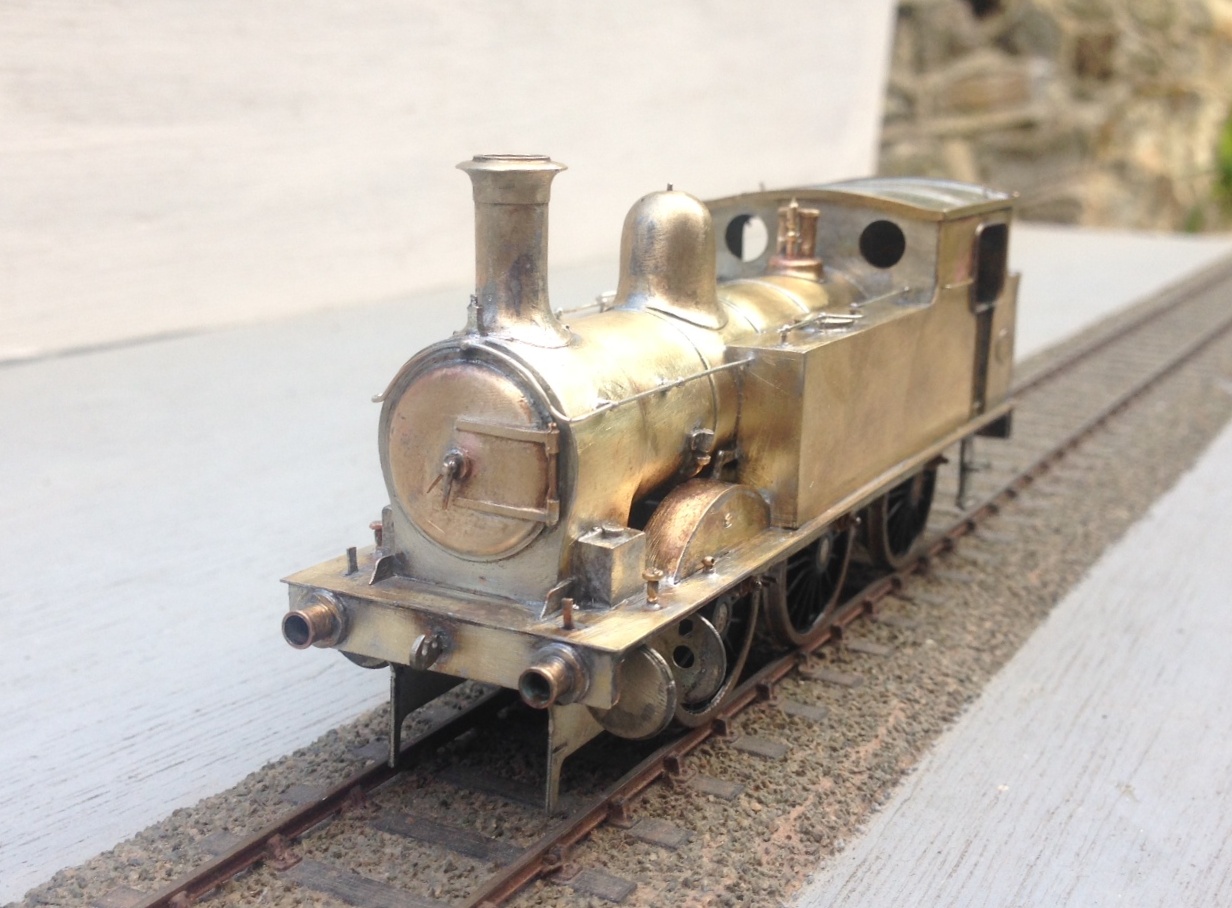
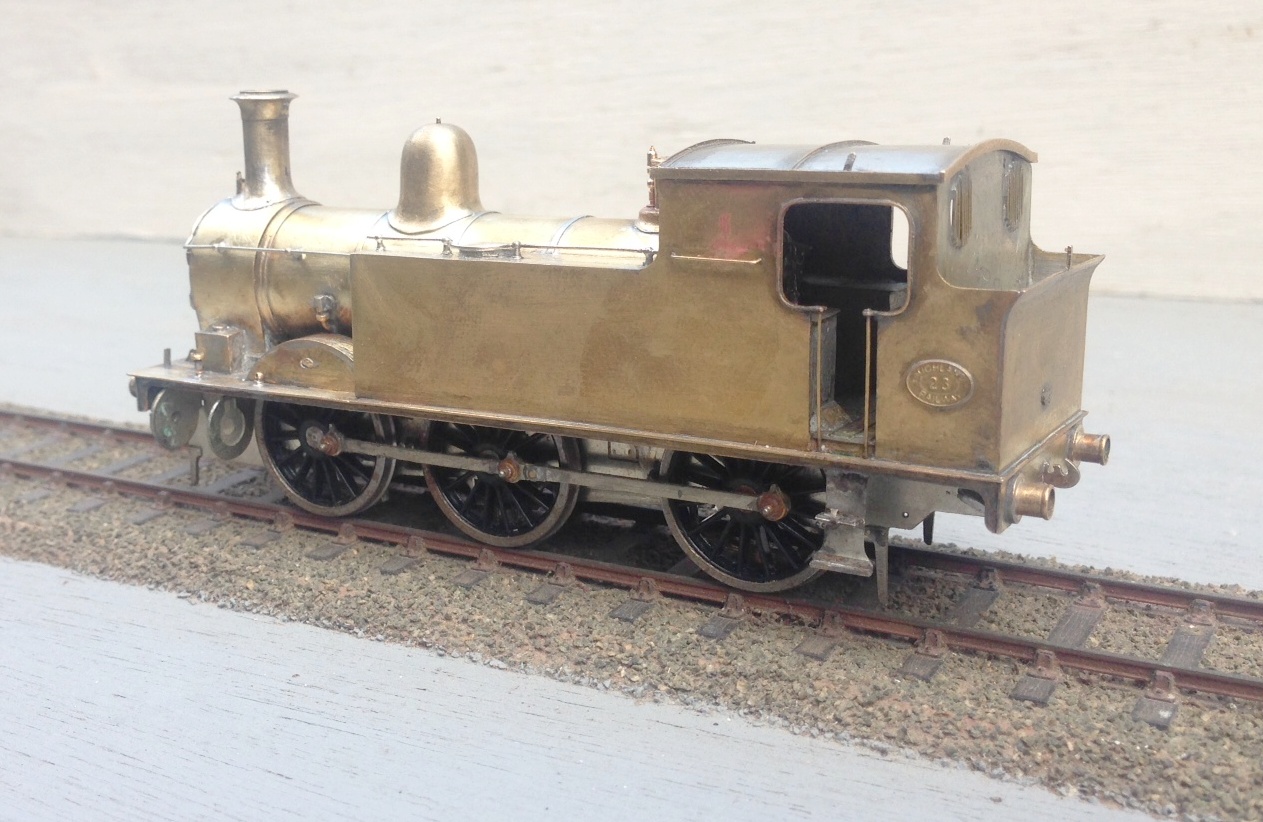
So next up will be the cylinders, crosshead and connecting rods!
