Blog Archives
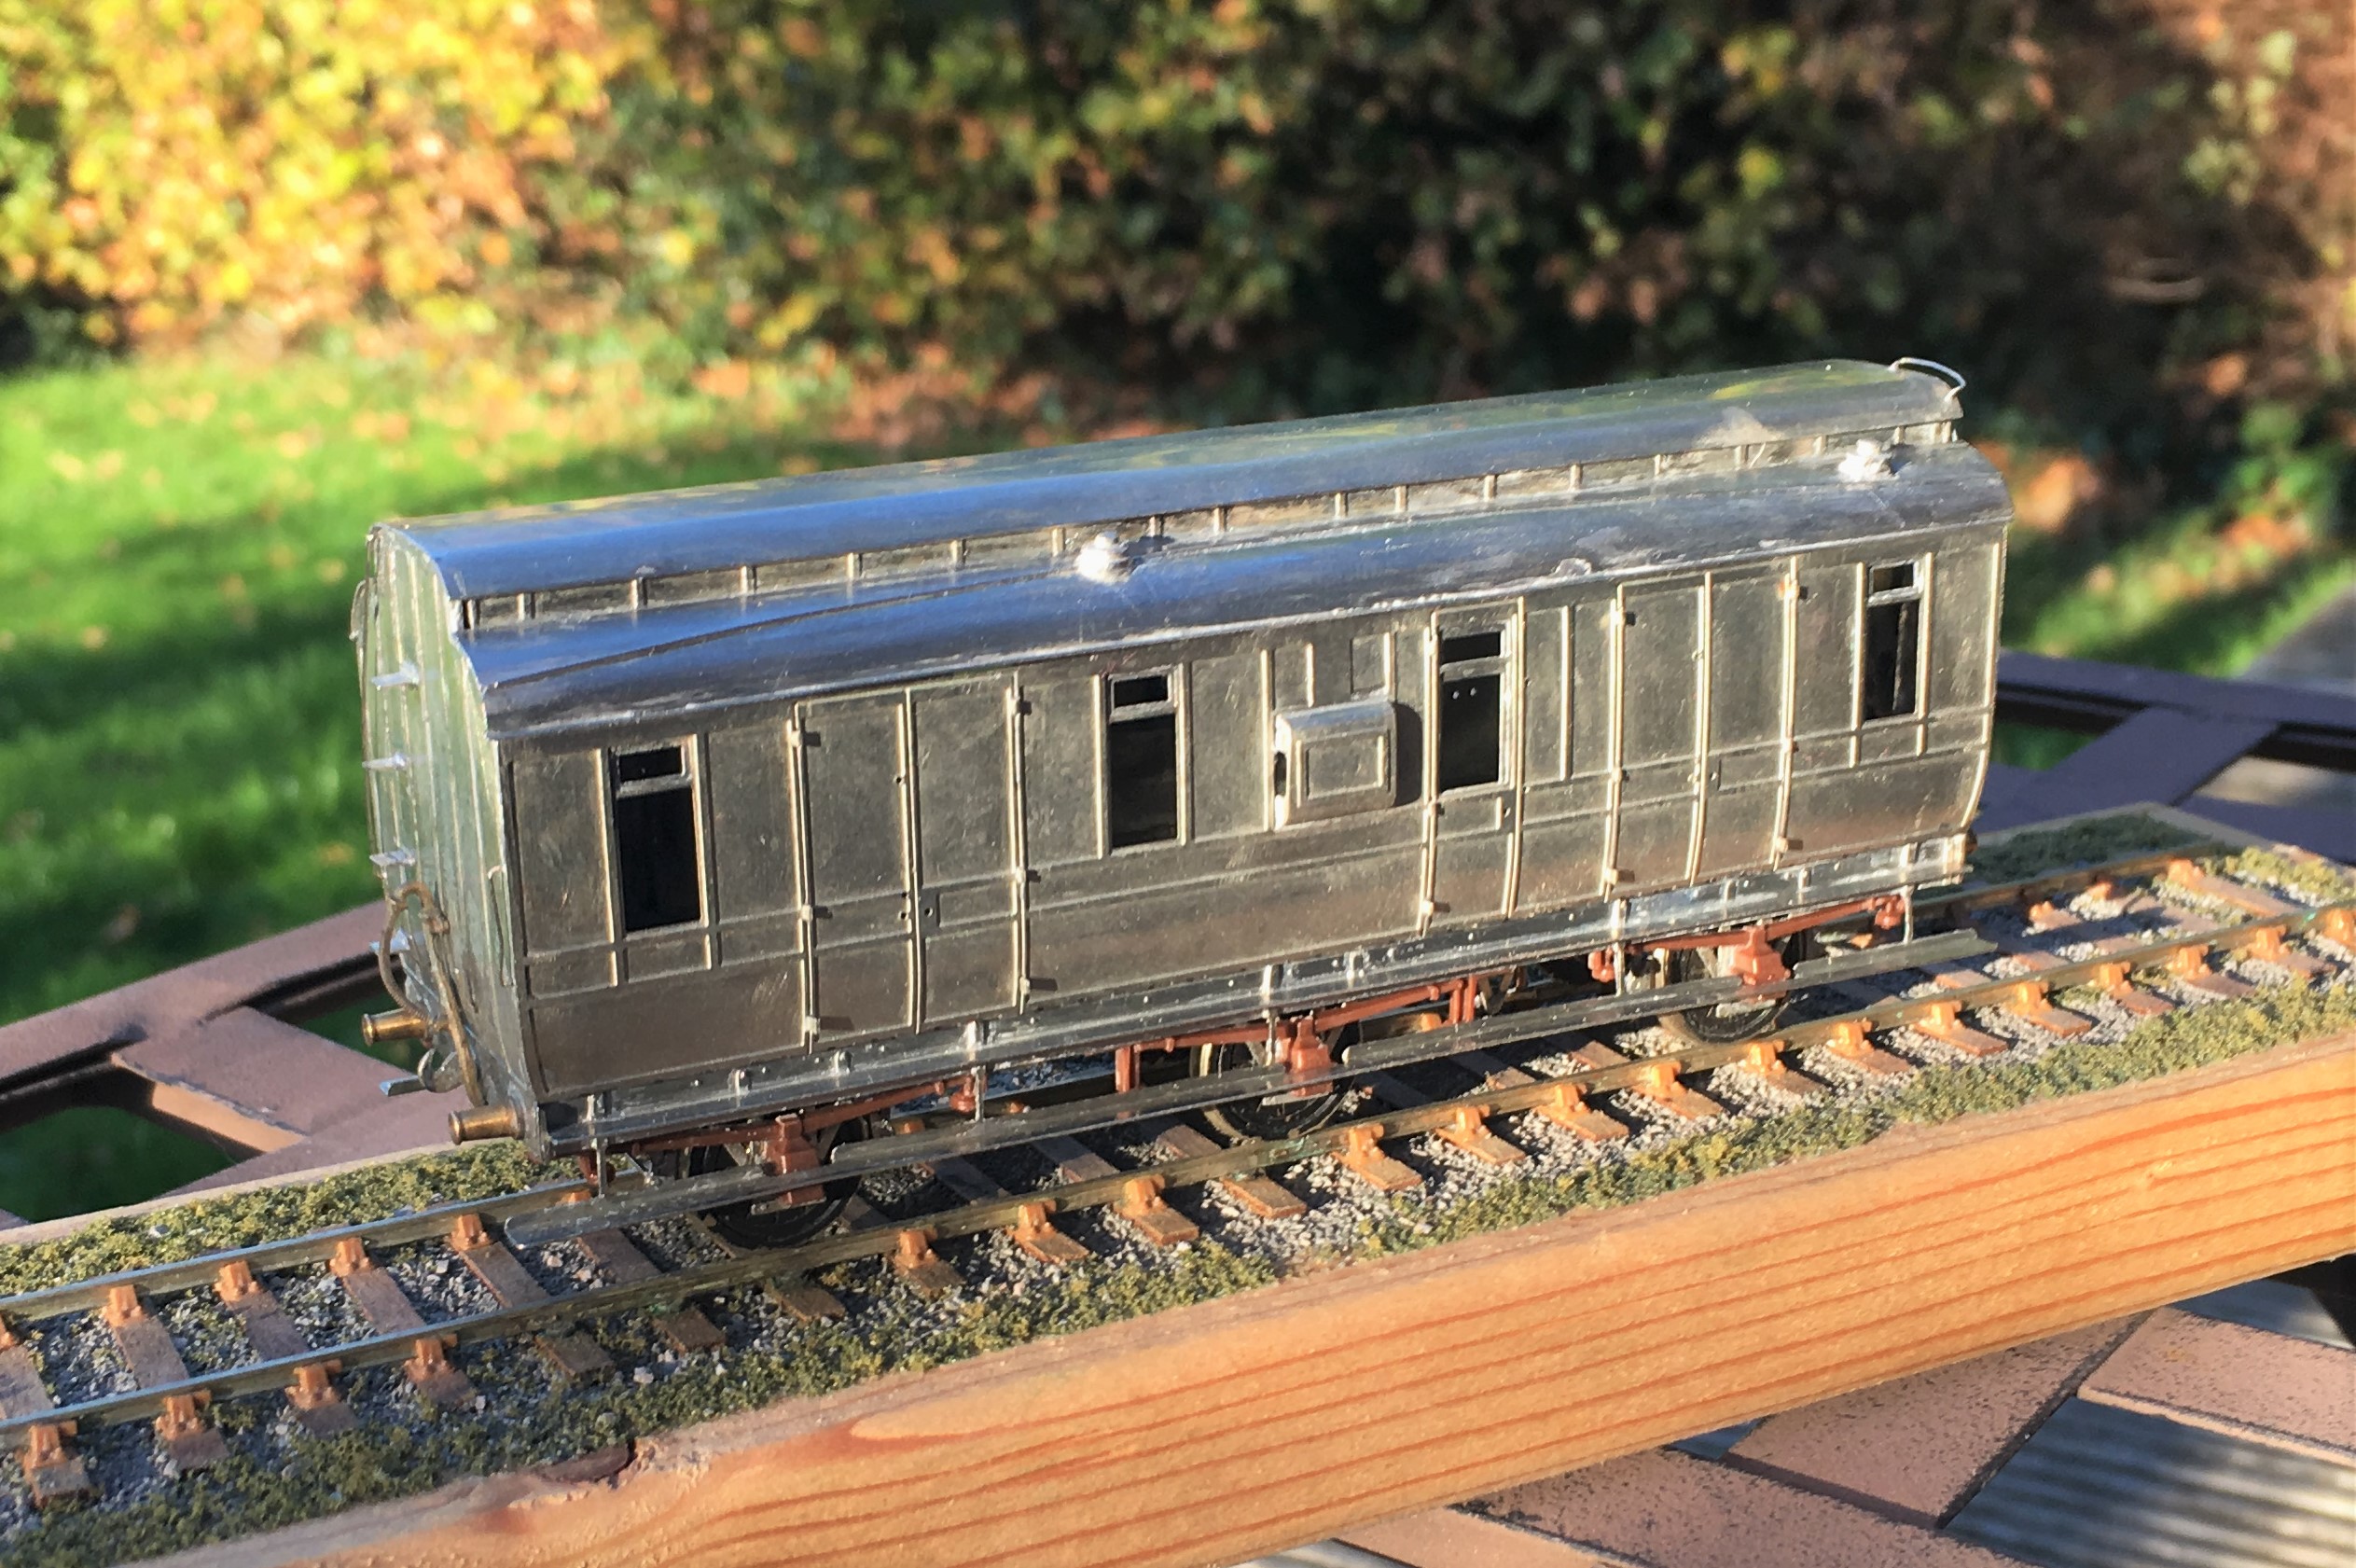
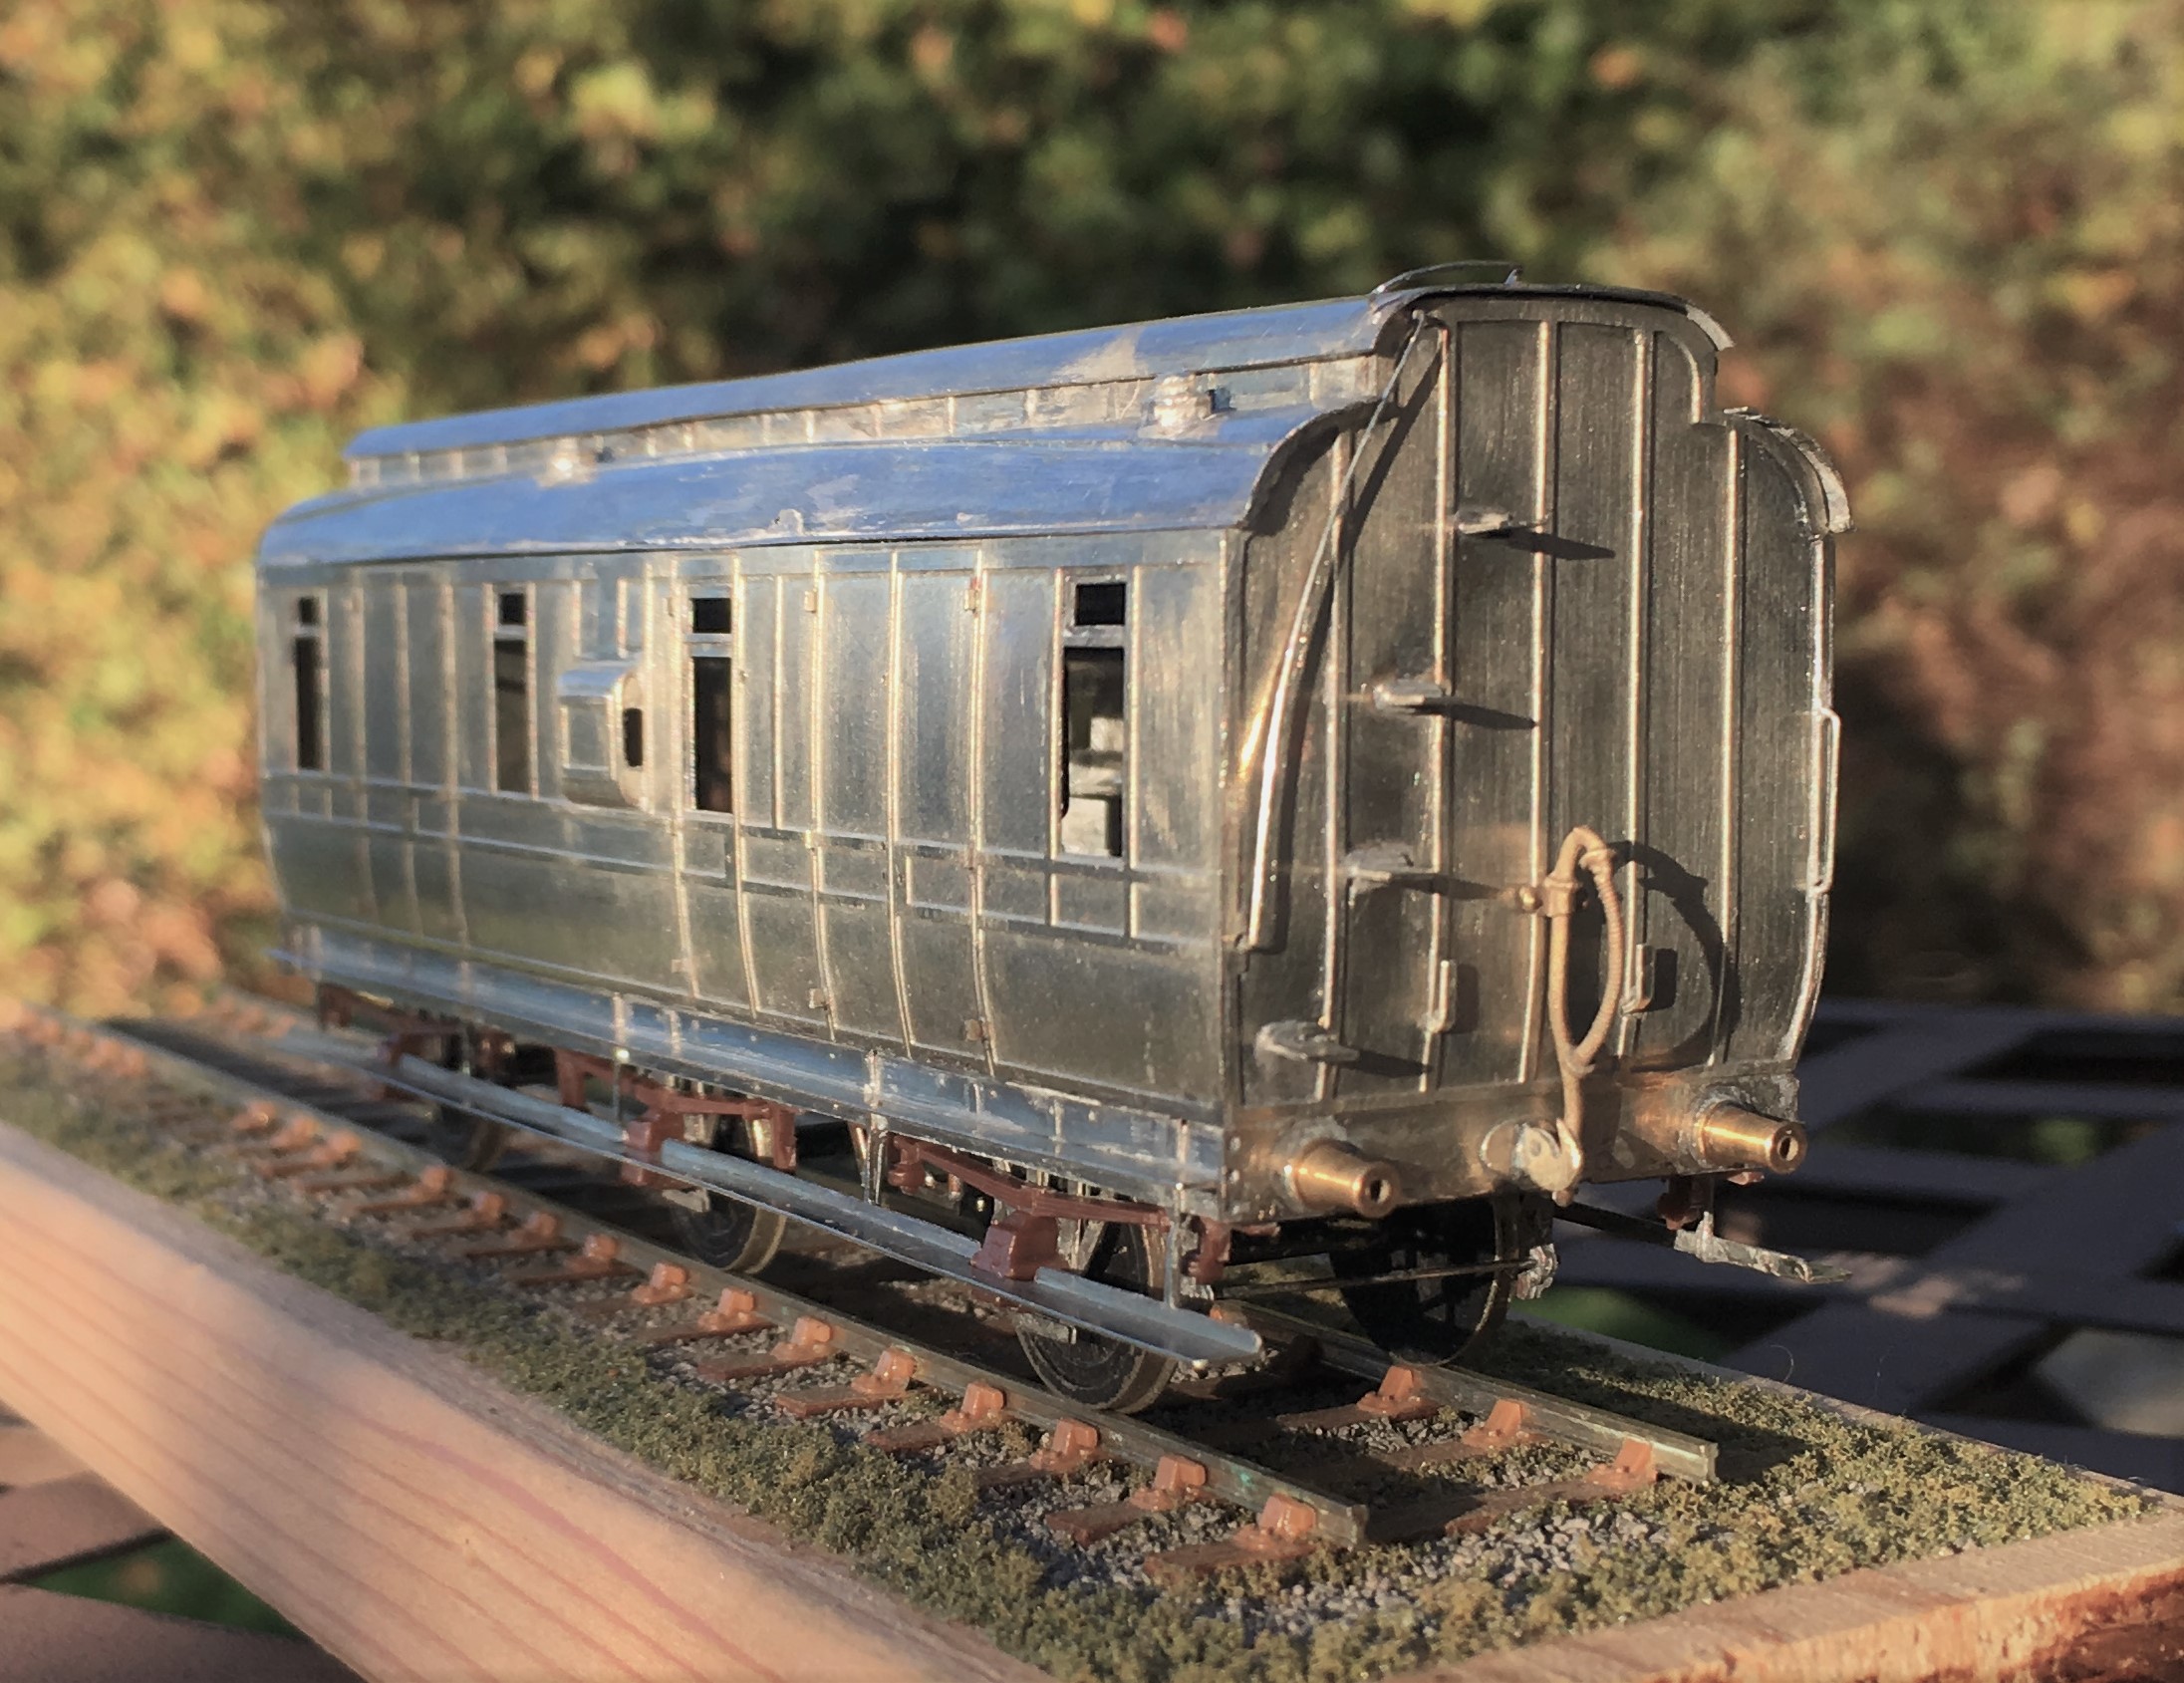
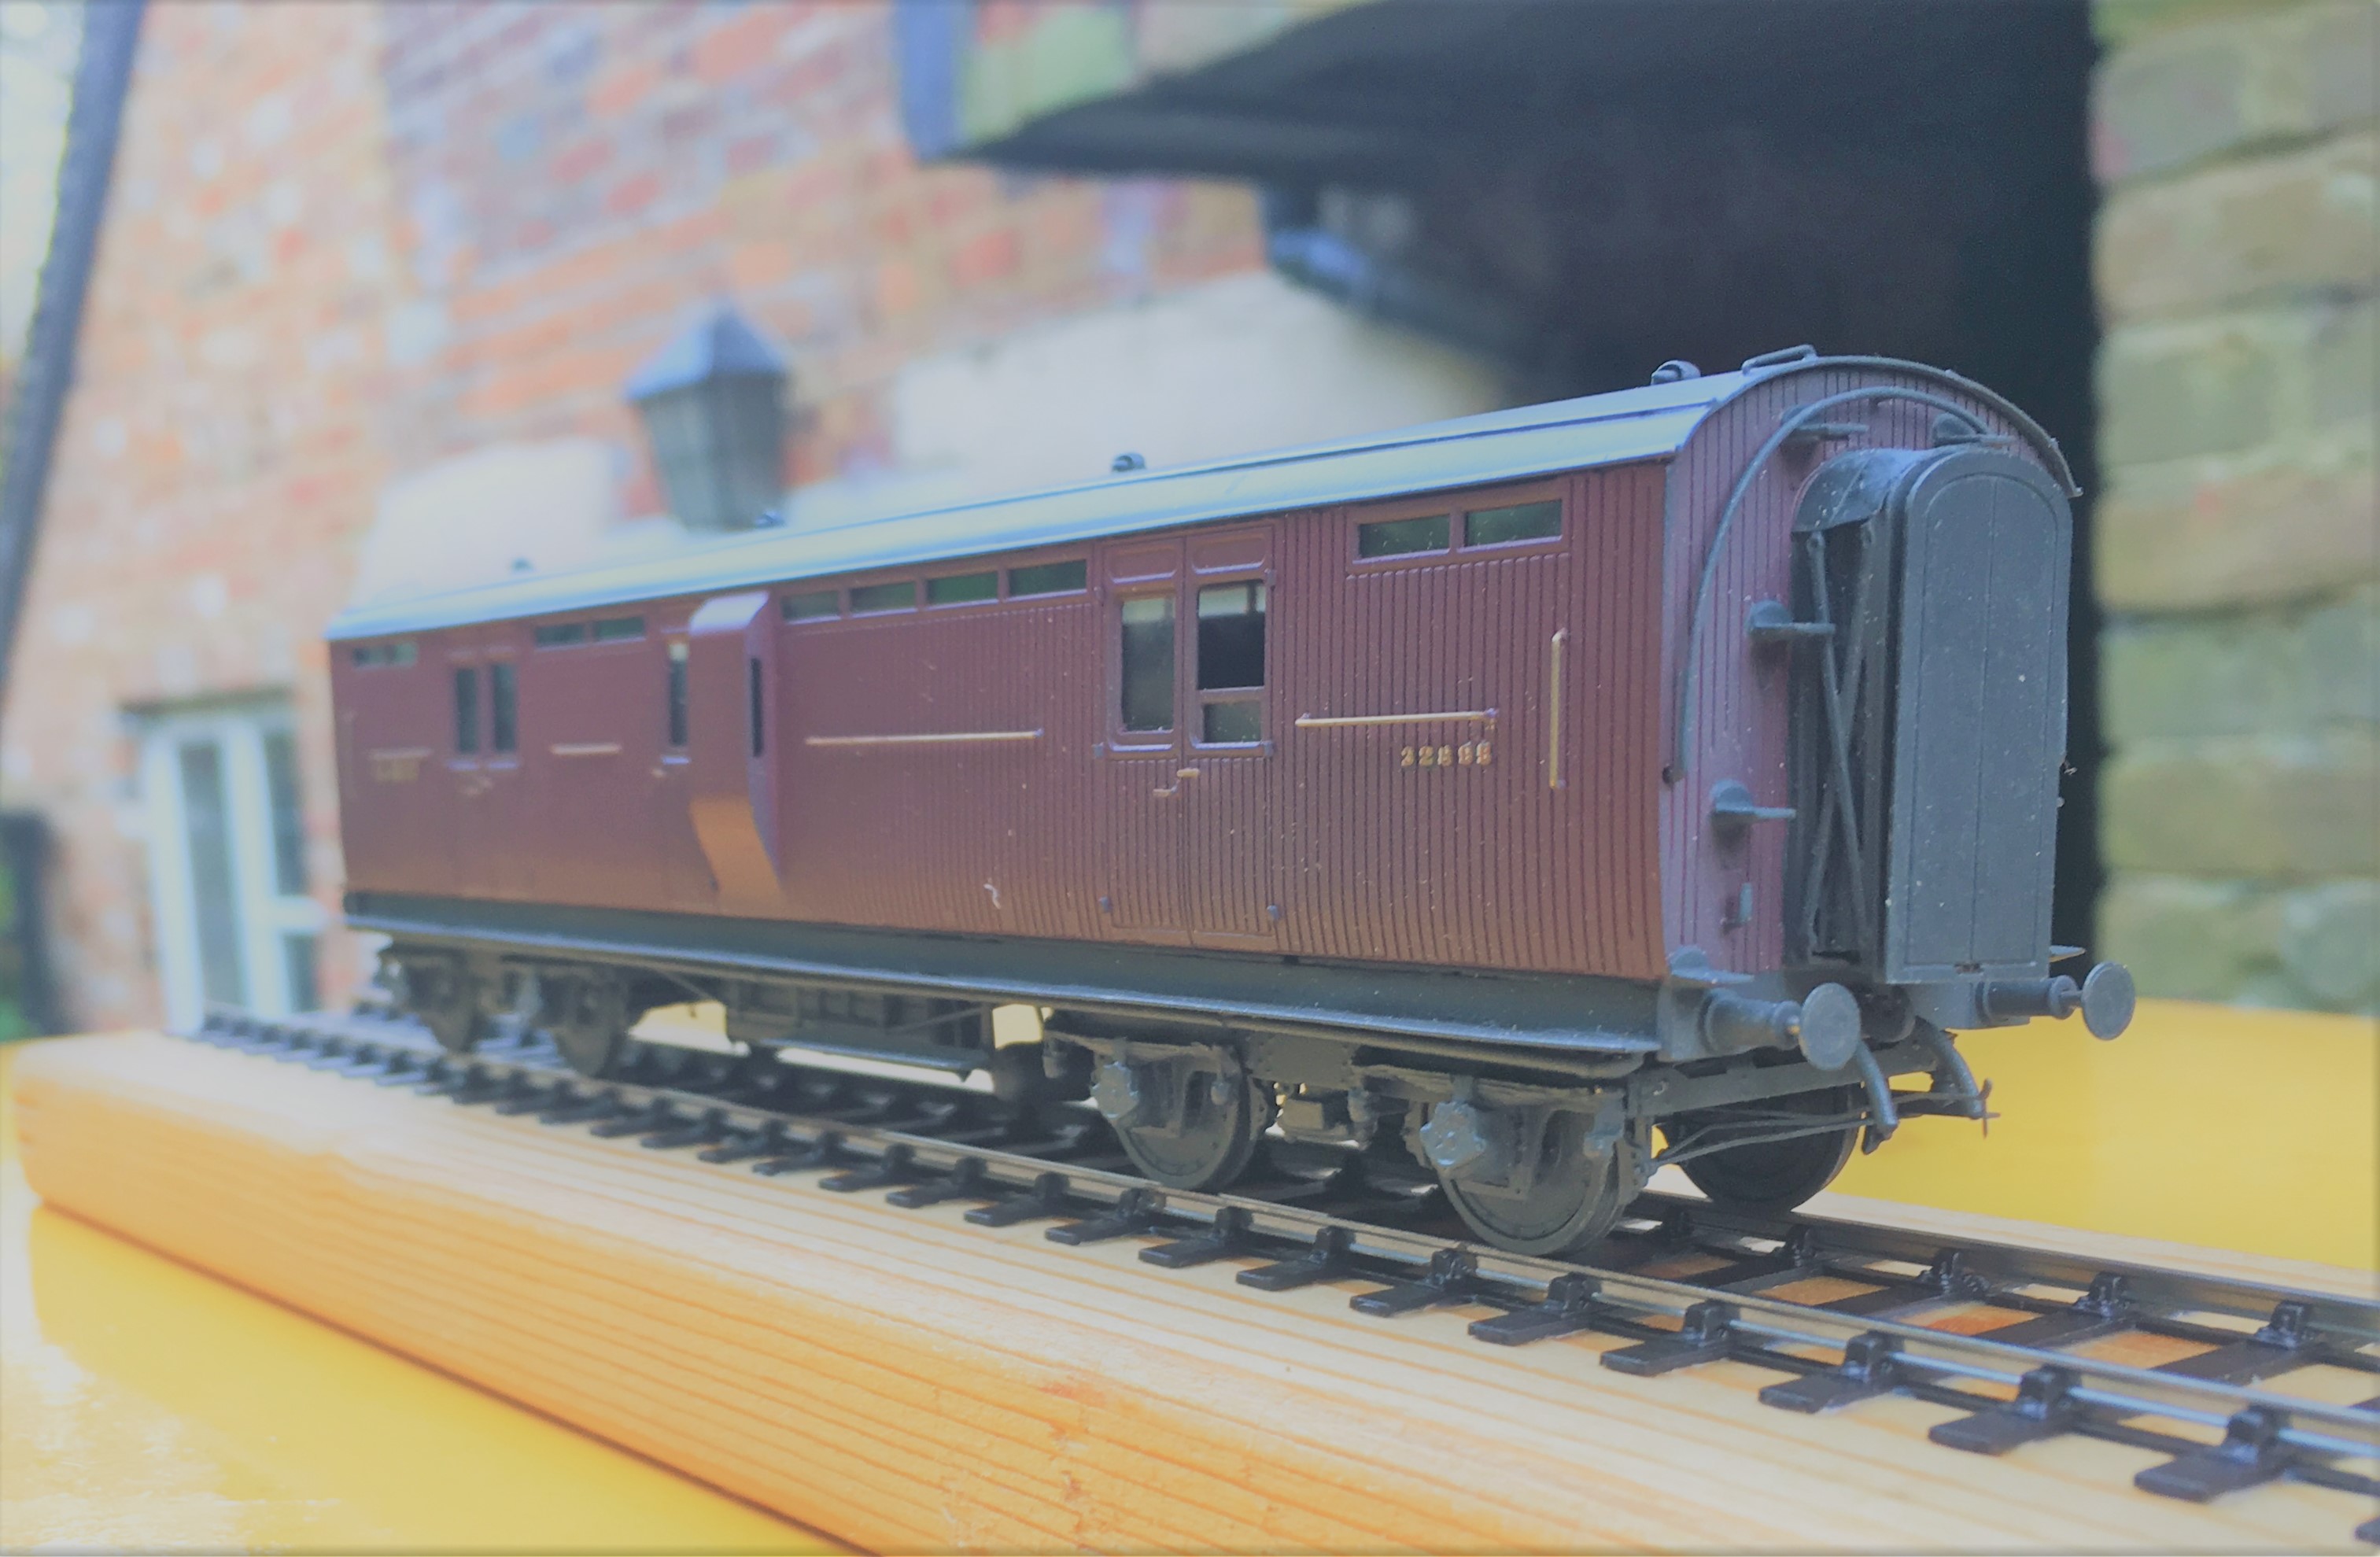
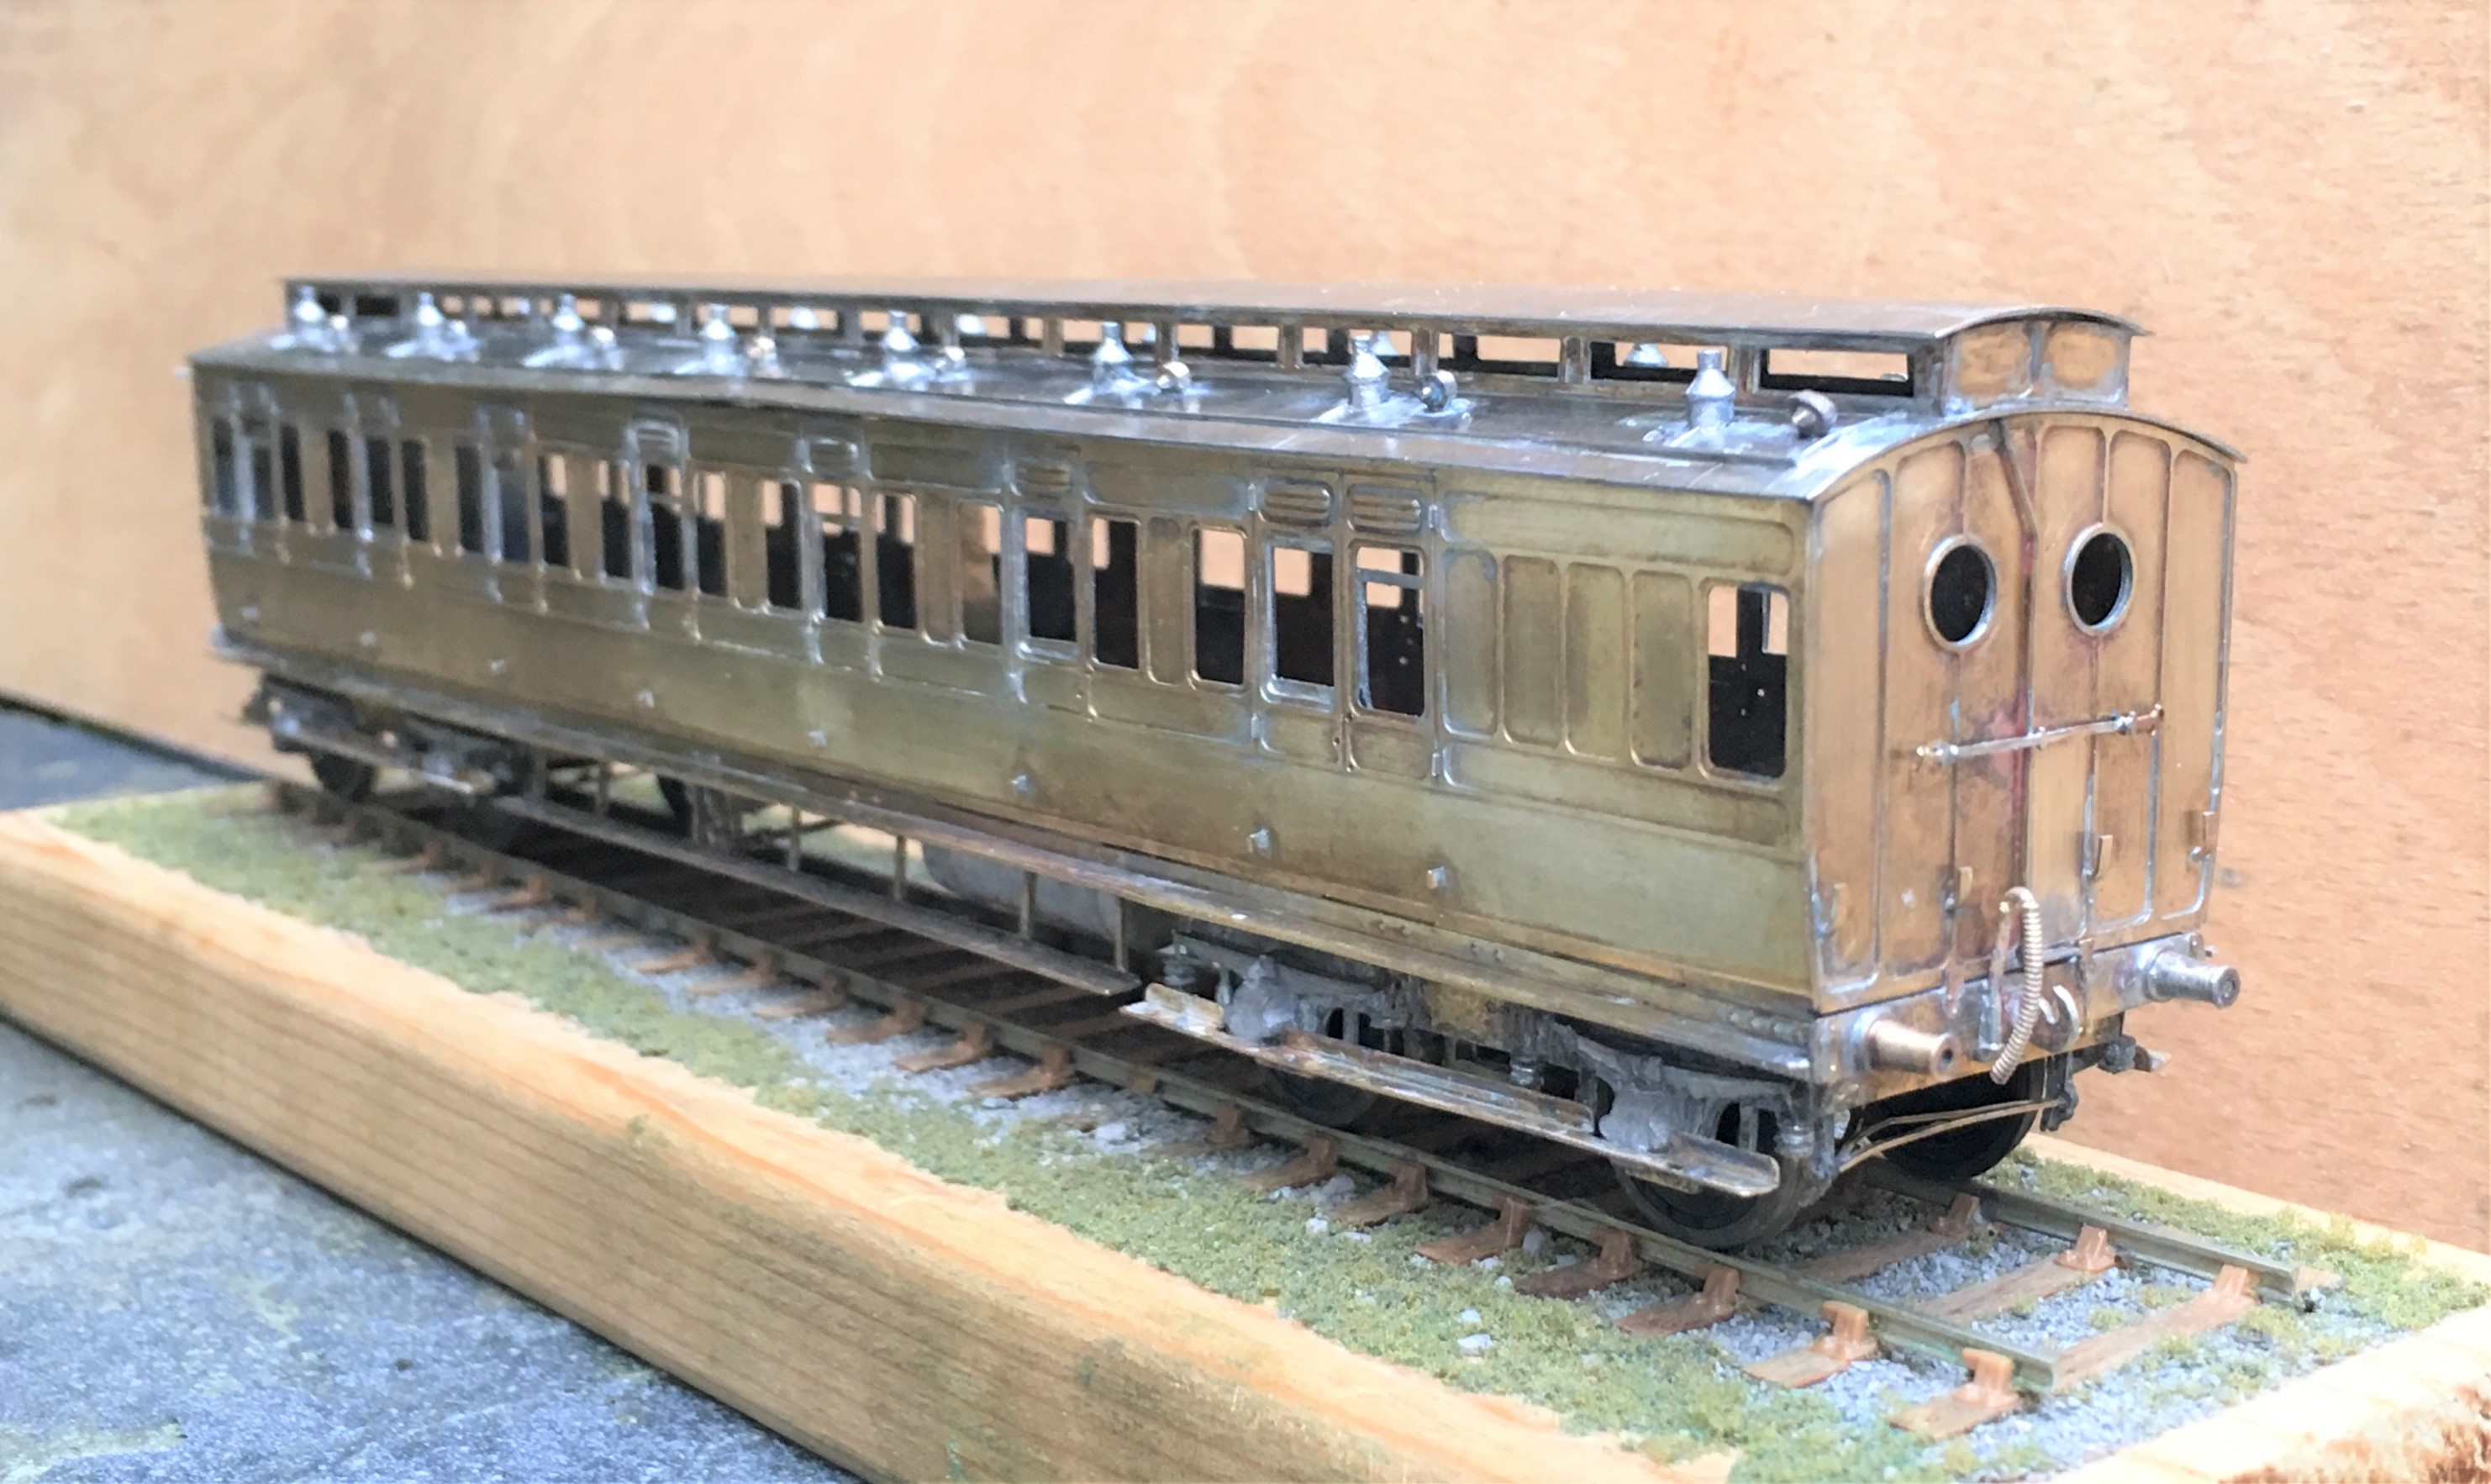
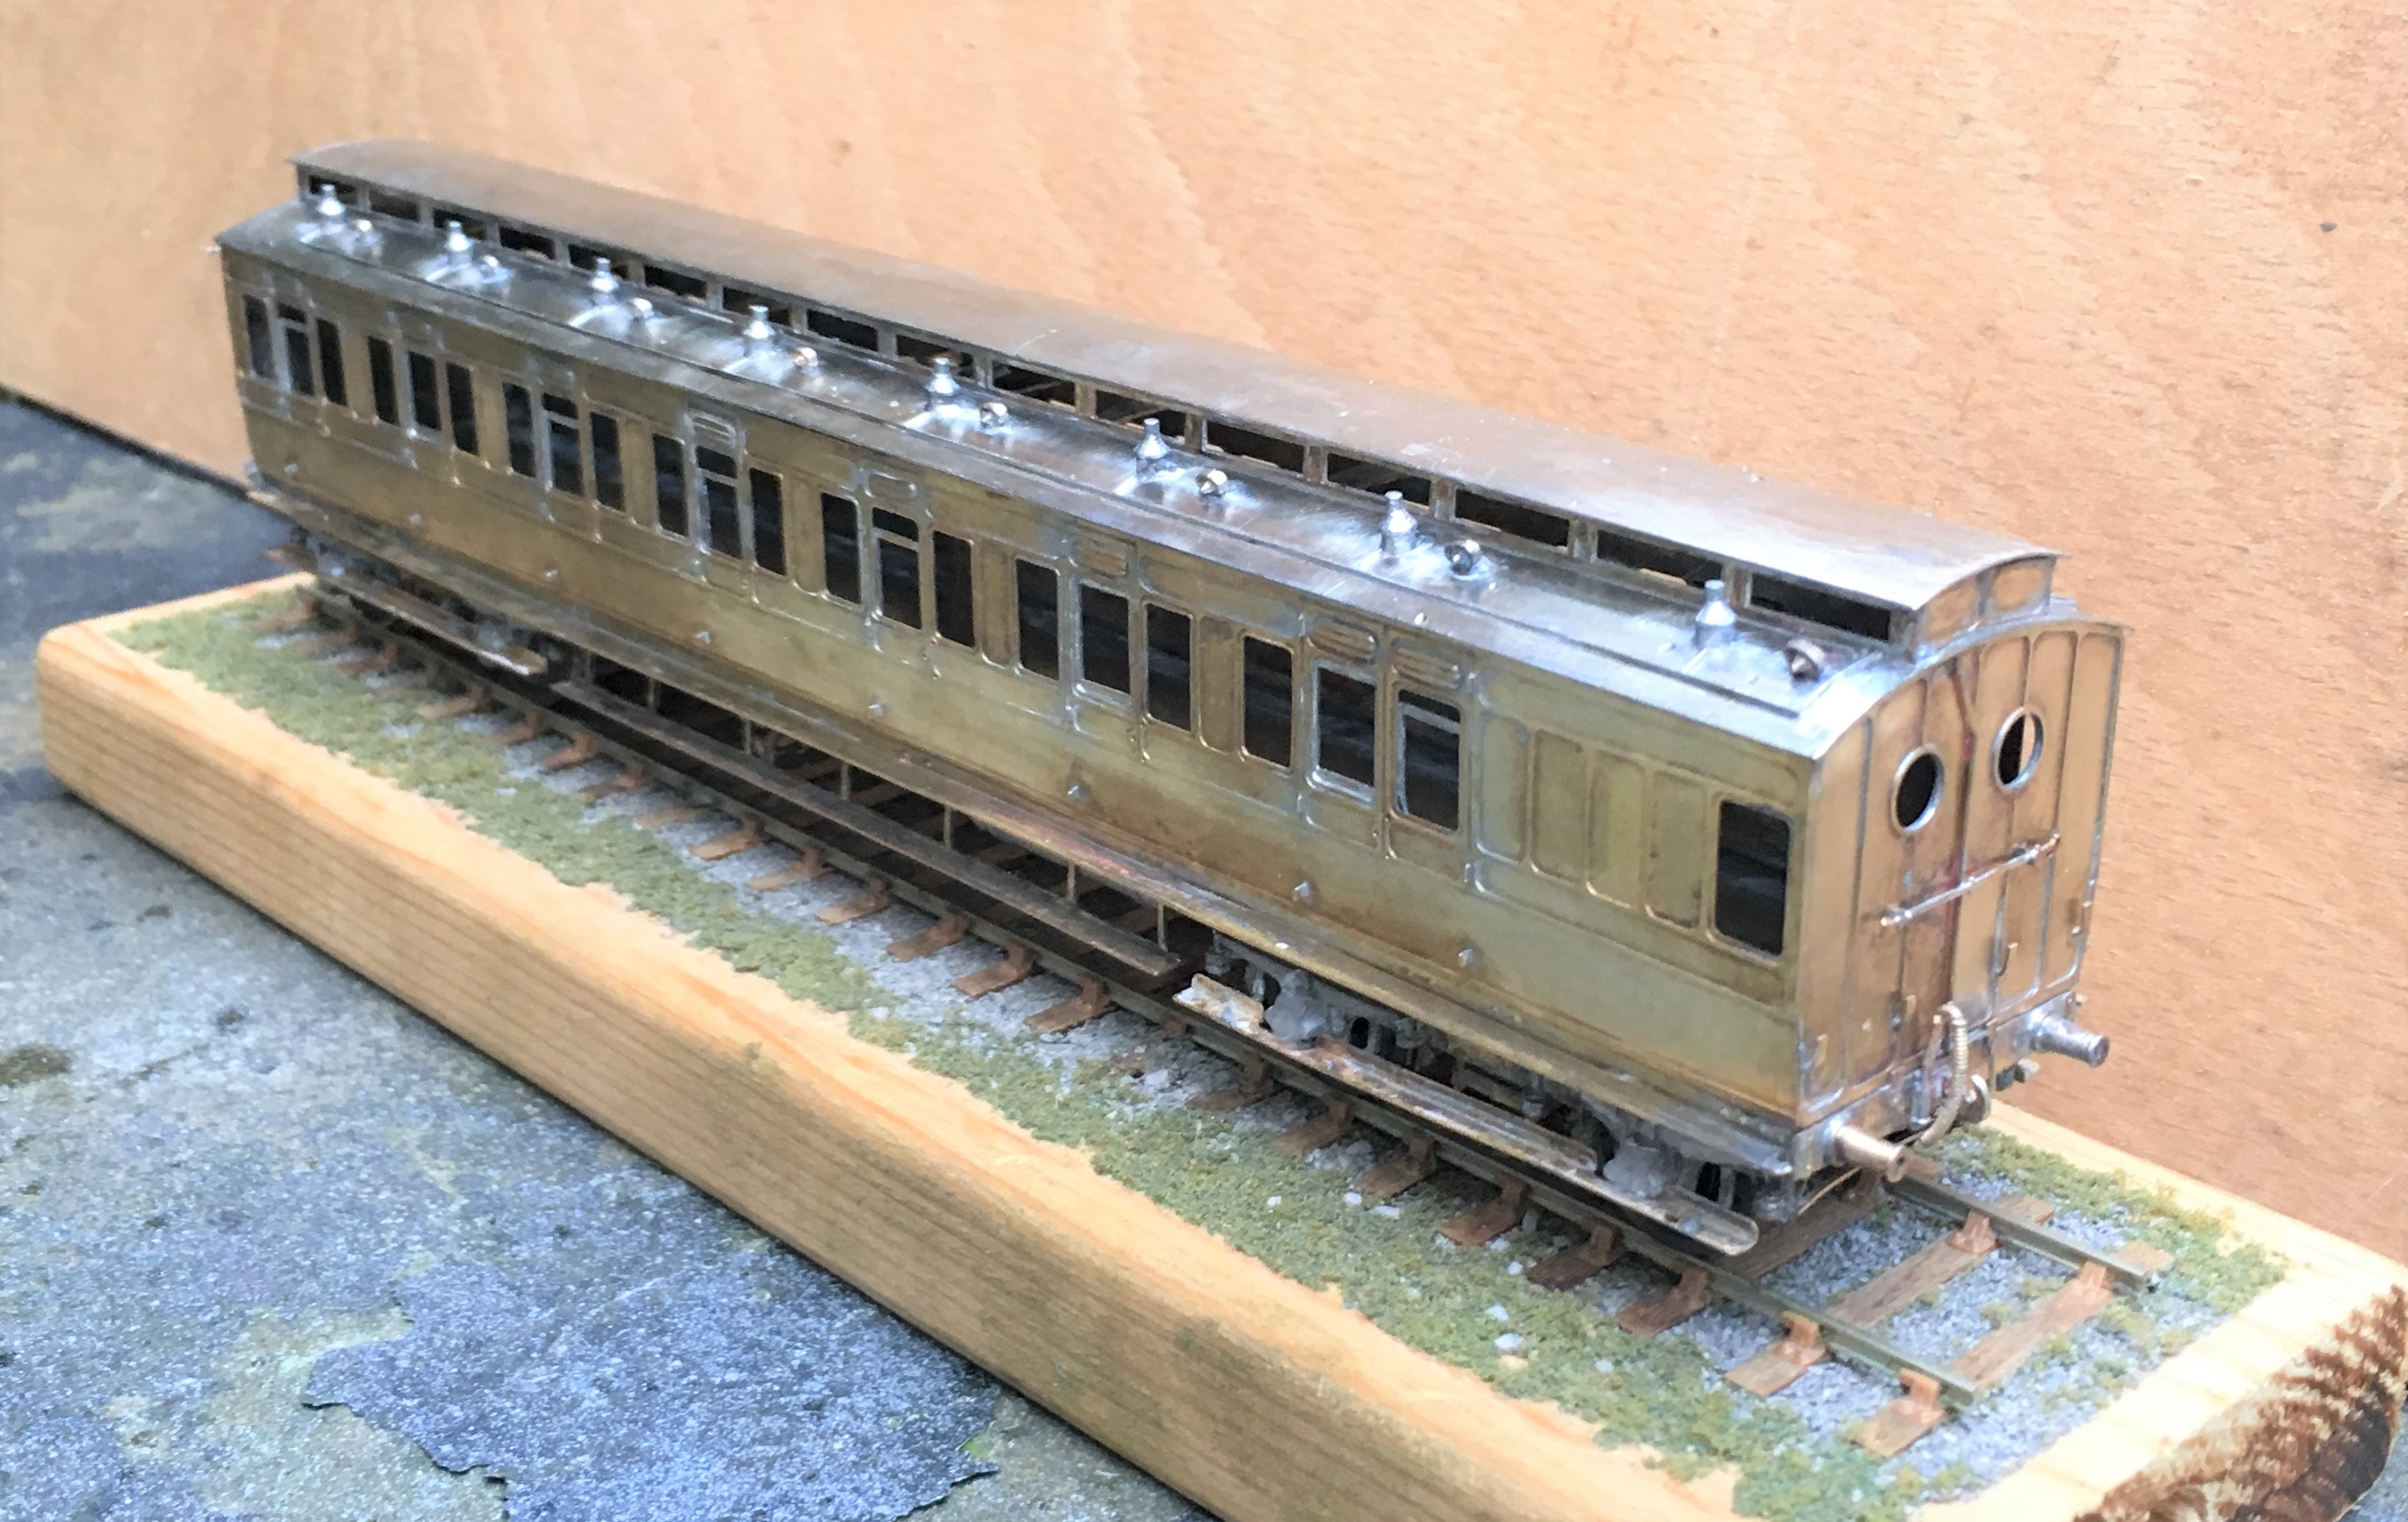
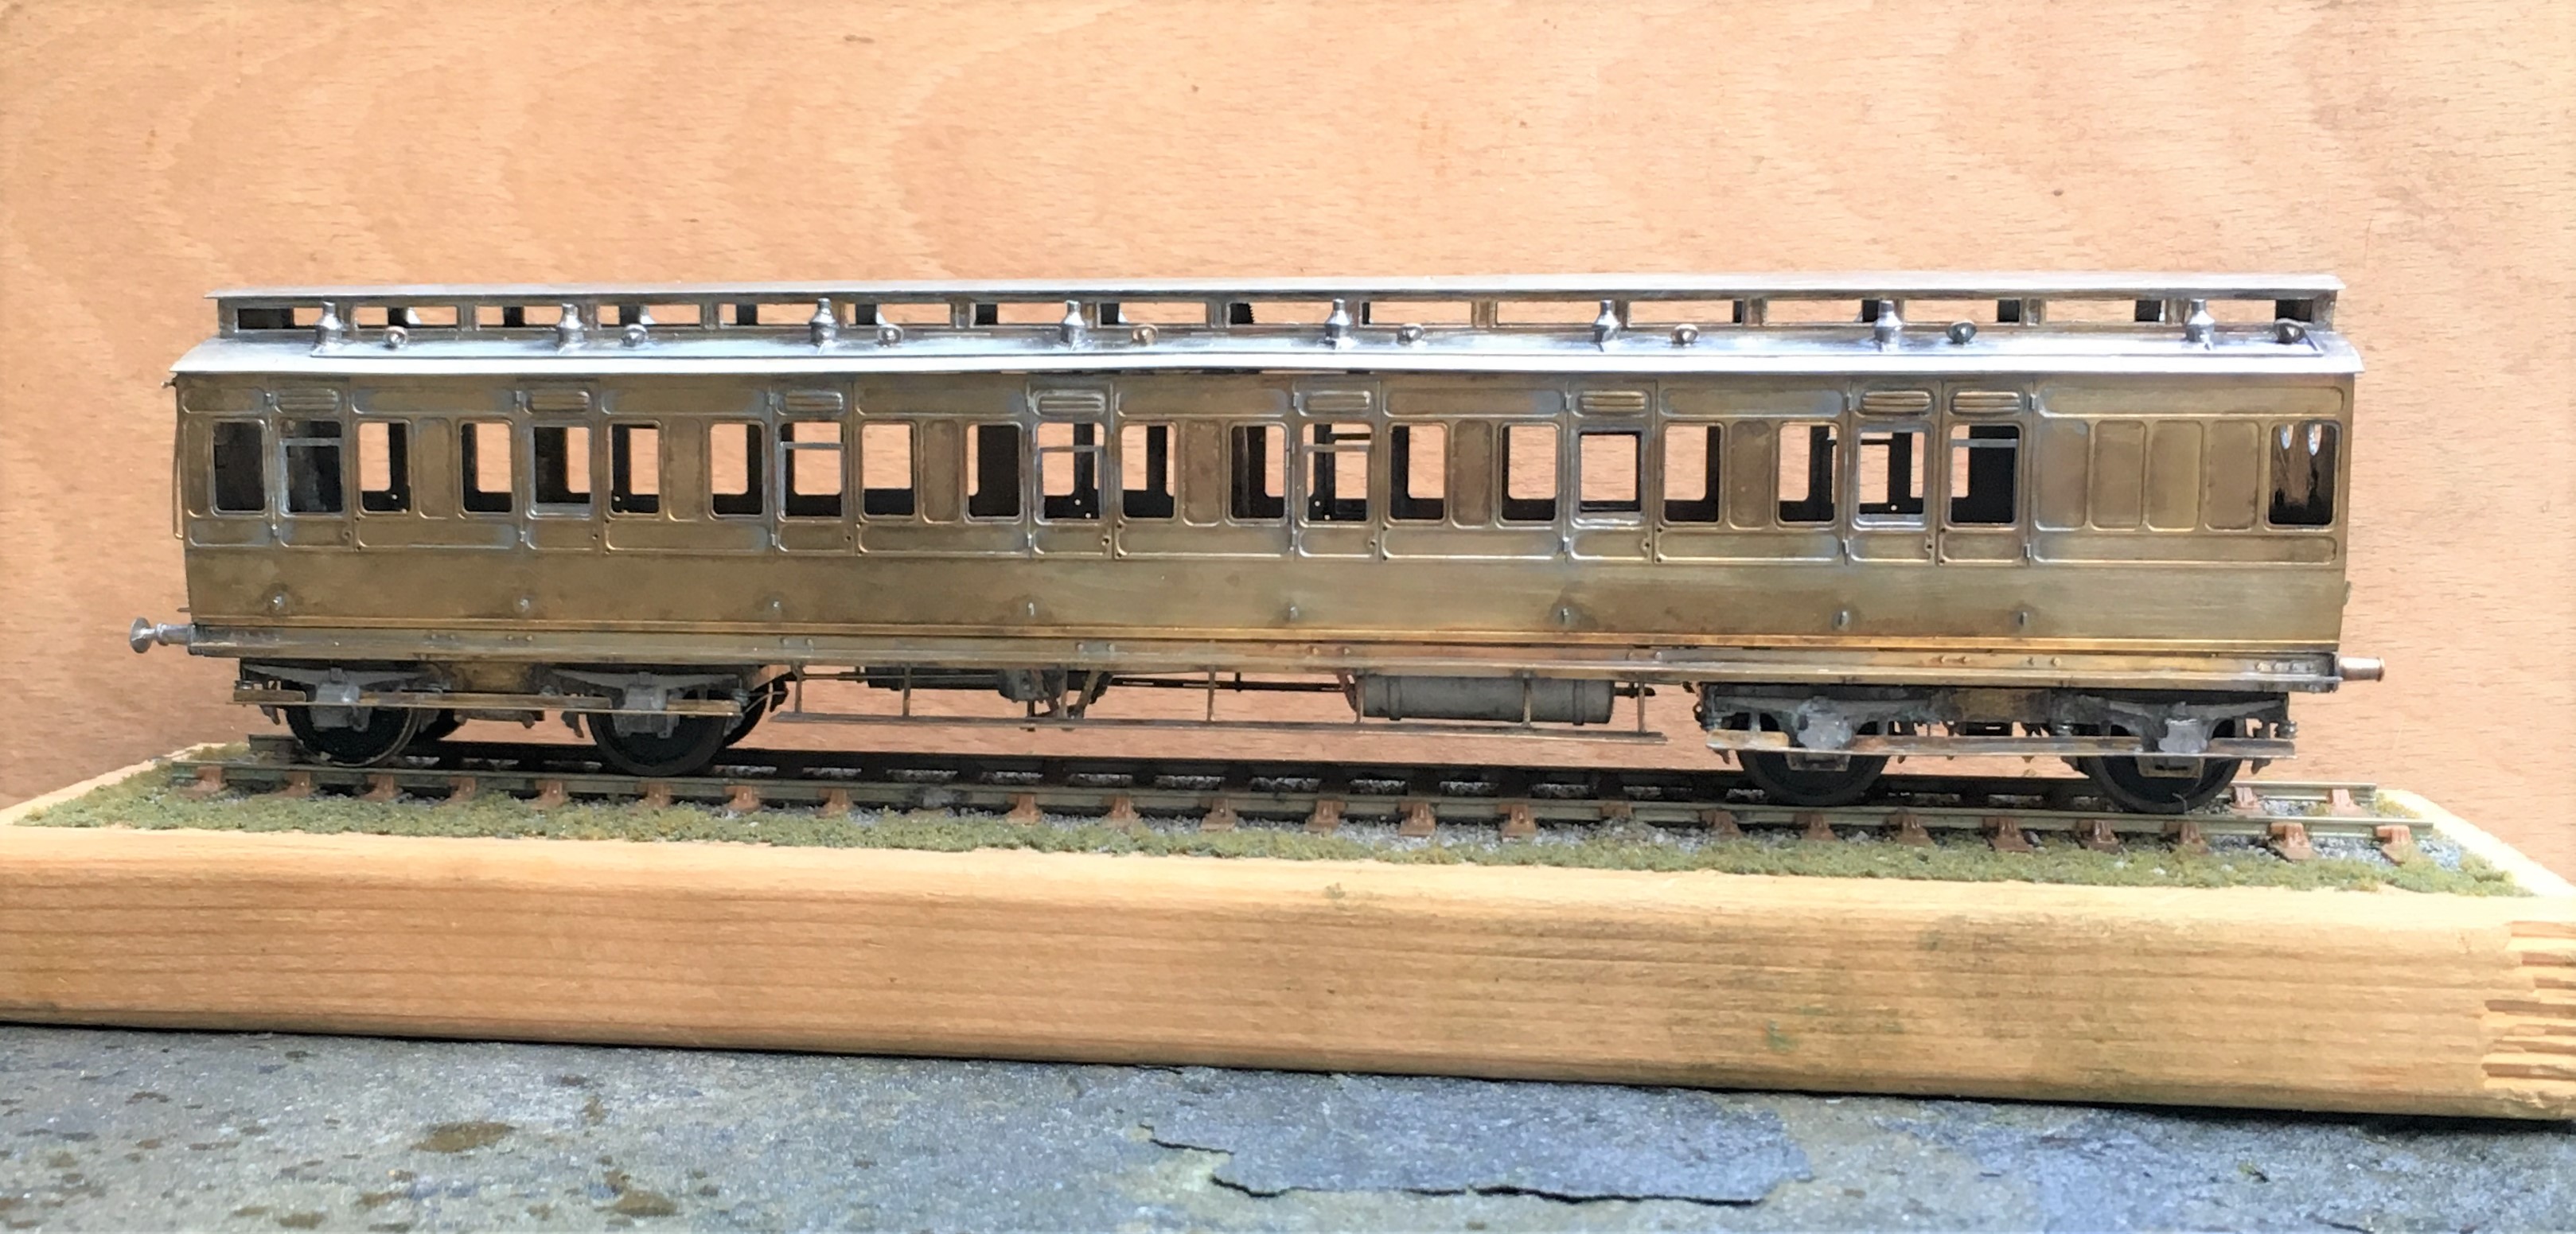
The Other Auto-coach
Some time back I posted about the construction of a NER autocoach that I was building for Benfieldside and subsequently what it looked like once painted by Warren Heywood.
The NER generally used these in pairs, with a loco sandwiched between, although they did go out singly and even as quads. In this case, the Benfieldside team wish to operate them as a pair, as the bay to the right of the layout is conceived to receive such a train, with a NER / LNER G6 in between. This means that there was pressure to build the second from the moment I handed the first over. They have recently given me a favour, so it was high time I repaid it.
It is now completed down to the final check over stage (which has indicated that I need to put the steam heating pipes on – doh!) and then it can be delivered. So I have braved the fading light this afternoon (so sorry about some of the depth of field issues) to take a few pictures and to prove to the fellas it is done!

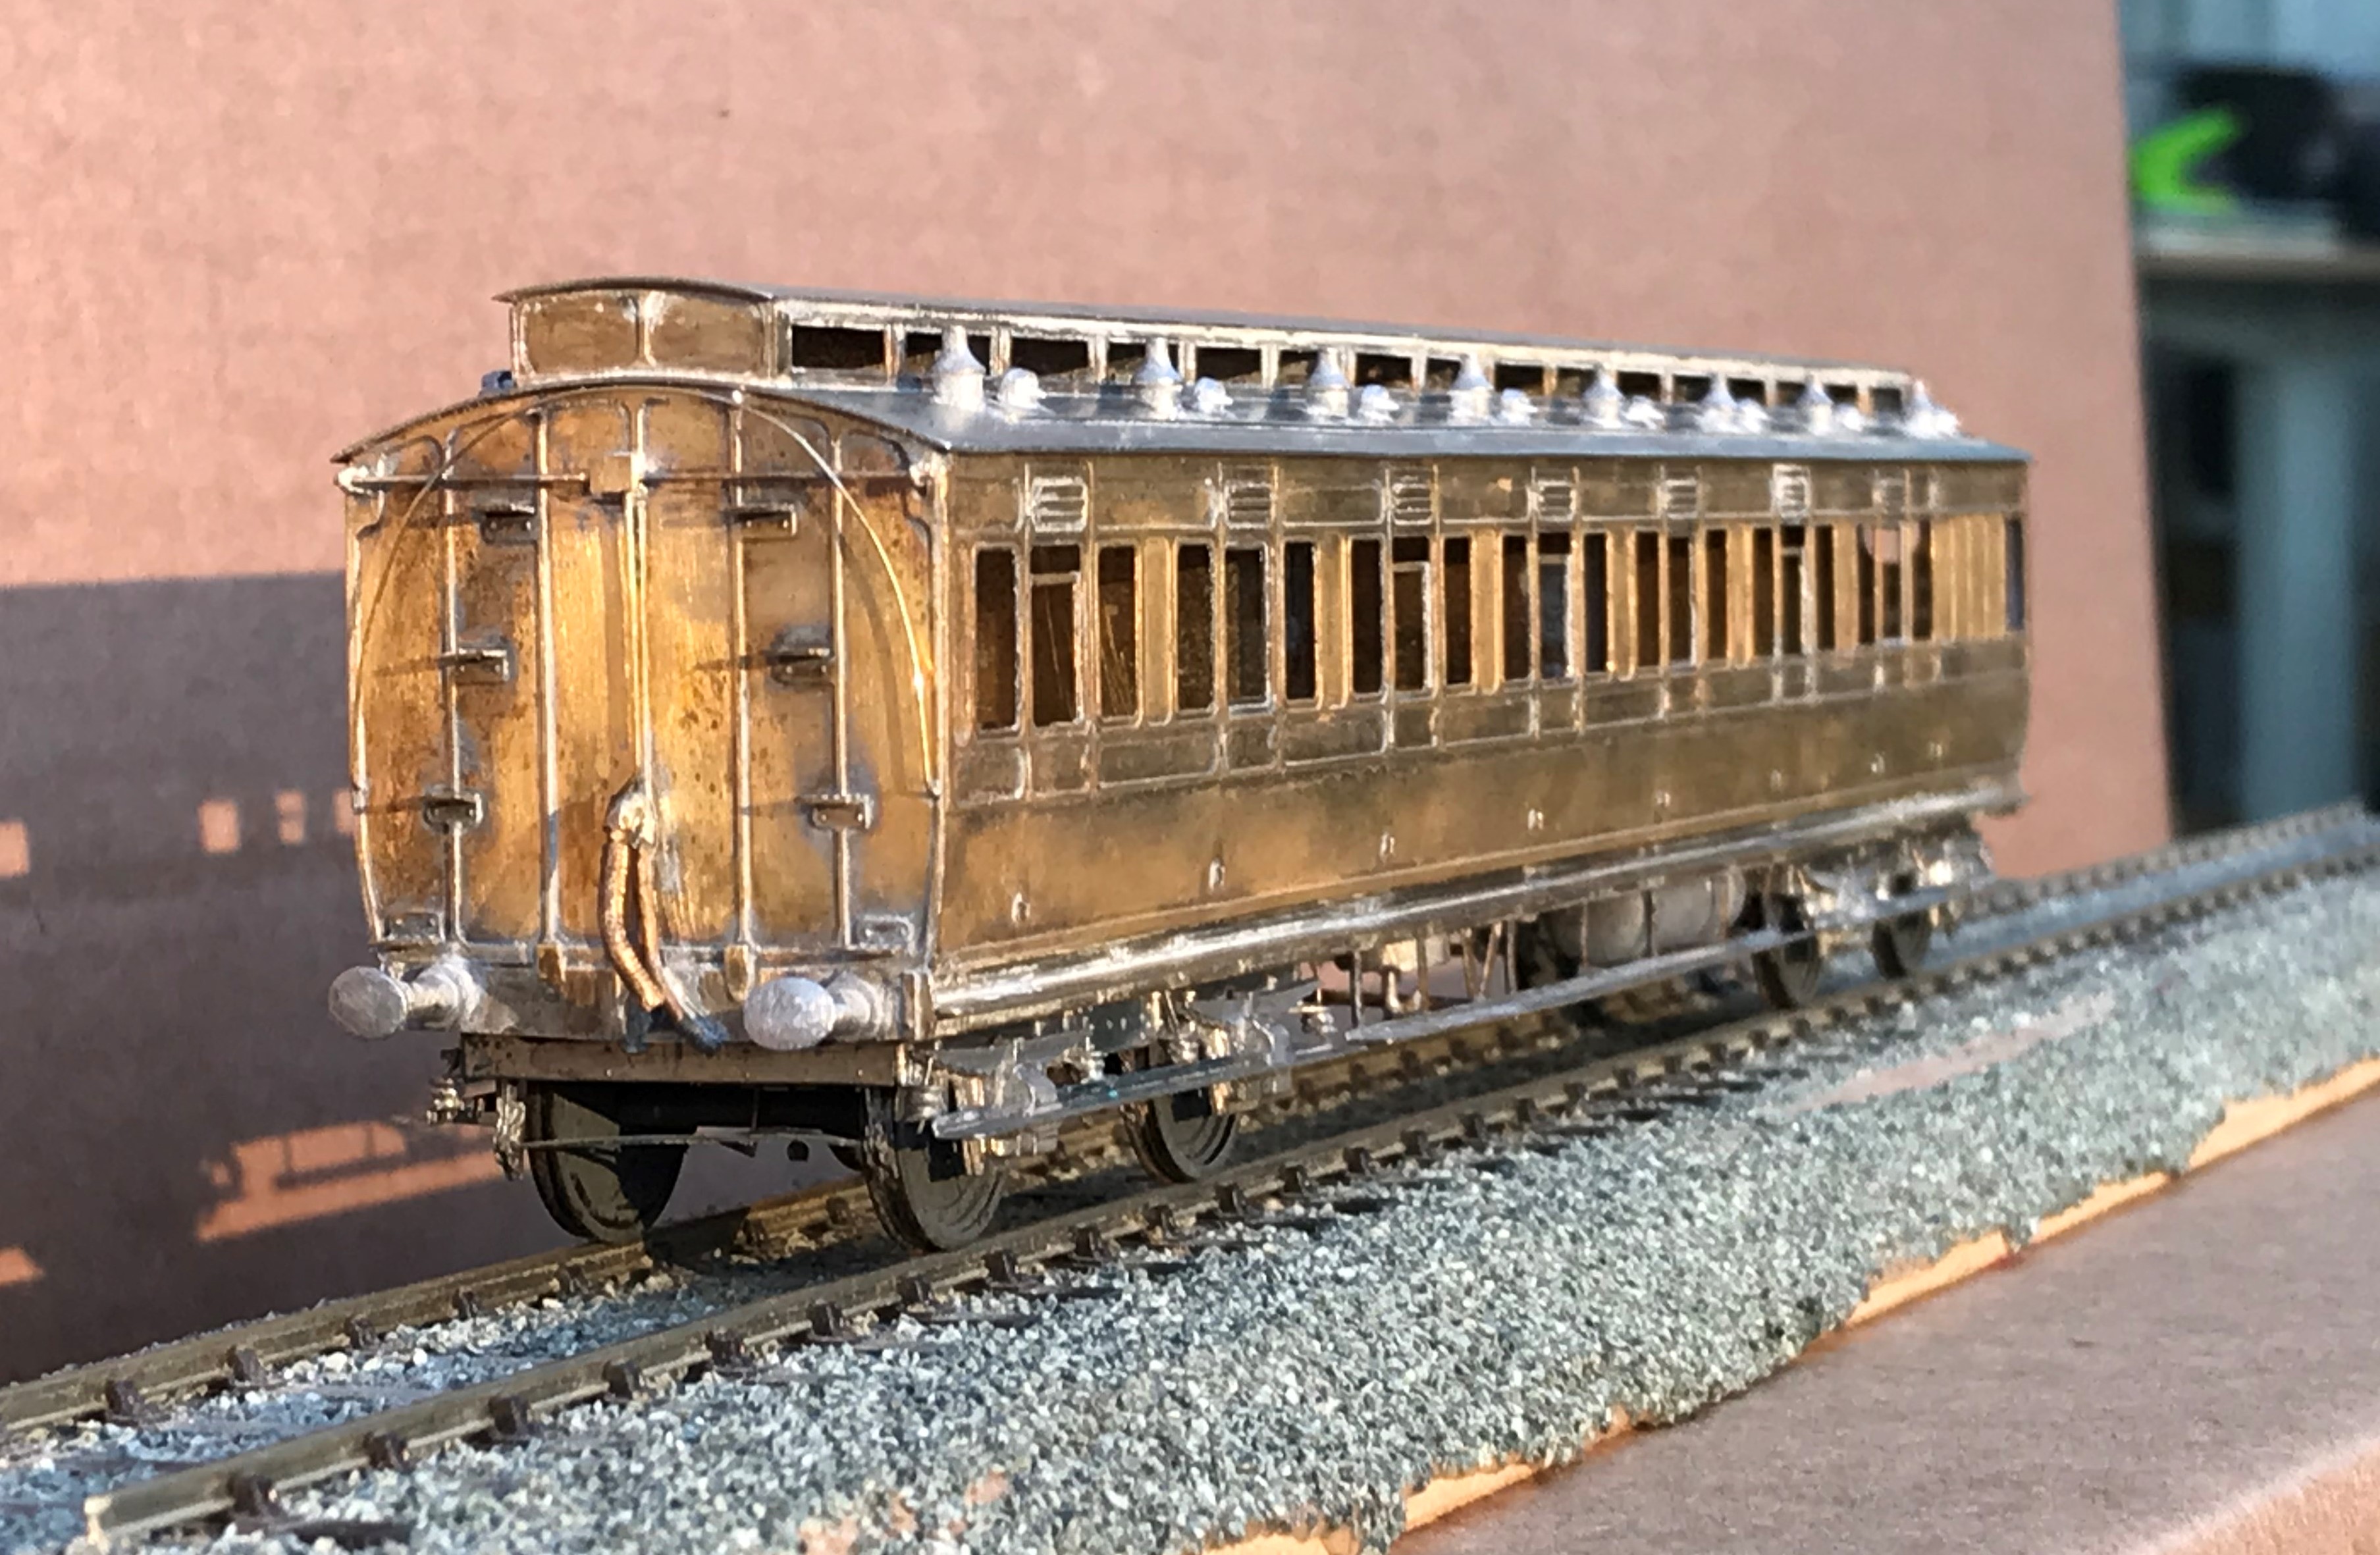
I completed a few personal upgrades to the kit in both this and the earlier autocoach. Chief of these is around the roof where I ditched the plastic roof and replaced it with rolled brass. This was formed of 0.25mm to give it a tangible depth, which makes its rolling a fair challenge. Add to this, I elected to cut out the portion below the clerestory, so that it was a clerestory! By the time I had added the gas lines and the various gas lamps and ventilators, I reckon there is around 20 hours in making the roof alone!
The prototype coaches were fairly long lived and numerous. They thus collected a good number of alterations and differences over time. I took some guidance to David Addyman and tweaked the kit in respect of gas lines, foot steps, handrails, footboards and gas cylinders. If someone thinks this is wrong, please don’t tell me!!
It always amuses me that the driver had to stand and peer down the line through two tiny windows. They lived in different times – could you imagine the snow-flakes tolerating this in the 21st century?
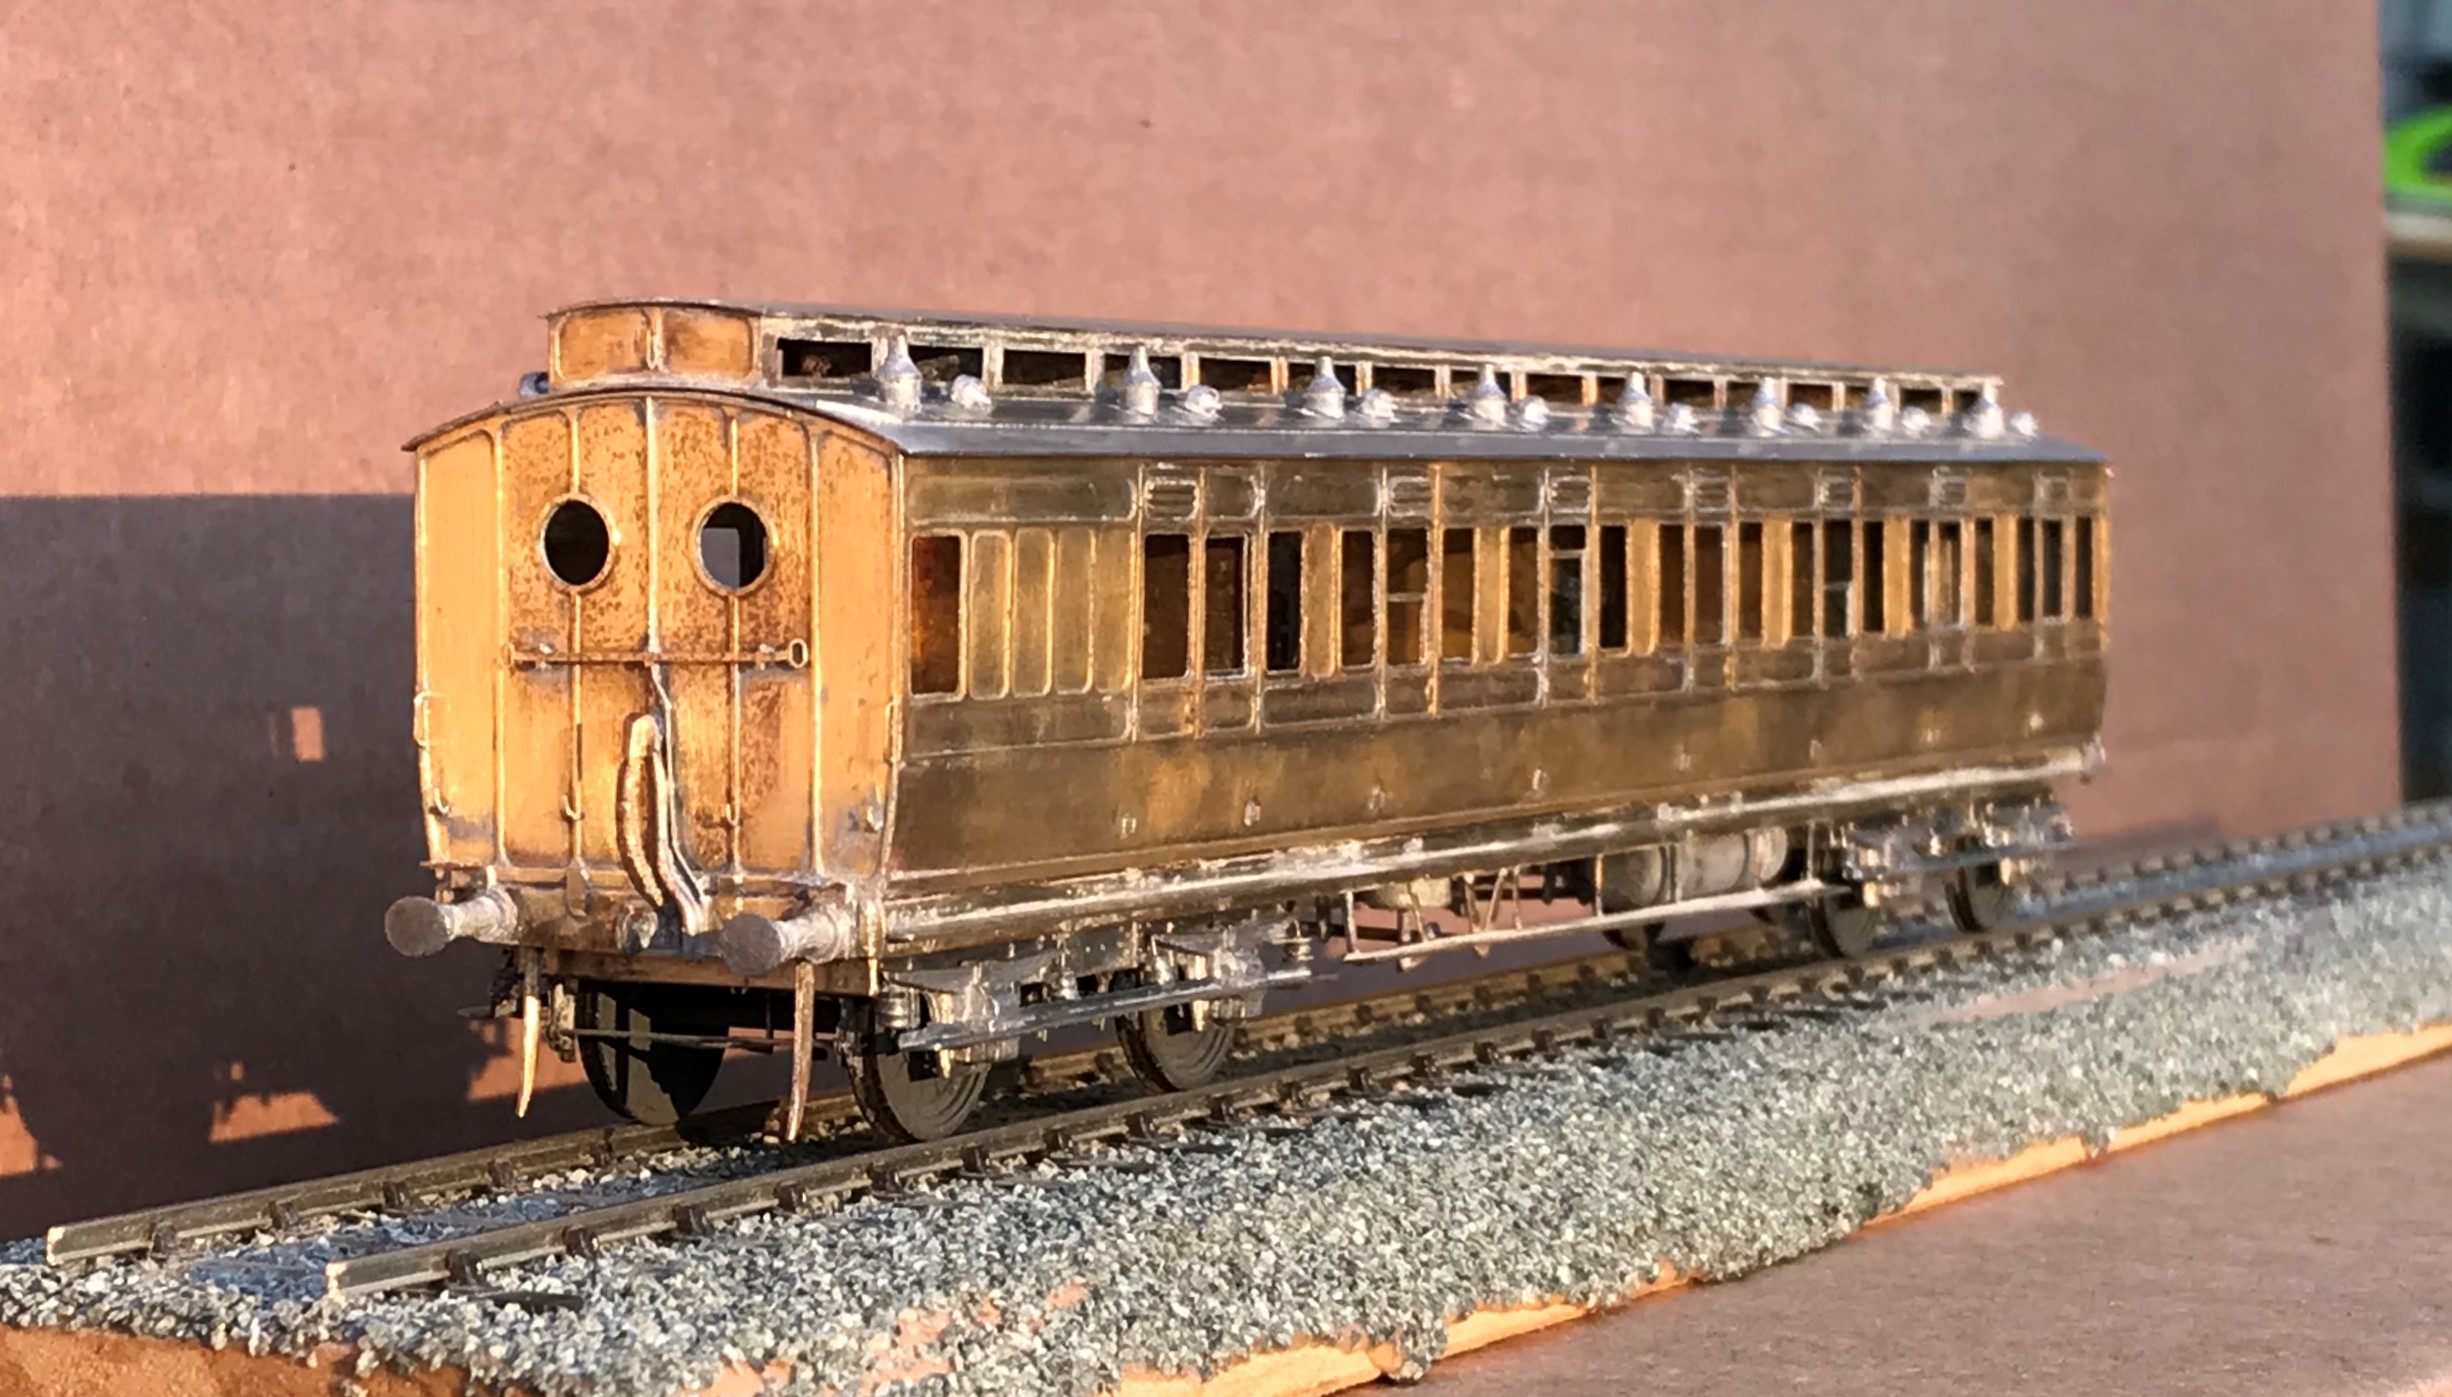
These are rather beautiful coaches, but not for the feint-hearted as there is a lot of time invested in these. I am pleased I do not have to paint it!

Catching up on a Tennant
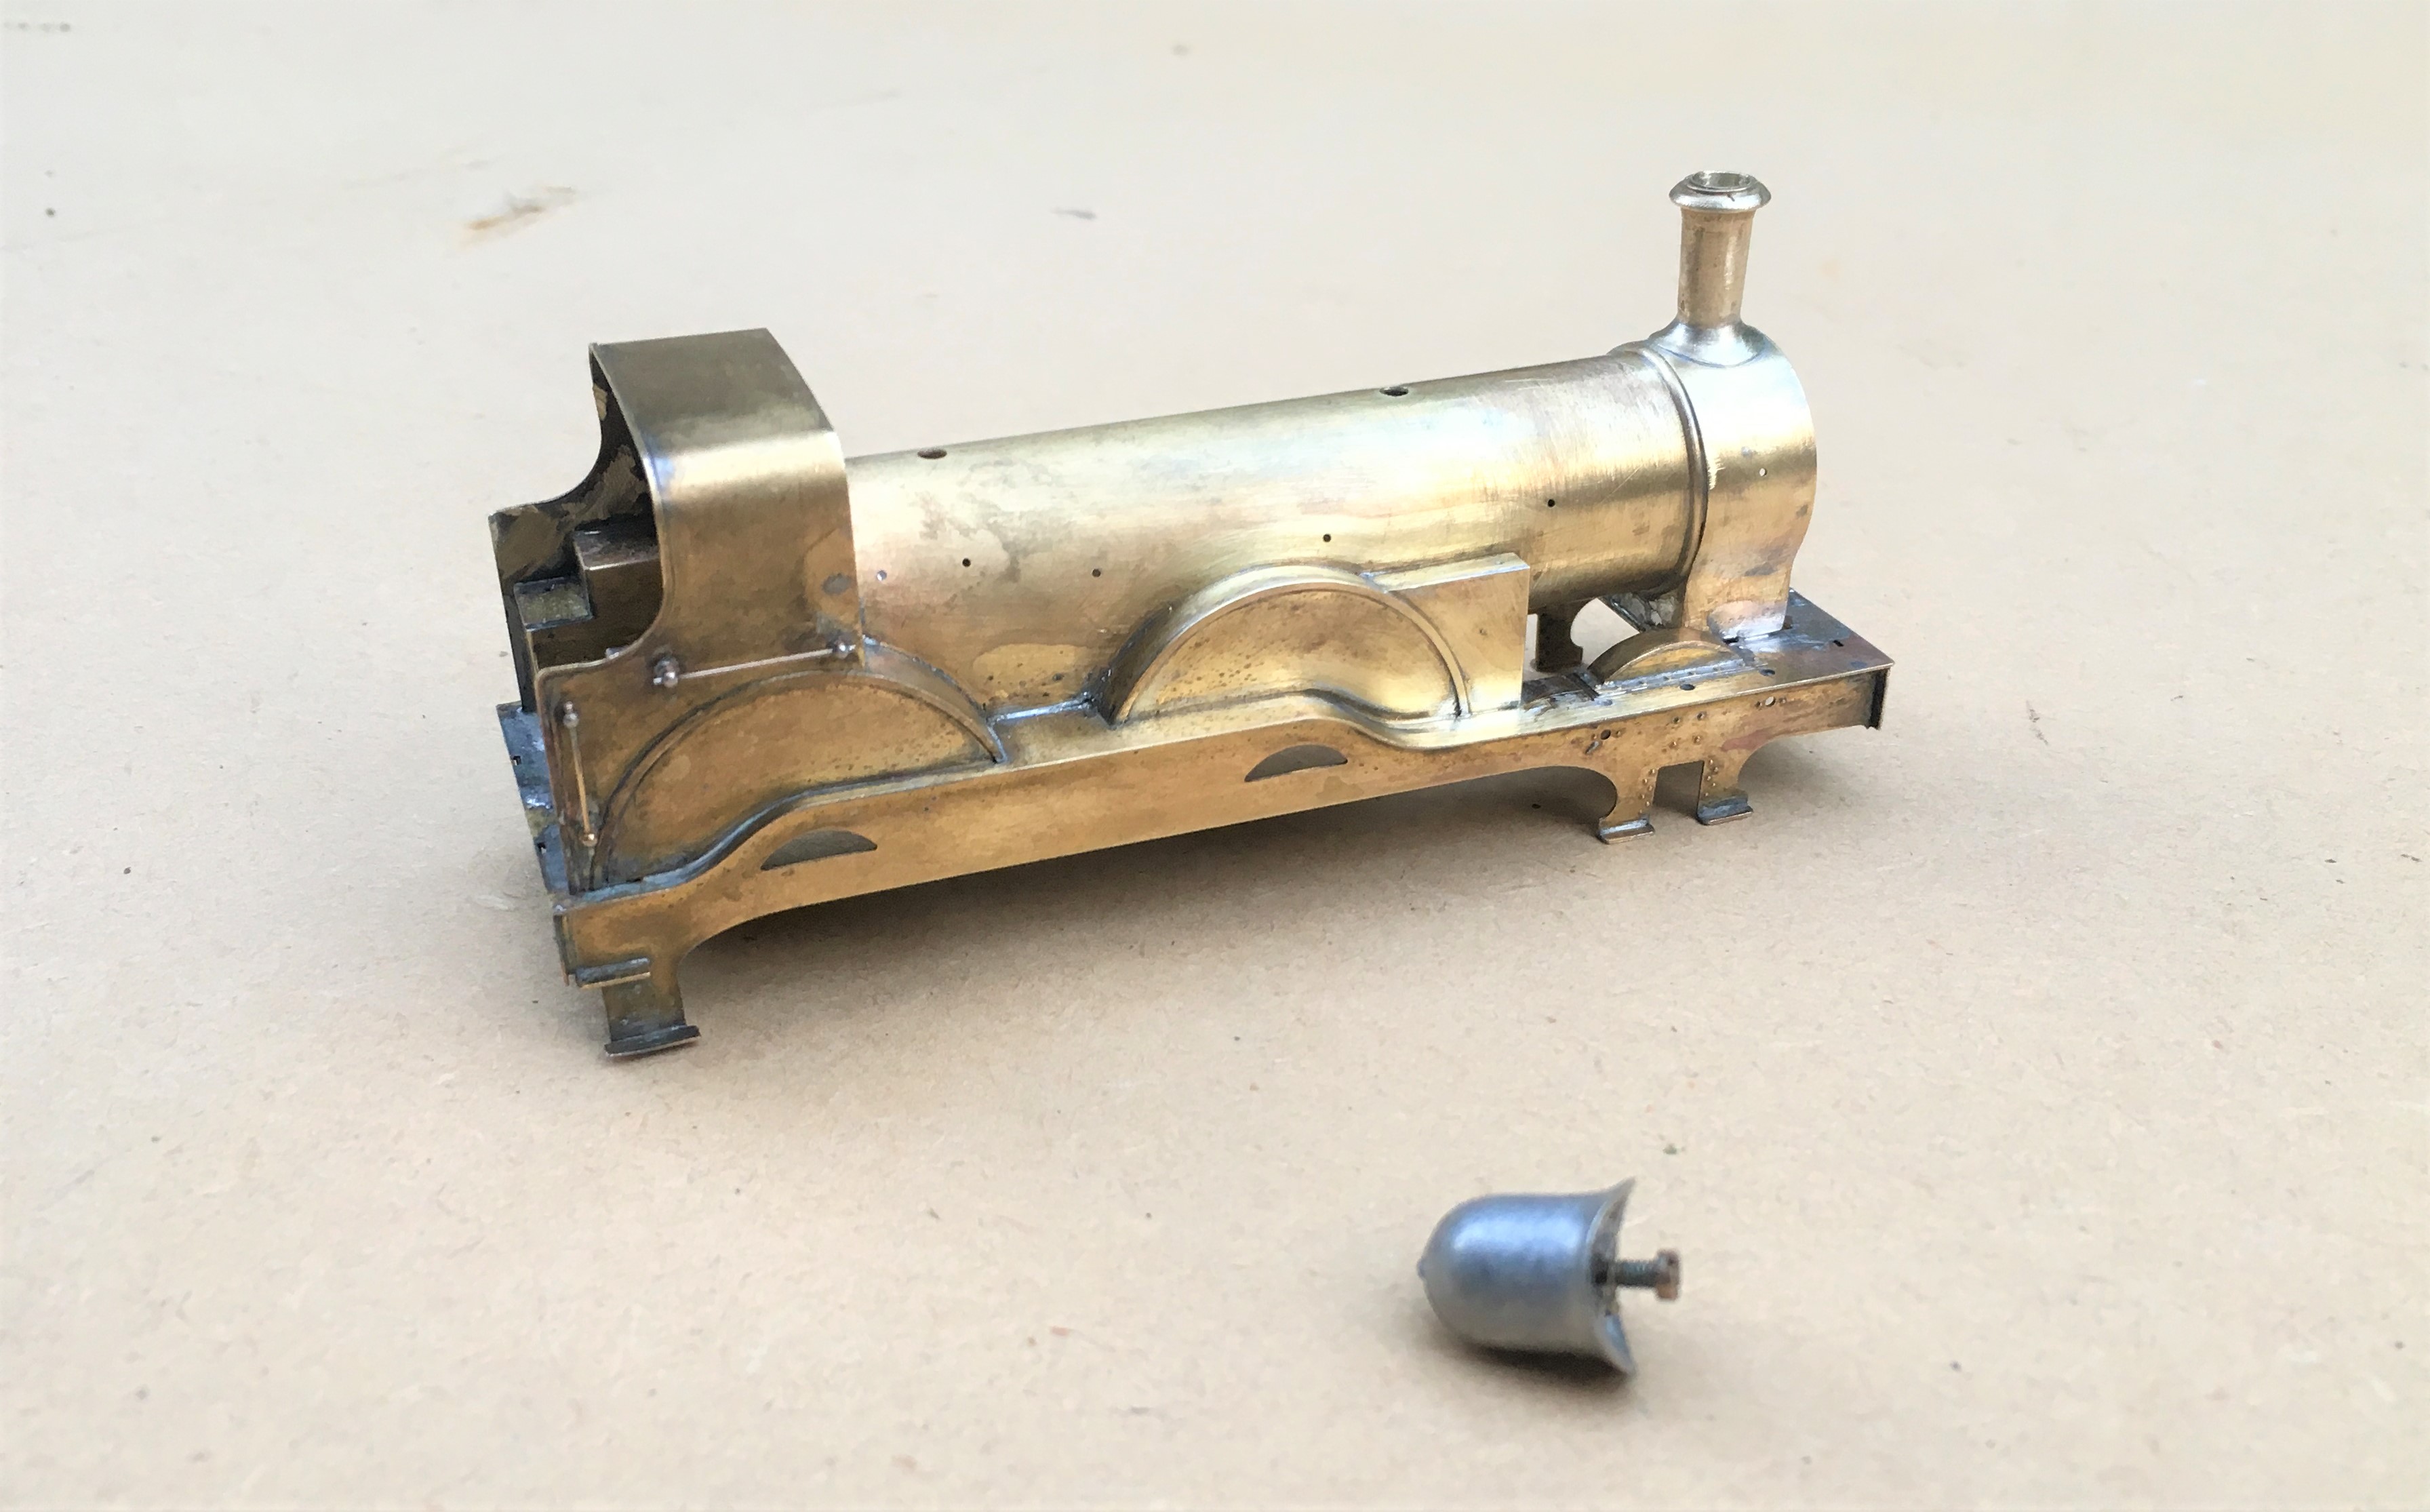
Way back in the mist of time (well 2016), I made a start on one of Arthur Kimber’s kits for a NER 2-4-0; termed a Tennant. After residing at the back of the cupboard for a bit too long (as is the way with my modelling, I do admire those that start something, see it neatly through to a finish before starting another……..!), I have made some more progress with it.
First up with the tender body which is close to finished except for some detailing around its front.
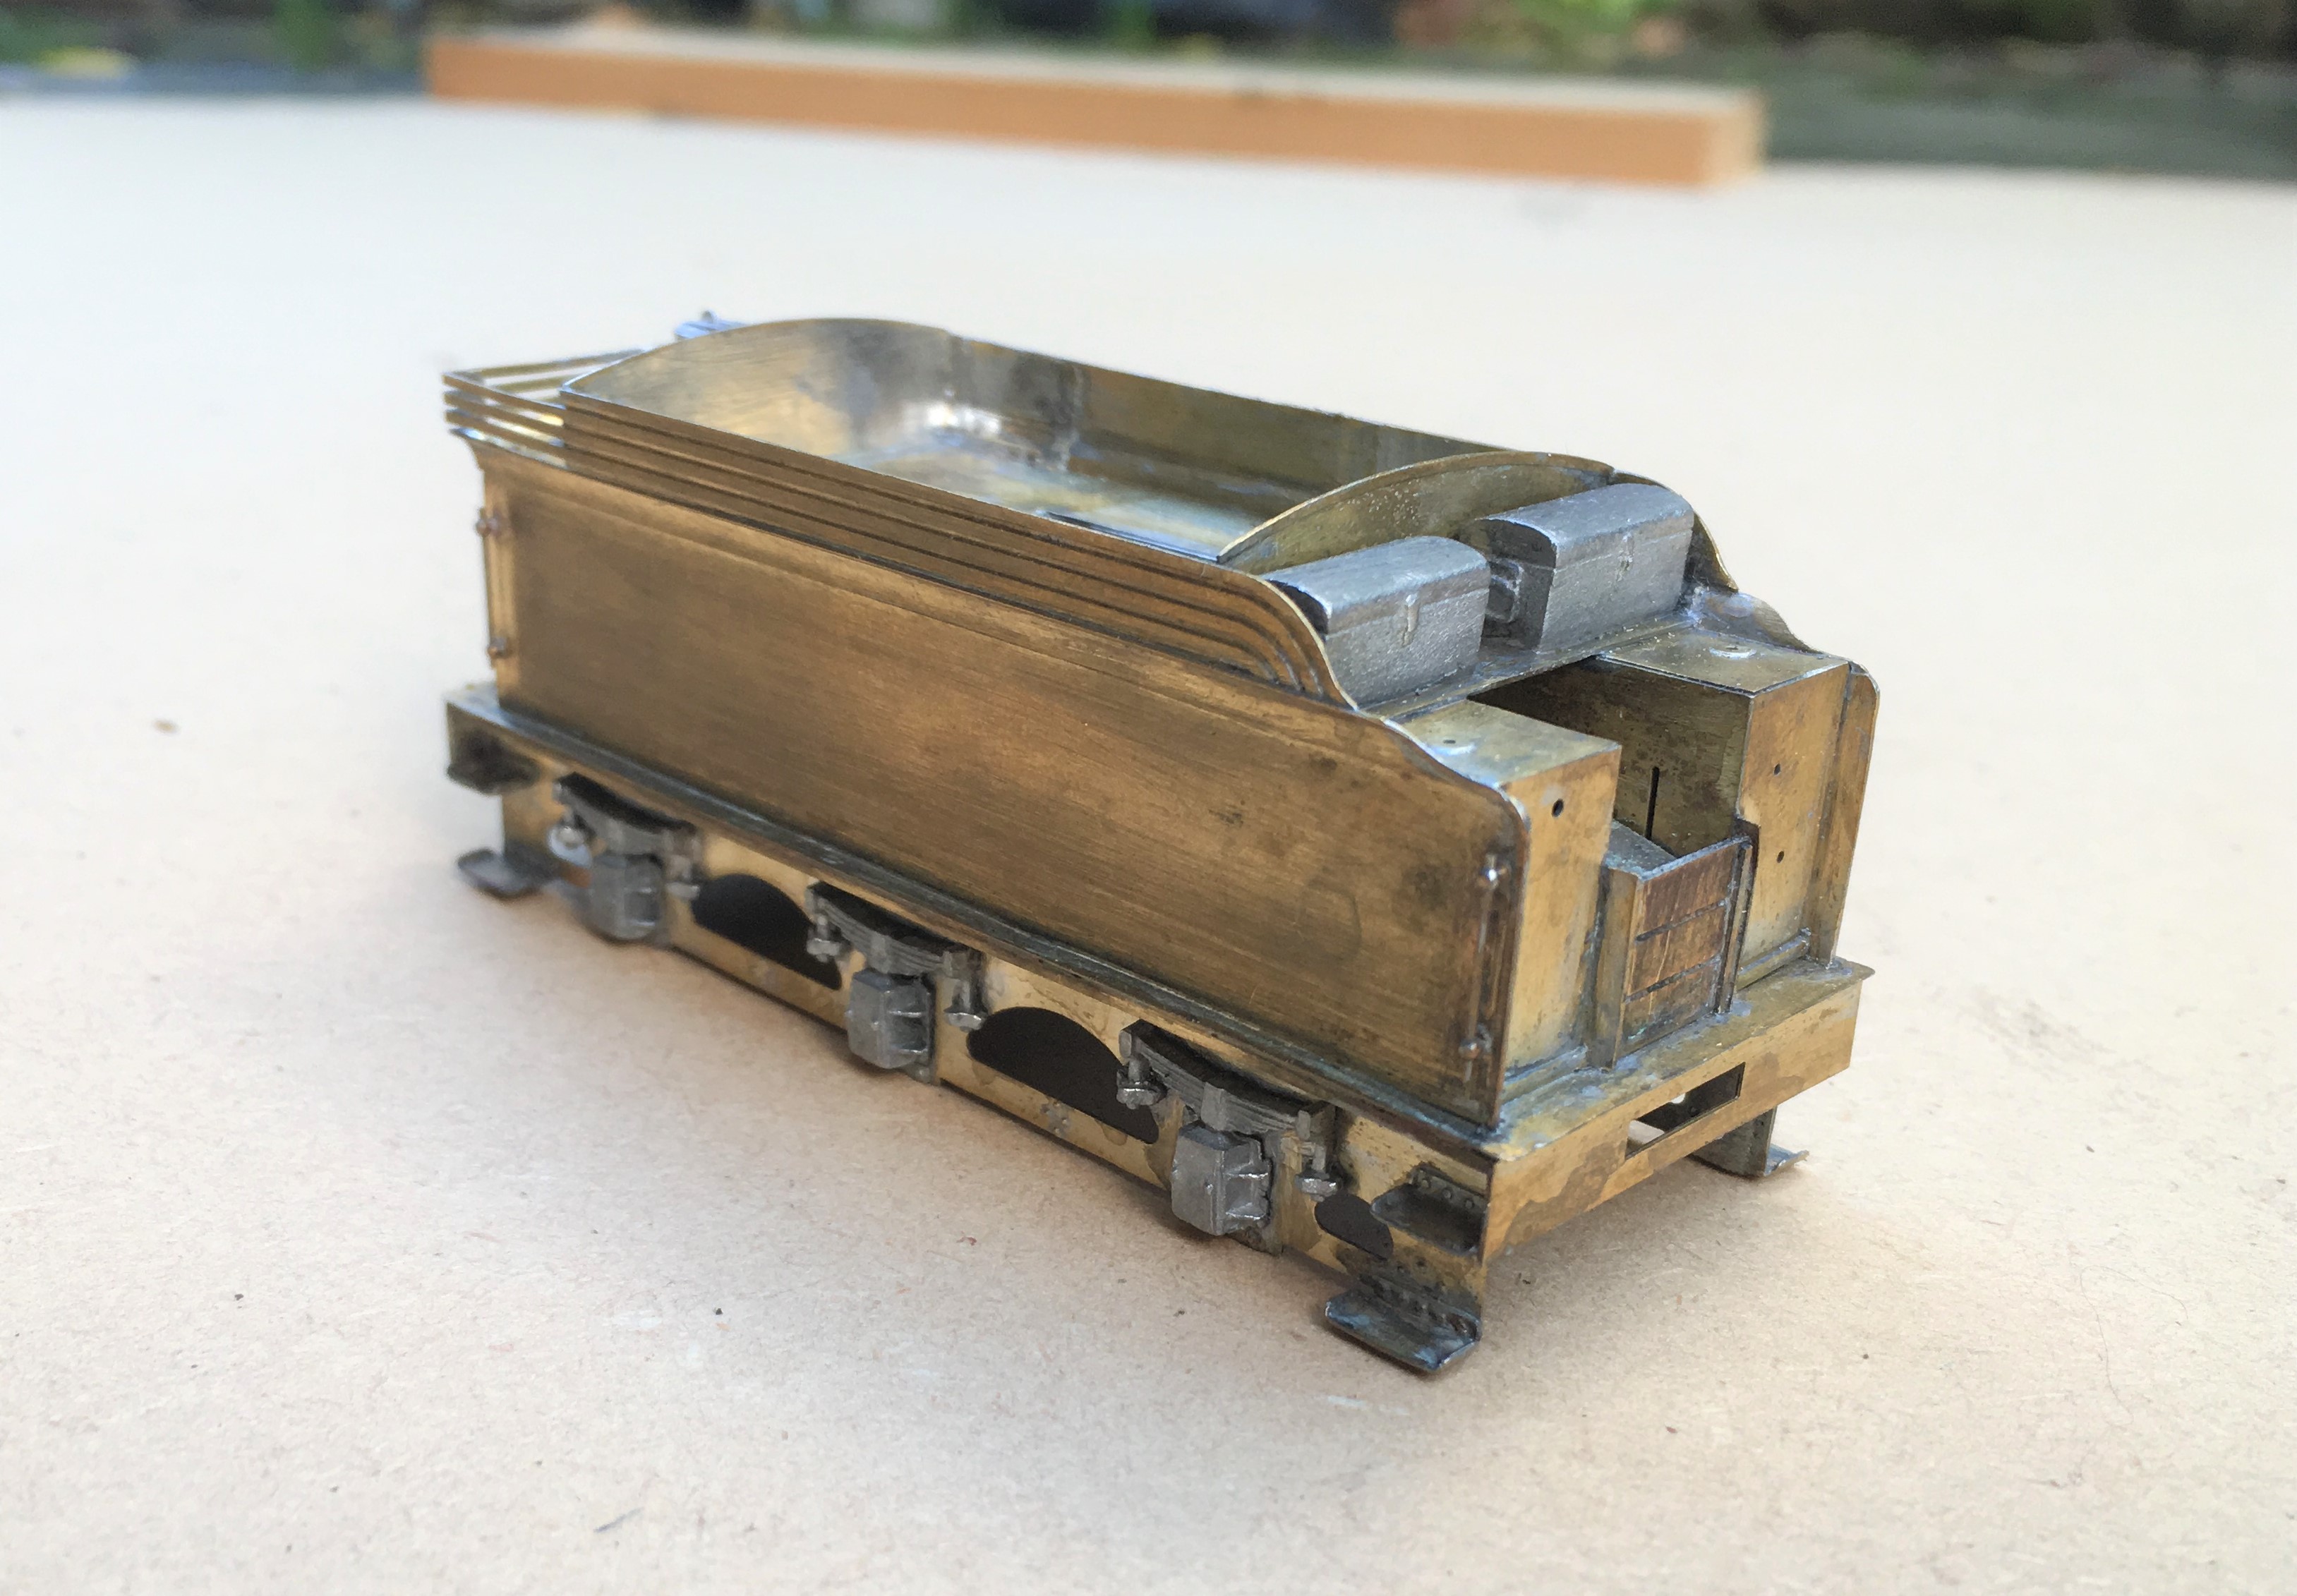
There was a bit of irritation in the building of this; despite being quite a modern kit the rear panel was much to narrow, the buffer beam a bit flimsy and there were some missing details around the front of the tender. Nothing someone raised on Jidenco’s kits can’t sort, but I rather hoped it wouldn’t happen with a modern design!
I also found that the boiler was about 0.7mm too long; a degree of filing and fettling has got it fitted. It is fair to say whilst there were these niggles, most of the rest of the kit is well designed and there are a number of neat facets to the kit, the flairs to the tender top for example are pre-rolled and they are very difficult to form without the right presses.

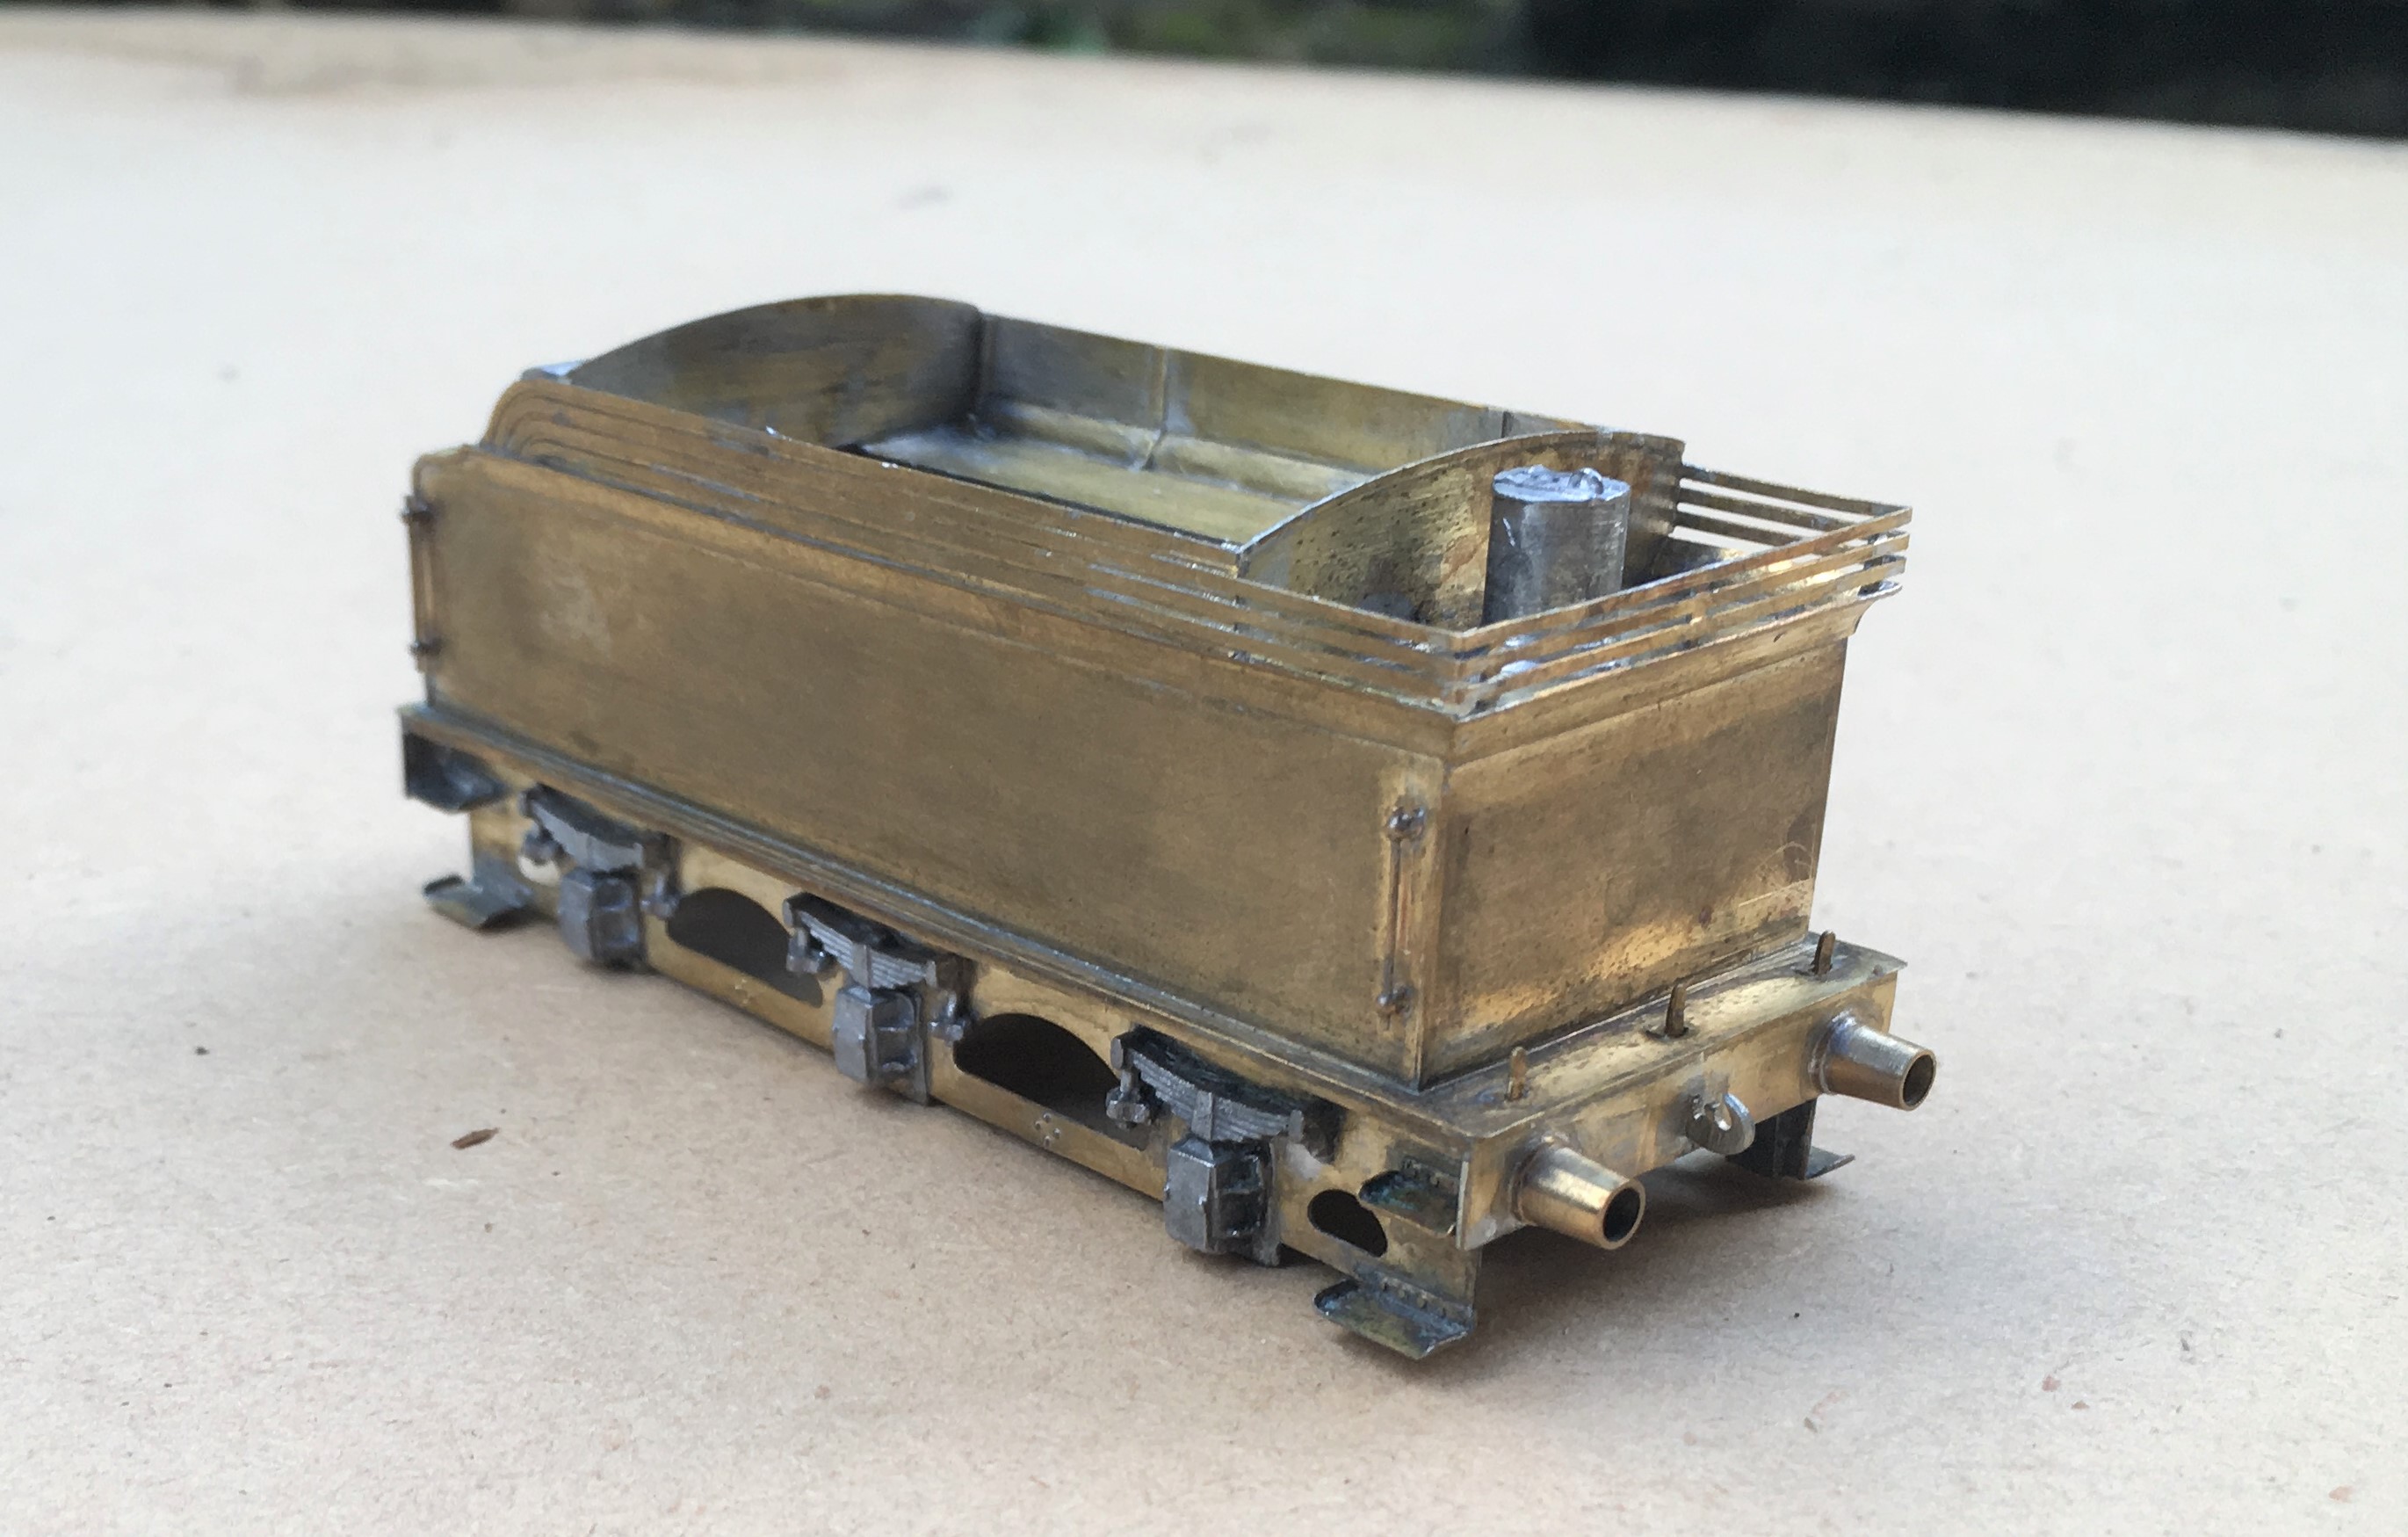
Here she is with the boiler now fitted and the first of the boiler fittings being attached. Something that grates with me on many people’s models is where these do not sit down tightly on the boiler or have overly thick flanges onto the boiler. Given that these are castings, it is understandable that these sometimes happen but they do damage the reality of the model and it pays to address these issues. For this reason, I prefer to solder them in place and am prepared to attack them with a file both before and after they have been fitted.
This does create a problem of soldering the parts in place; they are quite chunky so need a lot of heat to solder them in place and it is difficult to move them about to get them in the right place when they are so hot. I have just started to address this by drilling out the base of the boiler fitting and tapping it to take a 10BA bolt + washer. This allows the the fitting to be moved about until it is in the right place and held tight with the bolt so that it can then be soldered. I am pleased with this little trick; it definitely repays the effort and for the white metal castings, saves the risk of returning them to a blob of metal with too much heat!
One example of a Tennant is preserved, being situated at the Head of Steam Museum at North Road Darlington Station. This has enabled me to take a good number of detailed shots but they are all rather close up they don’t really capture the prototype; so here is one from Neil Dimmer’s collection from the earlish 1920s, at (I think) York. The thin nature of the flanges to the dome and chimney I comment on above can be seen in this.
![[IMG]](https://photos.smugmug.com/LNERSteam/1884-NER-Henry-Tennant/Tennant-E5-NER-1463-2-4-0-Locomotives/i-L5bsMX9/1/794c2272/XL/1463%20Tennant%20E5%20%28NER%20%271463%27%29%202-4-0%20Locomotives-XL.jpg)
This view also illustrates how thin the boiler bands are. Given that this will be painted in NER livery that has lining on the boiler bands I am going to rely on the thickness of the lining transfer to give the impression of the boiler band rather than represent them in metal.

News from Miscellany Models
Followers of this blog will have noted that various test builds of my artwork coming together and I am now able to offer a number of these for sale under the name of Miscellany Models.
First up is a Highland Railway/LMS/BR diagram 51 full brake – priced at £48.00 for a 4mm and is suitable for OO, EM or P4. These were the last generation of full brake produced by the Highland, built with both cupboard doors and sliding doors as well as alternative forms of guards duckets (all of these are included in the kit). The kit inclusive of fully sprung Fox bogies (see below), roof, corridor connections (also see below) but all castings and buffers will need to be sourced separately. The castings for the bogies are proposed, but are not presently available.

As was common with many pre-grouping coaches these vehicles utilised Fox Bogies (£16.00) and these are being made separately to the remainder of the kit, These bogies have been developed in conjunction with Justin at Rumney Models and are fully sprung, with both the axleboxes and the bolsters sprung. They really do glide across track and look as if they weigh many tons rather than a few grams! They need castings for your favoured axleboxes/springs and bolsters but do include the foot steps and all of the bogies sides, brakes and details. Suitable for oo, EM and P4.
.JPG.3b26712c4490ad68695b10226612a0a9.JPG)
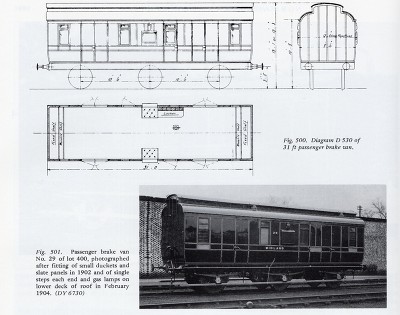
The second coach kit is for a MR/LMS/BR: Dia 530 Passenger Brake – priced at £36.00 in 4mm scale (suitable for OO, EM and P4). This prototype was built in some numbers and by the 1920s they were spread extensively across the LMS system. The kit is for full etches covering the roof, body, underframe and footboards plus parts for the sliding central axle included. It needs axlebox/springs (available from Branchlines or Coopercraft), gas lamps, buffers, brake and gas cylinders.
.JPG.1678157932a192d68328755d825c54f0.JPG)
On the wagon front, there is an etch to detail the NER/LNER/BR: Dia P7 Hopper Wagon – £13.50 4mm (sufficient for two wagons). They cater for a large number of the variants to this numerous and long lasting hopper wagon. Needs wheels and the Slaters kit P7 kit for the donor model. Variants that can be made include the end braked version, improved components for the Morton braked version, outside twin W irons and also the anti-friction wheel device.

All of these are available from my website https://miscellanymodels.com/ and in addition to this from the Rumney Models stand at the following shows – Scalefour North in April, Railex in May, Scalefourum in September and South Hants in November,
All of these have been extensively road tested by me with a couple of test builds for each of them. You can see this unfold on my blog and if you are interested in seeing how they go together do take a look!
Please remember that the availability of these models is an adjunct to my own hobby and this has to be accommodated within the constraints of my day job and general life! In particular I can’t get to post these orders until Saturdays so do please give me a little slack when it comes to getting the goods to you!
Diagram 51 Full Brakes – Test Build part 5; now in glorious technicolor!
The pages of this blog have charted the development of a proposed kit to build the Highland Railways dia 51 full brake; well finally it is finished and we get to see them in the flesh and painted up.
The kit can produce, with a bit of modification, two variants of door and I have now build both of them. First up the cupboard door version painted in crimson lake and minus full footboards.
Second we have the sliding door version, this being modelled with full step boards and in Highland Olive green.
Apologies that the technicolor photos are a bit short on gloriousness; it is fair p*ssing down today and this is the most light that I could get to take any photos!
If you want to recap on the earlier blogs that show the development of the proposed kit, you can find them here:
Part 1 – getting underway with the body
Part 2 – drawing the chassis and roof to a conclusion
Part 3 – the build of the second vehicle (sliding door version)
Part 4 – details of the spring bogies that accompany these (and many other coaches)
I do now have a batch of these back from the etchers and I aim to conclude the instructions on Monday/Tuesday. I will then make a notification that they are available but at present I cannot provide the castings and those to the bogie are rather important. If you can scavenge from a Lochgorm kit some Iracier axleboes/springs, you will be able to complete the kit; if not then I am seeking to either source some of these castings or produce my own. So watch this space.

Damaging Value…..
Over the last few years I have acquired a few coaches painted by Larry Goddard. As you can seen below, these are beautifully painted and, particularly, lined coaches. Although he is not really building much any more, Larry’s work comes up from time to time on ebay and I have been nabbing a few of these. They are not particularly cheap, but then there is a fair amount of work in building an etched coach and in reality the price I am paying for them is hardly a fair reflection of this time.
Whilst I have been able to line fairly well in the dim distant past of my teenage years, I don’t think my lining was as good as this and, more importantly, I have misplaced my lining mojo. Although I have plans to try and rediscover the mojo, these coaches do provide a means to get a few very nice coaches to get the layout moving.

This particular coach is to the LMS’s diagram 1778 and originate from 1925 – 28. They were the first standard design for the LMS and will have been found throughout their system, including on the Highland section. My intent for the layout is to have a pair of through trains to Edinburgh/Glasgow with through coaches to London – this will form part of this.
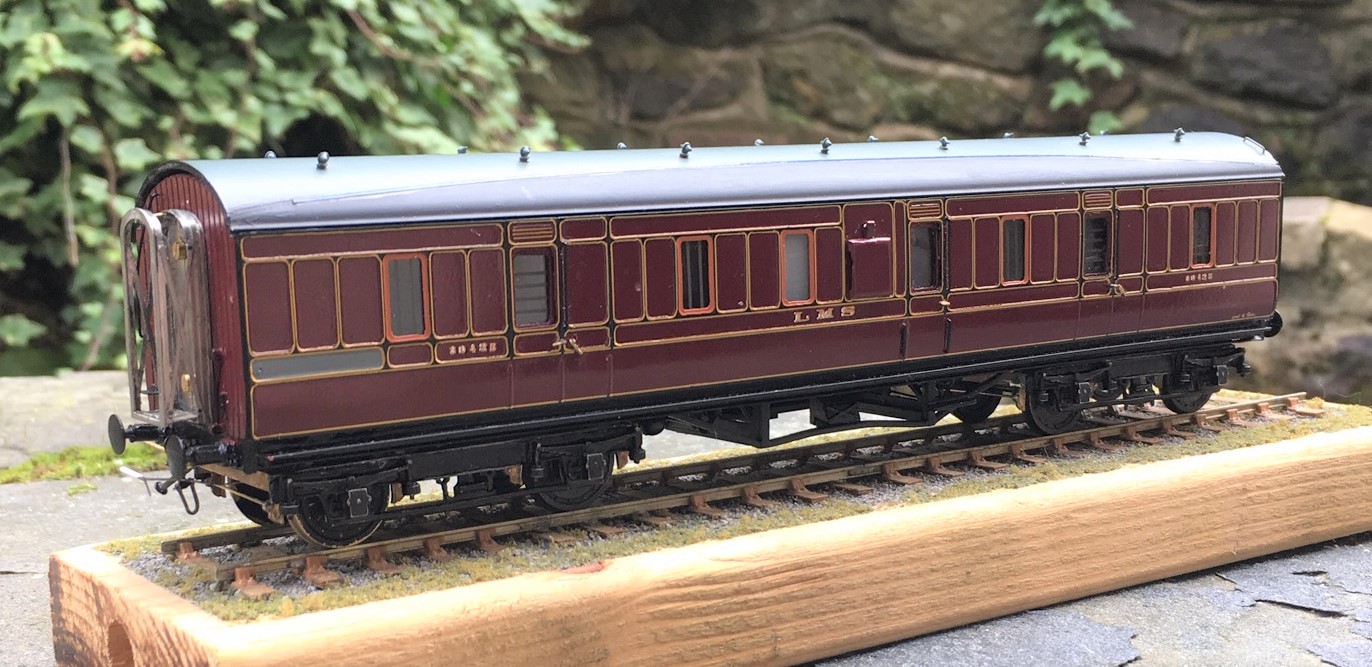
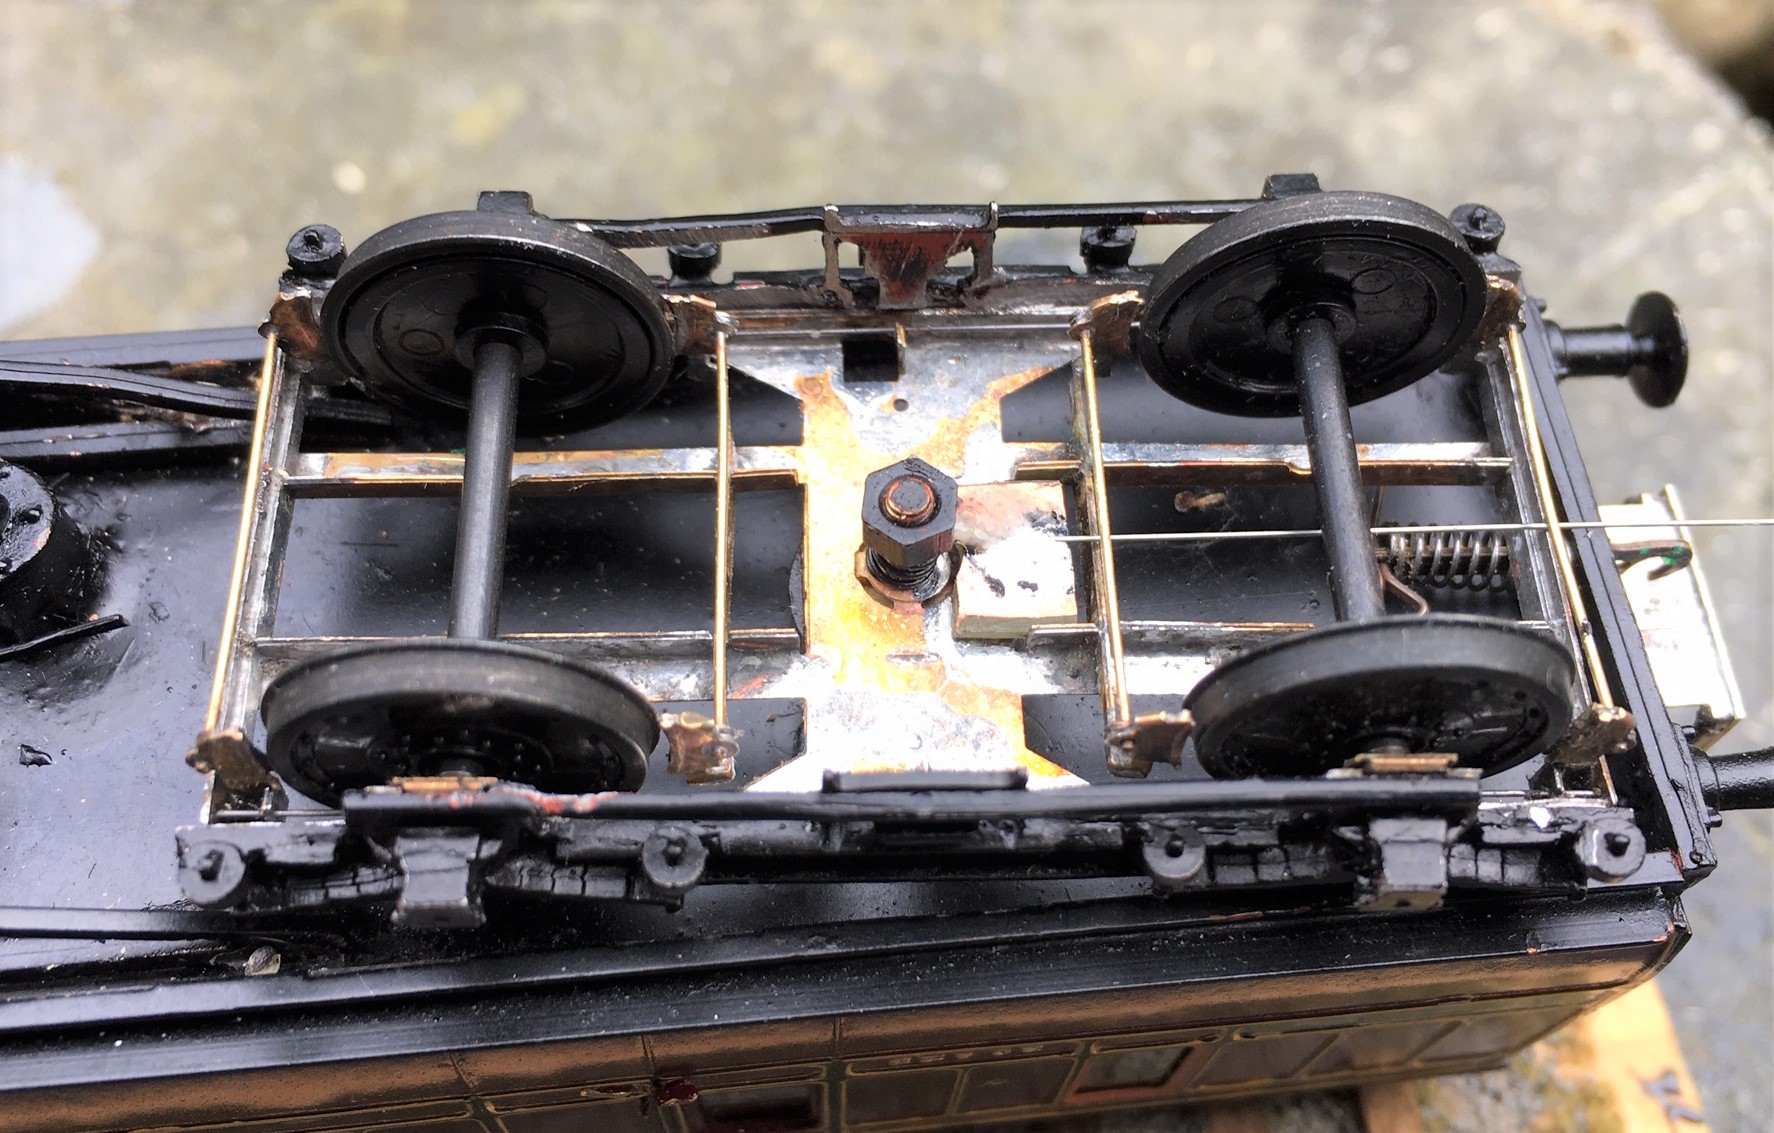
Whilst the basic building and painting/lining of the coach is top notch, there are some issues that I have sought to deal with. First of these is that the bogies are fairly clunky and being assembled from components they are unlikely to be truly square. Thus, I have disassembled these and used them as cosmetic sides to some Bill Bedford sprung bogies.
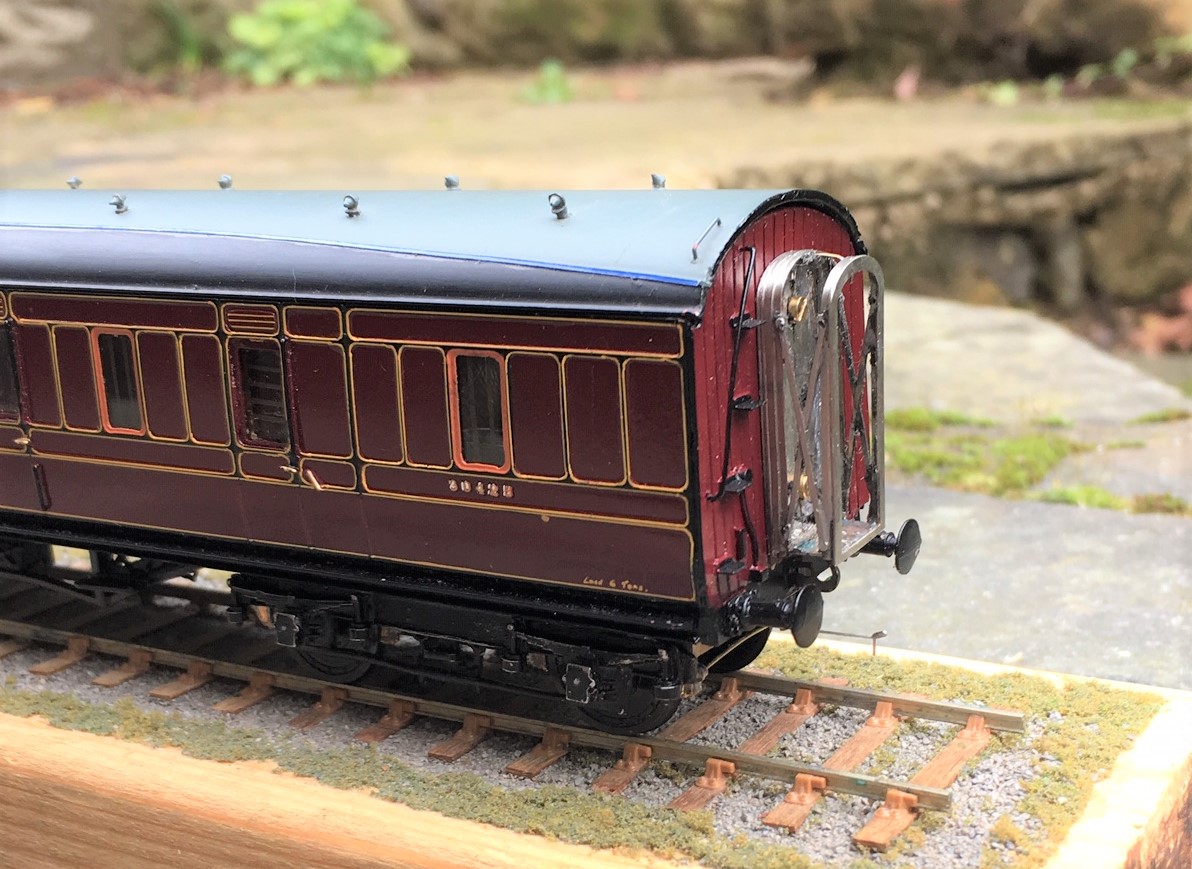
The coach as built comes with some paper concertina corridor connections – all very 1970s in they look and as they are stretching, they look rather rubbish so off they came. In their place, I have built some of my etched ones – these are a spin off from the dia 51 full brake kit that I am working on. This shows them part built and I will be looking to do a posting on these in their own right once I am fully happy with them.
If mucking about and making the coaches for P4 is not sufficient to undermine the resale value of the coach, the final task to weather down the very glossy paintwork will. These were obviously predominantly aimed at collectors and are finished to showroom standards. The railways of the steam age were amazingly dirty places and a loco or coach in an ex-works condition would be pretty mucky by the end of its first run, let alone its first year.
Thus, it can not stay as clean and glossy as this, no matter how beautiful it looks. I have a weathering day planned for a couple of weeks time, and attacking this will be one of the tasks…………..

One for the Paintshop
I am sure I am not alone in having in mind a list of modelling jobs to do over the Christmas break and to find that the bulk of the list remains uncompleted when it is time to go back to work!!
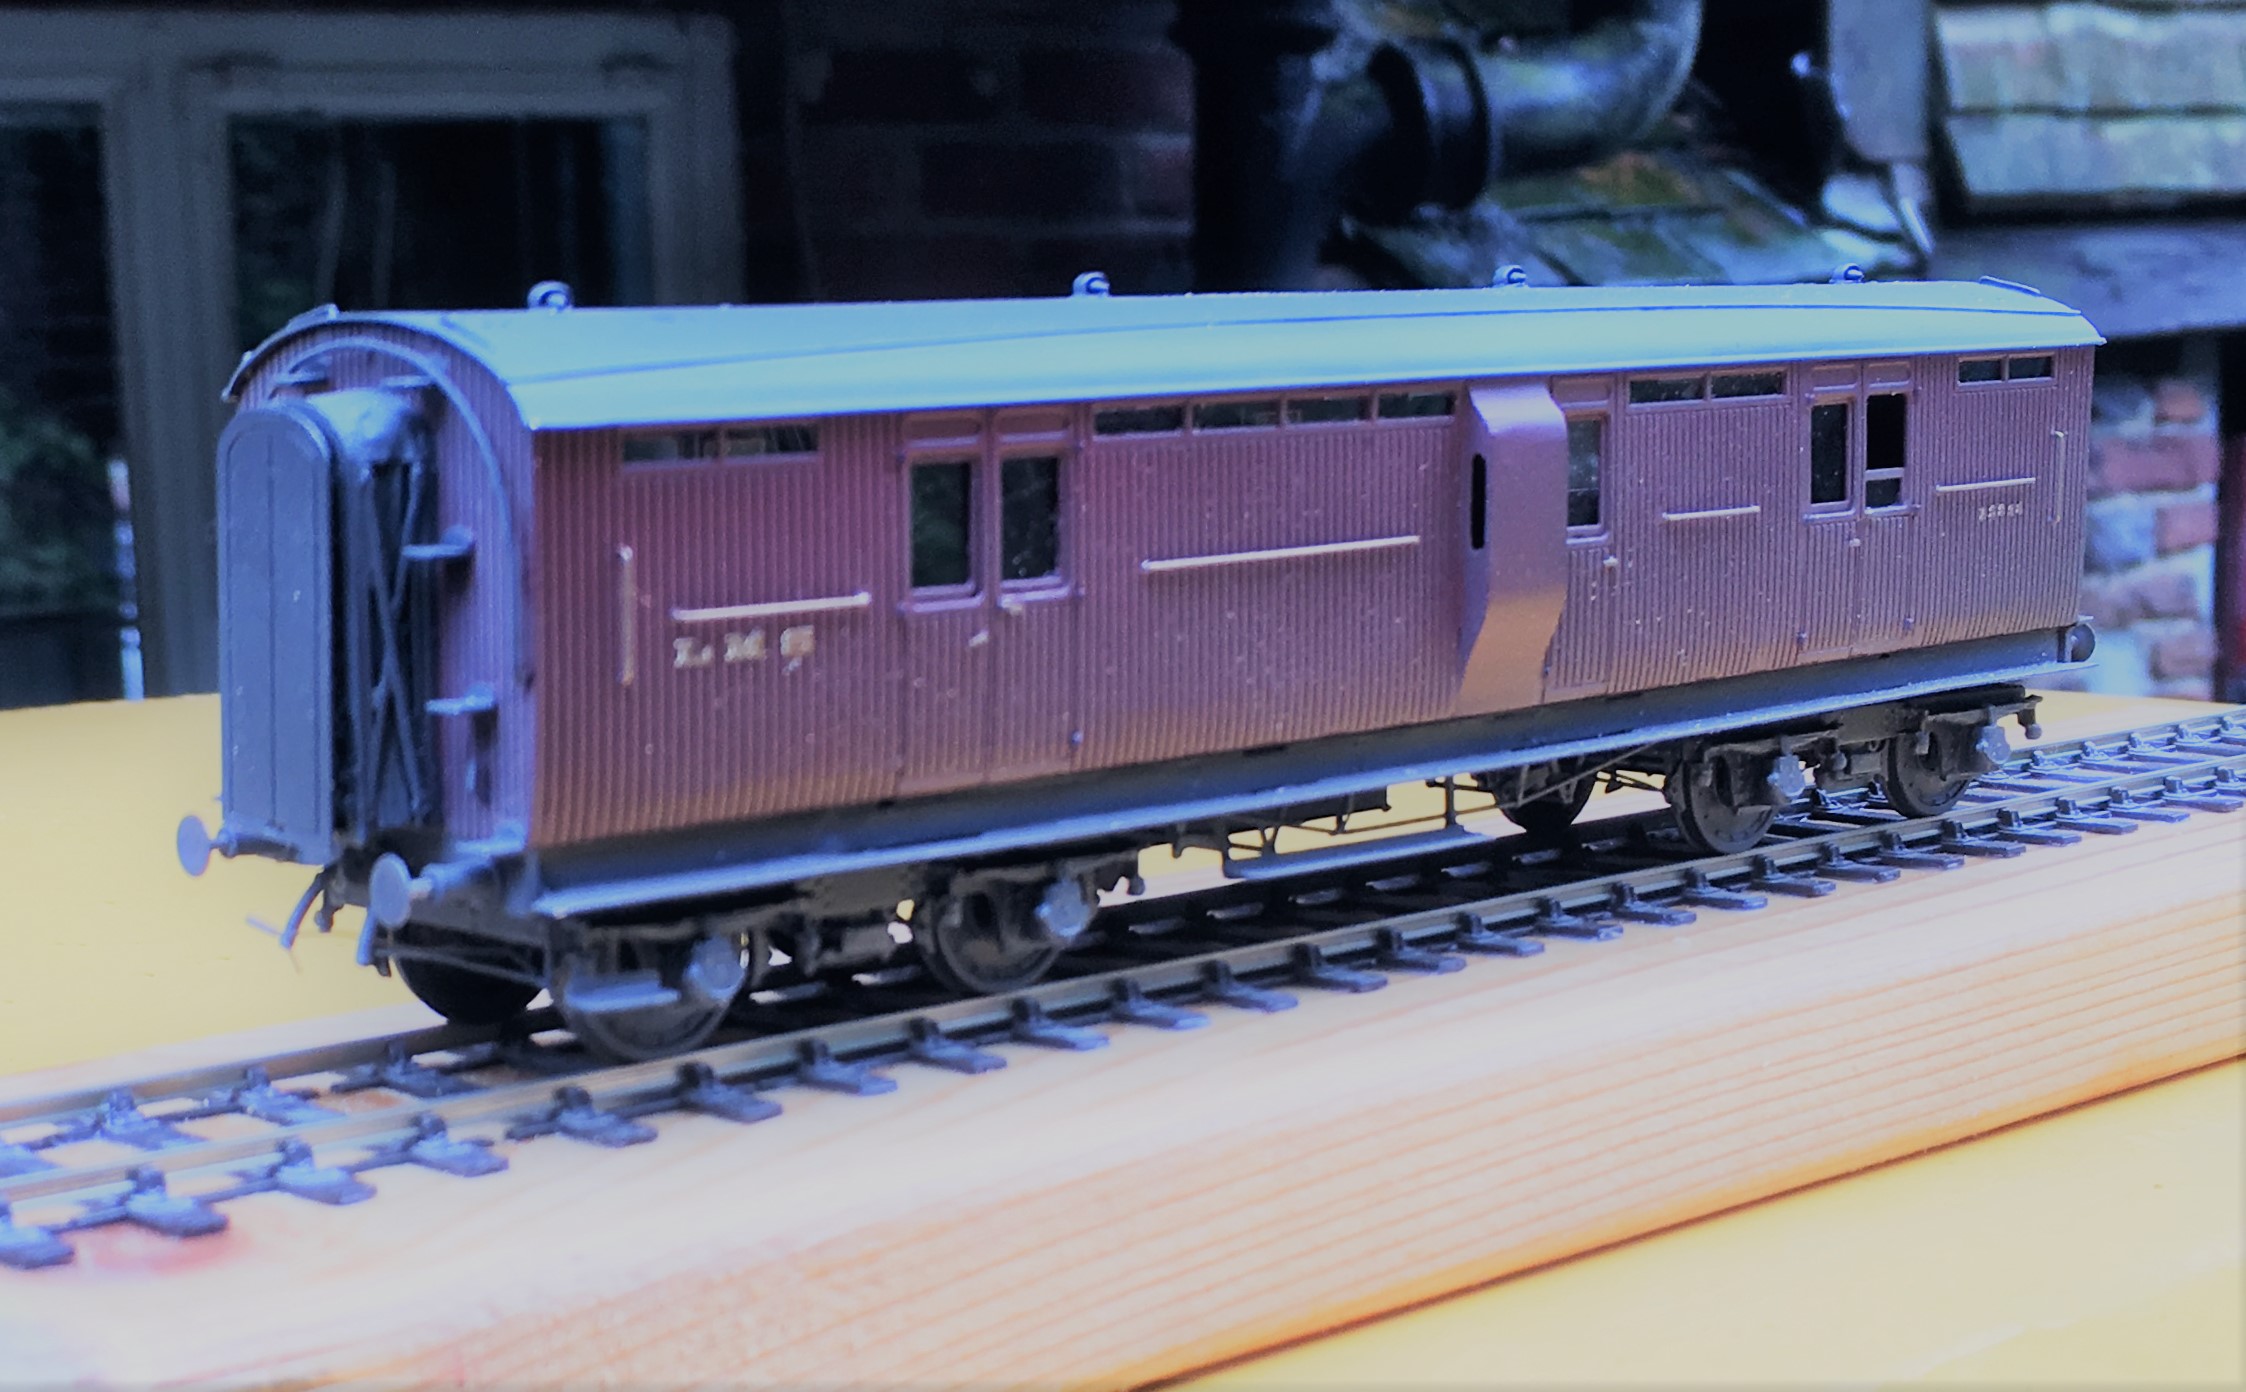
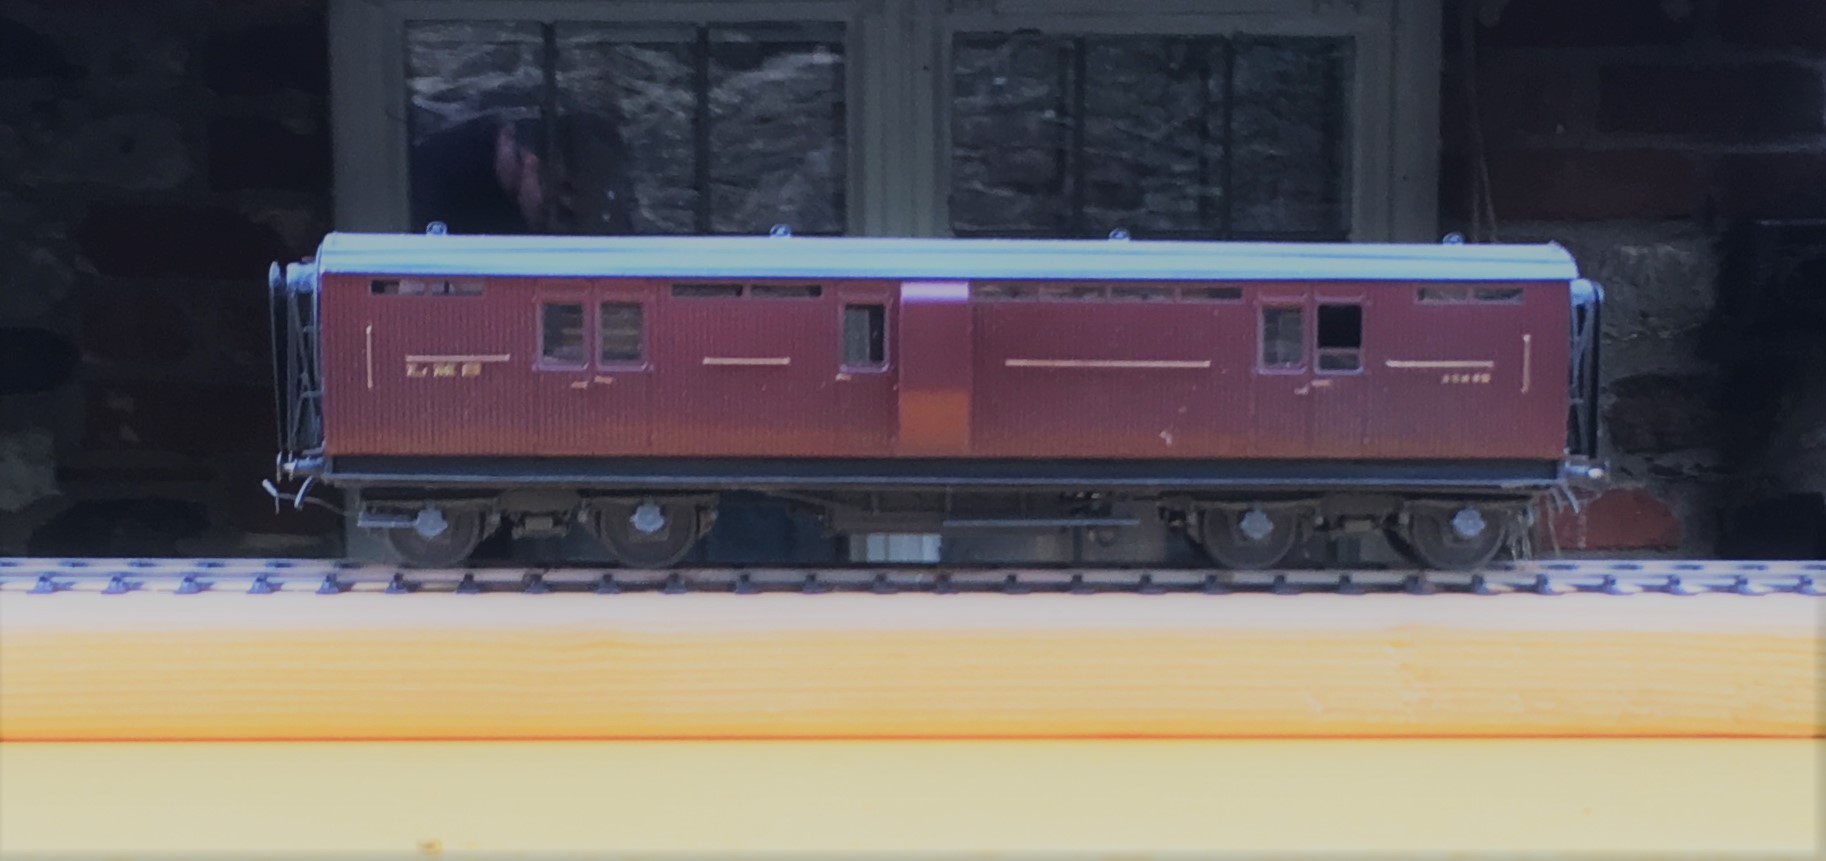
One item on my list was to finish a North Eastern Railway autocoach that I have had underway for a while and that at least has got itself off the list!
The bulk of this is from a D&S etched kit which I have seriously devalued by opening the box!! I have replaced the fixed bogies with some test build sprung bogies that I have had under development for rather too long now (they are finished, but for the castings which I need now to produce following the demise of Lochgorm Models for at least the time being).

I also replaced the roof with some metal sheet rolled to the curves. This proved a real challenge and took more than one attempt as I found you could not roll the section with the holes for the clerestory already cut as the bend all occurred at this weakened point. I also took the effort to put on the gas lines with fine wire as I think these add so much to a model of this era.
I think they are very attractive coaches but there is a problem with them – they tended to go in pairs so I have another to build! Just not quite yet! Fortunately, the BPT is not down to me, but I think you may find yourself under pressure soon John!!!!

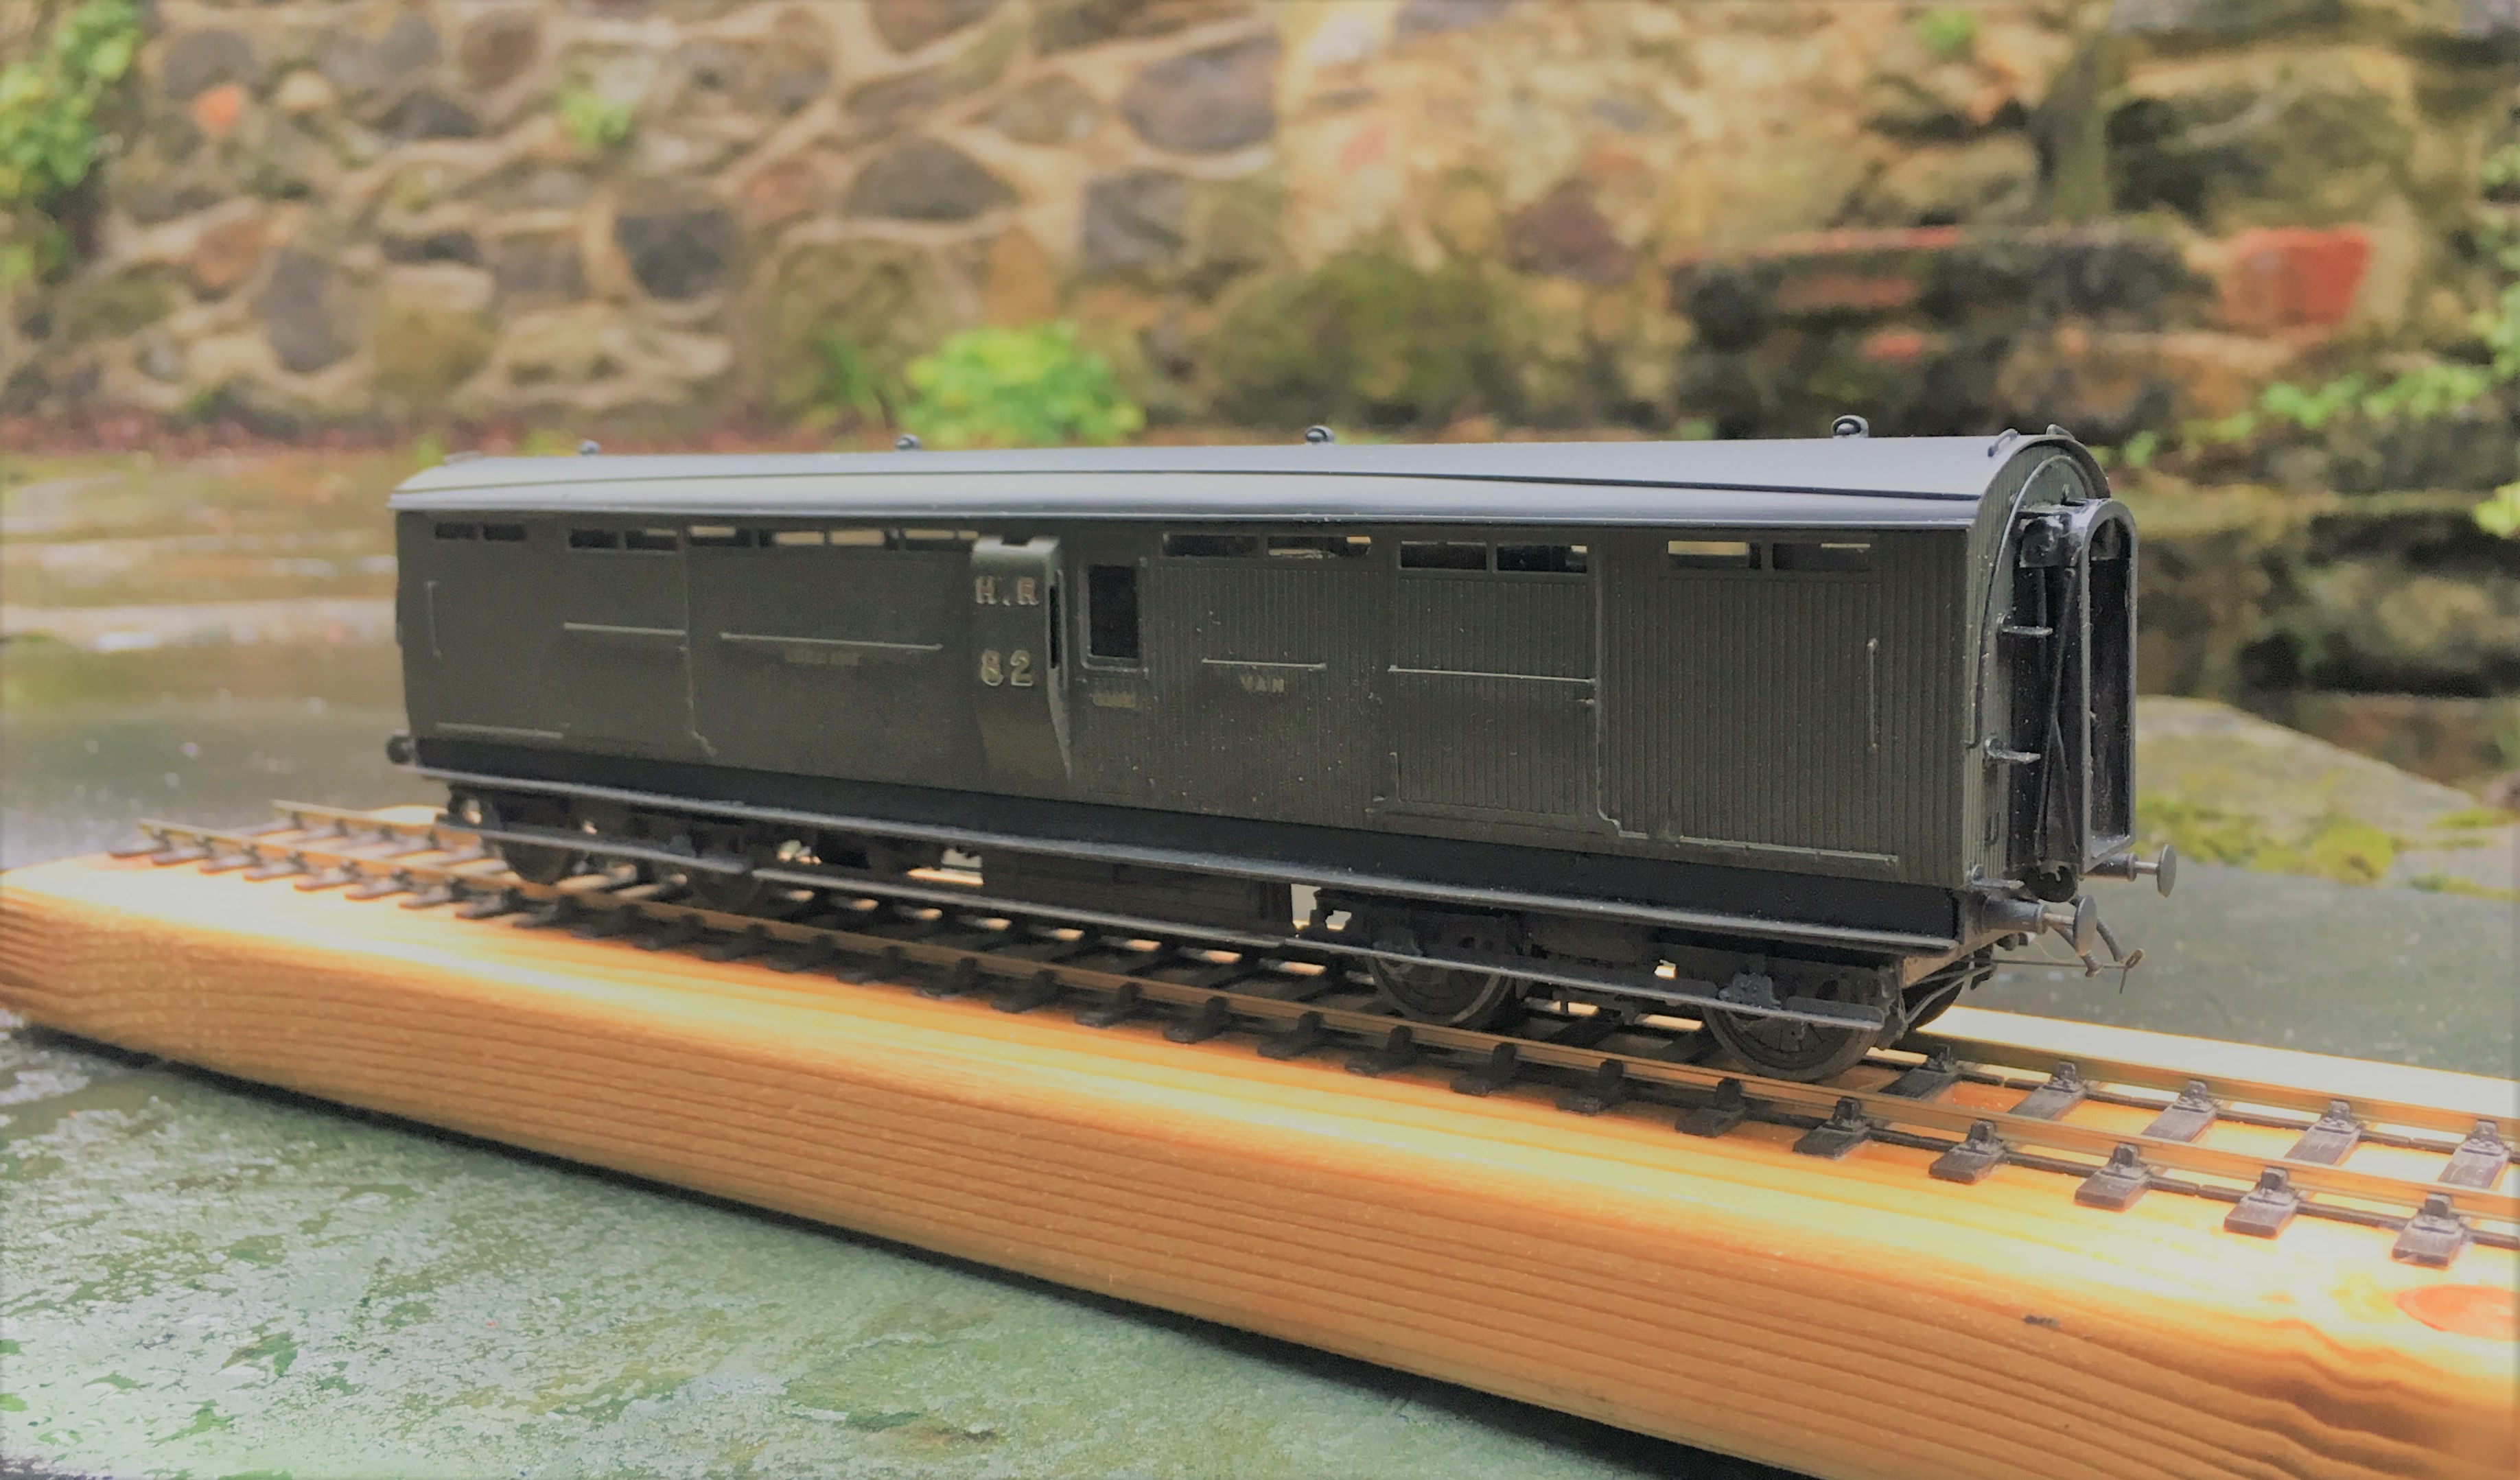
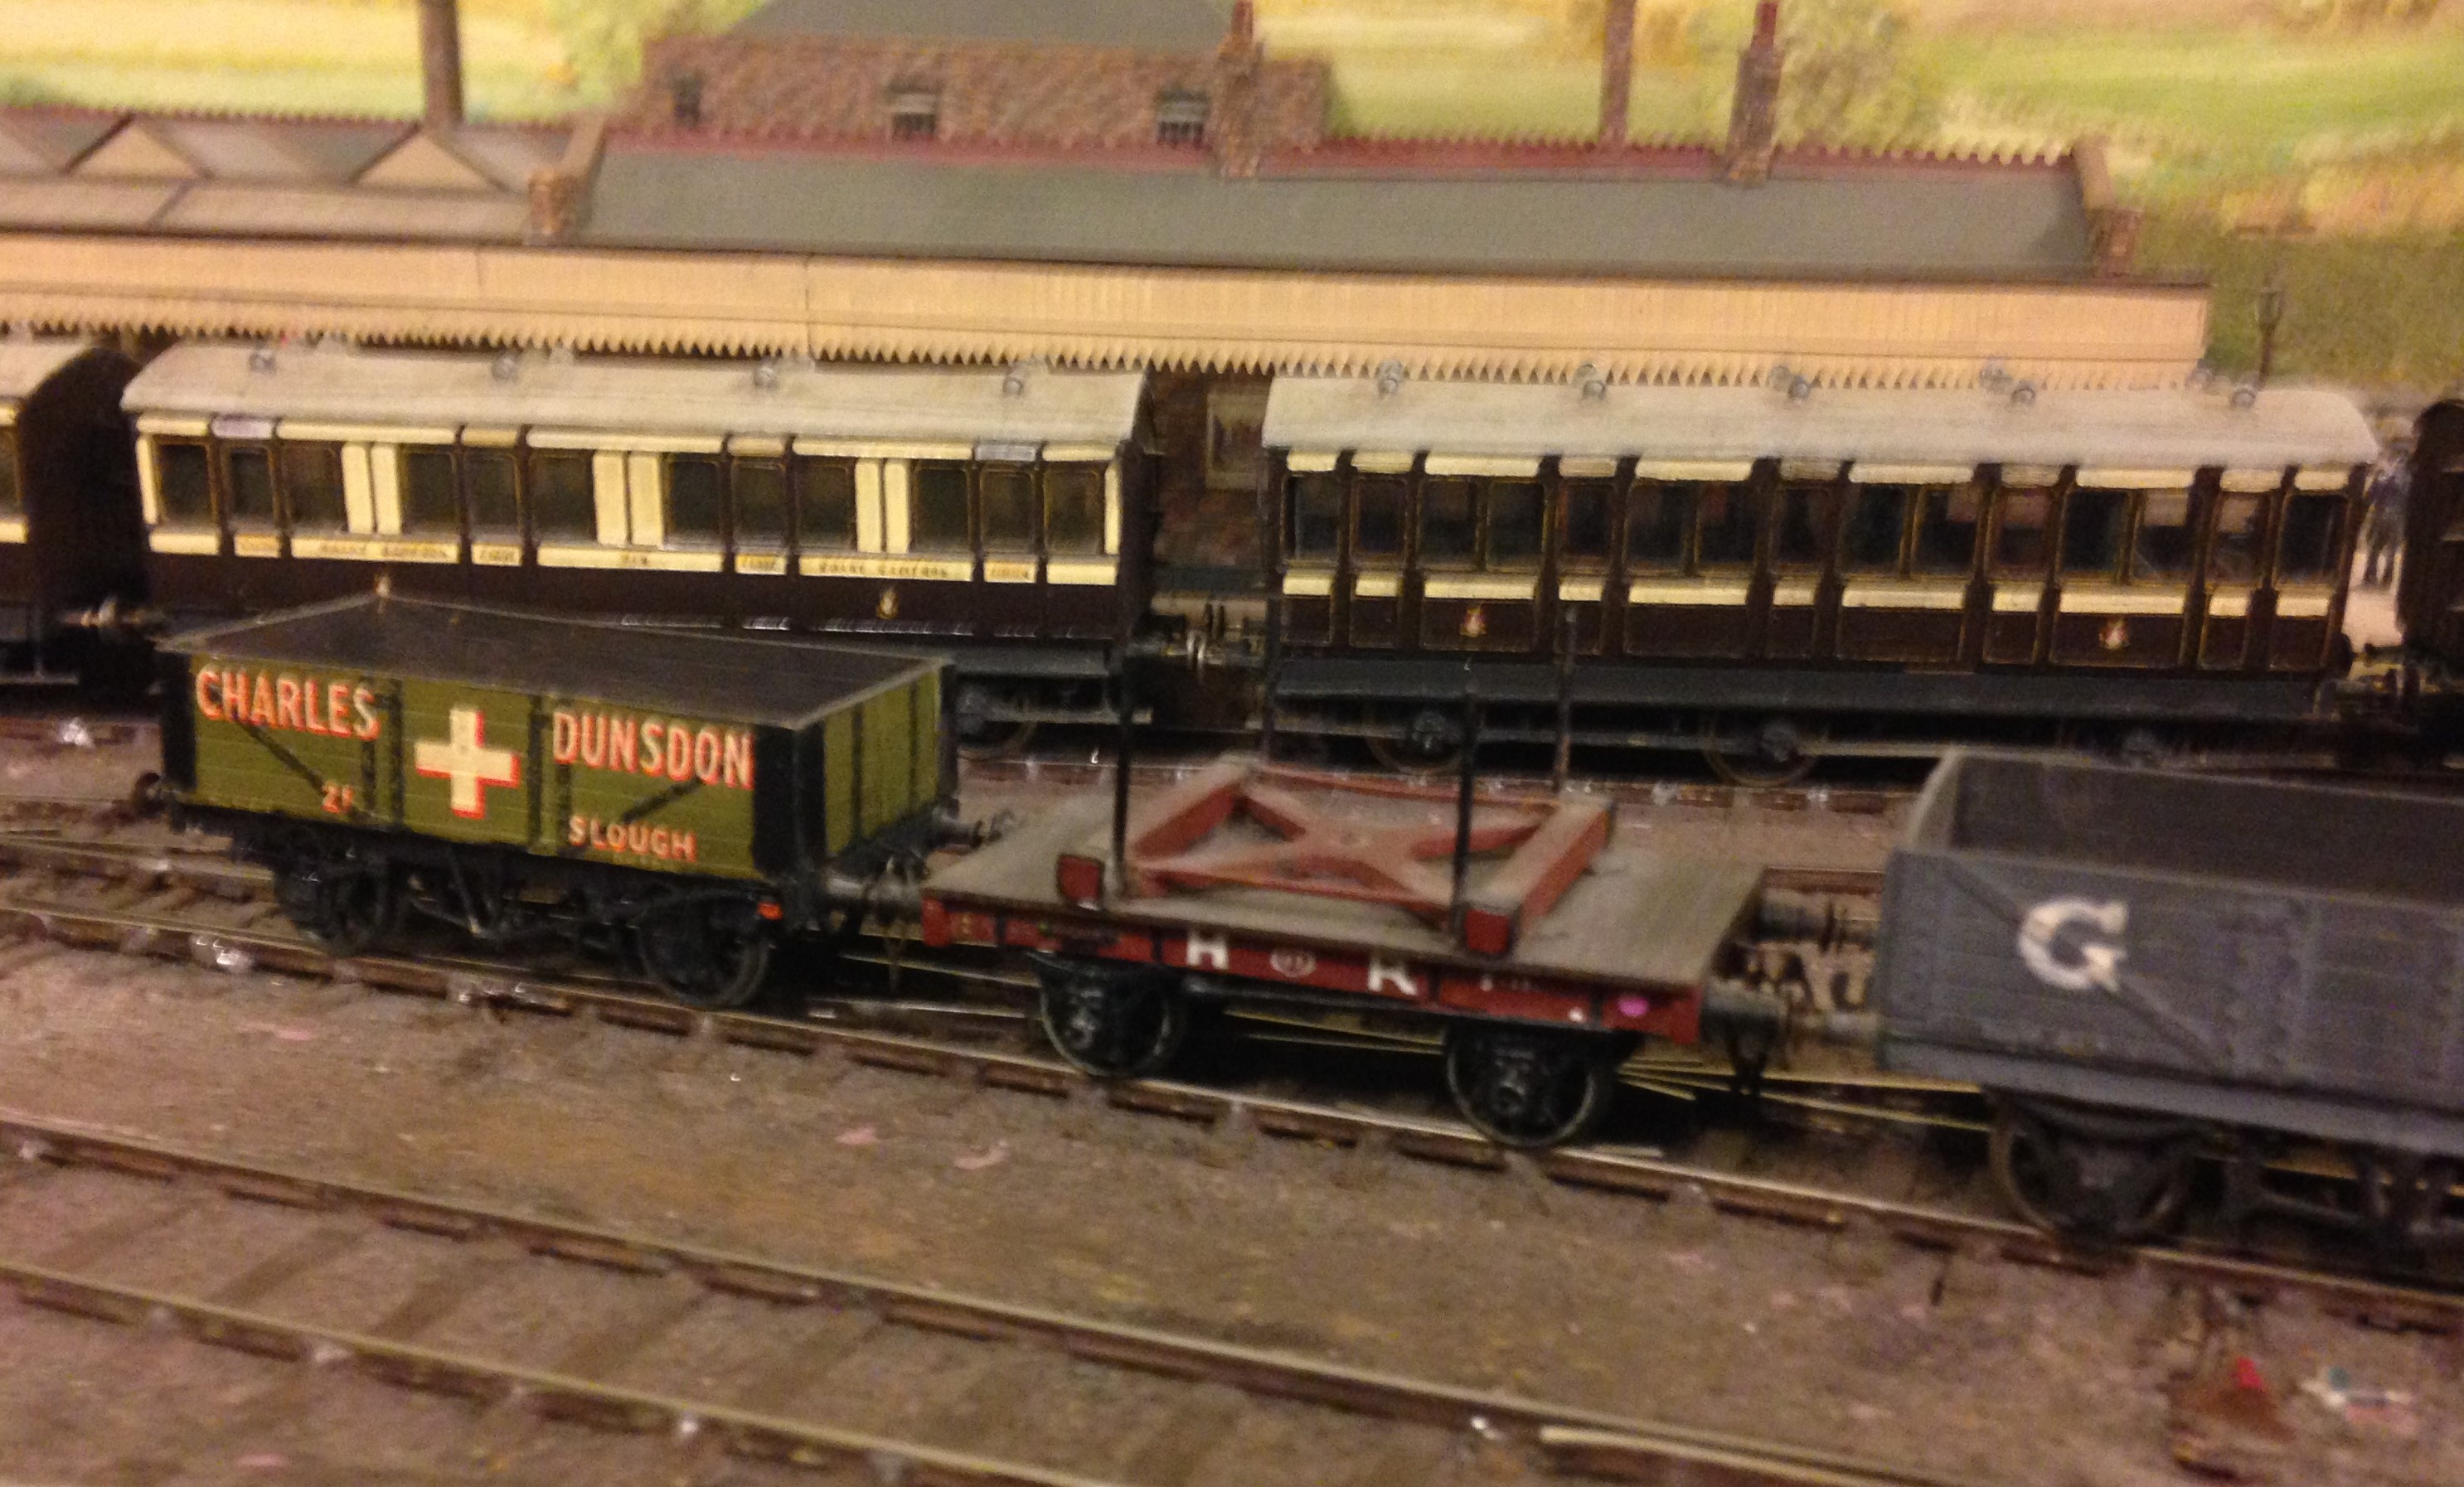
Highland Railway – Cradle Bolster
A long time ago, I showed that I had conceived a design for a pretty unusual vehicle in the Highland’s fleet, a cradle bolster. They gave this diagram no 25 and it has a square cradle that sits on the top of a fairly simple body. The cradle had four bolsters protruding from its corners and I anticipate it was used in conjunction with another bolster with the cradle rotating to allow the load to twist on curves. I presume it was conceived to support long but more flexible loads such as thin sheet steel/iron than a traditional bolster wagons could cater for.
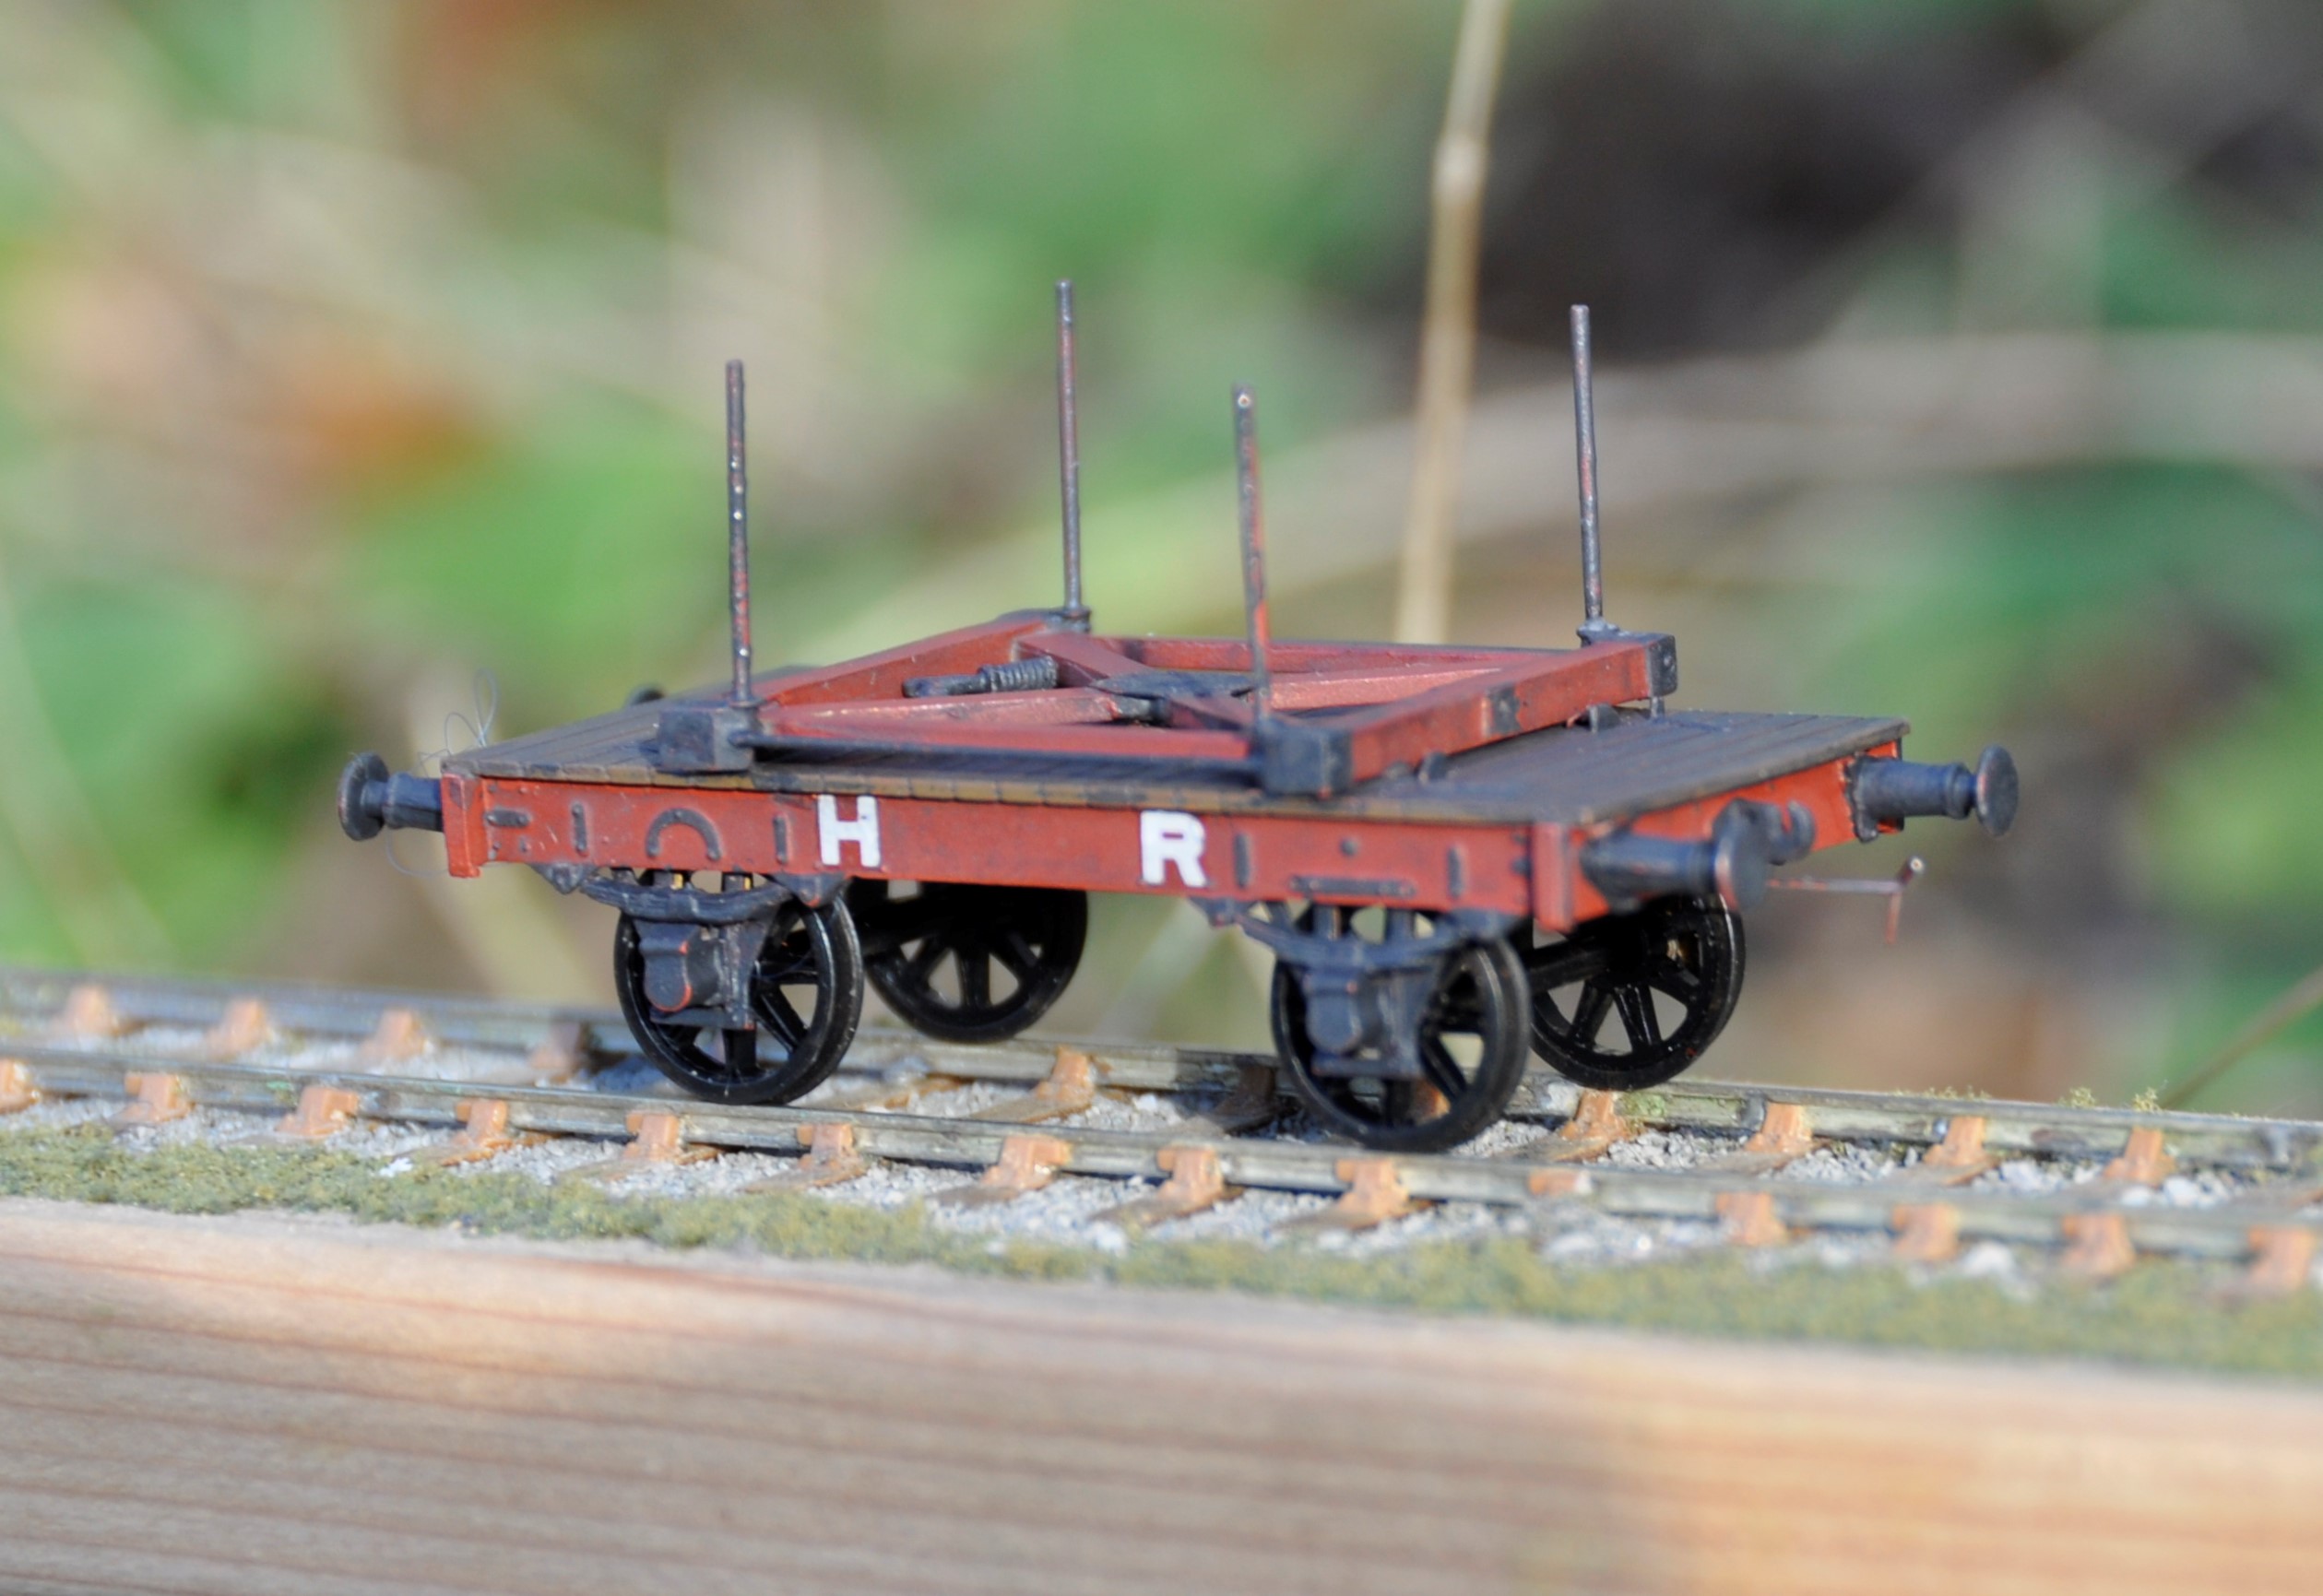
As this was my first attempt at designing vehicles, it is fair to say it went through a fair few iterations (or was that irritations!) which does largely explain why it has taken so long to complete from the first build – but it is now done and it looks pretty smart I reckon! It is really small in reality – being dwarfed by other even relative moderate wagons!
The second main complication has been as a result of the need to source castings for the axlebox/springs. I have used the Highland Railway Society’s but these do not come with attached springs (by design, so that they can be combined with differing springs to suit different situations). They are also not conceived to accommodate bearings sliding up and down within them and need to be ground out from the rear to make a slot for this. This makes them a bu**er to attach and therefore I am in the process of sorting out my own masters to overcome this problem. Once these are complete and I have got some castings done, I will produce a run of these for sale. So watch this space! I am also taking a look at the realities of scaling this up to 7mm, so also watch this space (but probably for longer before you will see anything!).
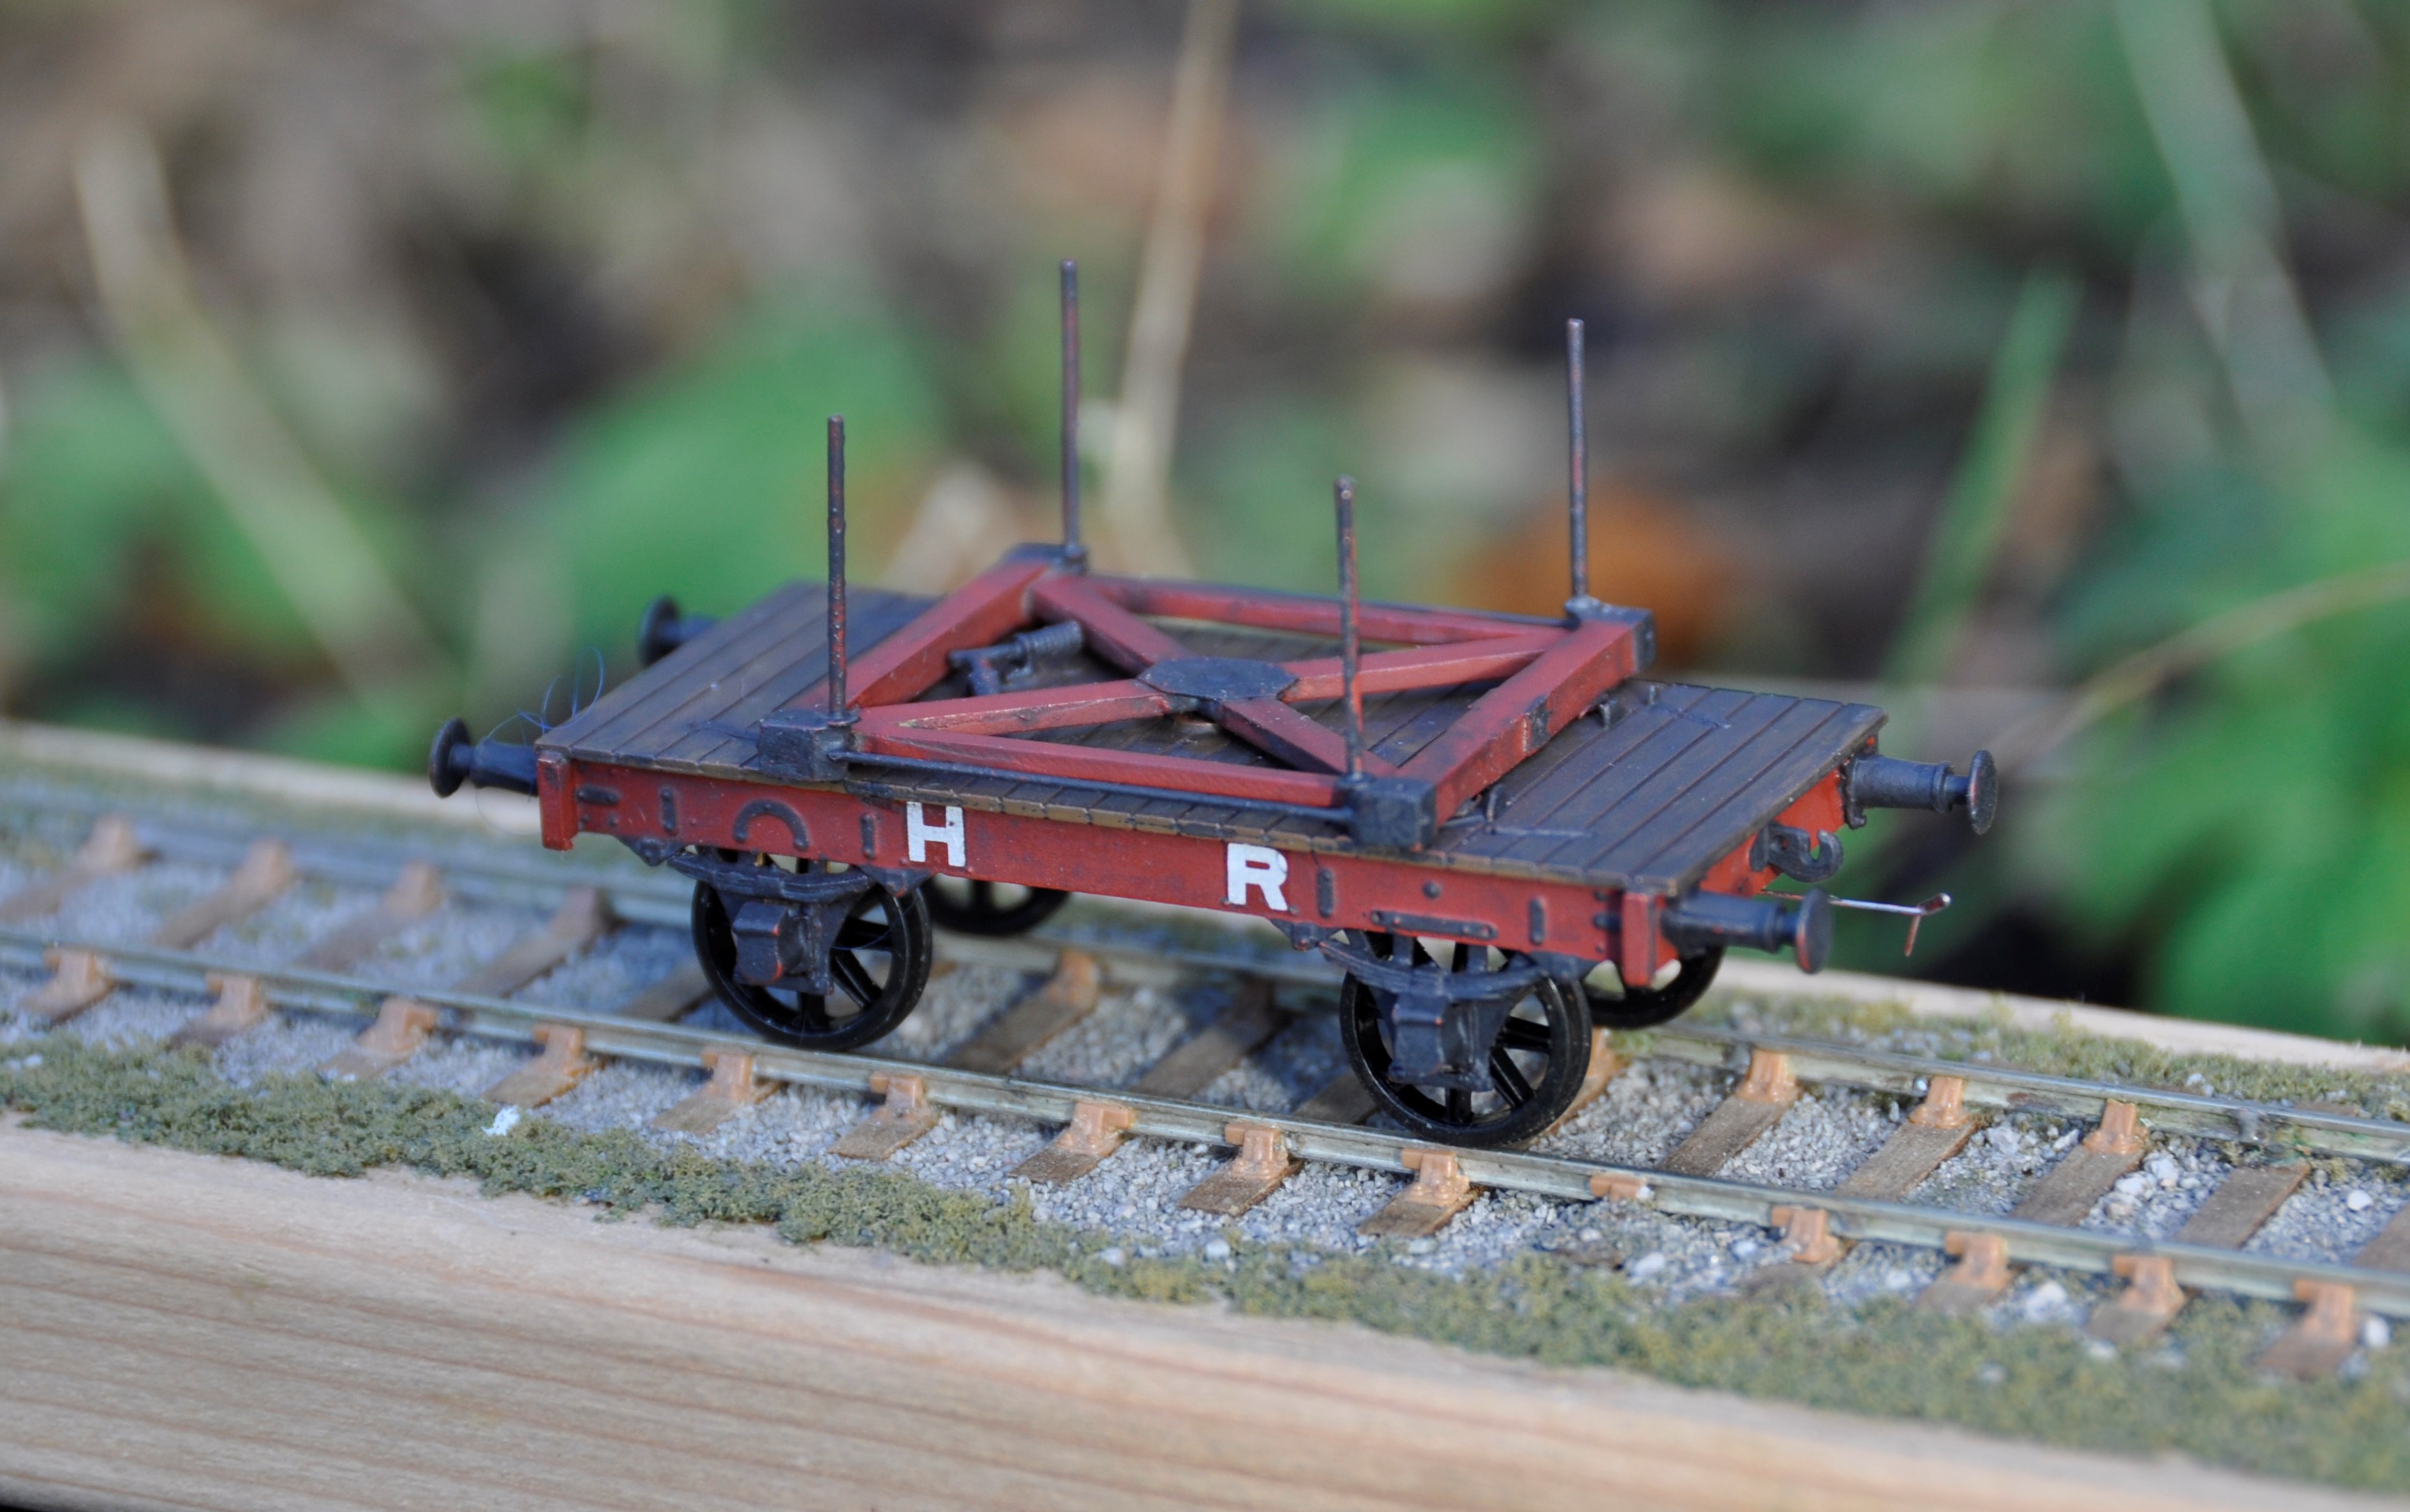
The error that I have had pointed out to me is that the bolsters ought to be tapered and now that I know this they do jar somewhat, so the next one will need to have this sorted out. As they lasted into well into the LMS days, there will be a second one and the one shown here will appear from time to time on Benfieldside jostling amongst the NER stuff!
When I first embarked on this build, I thought that this was such an unusual subject that I was going to be building the first model example ever. A rather foolish notion that was upset by a visit to visit Buckingham a couple of years back where I see Peter Denny had modelled one (it is believed he was friends with Hutchinson, who had measured one up in the 1930/40s) – as you can see below. I have subsequently found out at least two others who have scratch built their own, so clearly I will need to search harder for originality!

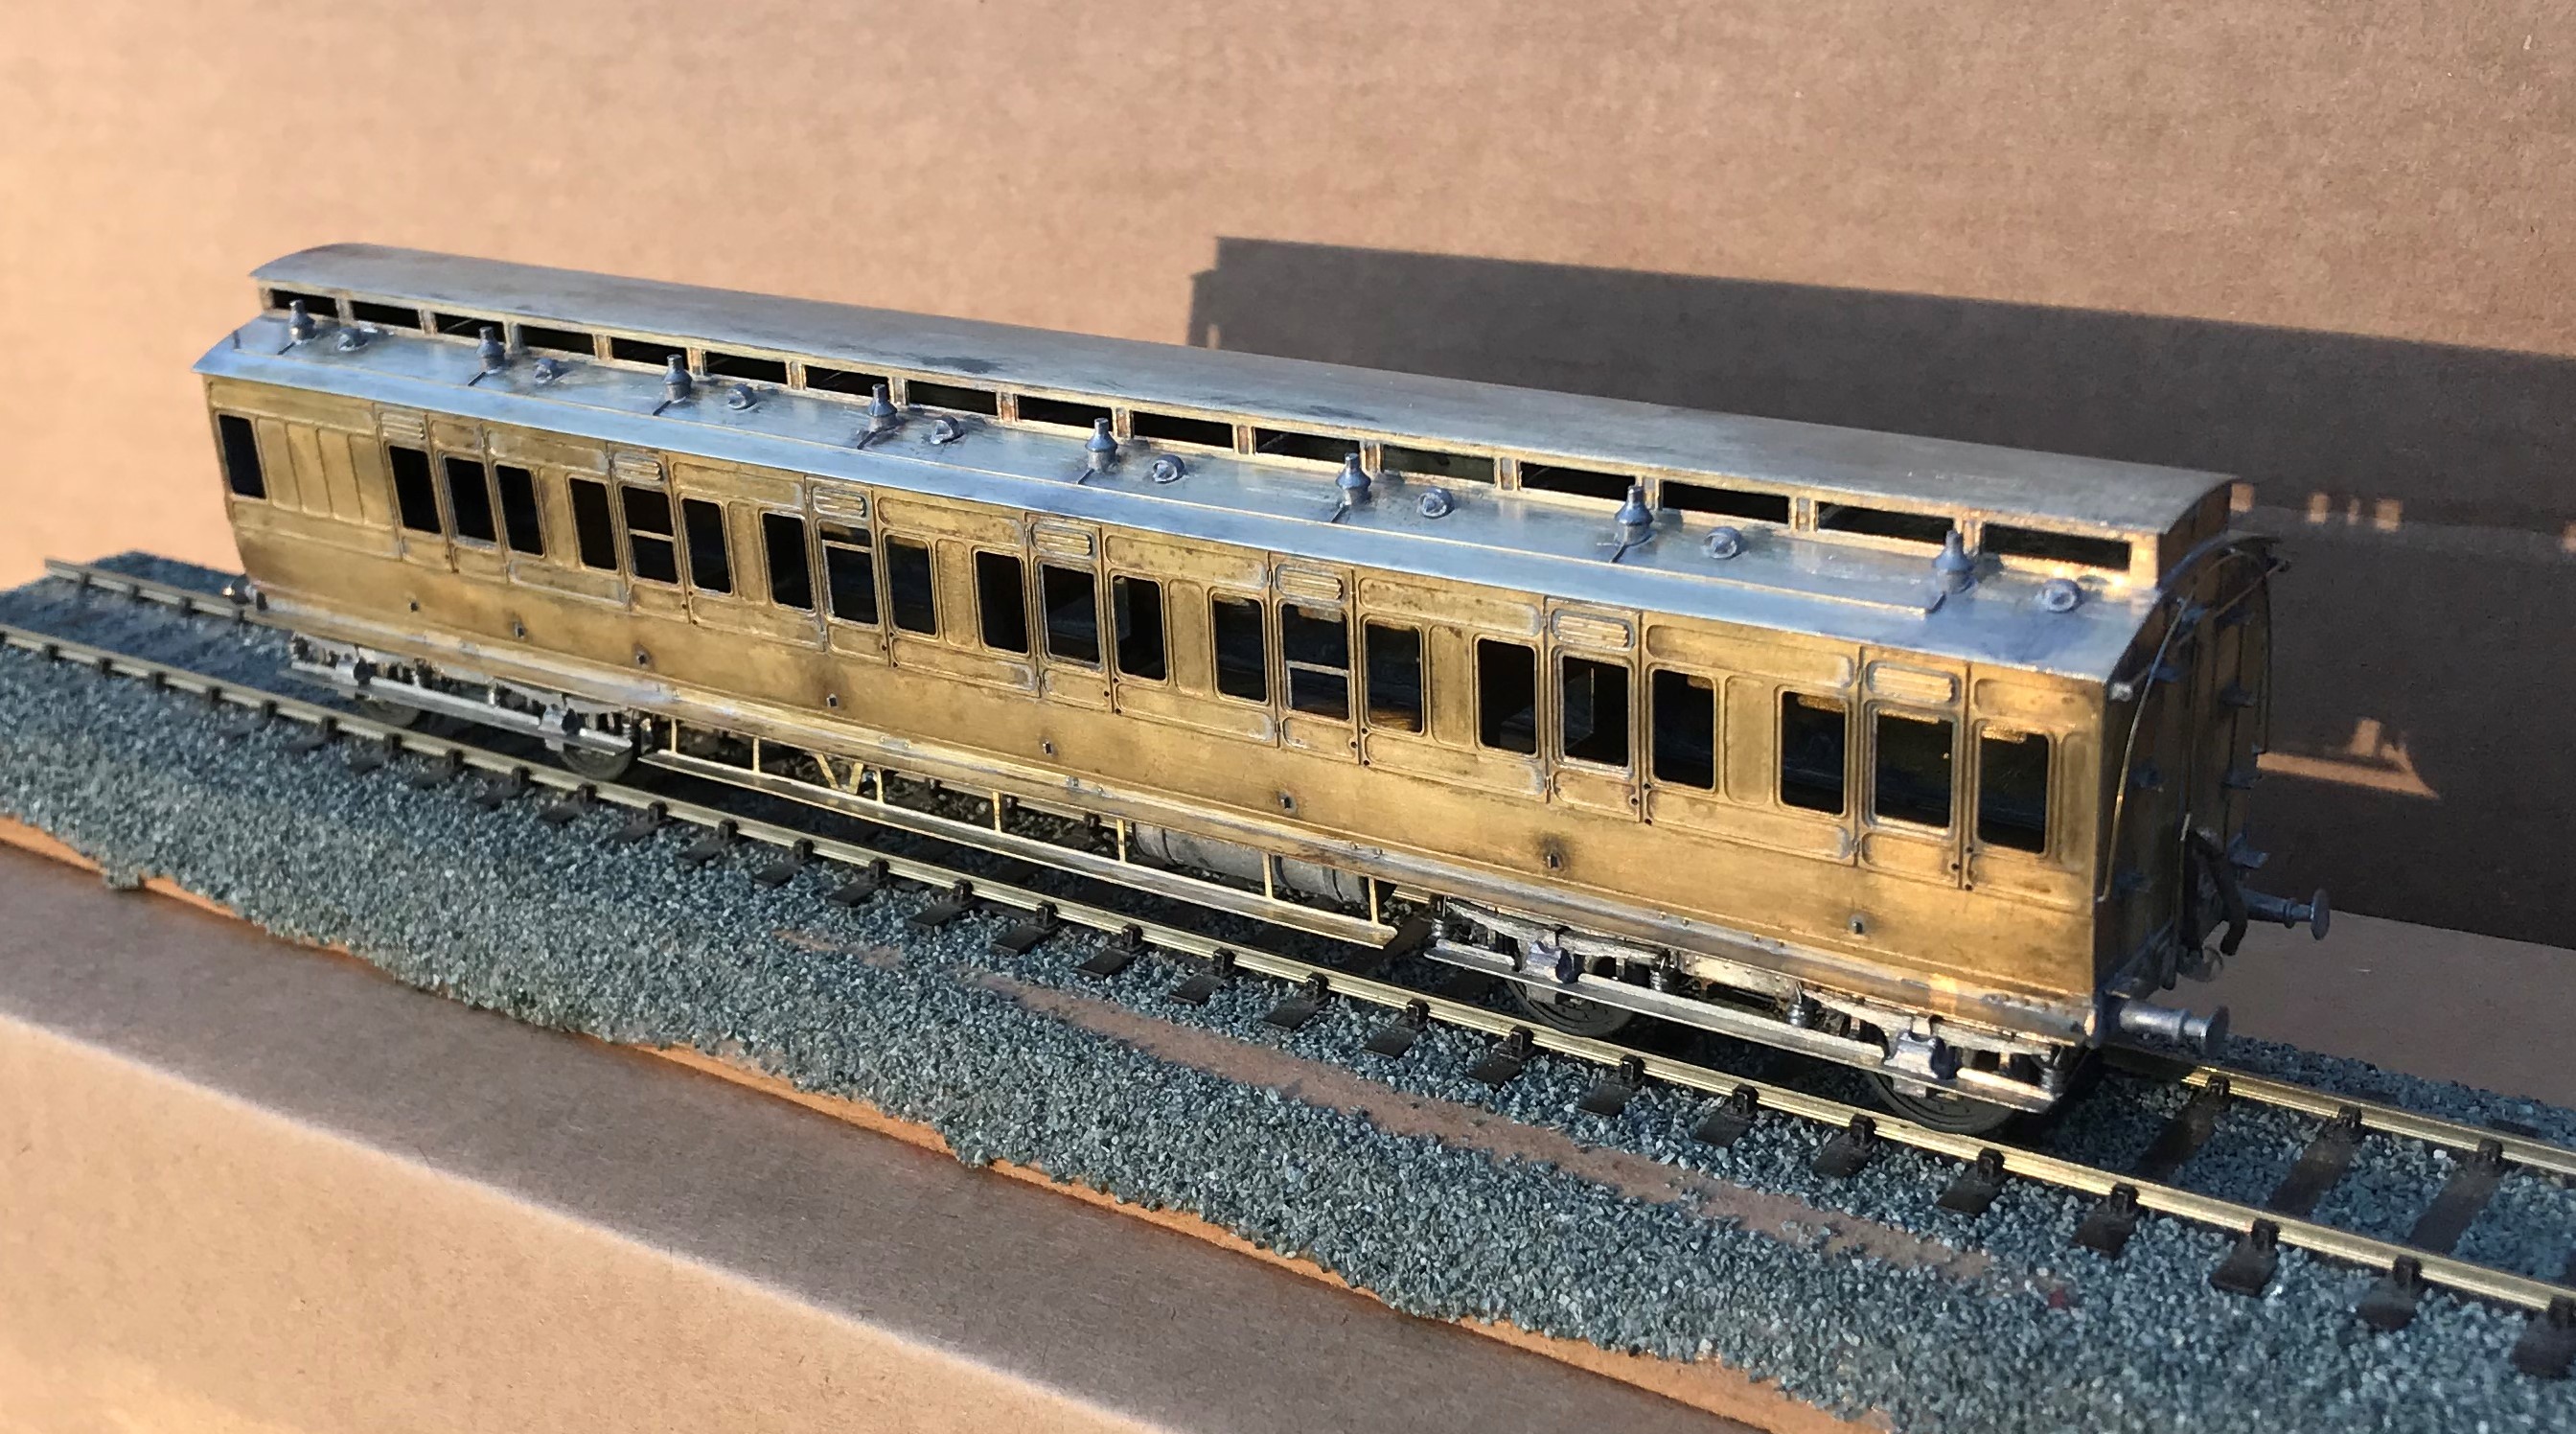
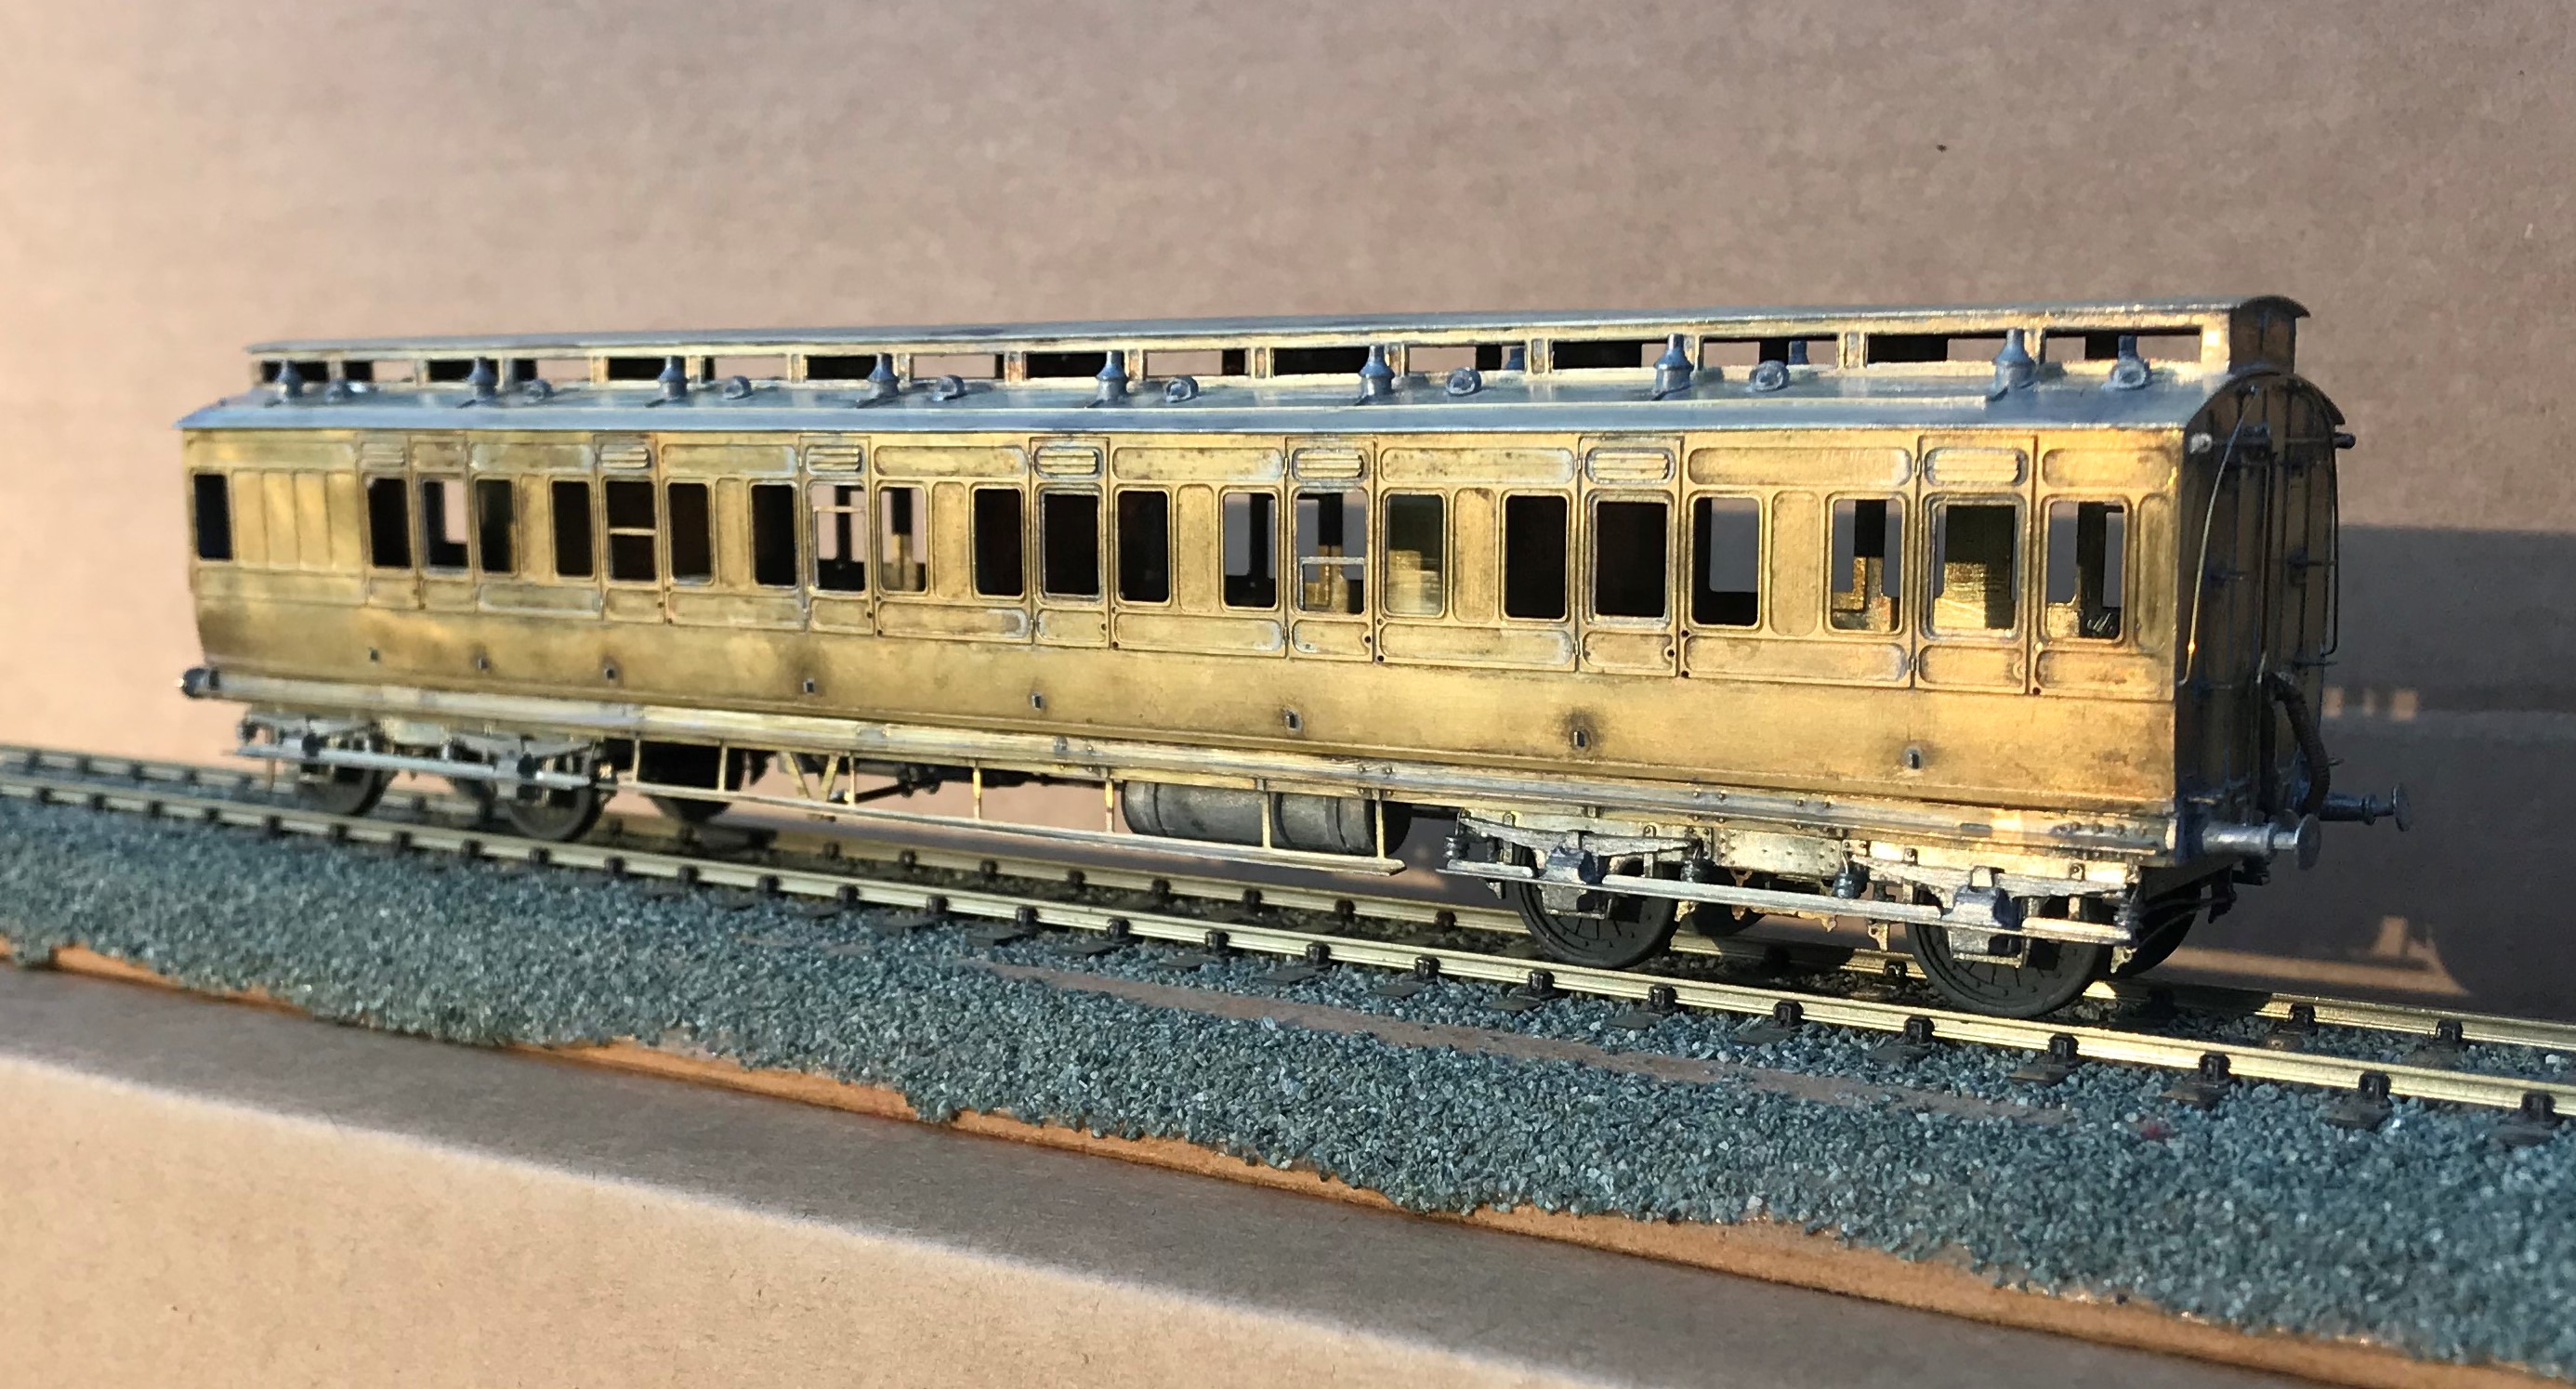
Midland Six Wheeled Full Brakes
Although not Highland vehicles, these full brakes have a strong association with the Highland’s branchlines in the post grouping years. Once the LMS took over the Highland’s system in 1923, they seemed to have been horrified by the state of the coaching stock that they inherited! Portions of the Highland’s fleet were speedily retired and large numbers of foreign company’s stock was drafted onto the system (especially the main line from Perth to Inverness, where the trains became fully corridor connected almost overnight).
When it came to the branchlines, the upgrade came primarily by the cascading of the better Highland stock onto these lines but there were exceptions. Although the Highland had full brakes, it was a line that had a lot of parcels/packages traffic, so it seemed that they needed even more and a batch of these Midland six wheeled full brakes were drafted in.
Many photographs of the Highland branchlines of the 1920s had one lurking in the background so I felt one should get to make appearances on Glenmutchkin. Simple, I thought, Slaters do a plastic kit for one and whilst it is no longer available, it is easy to pick up second hand and it should be a nice quick build. Unfortunately, I had not realised what a rubbish kit it was! It is too short and too narrow, most of the mastering is really crude and the panelling in particular would be a scale 6 inches deep. So the Slaters kit made it back on ebay only marginally quicker than it came off and I set about designing my own kit.
It has taken a couple of iterations and about three years, but finally I have got to the stage where I am happy with it but you can form your own view!
The first iteration used a cleminson chassis but in the light of the success I had with sliding axles on some of my other 6 wheeled stock, I redesigned it to include these and some sprung W-irons in the style of Bill Bedford’s.
This proved similarly successful and as you can see in the video, it trundles along quite nicely!
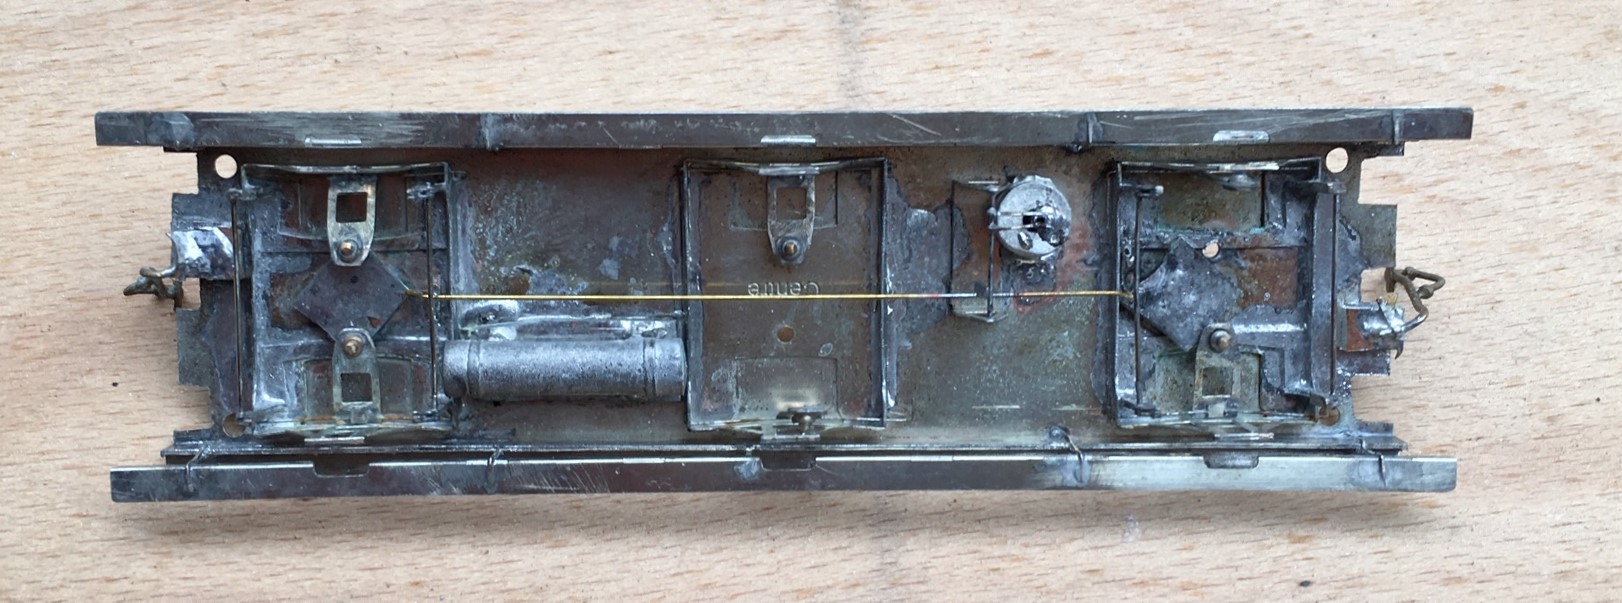
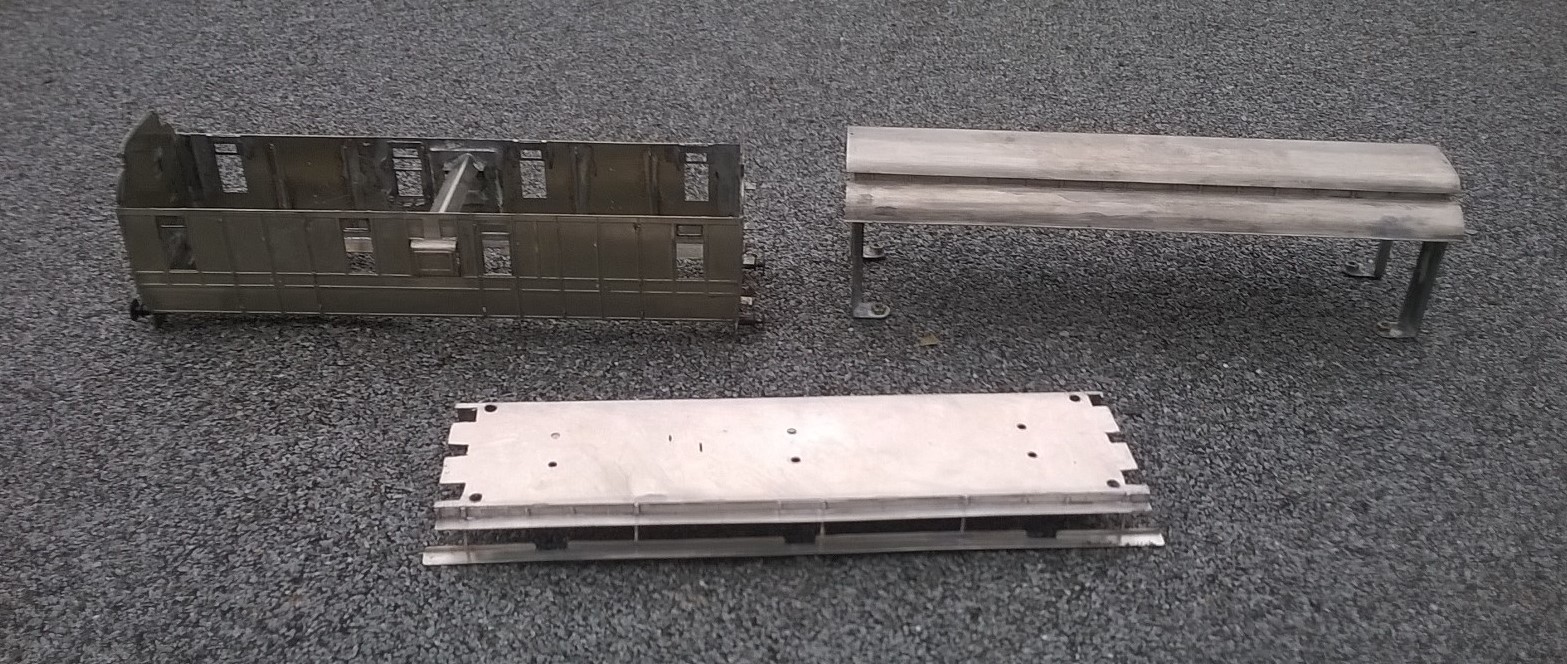
Other than the use of these sliding axles, the main unusual feature of the model is the arrangement of securing the roof. I have found that it is essential to bolt these in place to prevent the roof becoming adrift at some point in the future (which has happened to half my stock over time). Therefore, I designed a set of legs that allow the roof to be bolted through the floor from below and in the process also securing the separate chassis tight too. Broken down, the components look like this and having them separated does make painting a lot easier. It is definitely the route I will take in the future.
It is intended that this kit will be made available for sale as a 4mm/1ft model – albeit you will need to source the fittings/castings yourself. I have prepared some fairly extensive instructions (see link below) and this includes the details of what is required and where to get it from. I am waiting for a quote from the etching company to be able to work out the sensible cost for these; so an update post will follow when I list it on the Miscellany Models site.
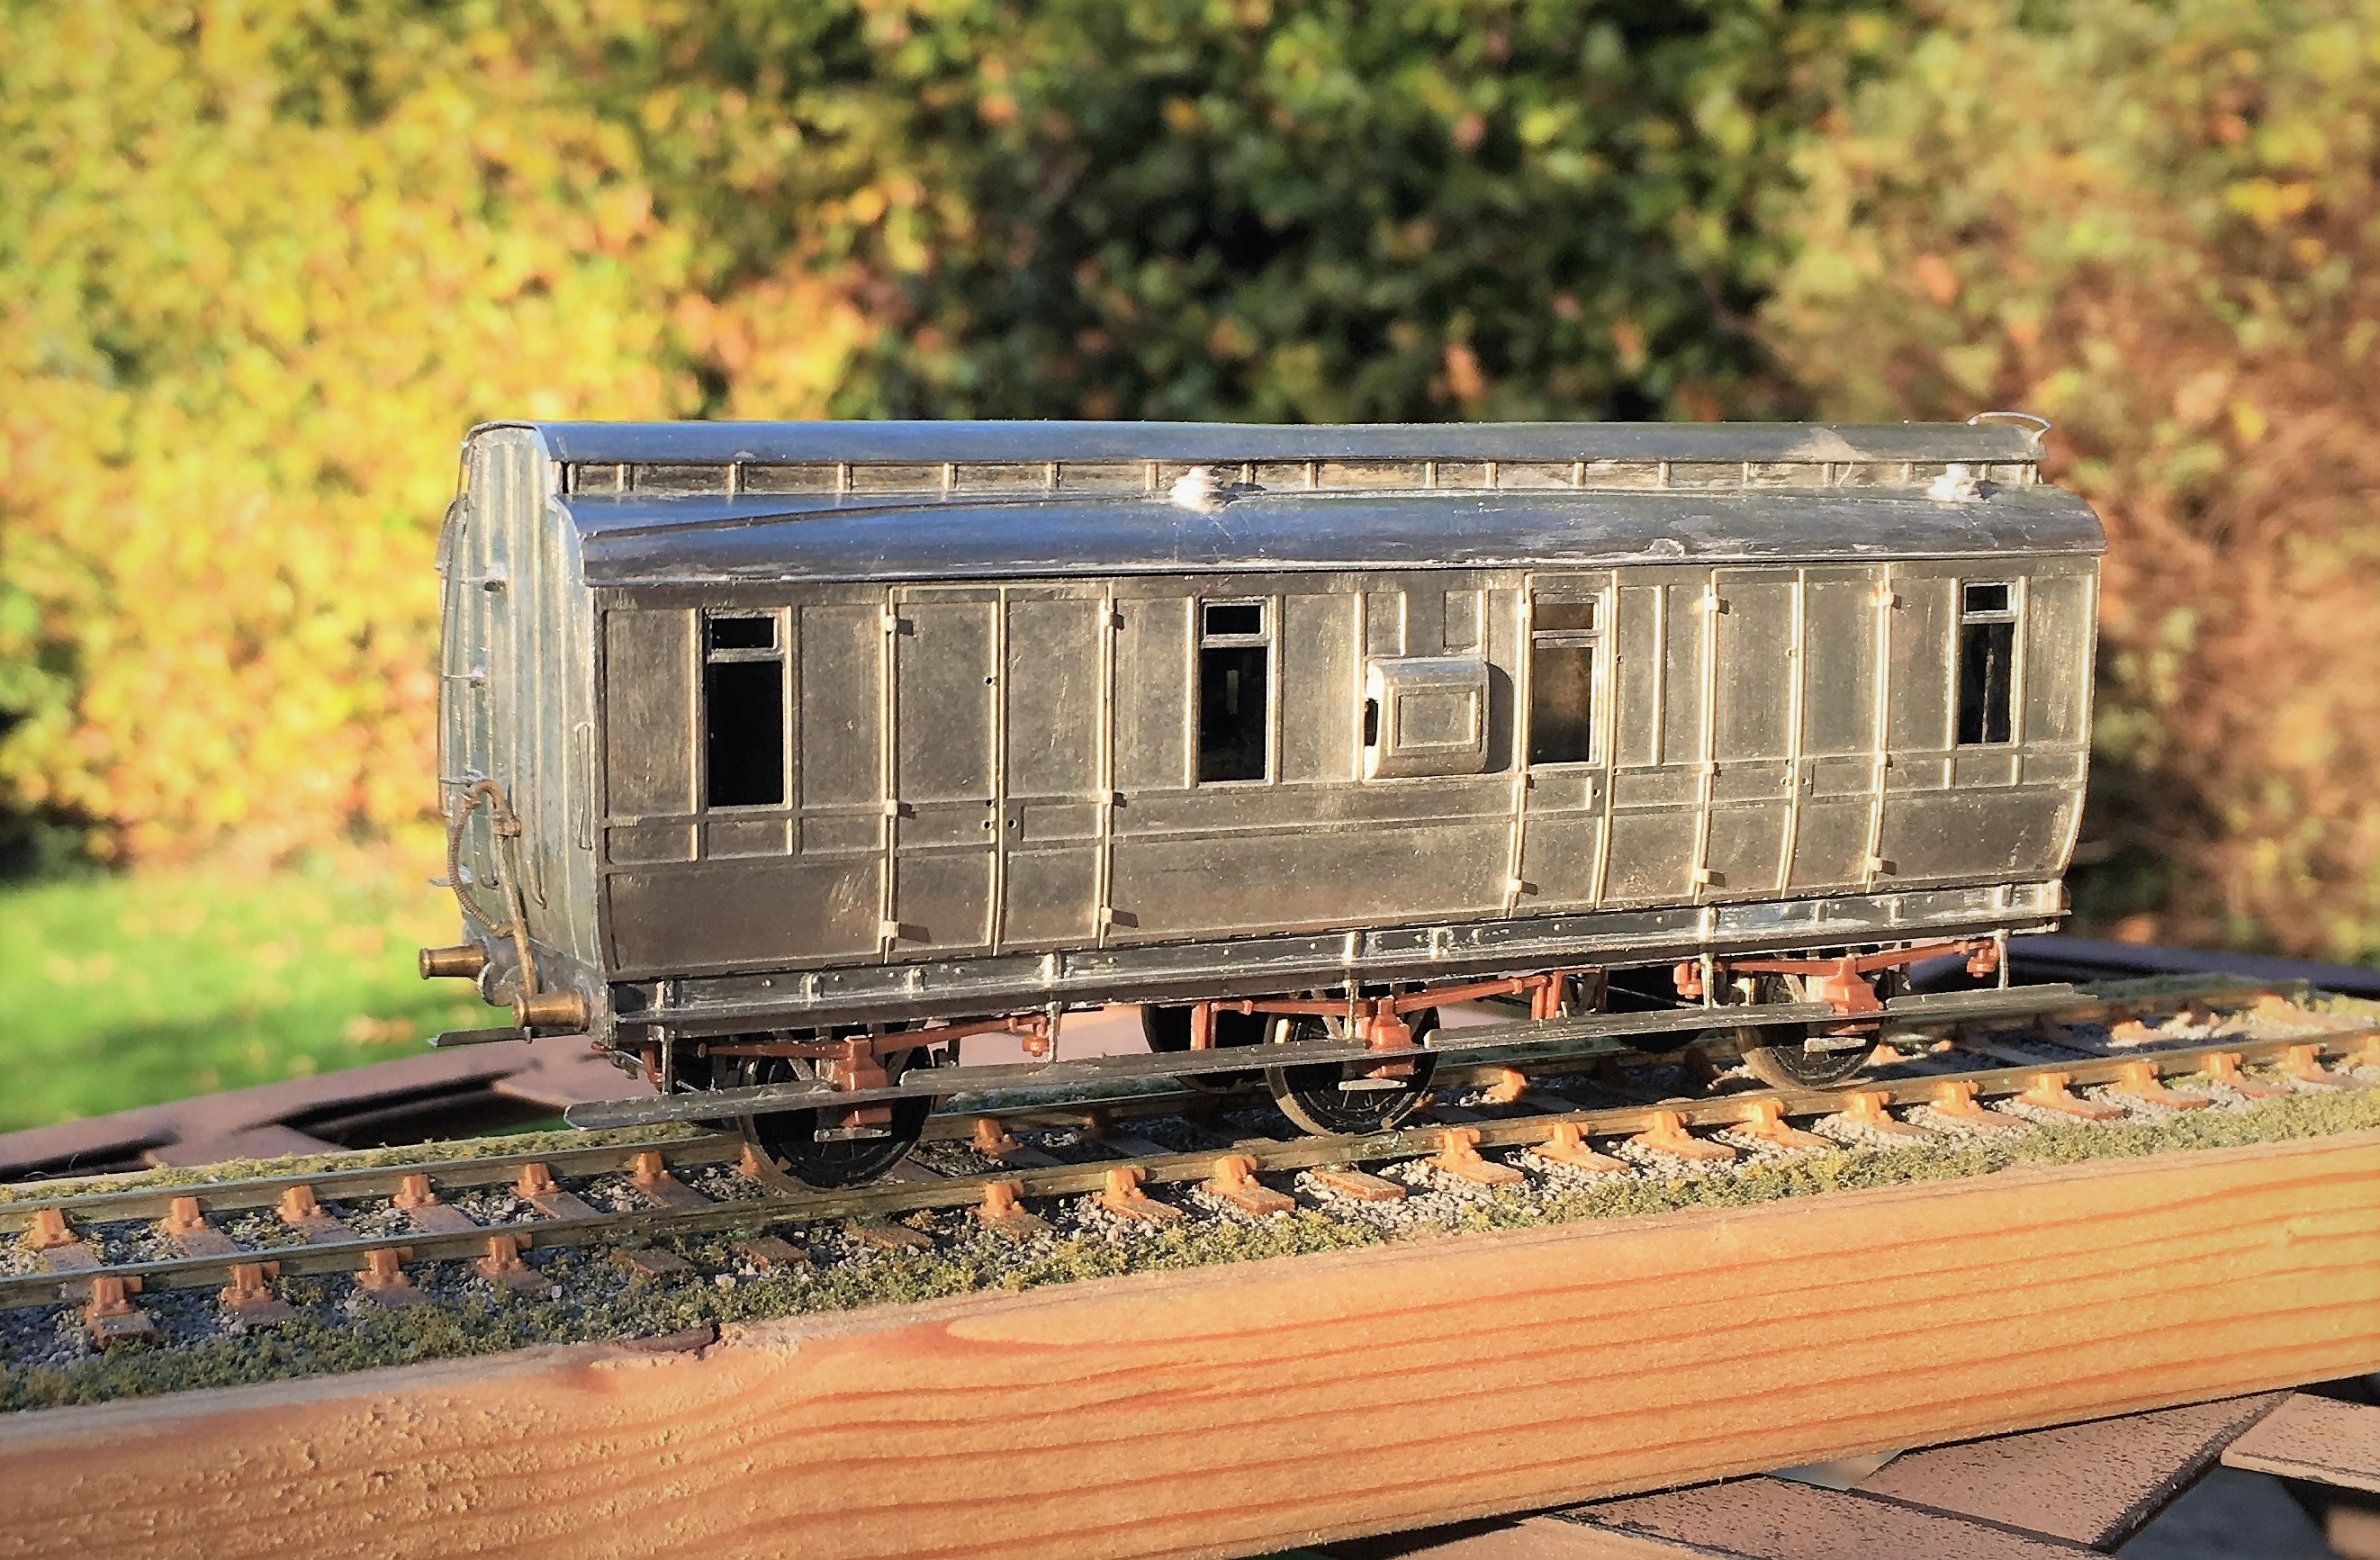
Miscellany Models Rolling Stock 2 – Midland dia 530 Full Brake v2
In the meantime, here are a couple of additional views of the completed vehicle, awaiting its turn in the paintshop!