Blog Archives

News from Miscellany Models
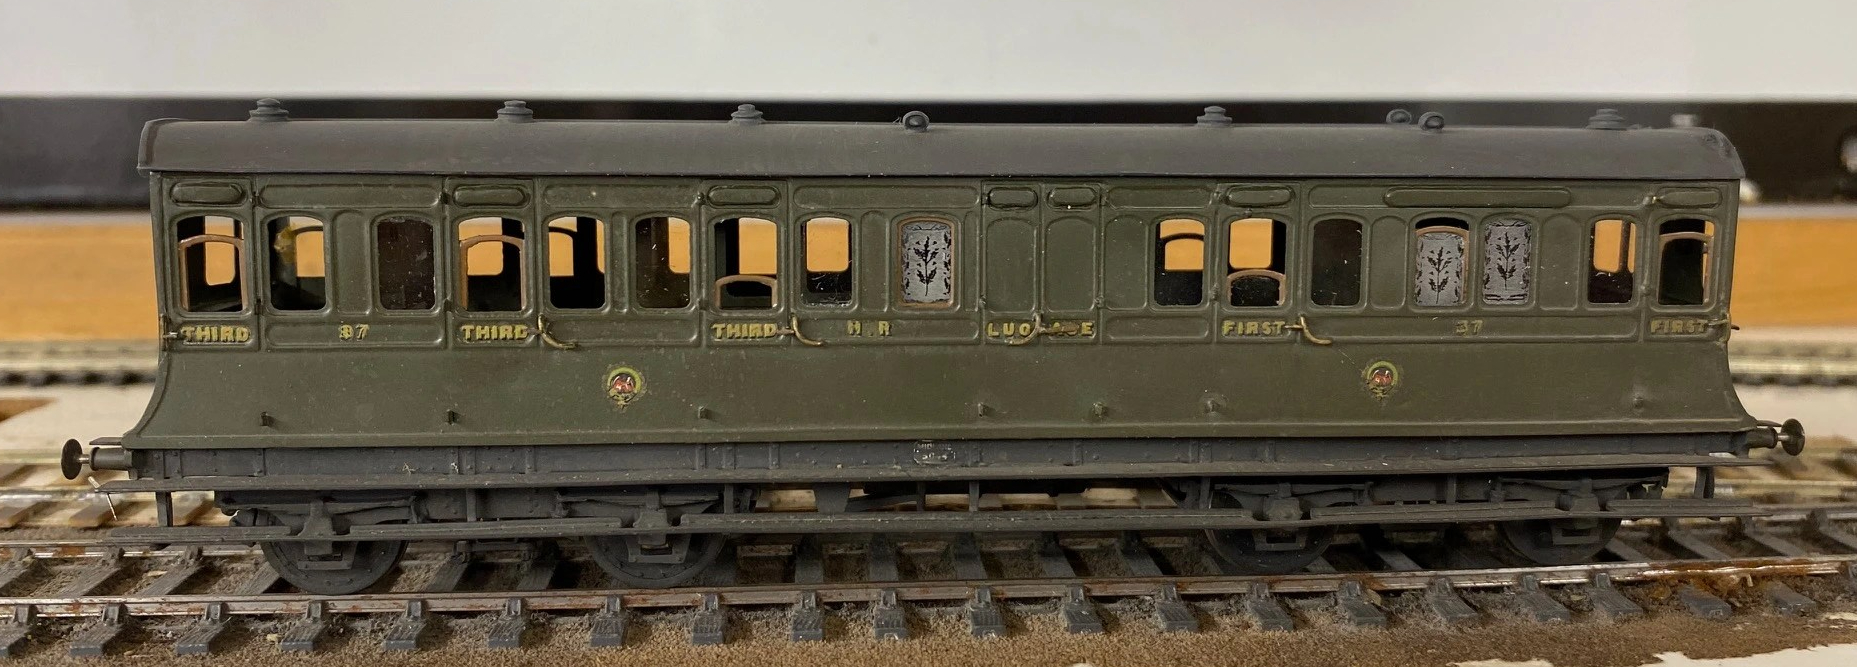
With the assistance of Duncan Petford, Miscellany Models are now offering engraved glass windows featuring the thistle emblem that the Highland used to obscure the windows of toilet compartments. They come in packs of five, for £7 postage included and are available here.
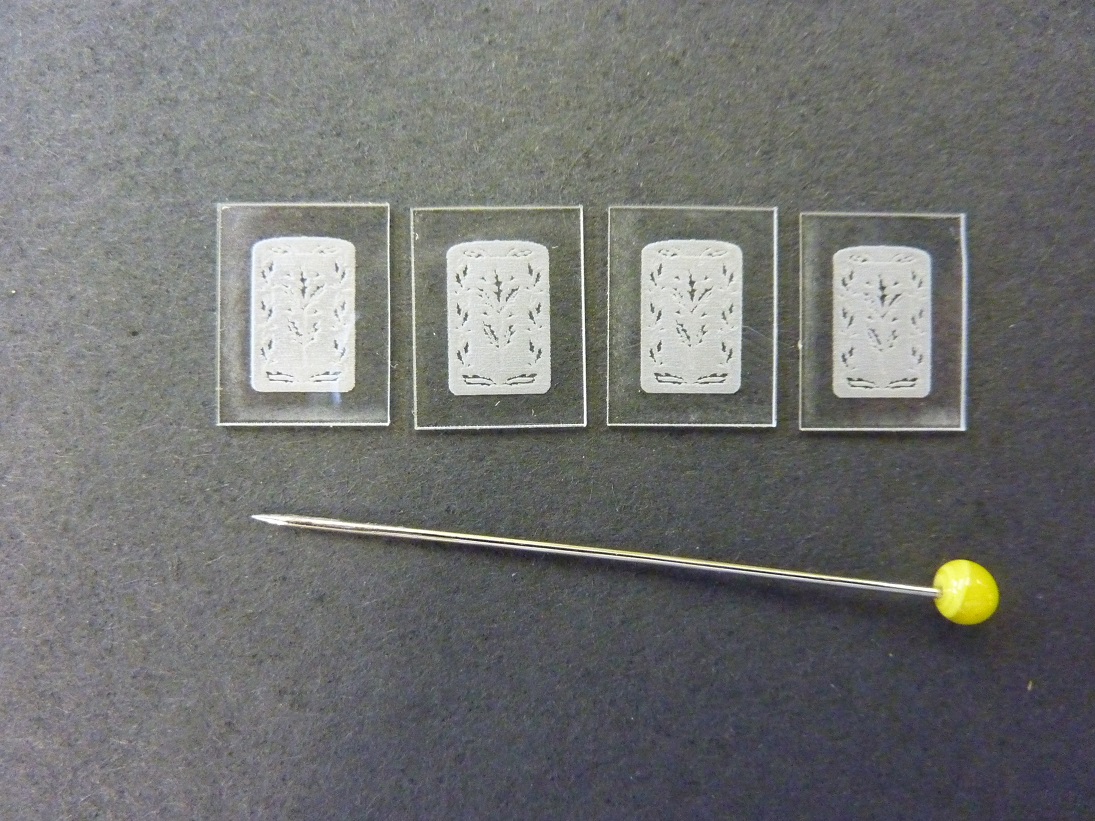
These are laser engraved on 1mm perspex and really lift the appearance of a Highland coach, as you can see:
Sadly, I have also had to increase the prices for most of the products. The costs of the last few deliveries from my etchers have been eyewateringly expensisve, so I need to defer a degree of this. The good news is that this is an indication that more products will soon be featured too – so Highland and LMS modellers keep an eye out.

That was the weekend that was….
Well the layout made it to and from Scaleforum – possibly I did too!
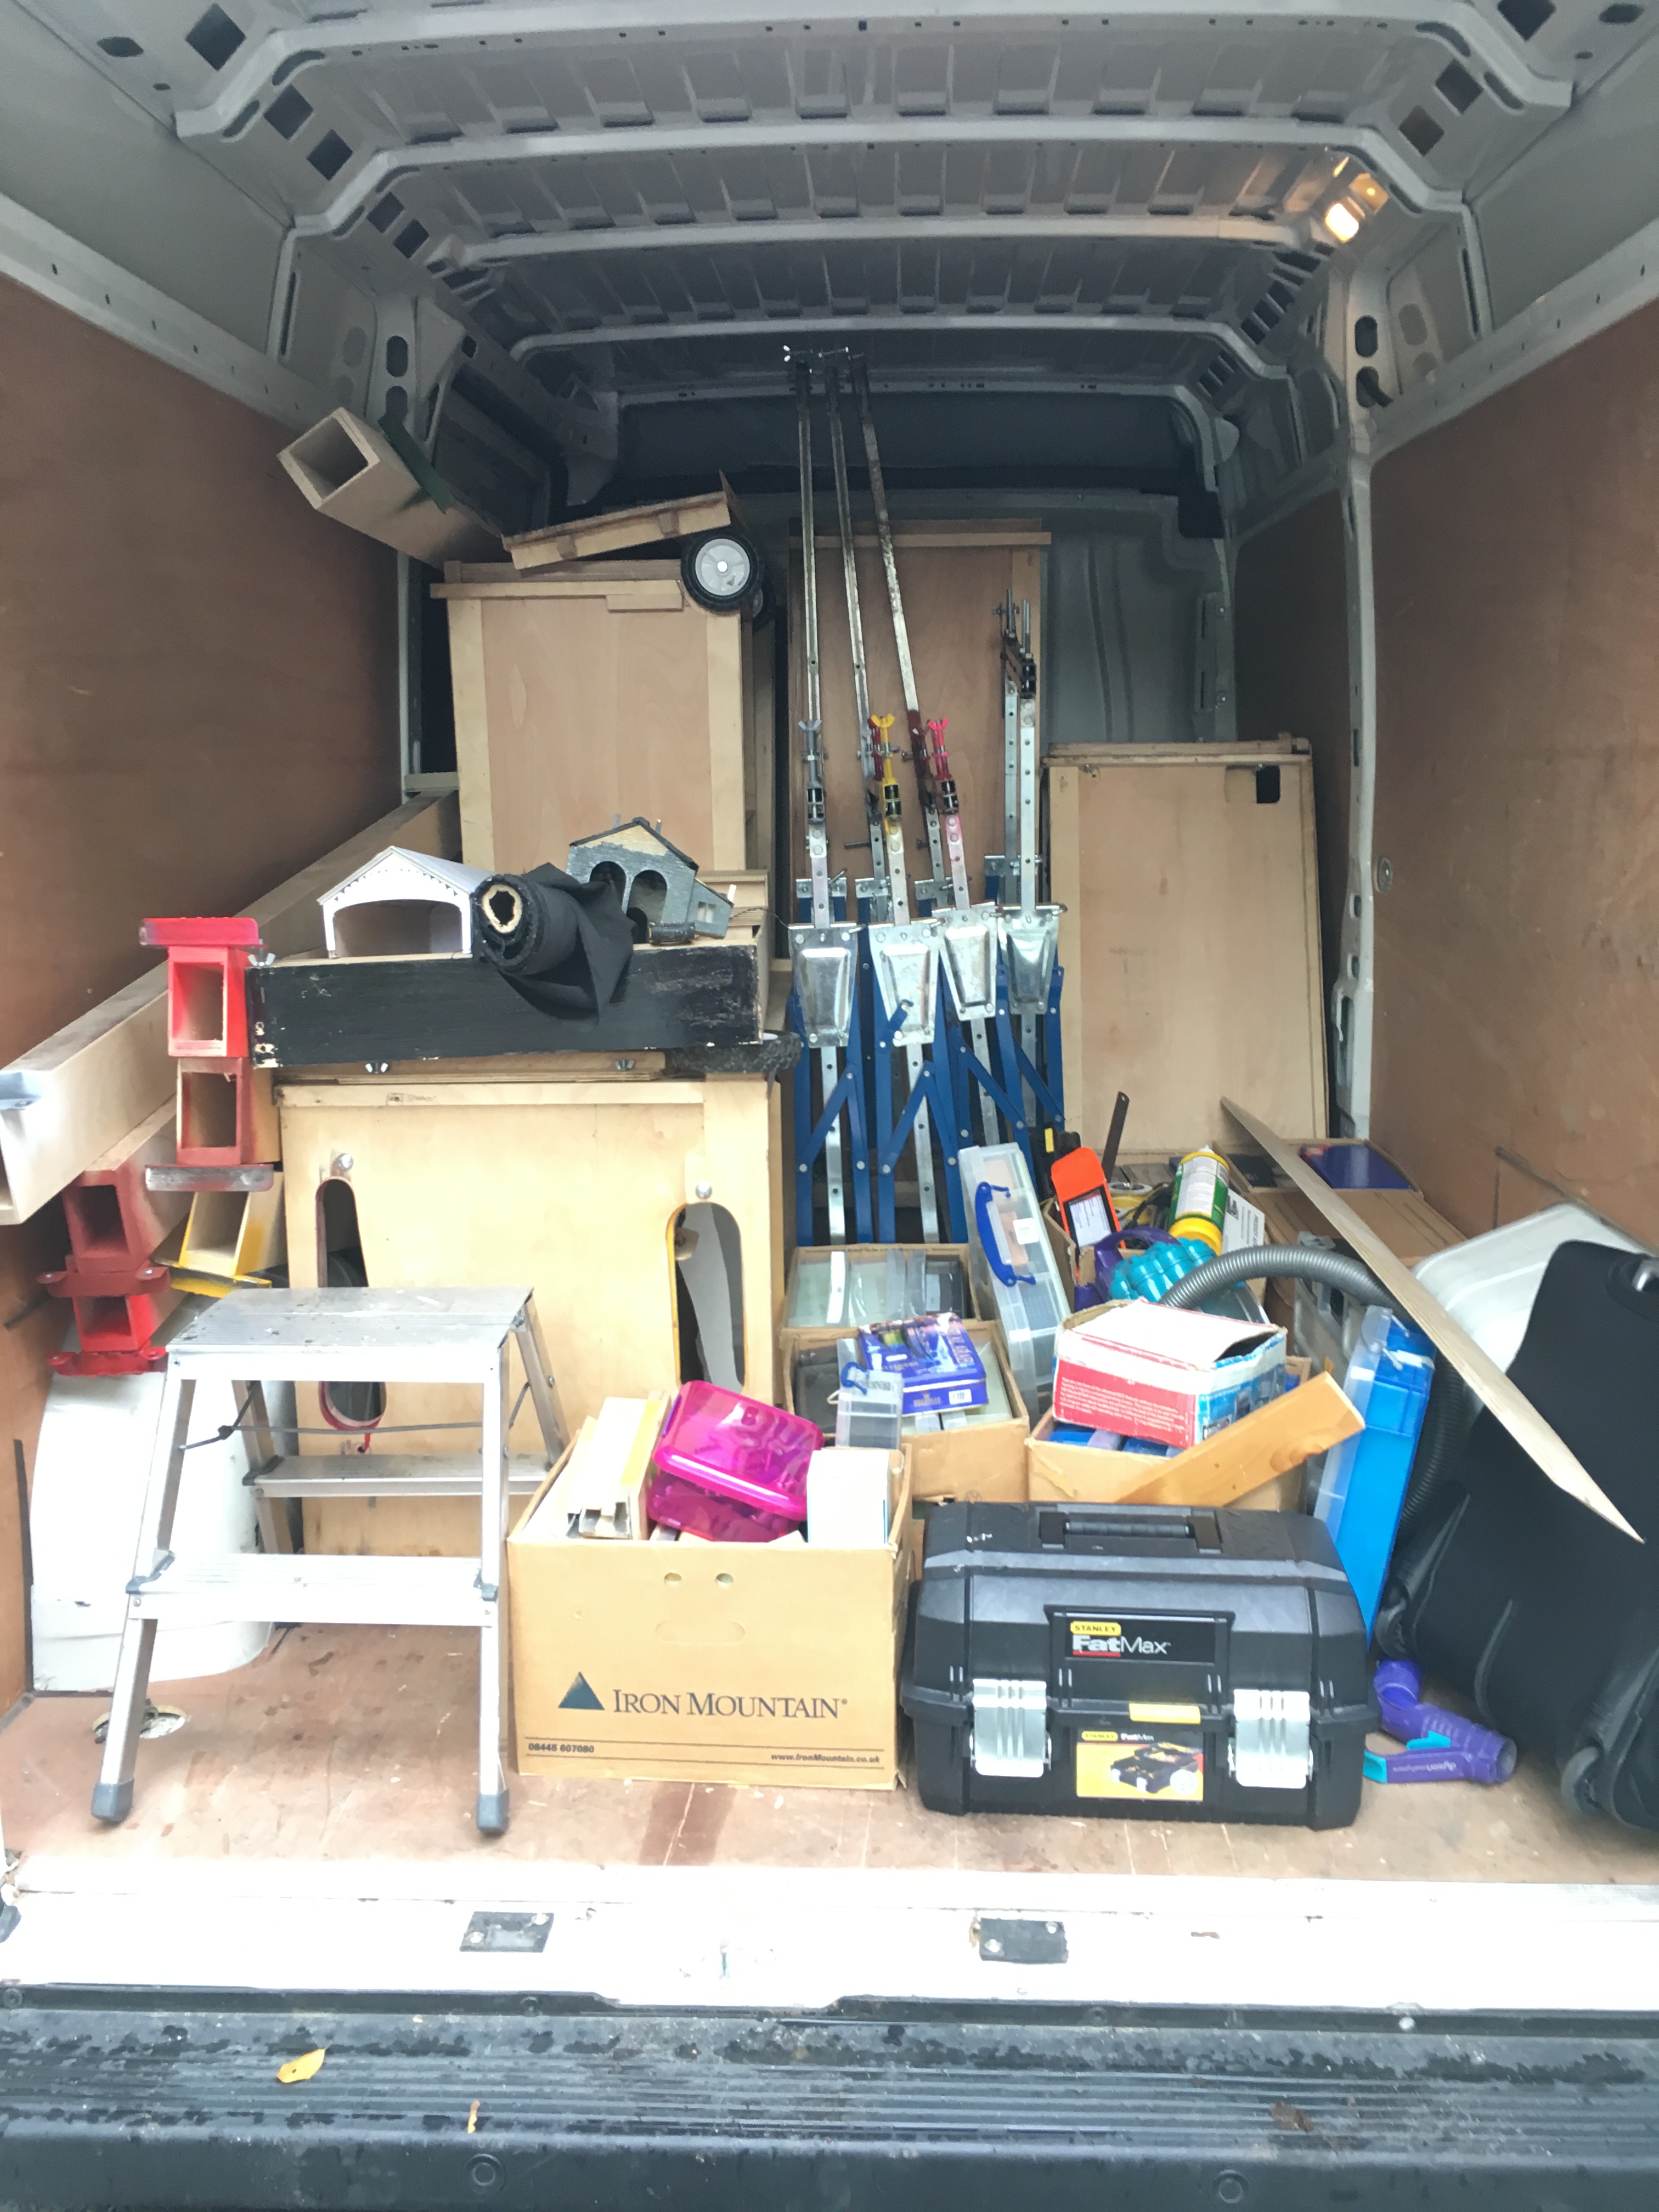
Last Friday, the inside of the hire van looked like this. Whilst the cases worked a treat, the dismantling of the layout from being set up on my own took a long time – much longer than I had hoped or expected.
Once at the venue, I was able to press gang some “volunteers” to erect the layout and this was much easier.
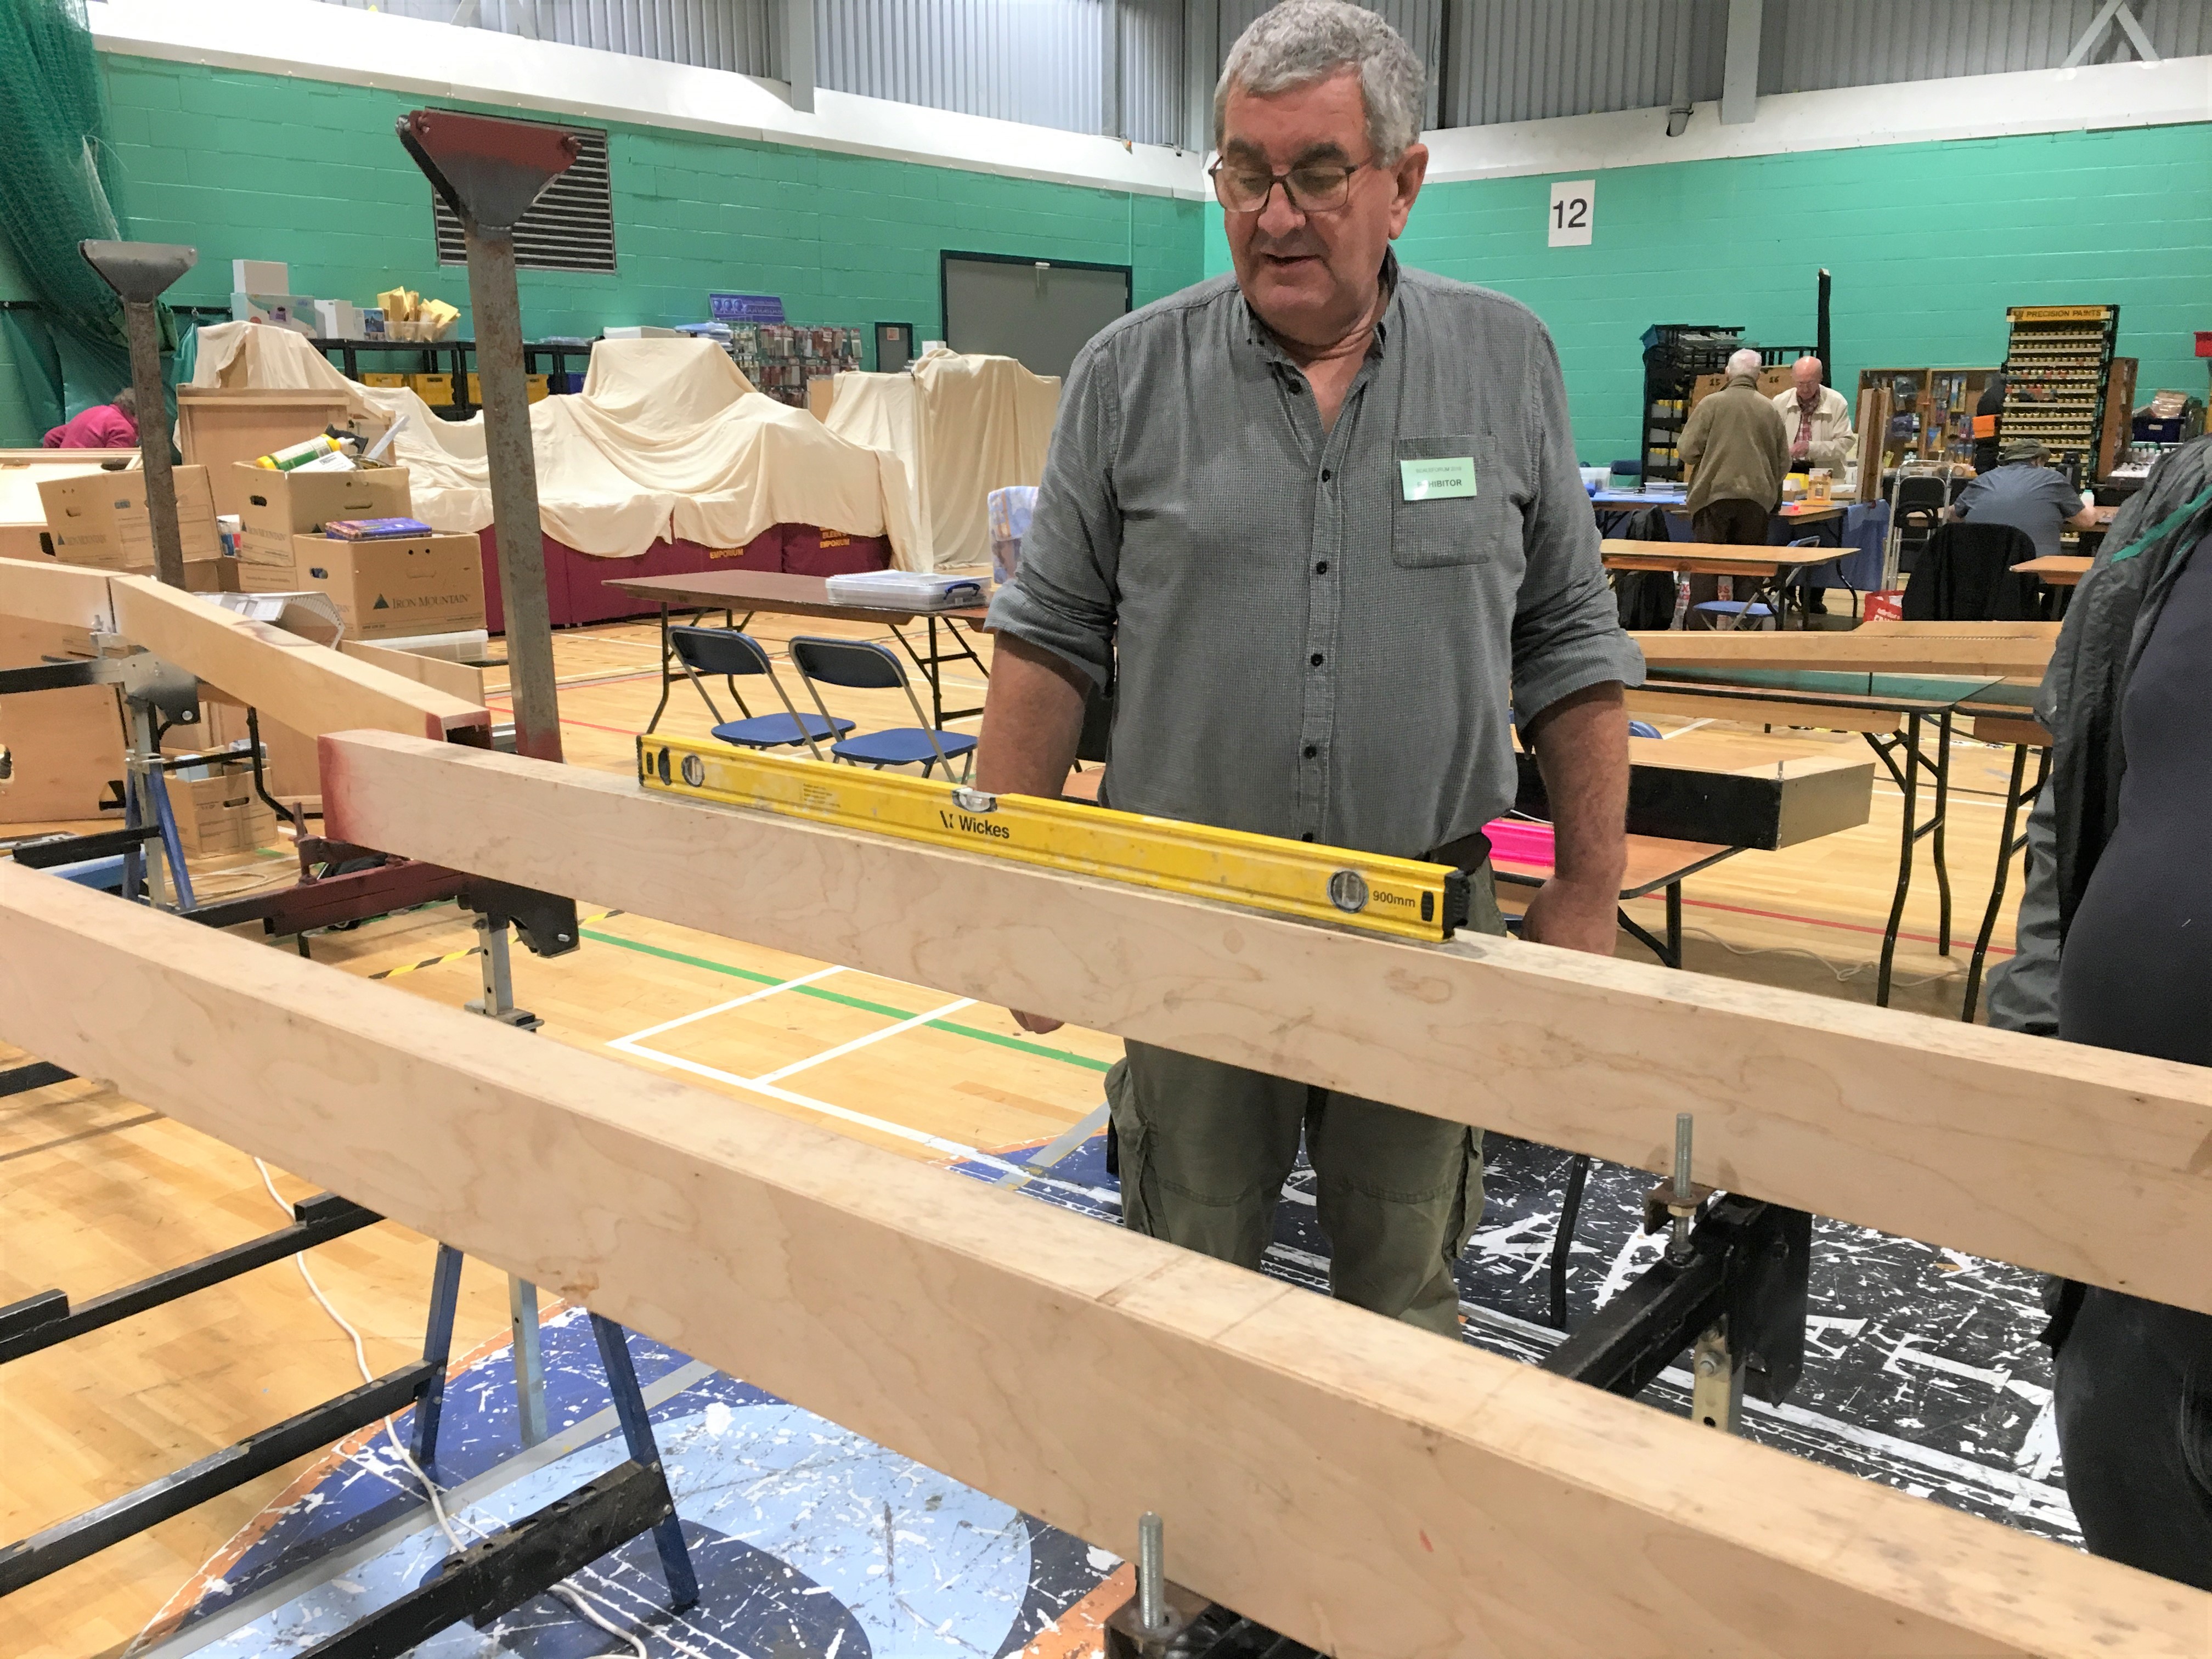
Getting the beams levelled up was speedy even though none of my press team had any experience of my logic! Indeed, with their help, it assembled itself quicker than Portchullin does although the jury is out in my mind as to whether this is simply because it as yet has rather less on it!
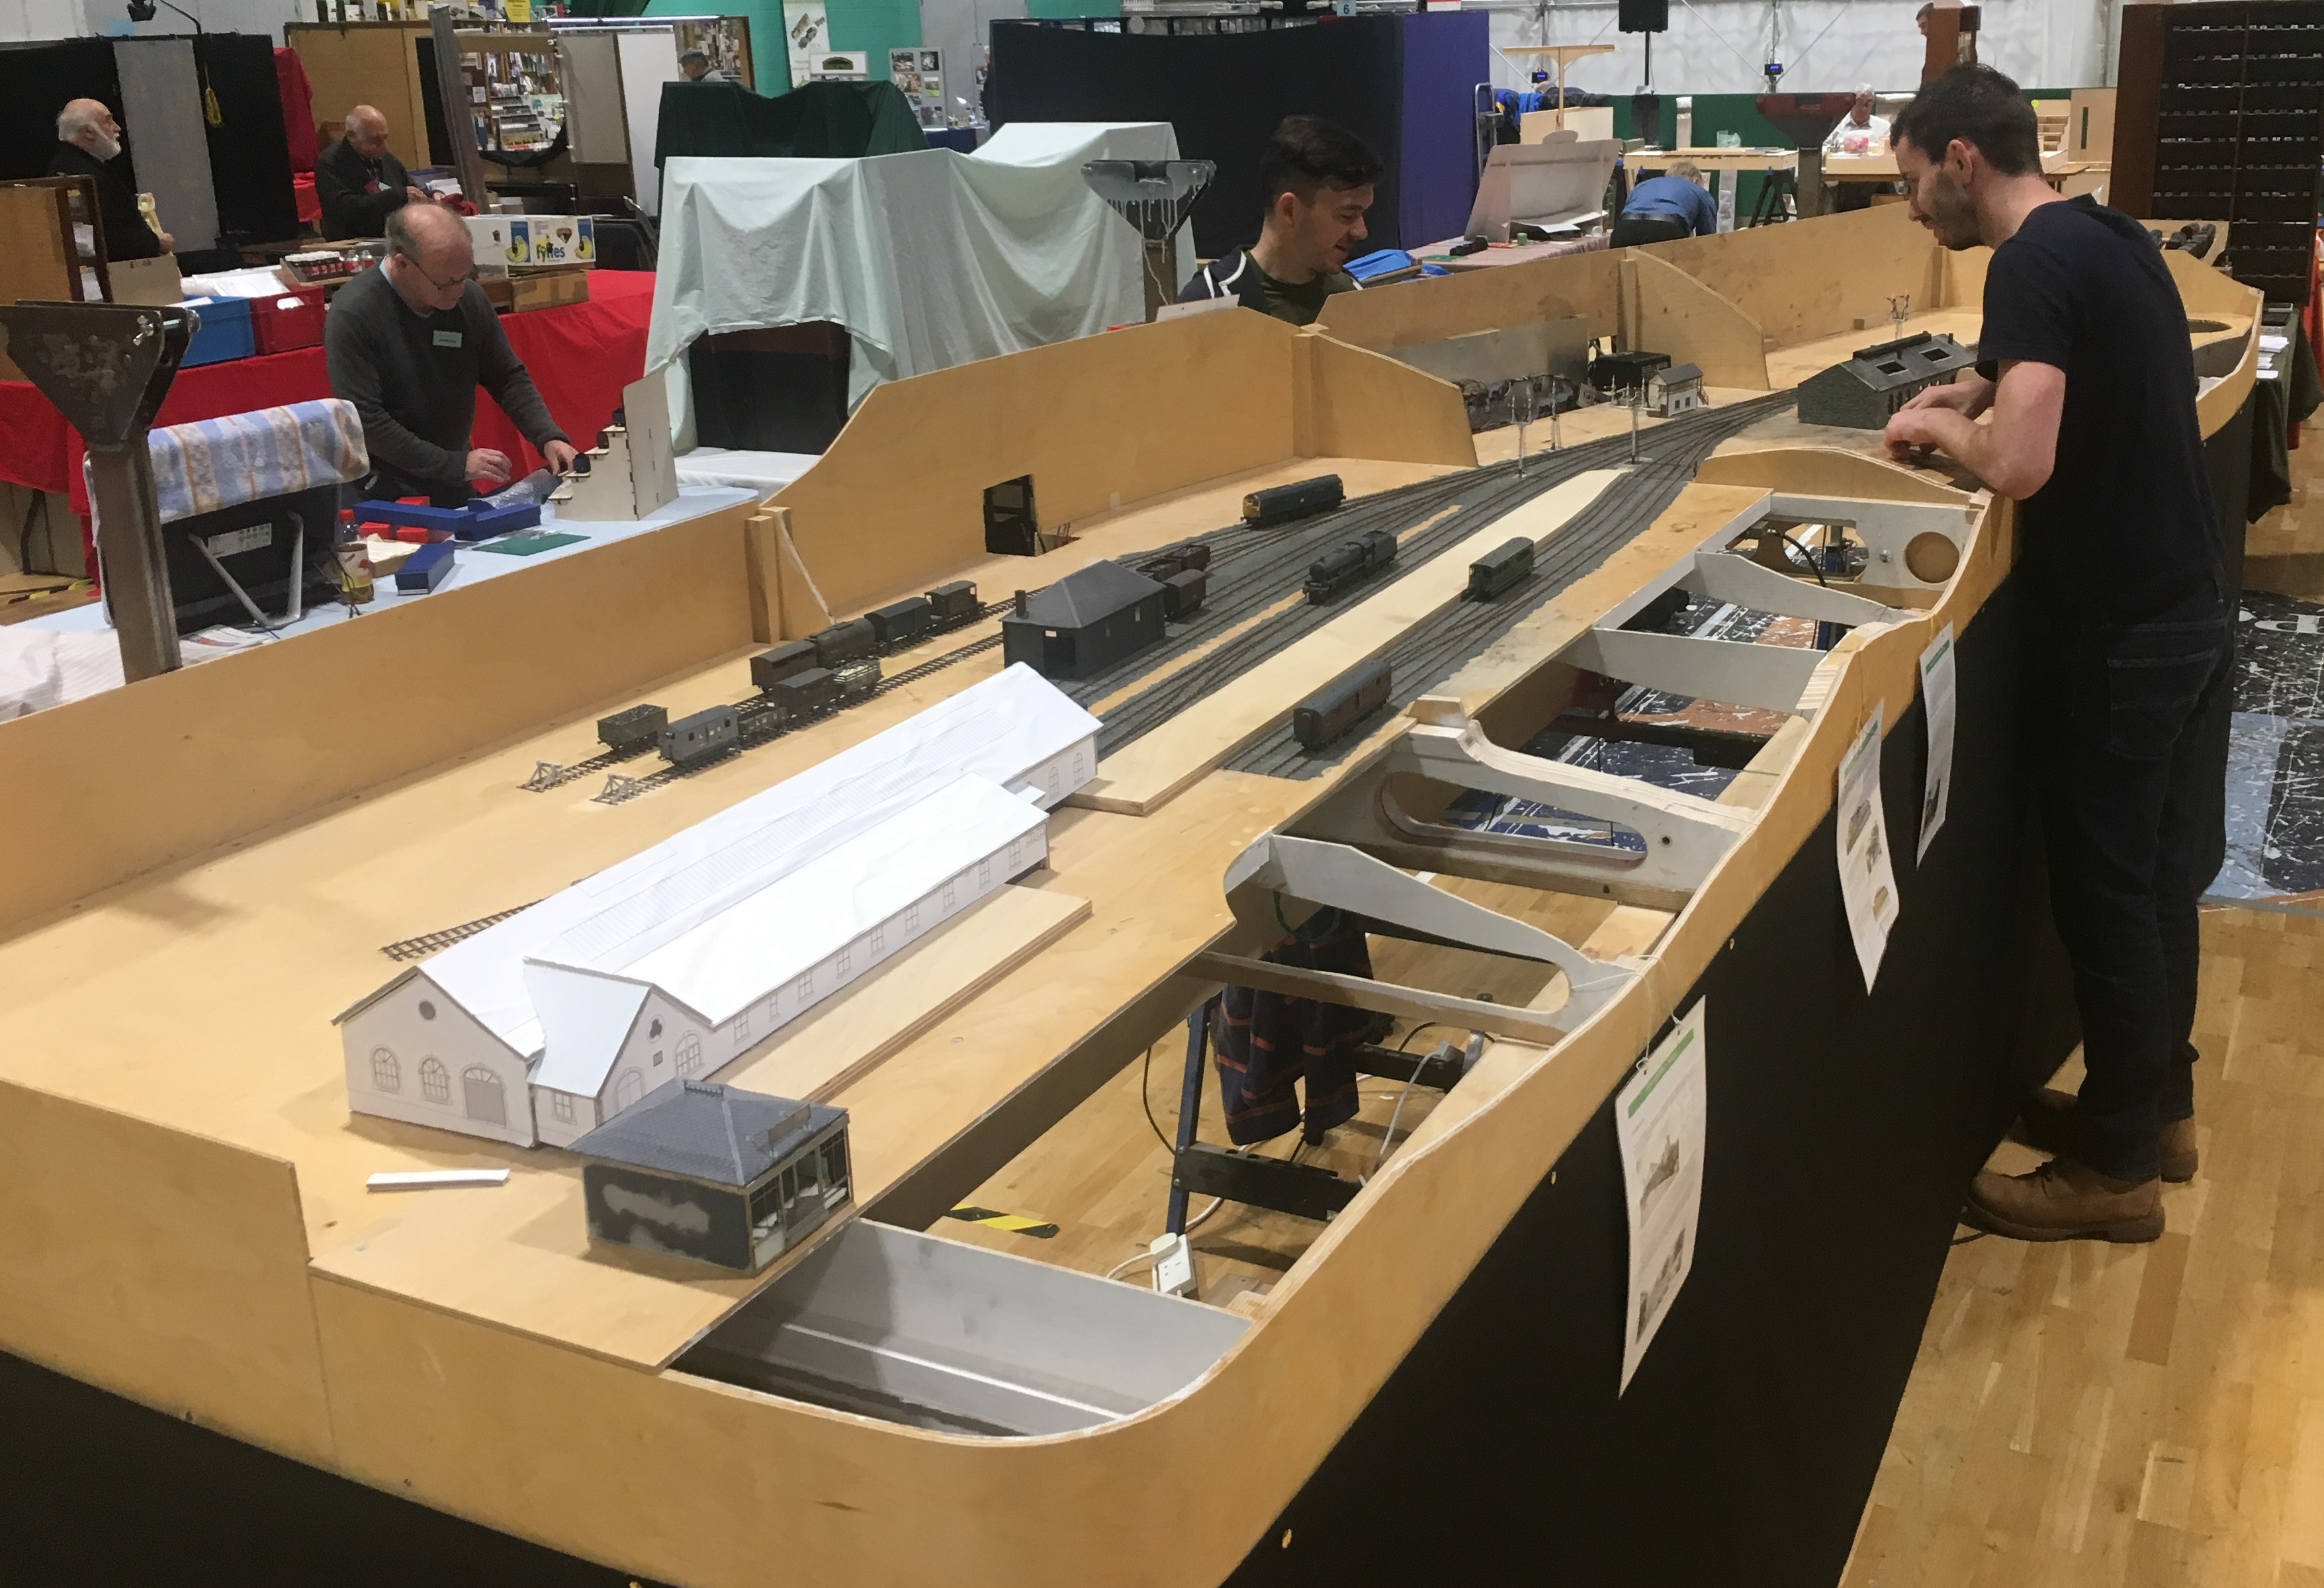
The layout’s size quite quickly became apparent; especially its depth – as can be seen here with Chris in the background for a sense of sale! Please don’t tell my wife this is actually quite big, I have been telling her it is pretty normally sized!
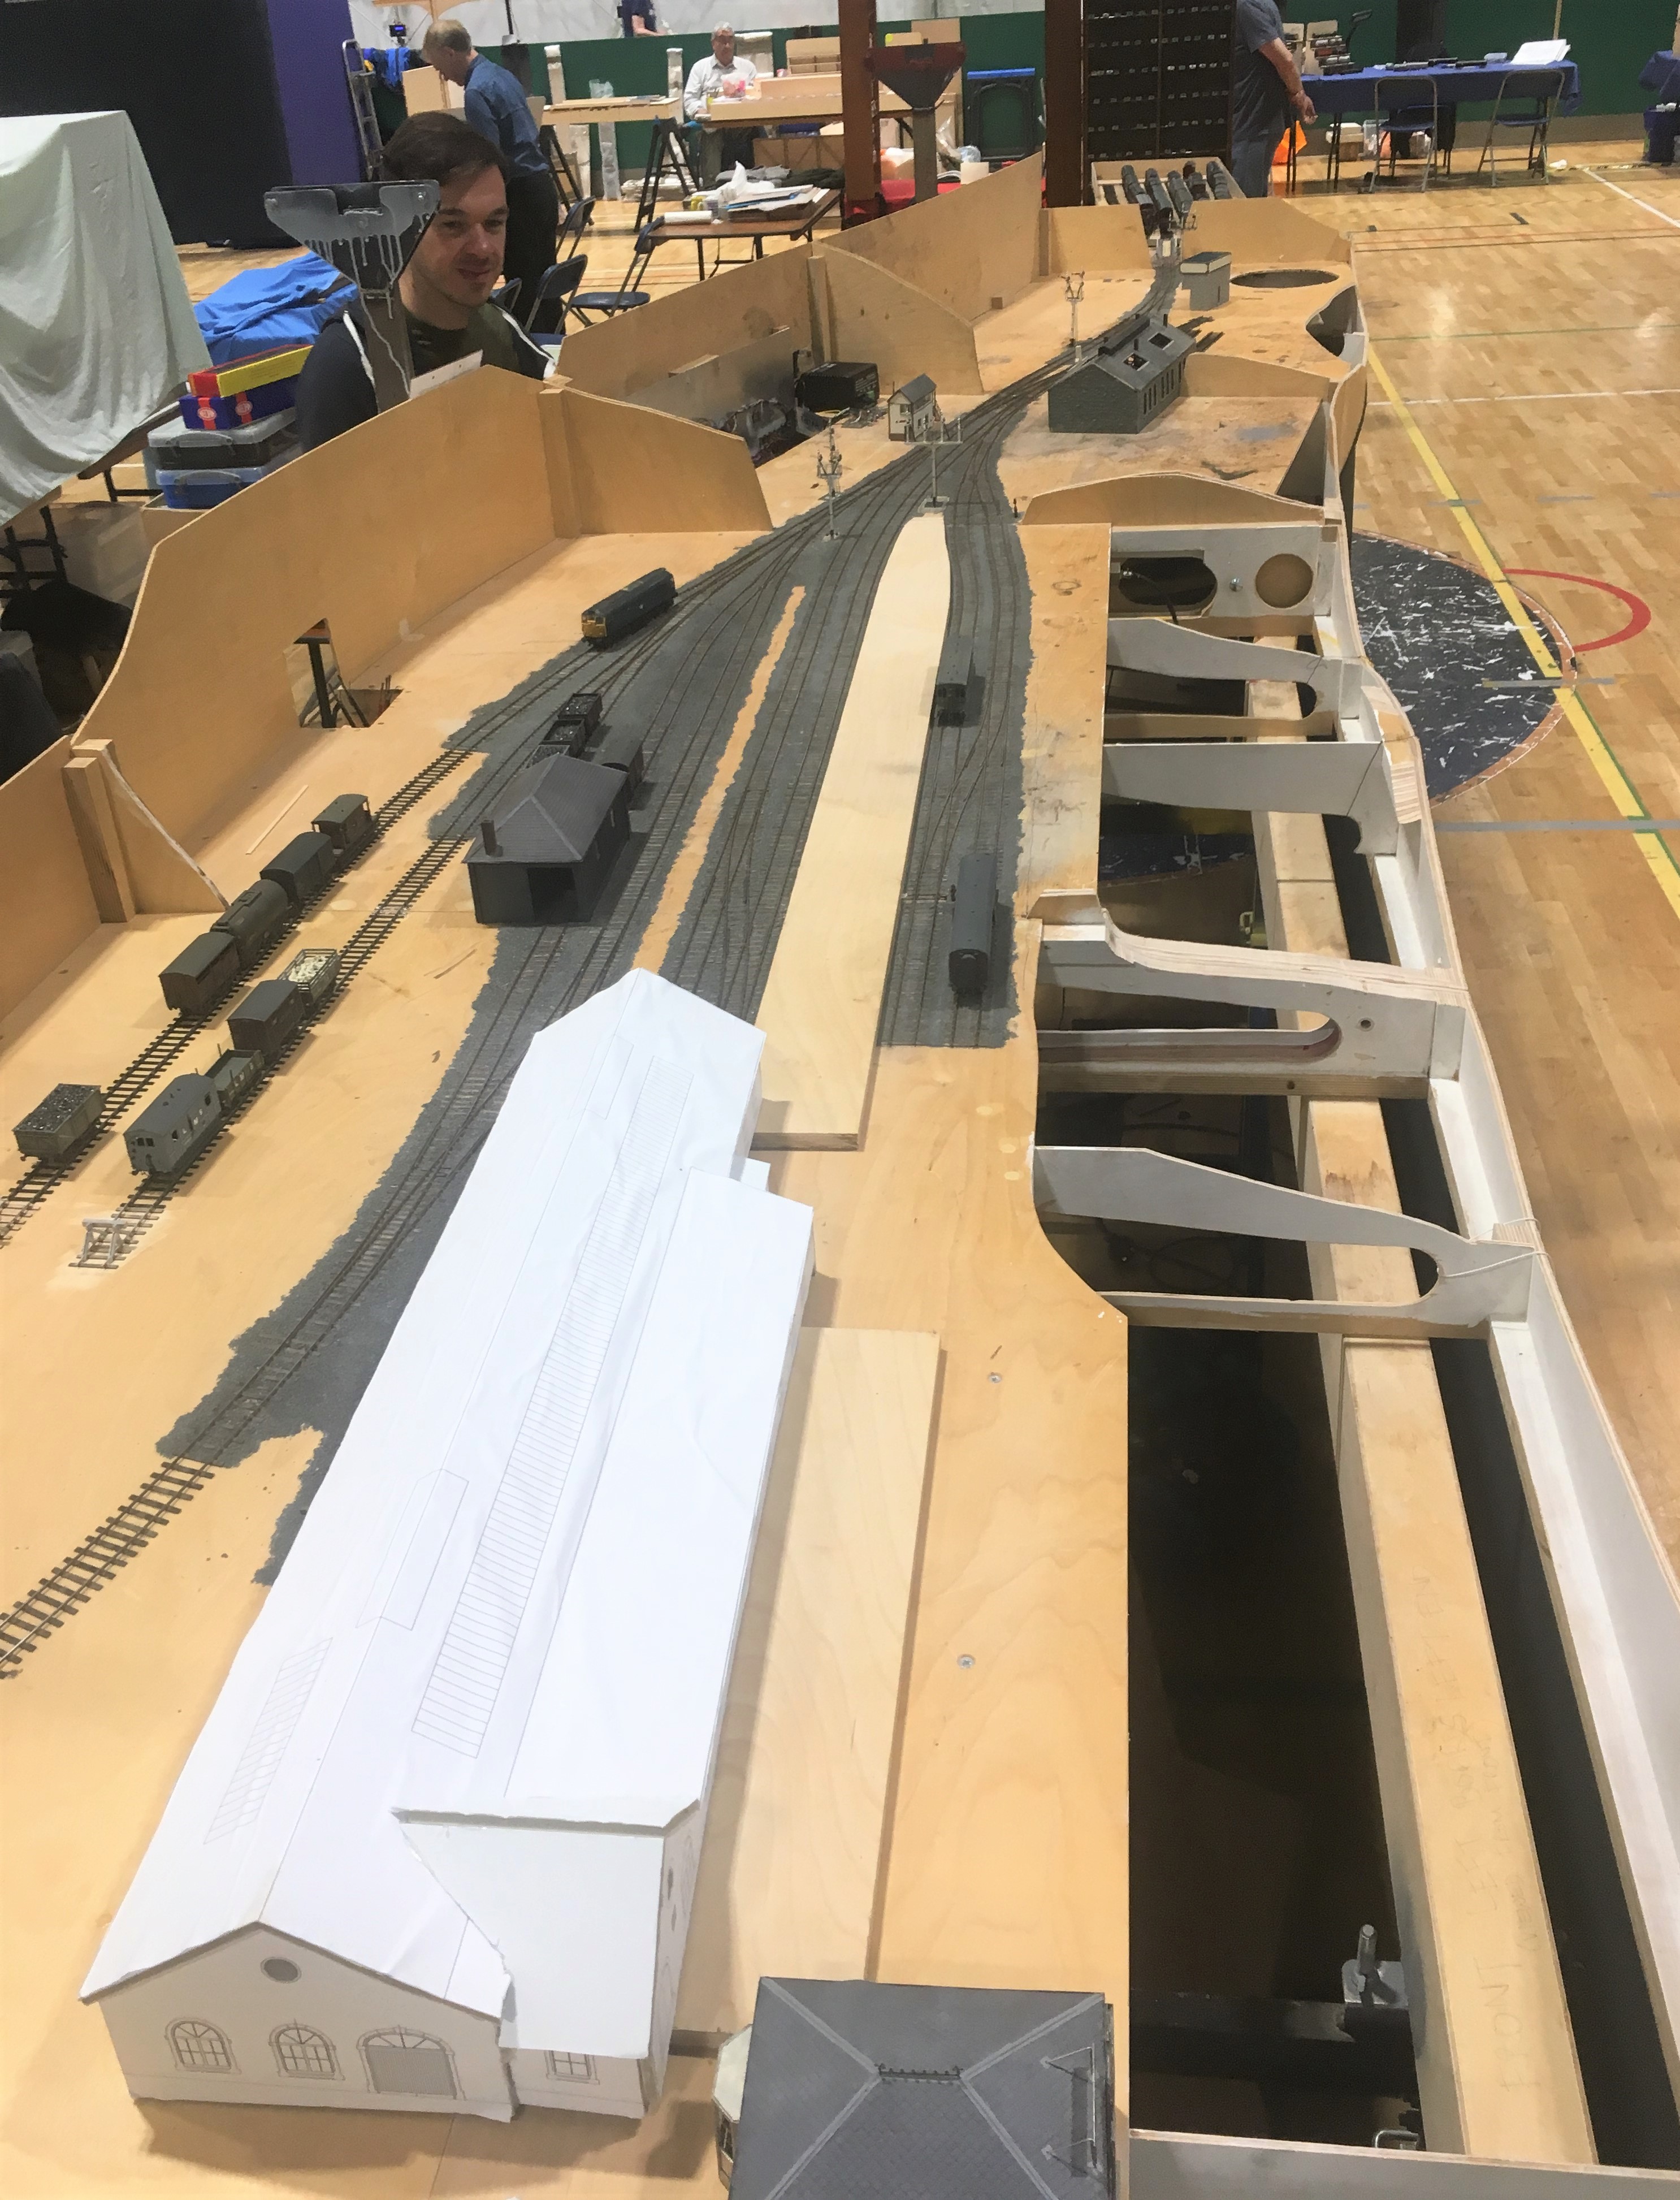
I did not manage to get front side all that often so I have only fairly limited numbers of photographs. Fortunately Samuel Bennett has come to my rescue and has provided a number of photographs to show what it looked like to the visitor.
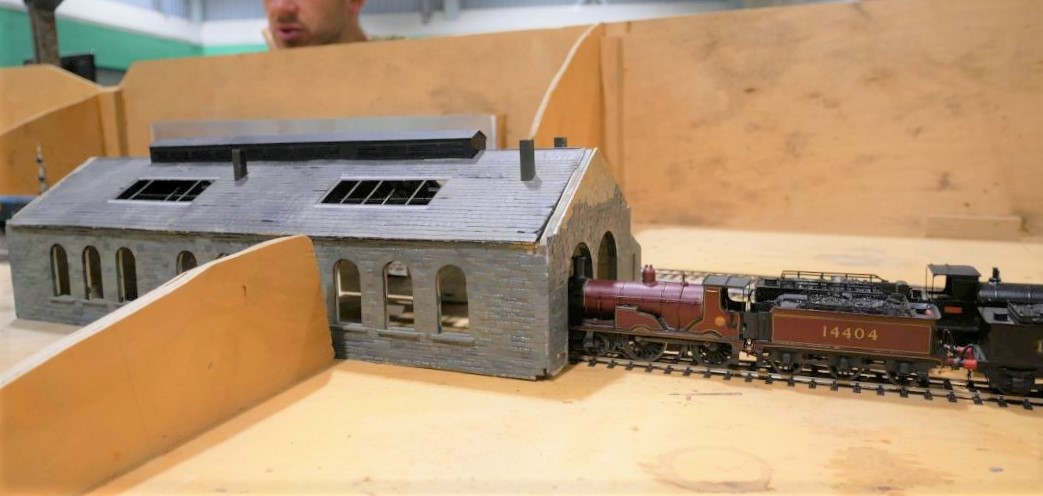
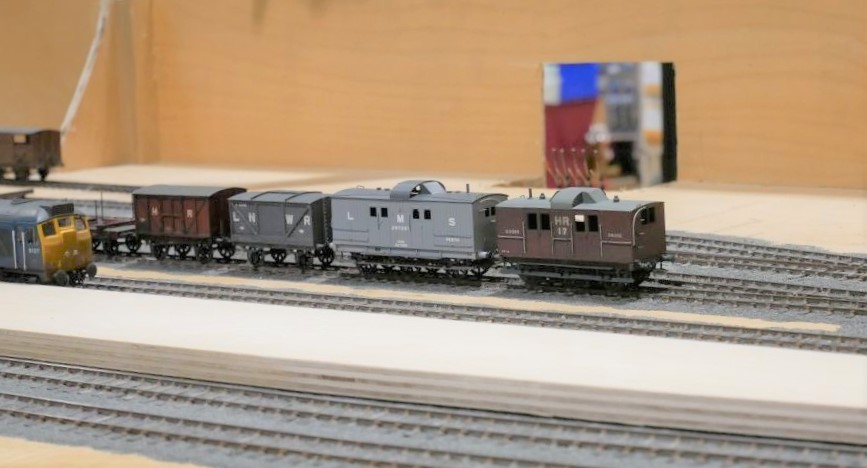
We only had three correct Highland locos chipped up (and one of these decided to sulk after a couple of hours!) so we did break out the blue diesels to make sure we had a fully operational layout. Above there are a few of the locos awaiting chipping on shed and below we have the scene 50 years later!
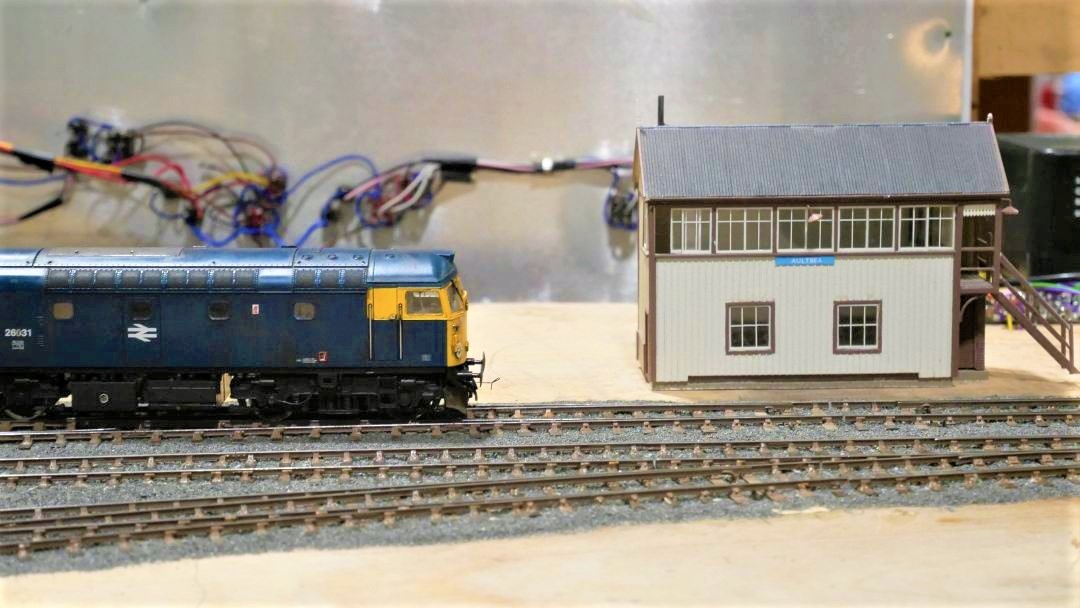
……..and below is simply confused!
Although the layout did not operate perfectly, it did behave much better than I (and my operating team) had feared! The two page list of faults and issues to resolve with the trackwork, wiring or stock is a fraction of the list that would have existed after Portchullin’s first outing (if I ever had one!).
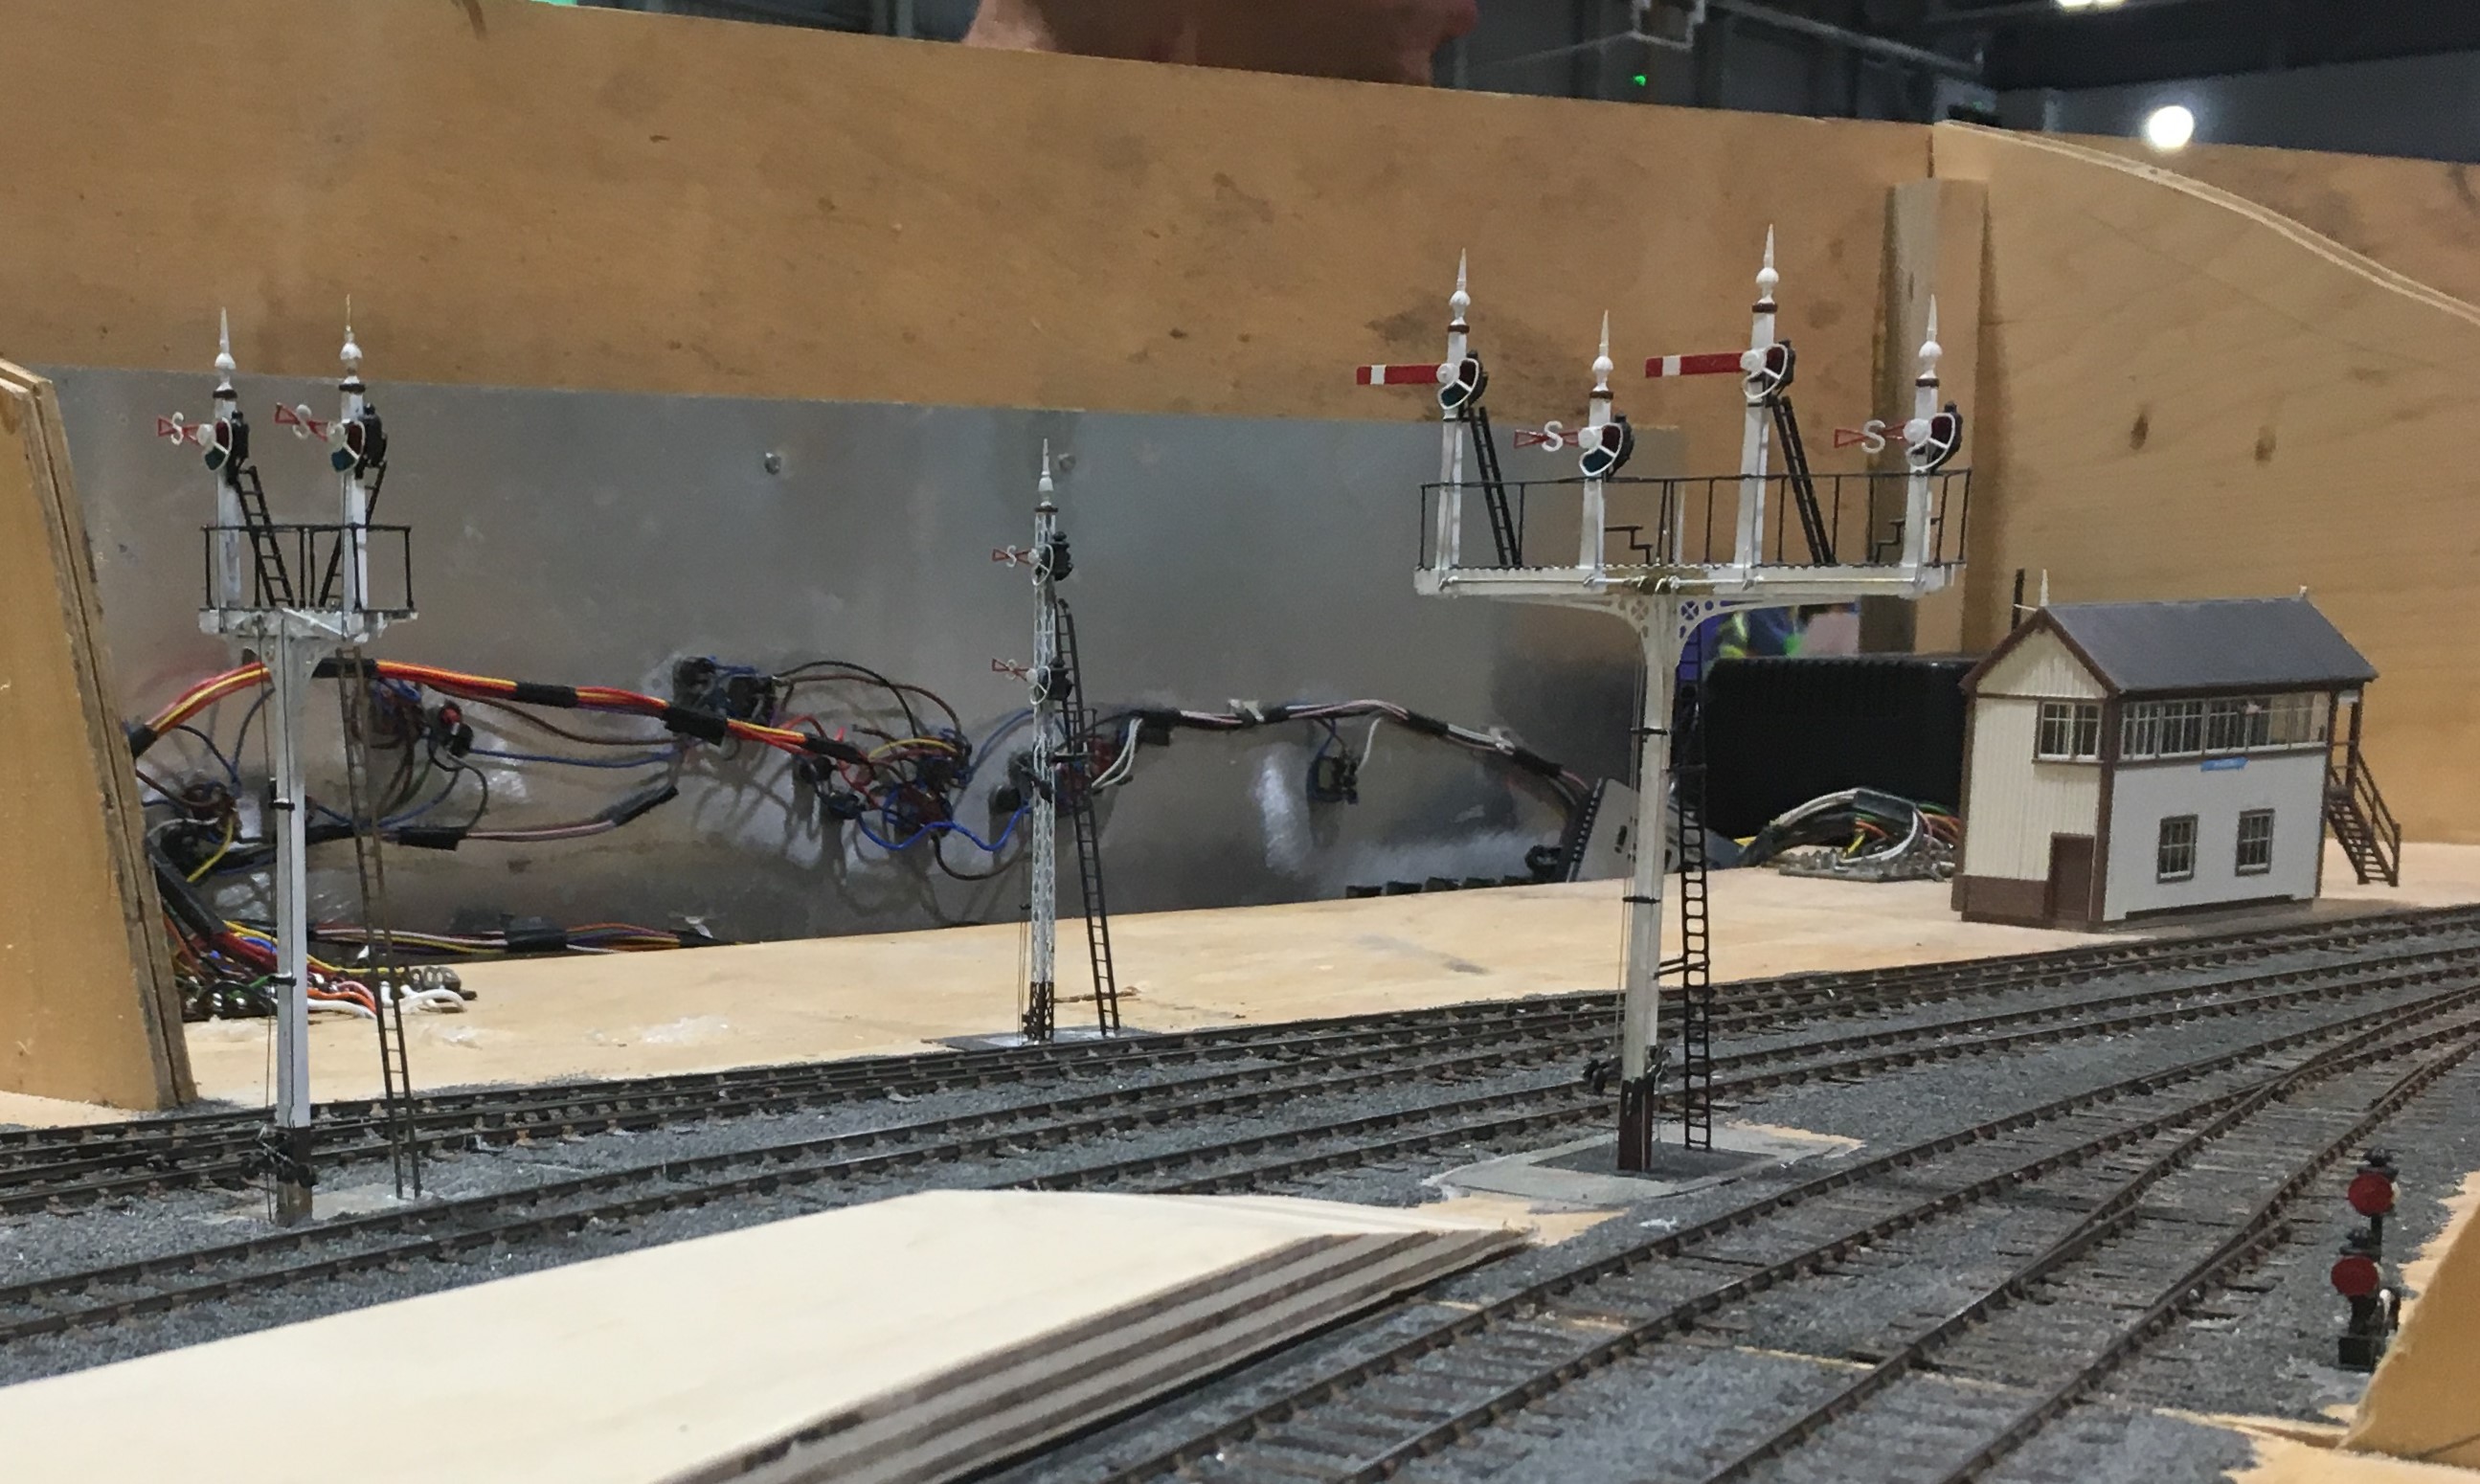
The signals received a lot of comment, even if there was one missing because I managed to damage it as I was packing the layout. There’ll be another post on these soon.

News from Miscellany Models
Followers of this blog will have noted that various test builds of my artwork coming together and I am now able to offer a number of these for sale under the name of Miscellany Models.
First up is a Highland Railway/LMS/BR diagram 51 full brake – priced at £48.00 for a 4mm and is suitable for OO, EM or P4. These were the last generation of full brake produced by the Highland, built with both cupboard doors and sliding doors as well as alternative forms of guards duckets (all of these are included in the kit). The kit inclusive of fully sprung Fox bogies (see below), roof, corridor connections (also see below) but all castings and buffers will need to be sourced separately. The castings for the bogies are proposed, but are not presently available.

As was common with many pre-grouping coaches these vehicles utilised Fox Bogies (£16.00) and these are being made separately to the remainder of the kit, These bogies have been developed in conjunction with Justin at Rumney Models and are fully sprung, with both the axleboxes and the bolsters sprung. They really do glide across track and look as if they weigh many tons rather than a few grams! They need castings for your favoured axleboxes/springs and bolsters but do include the foot steps and all of the bogies sides, brakes and details. Suitable for oo, EM and P4.
.JPG.3b26712c4490ad68695b10226612a0a9.JPG)
The second coach kit is for a MR/LMS/BR: Dia 530 Passenger Brake – priced at £36.00 in 4mm scale (suitable for OO, EM and P4). This prototype was built in some numbers and by the 1920s they were spread extensively across the LMS system. The kit is for full etches covering the roof, body, underframe and footboards plus parts for the sliding central axle included. It needs axlebox/springs (available from Branchlines or Coopercraft), gas lamps, buffers, brake and gas cylinders.
.JPG.1678157932a192d68328755d825c54f0.JPG)
On the wagon front, there is an etch to detail the NER/LNER/BR: Dia P7 Hopper Wagon – £13.50 4mm (sufficient for two wagons). They cater for a large number of the variants to this numerous and long lasting hopper wagon. Needs wheels and the Slaters kit P7 kit for the donor model. Variants that can be made include the end braked version, improved components for the Morton braked version, outside twin W irons and also the anti-friction wheel device.

All of these are available from my website https://miscellanymodels.com/ and in addition to this from the Rumney Models stand at the following shows – Scalefour North in April, Railex in May, Scalefourum in September and South Hants in November,
All of these have been extensively road tested by me with a couple of test builds for each of them. You can see this unfold on my blog and if you are interested in seeing how they go together do take a look!
Please remember that the availability of these models is an adjunct to my own hobby and this has to be accommodated within the constraints of my day job and general life! In particular I can’t get to post these orders until Saturdays so do please give me a little slack when it comes to getting the goods to you!

Improving the Oxford Rail North British Jubilee Wagon
As I mentioned in my previous post the Oxford Rail Jubilee wagon is a pretty good rendition of the original but it does have a few small issues and is fundamentally the wrong colour! Actually, these proved very simple to fix and the conversion to P4 was relatively painless; so within a couple of hours you can have a good rendition of this typically Scottish wagon.
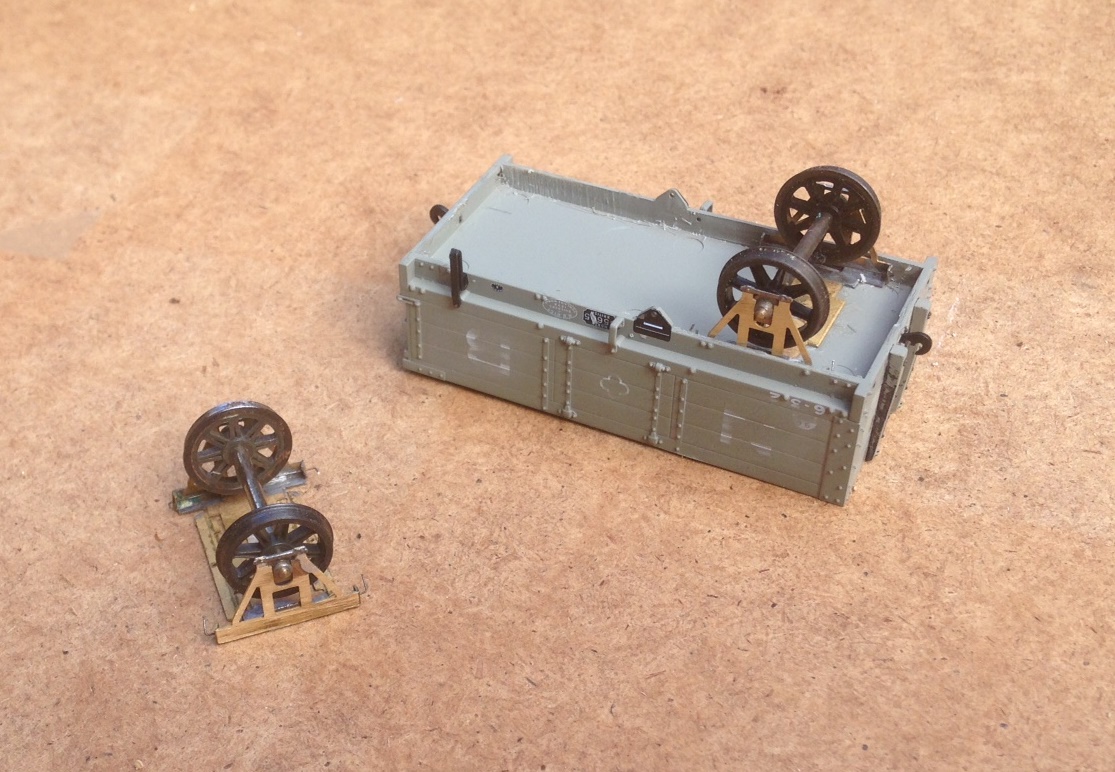
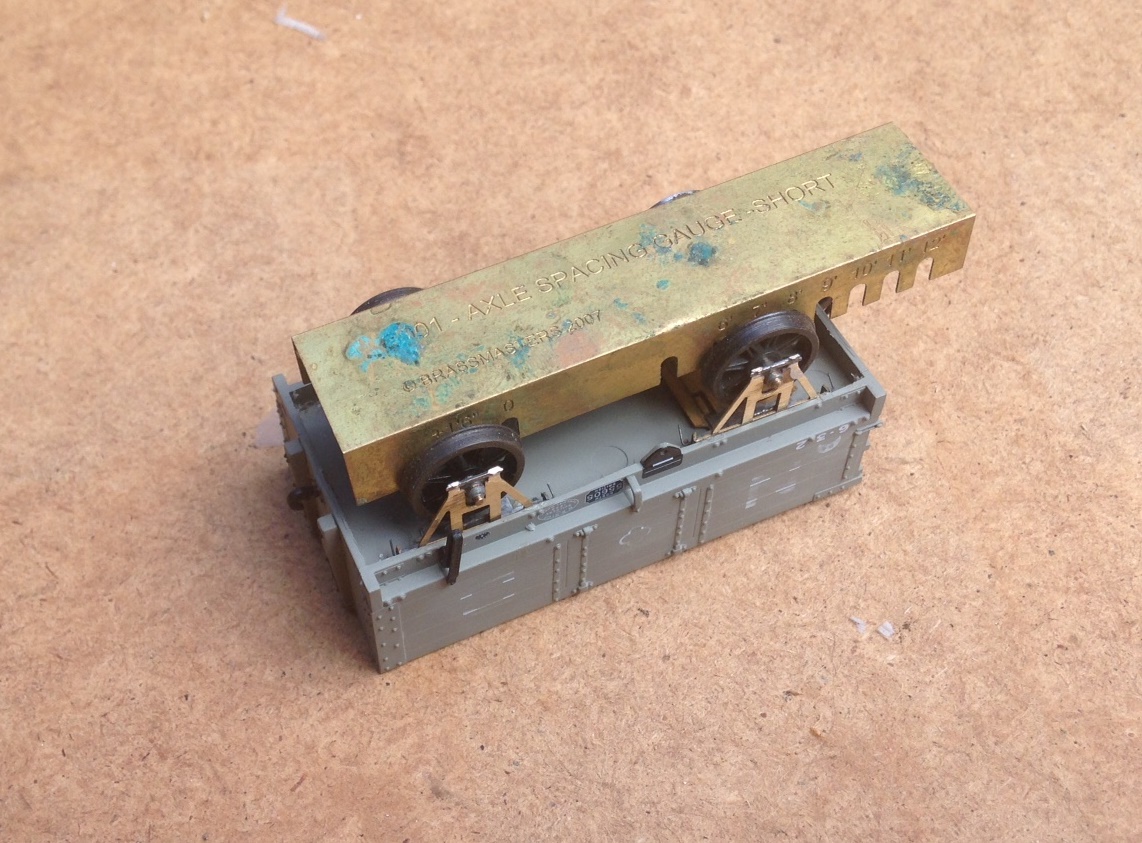
First off was the conversion to P4 which is not possible to do with the existing underframe as it is too narrow. In an approach that I have not seen before, Oxford Models have created an underframe that slips between the solebars. Even better, this is not secured with glue and merely popping out the buffer shanks from their housings allows this to drop out. Neither the buffers nor the brake gear are secured with glue either and I elected to temporarily detach these from the model throughout to prevent any damage to them. Bill Bedford pre 1907 RCH sprung W irons were then used but it was necessary to scrape back about ½mm of the inside of each solebar to get these in. Checking the ride height against the buffer height gauge I found that the right height was achieved without the need for any packing.
Although the axleboxes that are provided as part of the model are a bit crude, I did not have any better ones available (although 51L do provide them) so sought to retain these. There is a fair amount of cutting required to remove the remains of the plastic W iron and open up the rear of the axle box to take even a waisted pin-point bearing. Definitely do this with a finger drill and not a powered one as you need to remove as much plastic as you can short of actually going through it. Cutting these rebates was the slowest part of the whole task.
The end stanchions were separate pieces and popped off without bother but the planking joints did not run behind them continuously. Therefore, whilst it was easy to reattach the stanchions with glue, I had to score the missing plank joints in first. The buffer shanks are a tad too long, more appropriate for NBR fitted wagons than unfitted but these were easy to deal with. The metal heads pop out easily and then a few strokes with a file takes off about ½mm to reduce the length. The fixing hole needs to be deepened slightly and then the head can be resecured with a dab of glue.
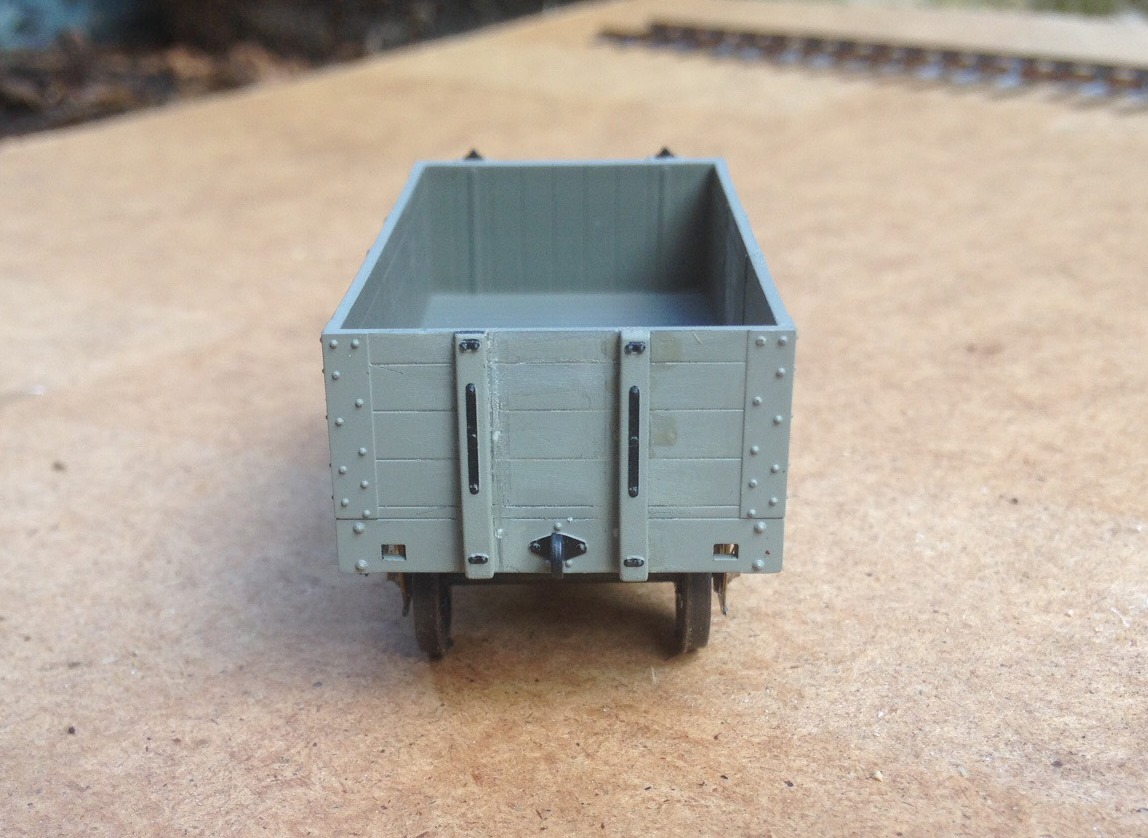
The missing ironwork to the solebar was from a left over etch; Mainly Trains do alternatives. I found that the bolt heads to the straps either side of the door had some of its bolts in impossible locations (in the joint between planks) and I therefore shaved these off prior to applying replacements with Archer transfer rivets. This is the first time I have actually used these and they are really easy to use; much quicker than any other method. The strapping to the inside of the wagon was missing, so this was added with microstrip and more Archer’s rivets. The hinge rings to the end door should be almost a full circle so these were replaced with pieces of bent wire to conclude the physical modifications.
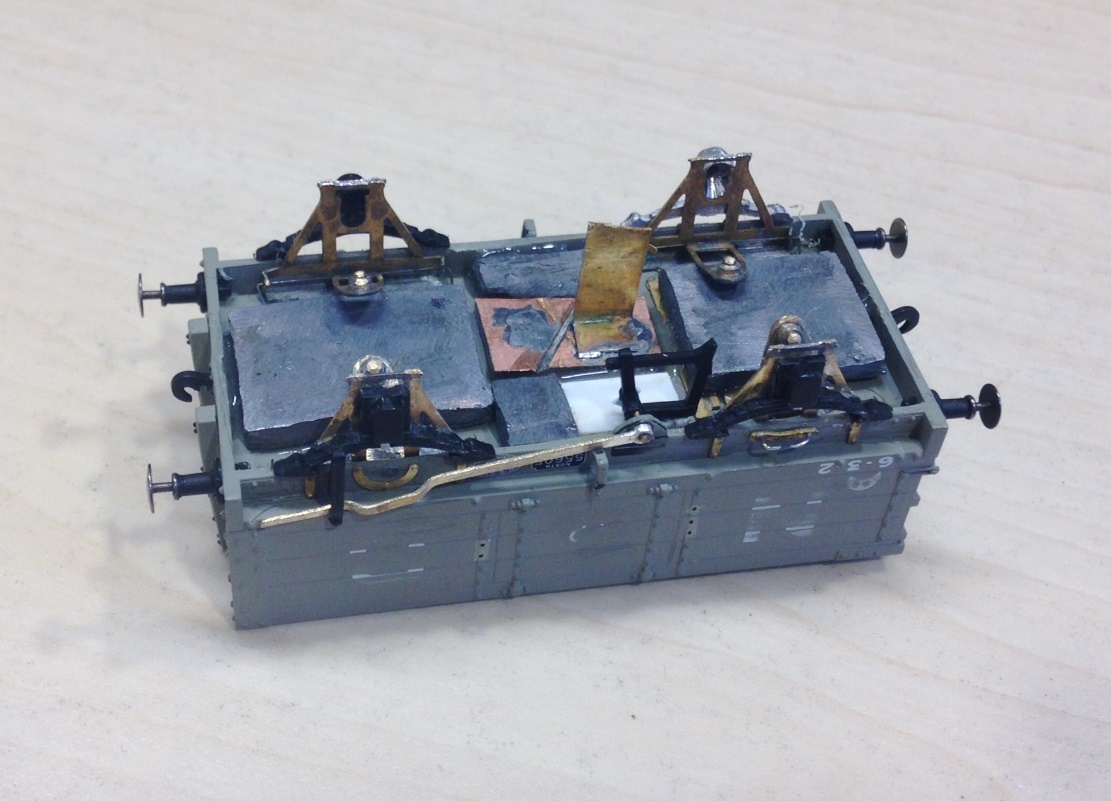
The model comes fitted with scotch fulcrum brakes to both sides which is correct for some vehicles but I cut away one side as I wished to represent the more common variant that had these only to one side. The actual fulcrum and brake block detach from the underframe without difficulty and I found that I could reuse it, after first mounting them on a piece of plasticard secured to the underside of the floor. I did, however, change the brake lever which I thought to be a bit clunky with an etched replacement and added a fair amount of lead as the model is very light. I also attached a piece of scrap brass to the underside – as seen below – as a temporary means to hold the wagon whilst it is painted.
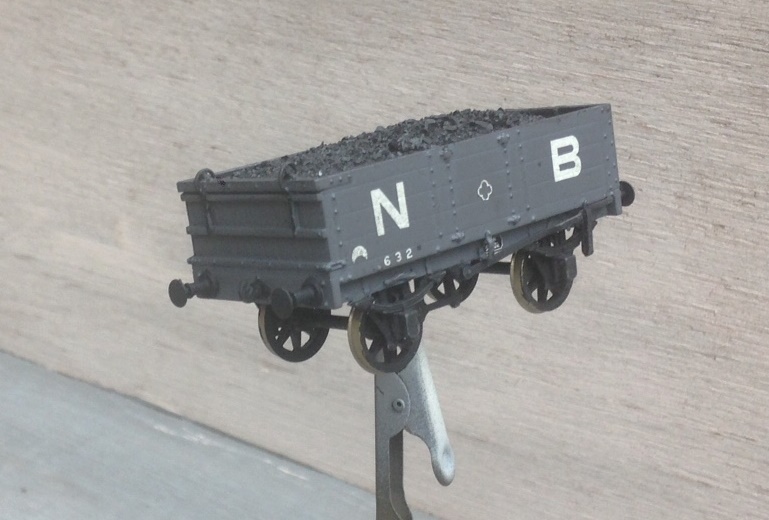
I chose to lightly abrade the surface of the existing lettering with a fine wet & dry paper as I was concerned that they might leave an impression through the new paint. Thereafter I painted them all over with Tamiya Paints, German Grey, picking out the ironwork to the solebar and below with black. The lettering was from PC Transfers sheet 20 but it will be partially lost below weathering; when I get it to this stage!
Here we can see the benefit of the brass strip to hold the model with during painting and weathering.

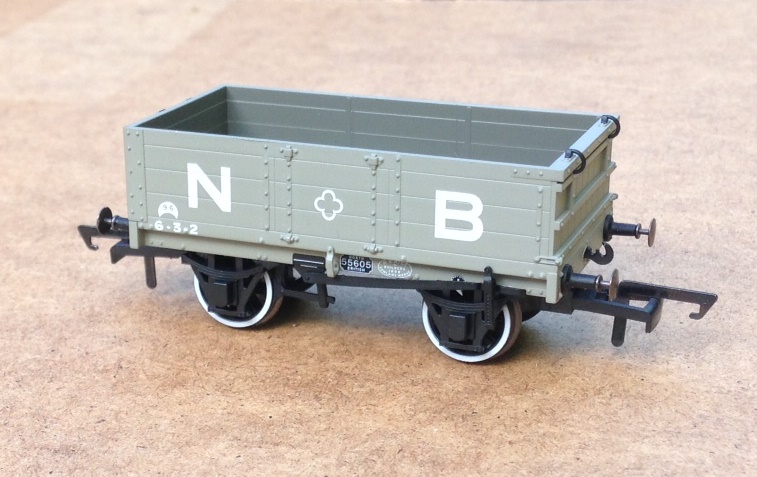
Oxford Rail North British Jubilee Wagon
Until recently, there have never been any mainstream ready to run locomotives or stock suitable for the pre-group modeller of the Highland. Whilst there remains nothing that emanated out of Lochgorm, with the release by Oxford Rail of a NB 8 ton jubilee wagon we do at least have one that would have made it onto the system regularly!
The first of these wagons originated from 1887, the year of Victoria’s jubilee (hence their name) and the bulk were constructed at Cowlairs but with others from several outside contractors. The design was developed and eventually over 20,000 were constructed, forming the mainstay of the North British’s mineral fleet. The model represents an example of the diagram 16B wagons, built from 1896 and marginally longer than those that went before. Oxford Rail presently produce this in NB livery and five private owner liveries, recognising that many of the railway company’s vehicles were leased to collieries and took on their lessee’s branding.
Dimensionally, the model matches the prototype well and as a result the proportions capture the character of the prototype. One exception seems to be the stanchions to the fixed ends which are placed rather too close together. Although with such a large number of examples spread over many batches there may have had examples with this closer spacing, I have not been able to unearth any photographs to confirm this. This problem is not difficult to solve, as the end stanchions are separately applied with small spigots attaching them to the body – thus it is easy to prise them off and reattach them on fresh holes at the correct distance apart.
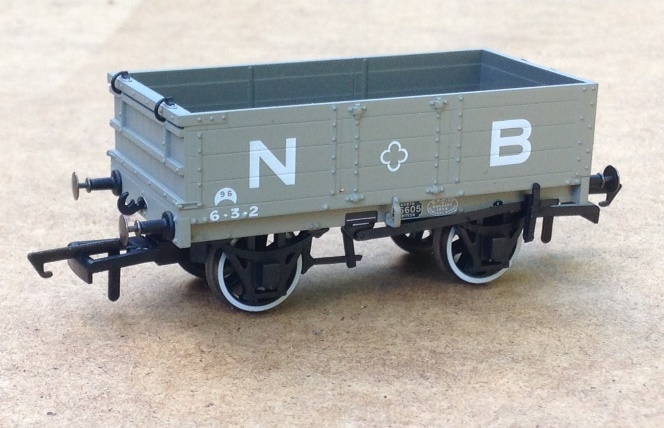
The model correctly incorporates scotch fulcrum brakes, although it provides one complete set per side. Although not wrong, it was more common for the wagon to be fitted with brakes to one side only and this variety can be provided by the relatively simple task of the removal of one set. In an approach that I have not seen before, the solebars are part of the body moulding with a separate chassis moulding that sits inside this. This does make the colour changes between the ironwork and the timber crisp but has resulted in the width between the W irons being narrower than usual – especially as the width over the solebars is a tad narrow. It is possible to convert the wagon to EM but it requires the shaving of a large degree of the inside of the W irons to take the increased width across the wheel faces. It is not possible to widen it further to accommodate P4 wheels, so to convert the wagon to P4 requires the replacement of the W irons in total. Few P4 modellers will be put off by this as with some carving away of some the inside of the solebars, Bill Bedford sprung W irons can readily be used. If the vehicle is to be kept as OO, the wheels can be retained as the correct split spoke wheels have been provided – a first I believe for a ready to run model.
The moulding is beautifully crisp throughout and the detail neatly incorporated. There are good amounts of separately added elements of detail – such as brake gear and buffers – assist in achieving a quality rendition of the prototype. They are also readily removed/reinstated, which is of assistance if you chose to enhance your model or convert it to one of the wider gauges. Rather peculiarly, a number of fairly obvious elements of ironwork to the solebar have been overlooked, including the crown plates. On the private owner variants these are visible so it appears to have been the intention to paint these on the model but this has not occurred in the North British liveried version for some reason. However, it is not particularly difficult to add these as they are available as etches from a number of sources. The most obvious issue with the model, however, is its colour; it is much too light for North British wagon grey and no amount of weathering will disguise this. This is a shame because the printing of its lettering is exquisite and any repaint will obliterate this.
Other points of detail that are not quite correct are the end hinges, part missing internal strapping, buffers that are too long for an unfitted wagon, overly skinny side door hinges and a few rivets that are in impossible positions. However, only the more fastidious modeller will want to change these (although this might include me!) and but for the colour this would be a “ready to plonk” model for most people. Helpfully, none of these points are insurmountable with a little effort and for those that want to improve the model, it will be a task of only a few hours.
So overall, I would commend this to the Scottish modeller of the pregroup or grouping era as it captures the look of these distinctively Scottish wagons even if it does really need a repaint. As I have hinted, I have attacked my wagon to correct these issues and convert it to P4; this will appear in the next blog post.
Transfer Update
Back in November 2013, I hinted that I was trying to crack transfers for the Highland’s locos in LMS days; something that is not realistically available via other sources and there does not seem to be much prospect of anyone else doing them.
Anyway, hopefully, I have cracked all I need to with regard to these and the final artwork is complete. This is what it looks like – hopefully it has covered all the locos you might fancy!
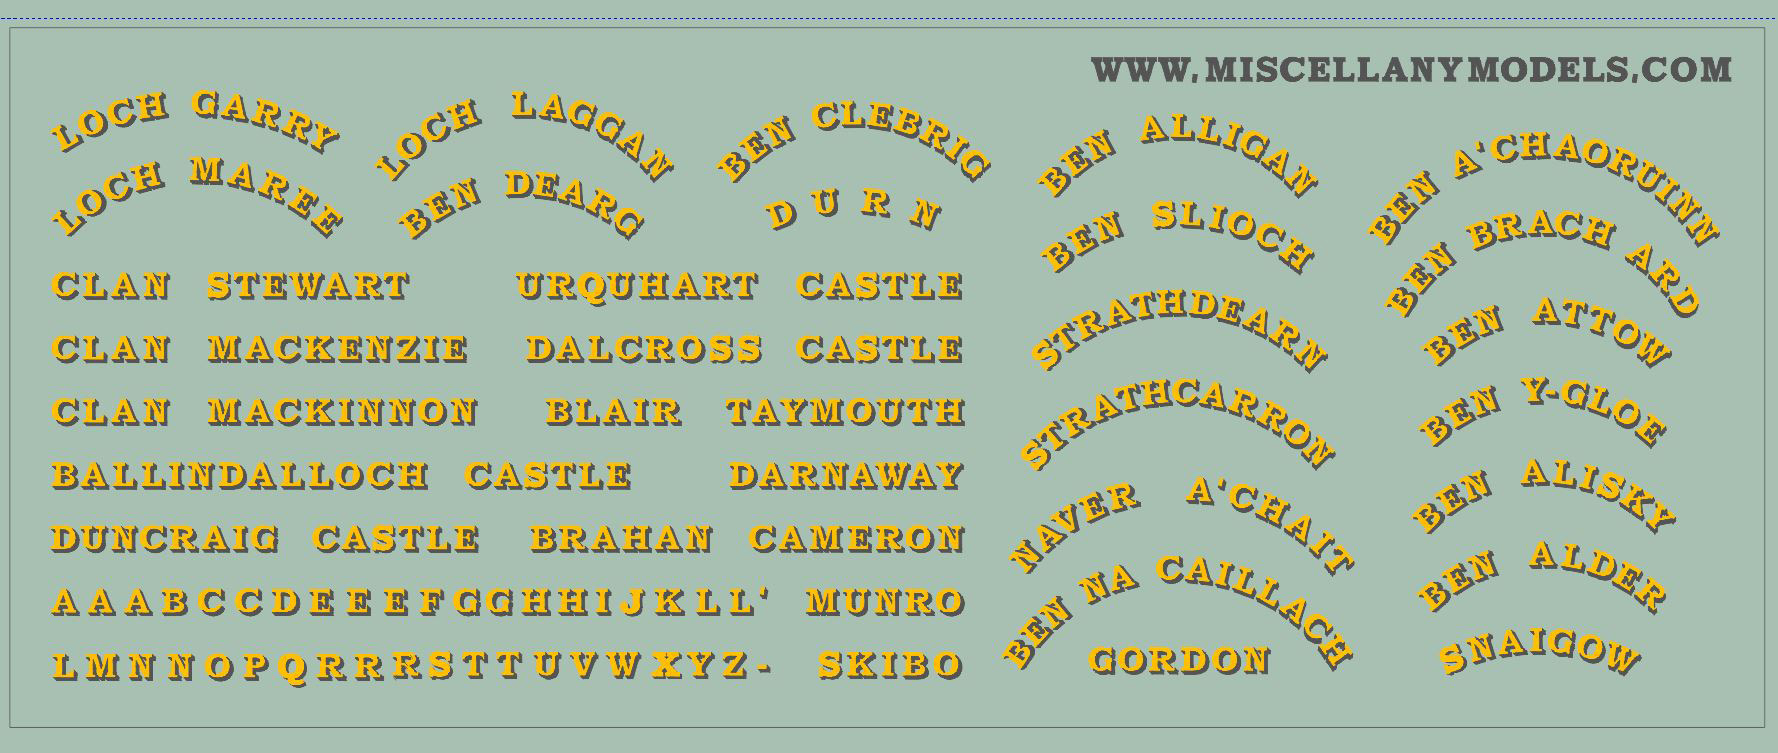
Also on the sheet are one or two other things; but I am less certain that these will work so I’ll keep these as a secret until I find out.
The intention is that these will be available in 4mm & 7mm scales; pricing to be confirmed but I am afraid they will be fairly expensive as the production run is not big and you 7mm chaps in particular eat the page with the size of the prints!
Once they come in, I decide whether they are viable.
