Category Archives: Workbench (stock)

What Have I Been Doing…………..?
Gosh, another year where my intentions to increase my rate of posting have got away………..
Whilst work and home life have intruded, I have still managed to get some modelling done; including a rake of NER coaches for John James for which i do get something in return in due course.
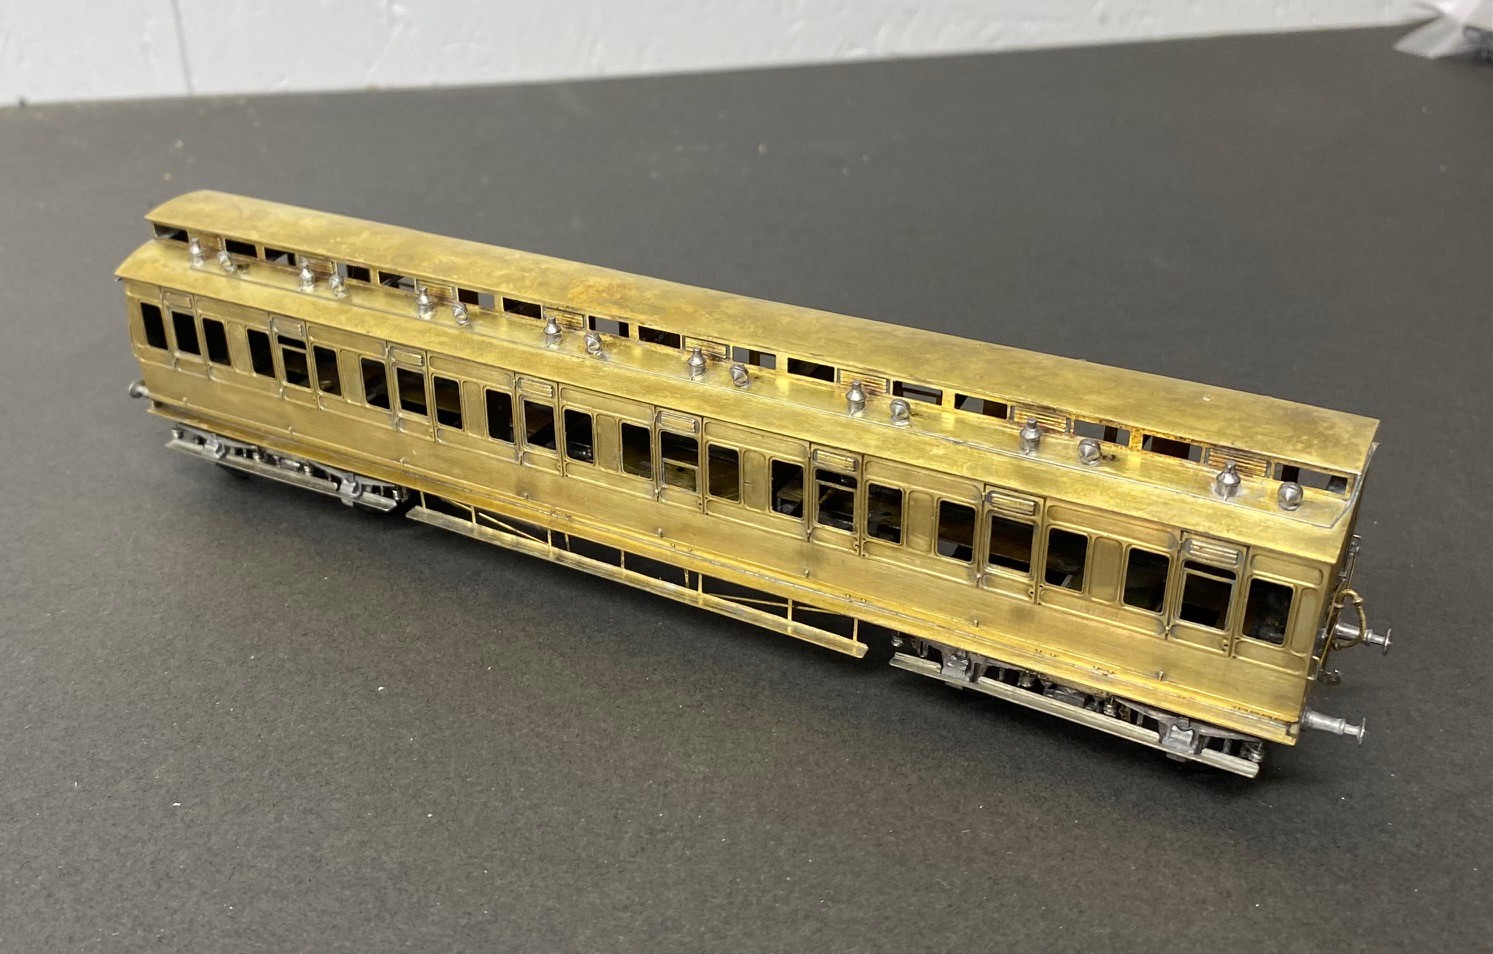
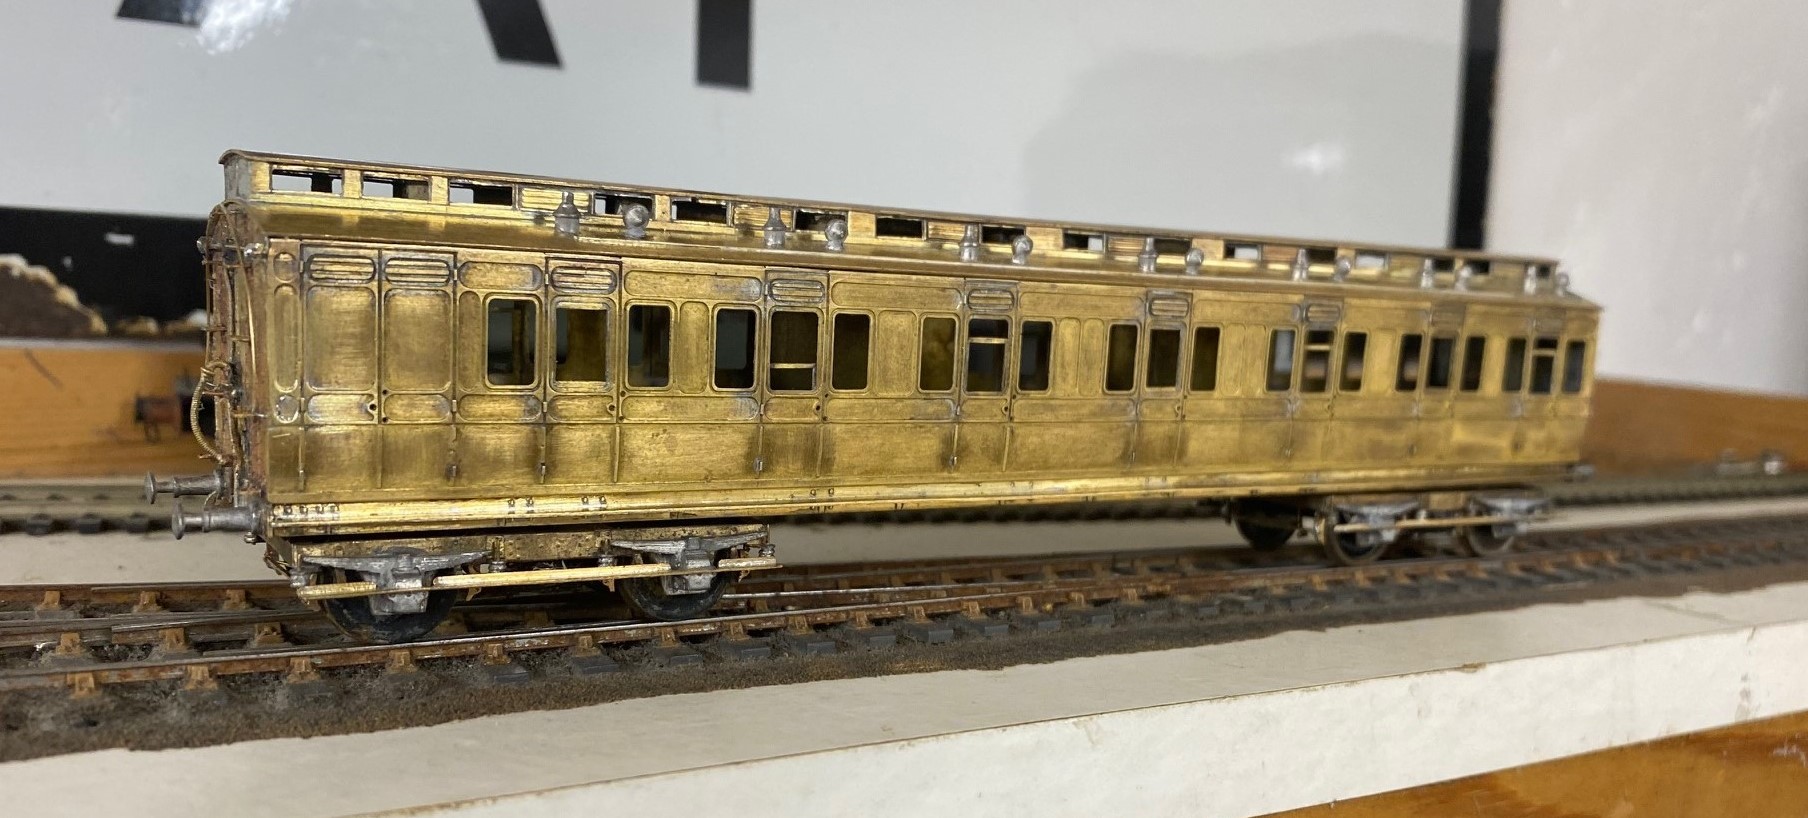
The rake had a pair of three compartment thirds, of which this is an example:

All of the coaches were constructed from D&S kits on my Miscellany Models Fox bogies with replacement roofs formed of nickle silver sheet. I find that the plasticard offering in the D&S kits to be their weakest point. The problem with this is that if you make your own roofs i find you might as well also cut out the section below the clerestory – it makes a huge difference for the coach to be illuminated from above. The issue is, that there is a lot of work in these roofs – I found that for each there was 15+ hours of work just in the roof!
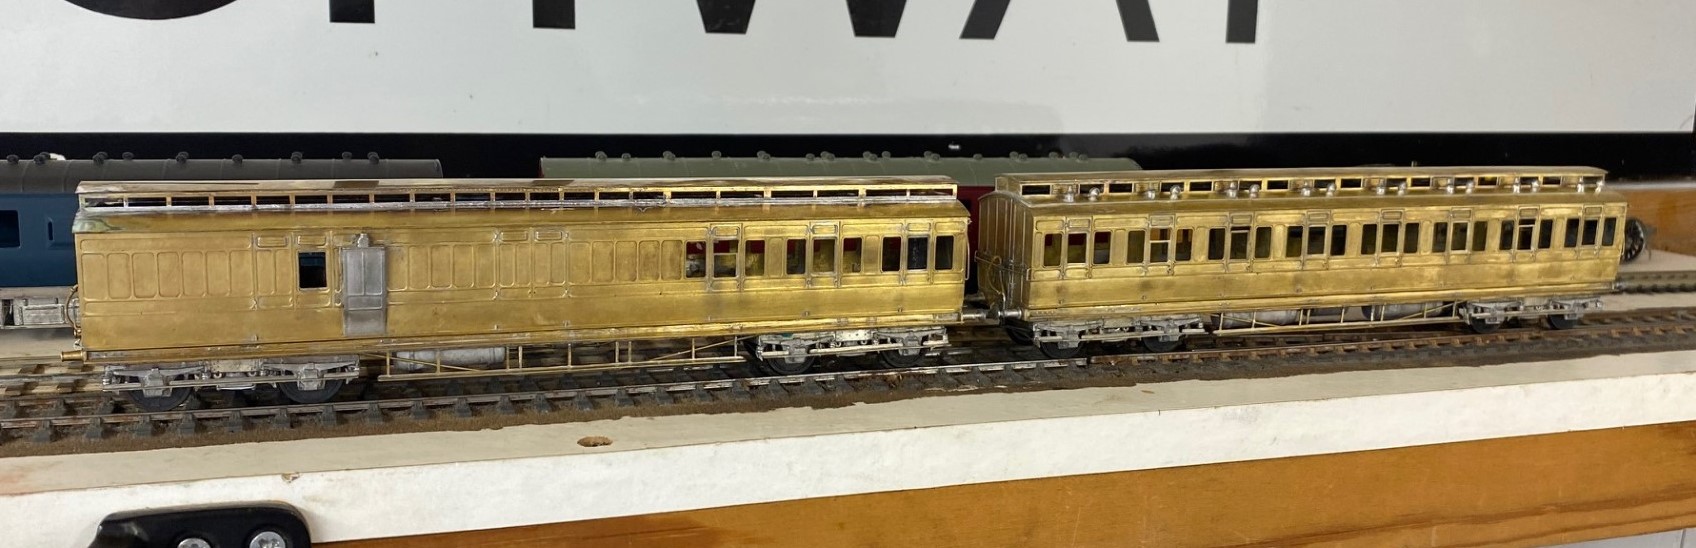
Also in the rake is an all third, which is probably my favourite of the build as it feels quite “pure” and also wihtout the problems of the composite…….see below…….

The rake only needed a modicum of first class accomodation made up from a composite diagram 7. Alas, this had a challenging problem that needed to be overcome, with the clerestory side pieces. These were much shallower than those on the other kits orwith the ends supplied in this kit. In addition to being obviously incorrect given the inconsistancy but the frames around the glazed lights were stunningly delicate. I regret persisting with this, i should have just drawn up some replacements in CAD and popped them in the next etching order.
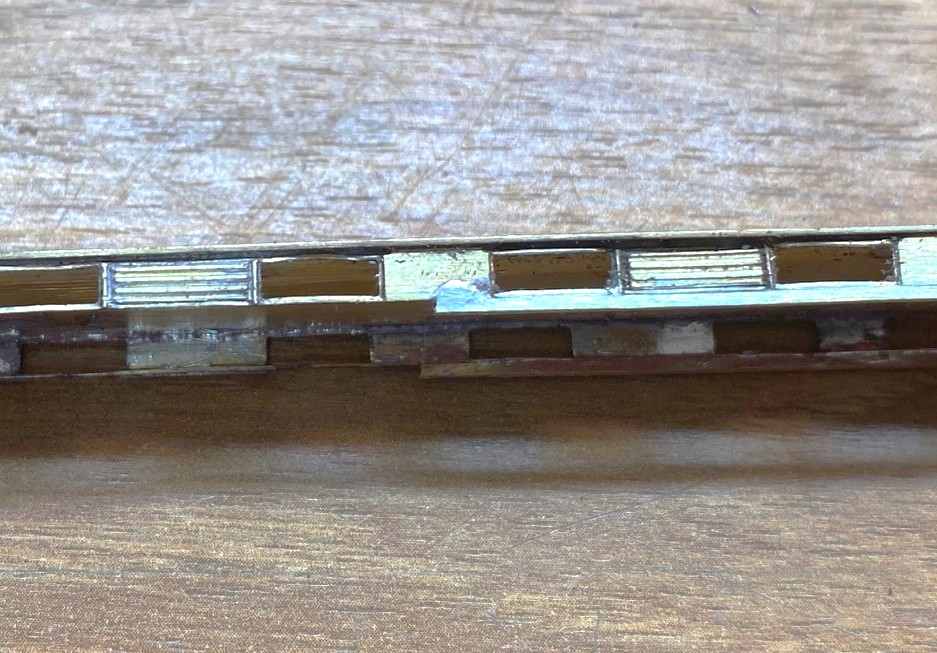
However, i solved the problem by soldering a flat strip, 1.5*0.5mm along the base. in theory it should be to both the top and bottom but that was not realistically possible and I decided life was too short. After much fighting, cussing, fighting, screaming and more fighting, I did get it there, as I hope you can see.
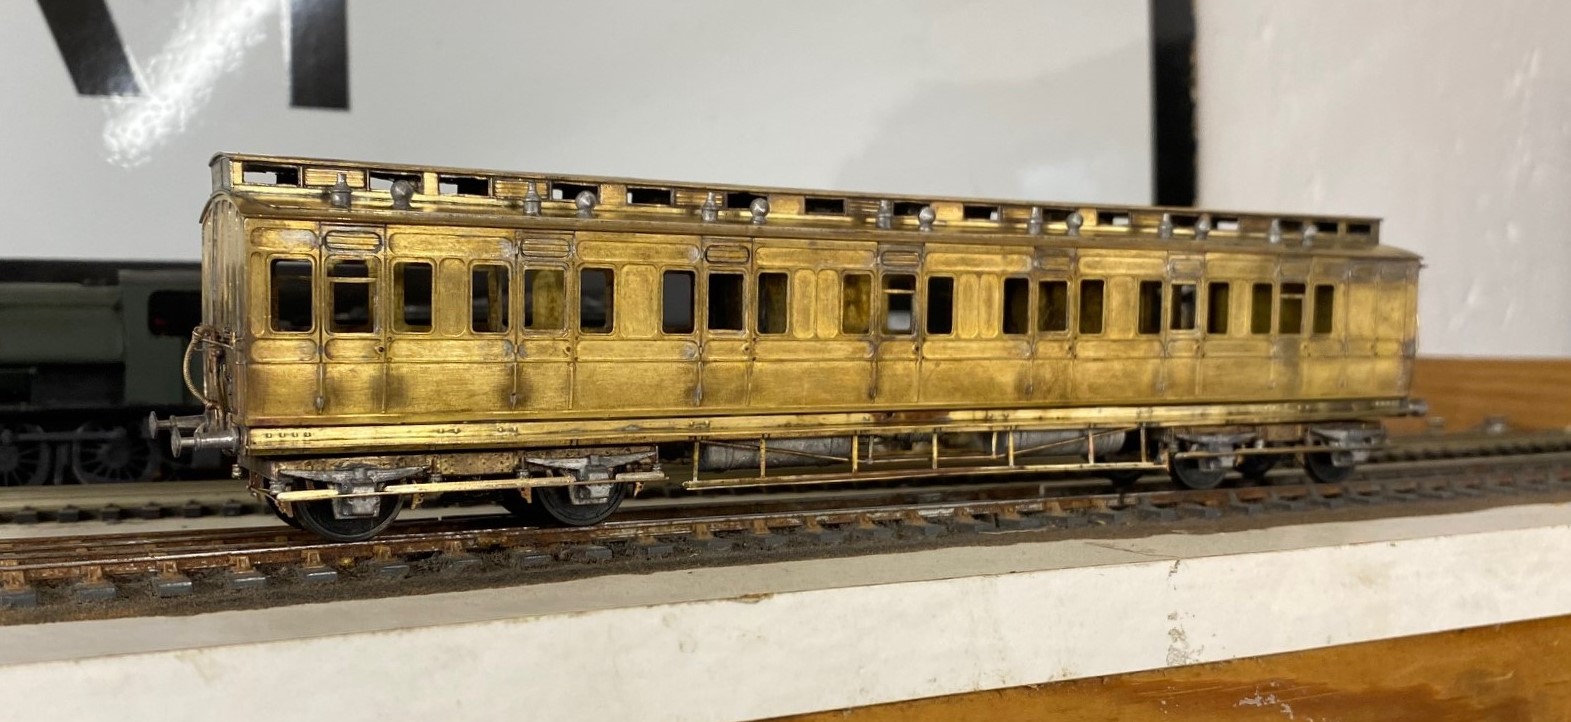
I was asked to do these as gas lit coaches and therefore there is a bit going on below, as one might say.
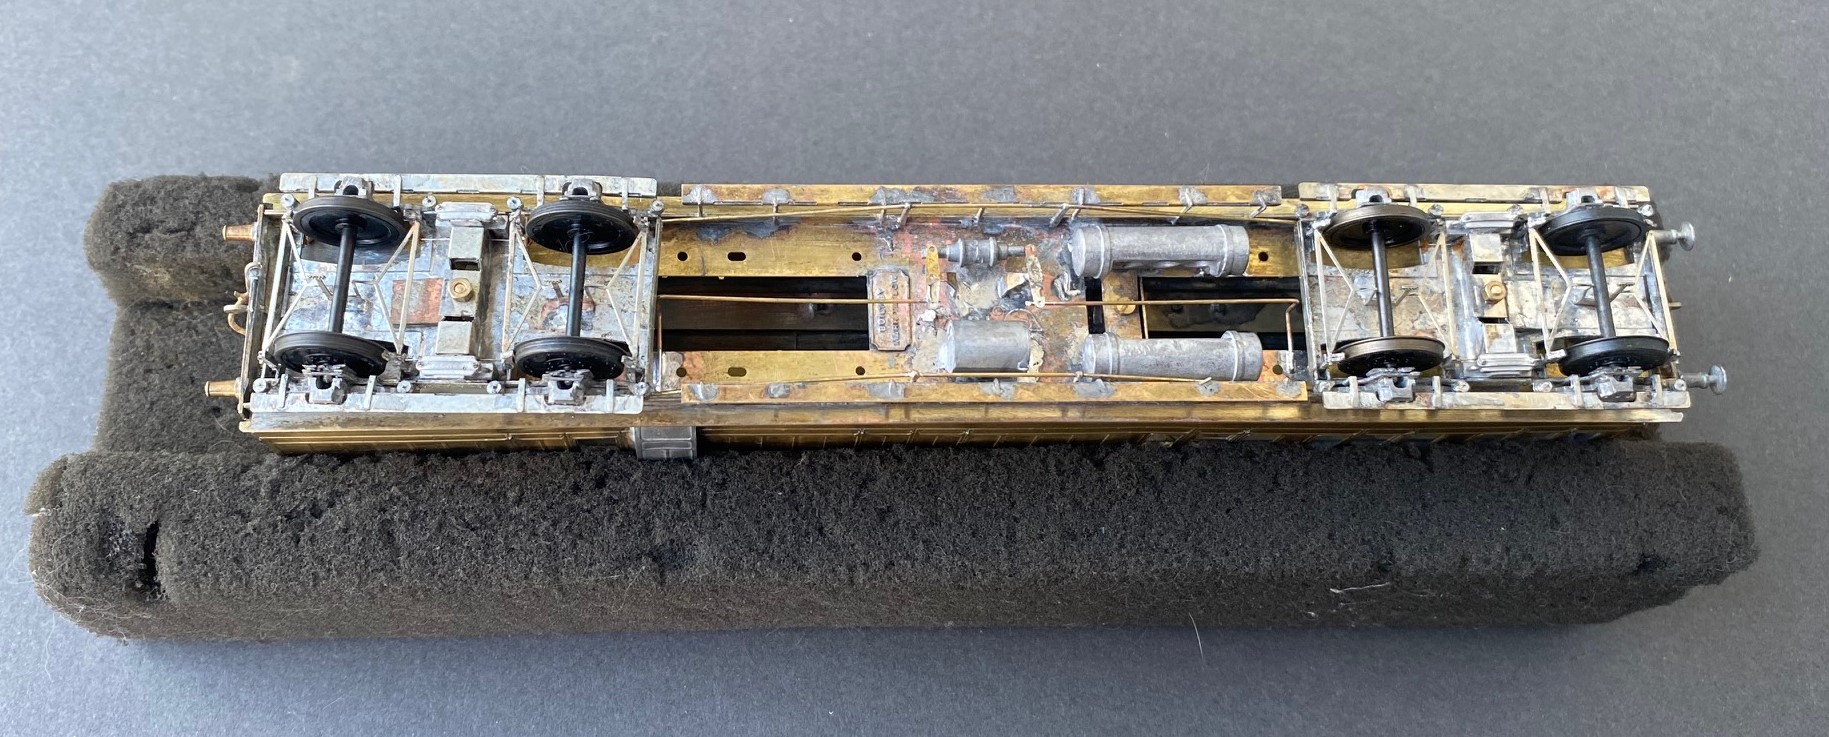
As the coaches were quite long lived, they went through many detailed changes. for anyoen who is contemplating building some, I would heartily recommend reading David Addyman’s notes on how he built his in the Scaleforu Forum https://www.scalefour.org/forum/viewtopic.php?f=39&t=7210&p=101662&hilit=ner+coaches#p101662 David’s coaches are modelled in the 1930s, so have different lighting arrangements, footsteps, bogie spring dampers and sides to the clerestories. Lots of things to be aware of if you are doing something similar.
At the end of this rather mammoth build, I had four coaches that i was rather proud of. They look rather fine on John Wright’s Benfieldside viaduct.
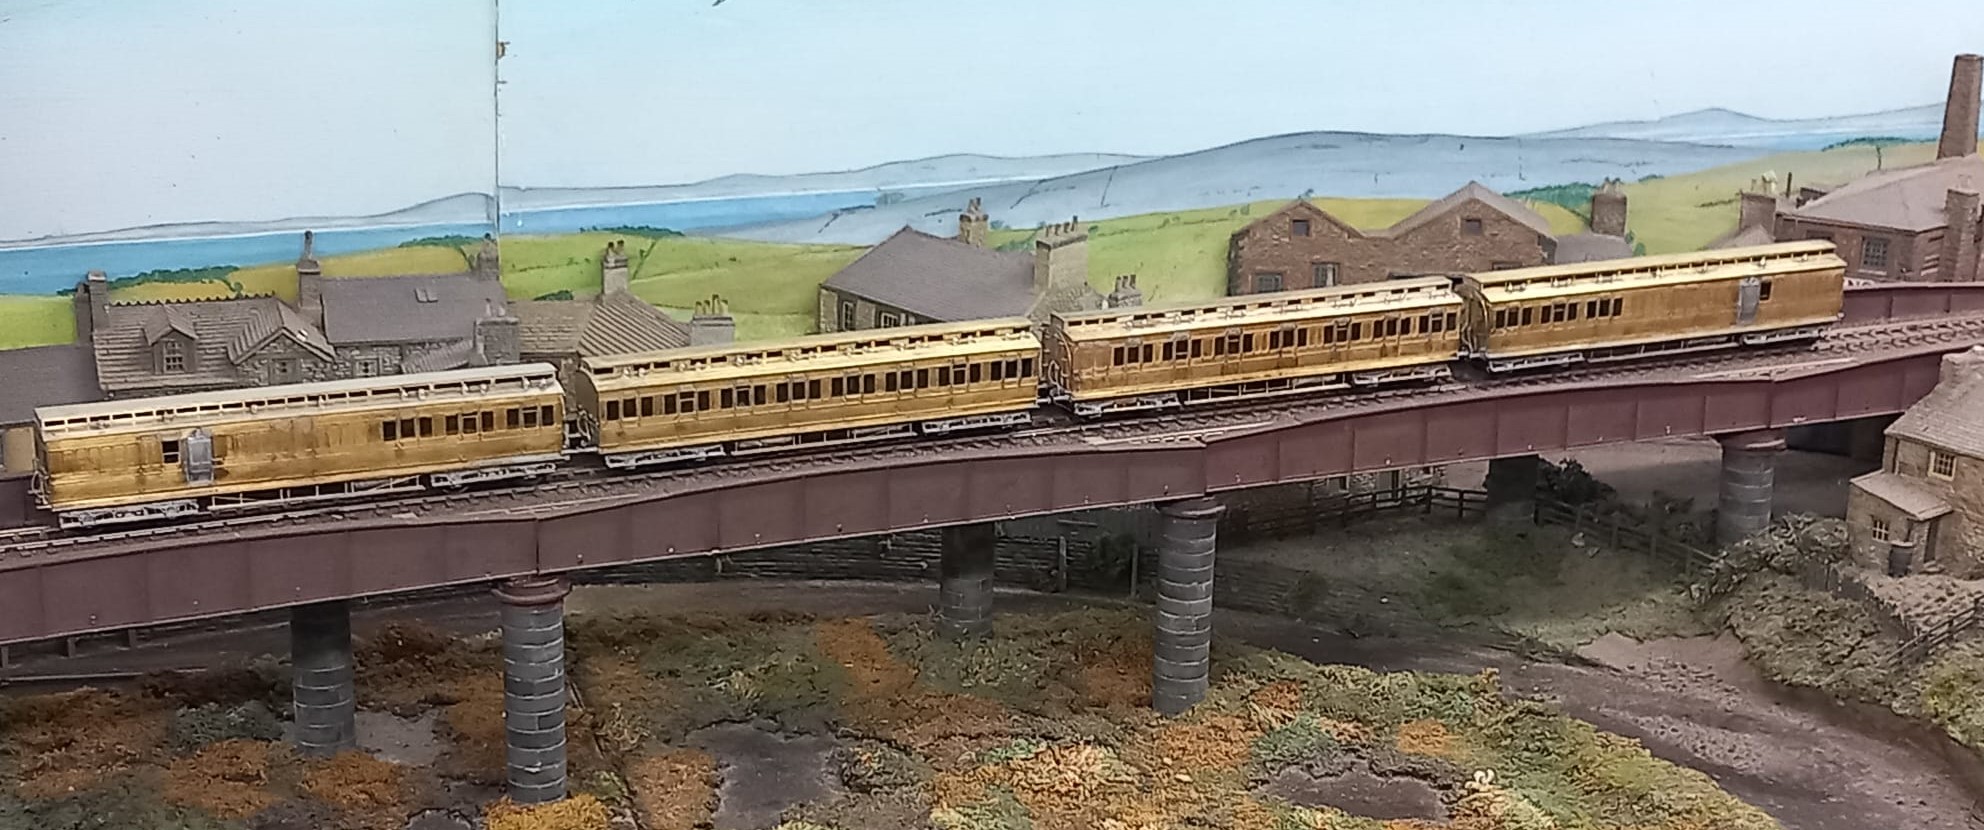
I am also pleased that i do not have to paint these; i am still looking for my lining mojo. I had it as a teenager, but have grown shy of lining. Maybe something for the Christmas break?
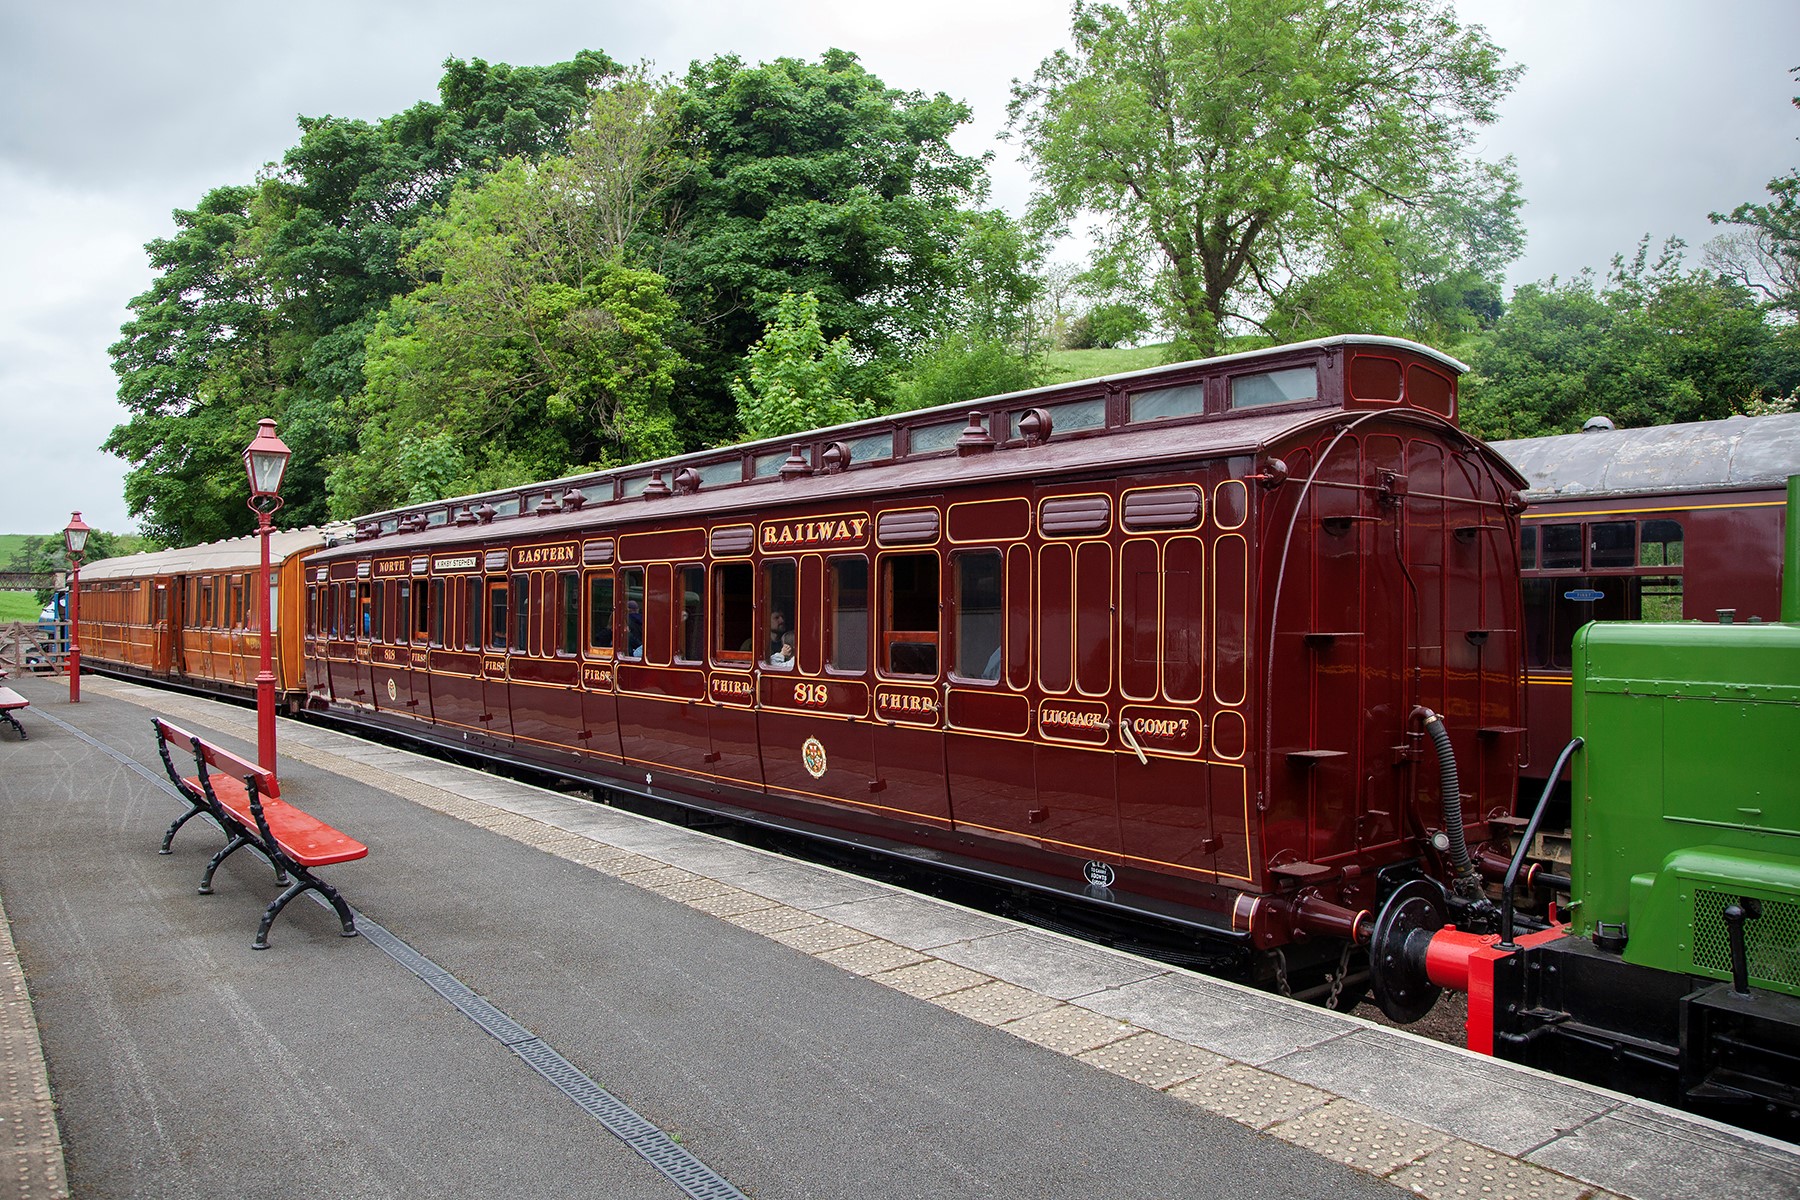
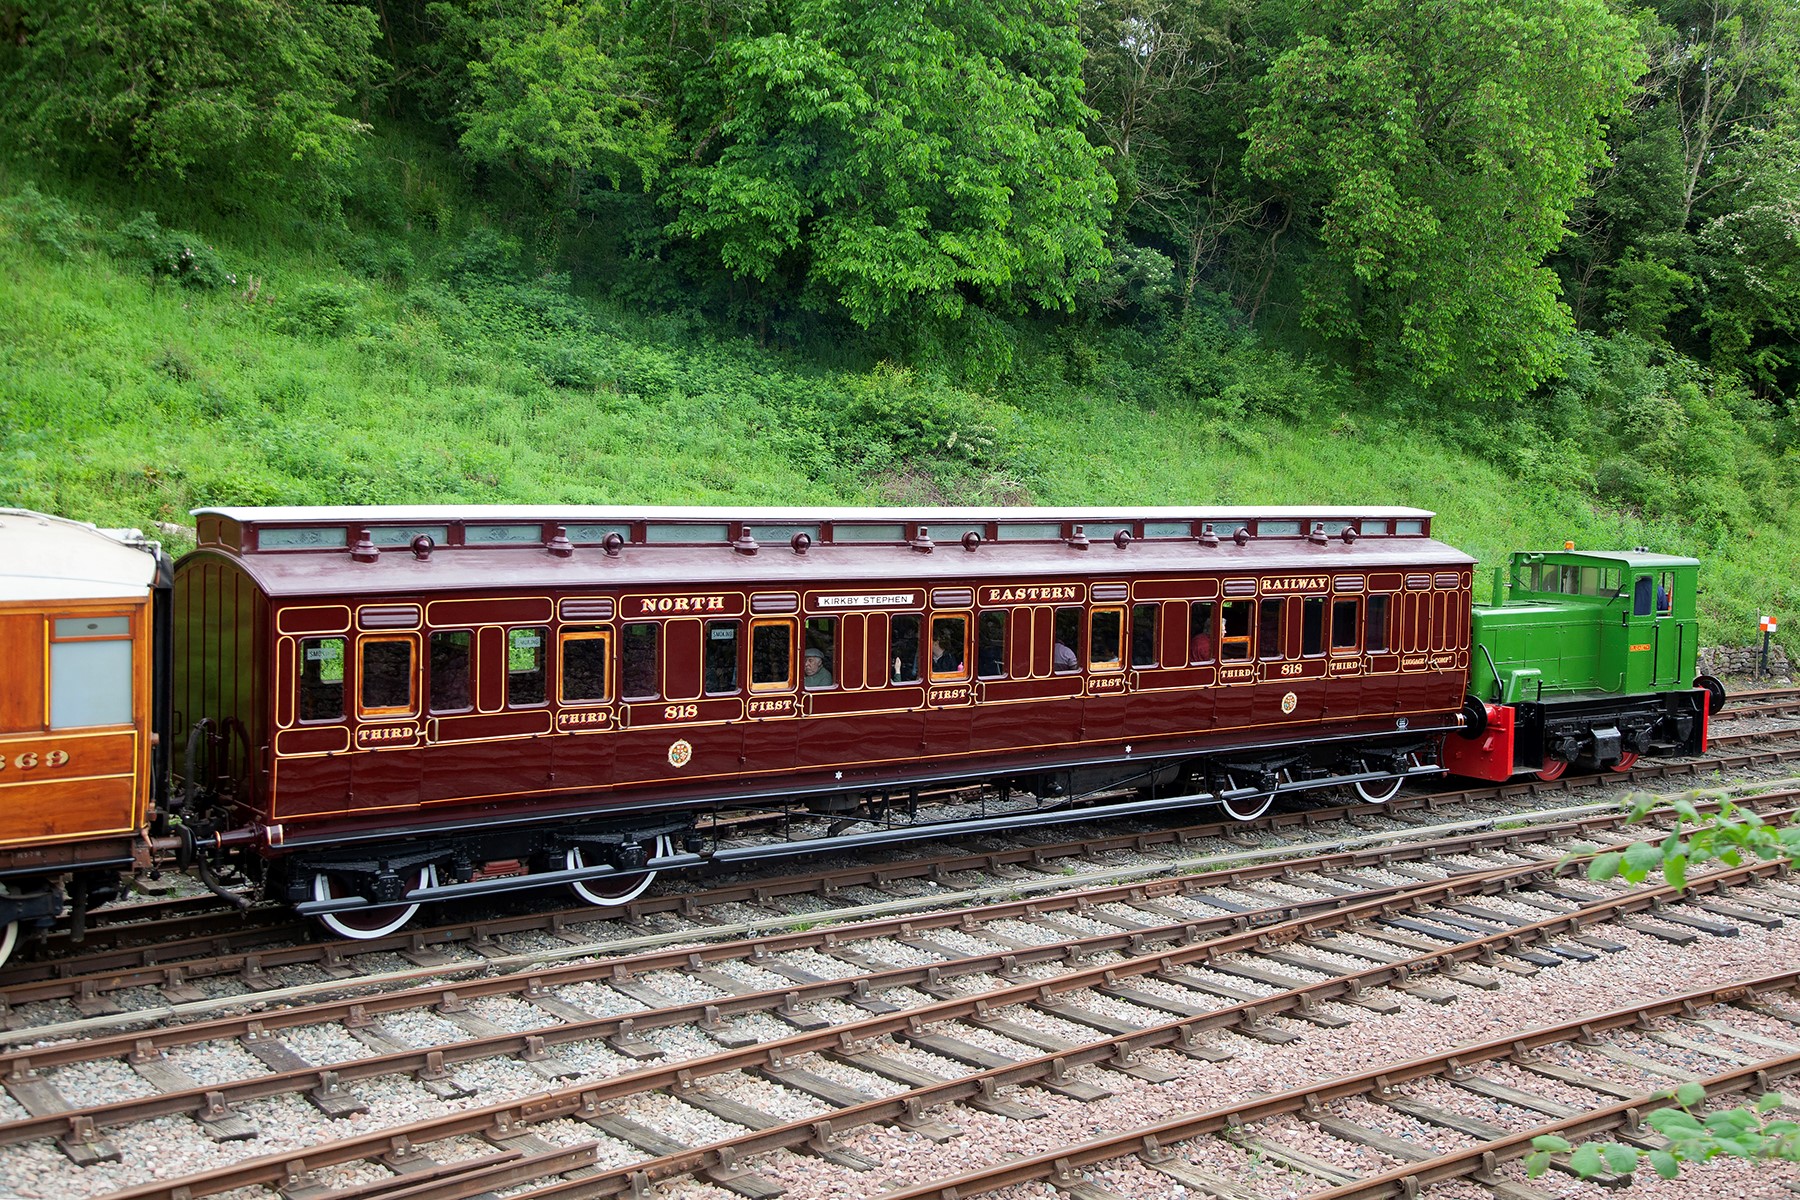
In the meantime, here are a couple of pictures of the newly restored NER coach 818 at Kirby Stephen, courtesy of the Beamish website. Does’t she look magnificant? I really must get up to see her.

More Filthy Wagons
Weathering is not something that I find comes easily to me, especially where it needs to be subtle. However, what the OTCM lads have taught me is that unsubtle weathering is easier and a lot more fun! So I have been unsubtle and making a few POs filthy; I wanted to leave the impression that they have seen few decades of hard work and I am really pleased with the results.
All of these have origins in Bachman RTR minerals but with replacement chassis from Colin Welsh’s range (available via the Scalefour Stores – members only I think, so why not sign up!) and some replacement axleboxes from Rumney Models.
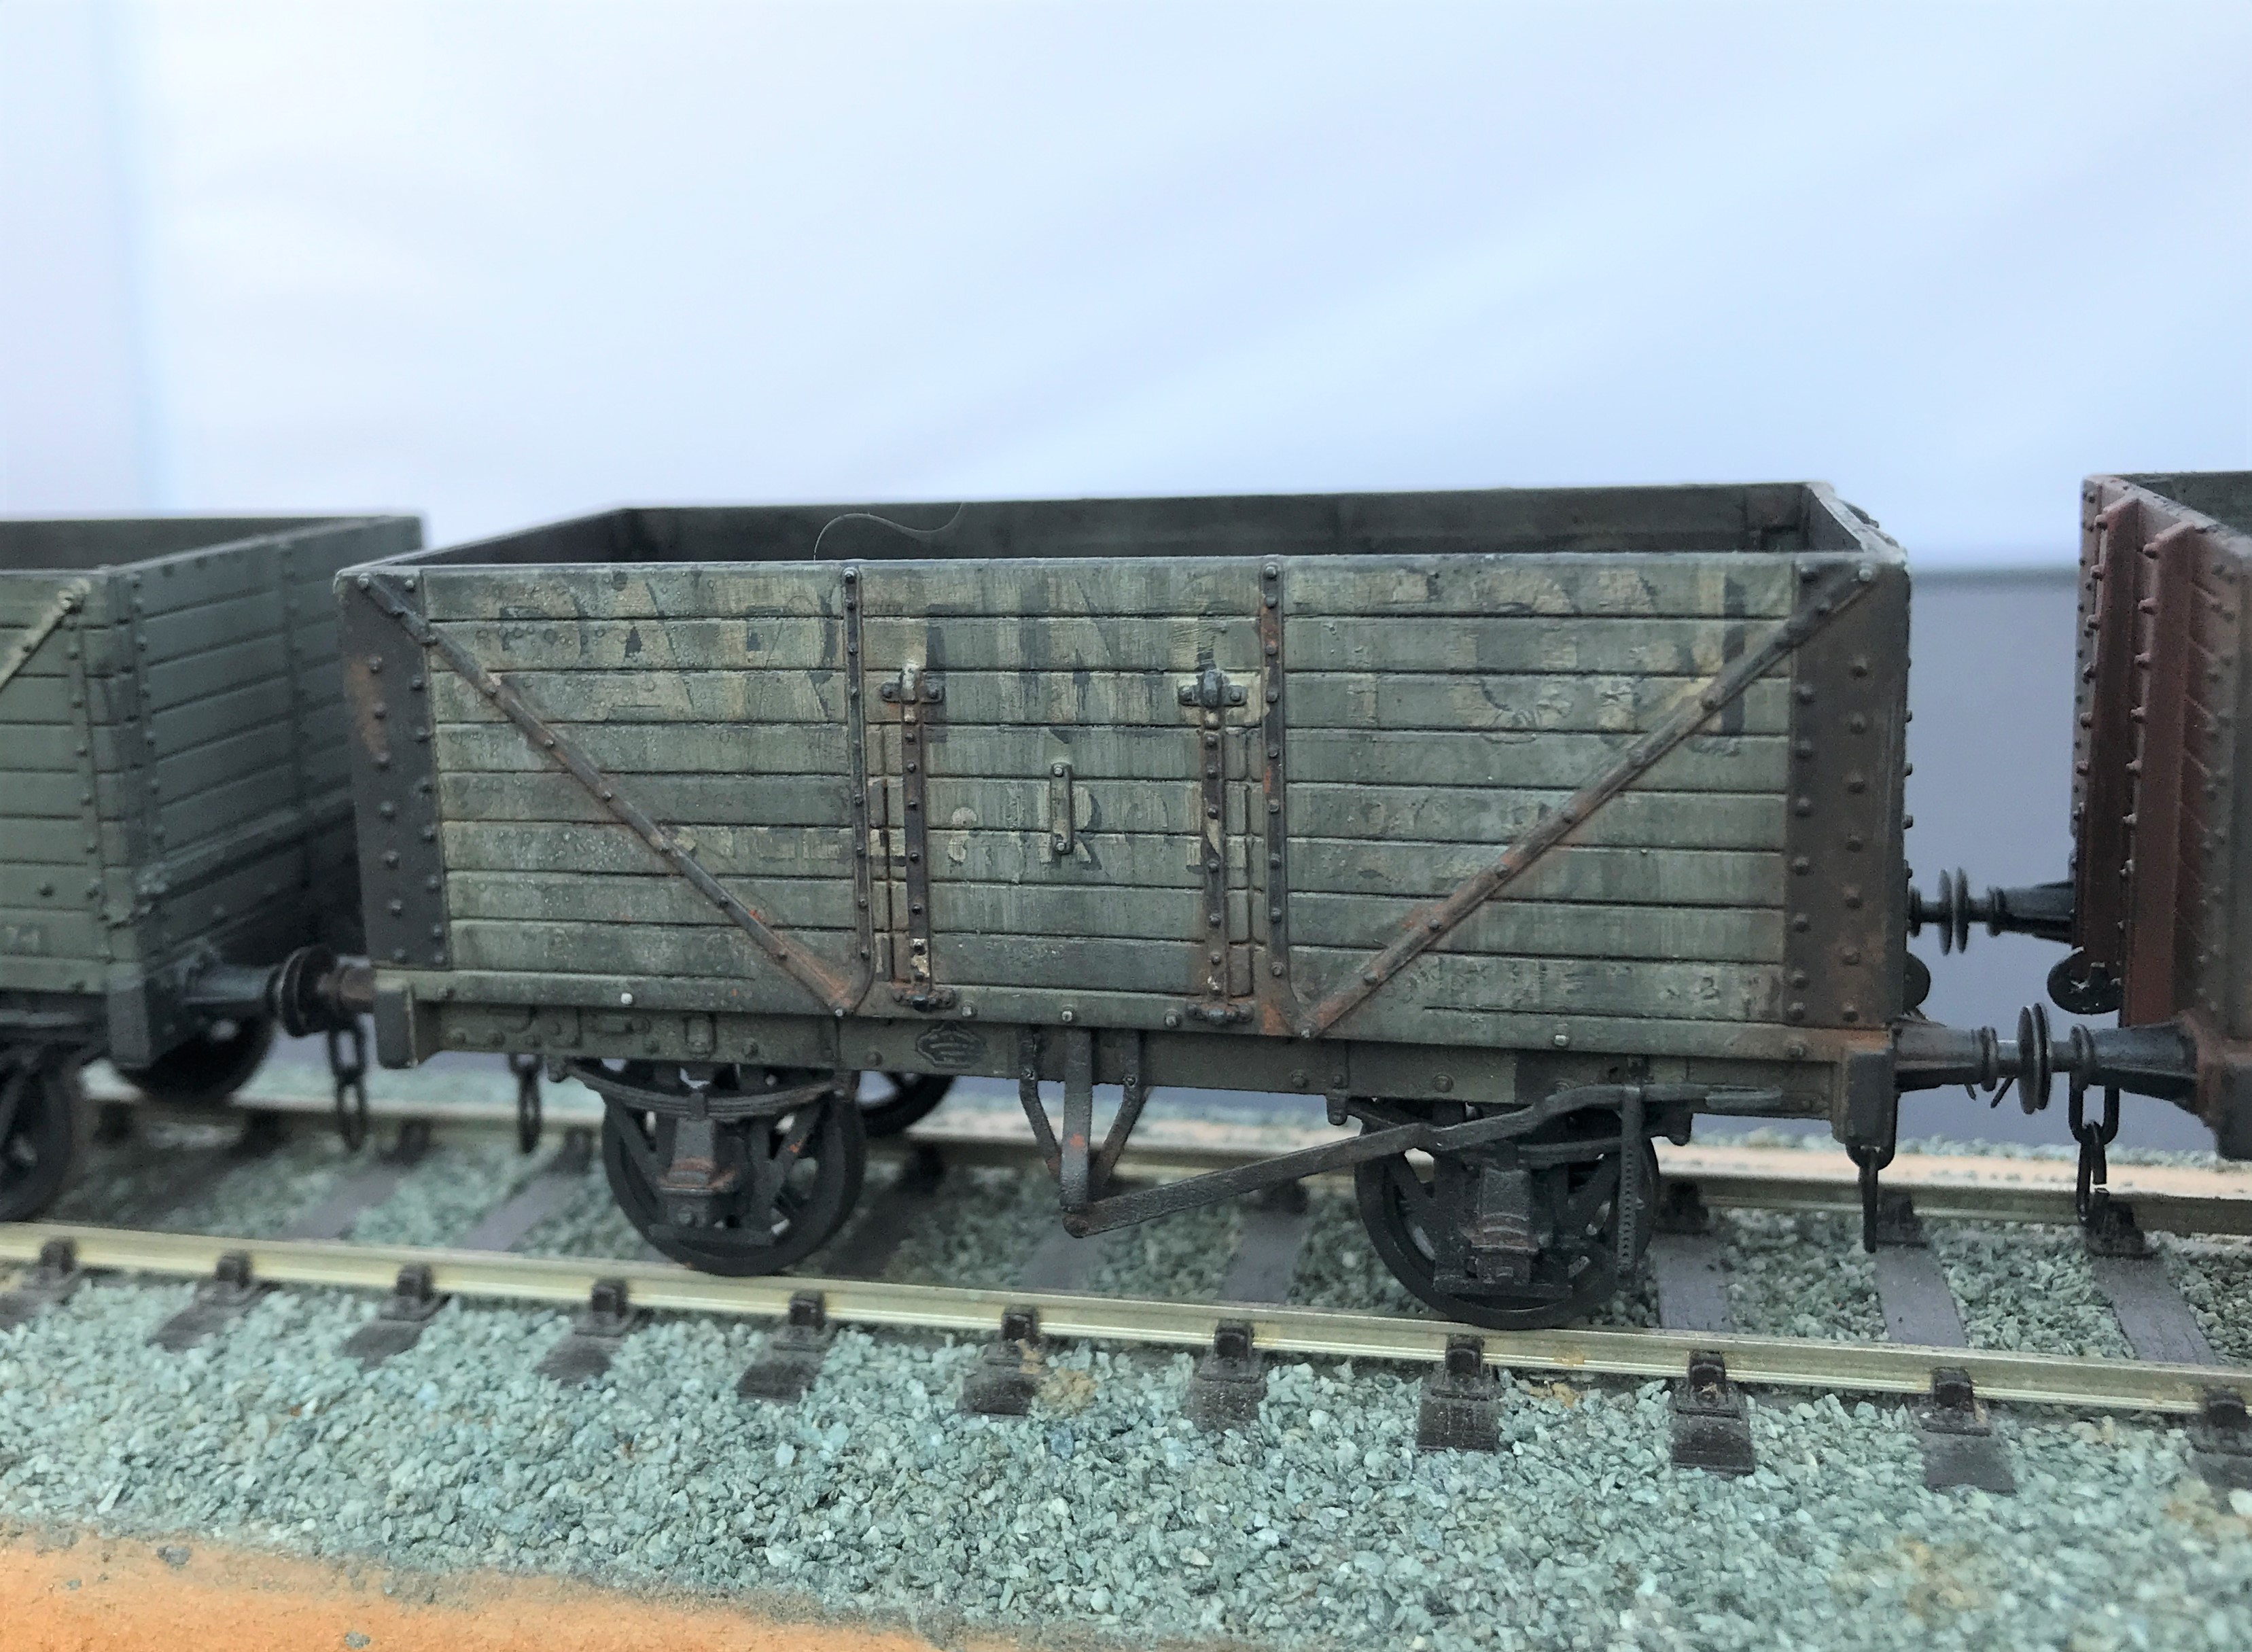
I started with the fibreglass brush to thin down the lettering to give it the feel that it is close to wasted away. Then I sought to represent plank replacements by painting out a few of these with a grey and then added a little texture with dry brushing with track colour (although ultimately the weathering was so heavy this subtly was not worth the effort). The same was undertaken to the insides of the wagon.
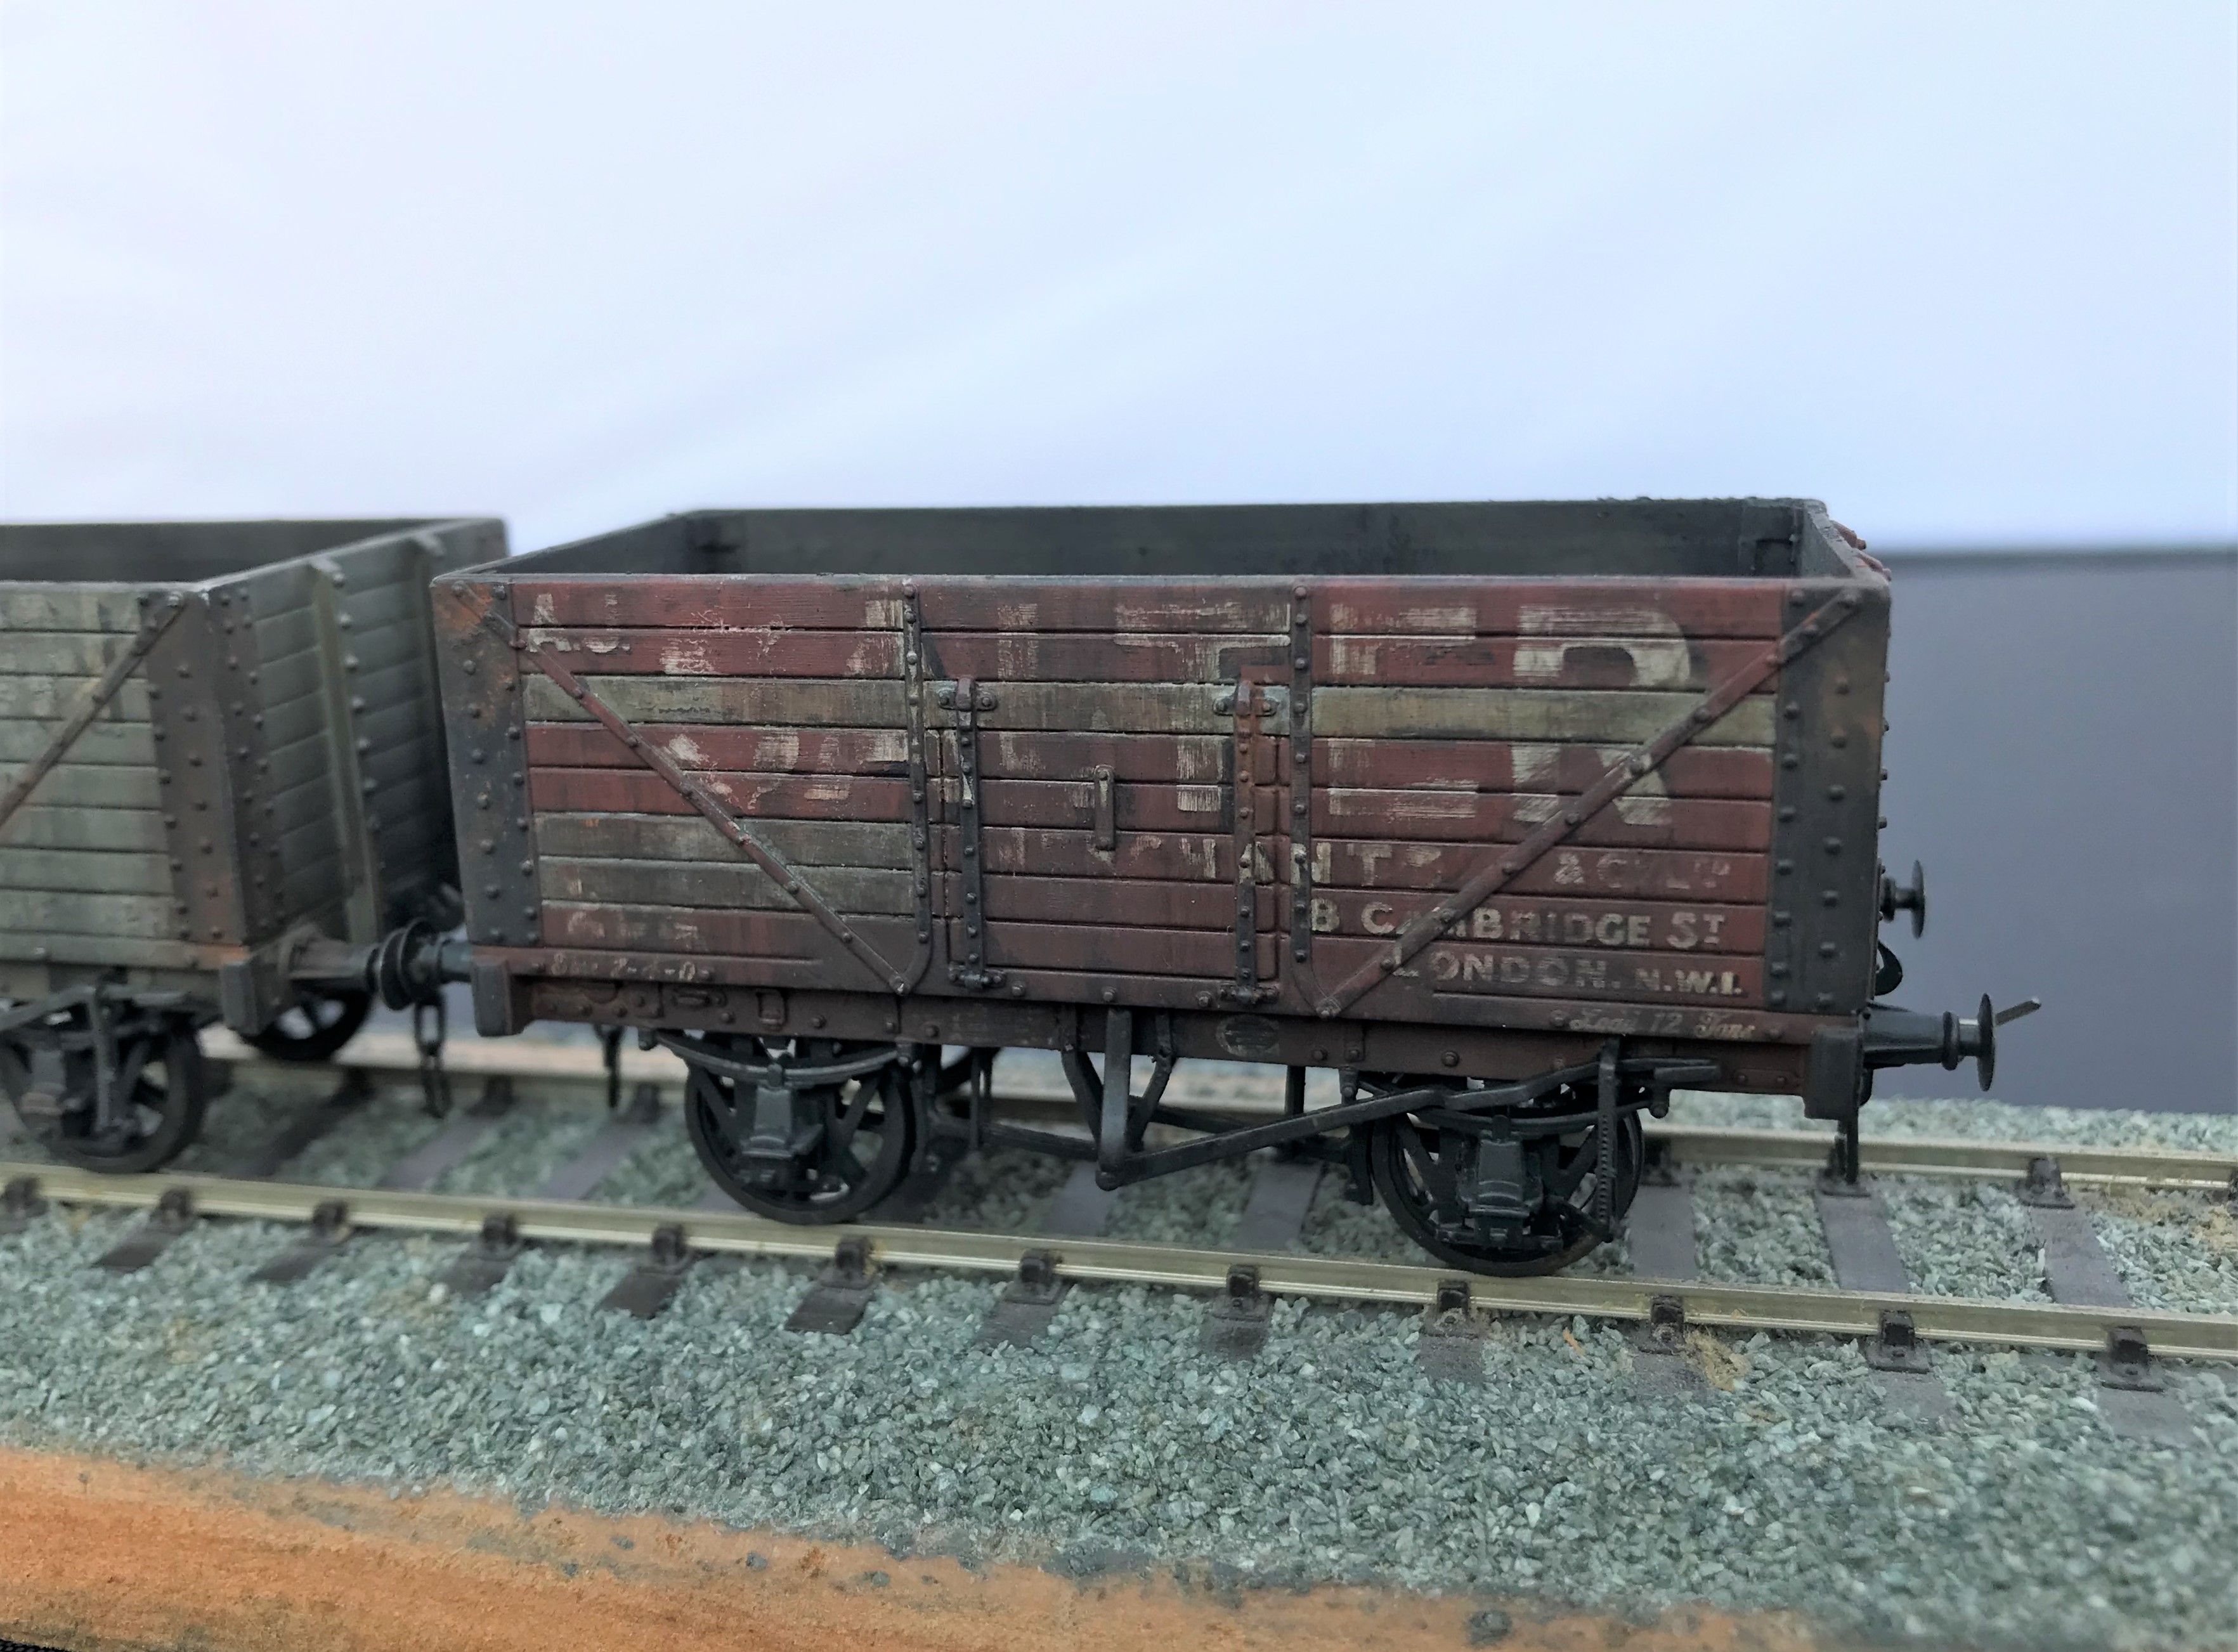
The weathering was completed by a mix of enamel paints; based on black and leather. I started with a lighter colour mix of 2:1 leather/black but then darkened this as I felt that a coal mineral would be a much darker mucky colour so reversed the proportions.
I did these over multiple coats under a very bright light, as otherwise you don’t really know whether you have put much paint on when it is deliberately so thin. The streaking is achieved by using a relatively large flat and stiff brush dipped in thinners. Don’t apply this straight into the model, rub it on the back of your hand to remove the bulk of the thinners and get it down to “slightly moist” before applying it to the model. Make sure it is drawn down vertically, to mimic the movements of water running down the wagon sides.
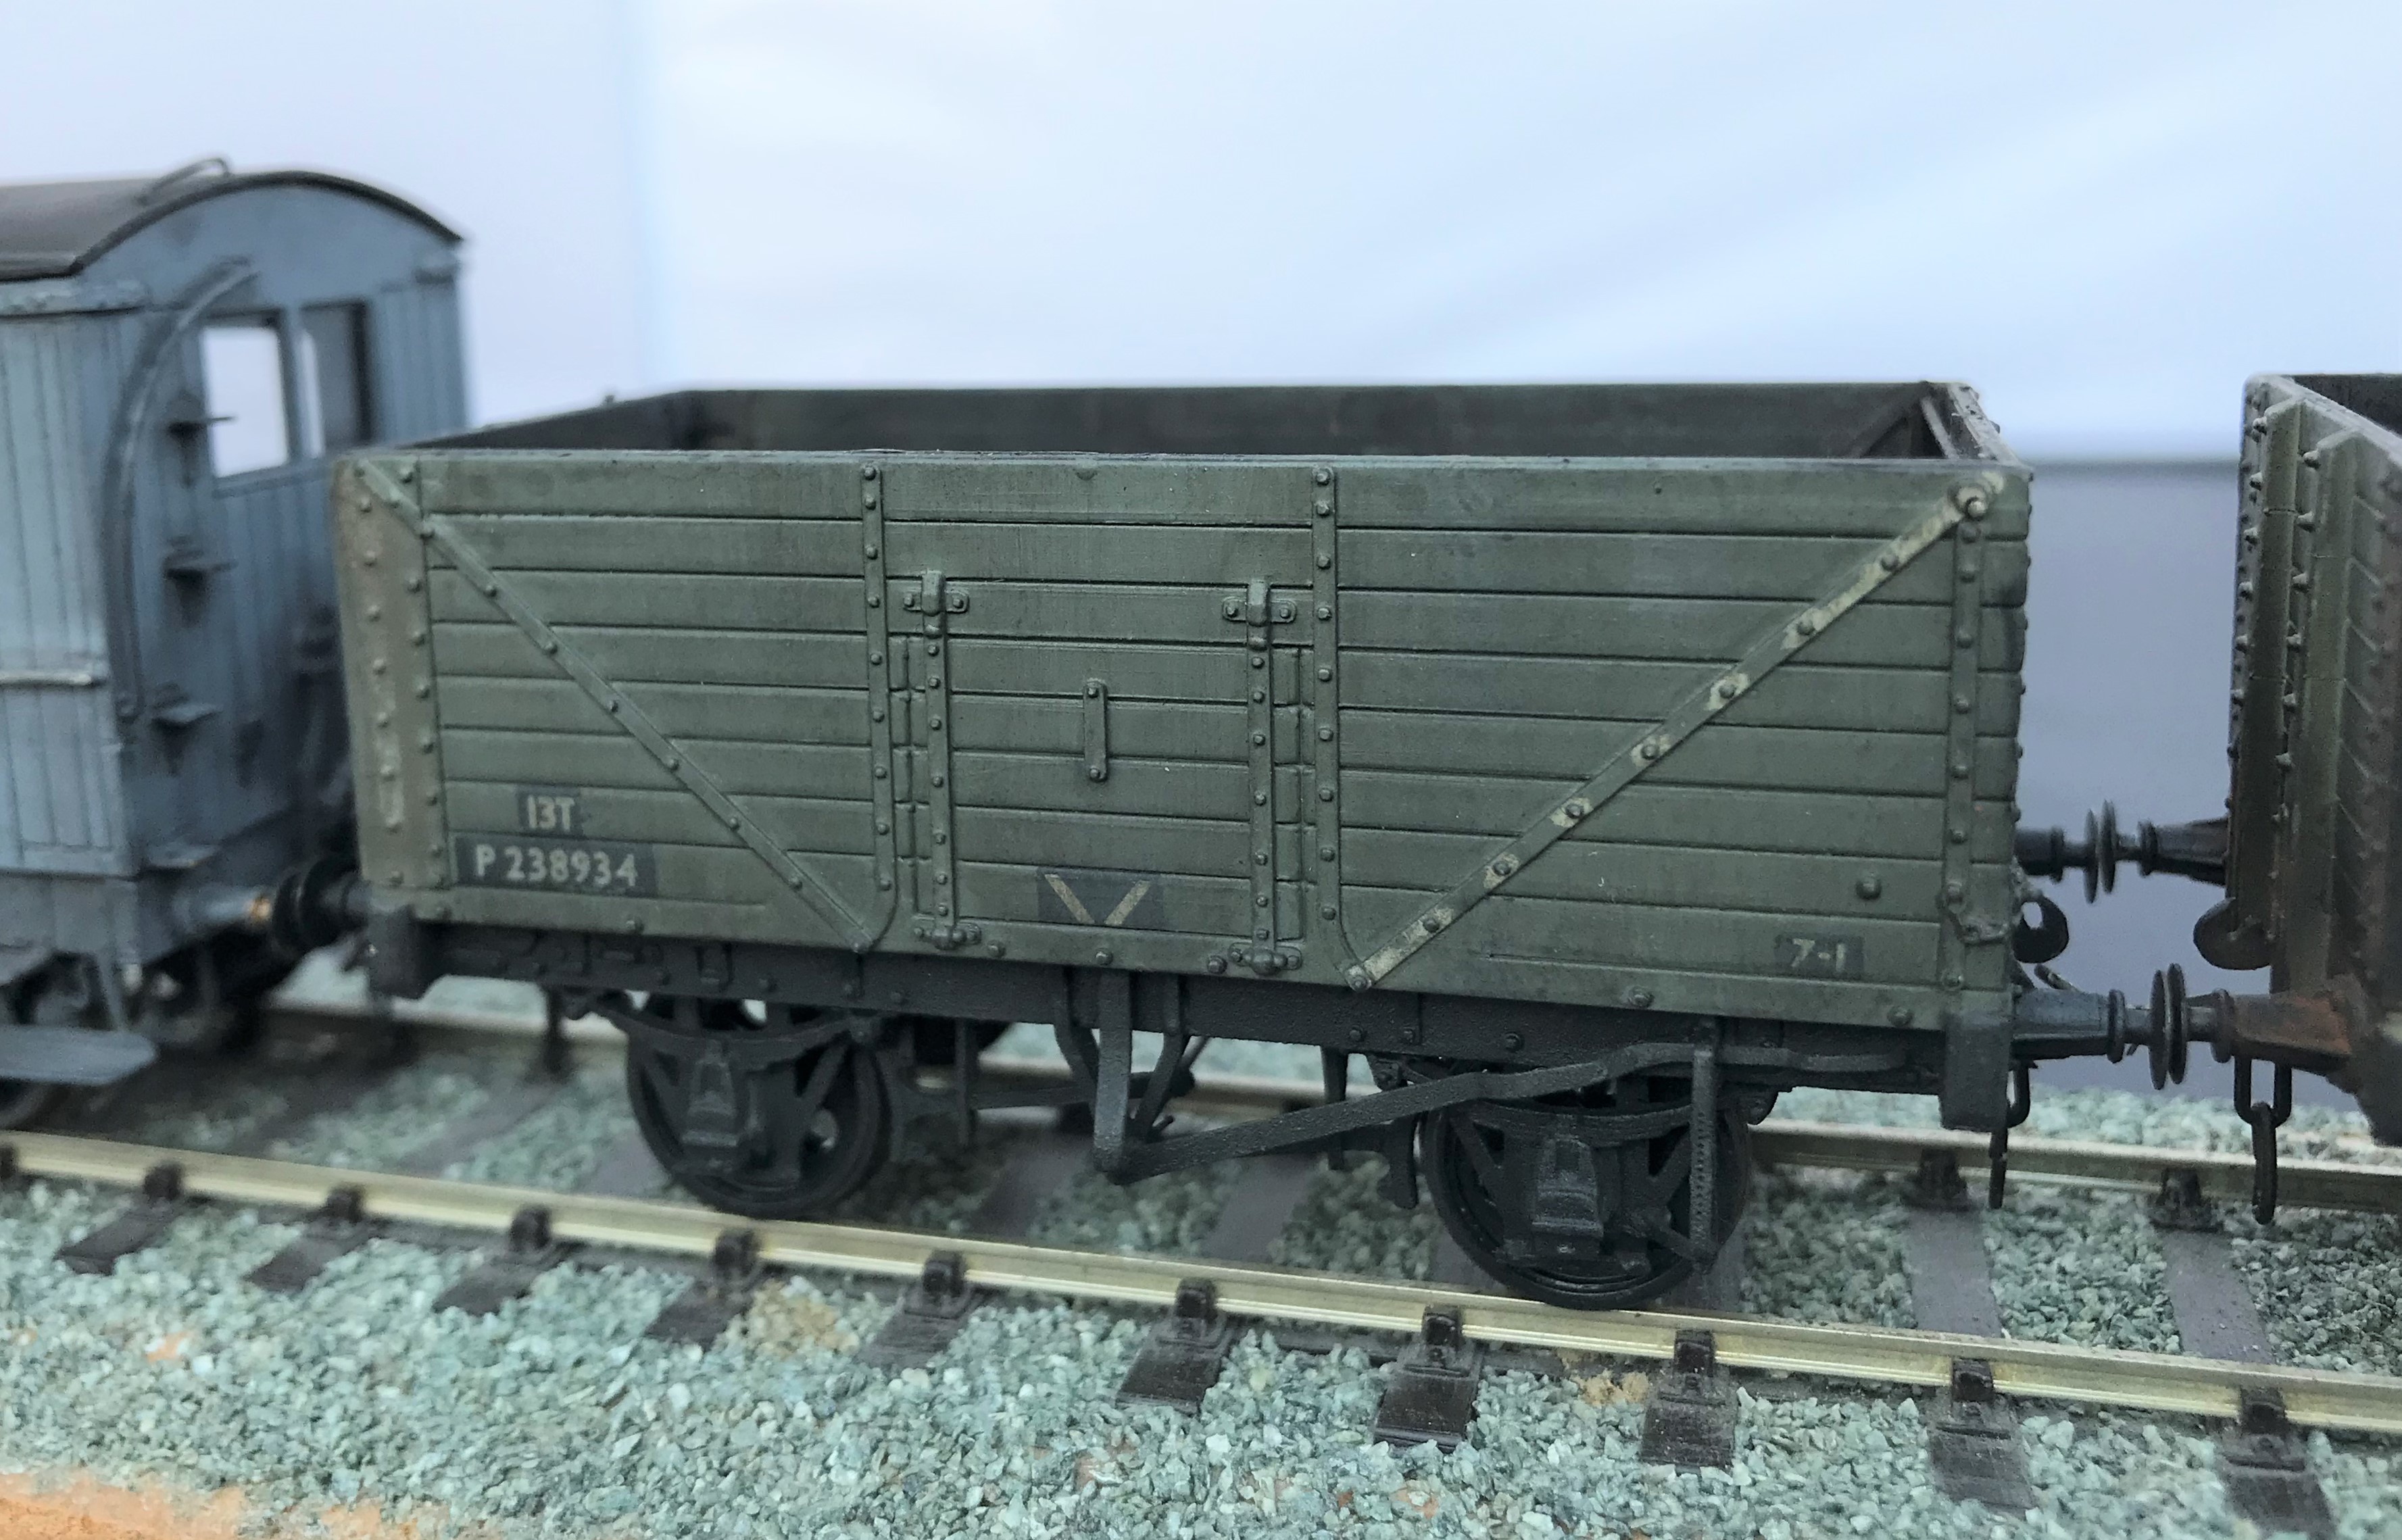
The final stage was then to use weathering powders, rust on the metalwork (mostly on the Partington grey wagon) and black soot. Very small amounts are put on the brush and then speckled on the model with the lightest of pressure because if you blob it straight on it tends to be rather heavy in the points of contact, so it gets a bit blotchy as a result. However, if this is the effect that is required – for example on the top of the buffers for me – then blob away! The powder is then spread across the model with the brush, the more pressure tends to deepen the colour but throughout the powders matt and draw together the underlying colours.
The coal effect in the interior was completed in a similar manner, but with a lot more powder is used and laid on the base a small amount coal dust secured on a matt varnish to leave the impression of a not quite well swept floor from the previous load.
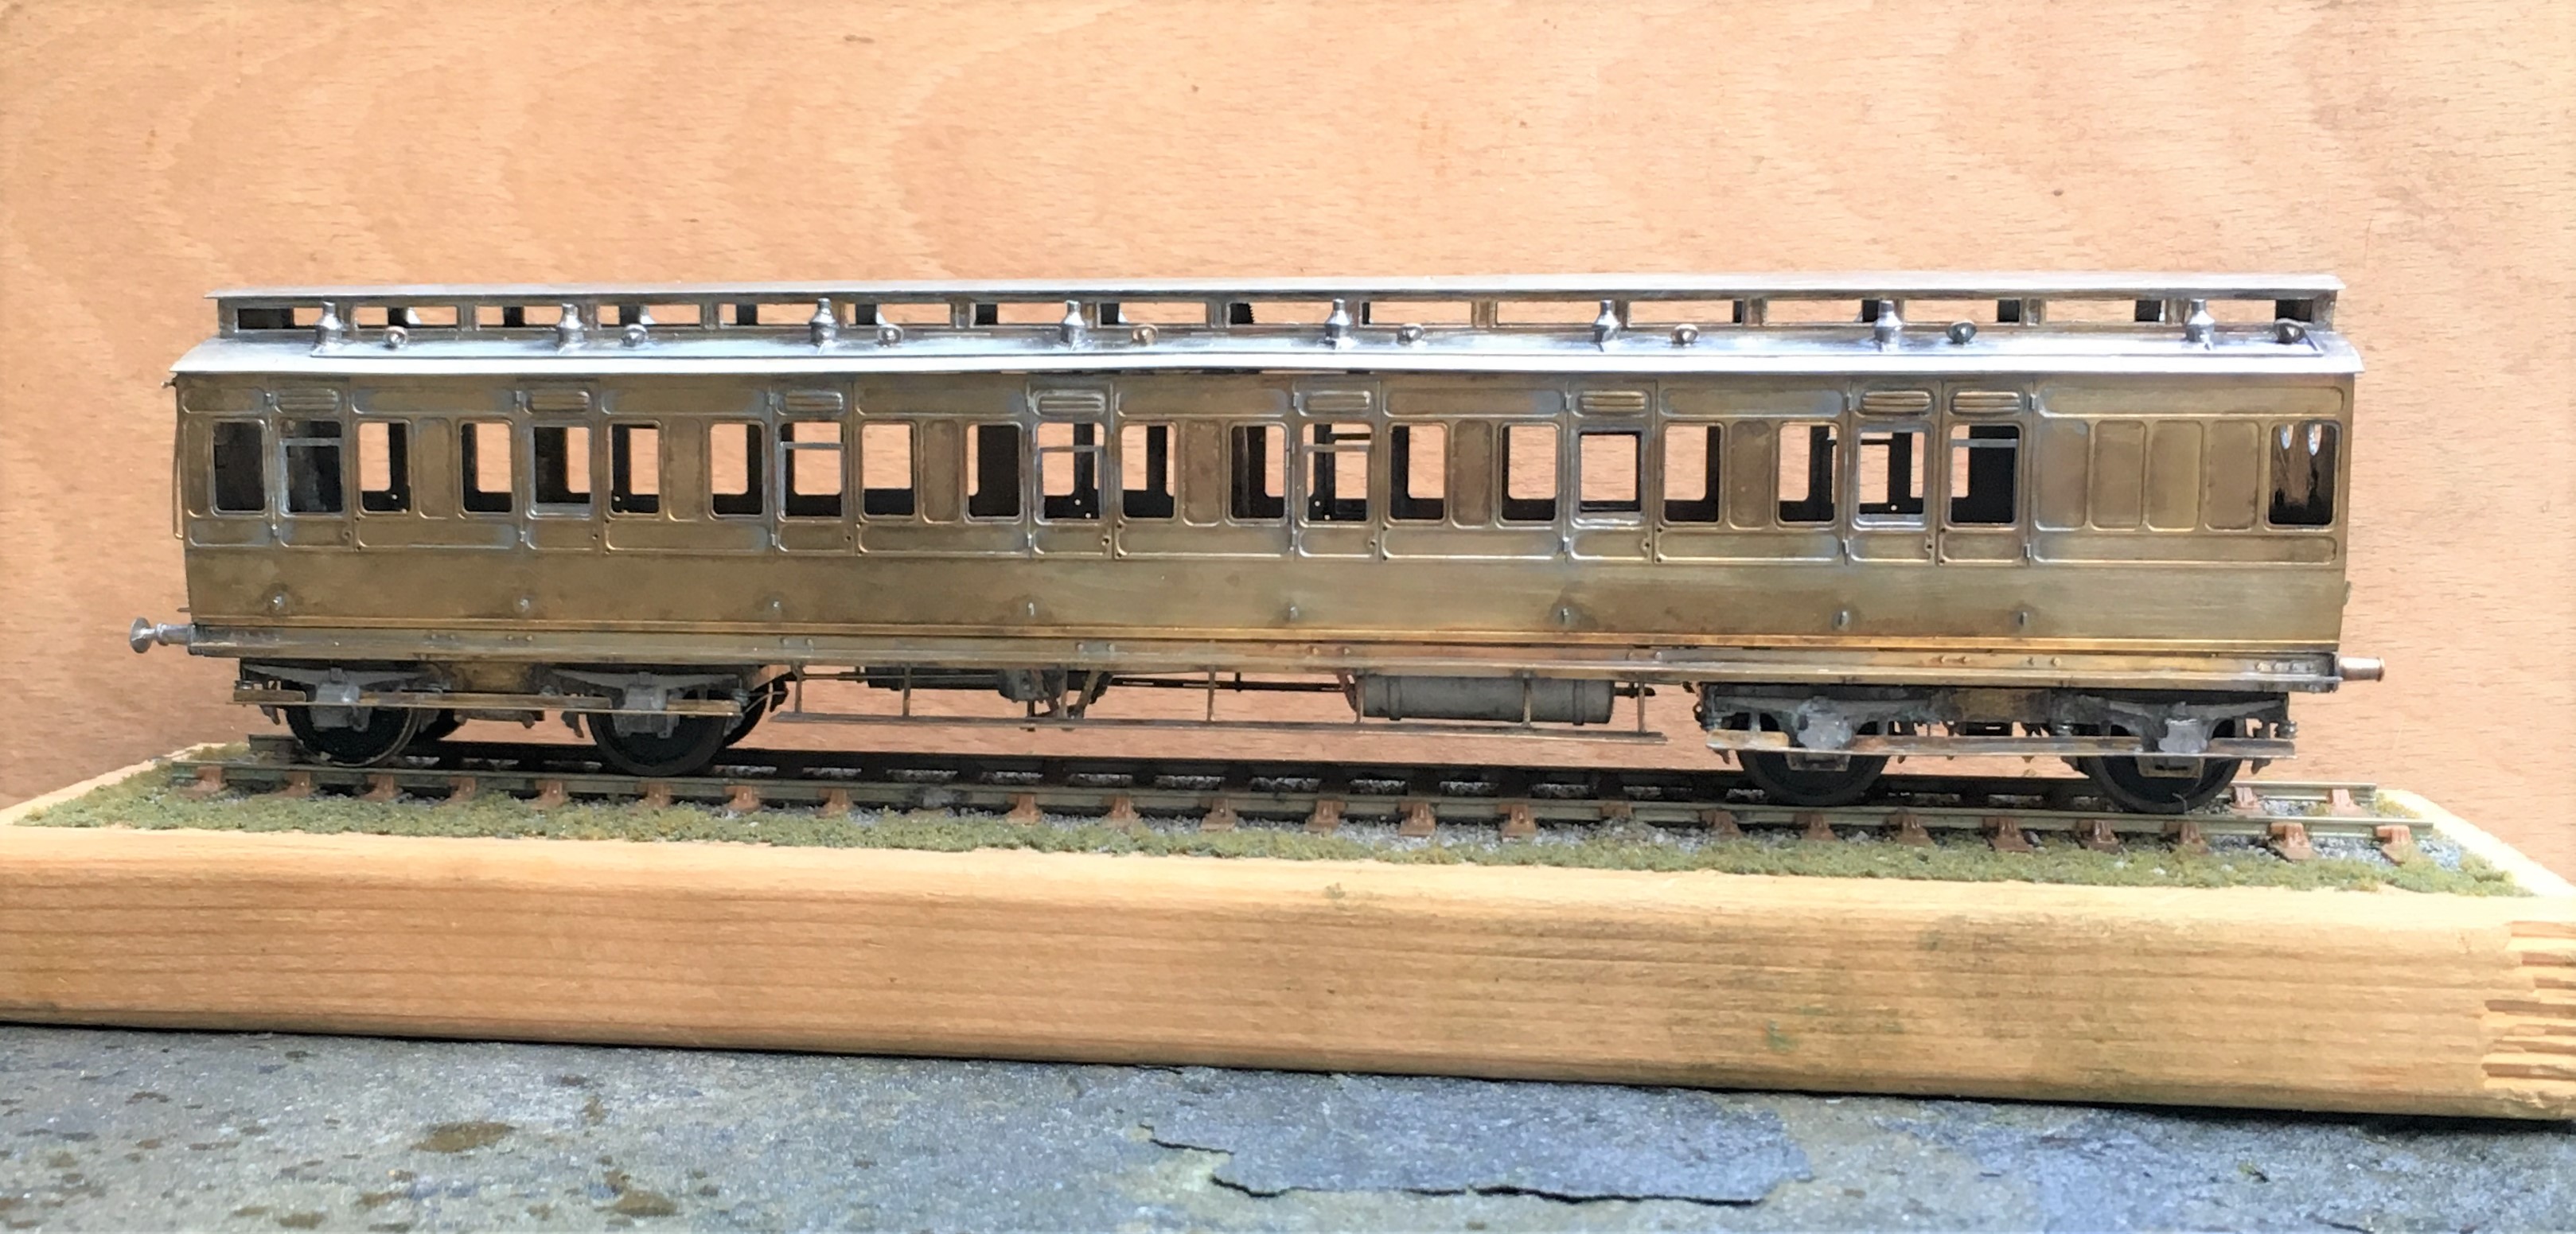
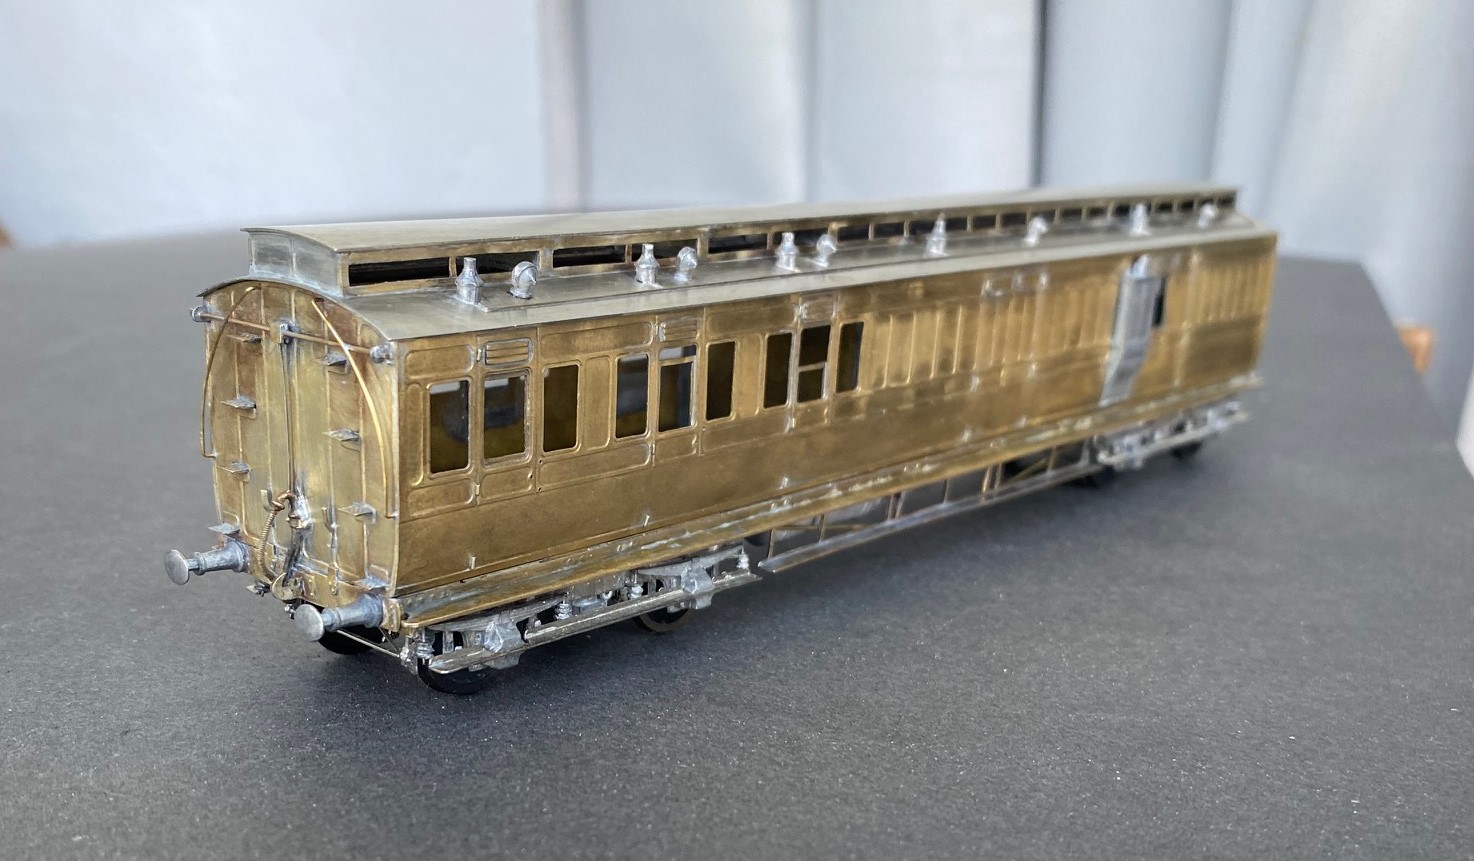
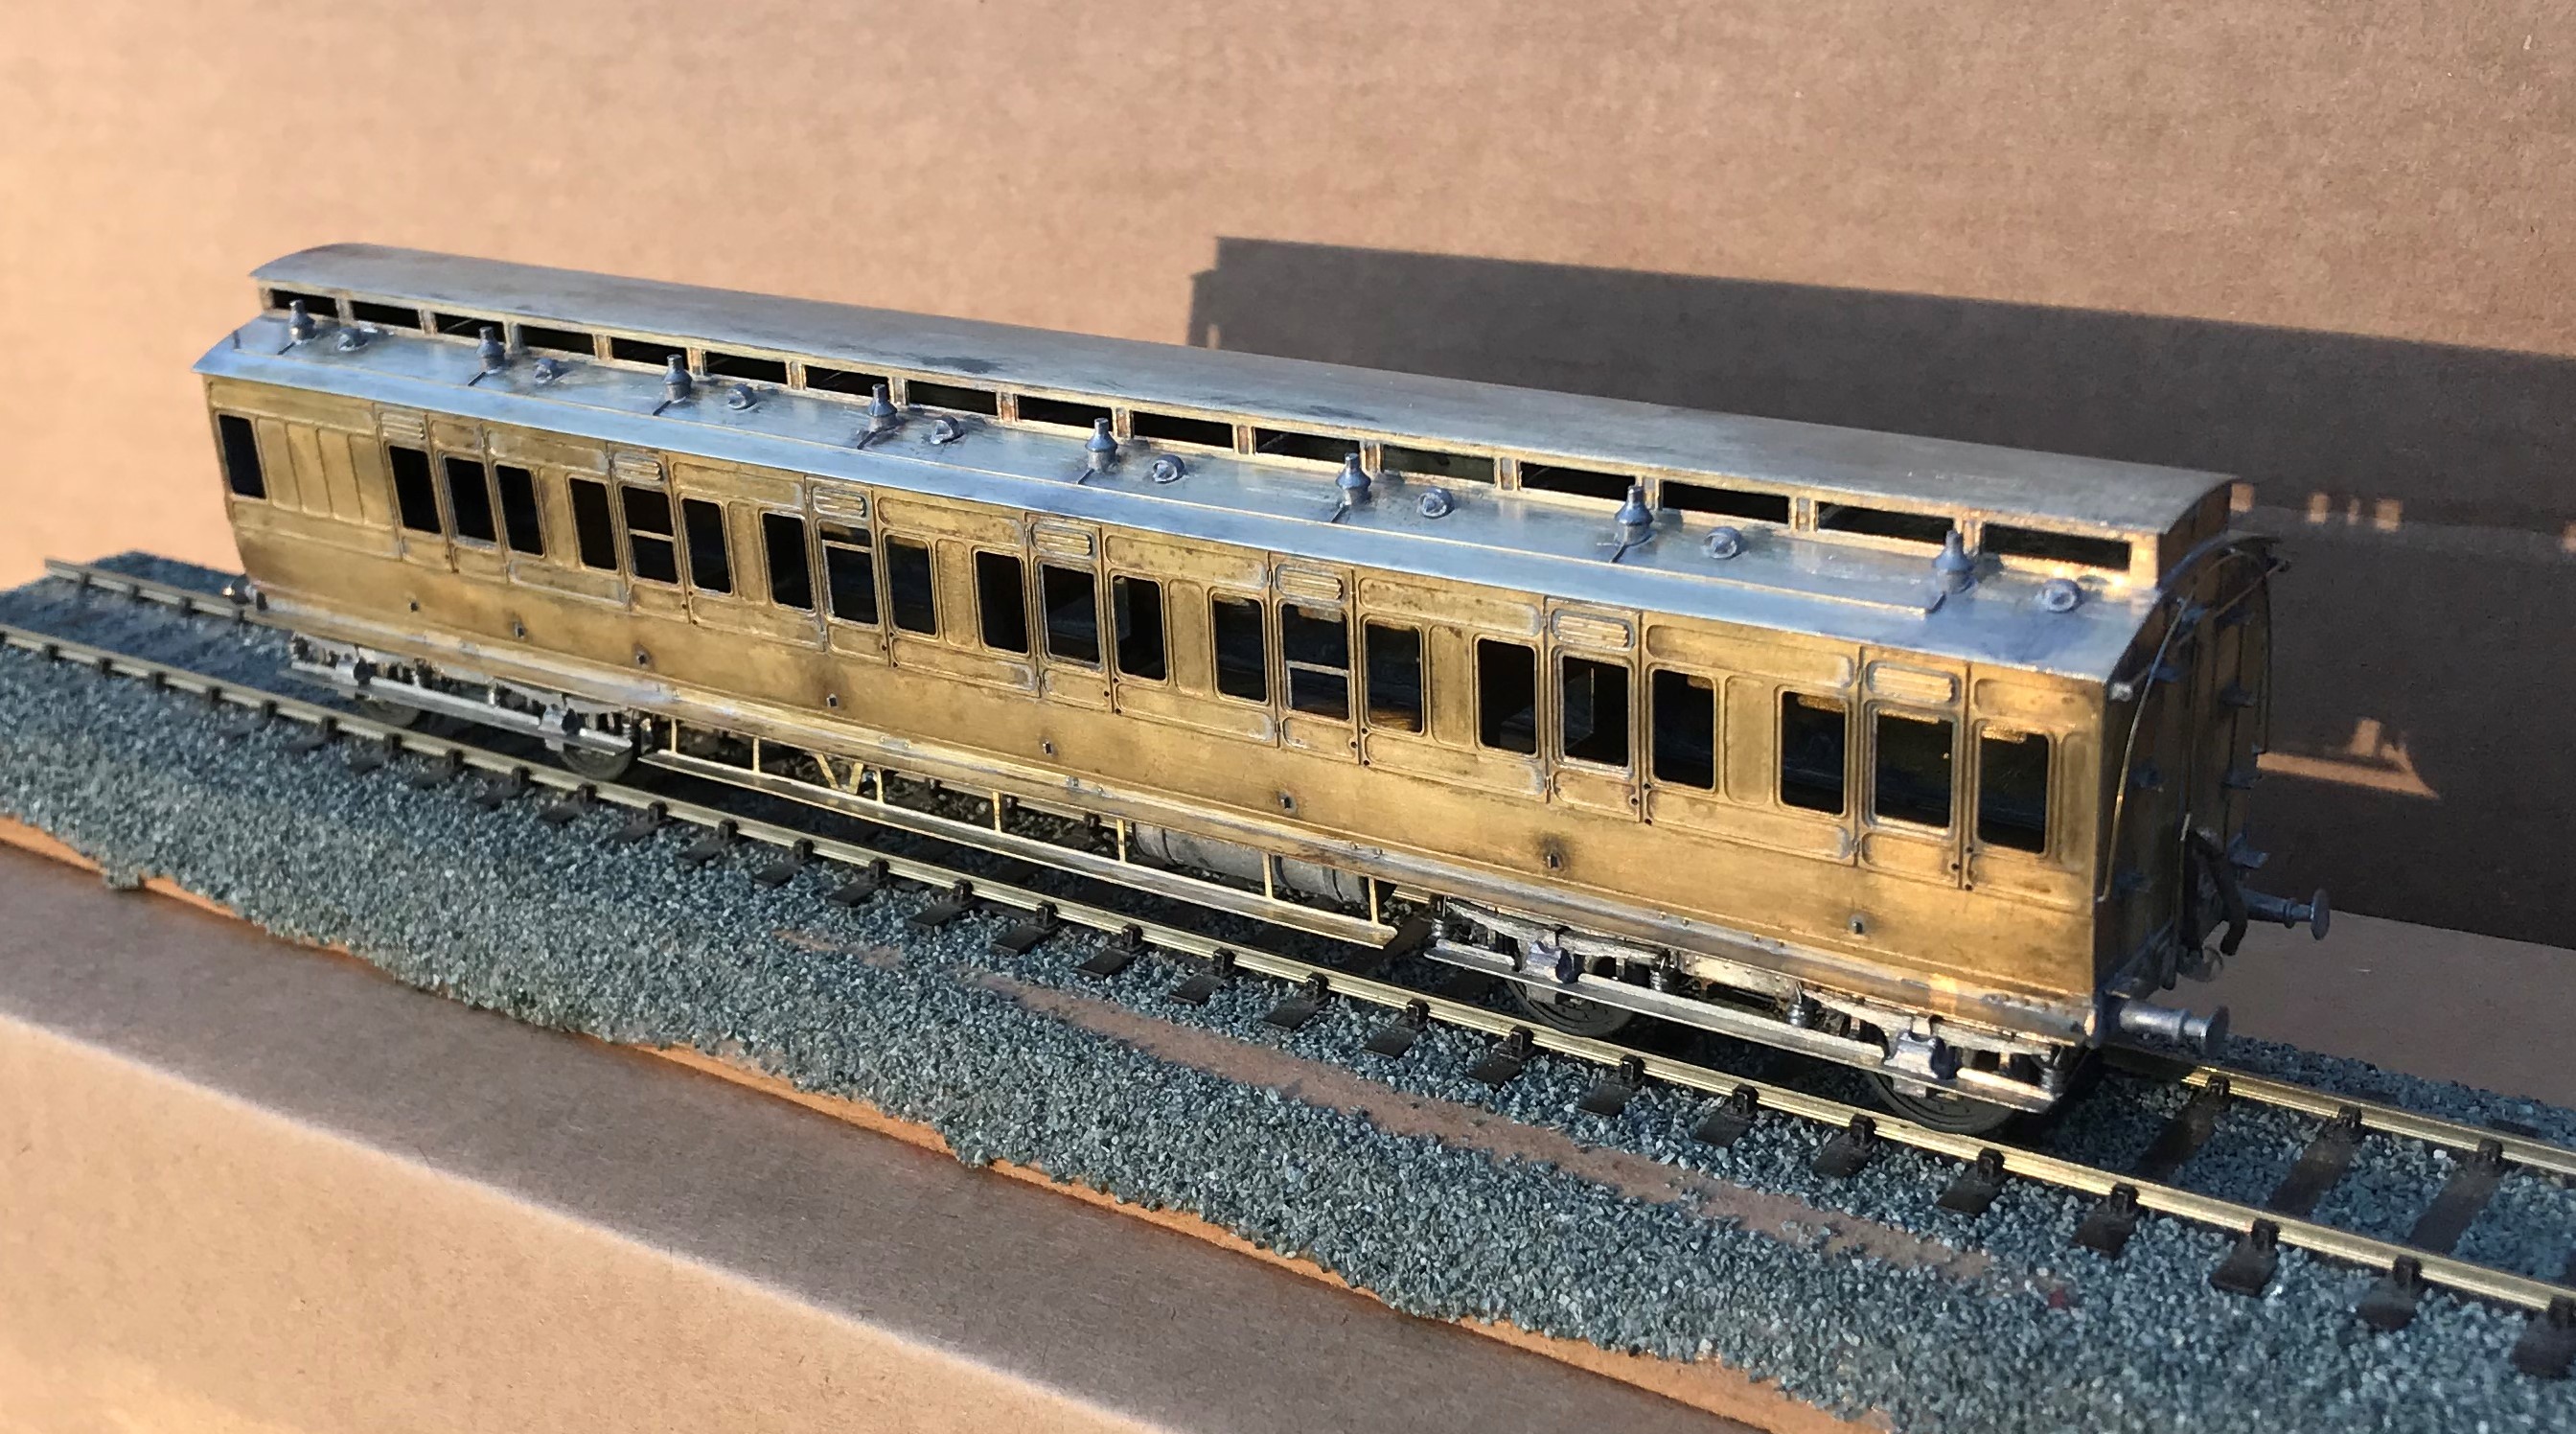
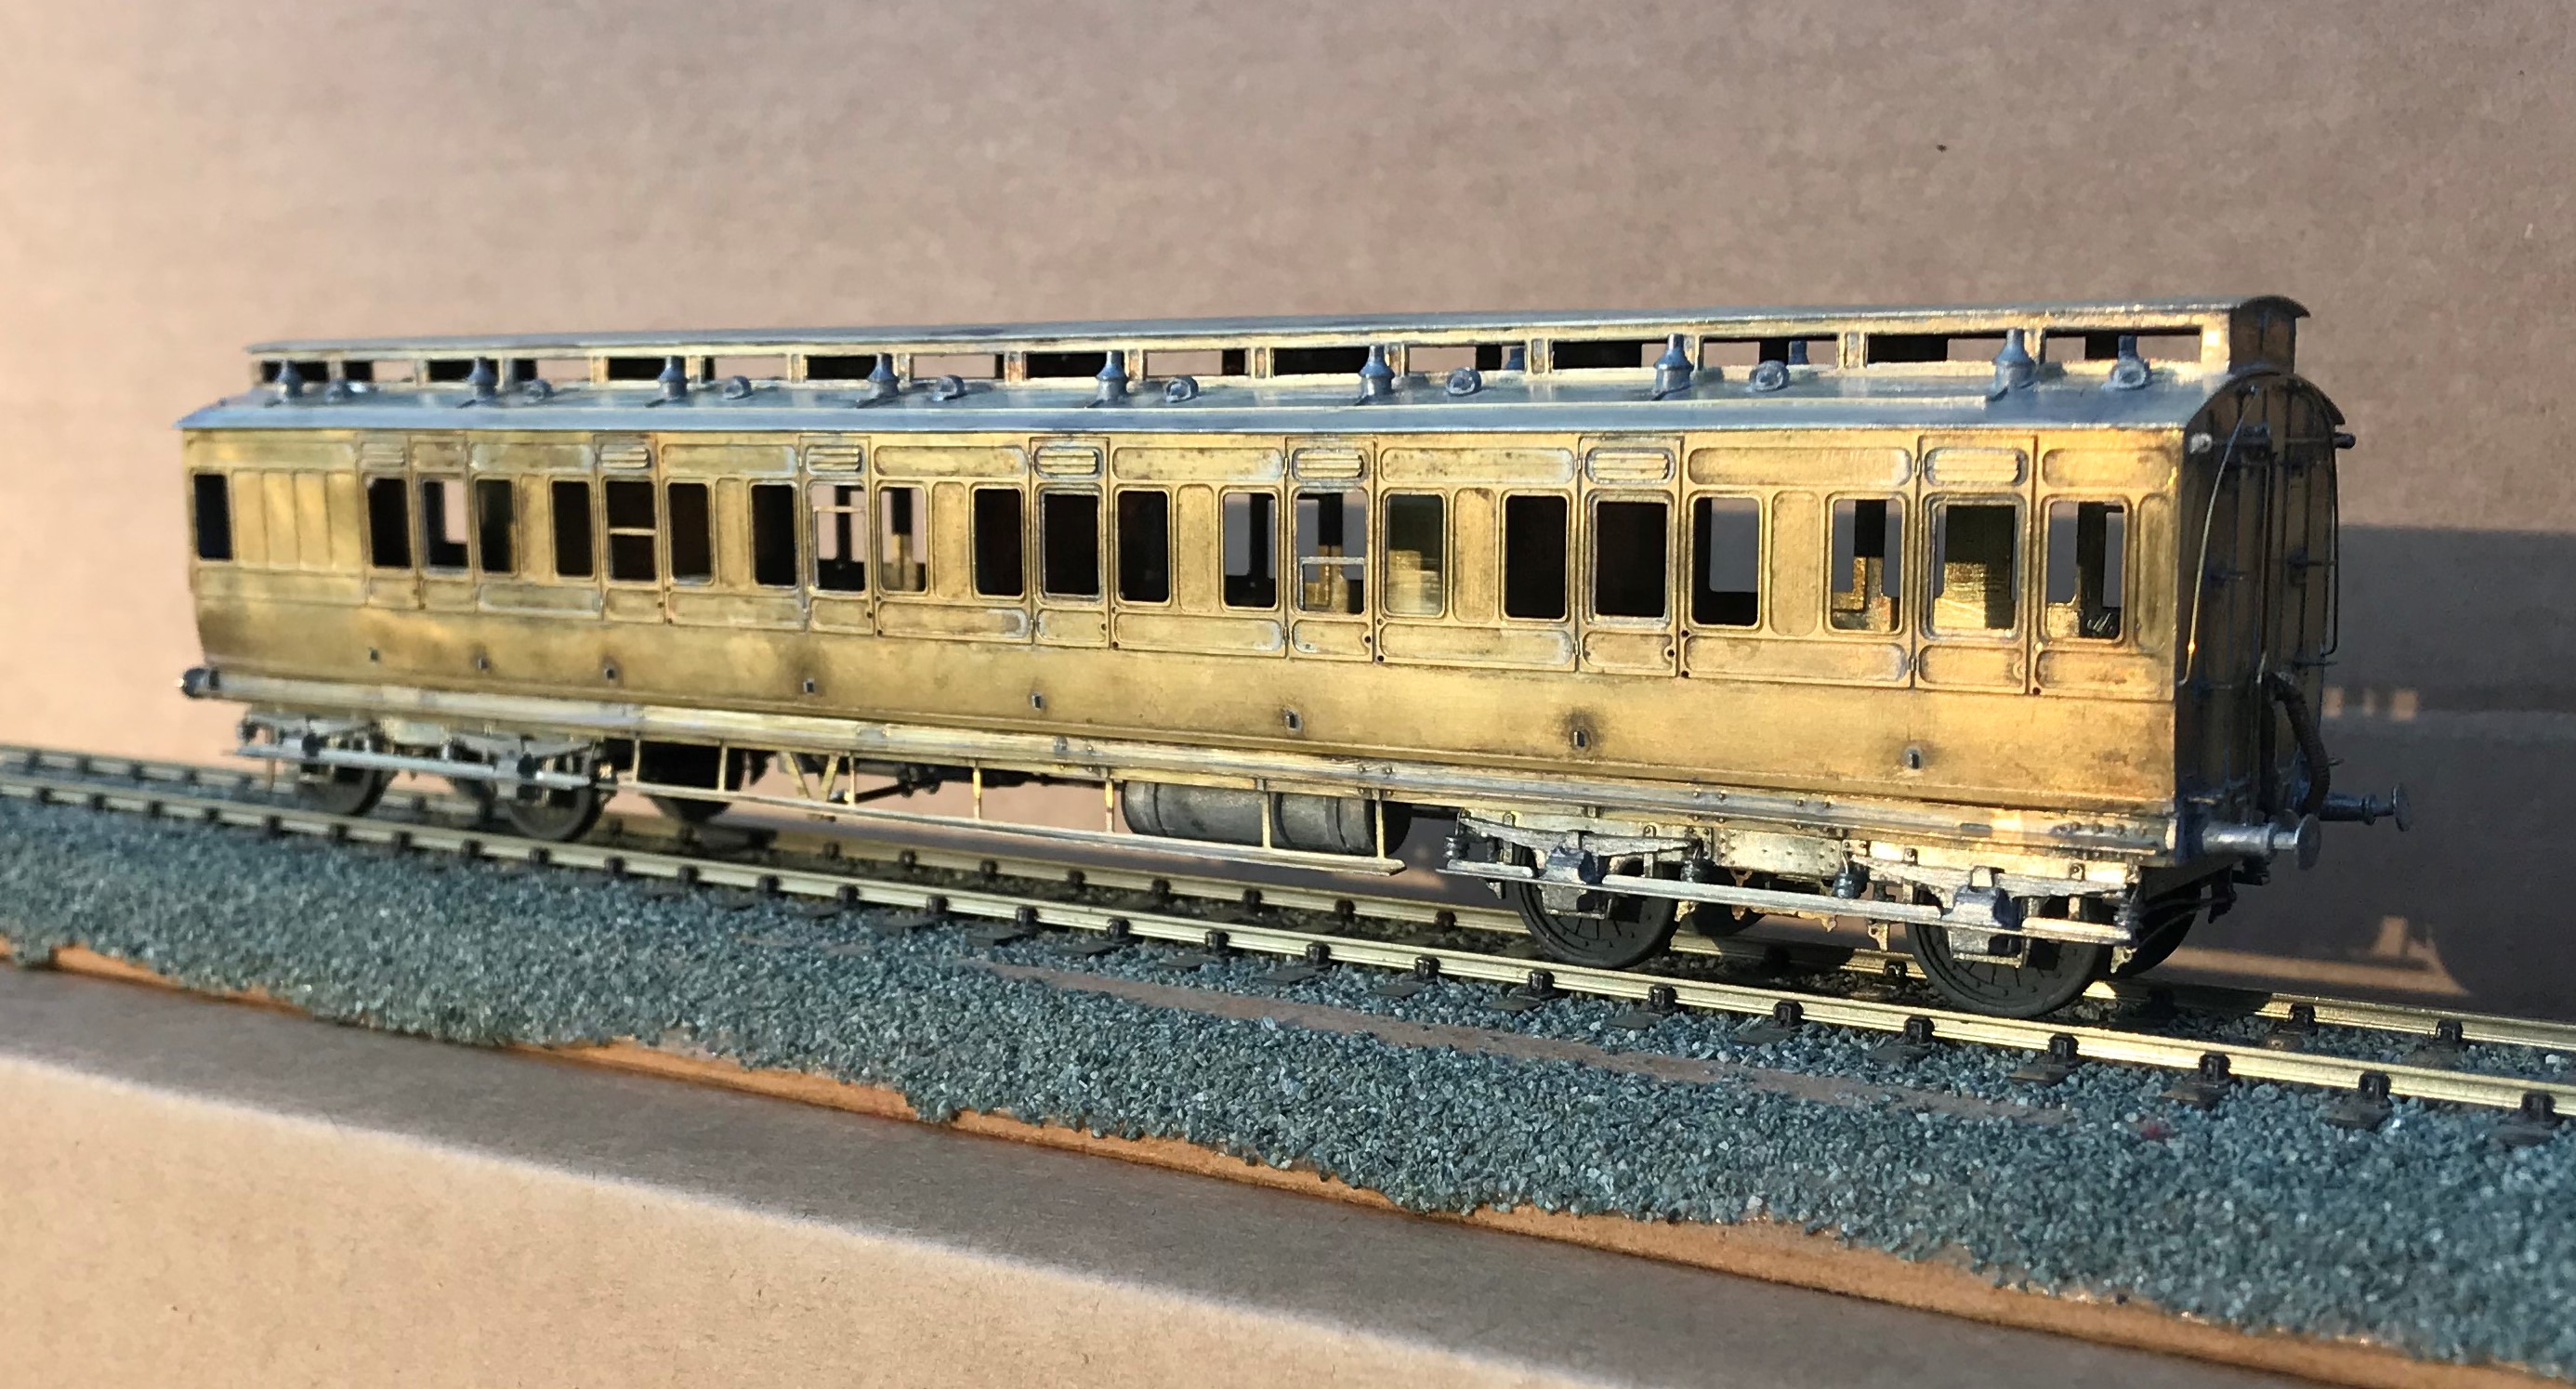
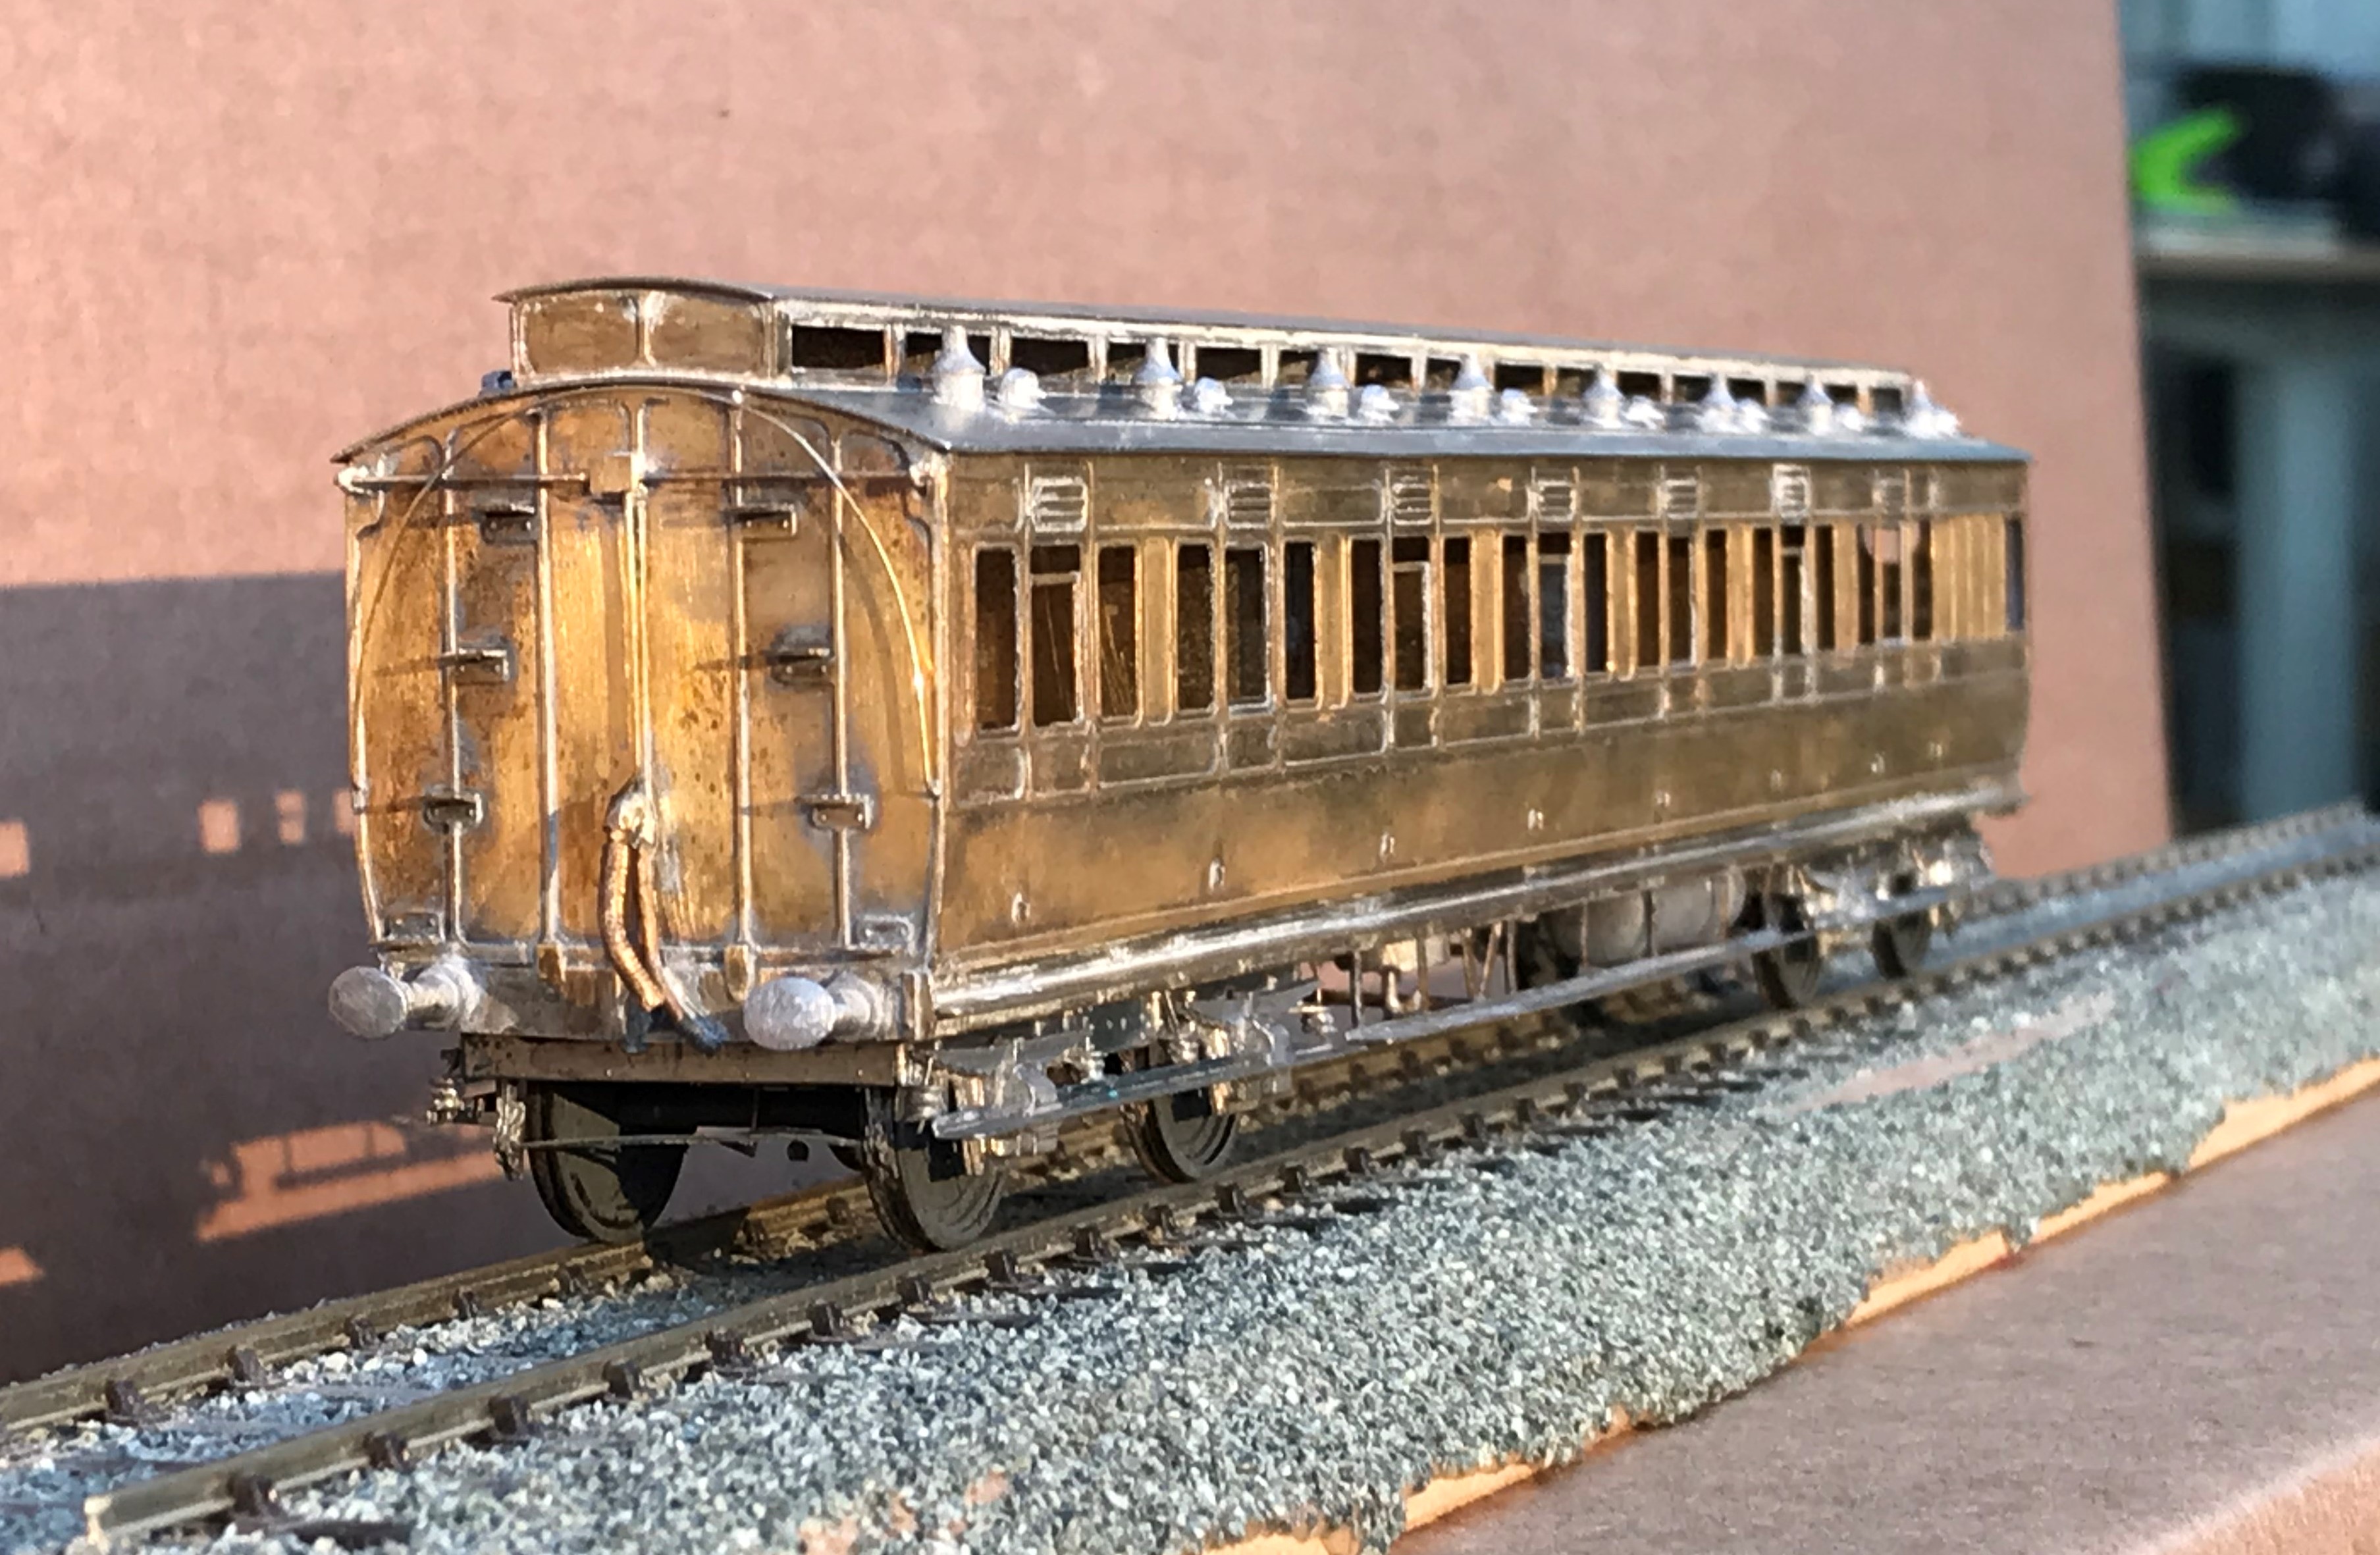
The Other Auto-coach
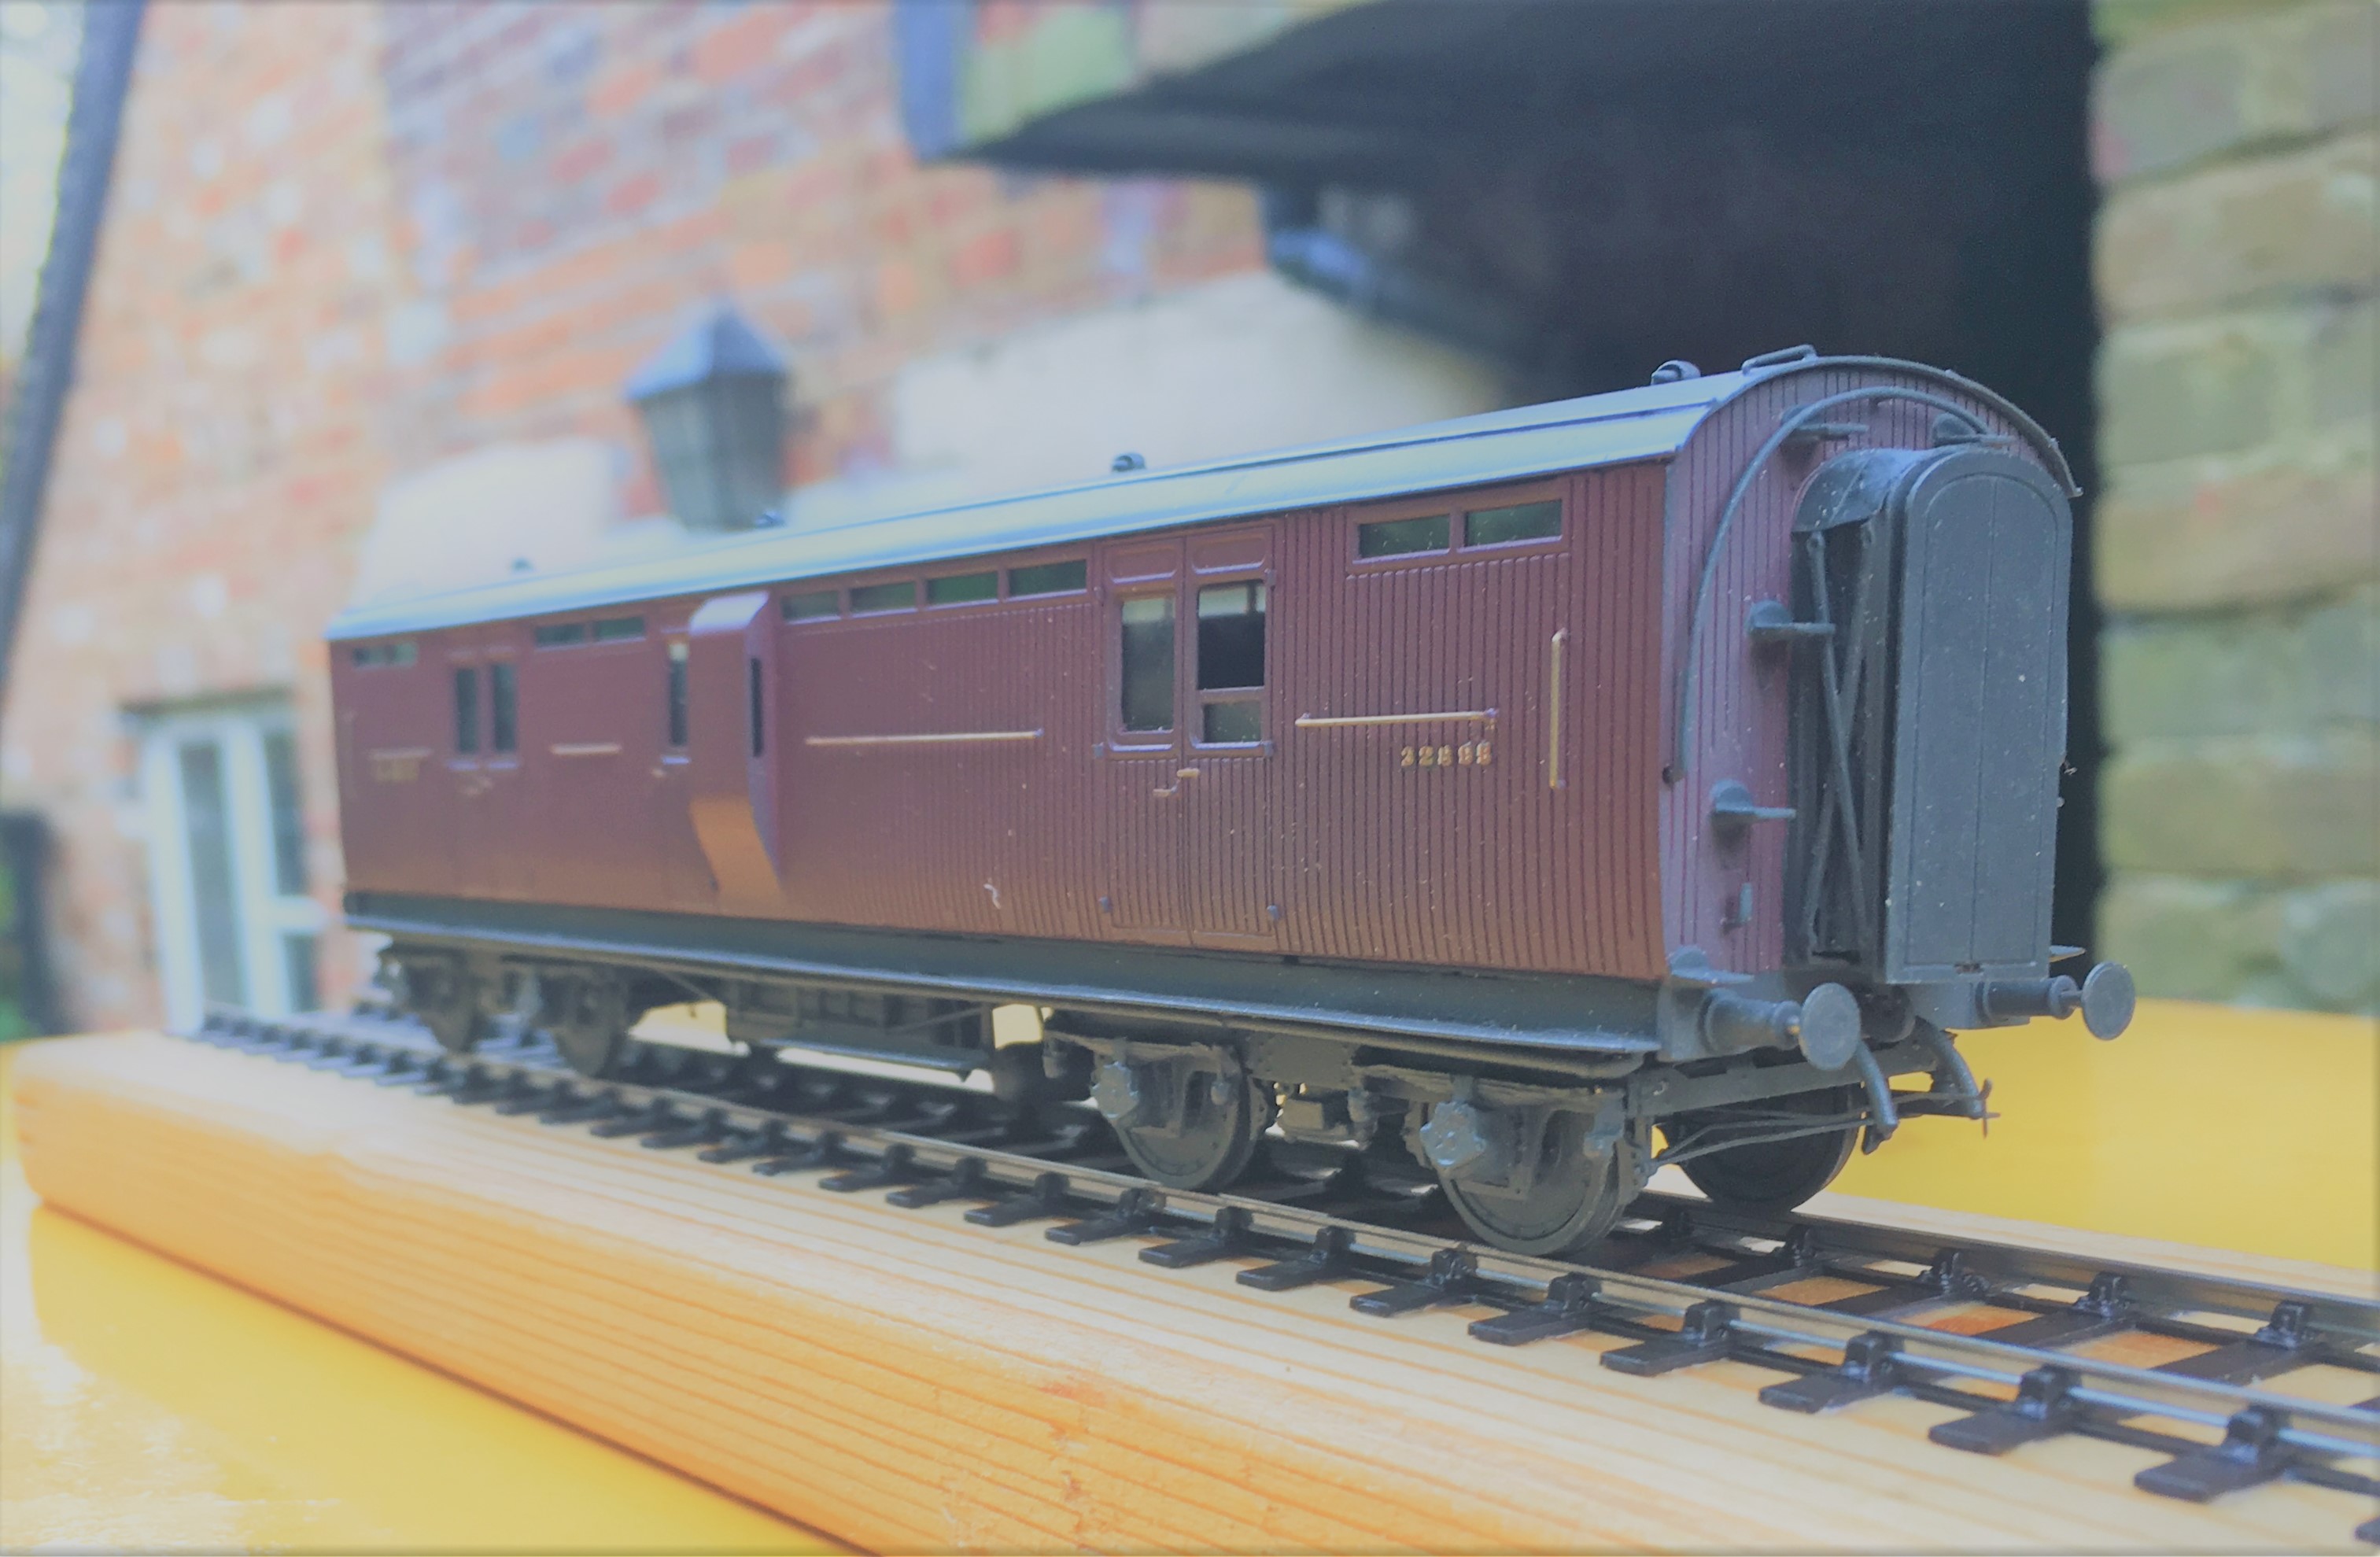
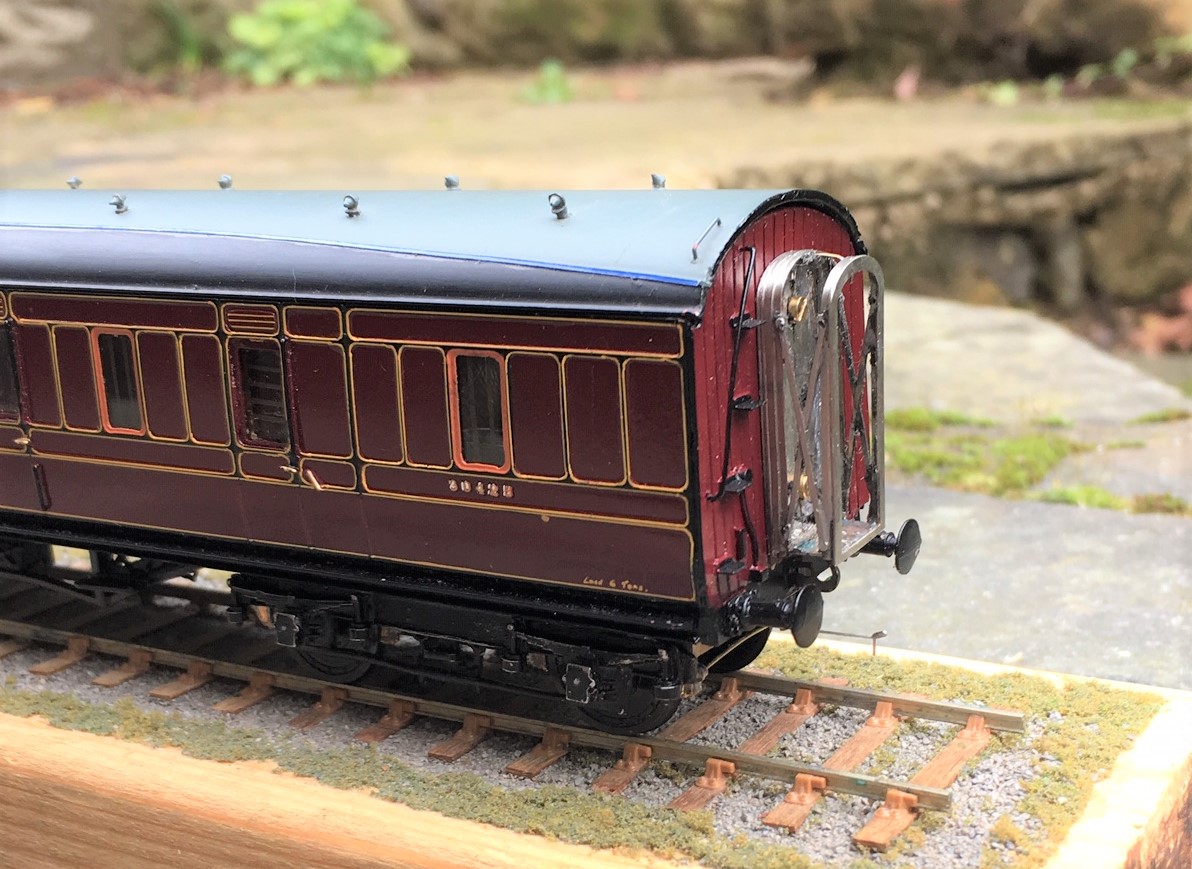
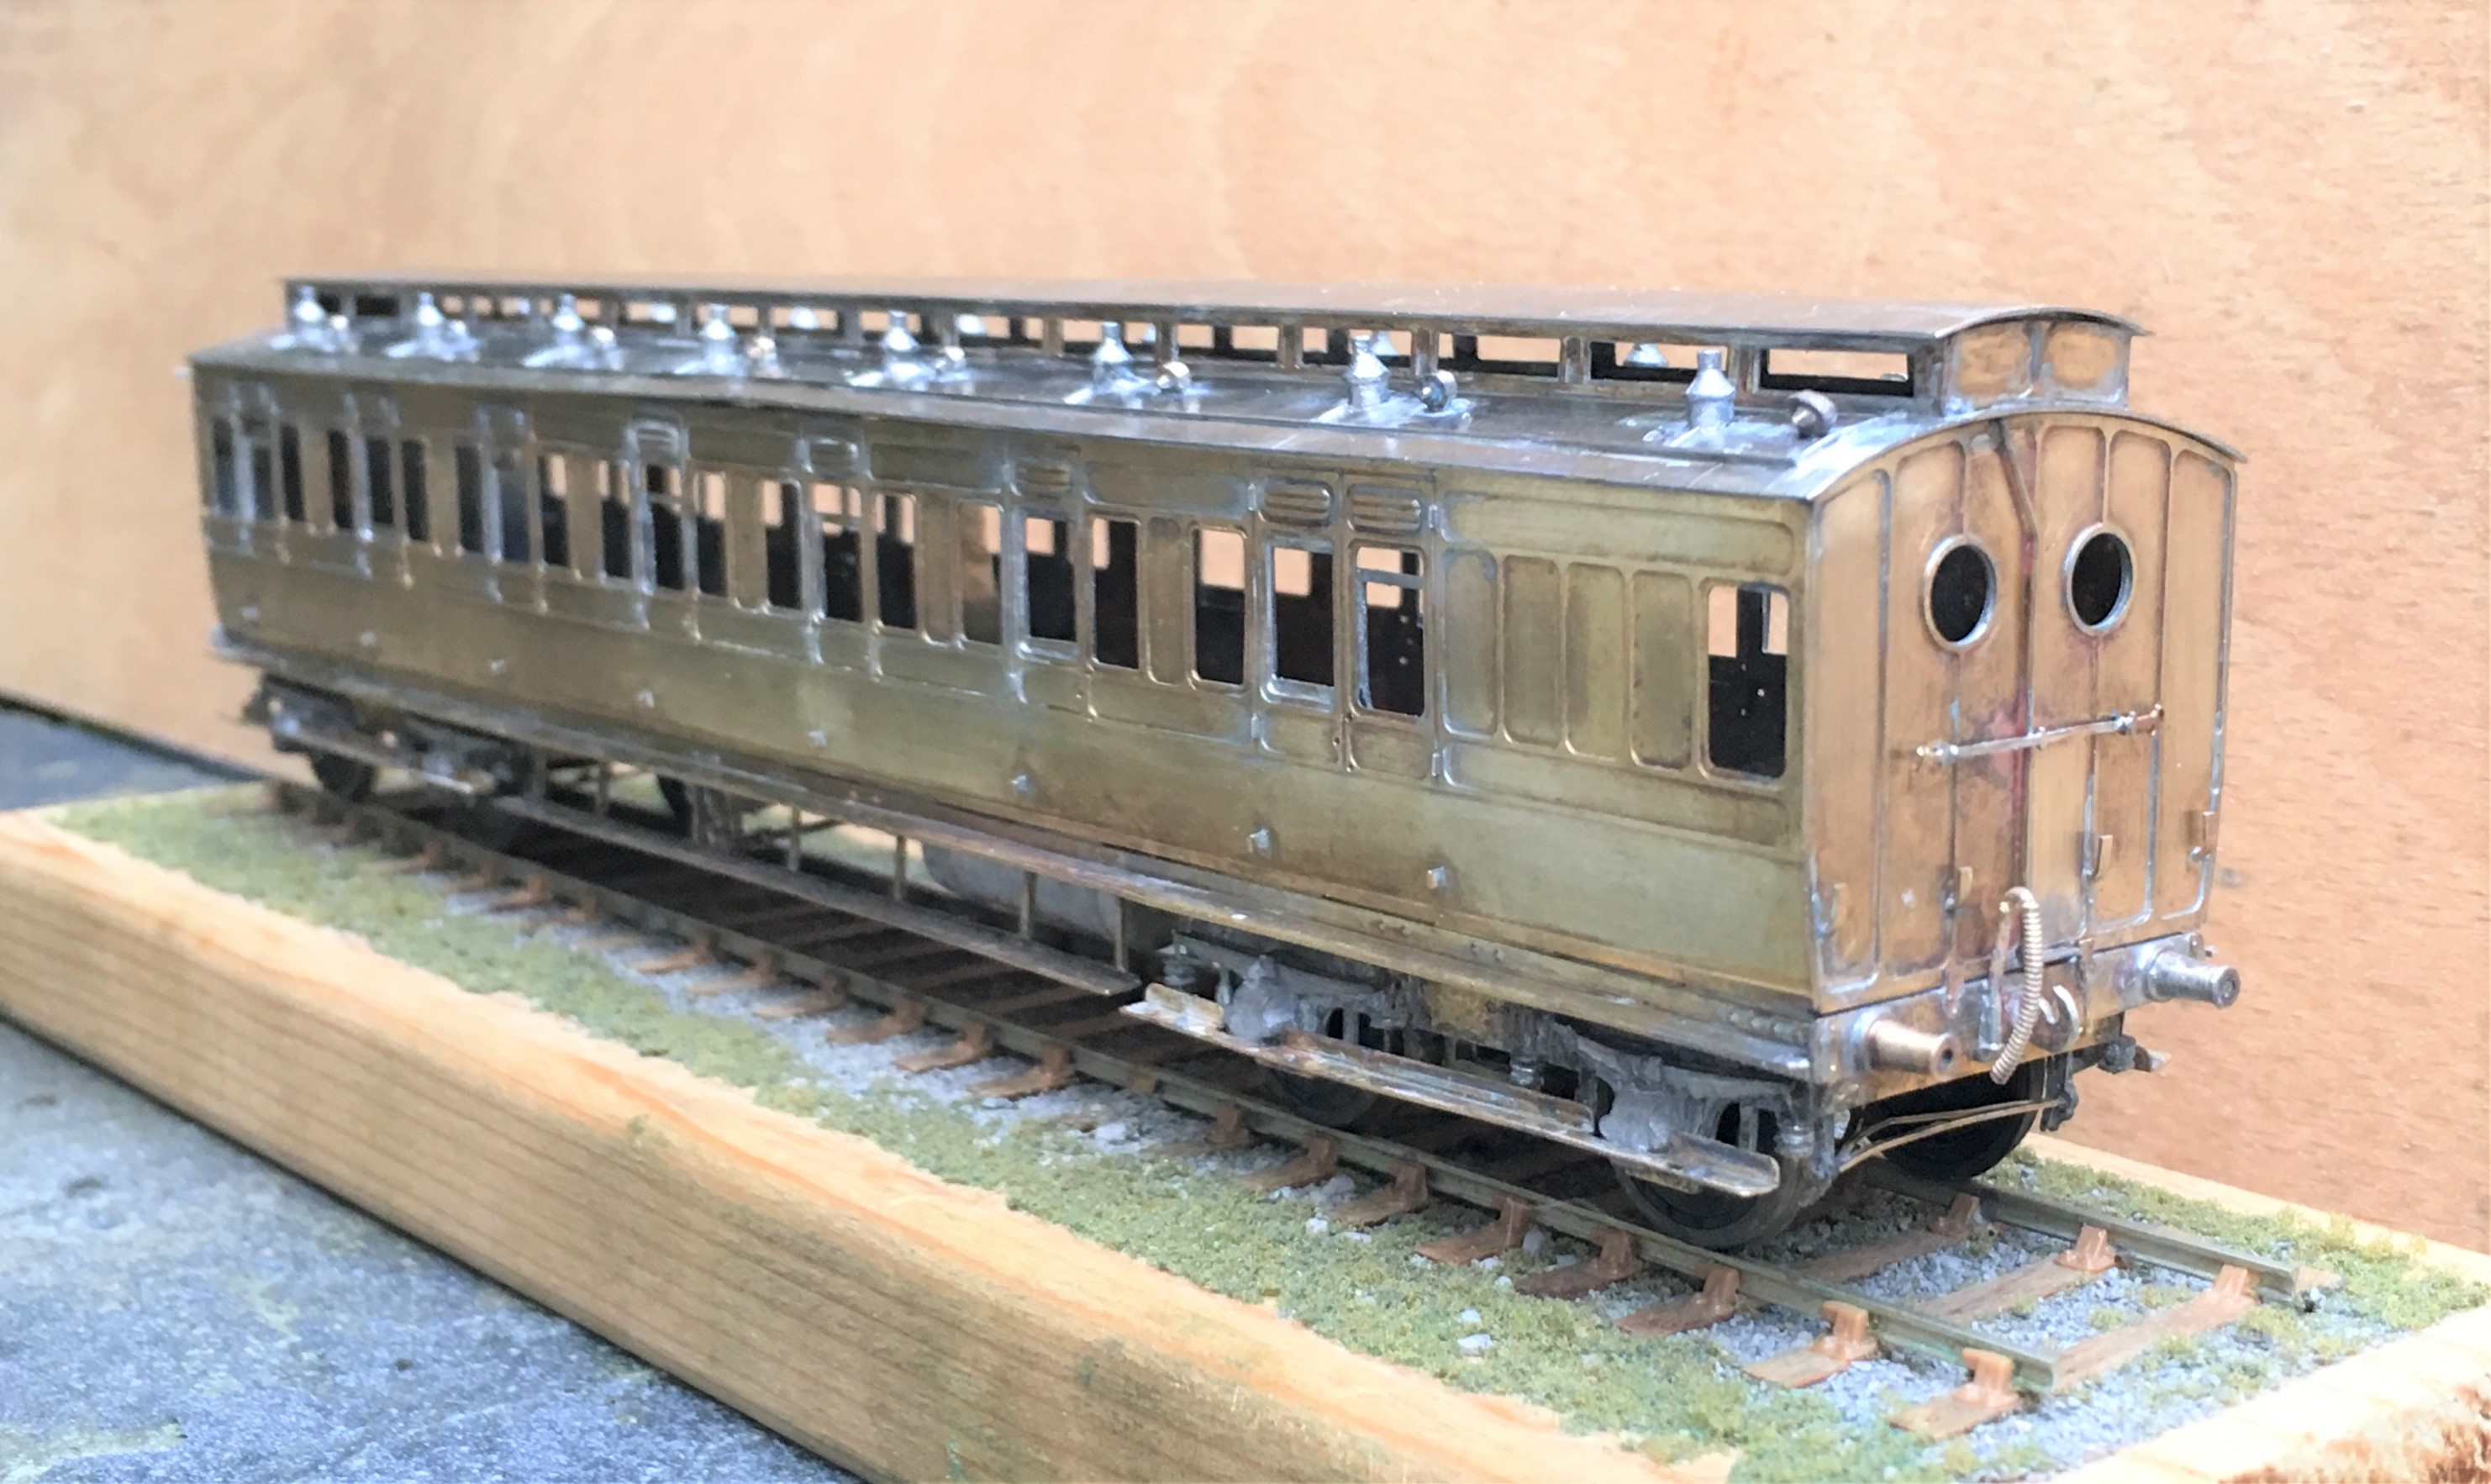
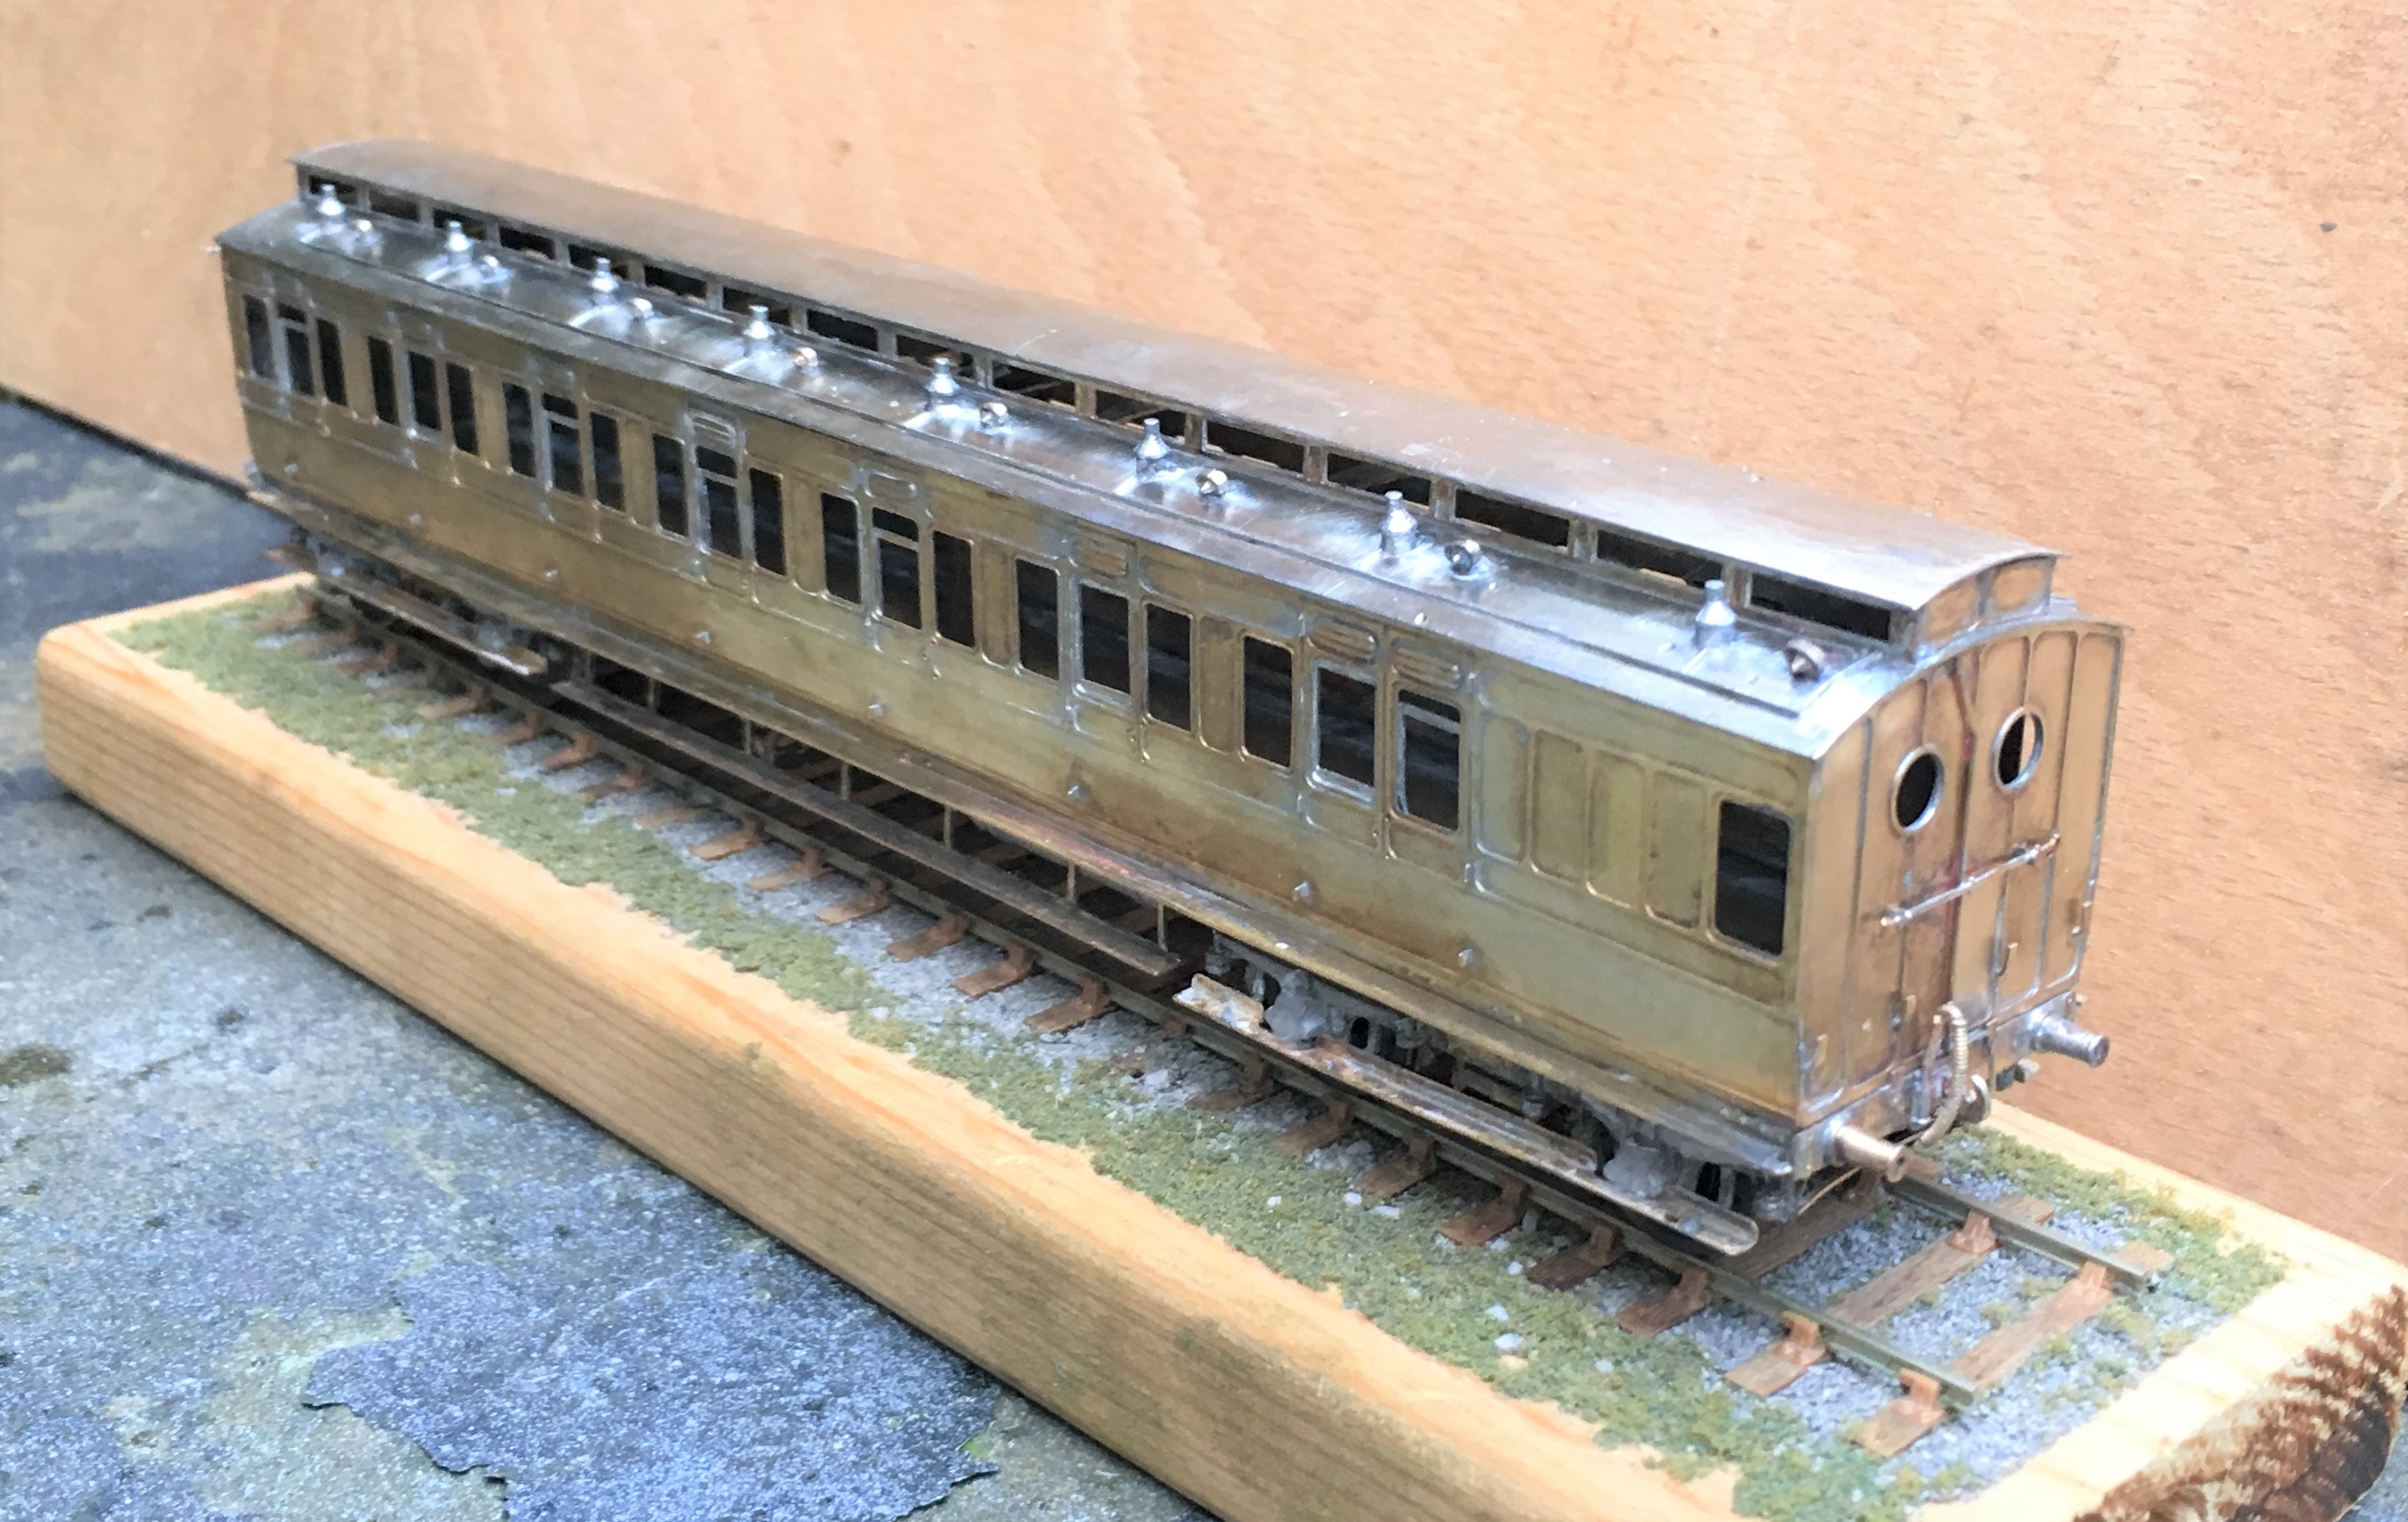
Some time back I posted about the construction of a NER autocoach that I was building for Benfieldside and subsequently what it looked like once painted by Warren Heywood.
The NER generally used these in pairs, with a loco sandwiched between, although they did go out singly and even as quads. In this case, the Benfieldside team wish to operate them as a pair, as the bay to the right of the layout is conceived to receive such a train, with a NER / LNER G6 in between. This means that there was pressure to build the second from the moment I handed the first over. They have recently given me a favour, so it was high time I repaid it.
It is now completed down to the final check over stage (which has indicated that I need to put the steam heating pipes on – doh!) and then it can be delivered. So I have braved the fading light this afternoon (so sorry about some of the depth of field issues) to take a few pictures and to prove to the fellas it is done!

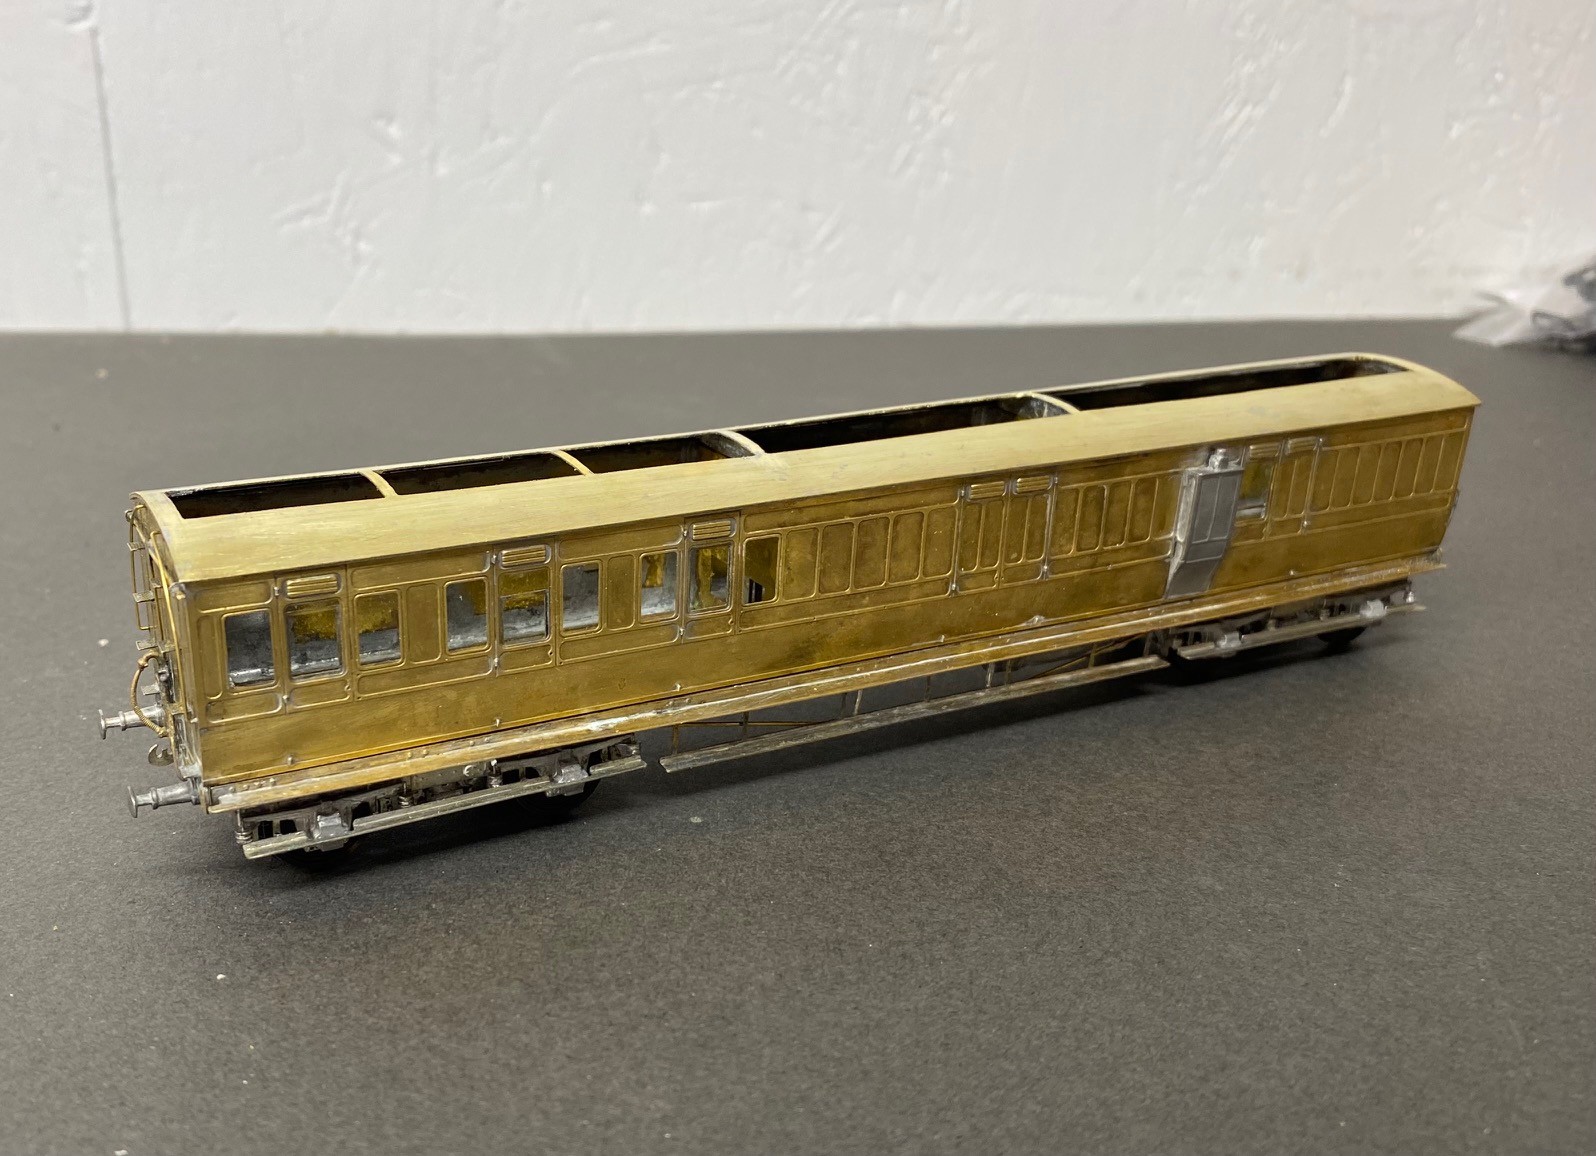
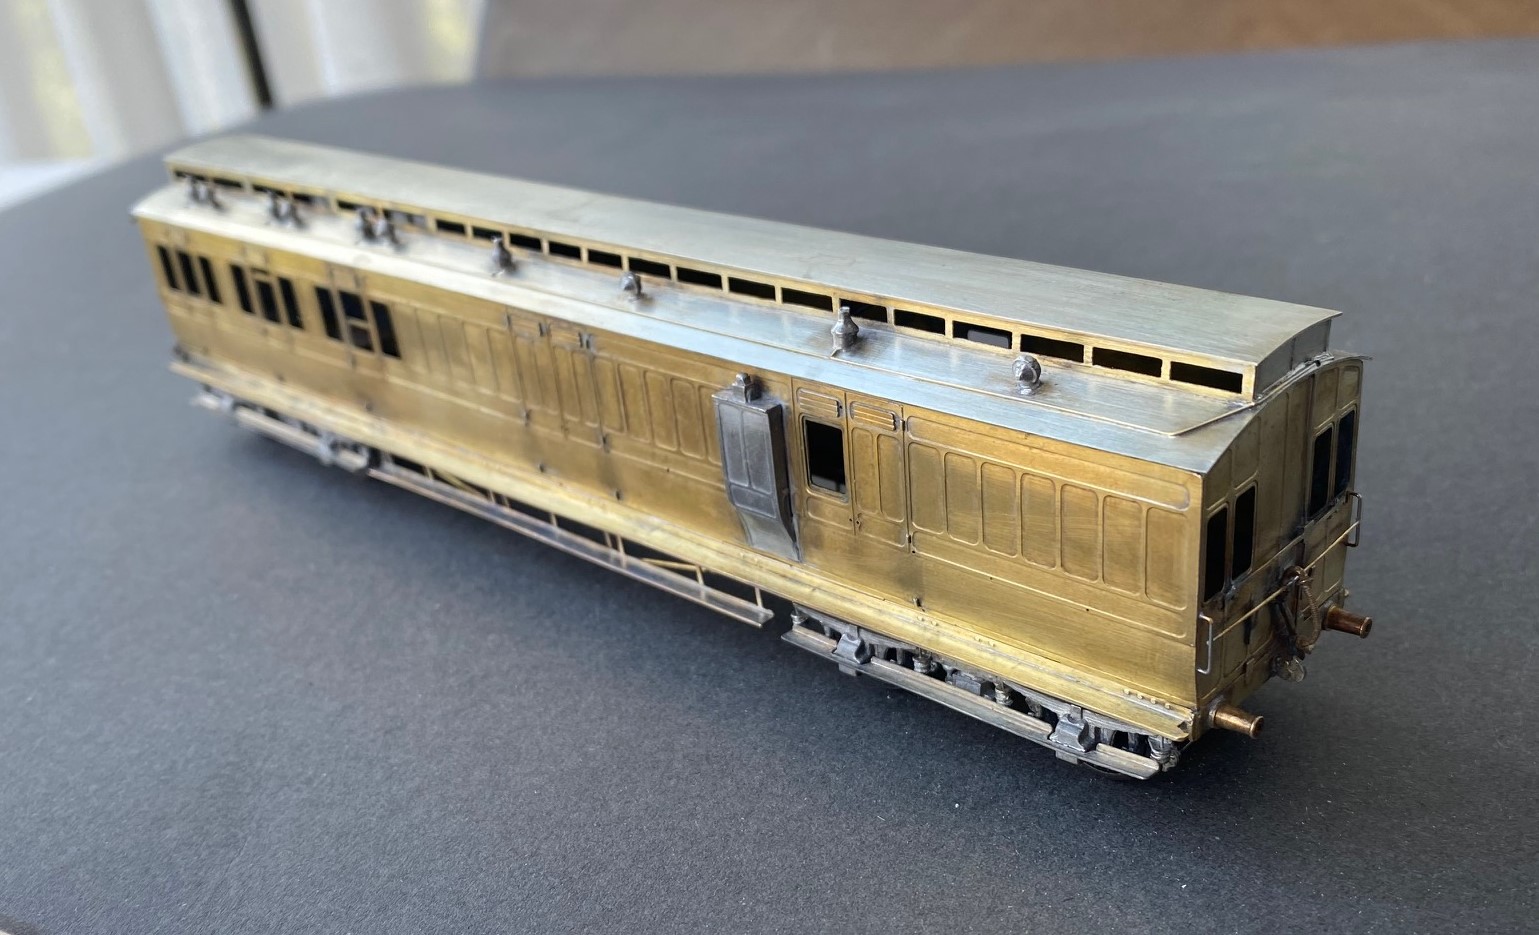
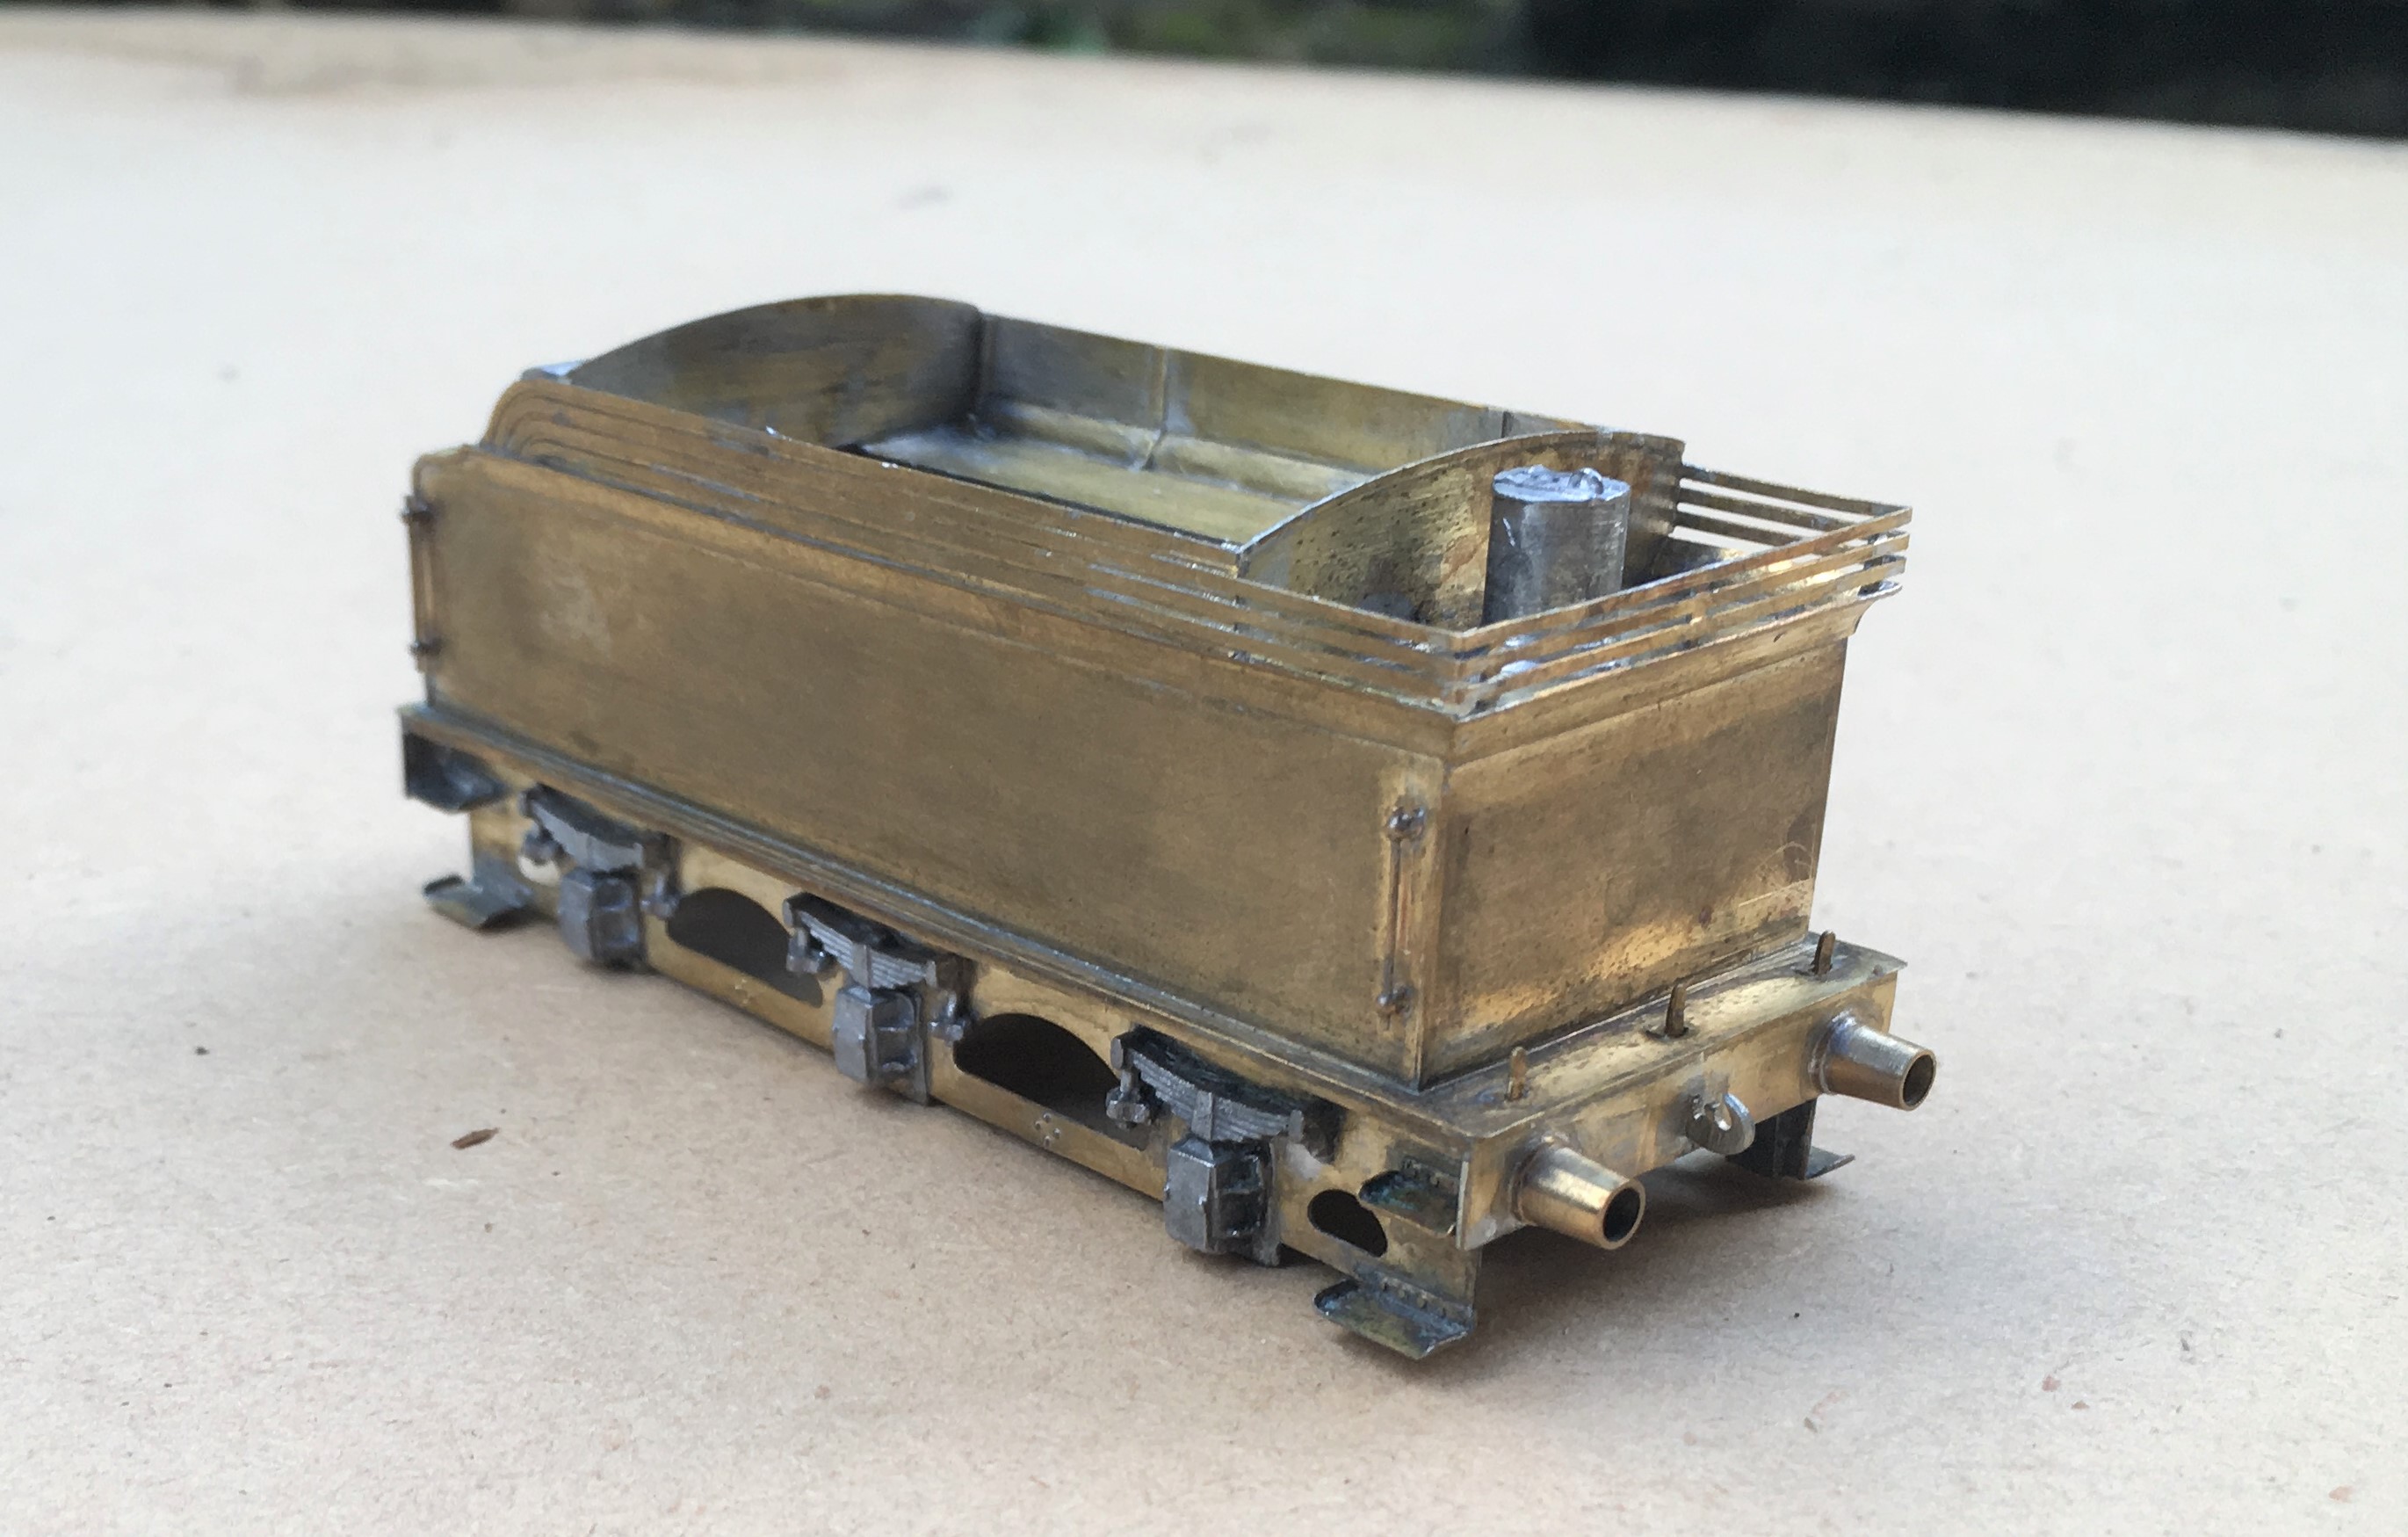
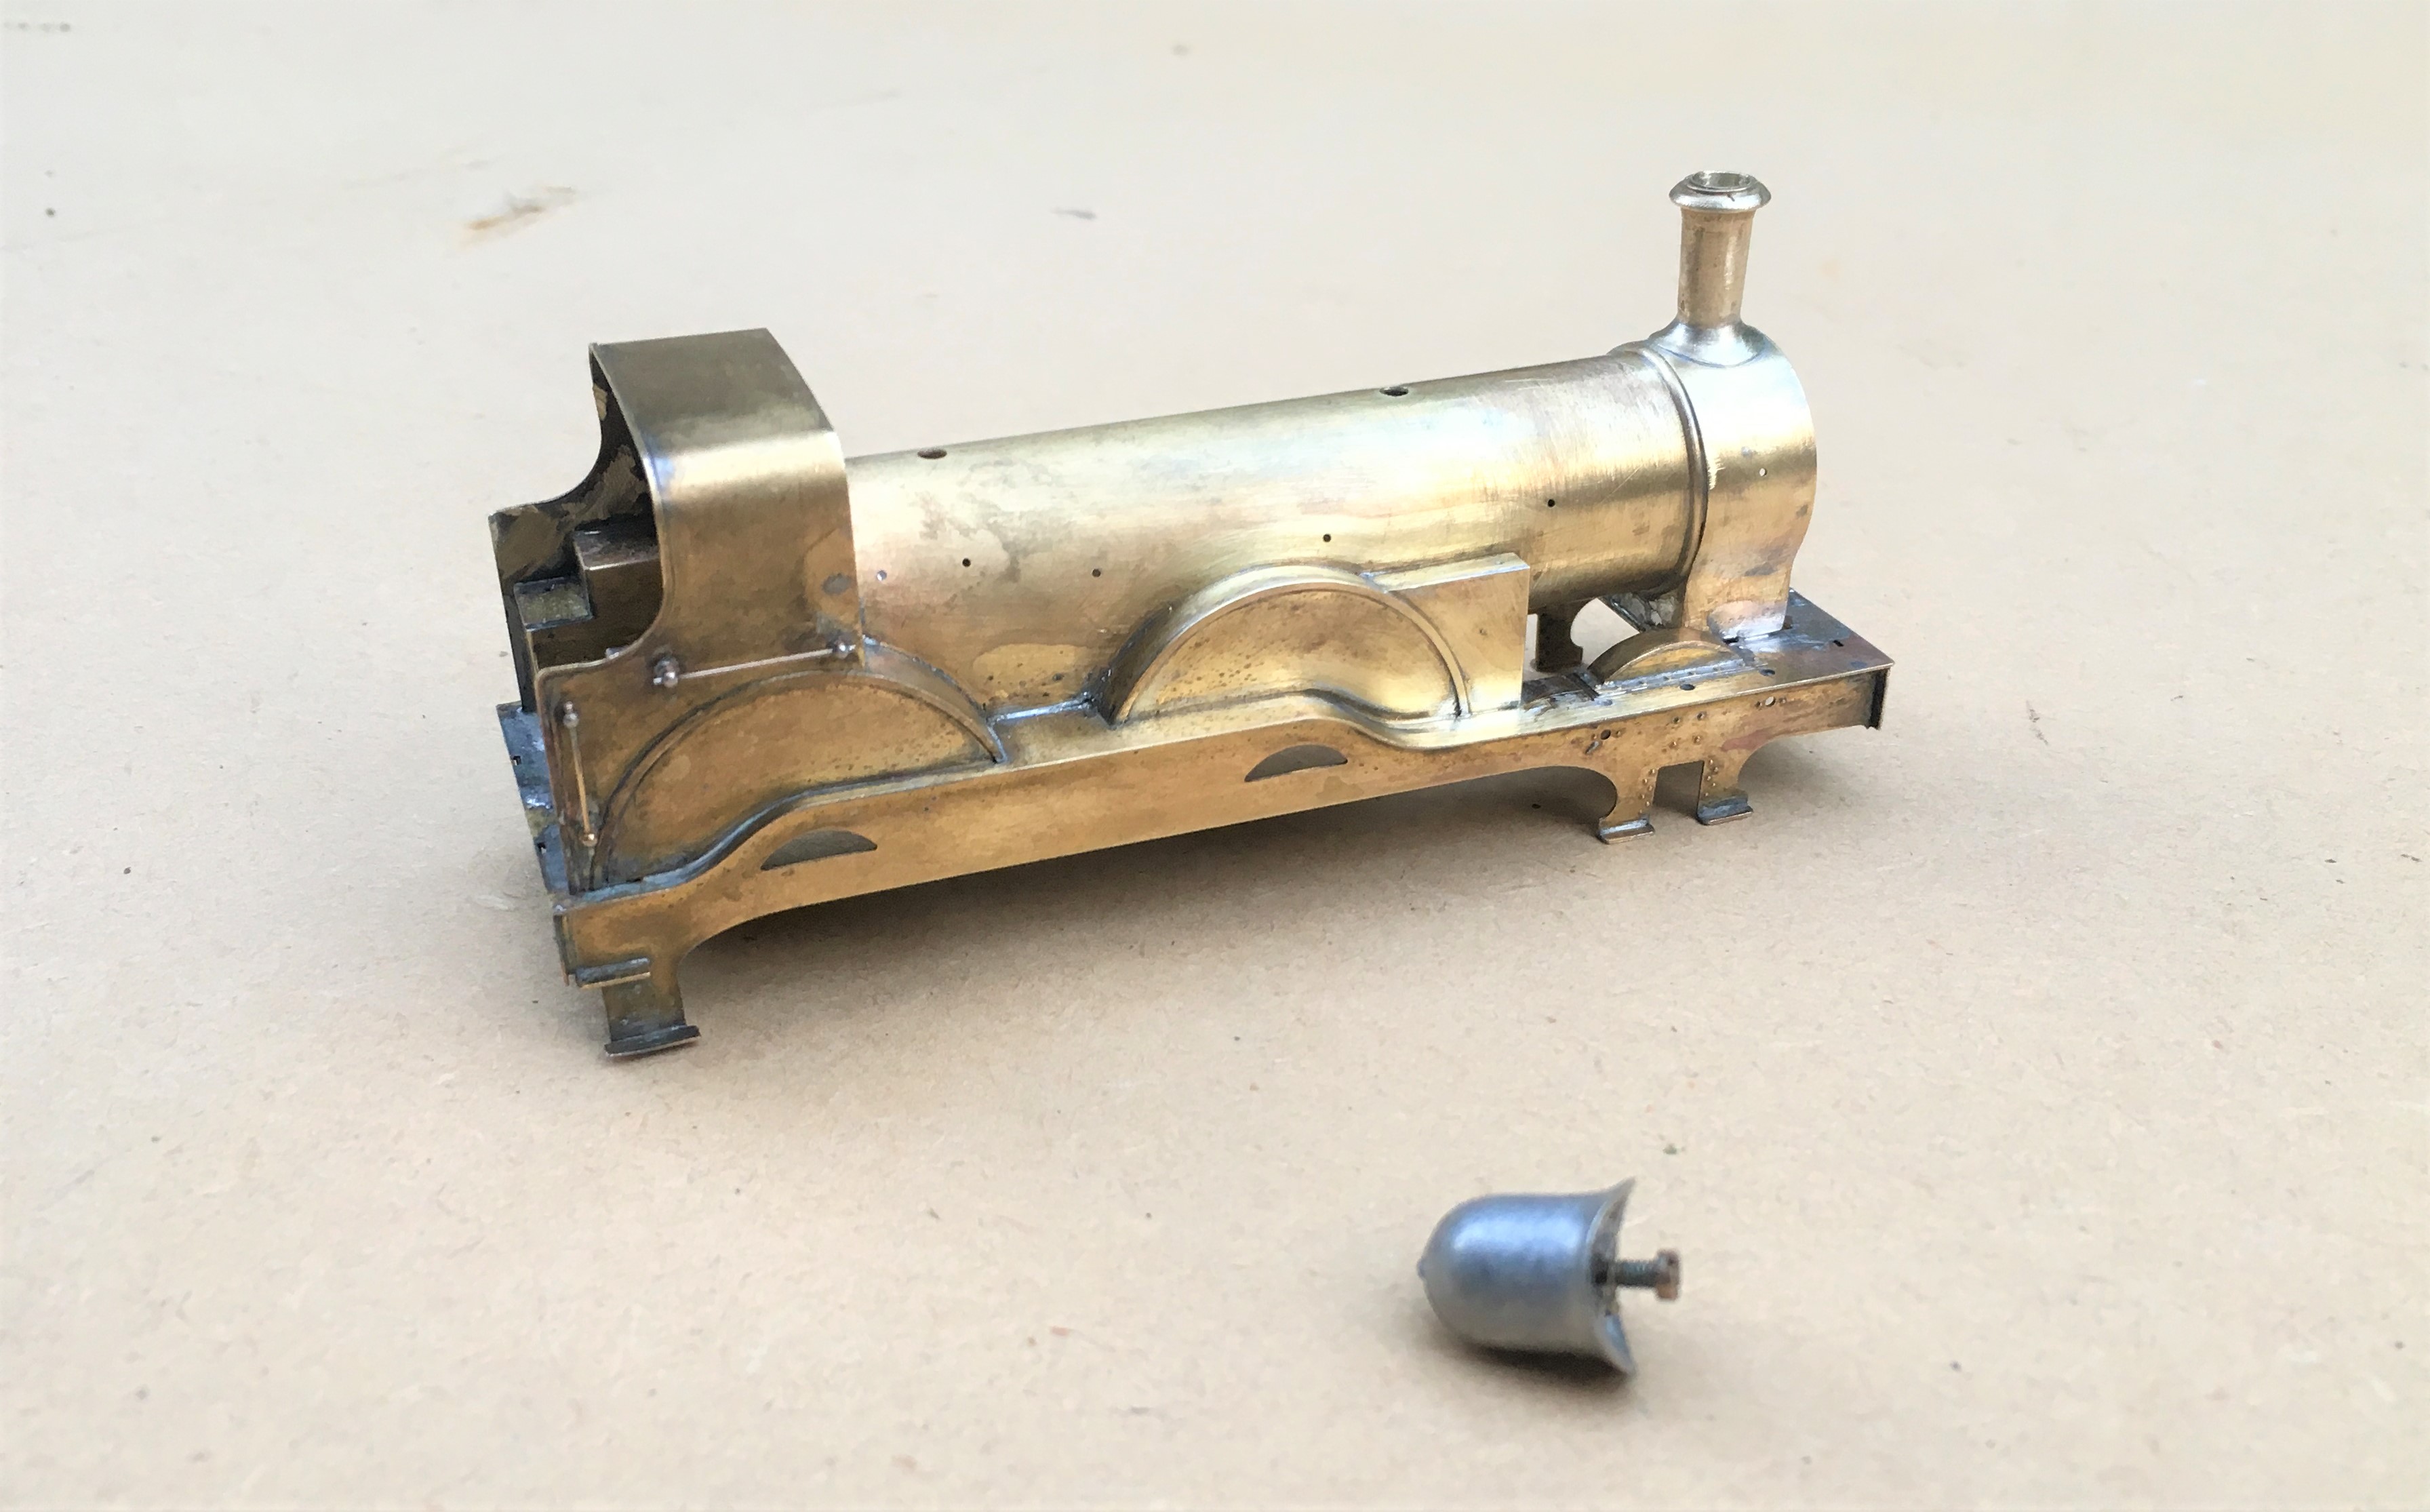
I completed a few personal upgrades to the kit in both this and the earlier autocoach. Chief of these is around the roof where I ditched the plastic roof and replaced it with rolled brass. This was formed of 0.25mm to give it a tangible depth, which makes its rolling a fair challenge. Add to this, I elected to cut out the portion below the clerestory, so that it was a clerestory! By the time I had added the gas lines and the various gas lamps and ventilators, I reckon there is around 20 hours in making the roof alone!
The prototype coaches were fairly long lived and numerous. They thus collected a good number of alterations and differences over time. I took some guidance to David Addyman and tweaked the kit in respect of gas lines, foot steps, handrails, footboards and gas cylinders. If someone thinks this is wrong, please don’t tell me!!
It always amuses me that the driver had to stand and peer down the line through two tiny windows. They lived in different times – could you imagine the snow-flakes tolerating this in the 21st century?
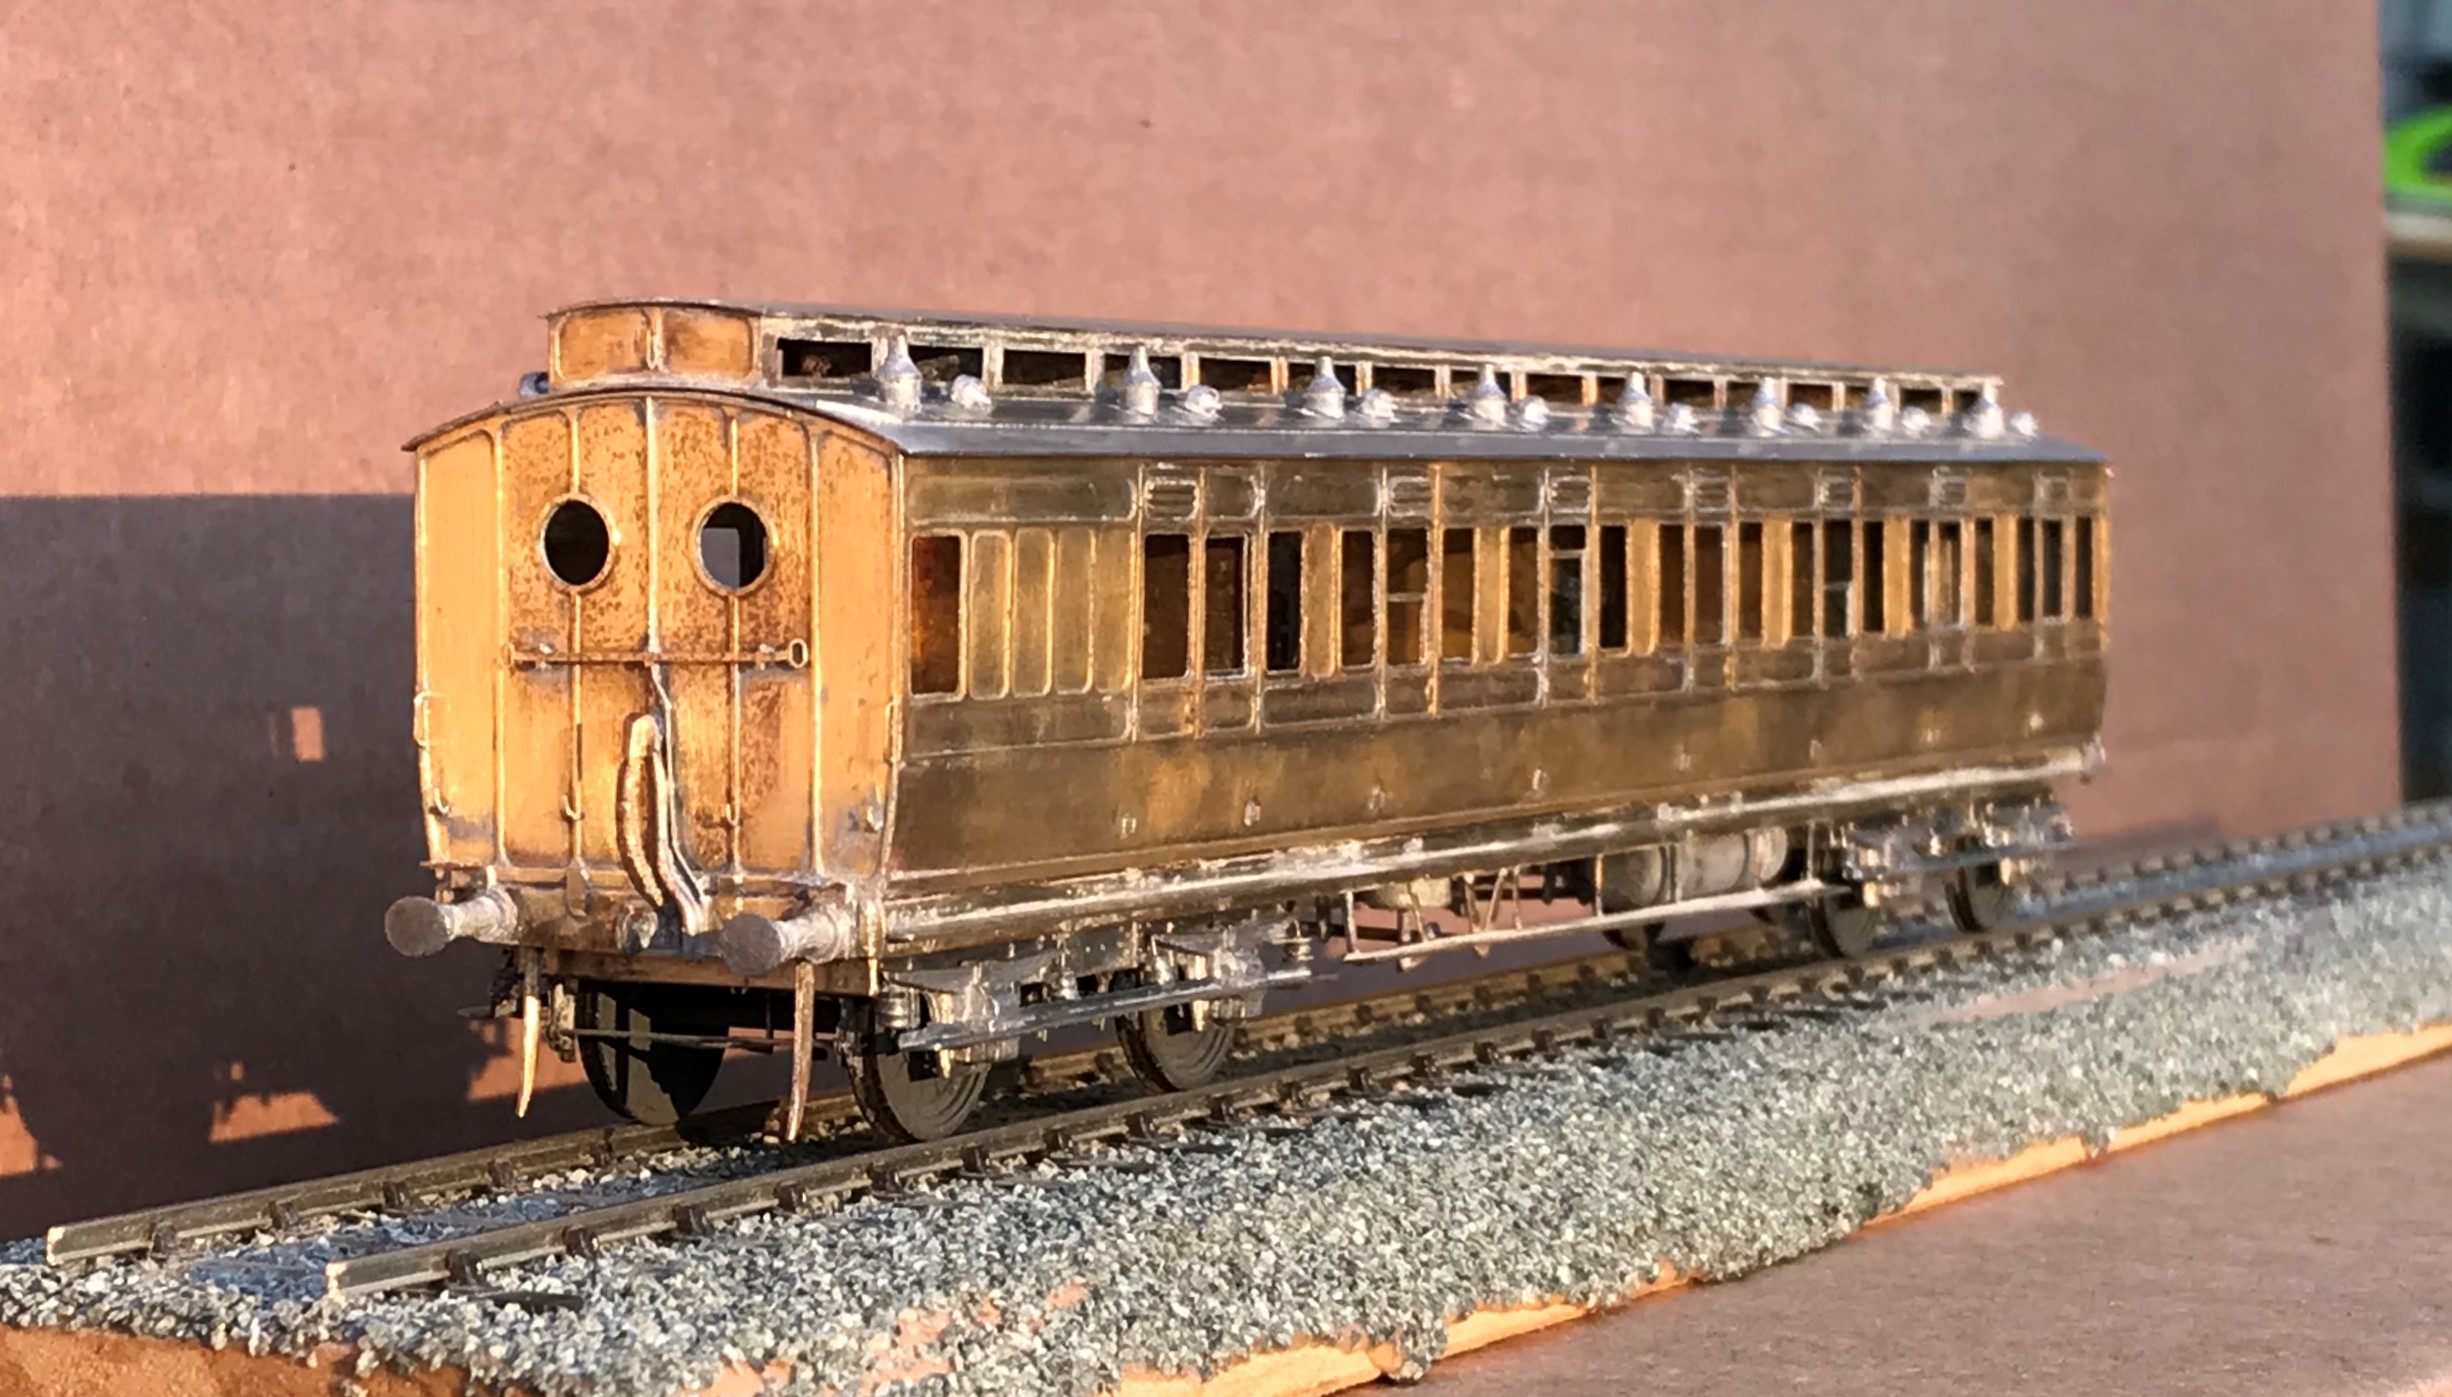
These are rather beautiful coaches, but not for the feint-hearted as there is a lot of time invested in these. I am pleased I do not have to paint it!

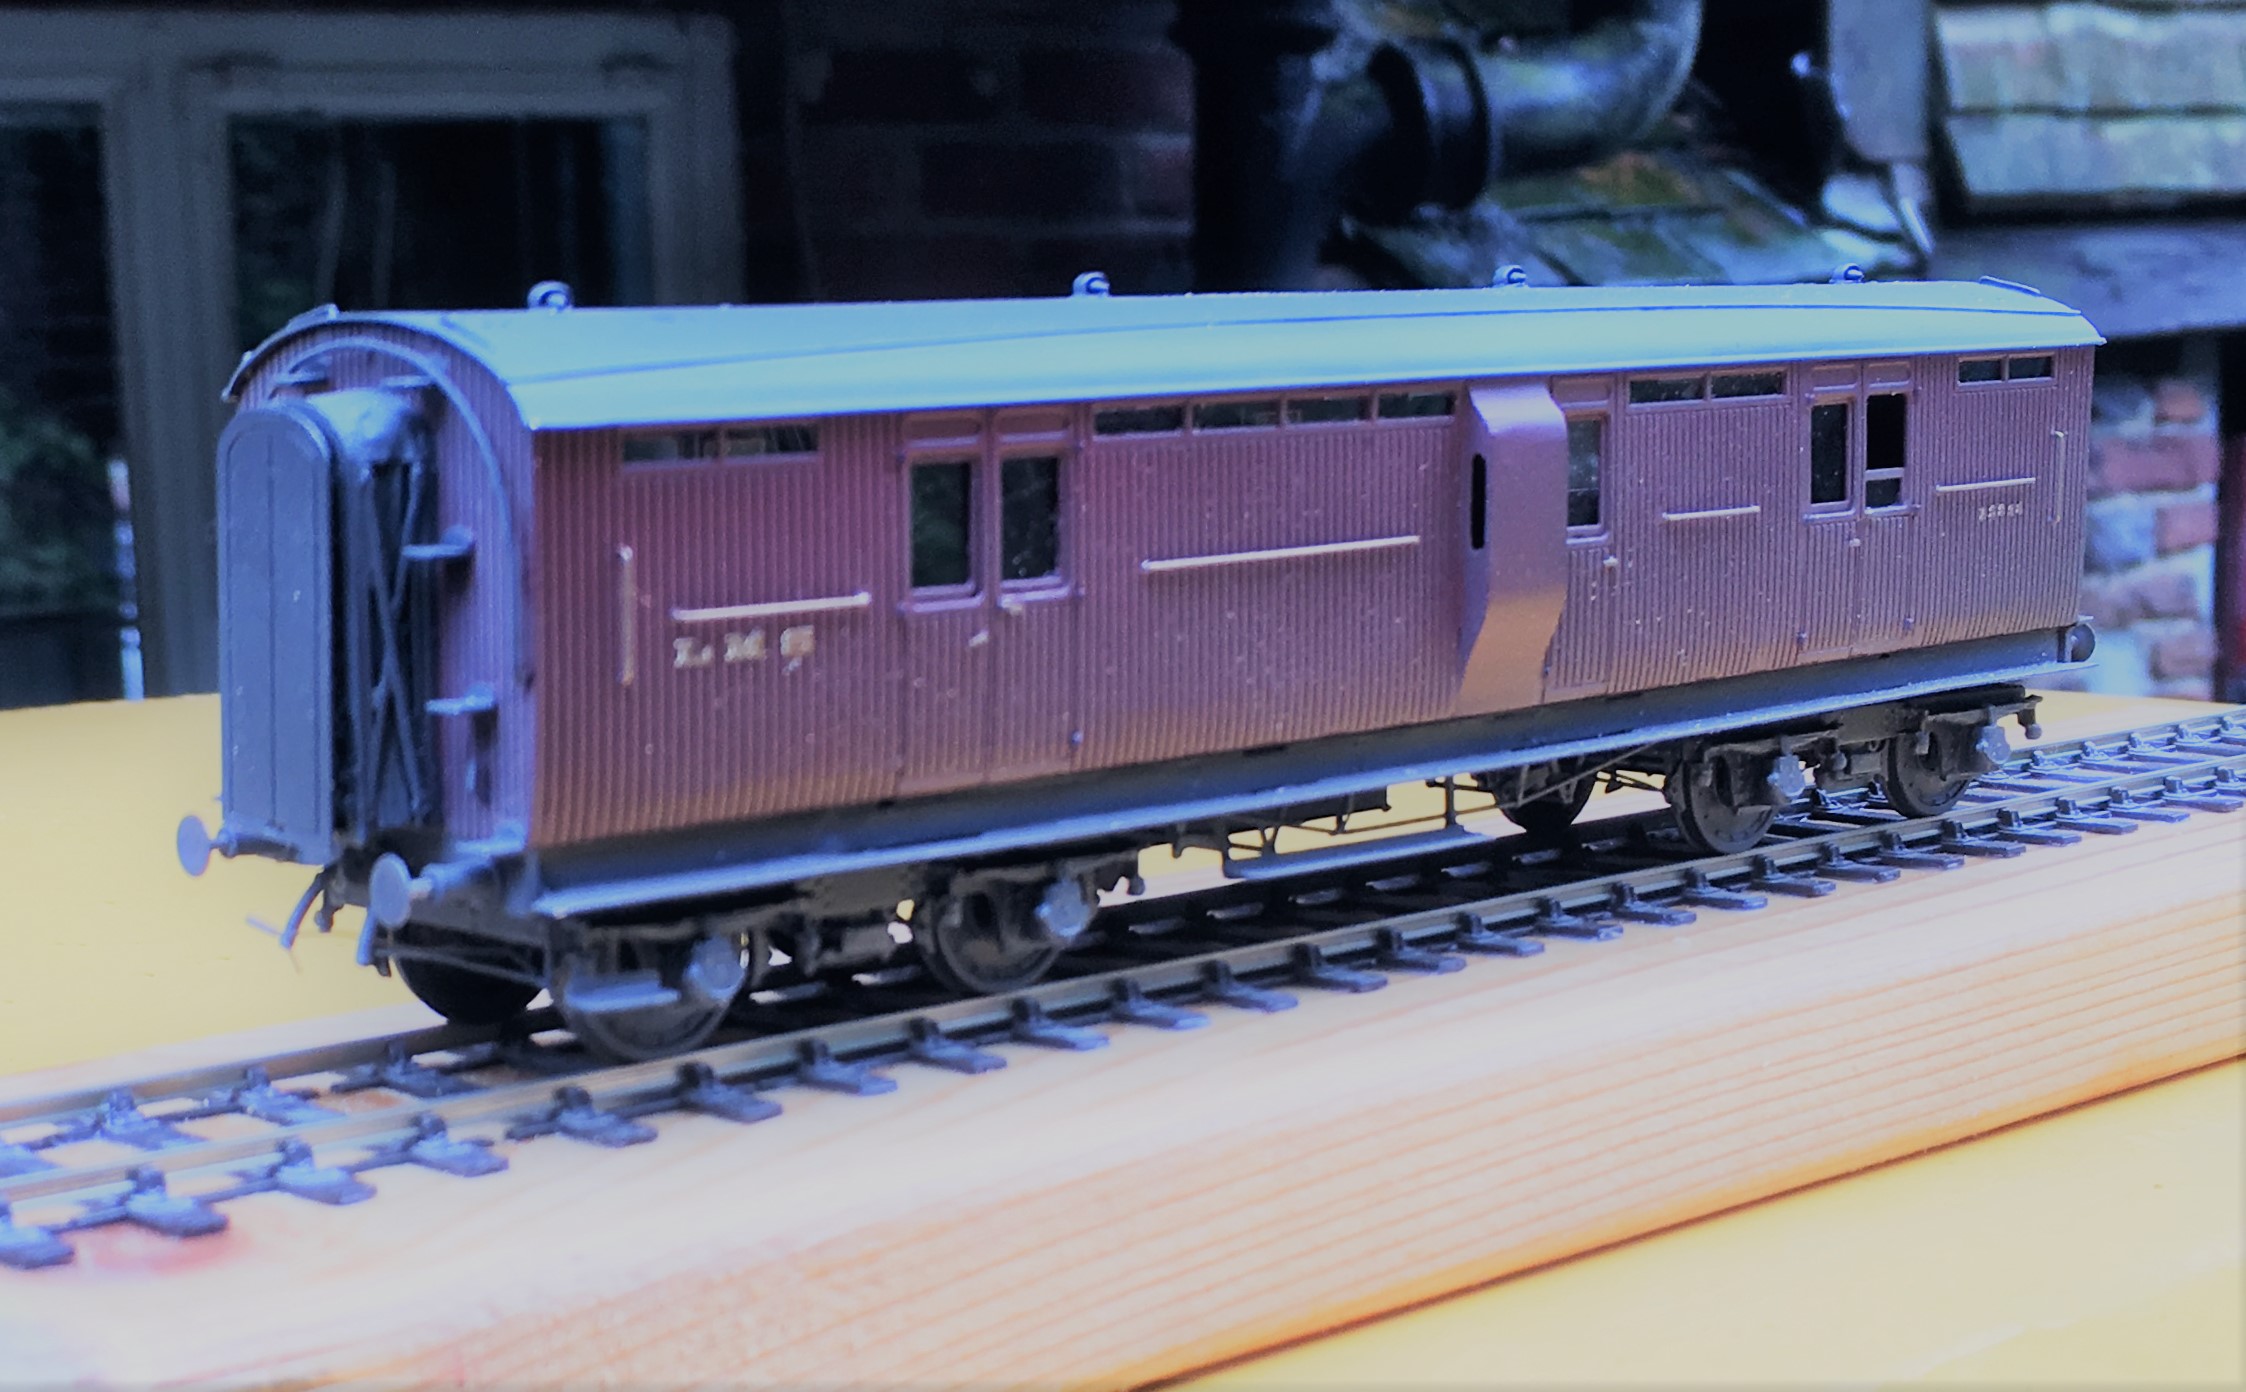
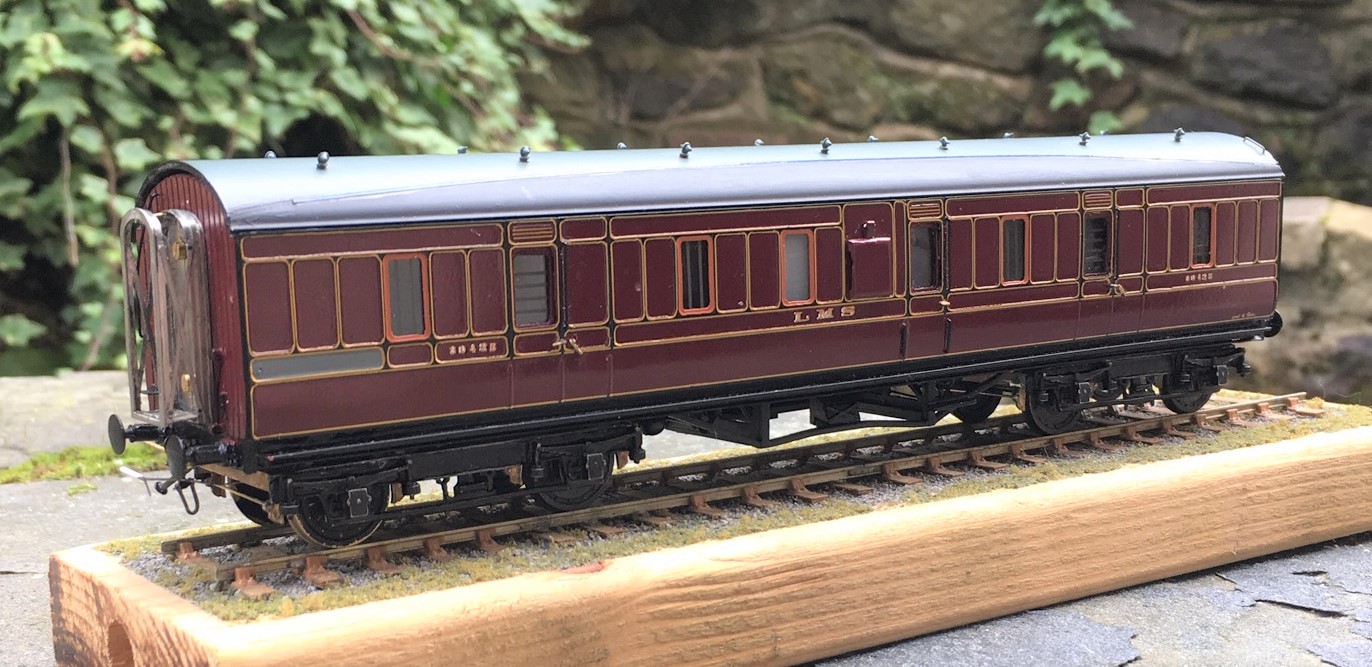
Back from the Paintshop
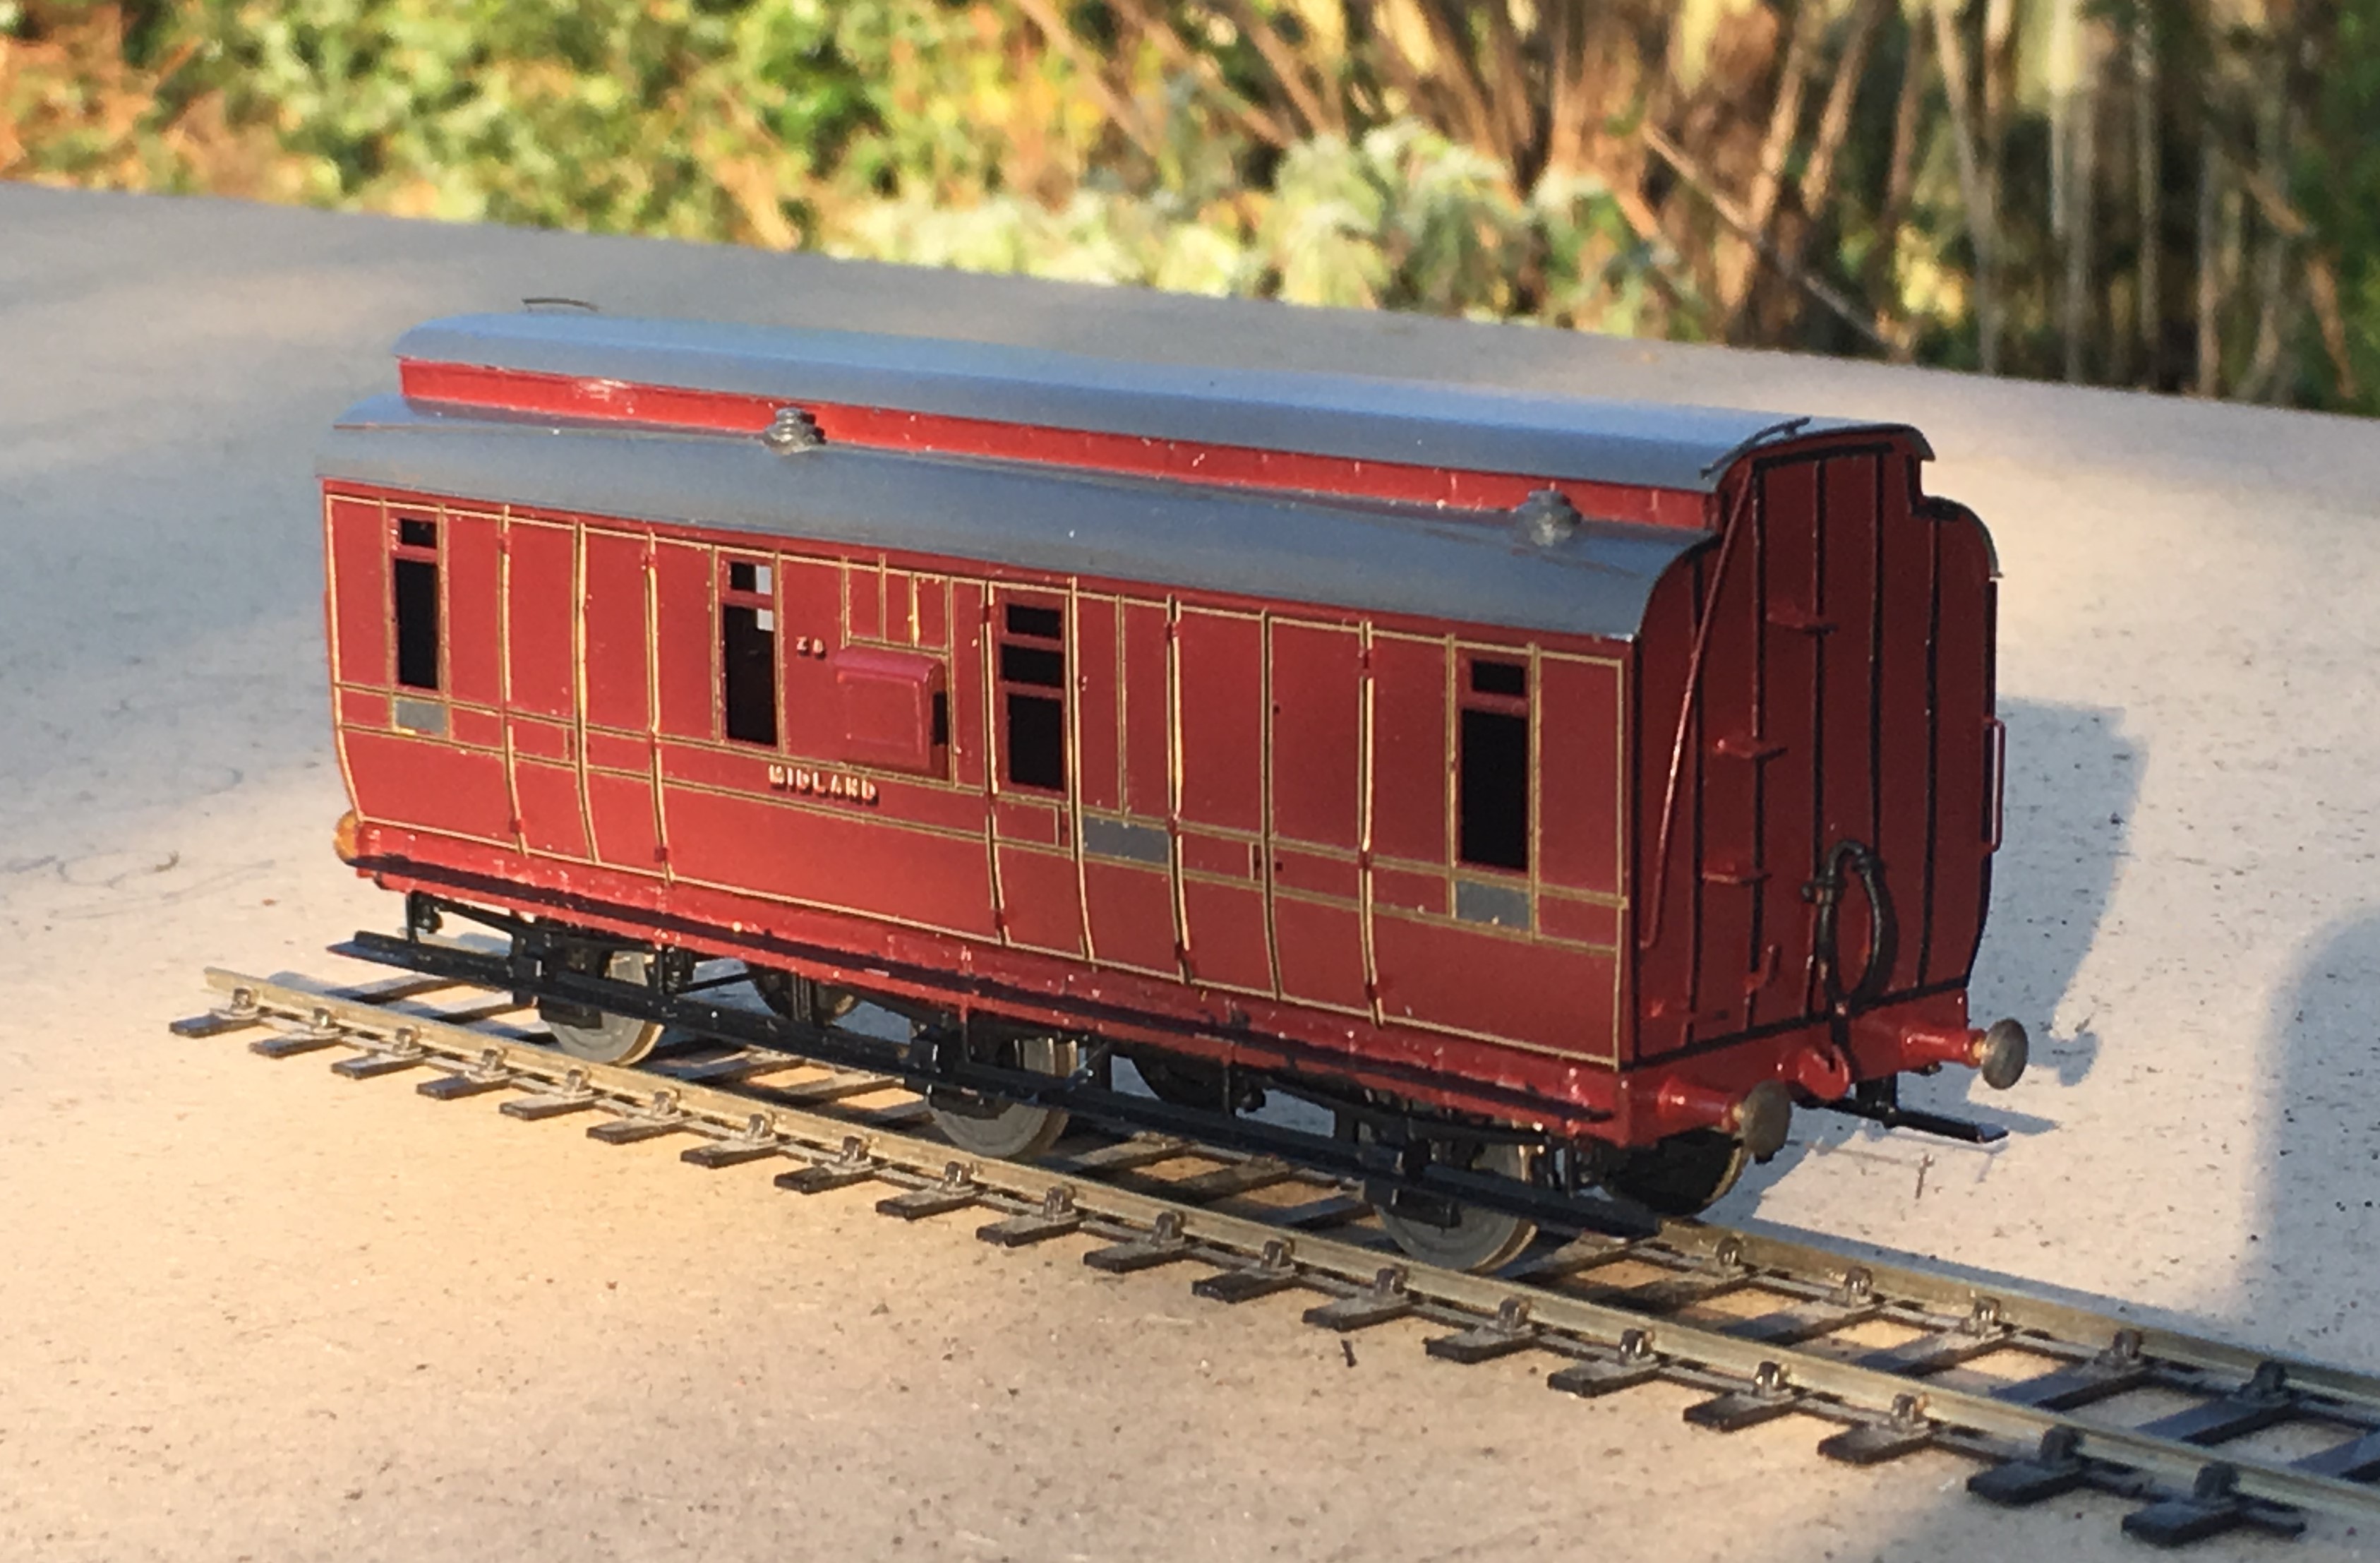
Some while ago, I showed a completed NER auto-trailer and mentioned that it was for the paintshop. Given that it was to go into full NER coaching livery I am pleased it was not my paintshop!
Well, it is now back and doesn’t it look fine…………..
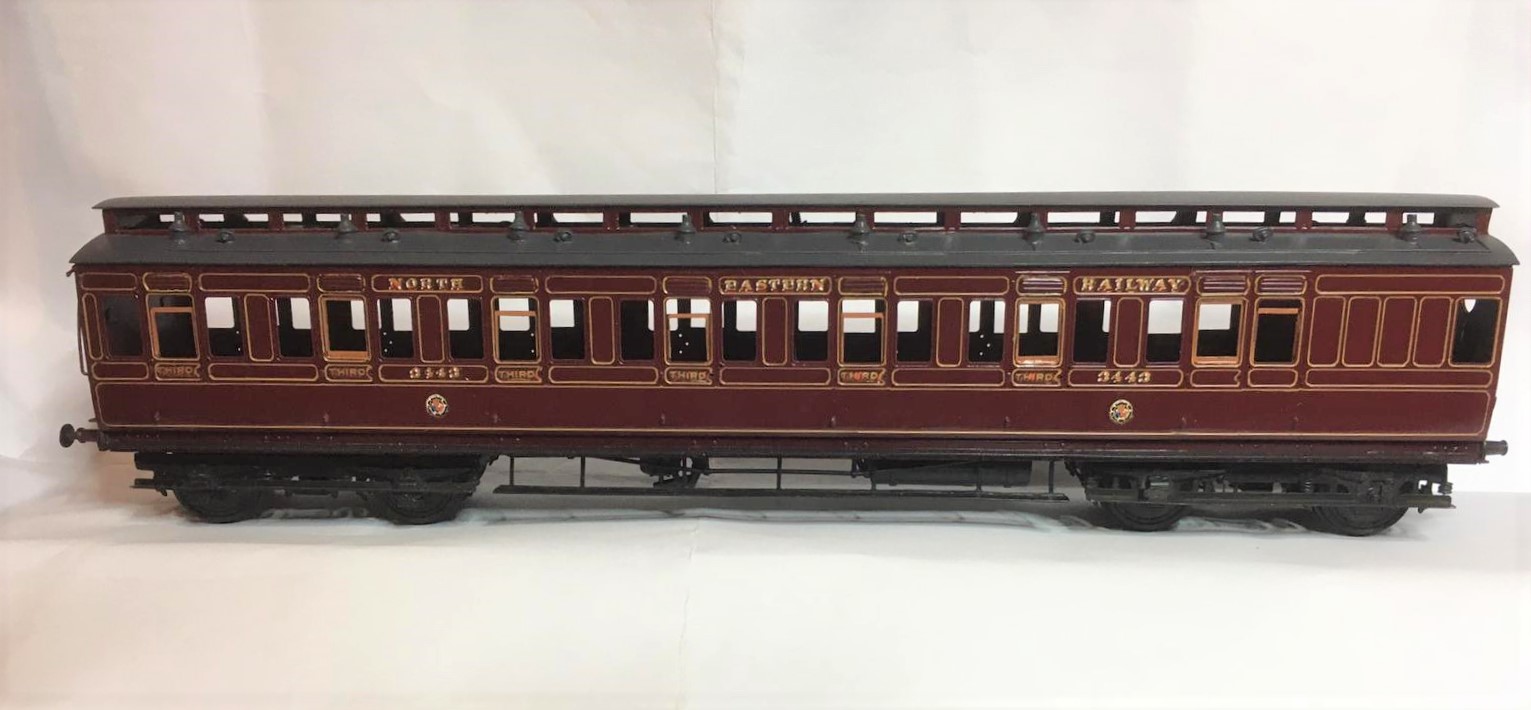
The painting and lining has been done by Warren Haywood and as you can see there is little to fault about it. It now needs finishing with grab handles, buffer heads and glazing.
And that reminds me that I have another one in the box and they did tend to operate as pairs……….

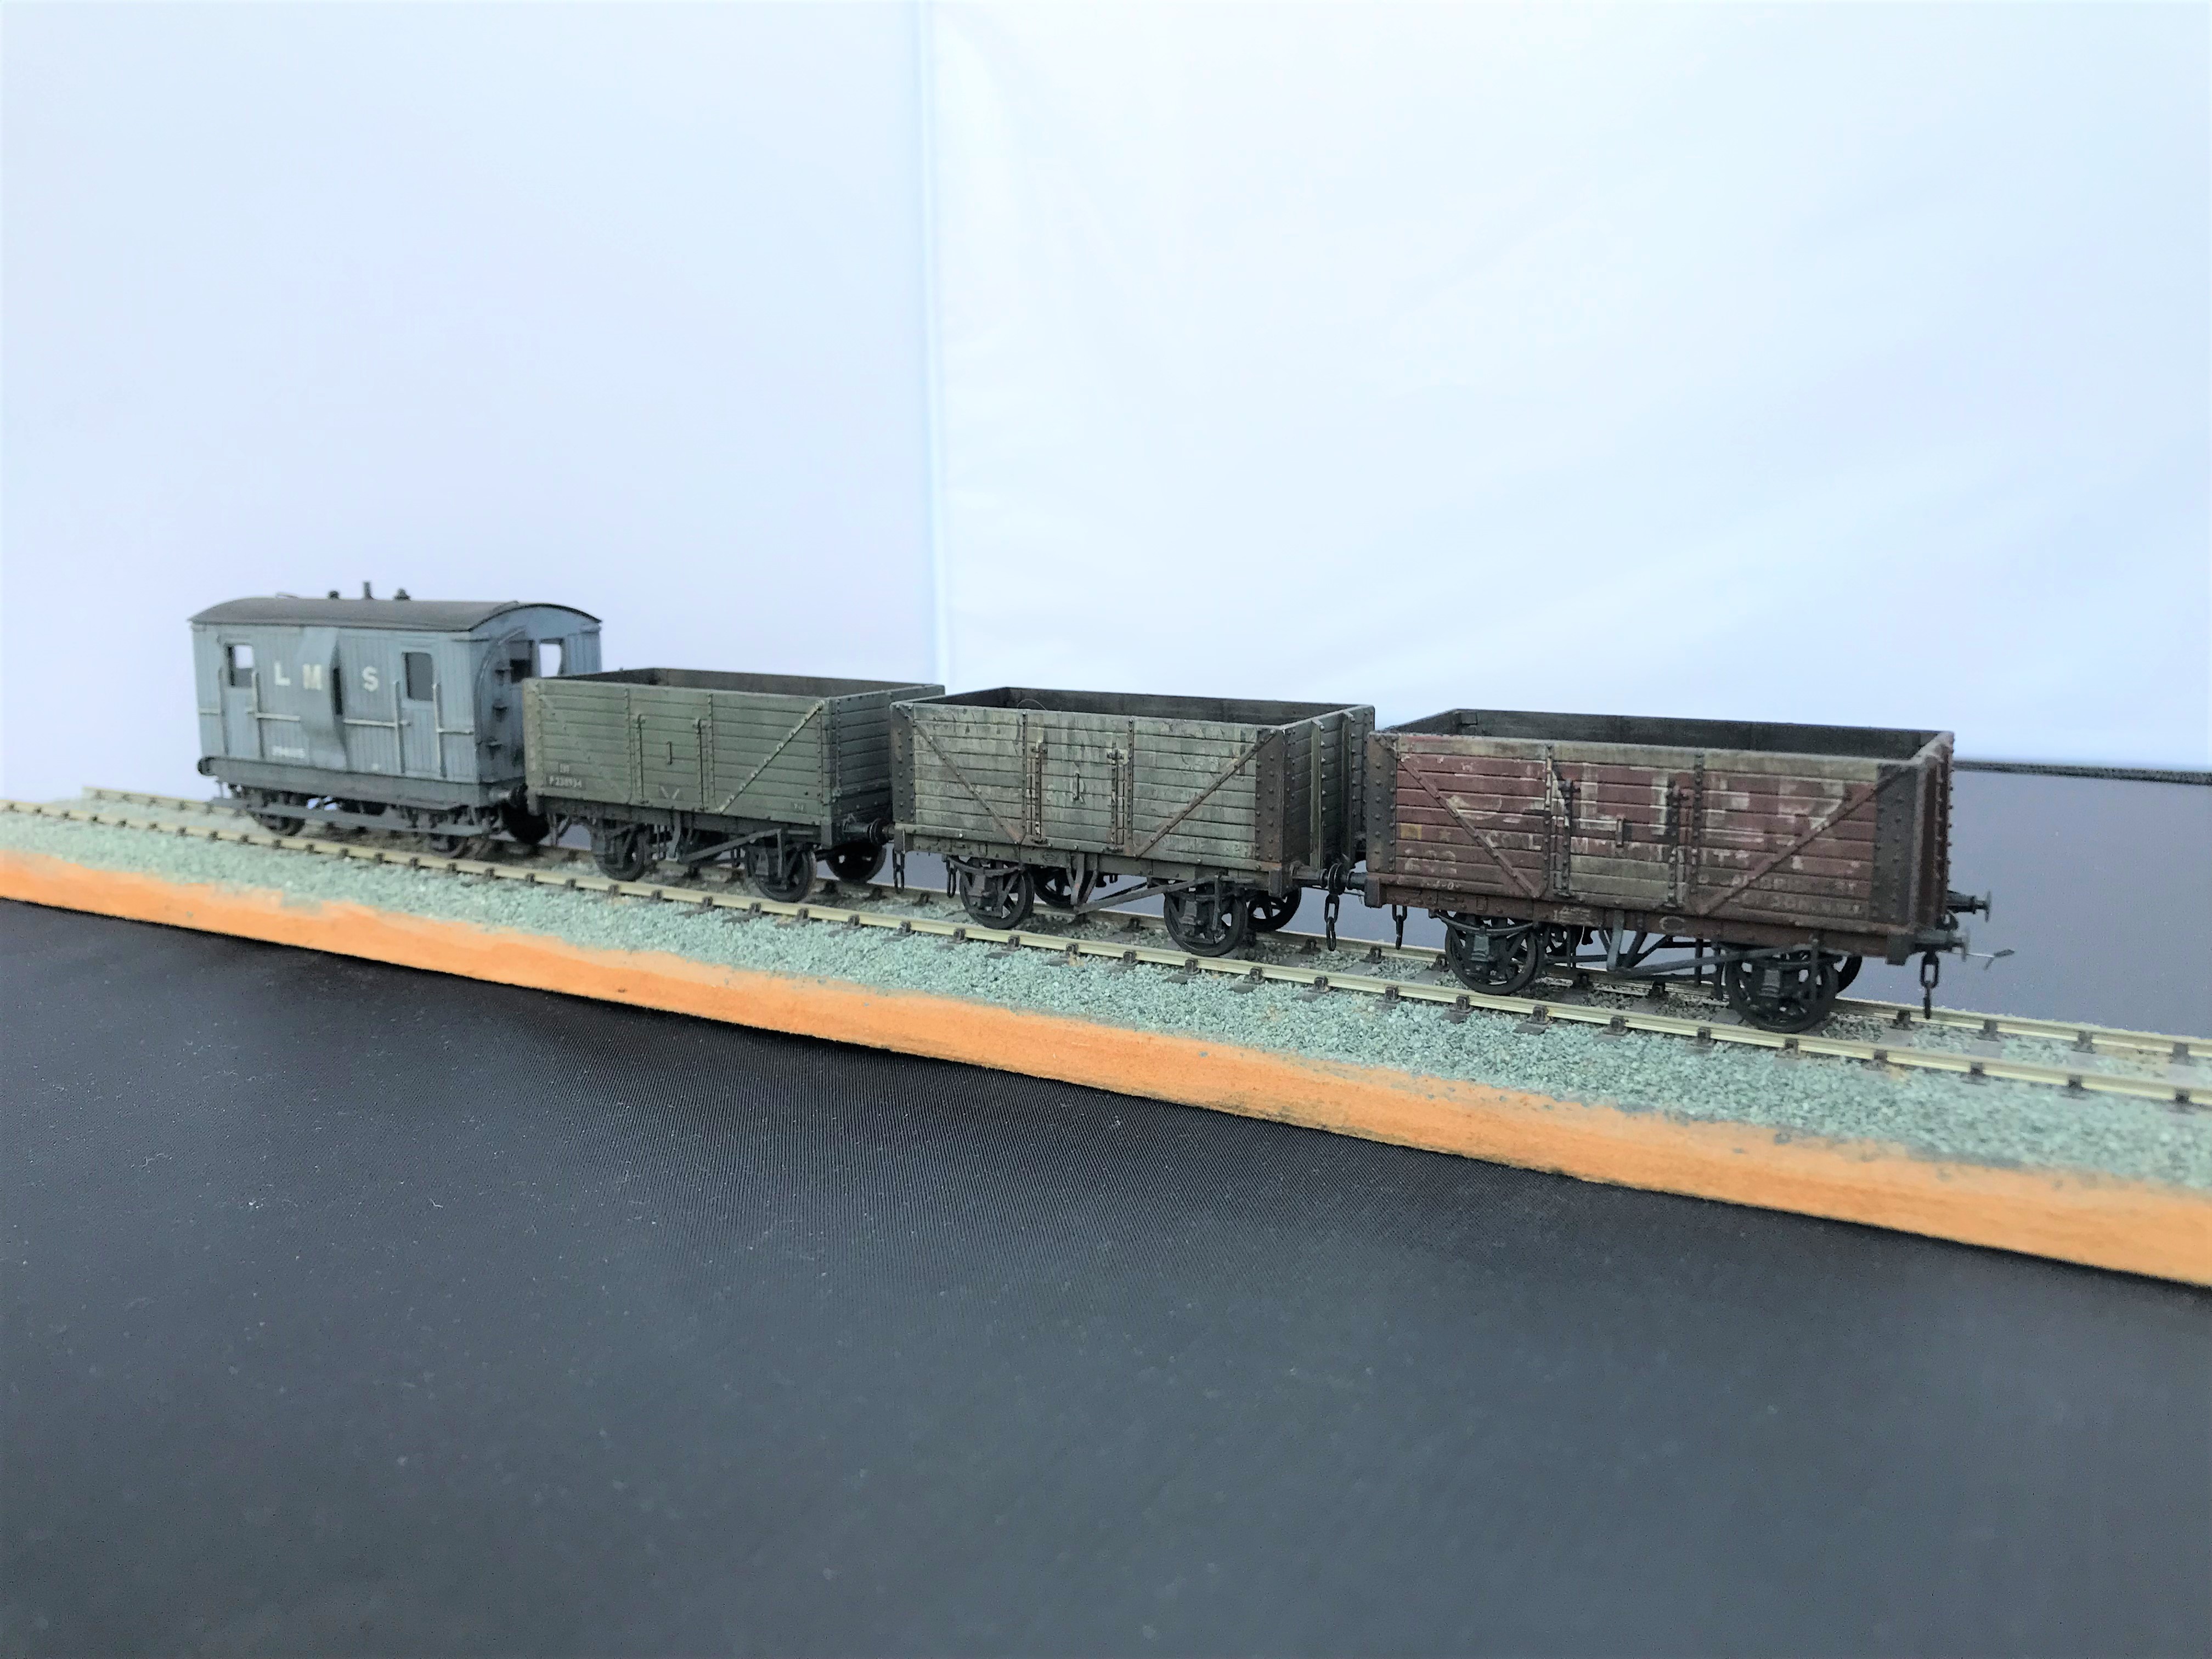
A Fold of Cattle Wagons
Your pub quiz fact for the day is that the collective name for Highland cattle is not a herd, as it would be for most cattle. Instead, and only for Highland cattle, the collective name for a group of cattle is a fold. If that does come up in a pub quiz, you owe me a pint!
Cattle were an important part of the highland economy and hence were a good source of income of the Highland Railway. In my slightly distorted version of real history, there were 4 million head of cattle to transport per annum in the Glenmutchkin area (which is remarkable given the cattle population of the entire UK at the time was only a little bit higher!). Thus, a fold of cattle wagons was obviously a pre-requisite for Glenmutchkin and this is what I have been working on of late.
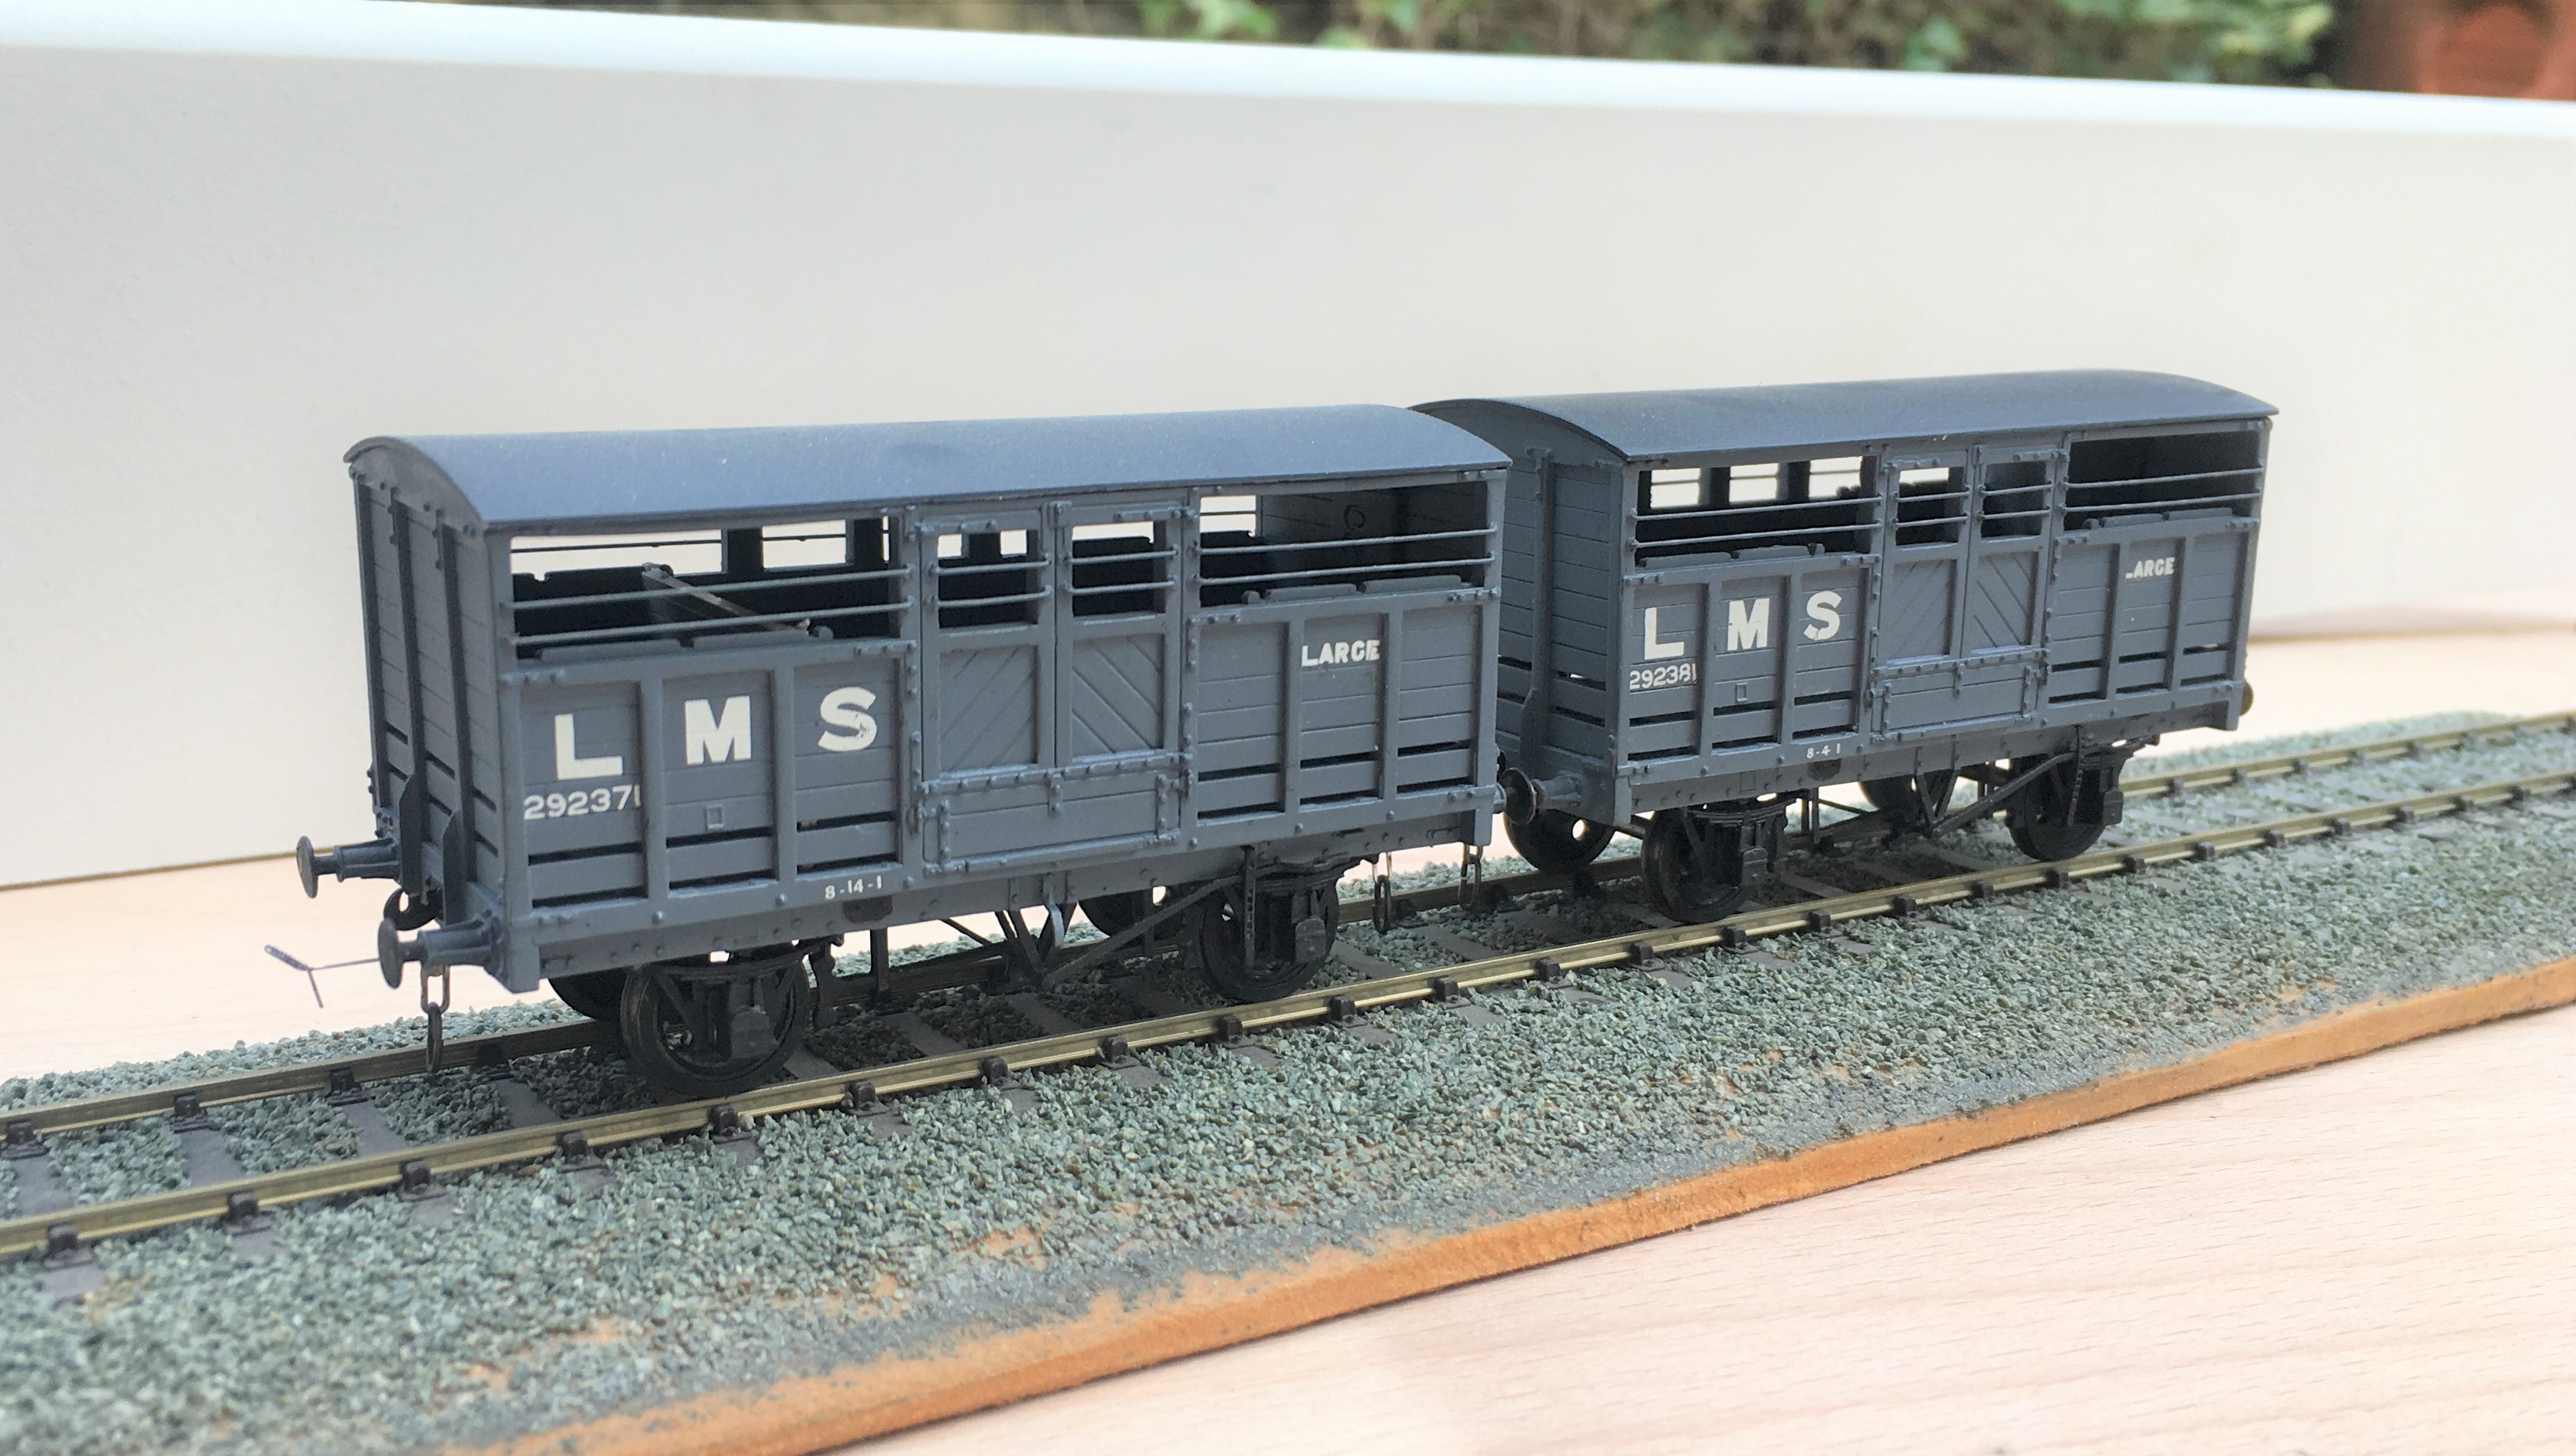
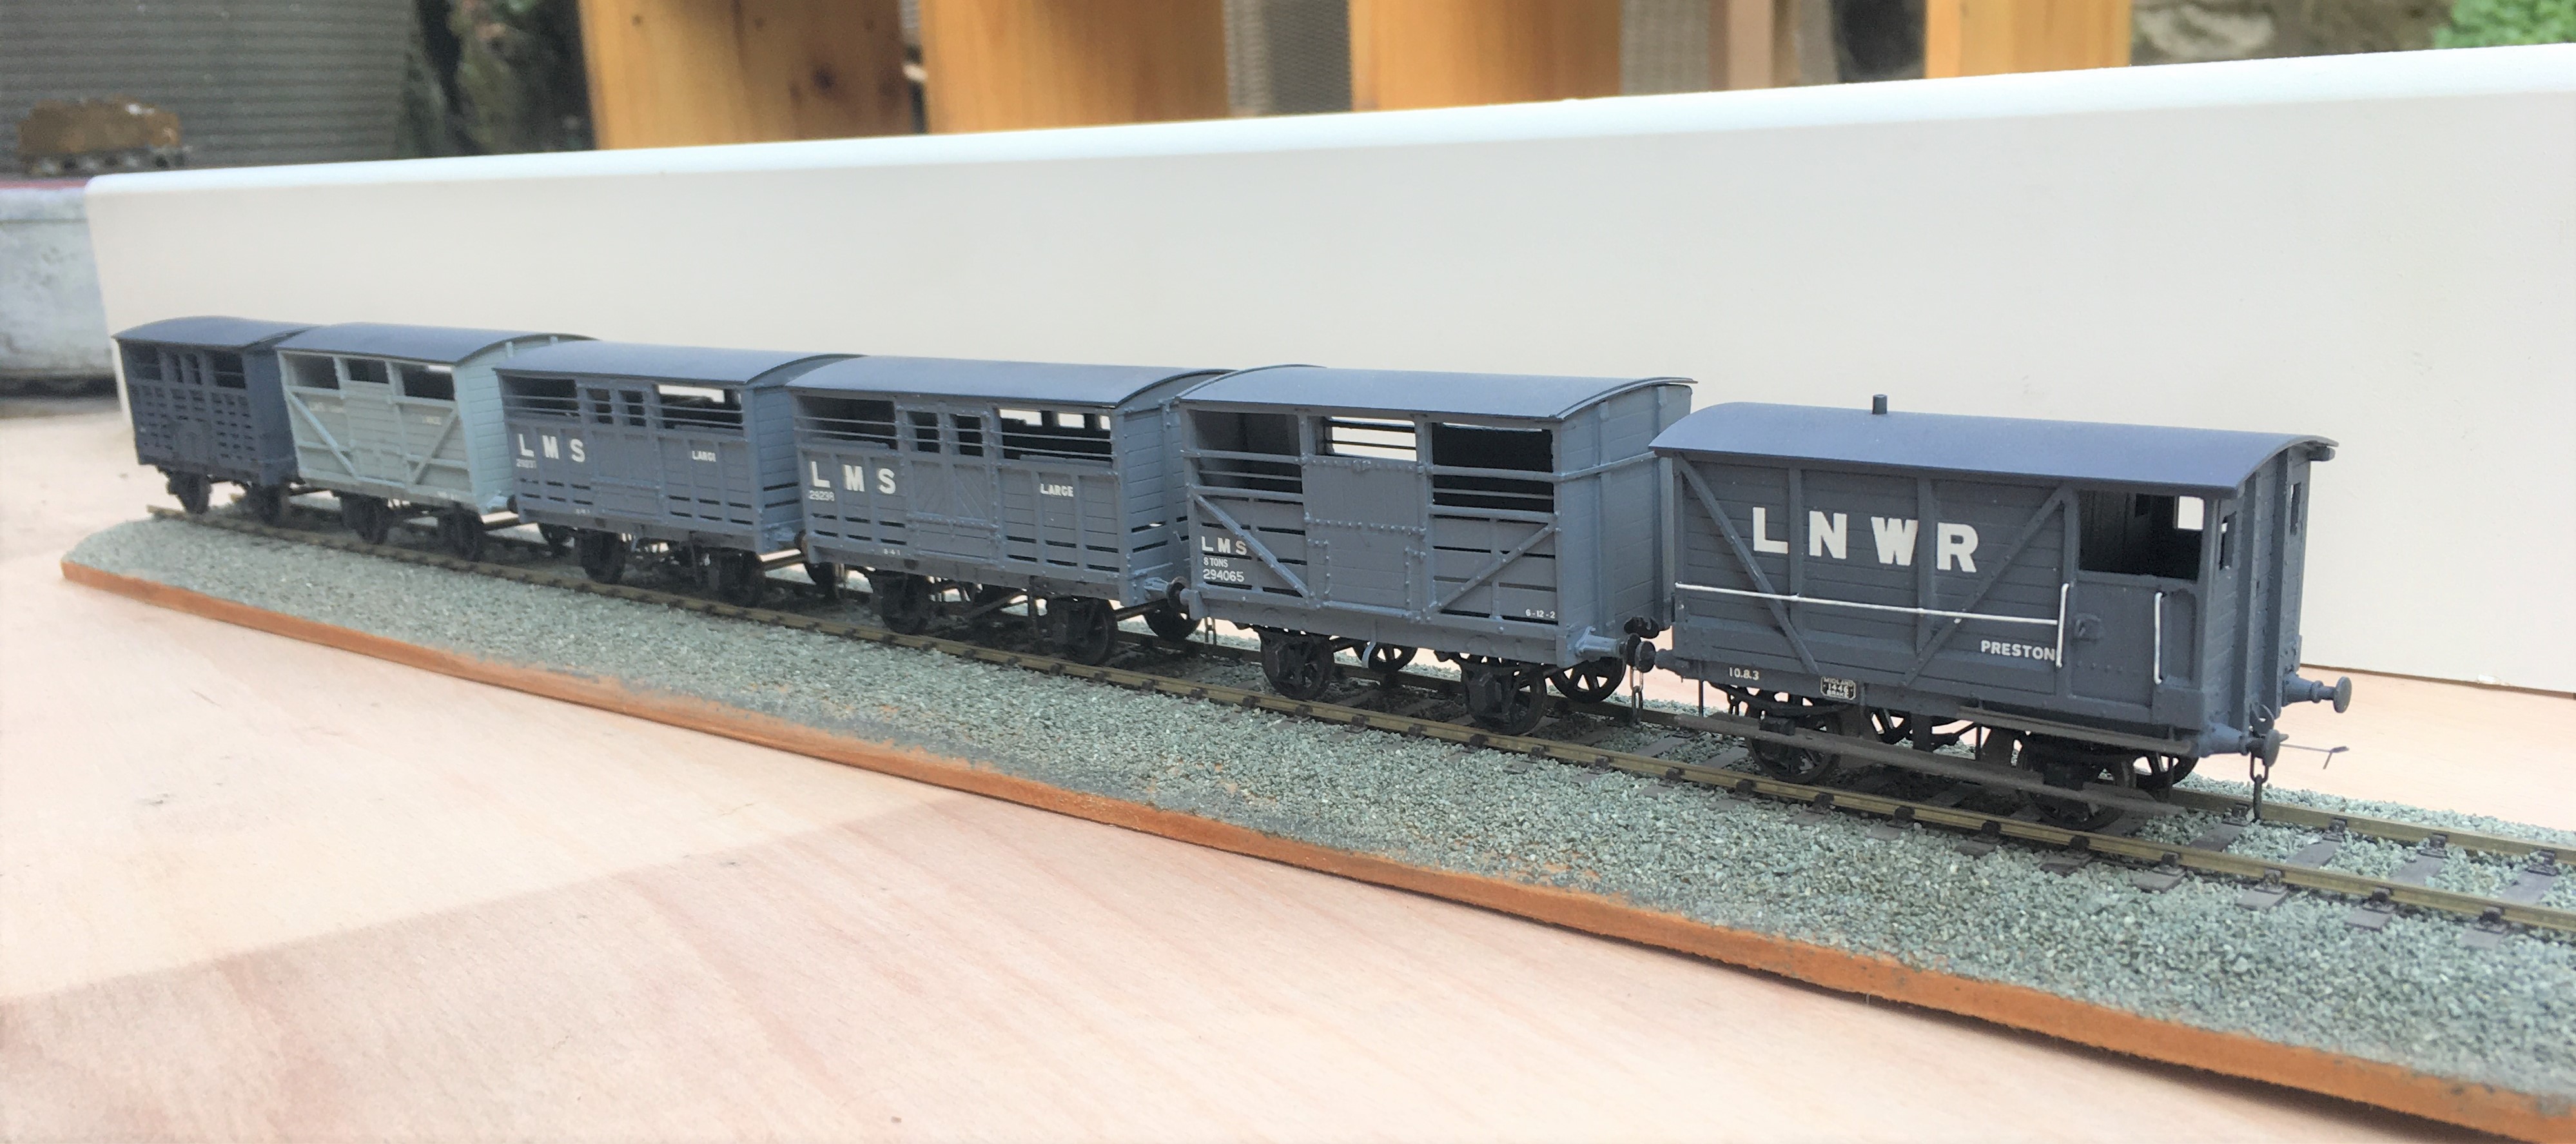
First up are a pair of LMS standard cattle wagons; to diagram 1661. These date from 1925; so they would have been fairly new at the time that my layout is set in. These were built from Parkside plastic kits with only moderate modifications around the break gear and, of course, some sprung w-irons. Being a relatively recent kit, it is generally very good and whilst it is possible to convert it to some alternative variants, these came later than my modelling period so I was not tempted. I am concerned that I have painted them rather to dark though, so I will be weathering them on the light side.
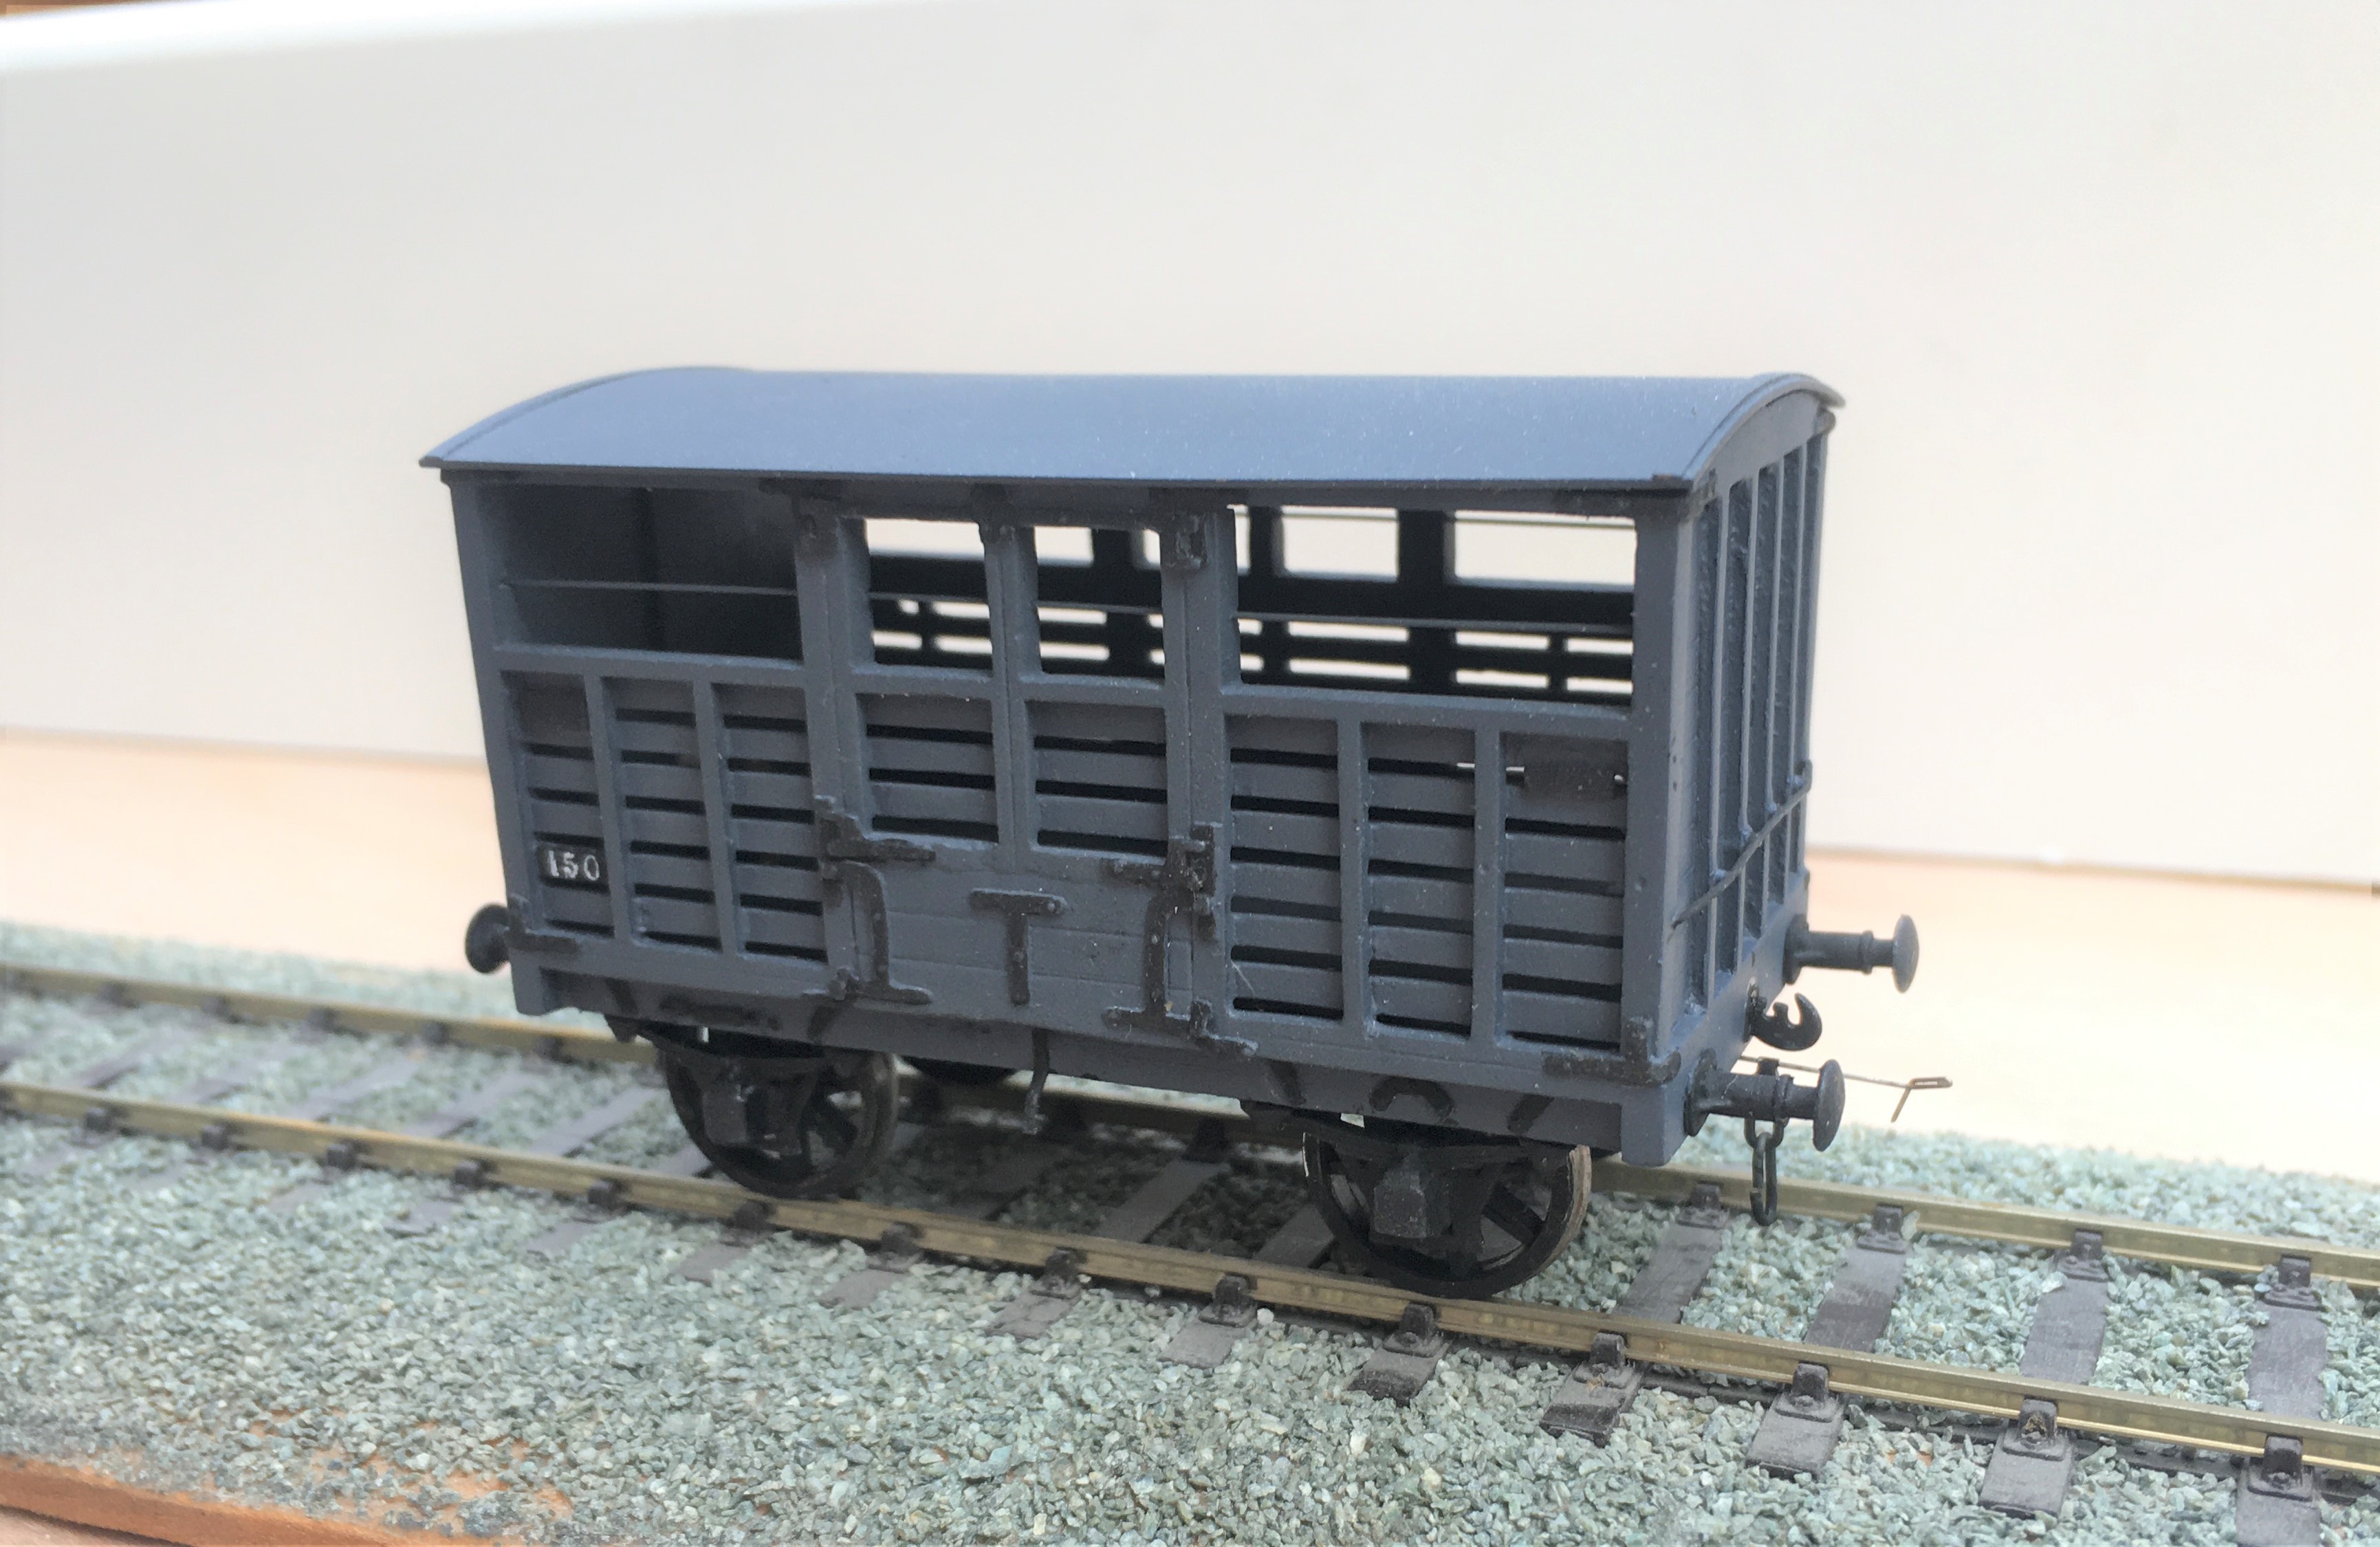
Next up is a Great North of Scotland Cattle wagon, from a Model Wagon Company white metal kit. This is a much older kit and didn’t it felt it! For reasons I am not certain of, the two sides were not the same length so in practise the body is a bit trapezoidal – but can you tell? The casting was also covered in flash which was a particular problem in the gaps between the wooden slats – this meant I spent a few hours I would sooner not have spent scraping it out to keep these clear. The GNoS vehicle was a much more basic vehicle and, strangely, did not get any large ownership lettering so they remained rather anonymous, Instead, they had simple cast plates, which I made from a locomotive number plate and dry brushed white on the letters. I have glossed over the fact it does not have the right number or even a consistent number from one side to the other – sod the “getting it all right” mantra!

I have also built a further Highland cattle wagon, built from a Model Wagon Company kit. This is the Drummond era version and I have already built a number of these so this was relatively routine – its just as well as there are still a couple in their packet waiting their turn!

The final cattle van is a David Geen kit for the L&Y large cattle wagon. Whilst still a whitemetal kit, it is of somewhat better quality than both the Model Wagon Co kits so was rather easier to make. Even then, it did need filling at the corner joints and I felt the need to swap the brake levers for replacements – why to even the better manufacturers use the same material for all of their kits?
To finish of this little rake, I obviously need another brake van. This is not so obvious because this is brake van no 11 in the collection and I know I have at least one more spirited away! Whilst this was a kit build, it was first a kit unassemble as this was a vehicle I had first built in my teens. Generally fairly well but a couple of bits had got damaged over the years so I felt it needed rejuvenating.
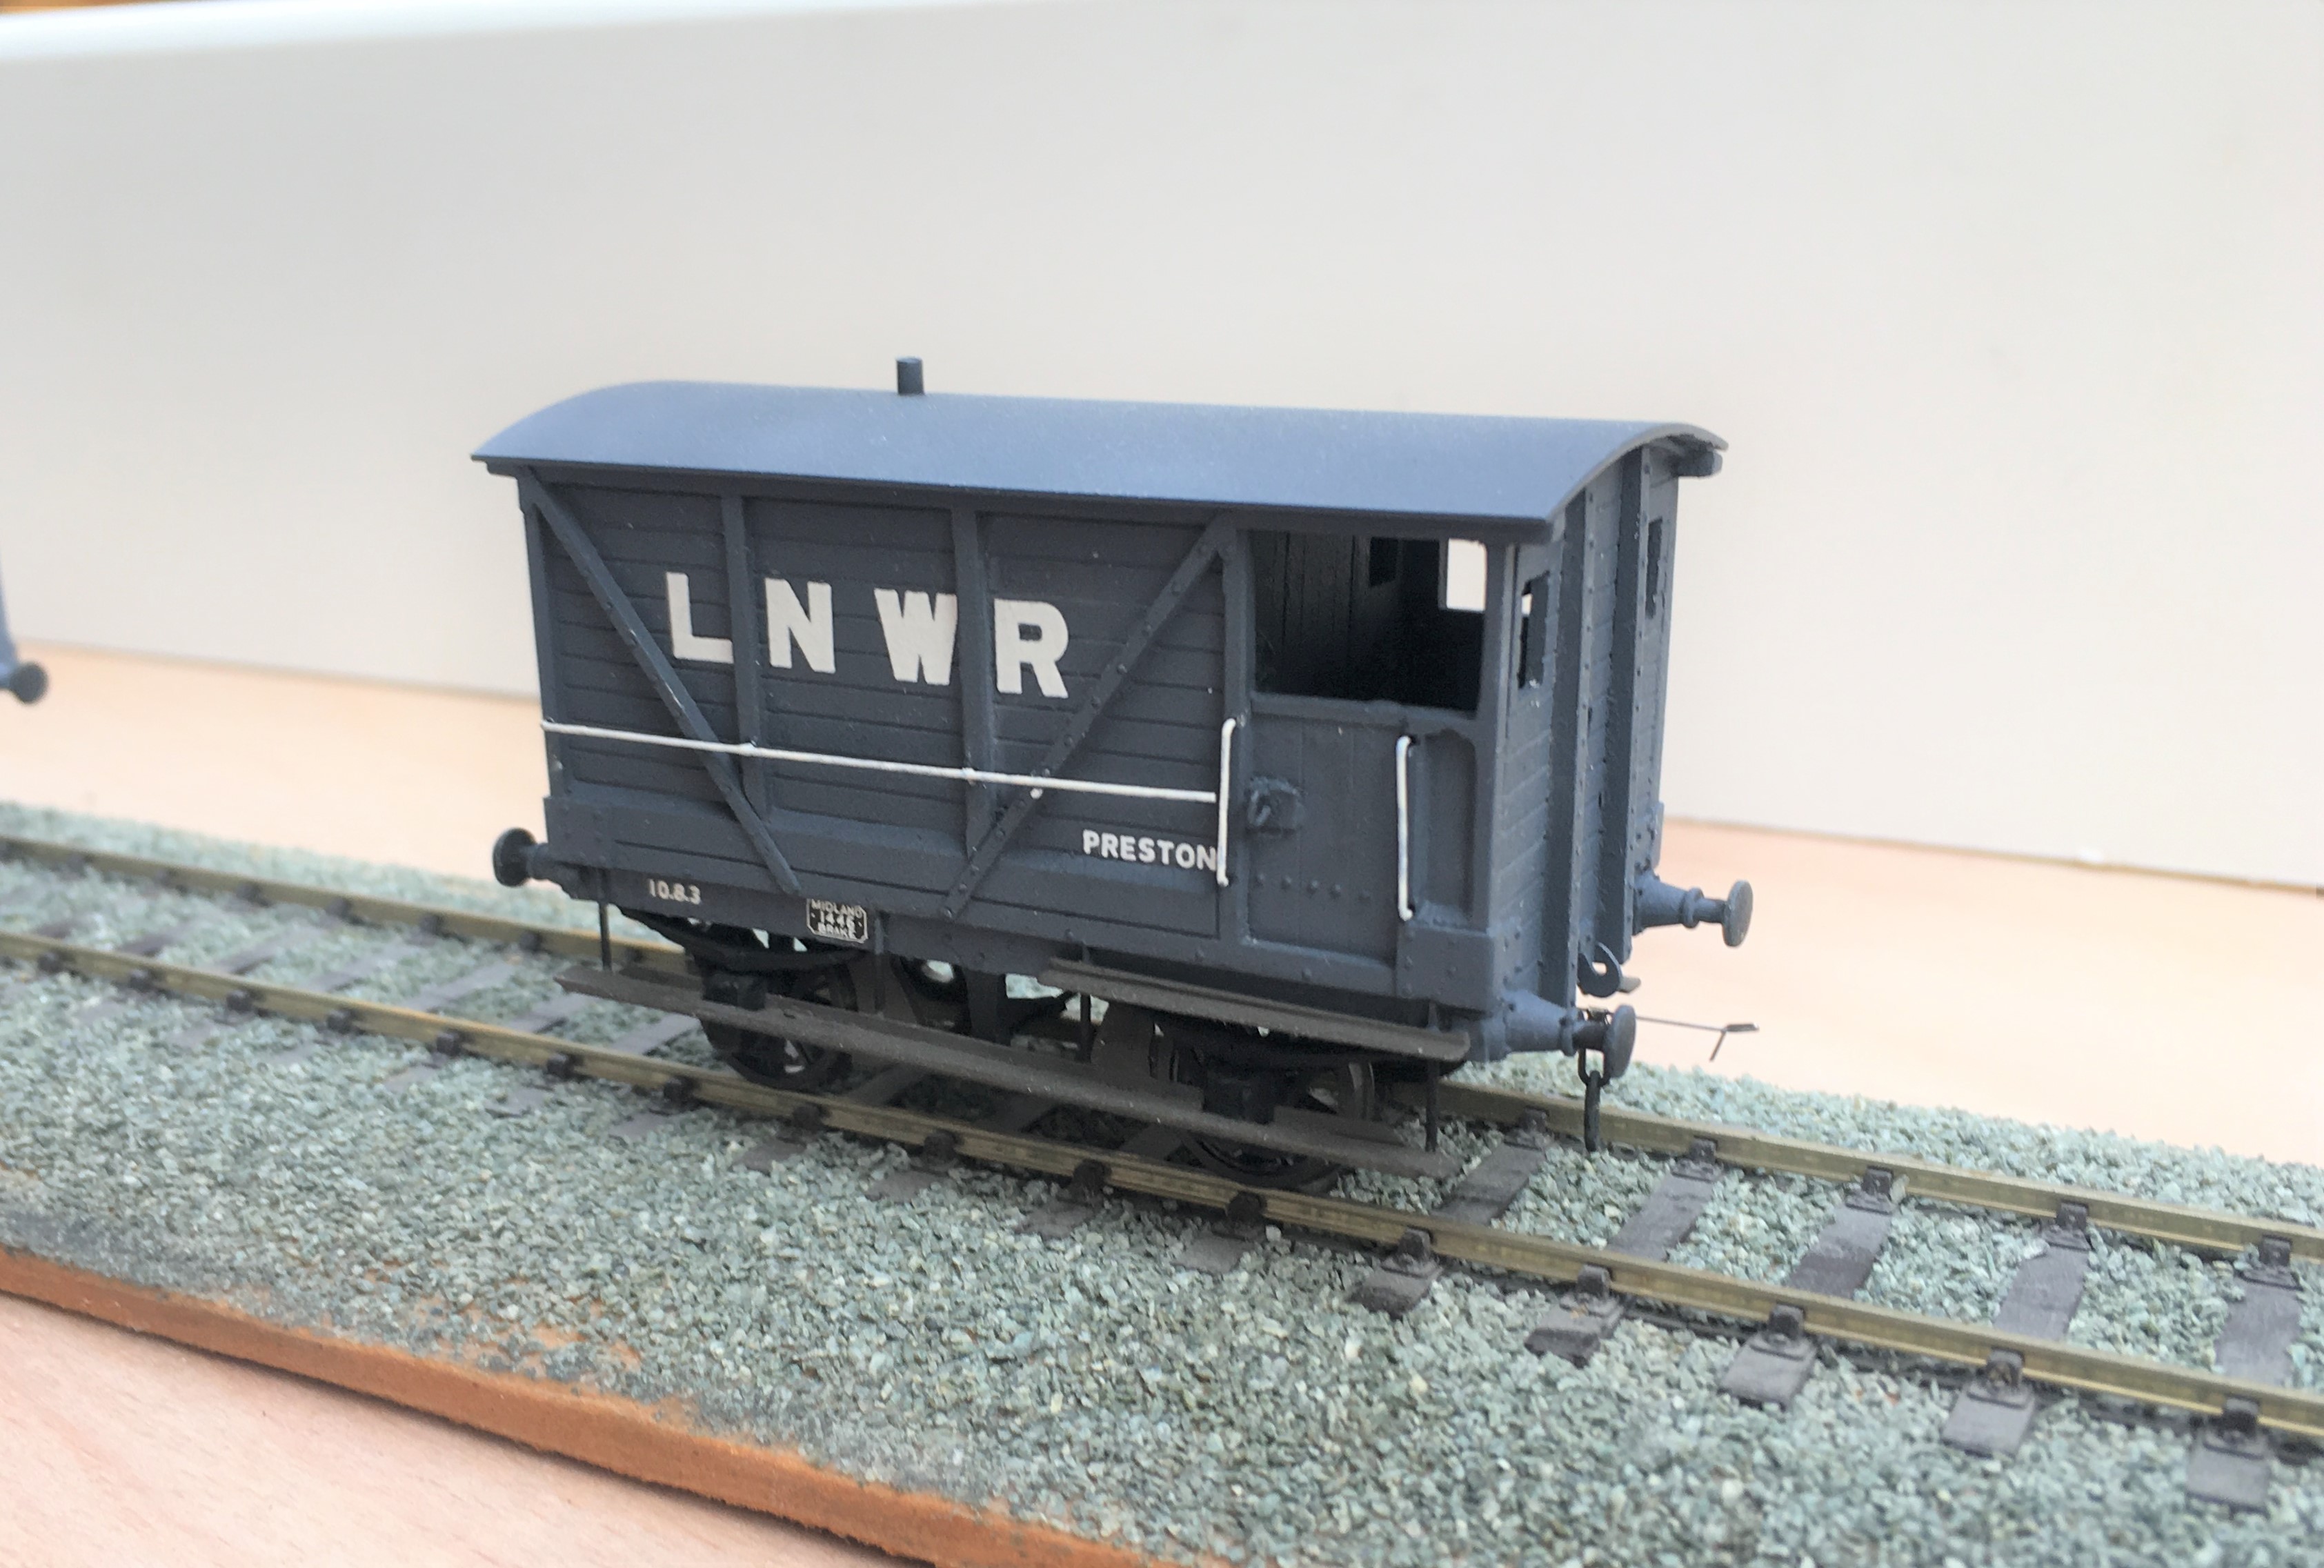
And here they all are on parade.
Now all I need is rather a lot of heilen coos to fill them up with. I have been working on this but it seems that resin casting is a tad more difficult than I thought……………..
Oh and yes, they are all way to clean; another weathering sess’ is required guys………..

Lining Things Up….
As usual, I set off over the festive break with plans to do all sorts of things and failed to do any of them fully. One aspect that I did get moved forward though was the painting and lining of a couple of my six wheeled coaches.
Back in my youth, lining pens held no fear and I could genuinely dash off a fully lined coach in a few evenings. Thirty years of pushing a computer keyboard has dulled my drawing skills to the point where I am close to terrified to pick up a bow pen and I have not had the nerve to line a coach for a long time. I am confronting this fear in a couple of months by attending a class run by Ian Rathbone on painting and lining at Missenden Railway Modellers. In the meantime, however, I can still line utilising transfers, in this case those provided by Fox Transfers.
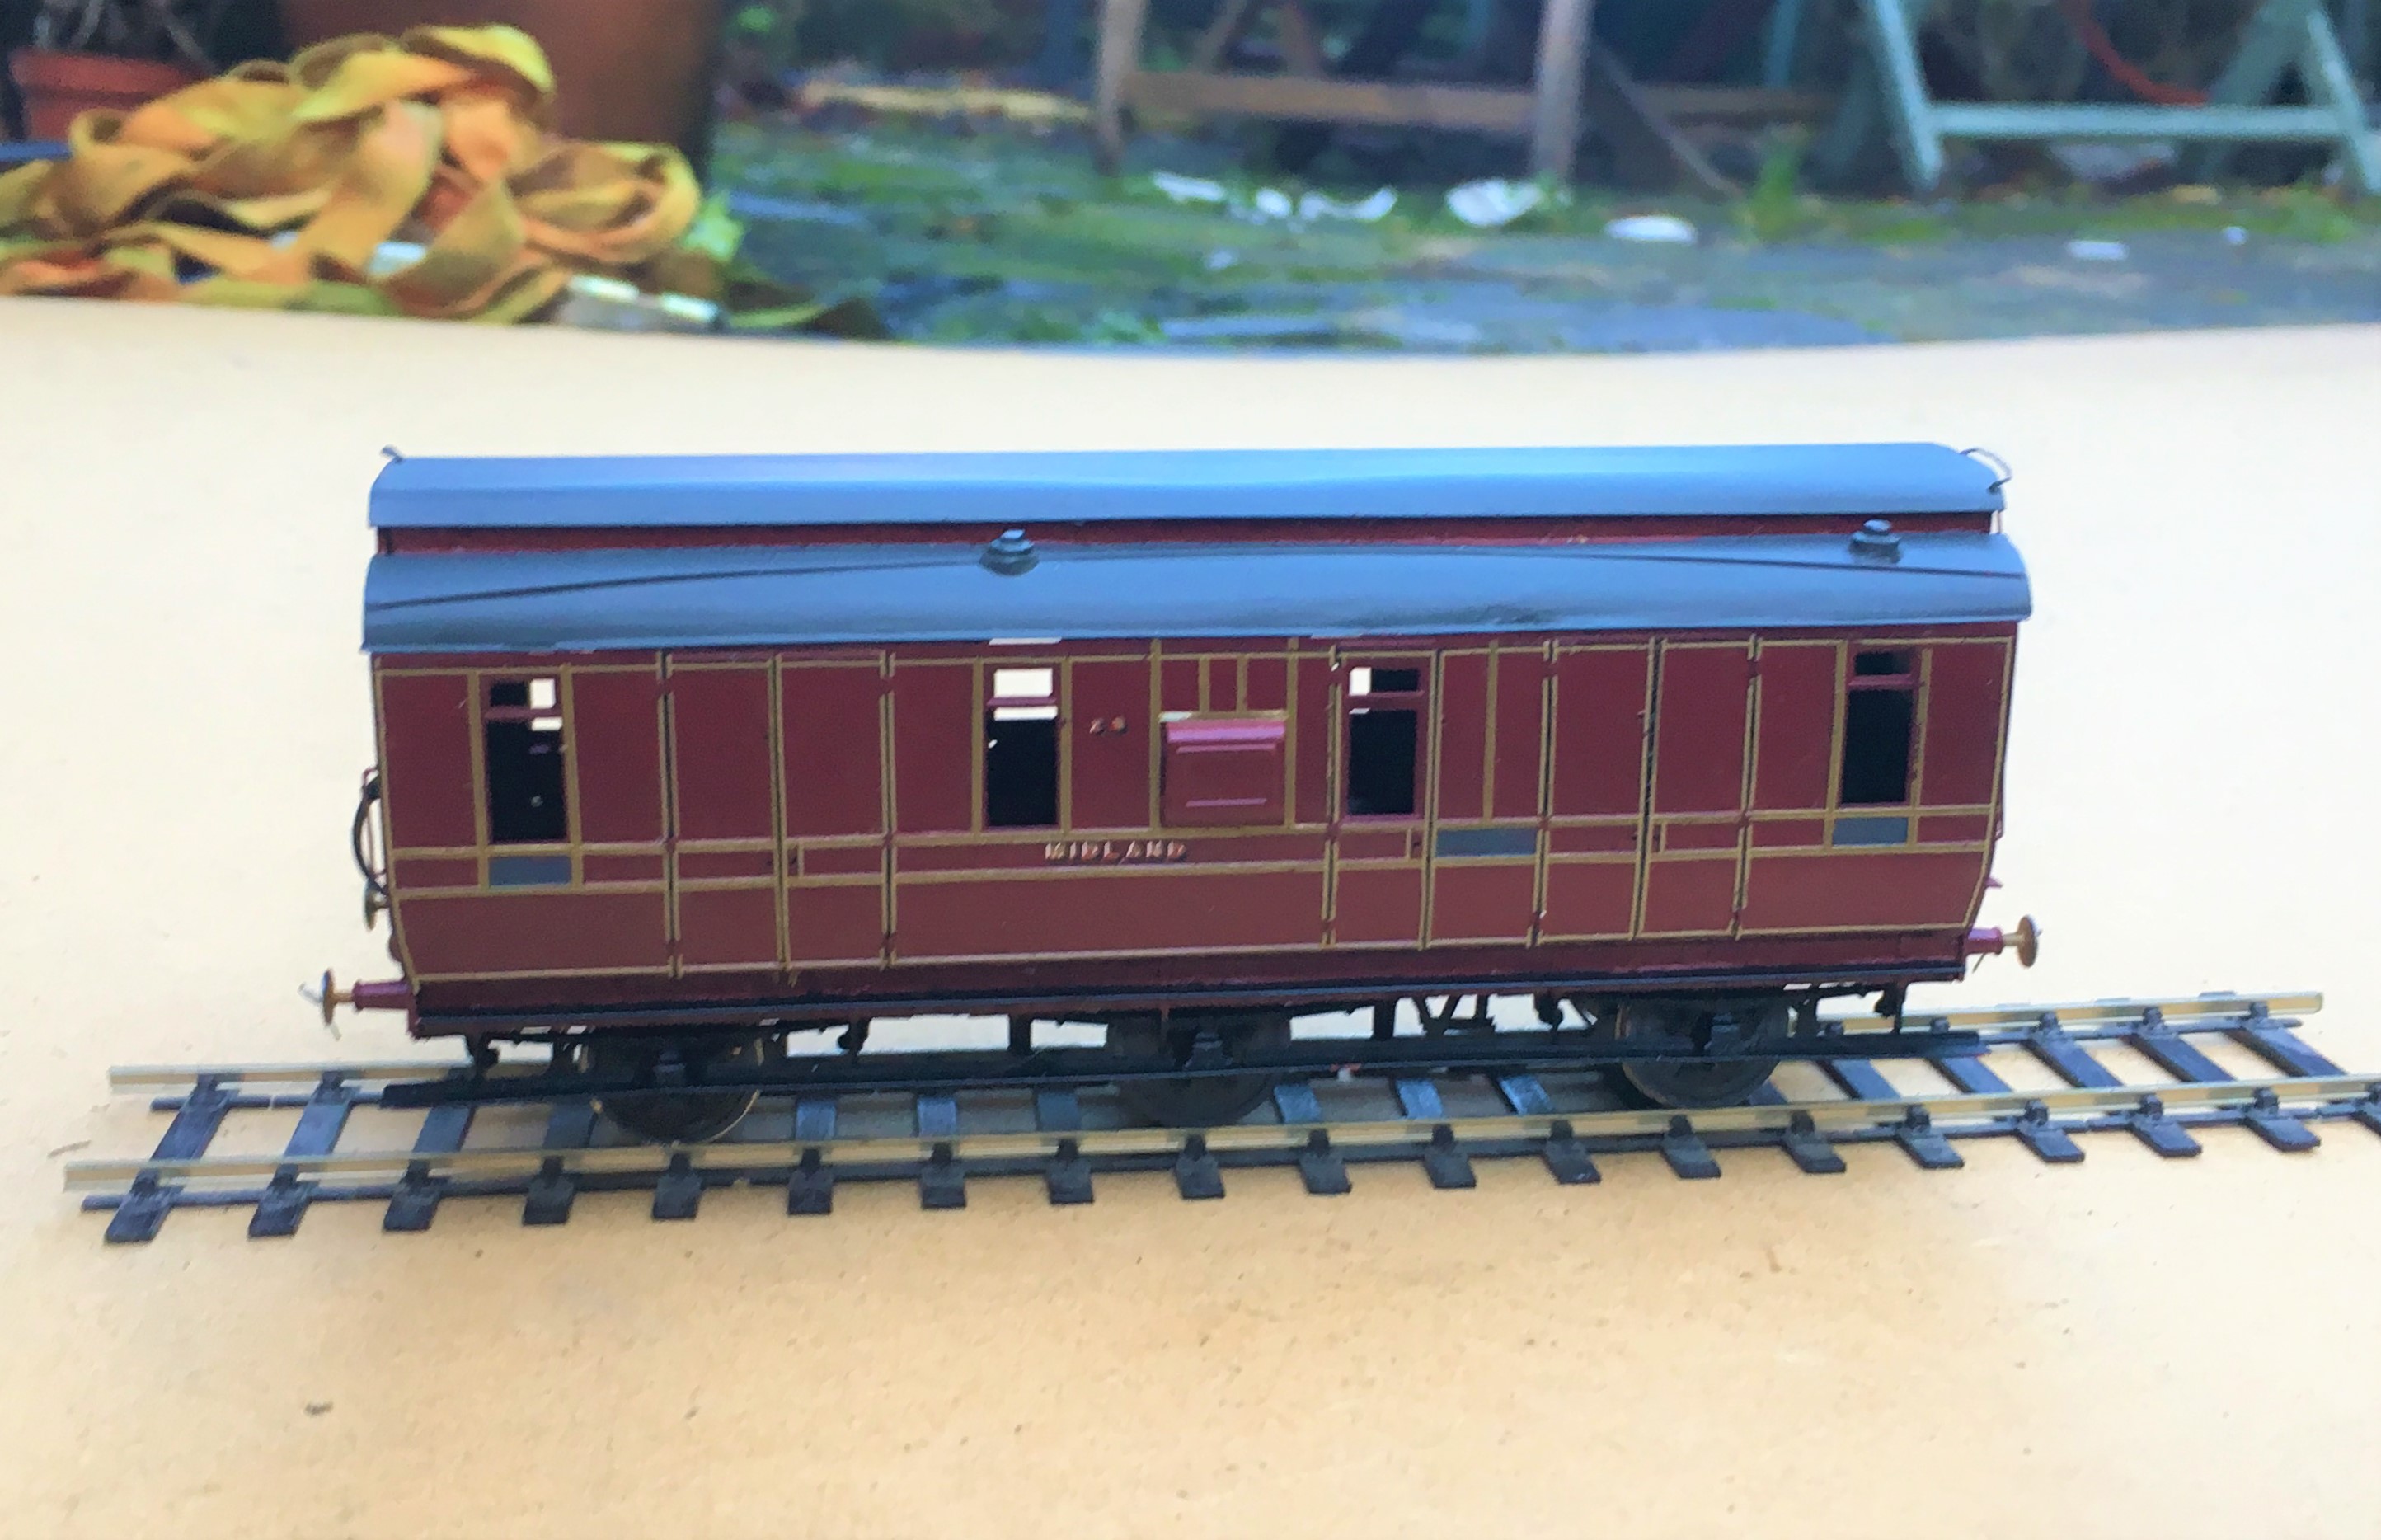
Being preformed in straight lines, these do work best for the square panelled beading of some of the Midland Clayton stock, like my dia 501 full brake. I had taken care in designing this with beading sizes that were correct (and matched the Fox Transfers). They thus work quite well I think.
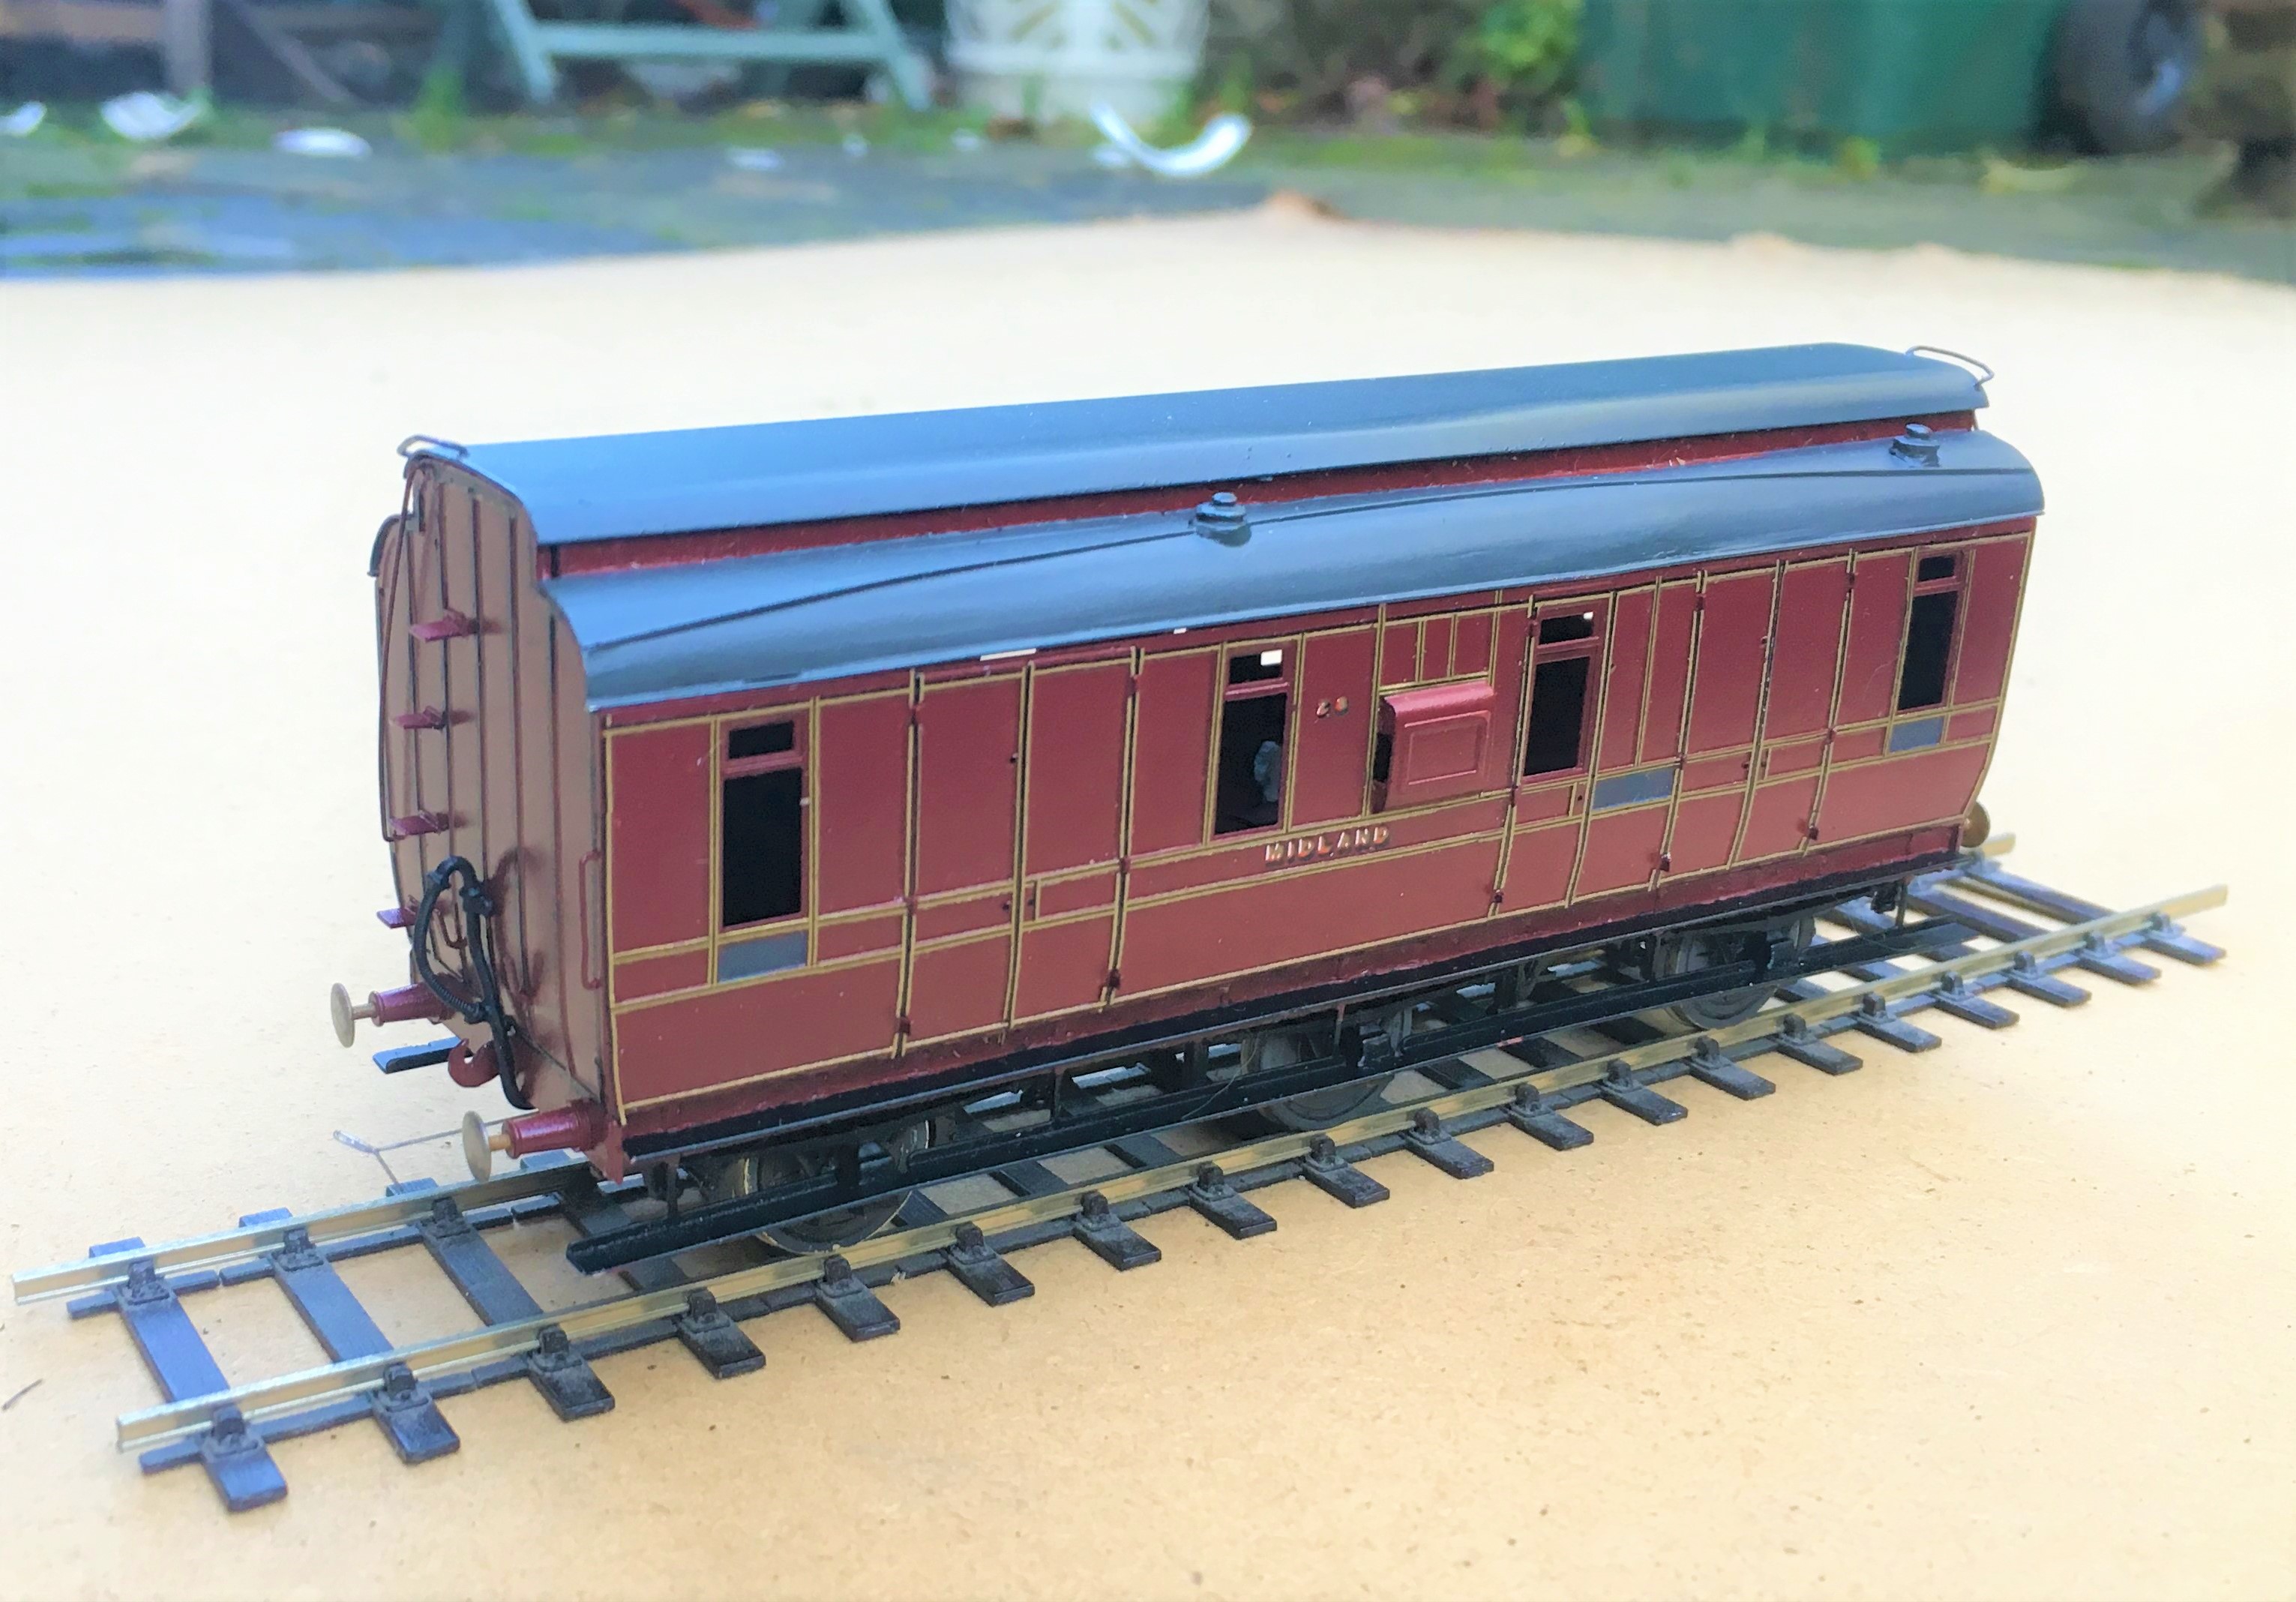
I deliberately left the handrails and door handles off at this stage to make the lining easier but the door hinges still created problems that I will need to touch in with acrylic paints; burnt ochre looks about right. I also still need to block in the black to the head and foot of the sides plus where the lengths of transfer where they crossed – I will do this with a Roting pen as I still feel confident enought to wield this!
So there is still plenty to do, but I am dead chuffed with this and it will soon be finished and ready for service.
Second up is a Lochgorm Models third class saloon that has been waiting for its lining for rather longer. It is a more difficult prospect to line as it has round corners to the panels and, over the doors and windows, shallow arcs. These can’t be formed with transfers as these are straight. I have thus used the transfers for the straight sections and then brush painted the curved sections with cadmium yellow acrylic paint.
If all goes well, the Roting pen can then be used to infill the black to the centre and form the curves across the windows and doors. Lets see!

Catching up on a Tennant
Way back in the mist of time (well 2016), I made a start on one of Arthur Kimber’s kits for a NER 2-4-0; termed a Tennant. After residing at the back of the cupboard for a bit too long (as is the way with my modelling, I do admire those that start something, see it neatly through to a finish before starting another……..!), I have made some more progress with it.
First up with the tender body which is close to finished except for some detailing around its front.
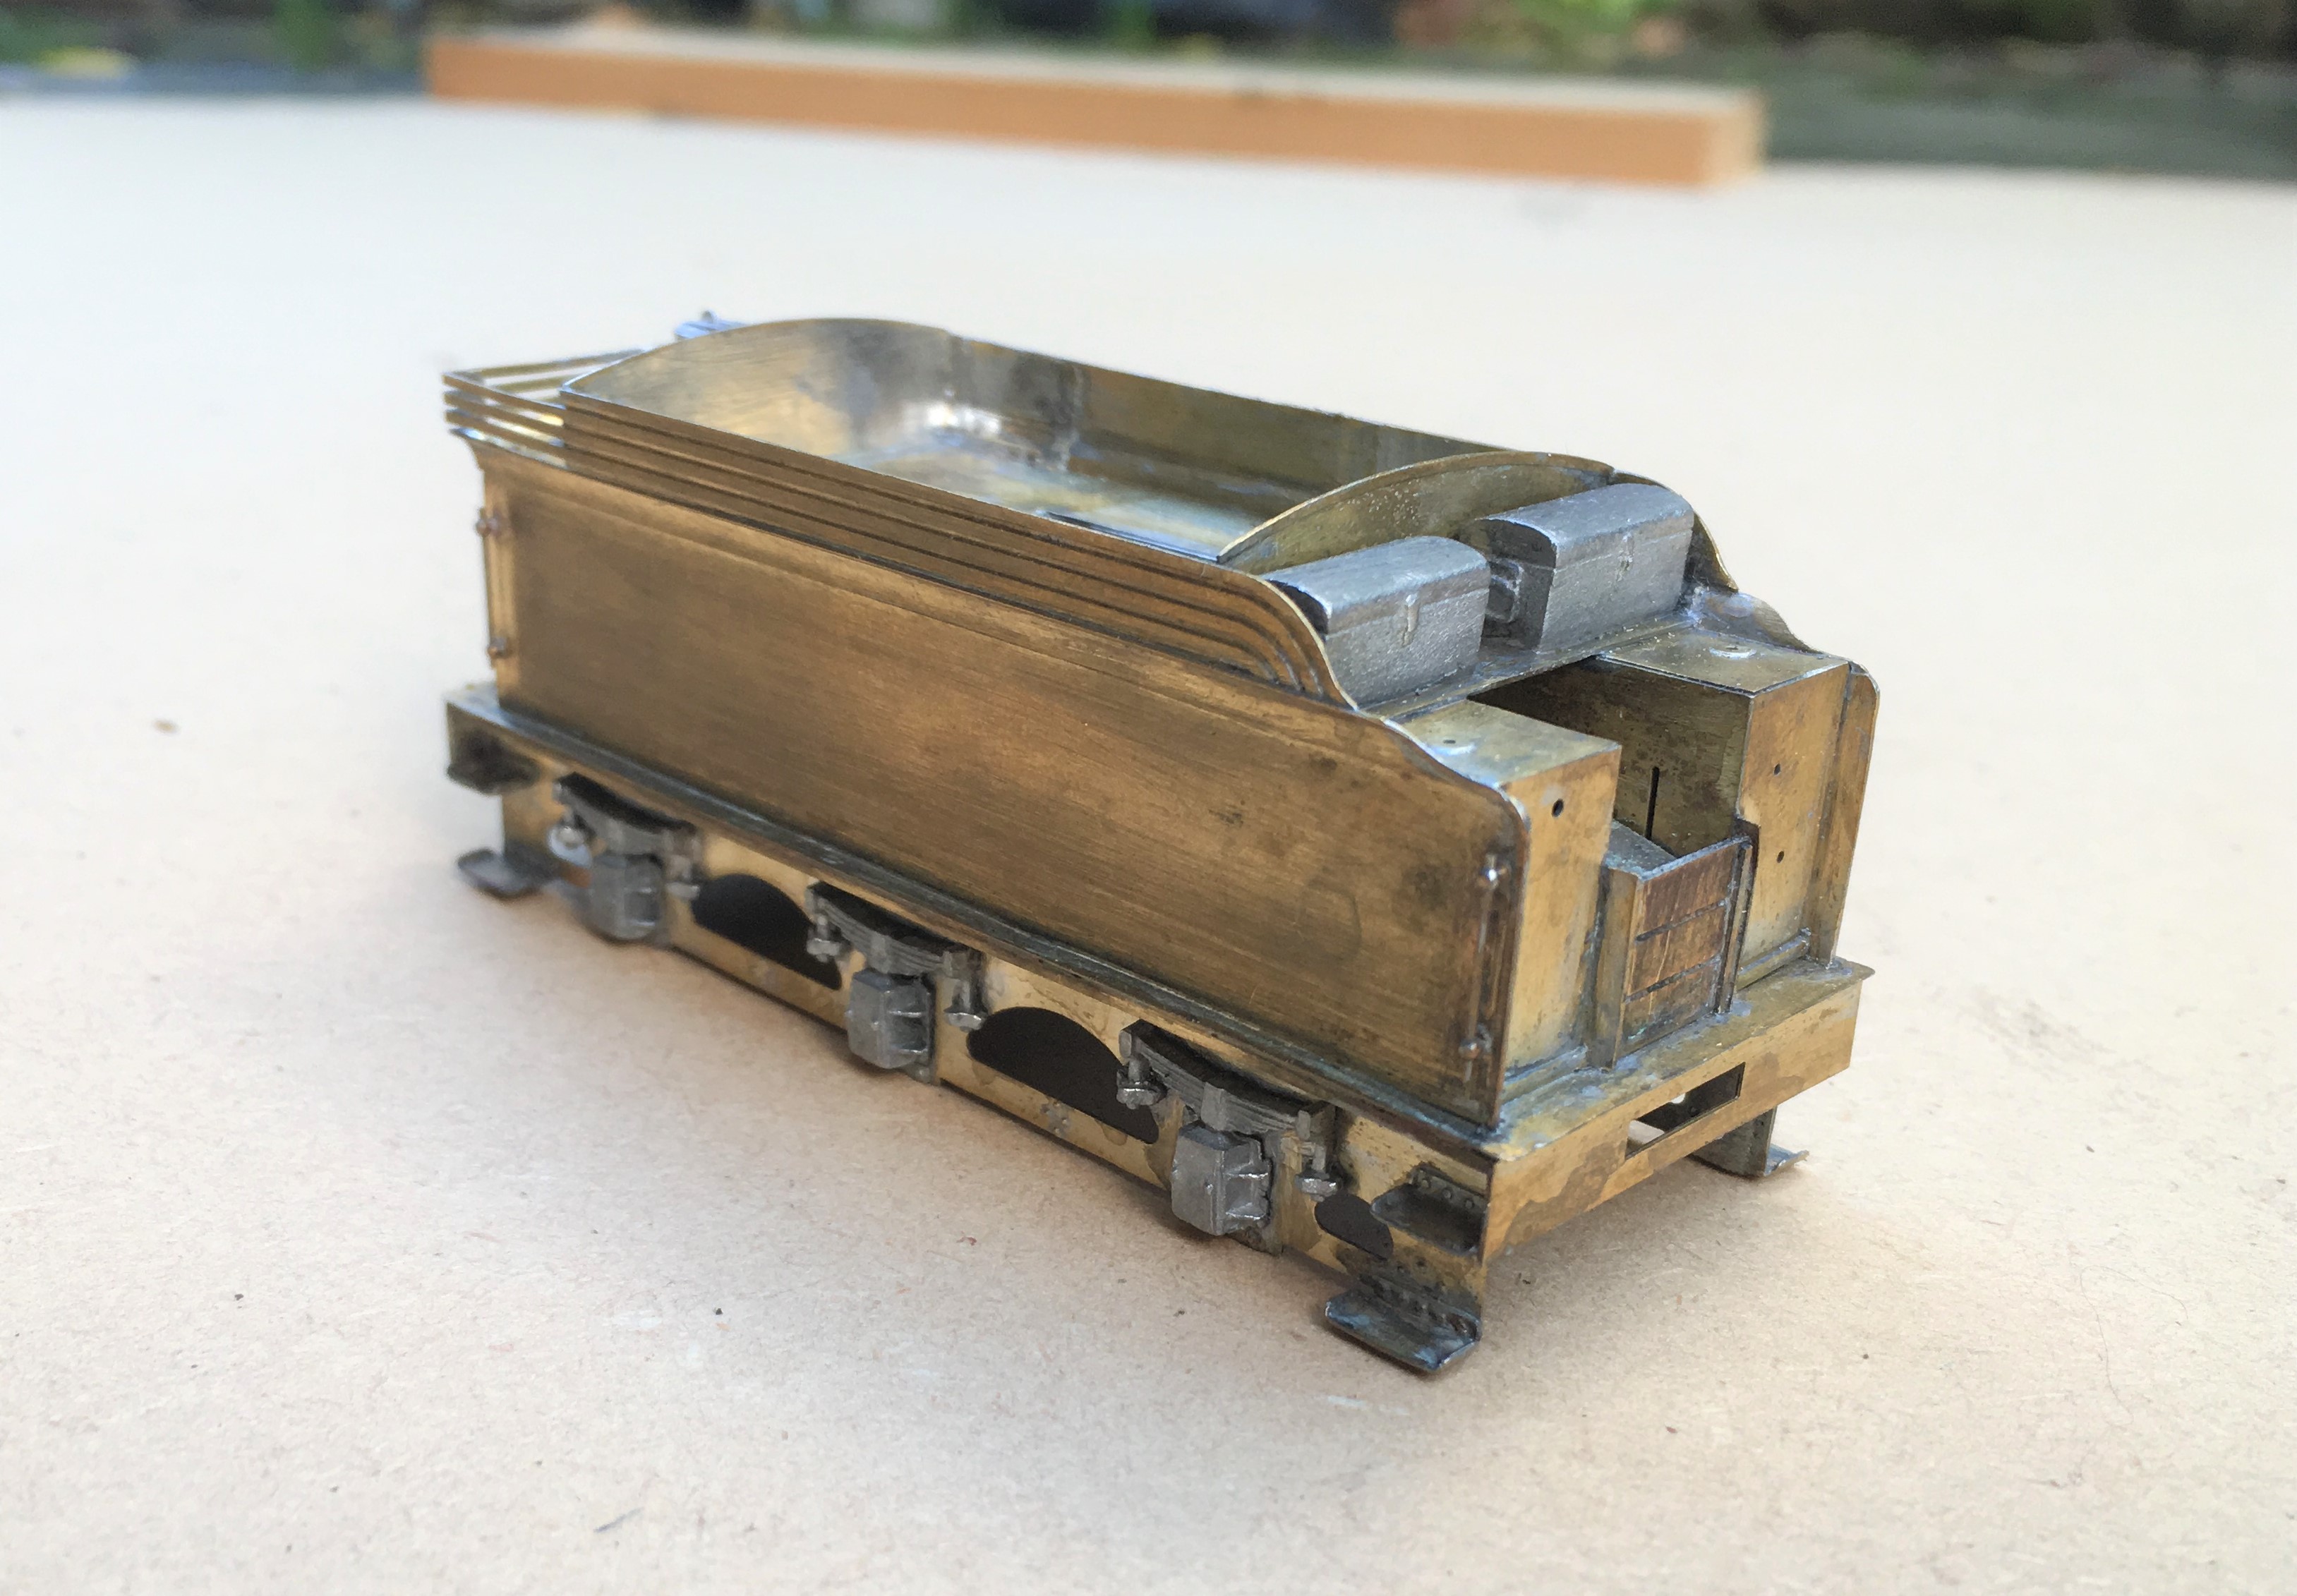
There was a bit of irritation in the building of this; despite being quite a modern kit the rear panel was much to narrow, the buffer beam a bit flimsy and there were some missing details around the front of the tender. Nothing someone raised on Jidenco’s kits can’t sort, but I rather hoped it wouldn’t happen with a modern design!
I also found that the boiler was about 0.7mm too long; a degree of filing and fettling has got it fitted. It is fair to say whilst there were these niggles, most of the rest of the kit is well designed and there are a number of neat facets to the kit, the flairs to the tender top for example are pre-rolled and they are very difficult to form without the right presses.

Here she is with the boiler now fitted and the first of the boiler fittings being attached. Something that grates with me on many people’s models is where these do not sit down tightly on the boiler or have overly thick flanges onto the boiler. Given that these are castings, it is understandable that these sometimes happen but they do damage the reality of the model and it pays to address these issues. For this reason, I prefer to solder them in place and am prepared to attack them with a file both before and after they have been fitted.
This does create a problem of soldering the parts in place; they are quite chunky so need a lot of heat to solder them in place and it is difficult to move them about to get them in the right place when they are so hot. I have just started to address this by drilling out the base of the boiler fitting and tapping it to take a 10BA bolt + washer. This allows the the fitting to be moved about until it is in the right place and held tight with the bolt so that it can then be soldered. I am pleased with this little trick; it definitely repays the effort and for the white metal castings, saves the risk of returning them to a blob of metal with too much heat!
One example of a Tennant is preserved, being situated at the Head of Steam Museum at North Road Darlington Station. This has enabled me to take a good number of detailed shots but they are all rather close up they don’t really capture the prototype; so here is one from Neil Dimmer’s collection from the earlish 1920s, at (I think) York. The thin nature of the flanges to the dome and chimney I comment on above can be seen in this.
![[IMG]](https://photos.smugmug.com/LNERSteam/1884-NER-Henry-Tennant/Tennant-E5-NER-1463-2-4-0-Locomotives/i-L5bsMX9/1/794c2272/XL/1463%20Tennant%20E5%20%28NER%20%271463%27%29%202-4-0%20Locomotives-XL.jpg)
This view also illustrates how thin the boiler bands are. Given that this will be painted in NER livery that has lining on the boiler bands I am going to rely on the thickness of the lining transfer to give the impression of the boiler band rather than represent them in metal.

Diagram 51 Full Brakes – Test Build part 5; now in glorious technicolor!
The pages of this blog have charted the development of a proposed kit to build the Highland Railways dia 51 full brake; well finally it is finished and we get to see them in the flesh and painted up.
The kit can produce, with a bit of modification, two variants of door and I have now build both of them. First up the cupboard door version painted in crimson lake and minus full footboards.
Second we have the sliding door version, this being modelled with full step boards and in Highland Olive green.

Apologies that the technicolor photos are a bit short on gloriousness; it is fair p*ssing down today and this is the most light that I could get to take any photos!
If you want to recap on the earlier blogs that show the development of the proposed kit, you can find them here:
Part 1 – getting underway with the body
Part 2 – drawing the chassis and roof to a conclusion
Part 3 – the build of the second vehicle (sliding door version)
Part 4 – details of the spring bogies that accompany these (and many other coaches)
I do now have a batch of these back from the etchers and I aim to conclude the instructions on Monday/Tuesday. I will then make a notification that they are available but at present I cannot provide the castings and those to the bogie are rather important. If you can scavenge from a Lochgorm kit some Iracier axleboes/springs, you will be able to complete the kit; if not then I am seeking to either source some of these castings or produce my own. So watch this space.

Damaging Value…..
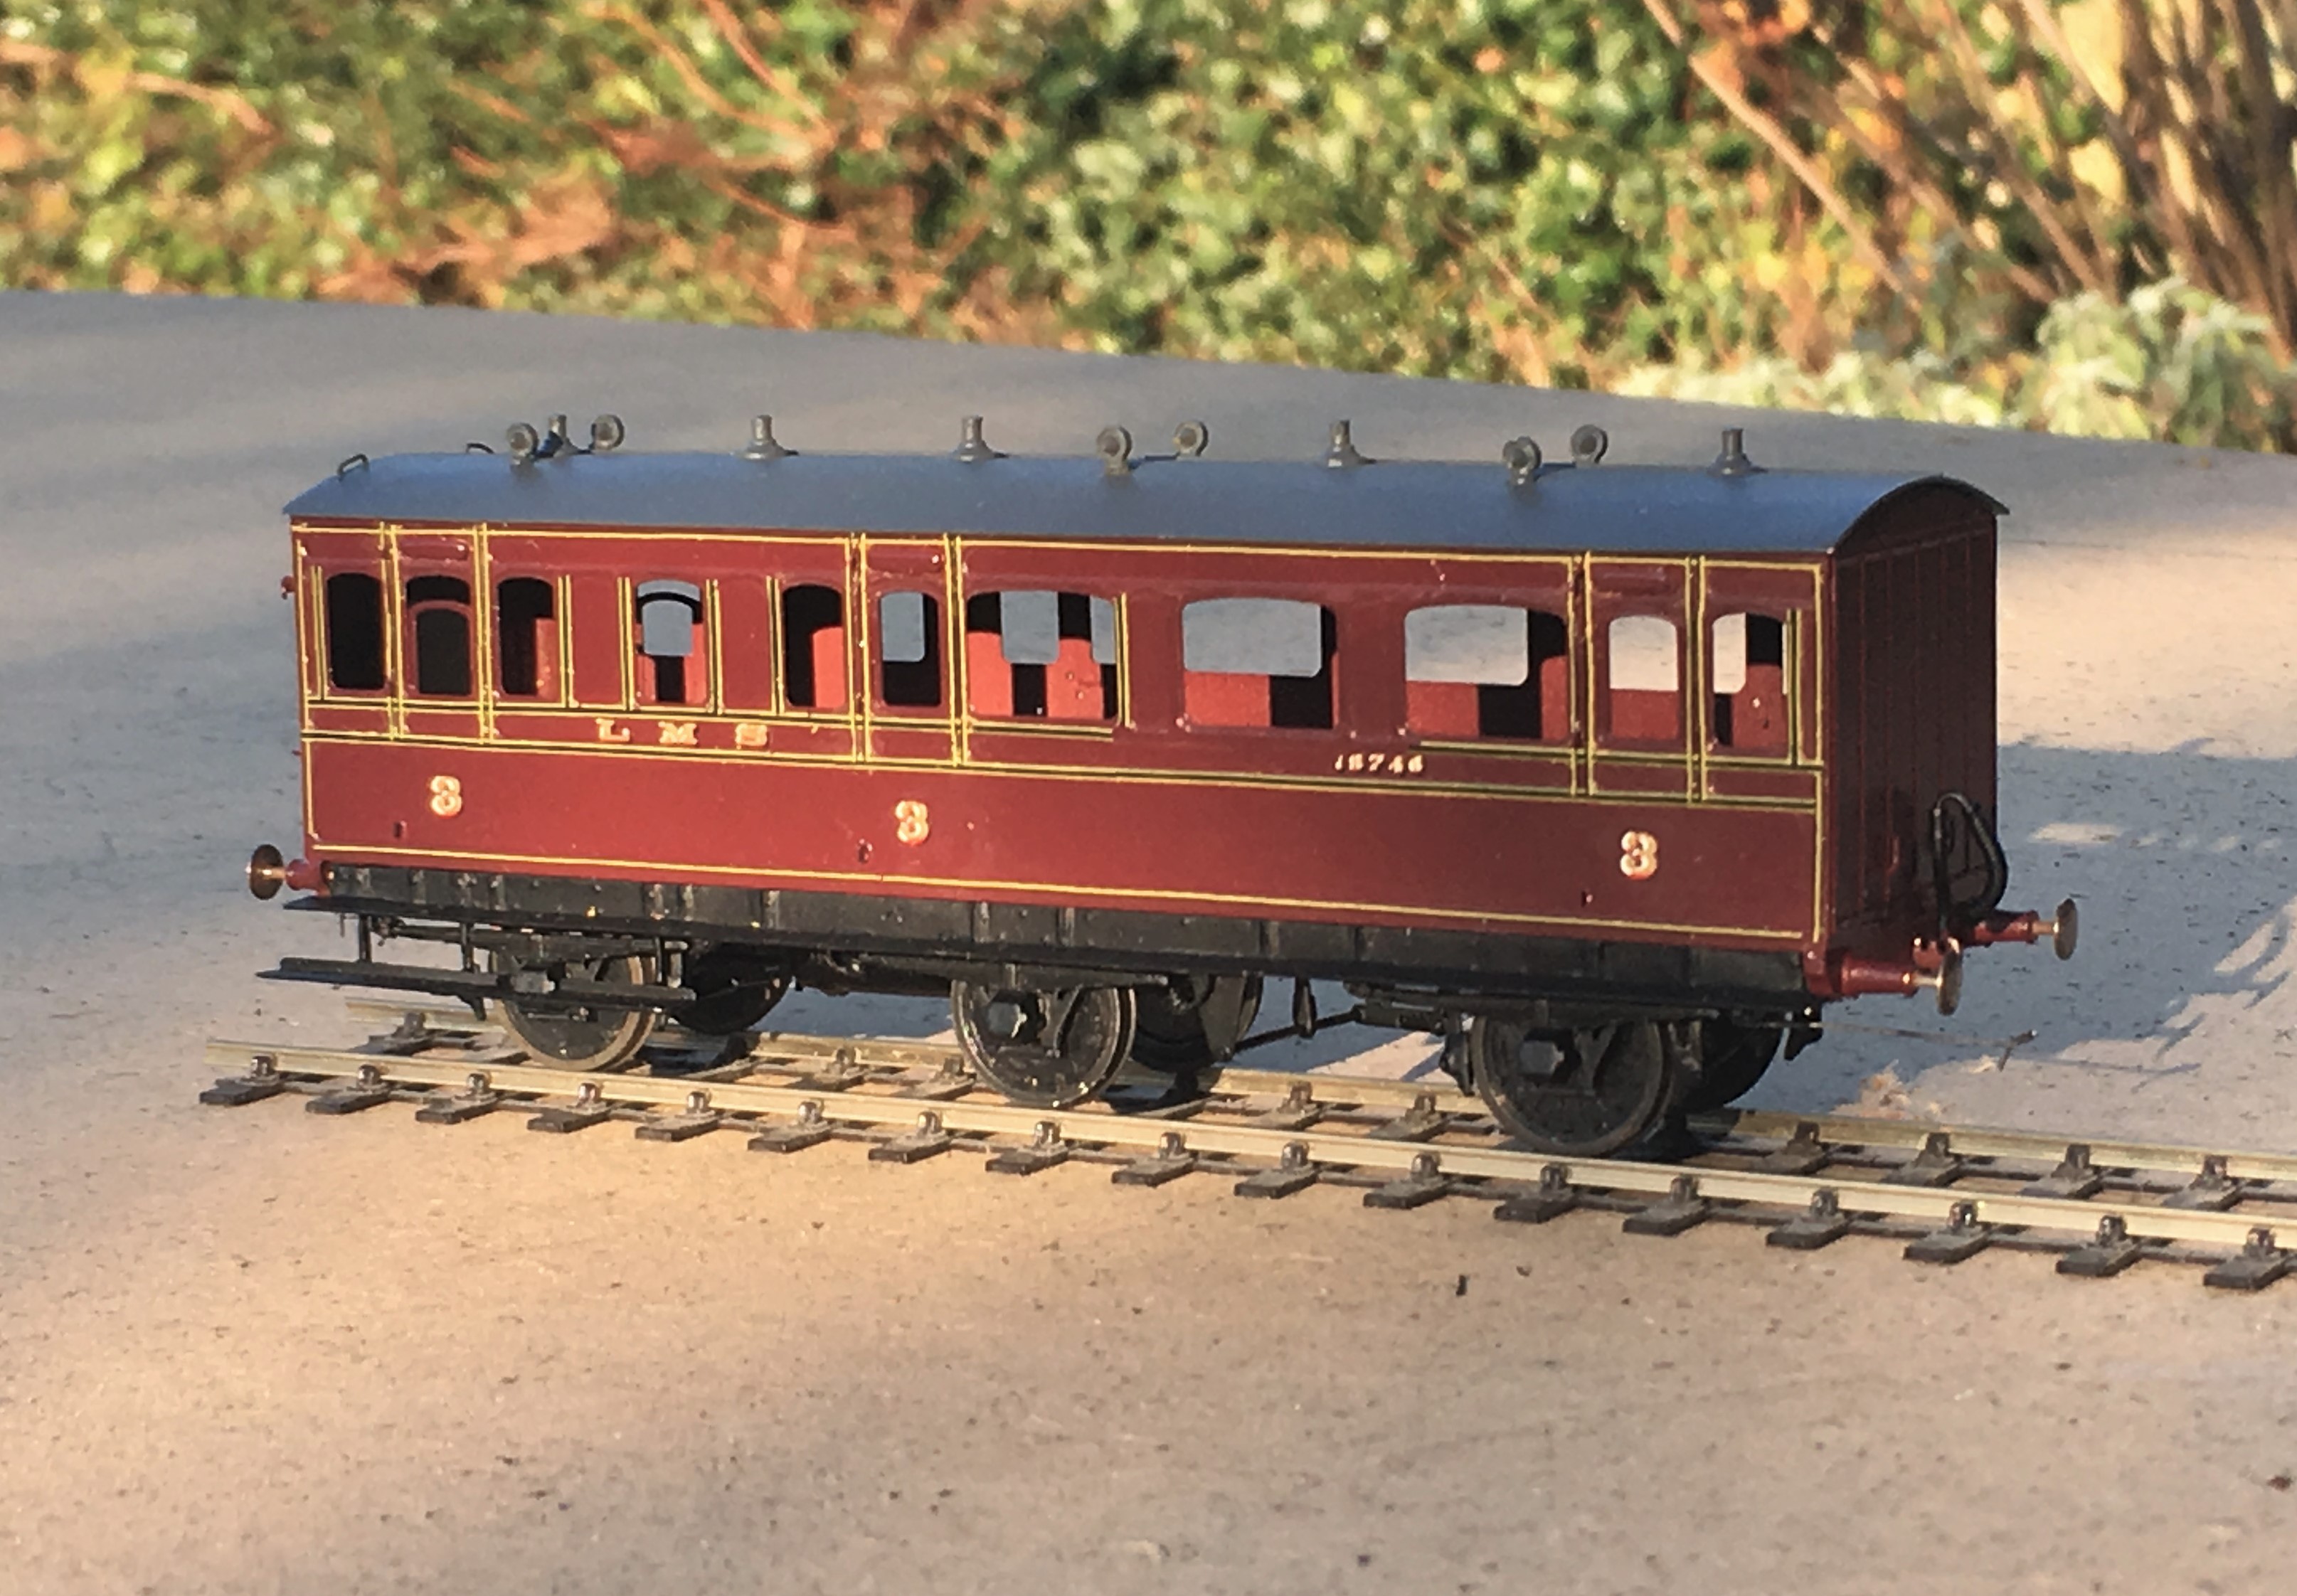
Over the last few years I have acquired a few coaches painted by Larry Goddard. As you can seen below, these are beautifully painted and, particularly, lined coaches. Although he is not really building much any more, Larry’s work comes up from time to time on ebay and I have been nabbing a few of these. They are not particularly cheap, but then there is a fair amount of work in building an etched coach and in reality the price I am paying for them is hardly a fair reflection of this time.
Whilst I have been able to line fairly well in the dim distant past of my teenage years, I don’t think my lining was as good as this and, more importantly, I have misplaced my lining mojo. Although I have plans to try and rediscover the mojo, these coaches do provide a means to get a few very nice coaches to get the layout moving.

This particular coach is to the LMS’s diagram 1778 and originate from 1925 – 28. They were the first standard design for the LMS and will have been found throughout their system, including on the Highland section. My intent for the layout is to have a pair of through trains to Edinburgh/Glasgow with through coaches to London – this will form part of this.
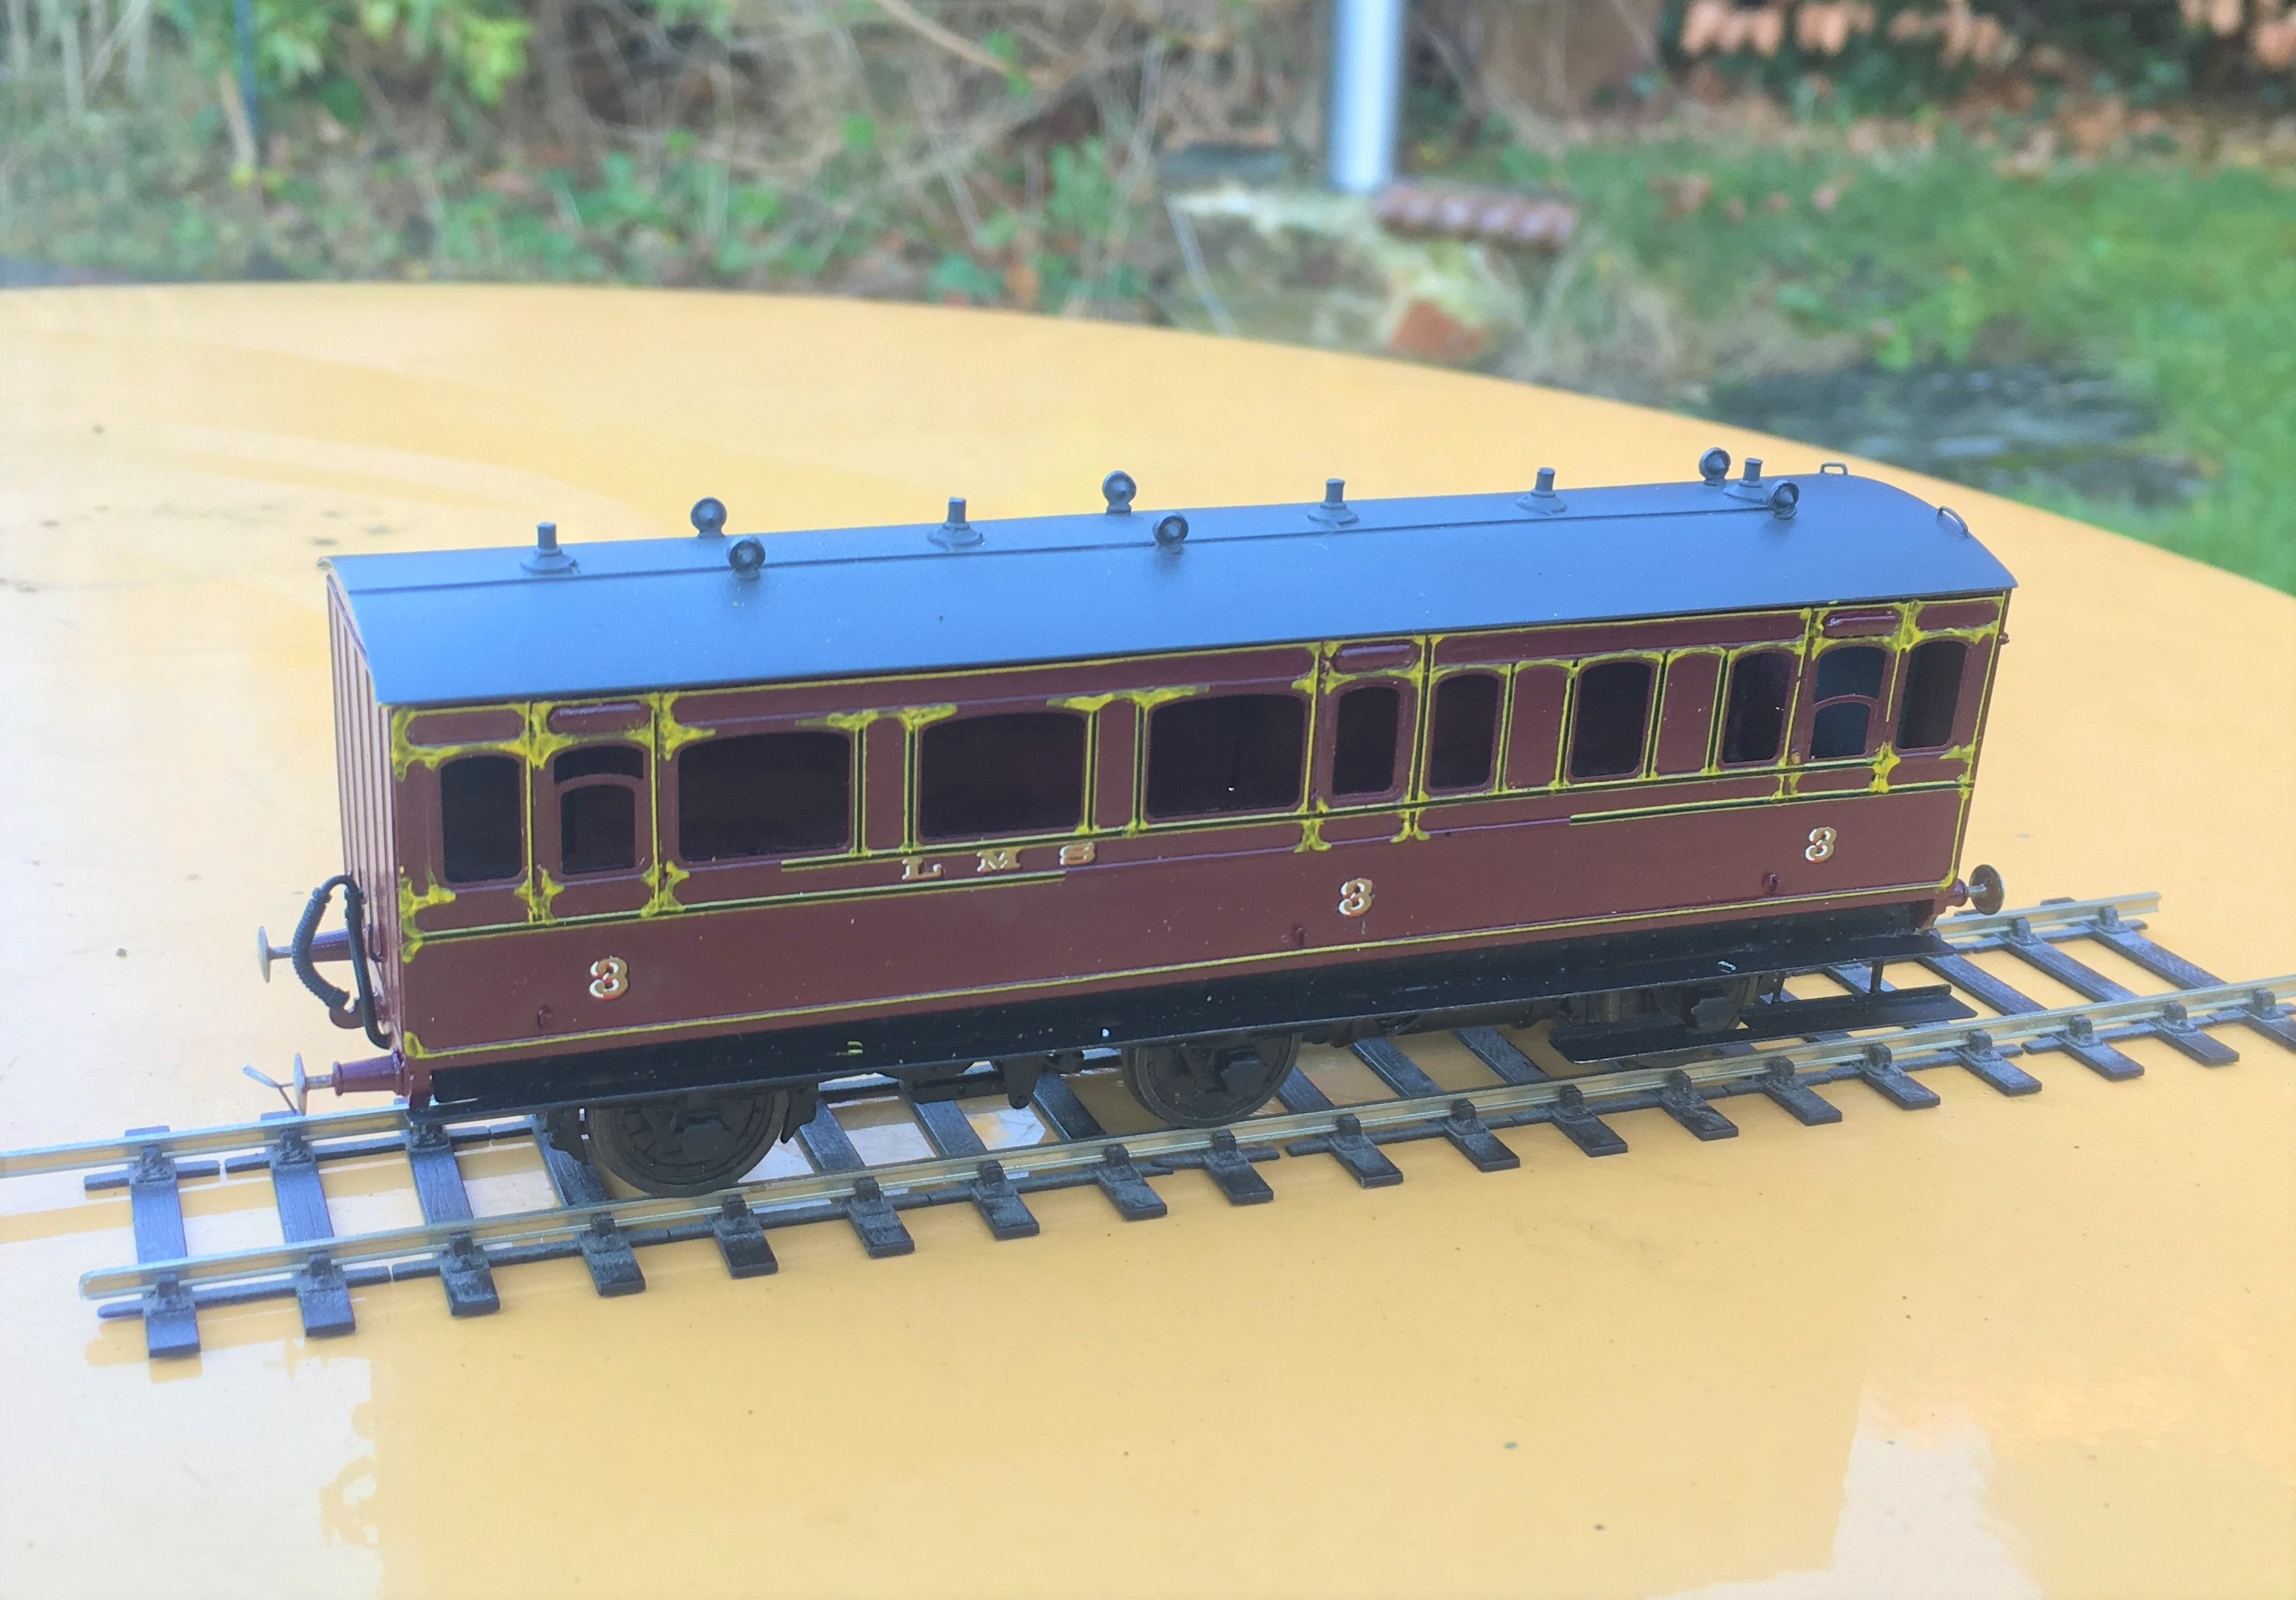
Whilst the basic building and painting/lining of the coach is top notch, there are some issues that I have sought to deal with. First of these is that the bogies are fairly clunky and being assembled from components they are unlikely to be truly square. Thus, I have disassembled these and used them as cosmetic sides to some Bill Bedford sprung bogies.
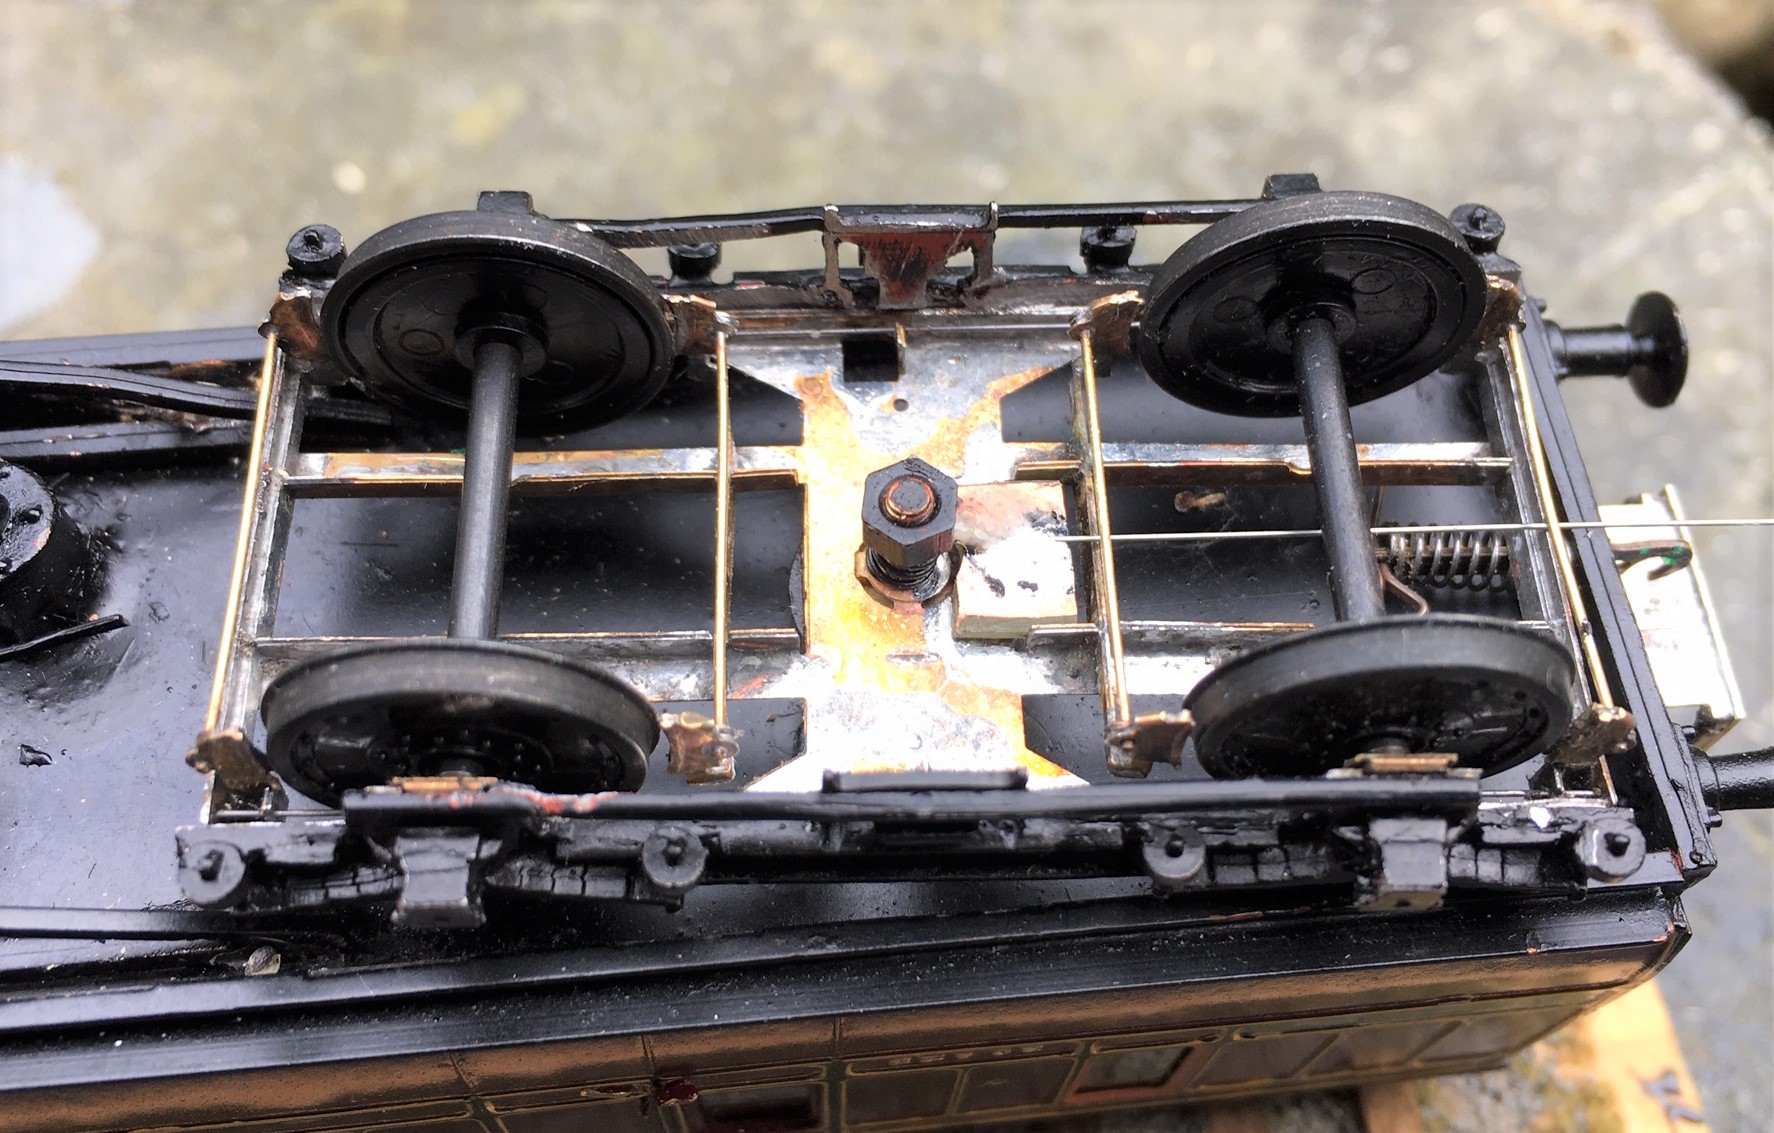
The coach as built comes with some paper concertina corridor connections – all very 1970s in they look and as they are stretching, they look rather rubbish so off they came. In their place, I have built some of my etched ones – these are a spin off from the dia 51 full brake kit that I am working on. This shows them part built and I will be looking to do a posting on these in their own right once I am fully happy with them.
If mucking about and making the coaches for P4 is not sufficient to undermine the resale value of the coach, the final task to weather down the very glossy paintwork will. These were obviously predominantly aimed at collectors and are finished to showroom standards. The railways of the steam age were amazingly dirty places and a loco or coach in an ex-works condition would be pretty mucky by the end of its first run, let alone its first year.
Thus, it can not stay as clean and glossy as this, no matter how beautiful it looks. I have a weathering day planned for a couple of weeks time, and attacking this will be one of the tasks…………..

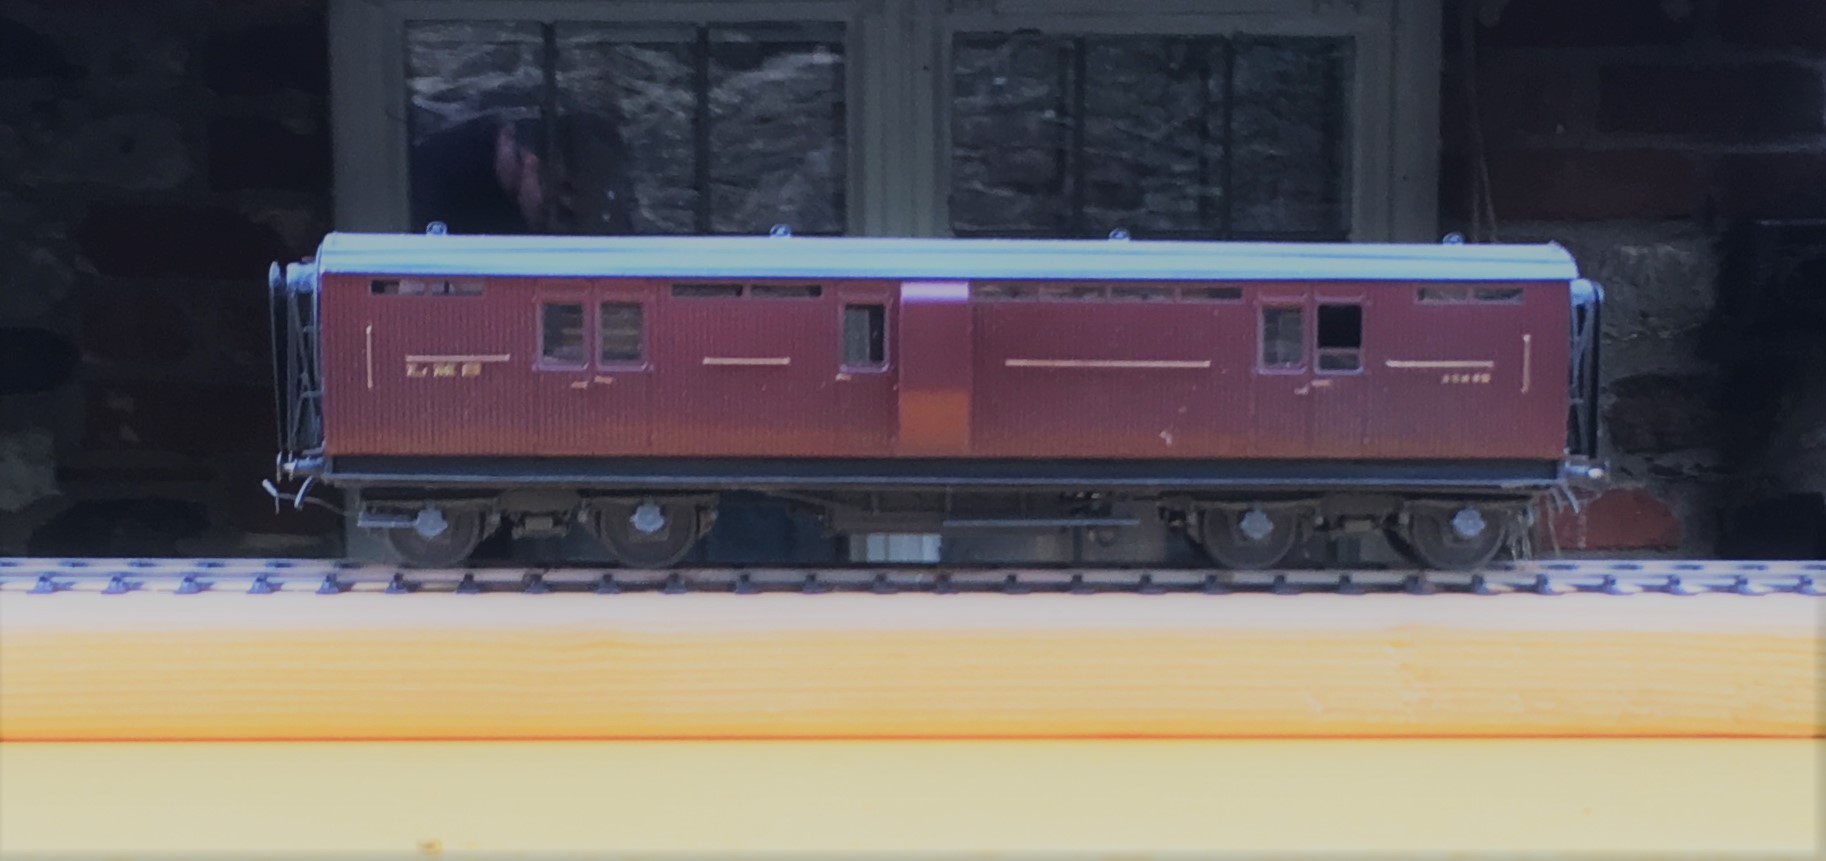
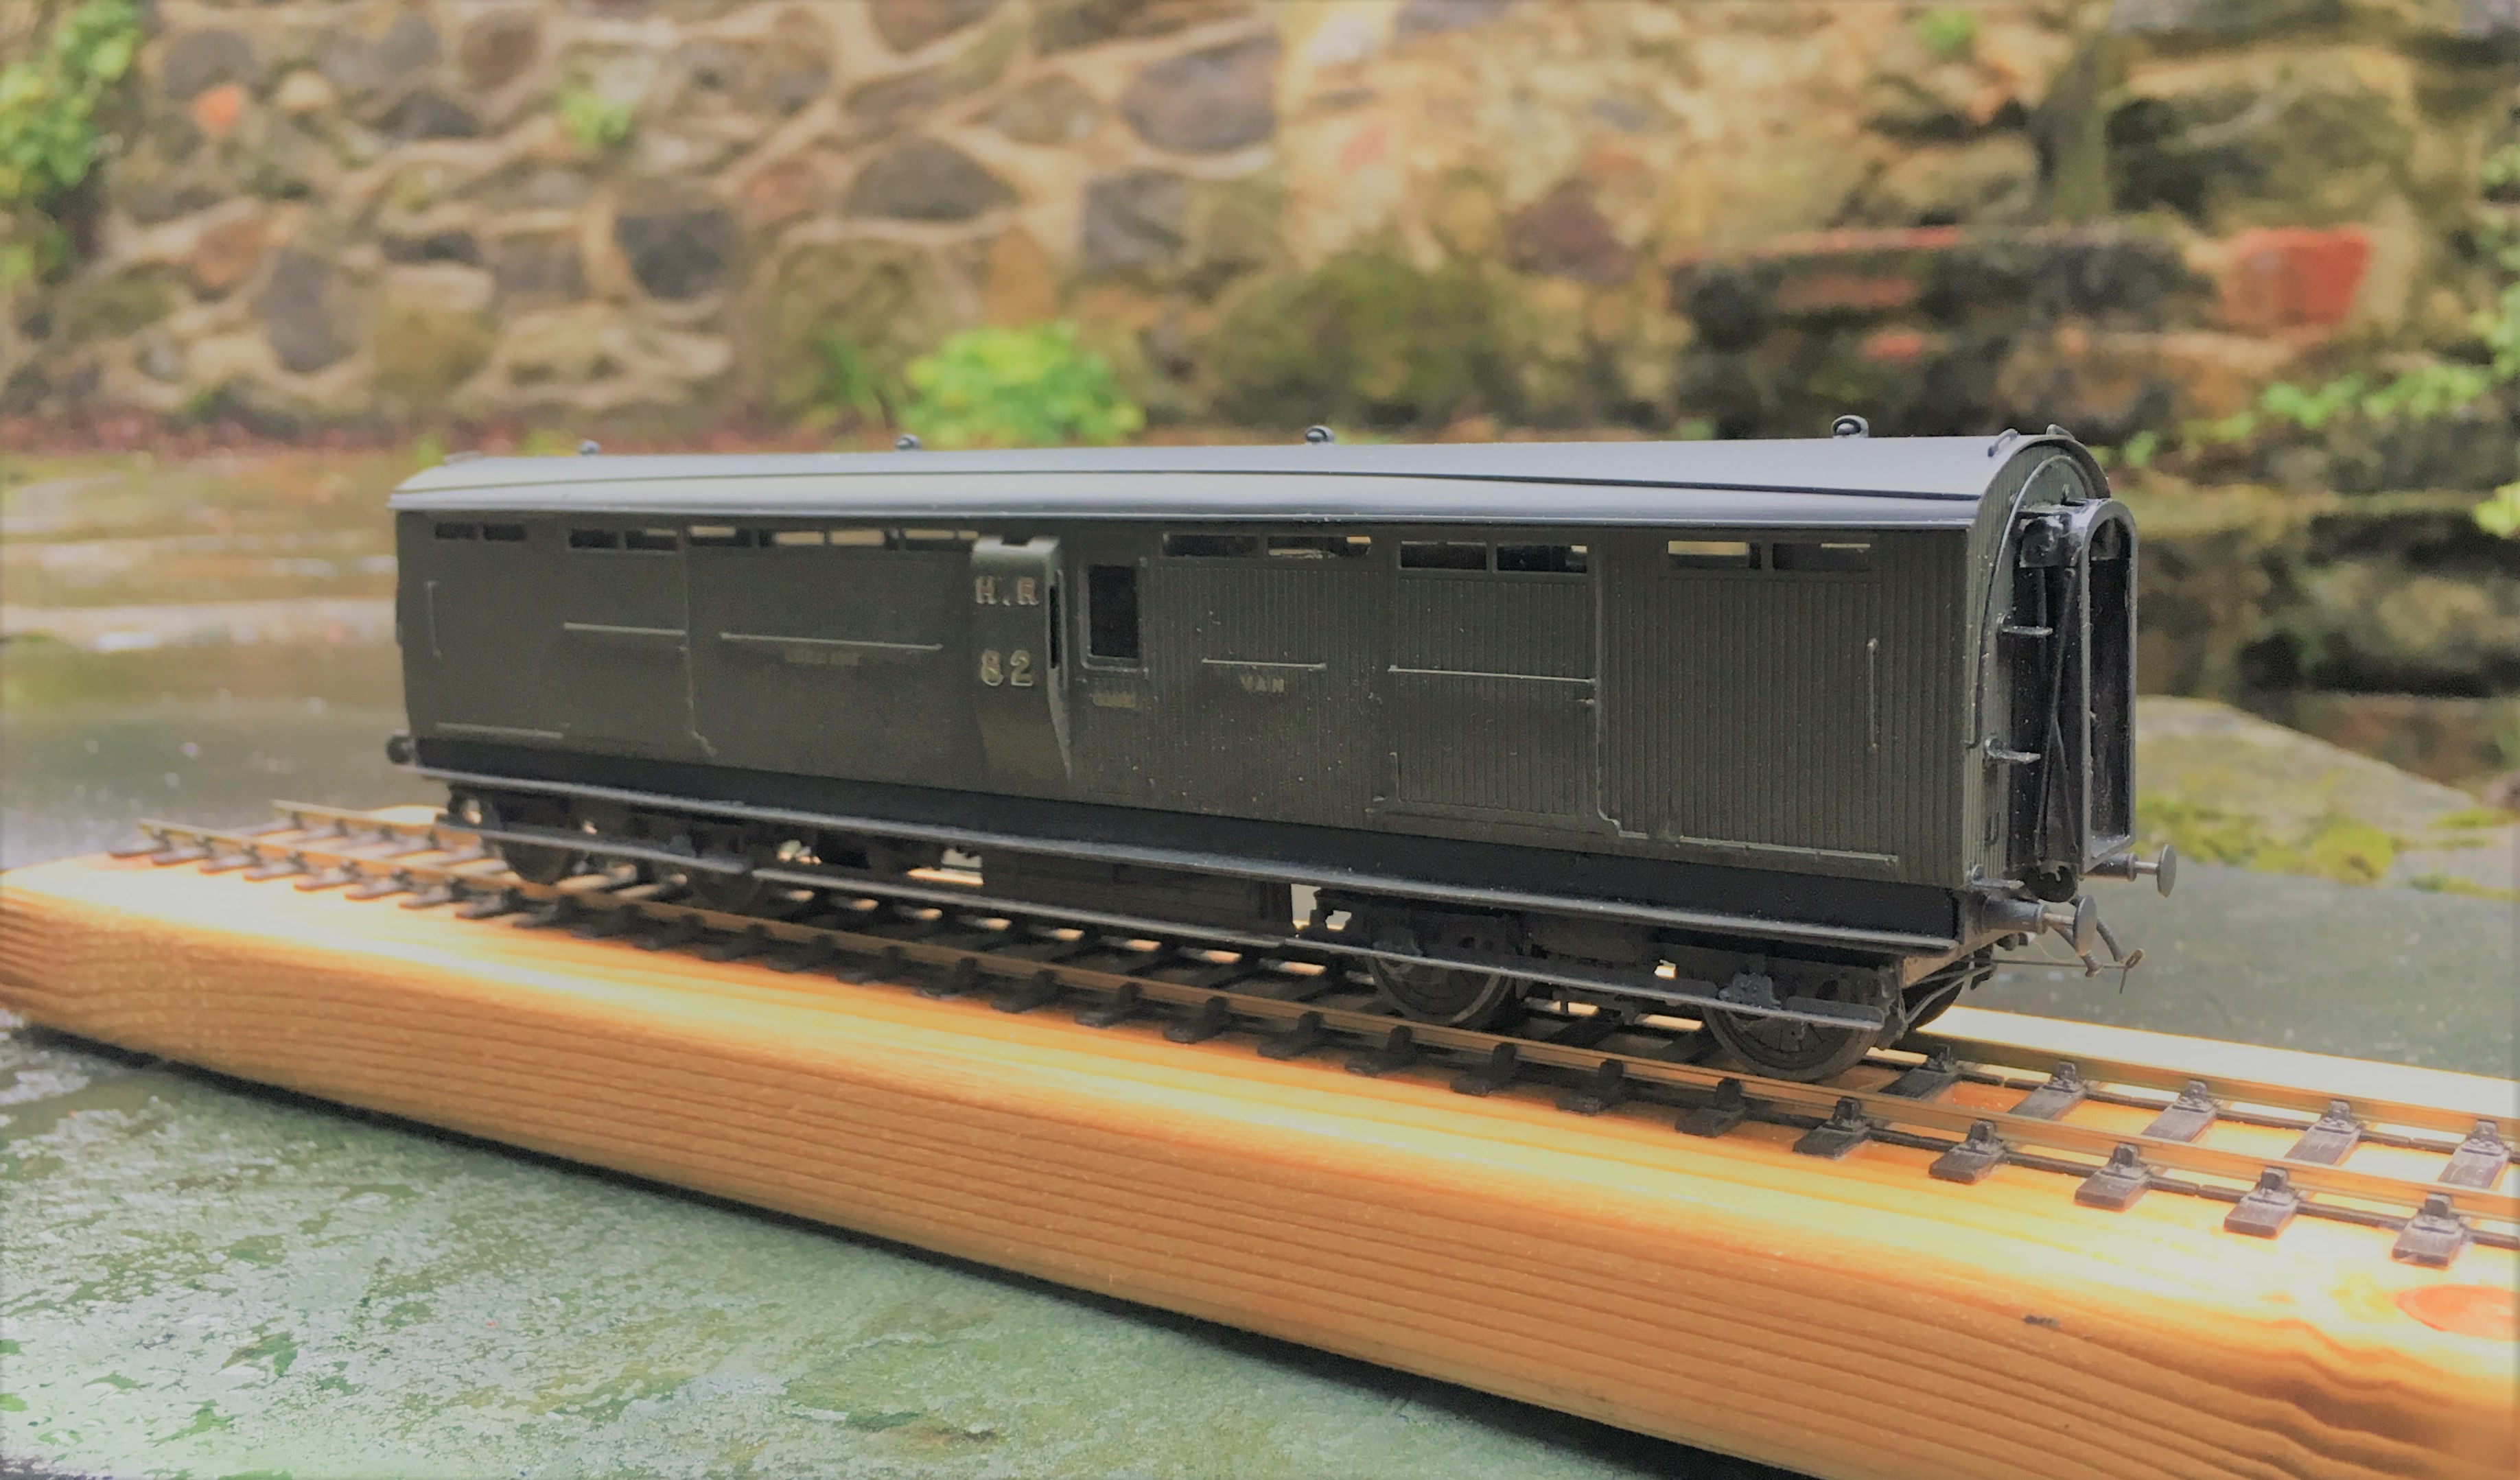
One for the Paintshop
I am sure I am not alone in having in mind a list of modelling jobs to do over the Christmas break and to find that the bulk of the list remains uncompleted when it is time to go back to work!!
One item on my list was to finish a North Eastern Railway autocoach that I have had underway for a while and that at least has got itself off the list!
The bulk of this is from a D&S etched kit which I have seriously devalued by opening the box!! I have replaced the fixed bogies with some test build sprung bogies that I have had under development for rather too long now (they are finished, but for the castings which I need now to produce following the demise of Lochgorm Models for at least the time being).

I also replaced the roof with some metal sheet rolled to the curves. This proved a real challenge and took more than one attempt as I found you could not roll the section with the holes for the clerestory already cut as the bend all occurred at this weakened point. I also took the effort to put on the gas lines with fine wire as I think these add so much to a model of this era.
I think they are very attractive coaches but there is a problem with them – they tended to go in pairs so I have another to build! Just not quite yet! Fortunately, the BPT is not down to me, but I think you may find yourself under pressure soon John!!!!