Let There be Water…….3 – Now There is!
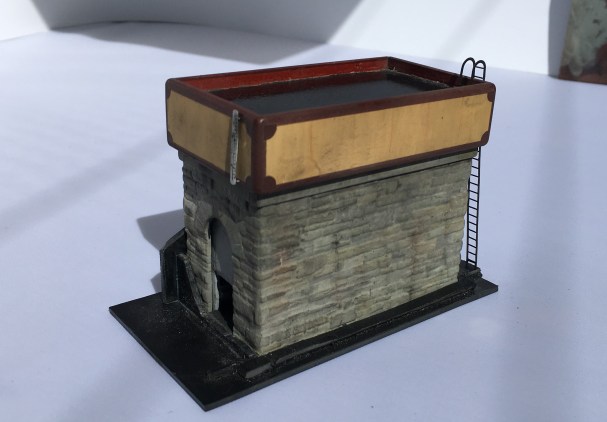
More progress has been made with the pair of water tanks and they have now reached the stage where they are effectively finished.

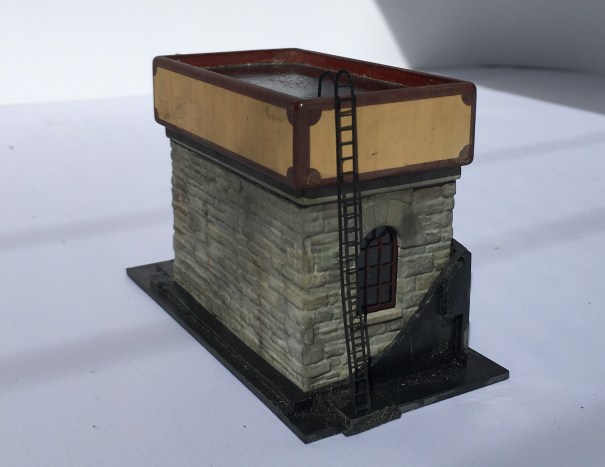
The stonework was painted by picking out each stone in different colours. I think there is a real art to this as when I see others do this, I often think the colour differences are unrealistically abrupt. I find the trick is to use a core of two colours that are close to the general colour that you want – in my case Humbrol Matt no 5 & 64. Put these in separate palates on a mixing dish and dip into these to create a combination of the two.
By selecting two relatively close colours, you can alternate from all one to all the other and any mix in between. Adding very moderate amounts of a stronger colour difference, in my case Humbrol Matt 66 and 62 which are a darker grey and a leather brown adds a bit of variety but in each case they still need to be mixed in with the two core paints to keep the toning consistent.
Even with this work the colours didn’t seem quite real, so I completed two additional steps. The first was to use some matt varnish that I knew the matting agent was a bit gone on – this gives a slightly translucent milky effect over the whole and drew the colours together a bit. The second was to use AK Abteilung 502 weathering powders – black smoke, ashes grey, gunmetal and rubble dust (primarily because these were the only colours I had!). These need to be used with care, as it is easy to put way too much on and you can’t generally get it off again! However, at low level and to the coal bank I have been pretty liberal with particularly the black smoke as such areas were far from clean!
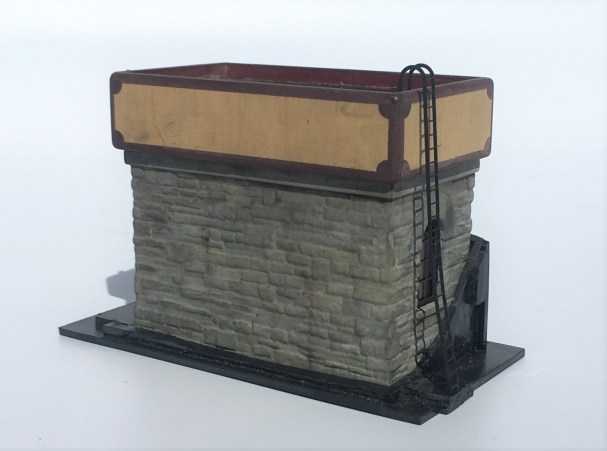
The weathering to the water tanks was dealt with slightly differently, although it also started with the use of the acrylic varnish with the defective matting agent (that’ll be how I found out it was defective!). I then used a Humbrol dark grey was with downward brush strokes and then wiped off with a piece of kitchen roll, again with a downward stroke. A few additional marks, especially to the panel joints, with AK Interactive weathering pencils.
The water effect was another accident flowing from the defective matting agent – the milking was far from desirable on the black base coat of paint. Thus, I wiped it off once it was semi dry and I got most of it but where the remainder was still there, it added a bit of texture to the surface, as if there was a little disturbance to the water that affects part of the surface not the whole.

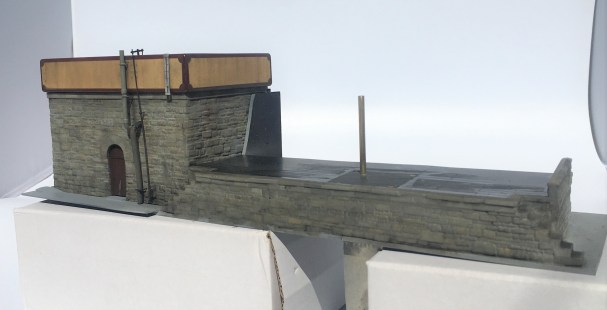
By reference to the prototype, I made a heating stove flue and spigot for the water bag from brass rod. To form the bends it was necessary to have a pair of additional tubes inside each other to stop the tube collapsing on the bend, The canvas section of the leather bag was formed by a piece of heat shrink sleeving but with a little 5 minute araldite in the centre such that as this starts to cure a degree of shape can be put into it and once fully cured it will stay in this shape.
The operating rod was based on that still largely apparent at Altnabreac and I have assumed this also had a ladder even if this has now gone. There is no watering bag to the smaller of the two water tanks as I propose to have some water columns, but that is a story for another day!
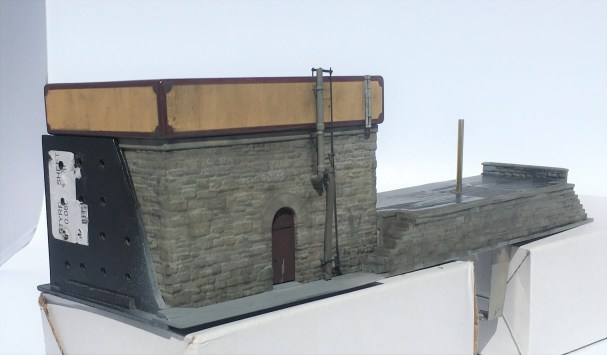
A further story for another day is the rather odd post sitting in the middle of the coaling bank; but that story will be fairly soon!
Posted on April 20, 2020, in Glenmutchkin, Workbench (other) and tagged Abteilung, AK Interactive, Altnabreac, Coaling Bank, Highland Railway, Humbrol, kyle of lochalsh, Model Railway, Model Railways, Water tank, weathering, weathering pigments. Bookmark the permalink. 3 Comments.

It’s absolutely amazing what can be done with skill, simple materials and color. No computers, no 3D prints and no laser cutting. You nailed it.
Charlie Pitts
>
The finish, especially the stonework, is exceptional. That’s the only word for it. You’ve created a thing of beauty. Ok, perhaps I had two words 🙂
Beautifully subtle. Wonderful!