Category Archives: Workbench (stock)
NER Hoppers – Part 2; liveries
I have made more progress with the hoppers, having completed the main paintwork of these and also the lettering.
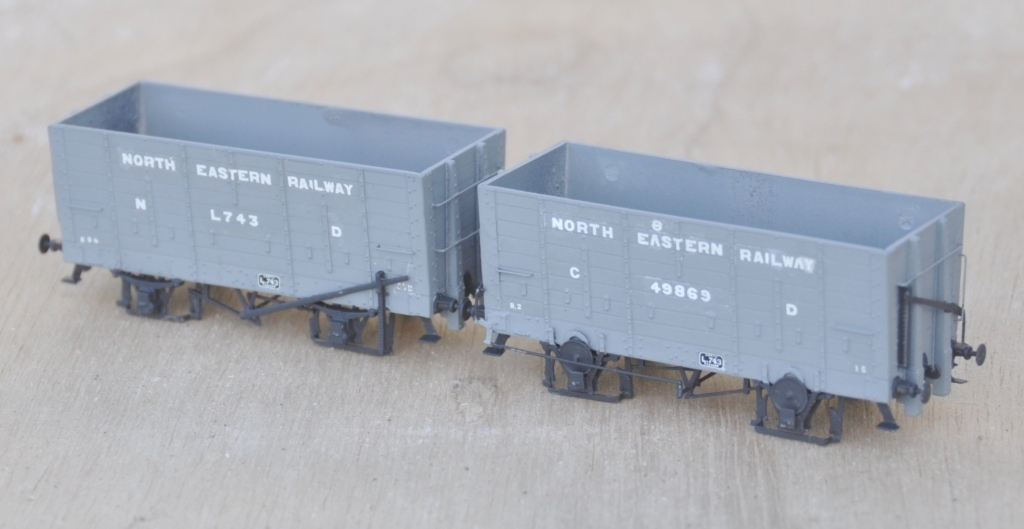
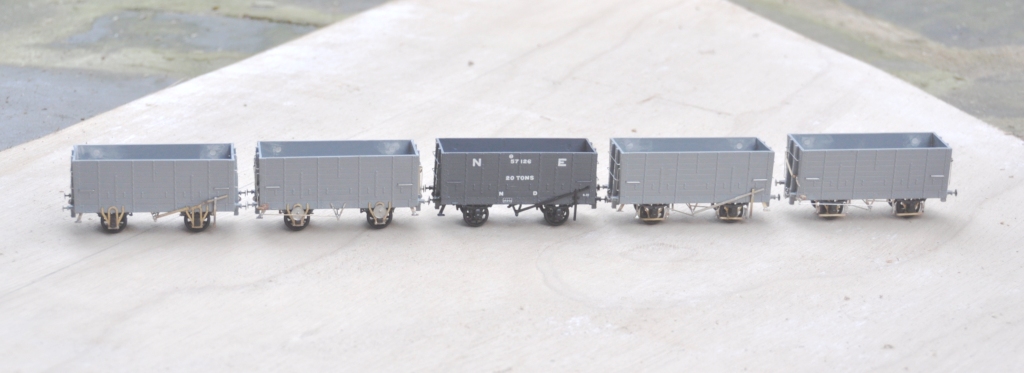
Both the livery and the lettering offer further opportunities for variety, which I have taken. First up are a pair of wagons lettered with the full legend “North Eastern Railway”; a livery applied on some of them upto 1903. This was a fair pain to create, as the full words had to be spelt out from an alphabet; even now I am not totally happy with this and a few tweeks to some of the letters is possible.
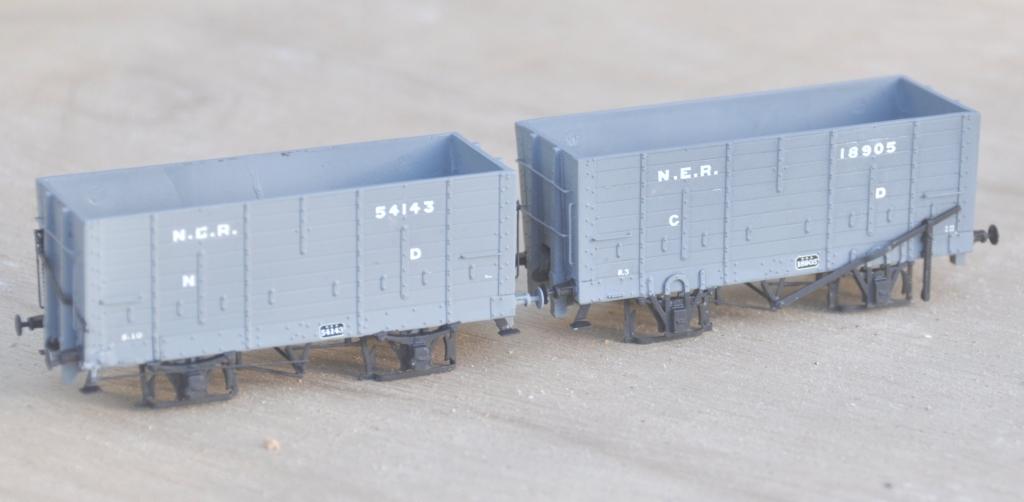
The most common livery for the period that Benfieldside is set (just prior to the first war), was the livery applied between 1903 and 1911 and the legend NER was used.
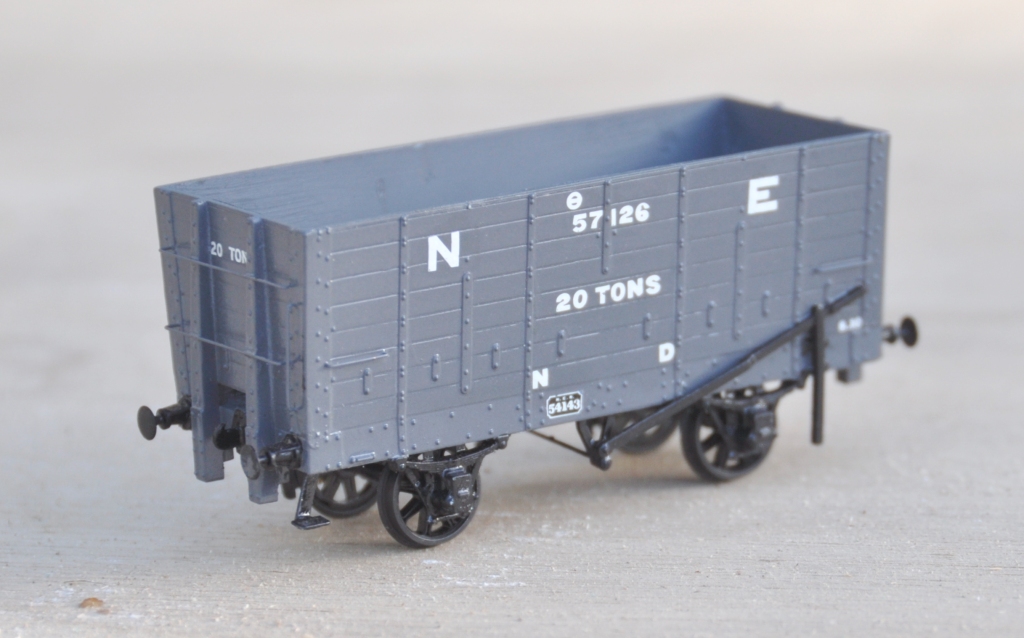
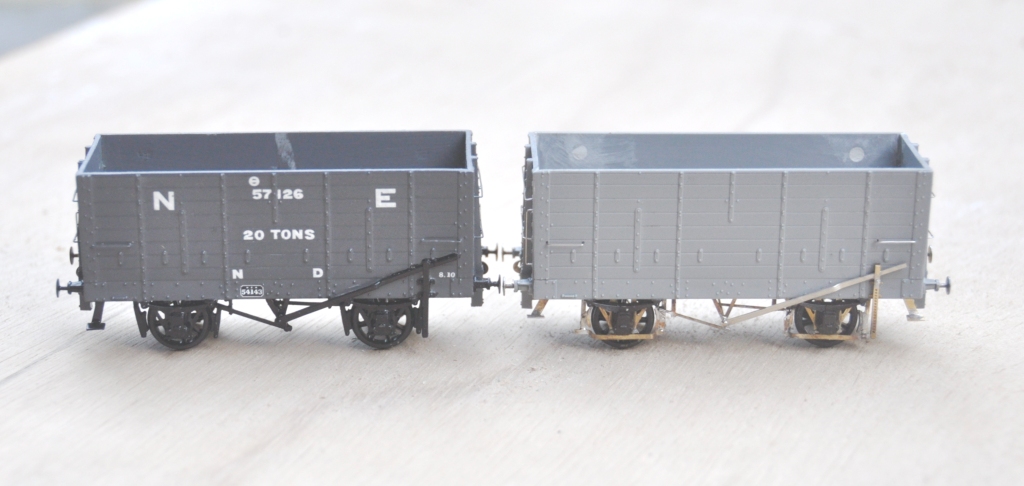
The final livery was on a darker grey and NER was dropped and replaced with a mere NE. This vehicle had a load designation on its end too, which appeared to be an occasional feature.
Once I have had a chance to tidy up the lettering, I will paint the interior a dirty black and speckle it with coal dust. I will also make a coal load. Then these need the application of grunge as I can’t believe that coal wagons were kept particularly well!
Christmas is the season for…………. jolly well finishing stuff off!
Over the break, I have been concentrating on trying to finish things. Like many people, I find it much easier to start a kit or project than it is to get it fully finished. Indeed, do we every truly finish our models – certainly not our layouts!
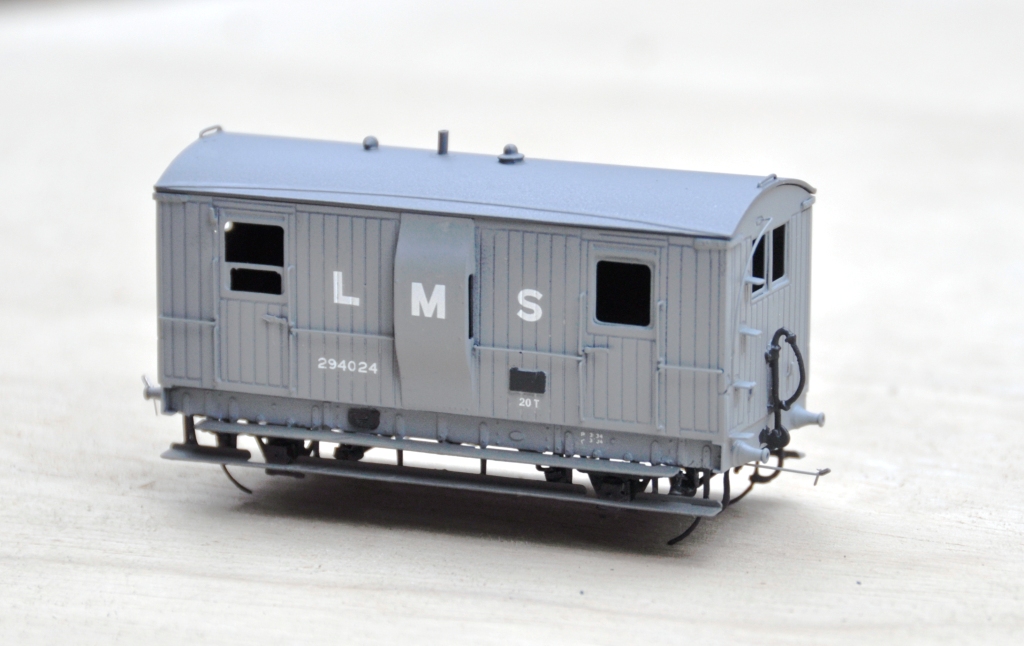
Back in March 2013, I completed a dia 39 goods break. These were the final Highland Railway break vans and it is not clear that they were actually finished prior to the end of the HR era. Given that I model in the mid 1920’s, I am quite content to do this in LMS grey which to date I have not seen the model depicted in! The main body painting has been completed and the van has been lettered but weathering, the interior and final detailing/glazing is still to be completed. Based on the Lochgorm Models kit with minimal adjustments (a few pipes below the chassis and sprung W irons in lieu of the compensation provided in the kit) this is what it presently looks like:
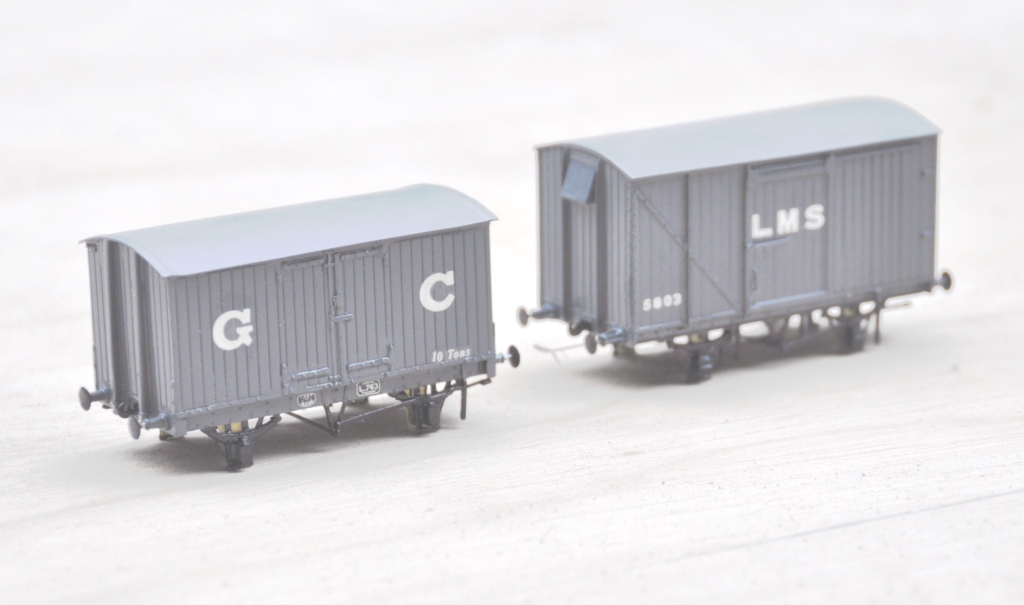
Also coming through the paint shops are a pair of vans. The first is a Great Central van build from a Mousa Models etched brass kit and the other is a LMS early standard van from an injection plastic moulded kit from Cambrian Models. Both are pretty simple models to build; the Mousa Models one was built as designed and no adjustments were found to be necessary. I only fitted springing to the Cambrian one and got rid of the rather too thick W irons in the process. Again the bulk of the painting is complete, but some dirtying work is definitely still required.

Apologies for the slightly squiffy photos; I left it a bit late in the day to take them and the light was poor. I have made a lot of progress painting the NER hoppers, but the photos of these really did not make it and need to be repeated. Something to post tomorrow I suspect!
NER Hoppers
I am presently cracking on with a batch of NER hoppers for Benfieldside. Having acquired the layout, Tim and Julian have very little stock to run on it, so as part of the repayment for the use of their facilities and expertese on my boards, I thought I would help to correct this shortfall.
The origins of all of this present batch of hoppers all go back to the Slaters’ injection moulded kit, which is of diagram P7 wagon. There were around 17,500 of these wagons at the time of the grouping and the LNER carried on building them for some years thereafter with only subtle differences; so not unsurprisingly there were quite a lot of variants. Thus, I have been doing a lot of modifying!
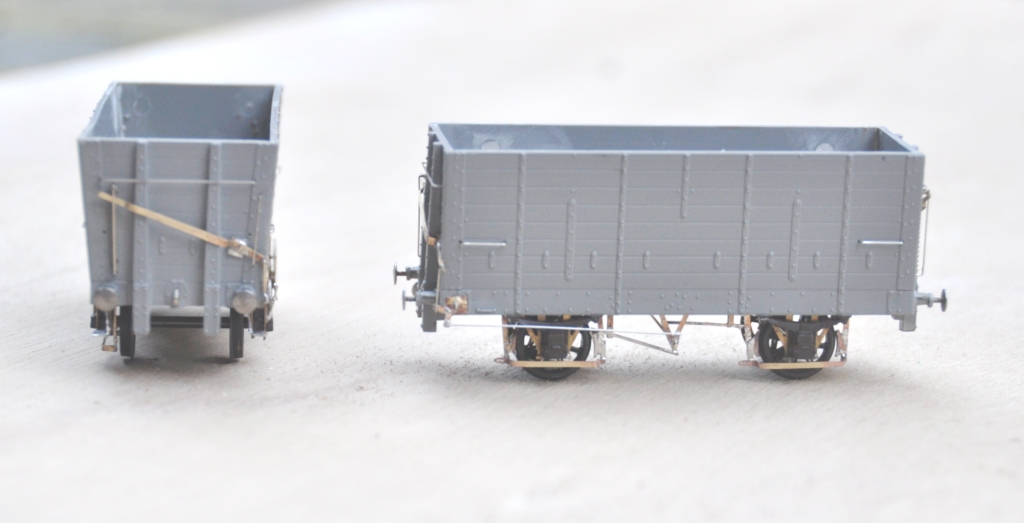
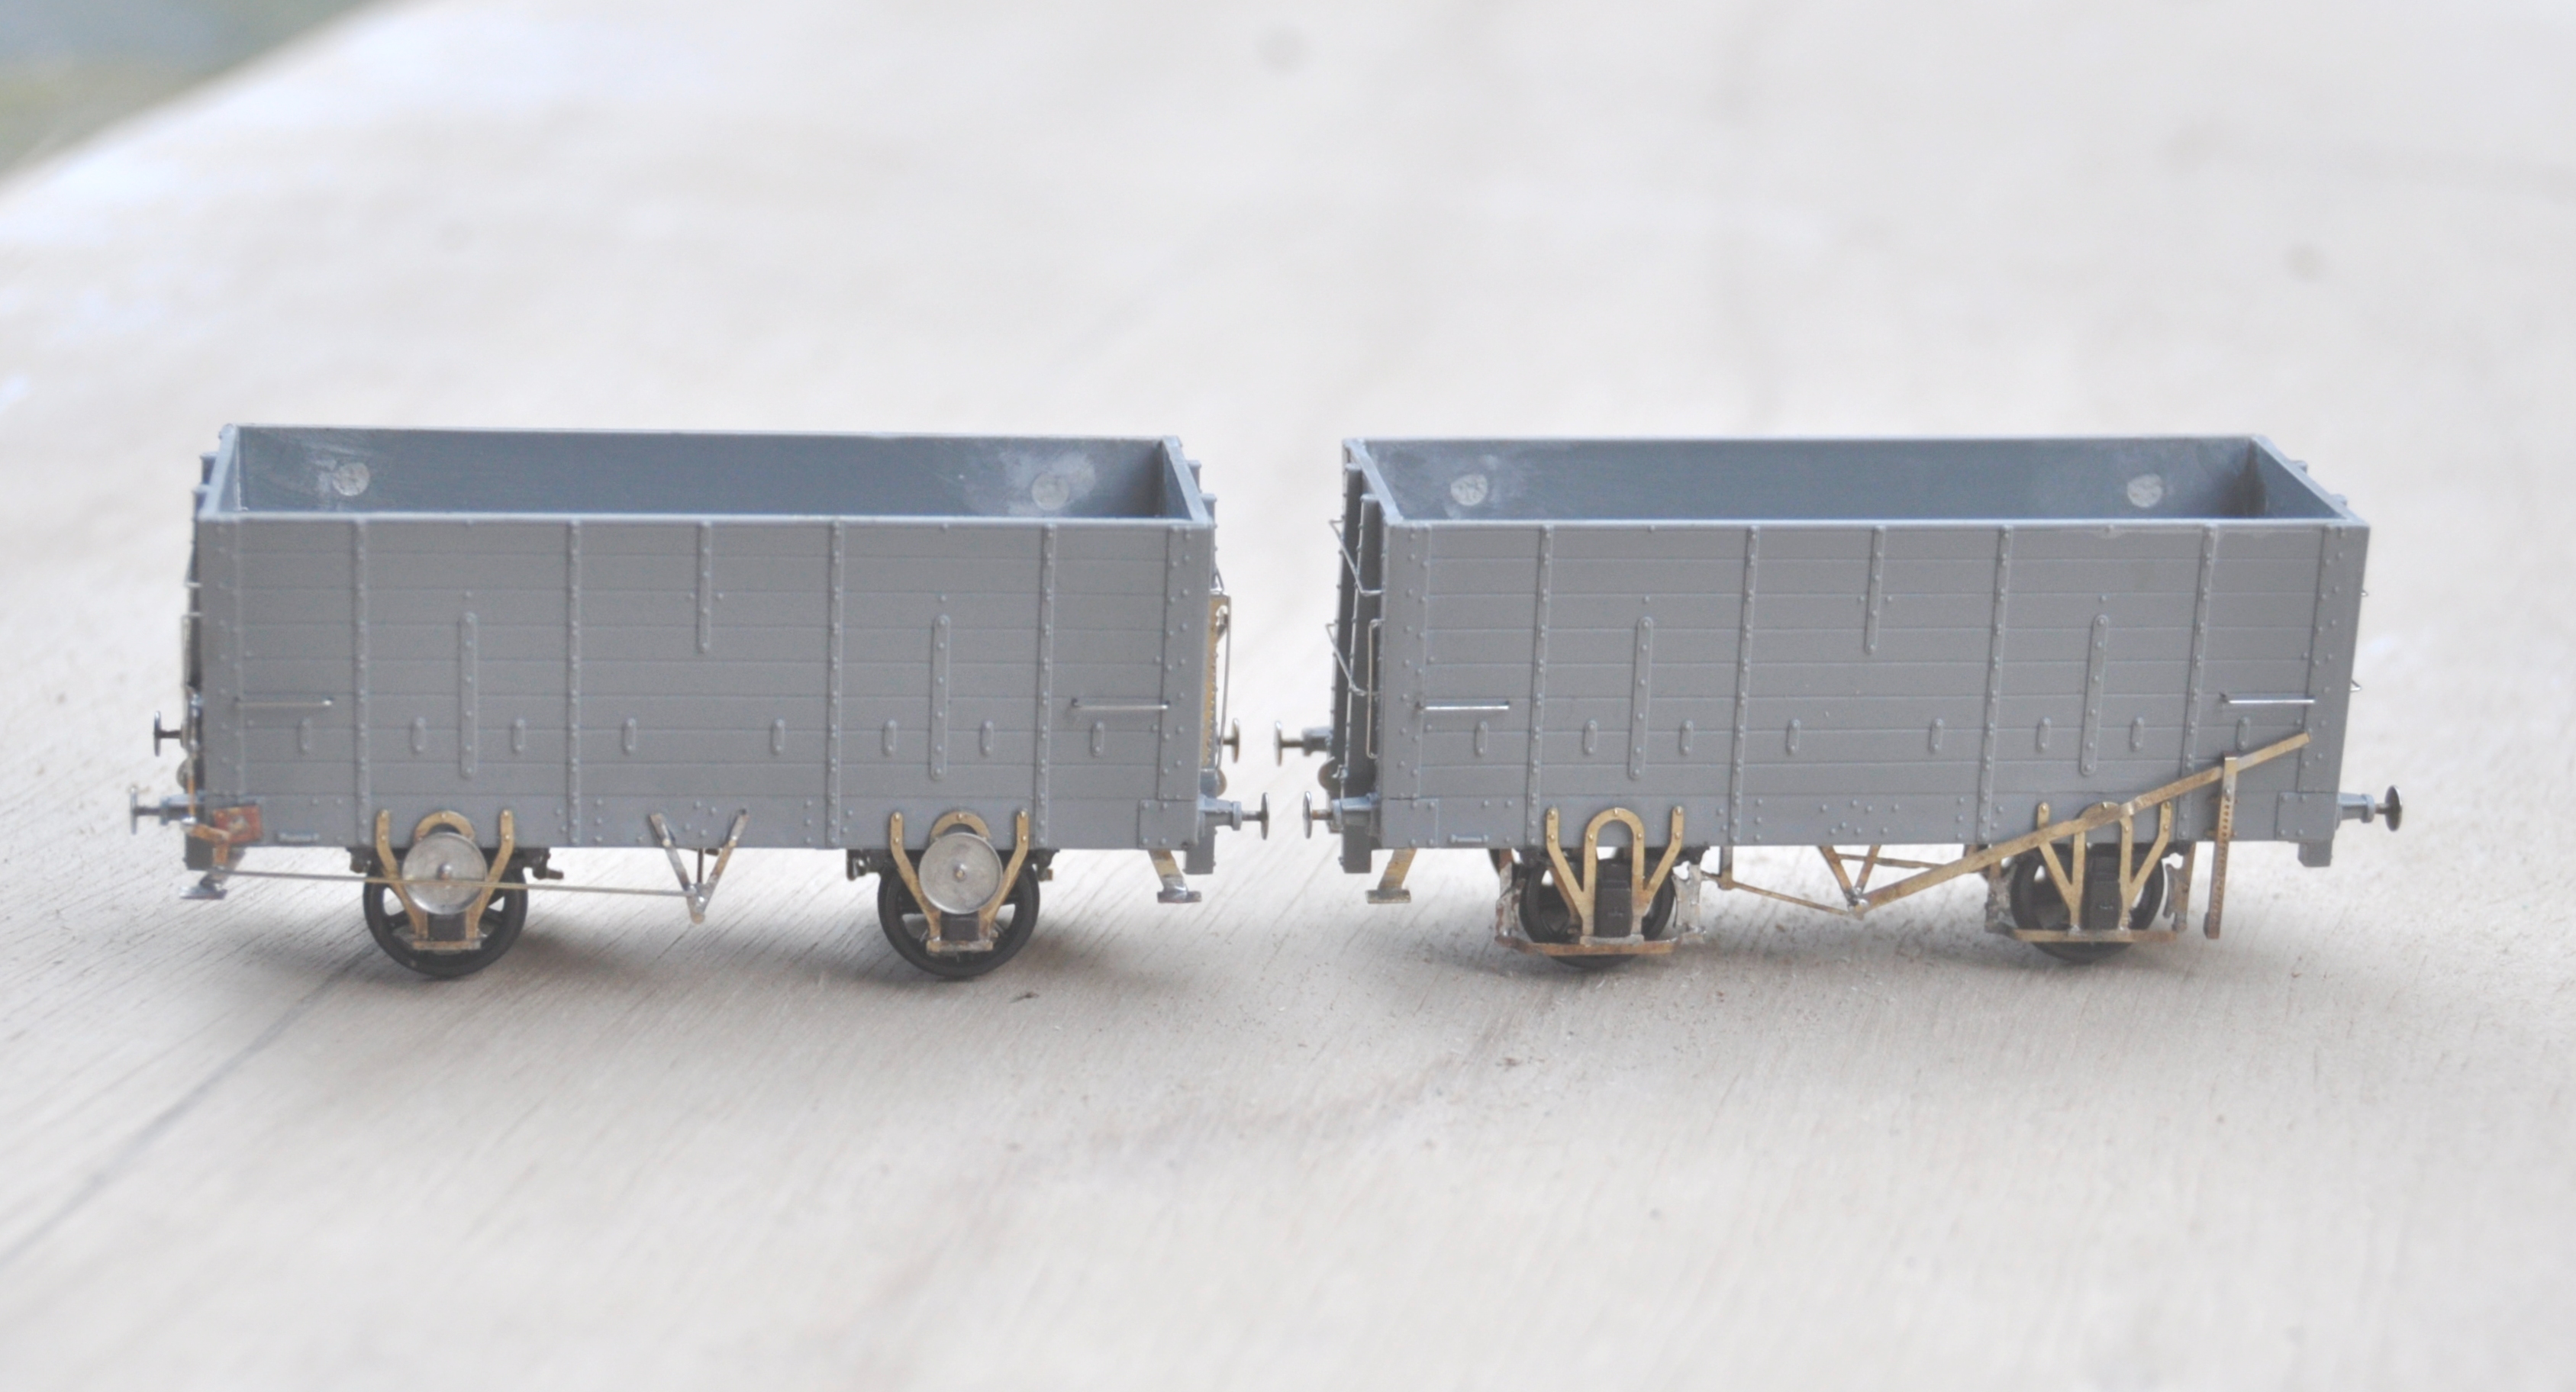
In each case, I replaced the very clunky W irons with Bill Bedford replacements; even though these were to be to EM, I felt that they would improve their performance. The first examples were essentially built as the kit was intended with fairly traditional brake gear (which was to one side only). However, having built my first one, I decided to refine the brake gear by drawing an etch for replacement steps, V hangers, morton brake mechanisms and brake levers. This (along with a comparison with the plastic equivalent – the painted wagon), is below:
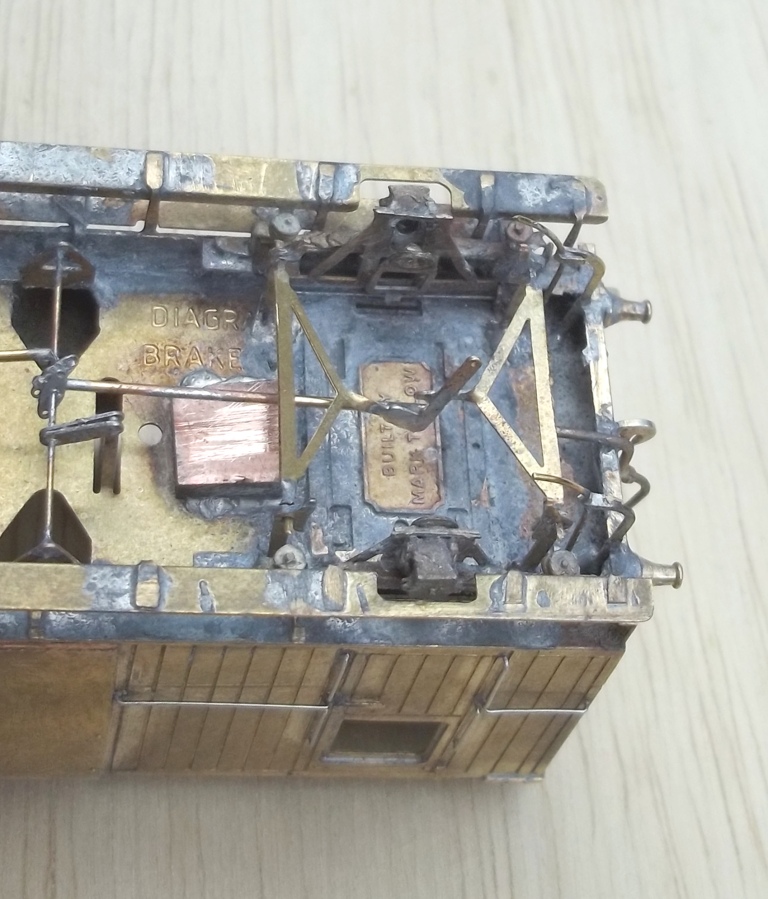
However, a significant proportion were modified with end levers that operated a crank that was connected to the Morton gear. At the ends, there was a much more chunky ratchet arrangement to retain the lever in position. Again, I drew this up on the etch, and the arrangement looks like this:
The NER undertook a number of experiments with these vehicles to attempt to reduce rolling resistance and this was the subject of my next modification. On the right (below), shows the provision of a second outside set of W irons. This was to add stiffening to the axles. There is a set of Bill Bedford W irons to cater for this, but I chose instead to create a fresh set on the etch. On the left is a further variant, where an anti-friction bearing was added in addition to the outer W irons. This was a wheel that ran on the top of the axle and I presume the idea was that as it rotated less, there would be less friction. I suspect that the introduction of an open bearing surface that would instantly get contaminated with coal and grot would actually have the exact opposite impact – as these were removed by the grouping era, I may well be right!
The final variation of construction that I have modelled was a slot cut into the ends, which appeared on some vehicles. The NER used these on vehicles that were hauled up rope inclines – of which they had many. A plank of wood was inserted into the hole and wedged such that it was secured behind the end posts to ensure that the haulage point was close to the centre of the wagon. They found without this that there was a tendency to pull the end posts loose due to the uneven point of pressure.
Next up will be the painting and lettering of these; where I have three eras to chose from that would have all been apparent immediately pre- first war, which is when Benfieldside will be set. More on this in a future post.
If there is a desire from anybody for the etches, I would be able to offer them; so drop me a note?
HR Cradle Bolster – First Test Build
I had a delivery from PPD a week back, so I have been playing with some test builds of this:

This is a dia 25 cradle bolster; a type of vehicle that I have not seen on another railway. It has a square cradle that sits on the top of this, with four bolsters protruding from the corners of the cradle. They were used on pairs and the whole cradle rotated when the pair of vehicle went around curves. The intention, I presume, was to offer the load more support by offering more points of contact. Anyway, as no one else had tackled this vehicle before, I thought I would have a go!
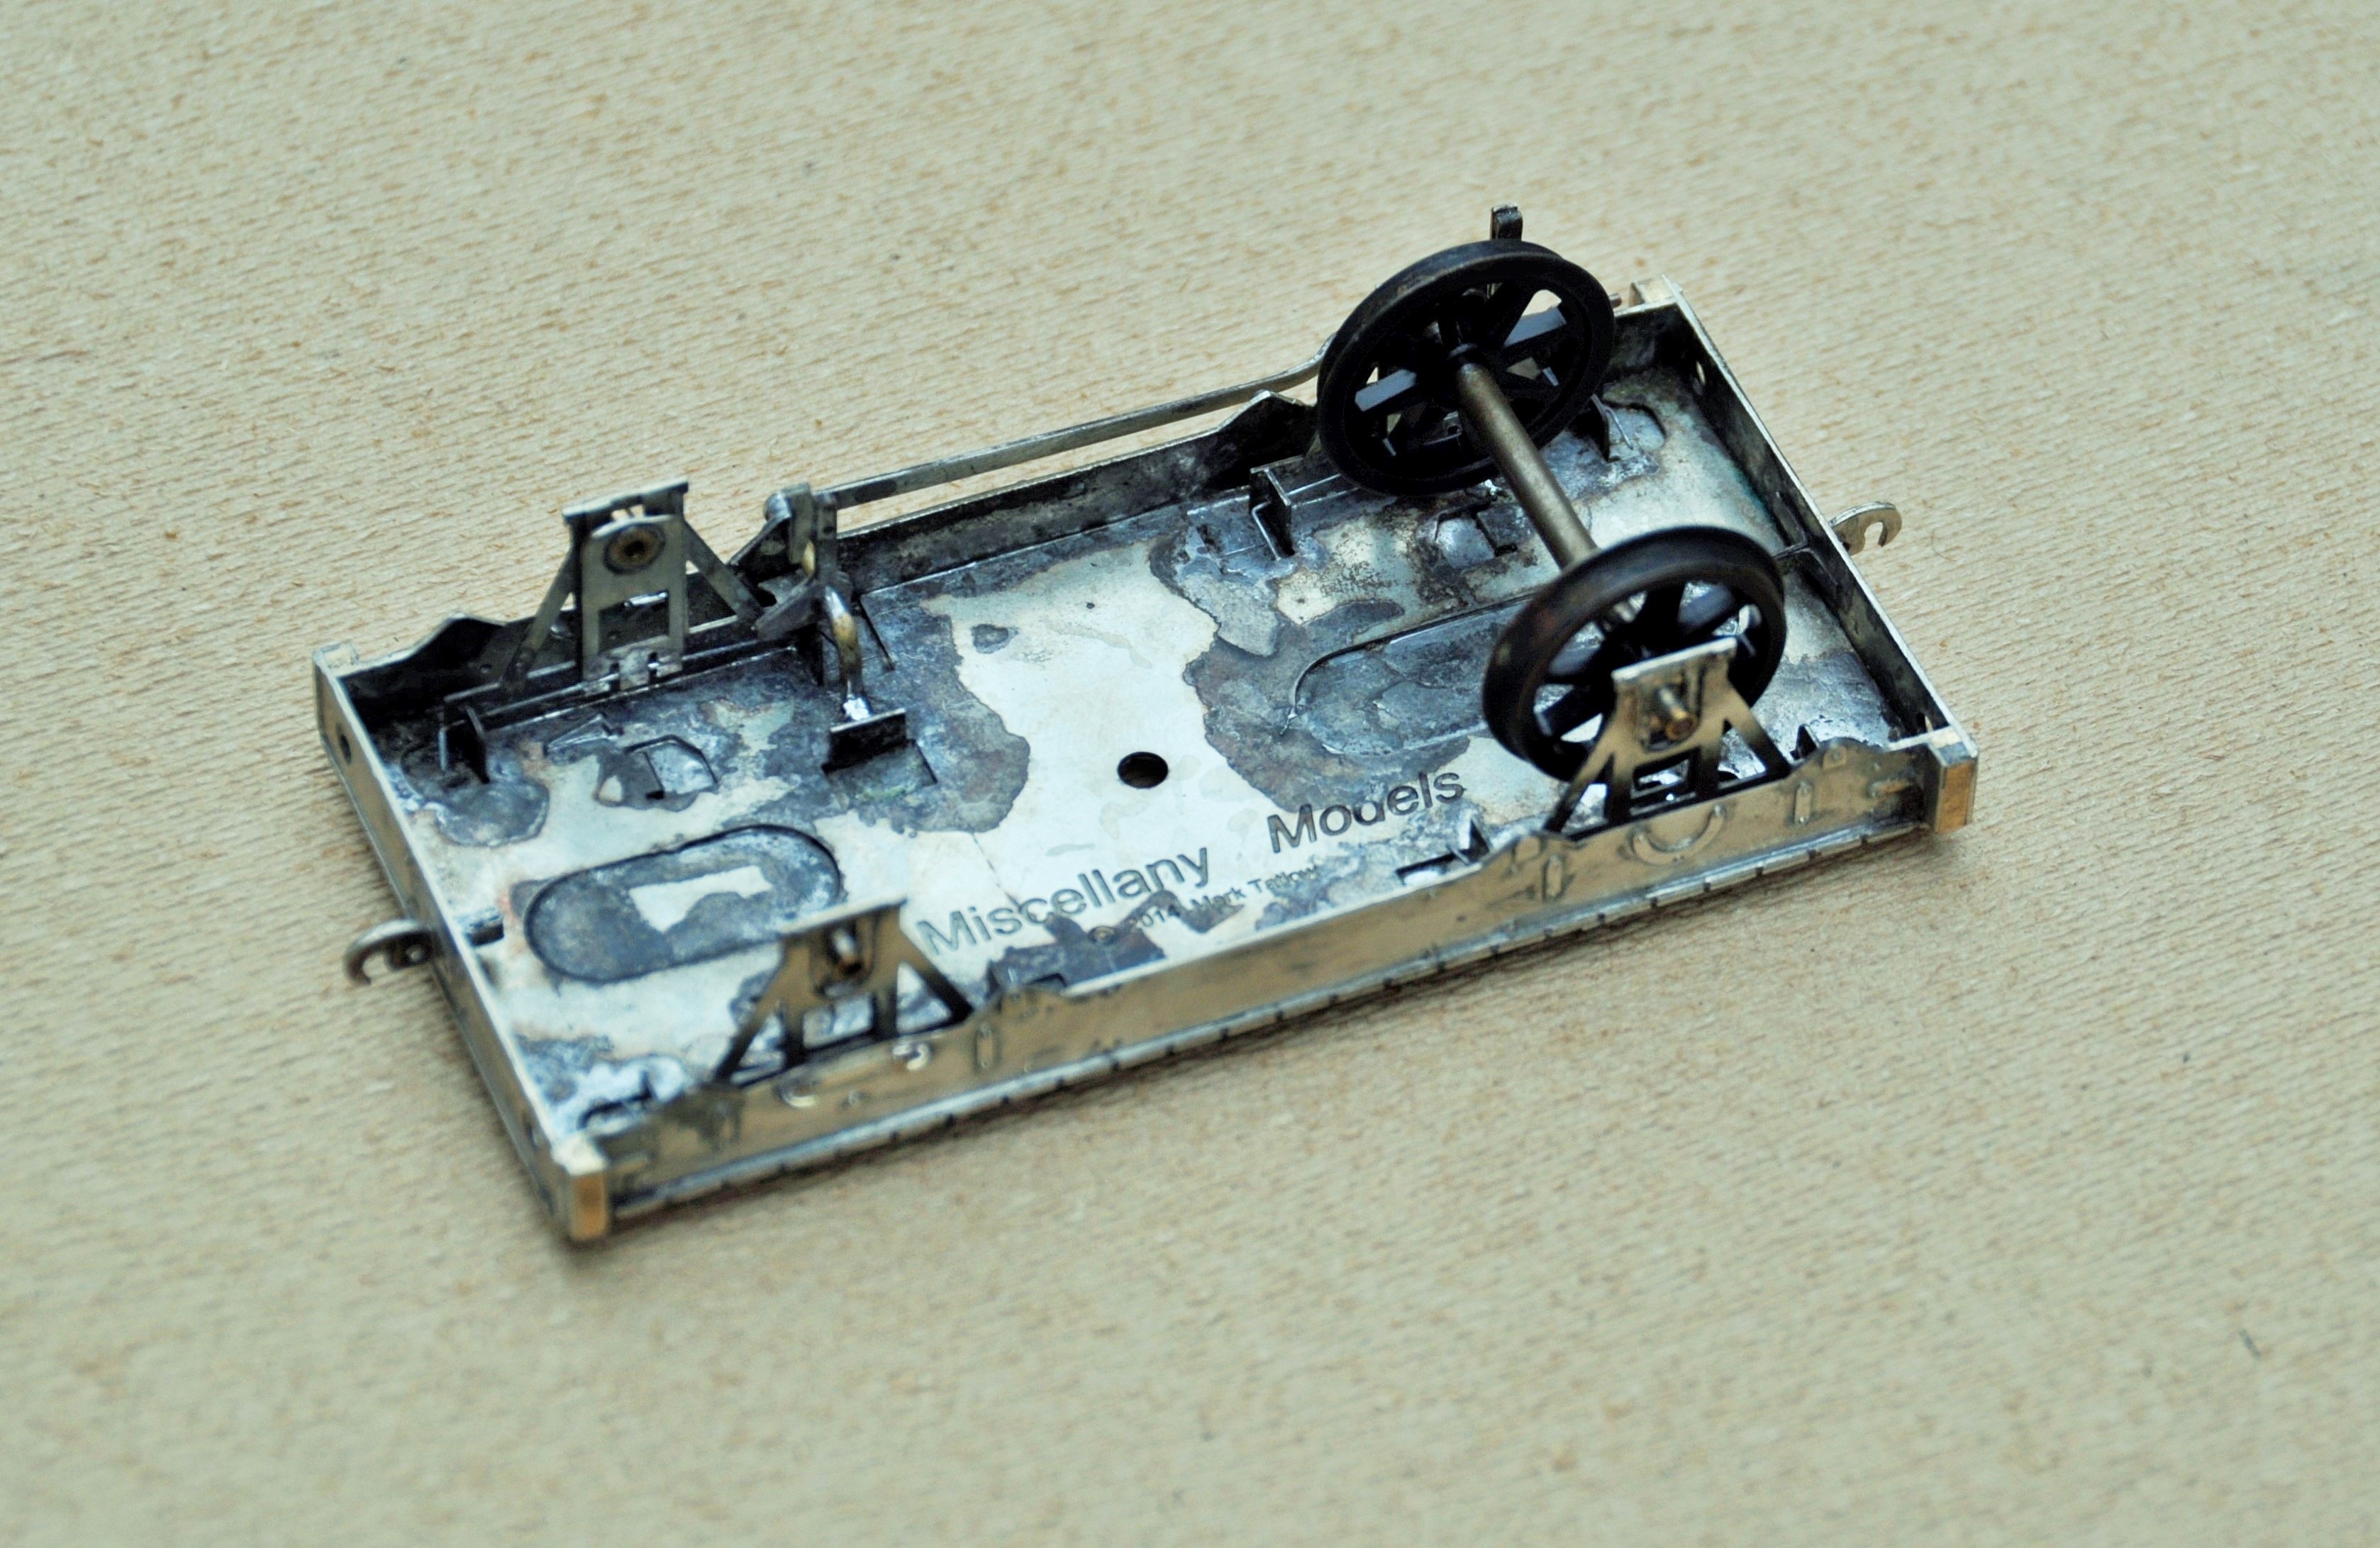
As this is my first etched design for a vehicle, I have certainly encountered a number of problems. As the top photograph shows I produced this in both 4mm and 7mm; the latter has proved more successful due to the thickness of metal being greater. The main issue that I created for myself was to half etch the solebar overlays so that the rivets and the ironwork could be portrayed. However, rather than backing them on a further layer of etch (like the etched kits I have built – they evidently knew something……), I spanned it between supports. The intention had been to make the kit fold up more readily but in practise what has happened is that the half etched solebars have distorted (badly in the case of the 4mm one) due to the stresses introduced in the heat from soldering. Thus, whilst I have a working model (at least in 7mm), a rework is going to be required.

Both the 4mm and 7mm versions will have sprung axleboxes, using a varient of the guitar wire sprung version used by Bill Bedford and others. The 7mm chaps don’t seem to use it much and I guess the mass of their models helps. However, it does glide with the springing and is better as a result I reckon.
I have also done a 3-D design for the cradle, which I am proposing to use as a master for some resin castings (certainly in 7mm, I might go down the lost wax brass route in 4mm). A new process that I have not previously attempted. I need to find out where to get axleboxes and buffers from – Larrie Griffin I presume.
Also back from PPD, were some etches for something altogether more bold (which is a worry in the light of the problems I have encountered on a relatively simple wagon!). This is the chassis and body etch for a Drummond Scrap Tank. I have made a start on this and again, some reworking will be required but again there is a viable model in an amongst these parts; it just needs tweeking. More to follow once I have got further with it.


Chequebook Modelling – a Wee Ben
I don’t know whether this is a serious admission or not, but I have been doing some chequebook modelling – and my crime is rather more serious than the latest Hornby offering………………
………and it cost rather more than an offering from Margate too!
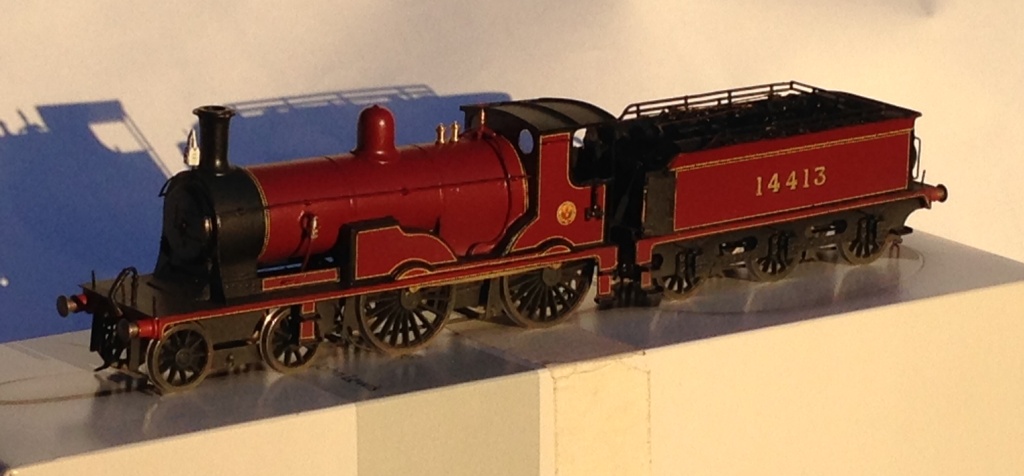
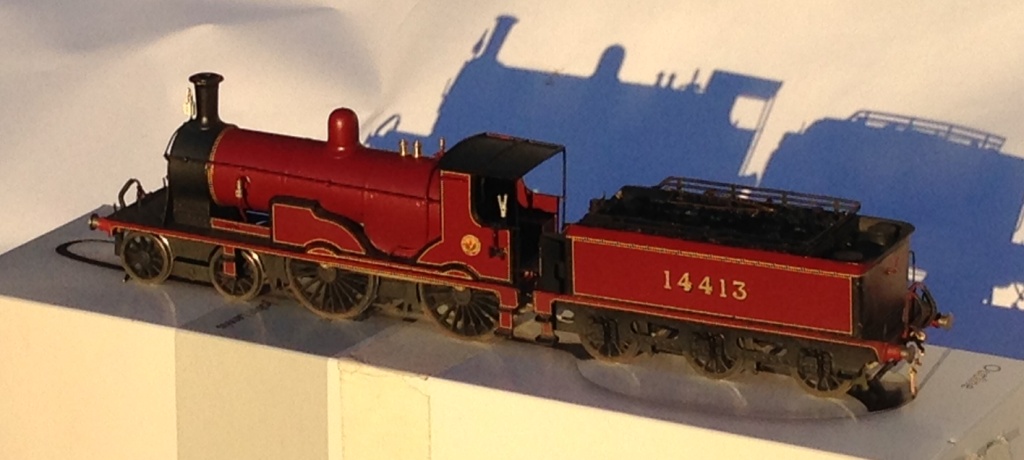
I commissioned John James to build this about two years ago (that is how long a pro builder’s waiting list is if they are any good) and this was delivered a couple of weeks ago. 14413; Ben Alligan – constructed as she was in the mid 1920’s so in the fully lined crimson lake and jolly fine she looks to I am sure you will agree.
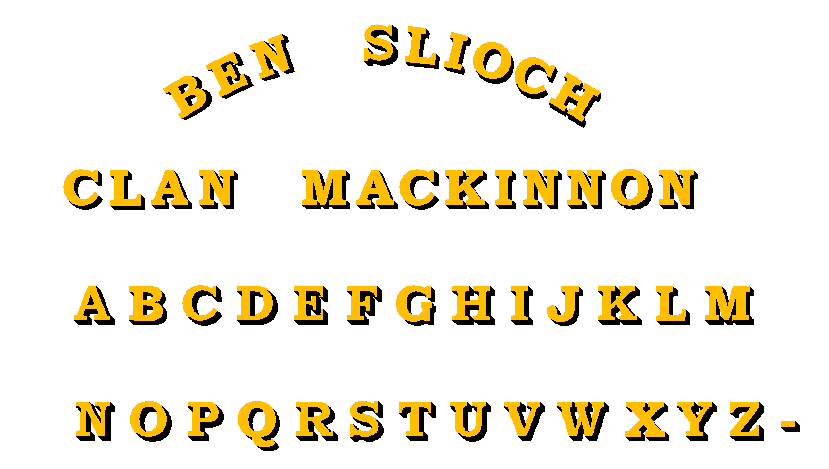
But, there is a problem with her…………………..she has names. The LMS perpetuated nearly all of the Highland’s names that were still applied to the locos at the grouping (I can think of only one exception – Lochgorm) and continued to paint them on the splashers. We hunted around for a sensible letting and did not manage to find any where the font had the right serifs and slightly unusual massing of the down stroke of the leters, so John omitted the names of this and another that he built for my father (Ben Clebrig if that is of interest to you). That has meant that I have been fighting with CAD again and I think I have got close enough for my purposes (in 4mm, these are less than 2mm high!).
So once I have sorted out the right radius for the name (I think the Ben Slioch below is on a slightly too shallow an arc); then I will have a go at printing my own transfers. I have the appropriate paper, so lets see how we do!
One of the fun things with the Bens is choosing names for mountains that I really enjoyed climbing; Ben Alligan was probably around my 30th Munro and is a fabulous climb. If you do it, you have to do the full circuit and finish on the Horns of Alligan – a bit of a mild scramble, not as airy as Aonach Eagach (which I have done) or the Cuillin (which I have not!); but still a jolly fine climb. Oh and on a clear day you can see clearly to the outer Hebrides – fabulous in the blue sky.

The Horns of Alligan looking east.
Hopefully to be ready for Warley
Slightly prompted by a comment on an early post, I have completed a BR (S) utility van; which I think British Rail called NQVs.
This was made from a Parkside kit, with a chassis from Masokits. The former were so simple that you hardly need instructions but the other was less so and it was a bit of a pain to find that it came with only quite limited instructions – I wonder if I did not get the full pack as Masokits are normally fairly good?

The other things that I changed with it were to avoid the use of the really grotty buffers from Parkside and used some very good Lanarkshire Models buffers – but I have managed to break a drill bit on one, so I may be stuck with one end being unsprung. I also changed the rather poor handrails over for 0.45mm wire. I have not done the rainstrips yet, but looking at this picture I am going to have too!
So it should be to the paintshop tomorrow. Hopefully by the time I have finished it will look like the one in Paul Barlett’s photo thus: http://paulbartlett.zenfolio.com/srcct/h11744058#h11744058
It should be done for Warley, which is Portchullin’s next outing.
Diagram 39 Brake Van
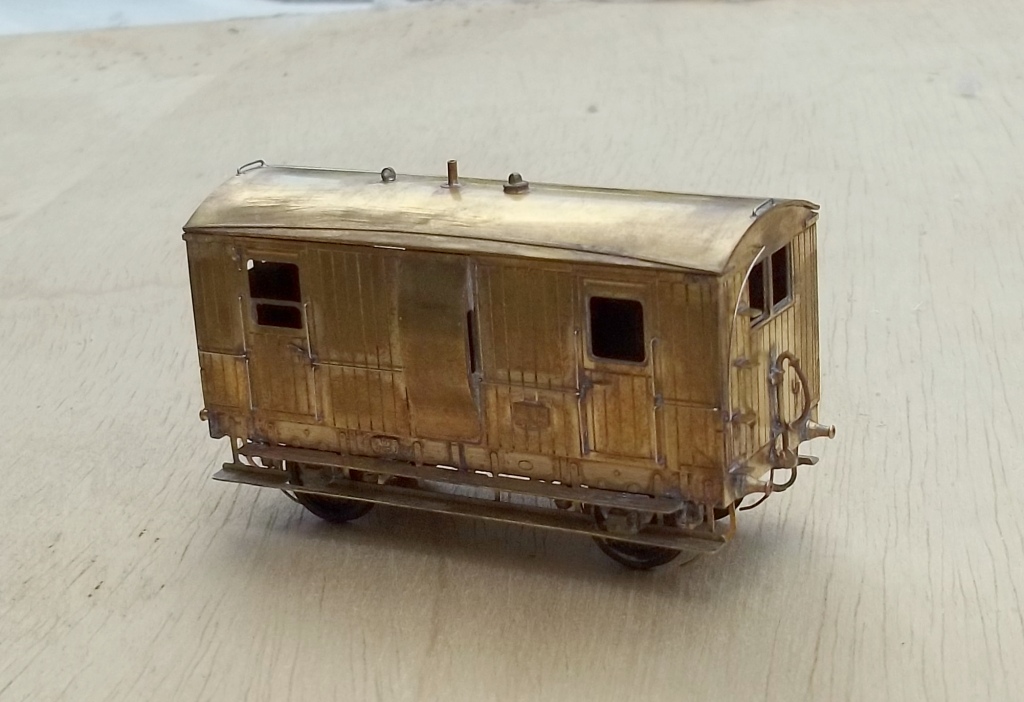
The latest completion off the workbench is a goods brake van.
This is a diagram 39 version; which was the Highland’s last brake van design (and there is some speculation that they were not delivered until after the start of the LMS era but if someone has a photograph in HR days, we would be all eyes!). These were quite modern by the Highland’s standards and were the first ones for several decades to do away with the lookout on the top of the roof which was likely to be a retrograde step given all the twists and turns of the Highland’s lines.
 .
.
It was built from a Lochgorm Models kit; constructed mostly as intended. However, I elected to insert some sprung suspension using Bill Bedford sprung W irons, rather than the designers intention of compensation. I also found that the sides were a little tall, so these needed to be cut down a tad. Other than this, it is was pretty easy. Having bought some of the NBR Models etched builder’s places, this became the first model of mine to be fitted with one – so a small first!