Blog Archives

Controlling Bottom Works Sidings
Followers of this blog will probably be aware that I share some of my model railway escapades with the two authors of the blog OTCM. Both of the authors are in the process of putting together entries into a competition to build cameo layouts being orchestrated by the publishers Titfield Thunderbolt. Cameo layouts was the topic of a book written by Ian Rice and seeks to describe a small layouts seeking to use presentation techniques to capture a slice of the whole in a convincing manner.
To be fair to Oly, his entry is largely complete as long as he does not seek to tinker with it too much(!), the same could not be said for Chris’s entry – titled Bottom Works Siding – so he has some catching up to do! To assist Chris I offered to make his signals and after a few weeks of work we have reached the point where they are complete.
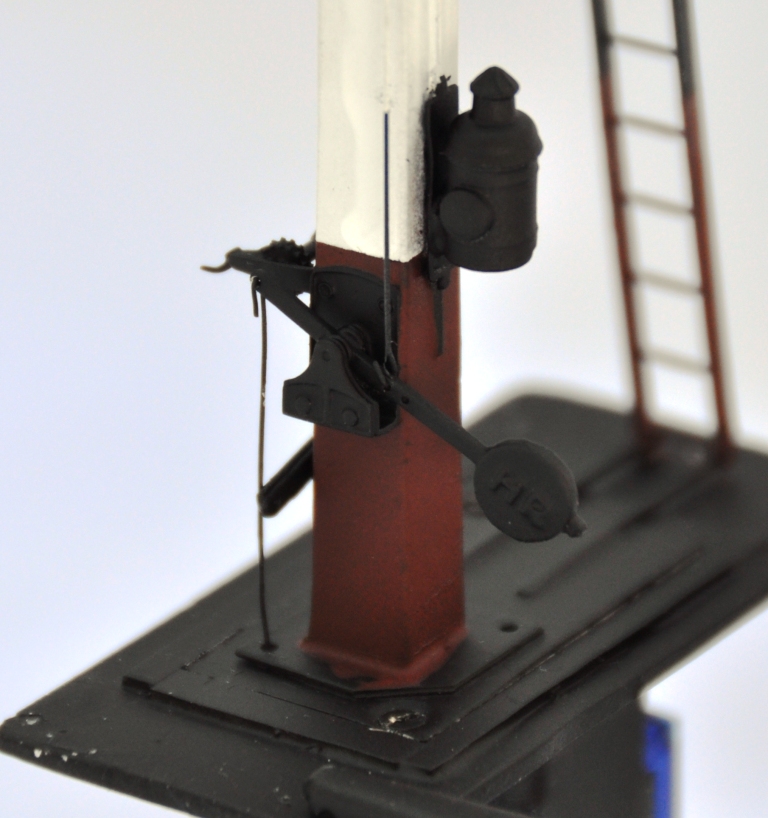
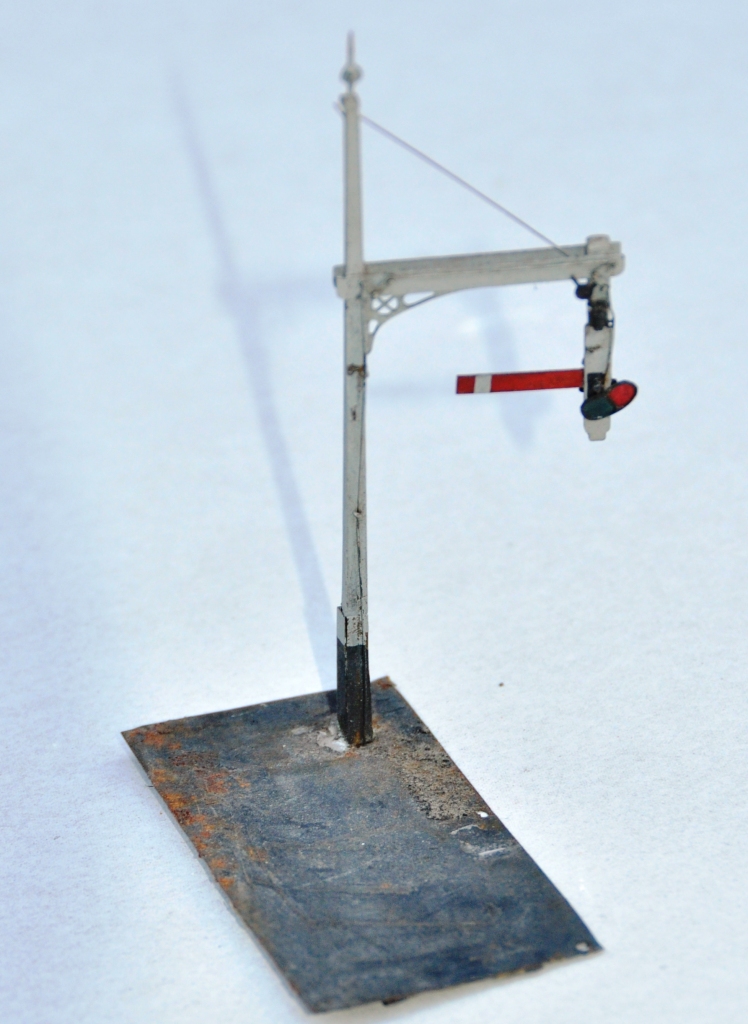
Chris’ model is based on the GCR’s route over the pennines at its Yorkshire end. It will represent a set of transfer sidings from the Woodhead route electrification to a industrial line serving a coking plant – so I suspect we will get to see a fair amount of grot in the finished article! Its signals are LNER or BR(E) practise which is mildly different to what I have built before in some regards but not others as there was a lot of standardisation between the LMS and LNER (and BR more or less adopted LMS practise). So first up (above) is an LNER standard wooden post with replacement BR miniature upper quadrant arms. The post is a piece of brass square section that I filed to a taper (hard work) with predominantly Masokit’s fittings (which I found to be notably better than MSE’s equivalent).
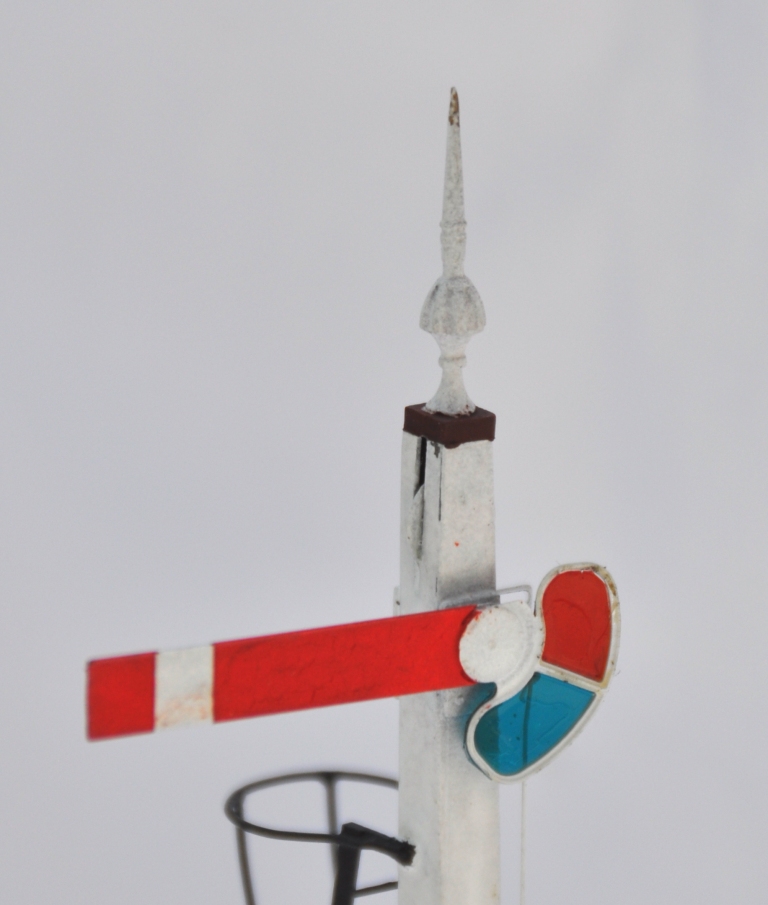
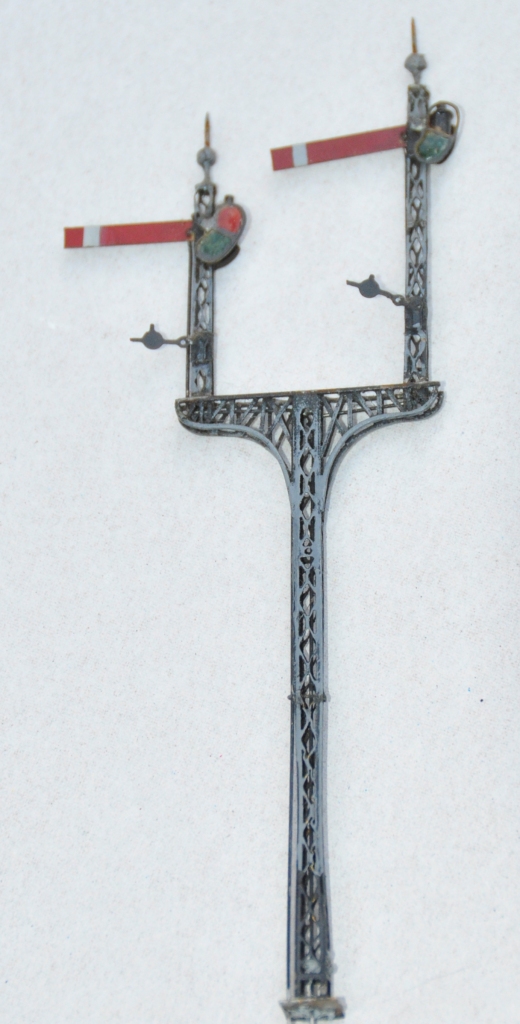
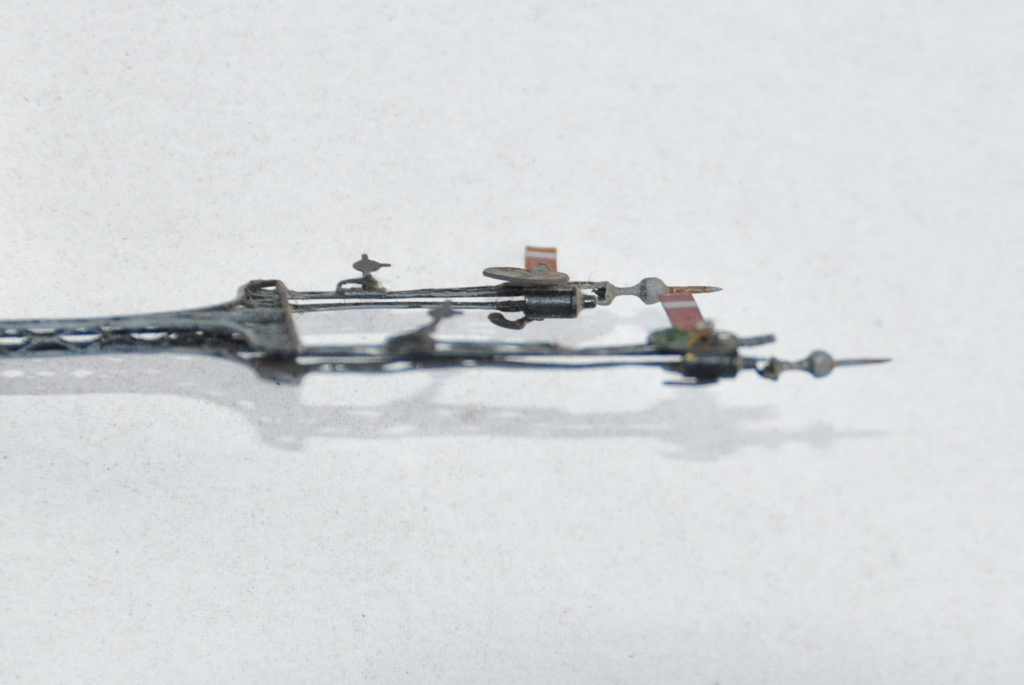
This one is effectively a standard LMS/BR tubular post signal (apparently with brewer’s droop – sorry!) with a small bracket that has another miniature arm signal to it. This is assembled with a combination of tubes and angle section from Eileen’s Emporium, along with some more Masokit’s arms.
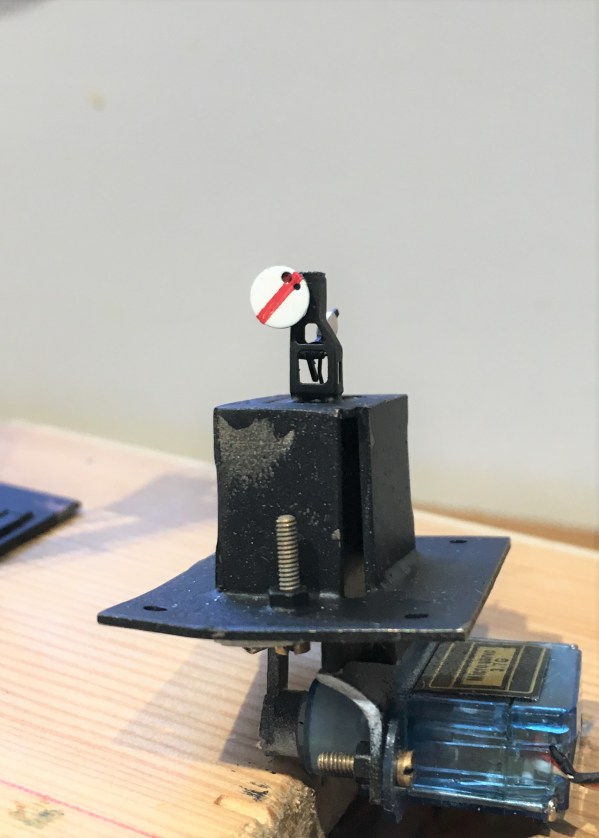
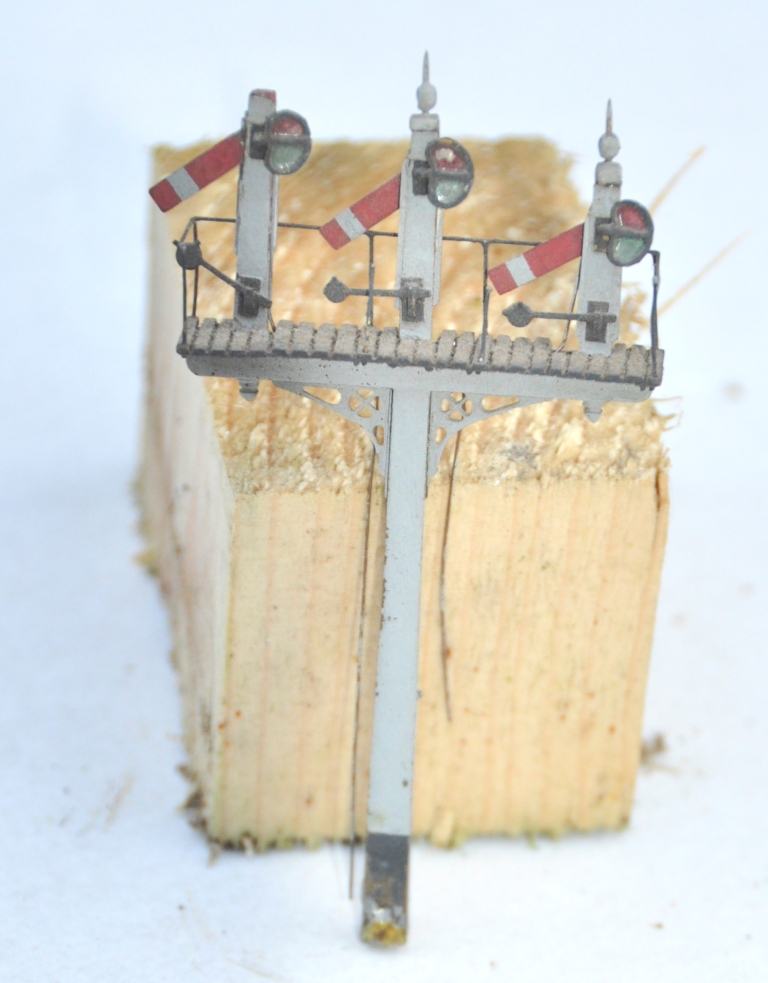
And finally a miniature ground signal – which despite being startling small was not actually all that difficult to build – it being based on a excellent little etched kit from Palatine Models.
As a result of a lost camera, there are not really any meaningful photographs of the signals being created but fear not, I still have a few to go for Glenmutchkin, so there will be some to come! In the meantime, and to prove that they really do go, here are some videos.
In the fullness of time, I dare say we will get to see these in situ, so why not subscribe to Oly and Chris’ blog, to get an instant notification?

Princes Risborough North Box
As part of the Missenden Railway Modellers summer retreat, I was lucky enough to be invited to see the Princes Risborough North Box, which is now in the custody of the Chinnor and Princes Risborough Railway Association.
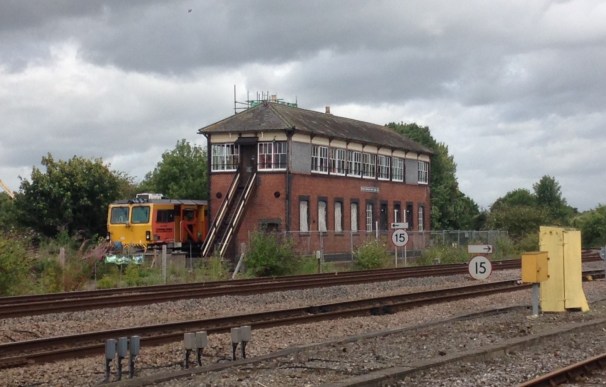
The box had lain derelict for many years, since its closure in 1991. Somewhat peculiarly, it was a break in by vandals during this period that potentially saved the box as it identified how seriously affected by water penetration and rot it was. This lead to the preservation society being able to convince Network Rail to let them in to stabilise it and they feel that had this not have occurred, when the building’s distress subsequently became apparent to Network Rail they would have merely ripped it down.
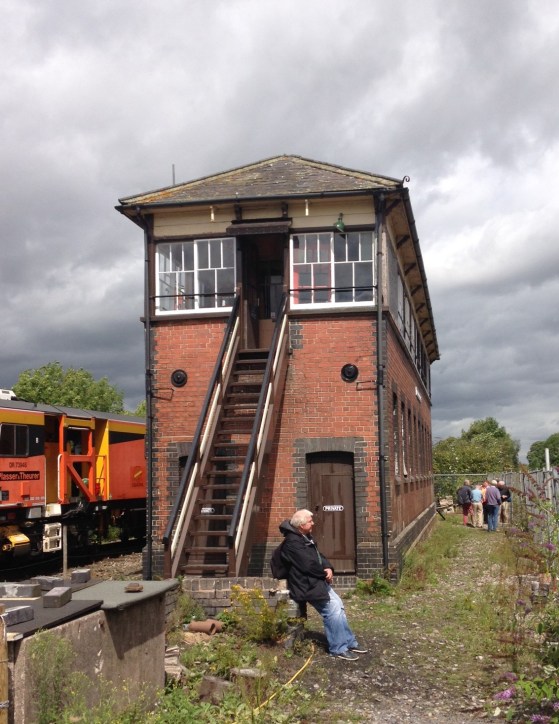
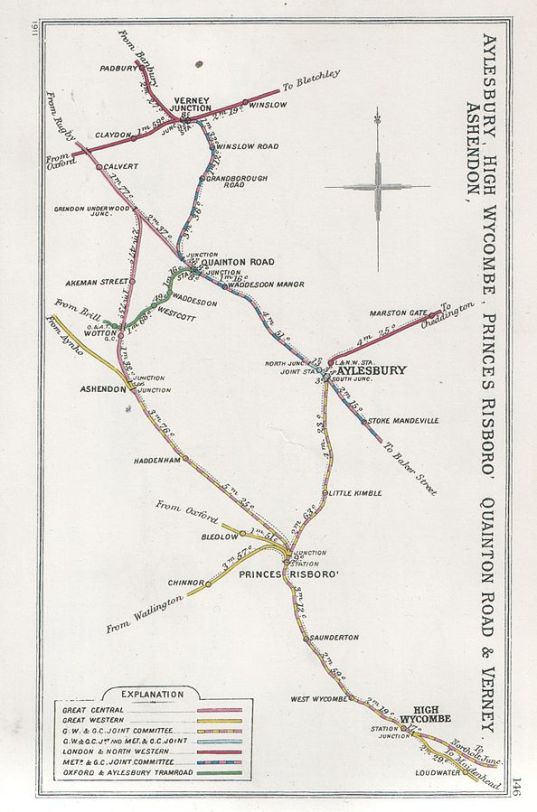
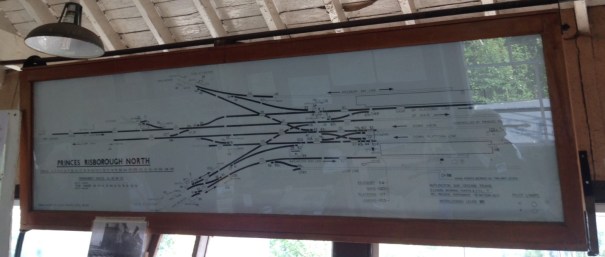
The box is substantial and is apparently the largest remaining GWR signal box in the country. It originally controlled the north end of Princes Risborough station but its size was determined by the complicated junction at this end of the station with three branch lines splitting from the main-line to Bicester and beyond. The branches it served were Aylesbury (still part of the national network), Oxford (closed in 1963) and Watlington (closed in 1957 but now reopened to Chinner as part of the preserved railway). The Railway Clearing House map is below and just to prove the complexity the box diagram too!
As would be imagined, there is a fairly extensive array of levers although in the various rationalisations that occurred through the GWR and BR eras have reduced the extent of these significantly. The preservation association have, however, reinstated many of the missing levers even though they are not yet connected to anything.
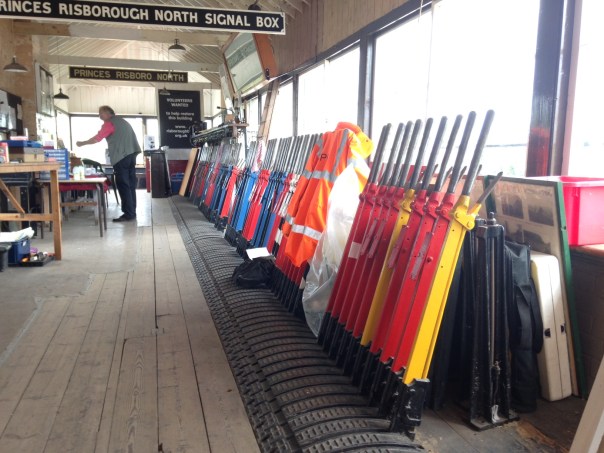
At present, the preservation society only have a temporary connection into the Princes Risborough bay platform but the intention will be to make this a permanent link onto their line, signalled via the box. However, given that this will still only be one of the lines that the box formerly served, there will only be a limited amount of it in use. Apparently the plan therefore will be to separate off the bulk of the box to create an interactive museum where visitors can play the part of a signalman.

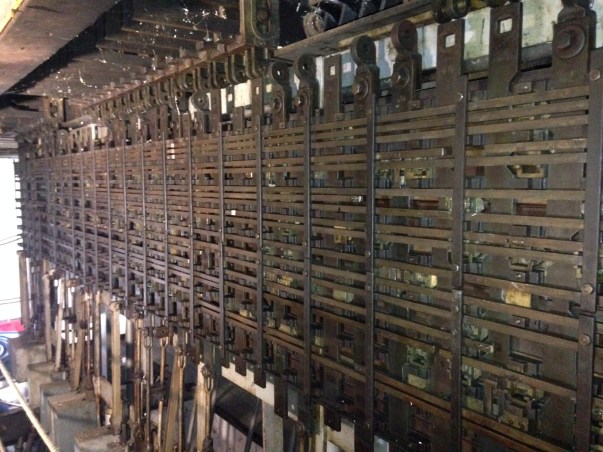
The treat for me (and many of the others on the visit) was to go into the frame room to take a look at the locking frame. Although I had seen this in model form before, I had never seen a full sized locking frame – even though this is only a shadow of its former self as it only covers that proportion of the box that was in use at 1991, it is still very complicated as you can see.
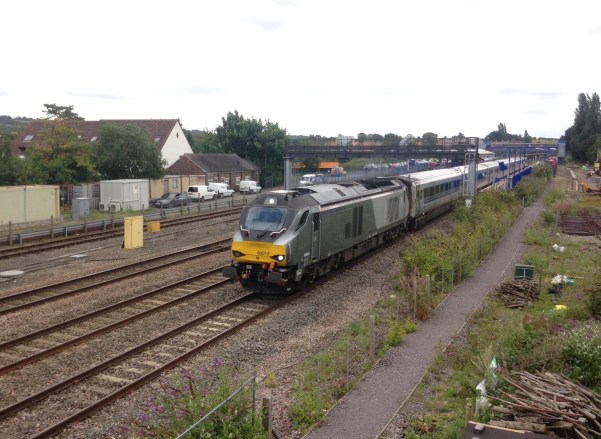
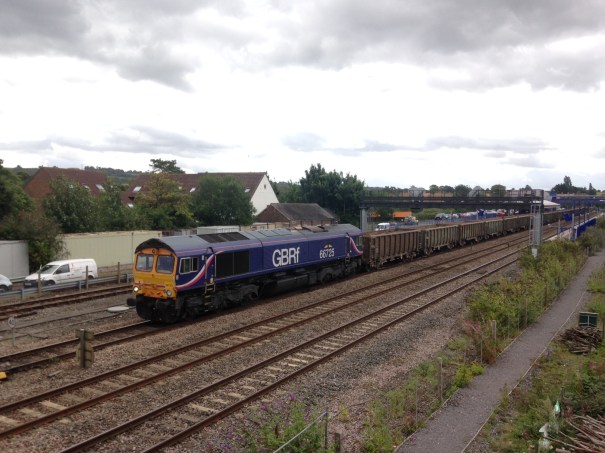
The Chiltern line is now really quite busy, far more so than when I used it to get to Solihull on business regularly. In addition to the procession of class 168 DMUs, there were class 68s on the trains for Birmingham and Wrexham plus a pair of trips each day with class 66s on spoil trains from the Thames Tideway sewer project.

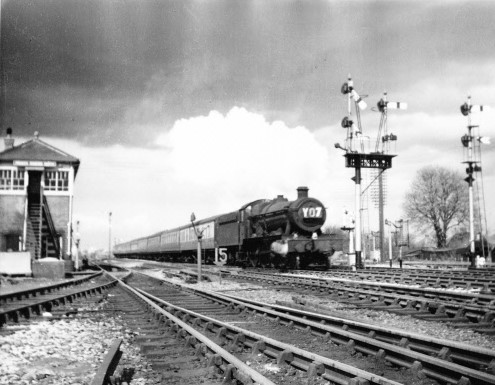
And finally, this is what the box looked like in the days of steam. This photograph was taken in 1960 by Christopher Bomken when he was still in his shorts – it even won him 2 shillings and sixpence in a school photographic competition. Recognition at last Christopher it has made the interweb!
")
Christmas Layout Wiring (Not!)
I promised a number of people that I would be making sure that the layour had at least the main elements wired up over christmas, so that it could at last run. But then it was a bit wet and cold so I did not fancy it out in the summerhouse so I applied rule no 1 – its my trainset!
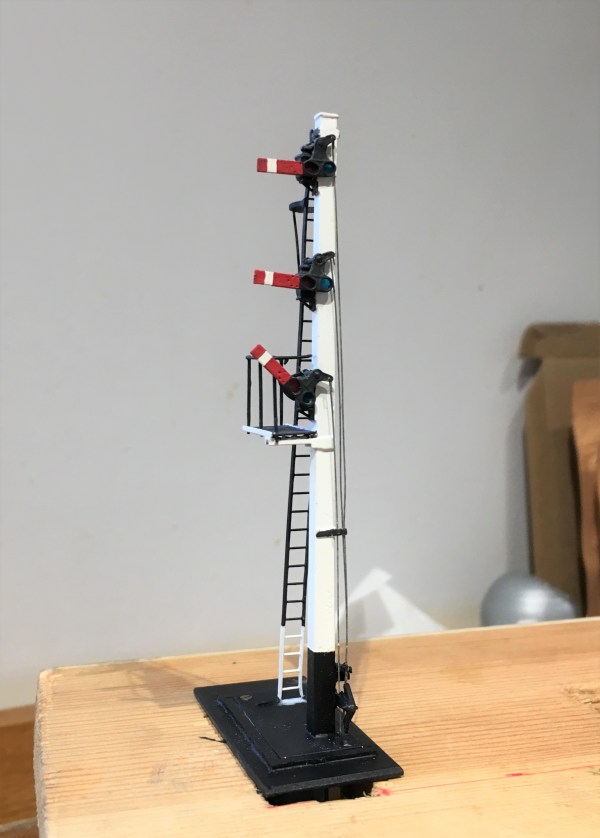
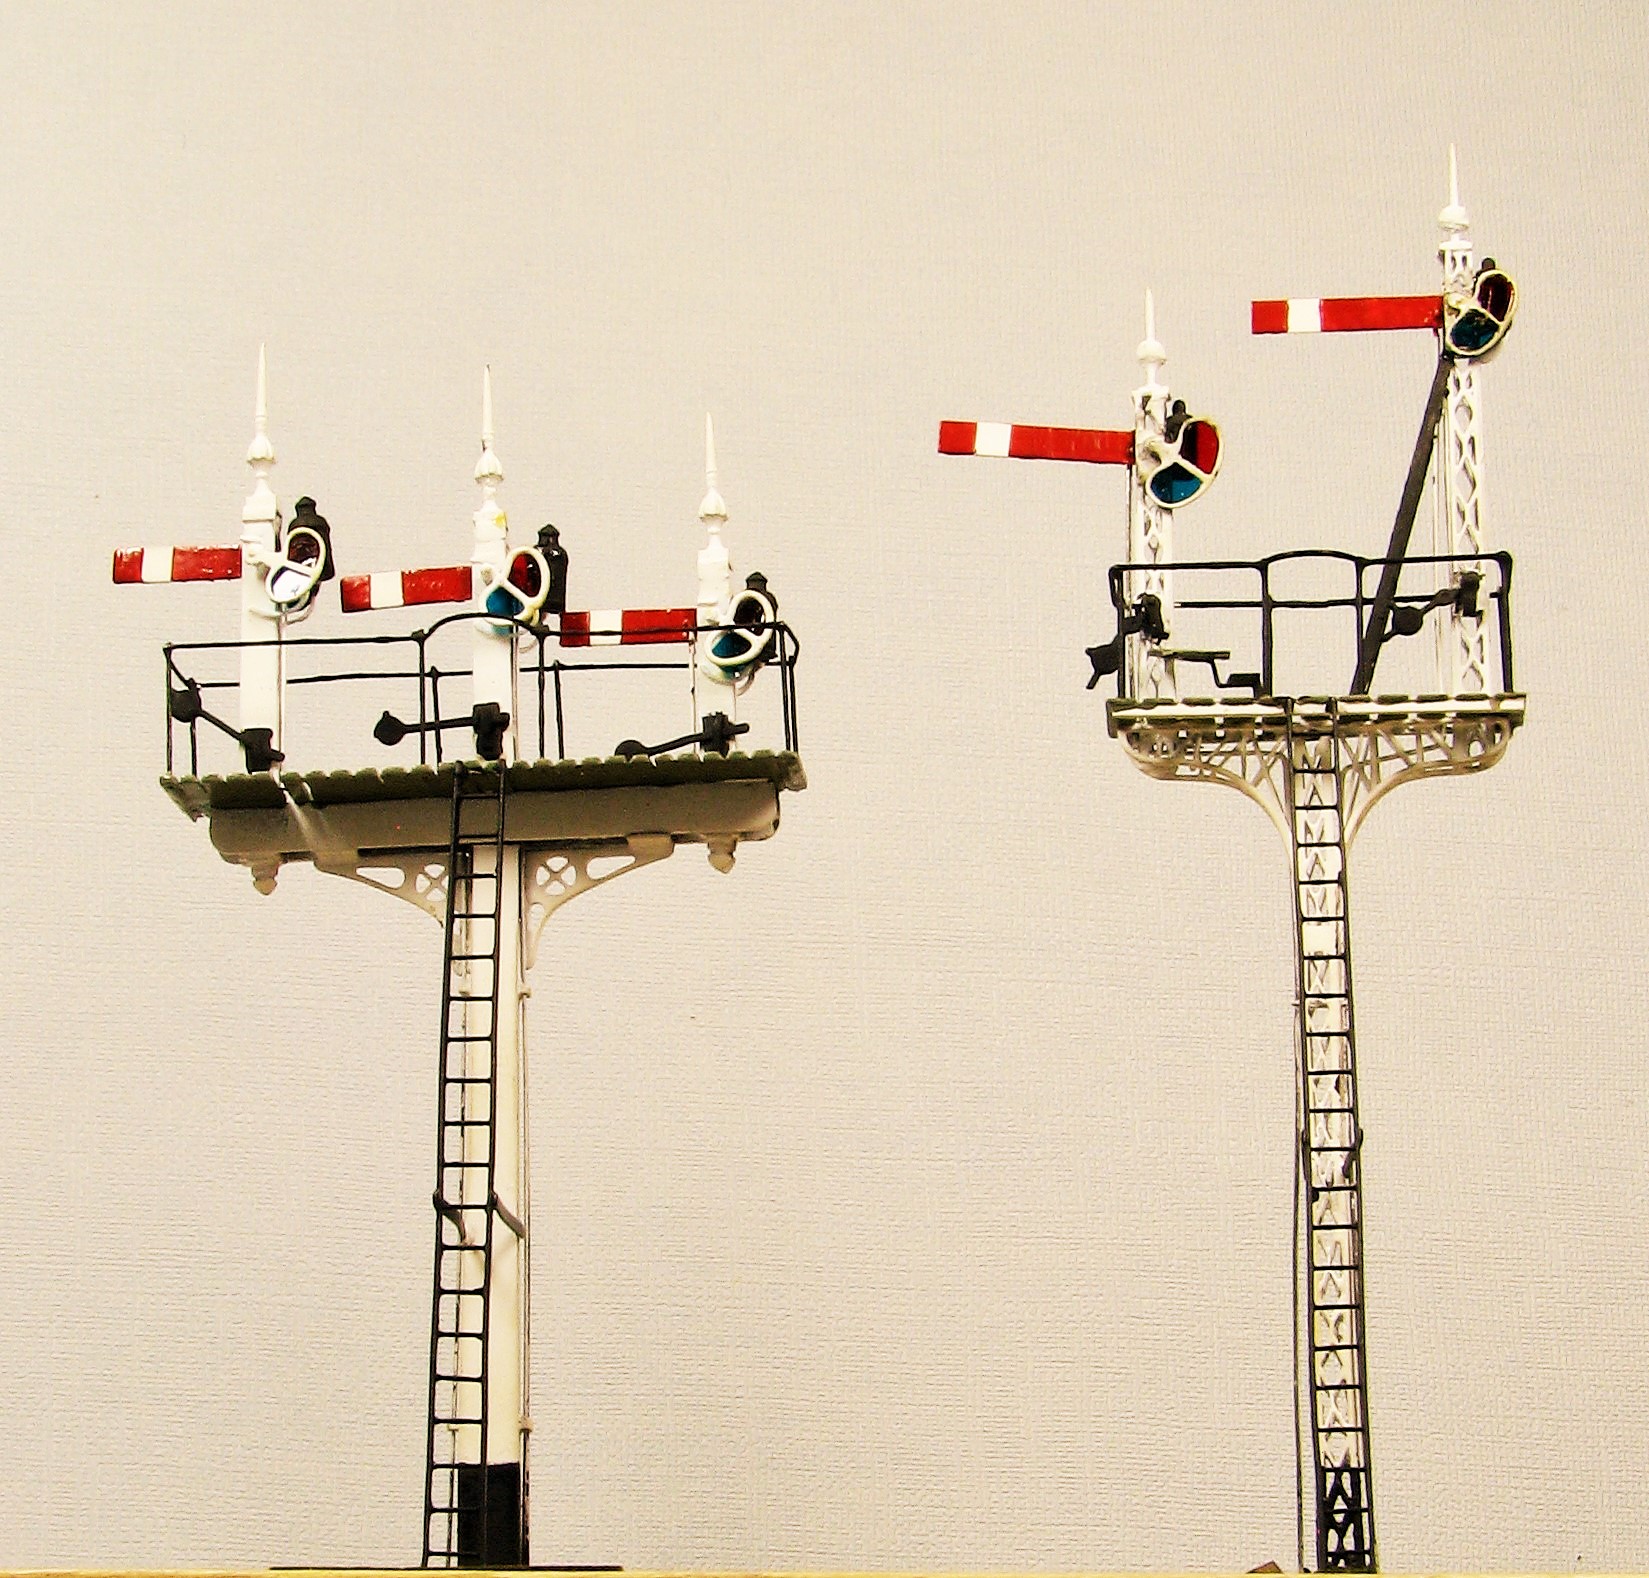
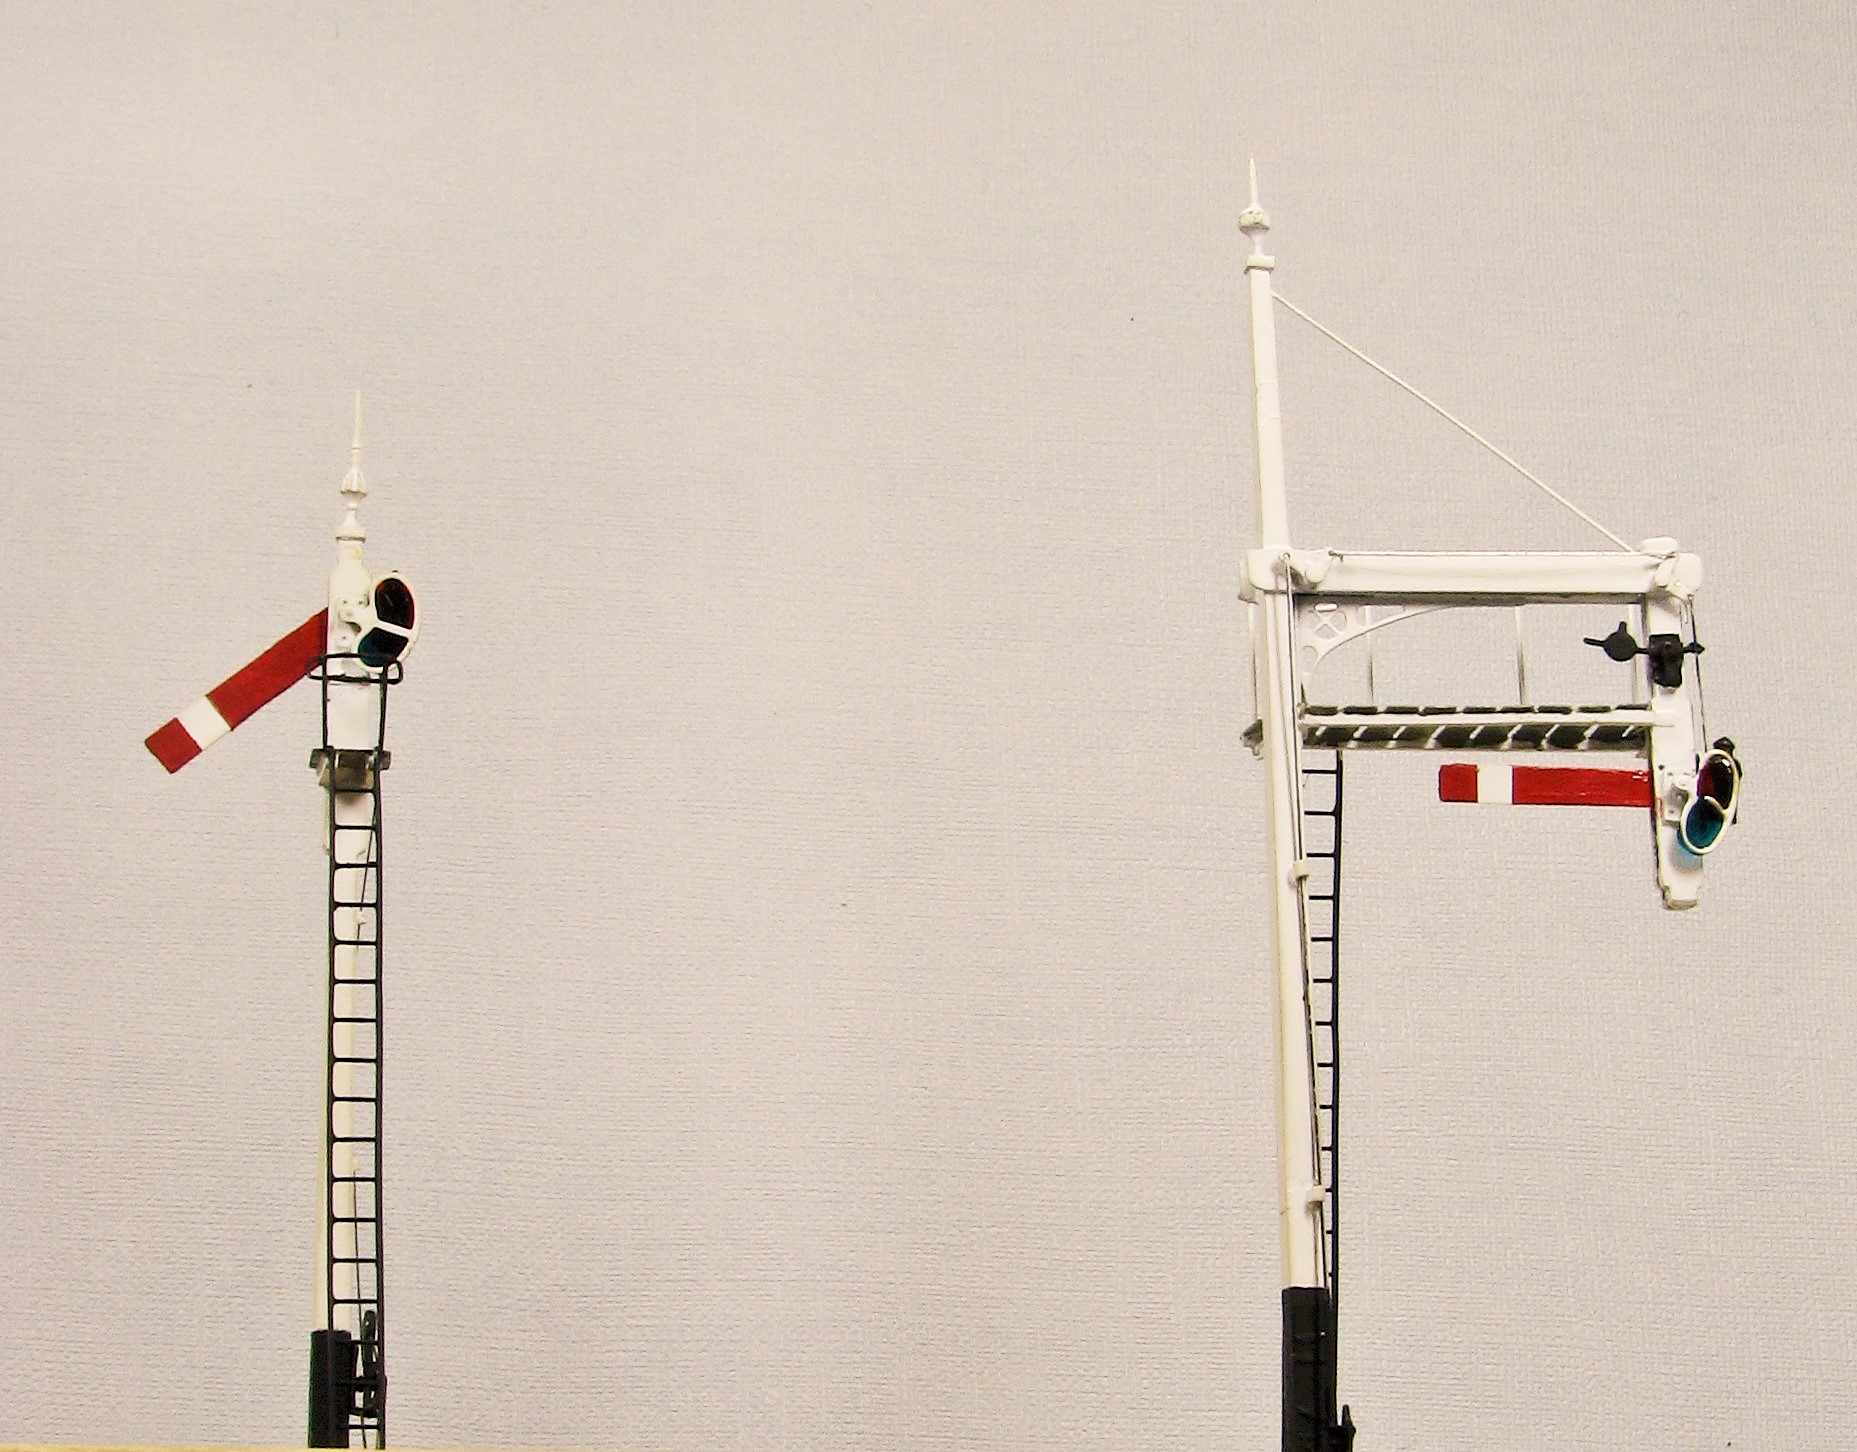
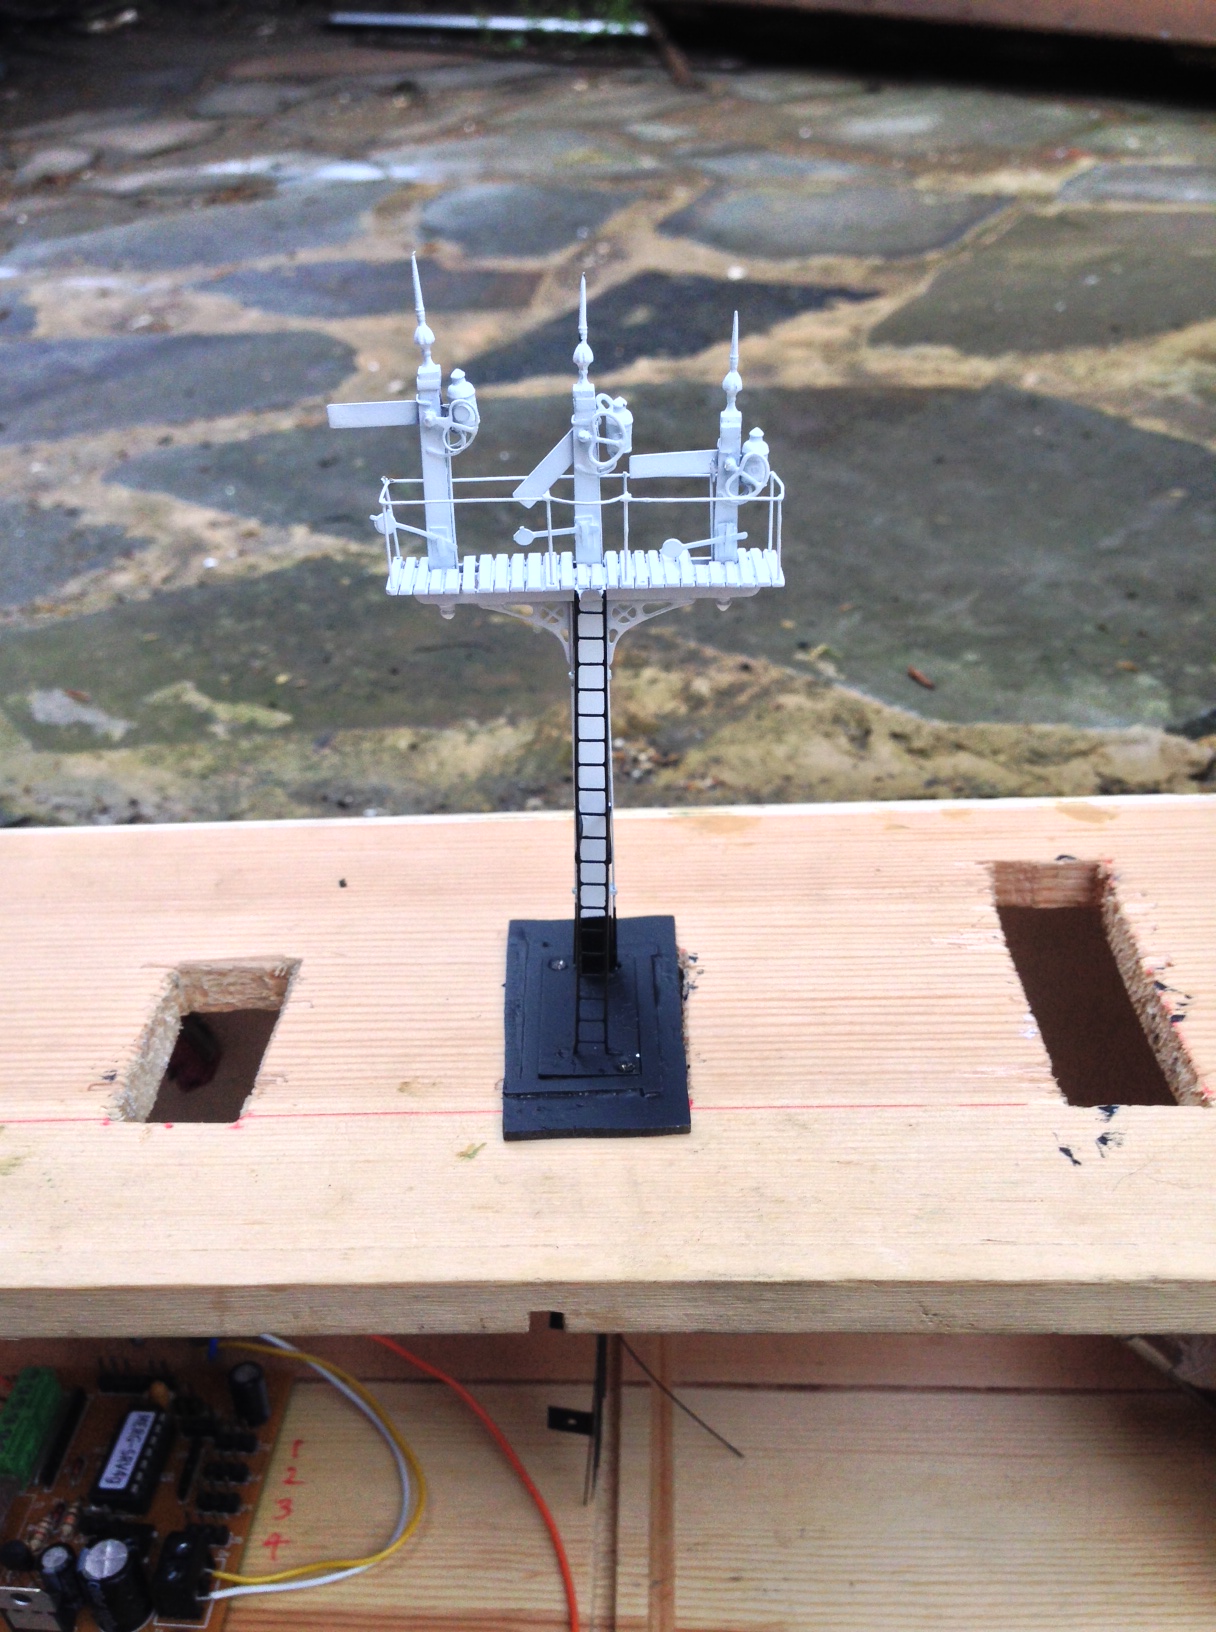
Instead, I stayed at the bench and made a pair of the signals that still remain to be made for Glenmutchkin. The signalling plan has developed very slightly since I originally showed it back here and is shown below (actually this is the artwork for the control panel facia).

The signals that I built were those that control the main loop prior to the shed link – levelrs 27 & 28 – and then the outer starter (that covers both the main loop and the main line) – levers 23, 24, 25 & 26. Only a pair of two doll signals, I thought, they shouldn’t take more than a day or two? Phew, well that wasn’t right; the more you look at the prototypes, the more you find there is to model!
Having created much of my own etchings and castings for MacKenzie & Holland signals I have obviously made good use of these. In this case, the small brackets, arms, ladders and castings.


Both of the signals have used the small brackets to create smallish landings. The smaller of the two signals has only one arm per doll, the larger two. The dolls and the posts are made up of square brass section which is filed to a taper – a certain amount of elbow grease is needed to acheive this! The posts are then sandwiched between some transom beams that also clasp the doll post – this is all soldered with a high melt solder to stop it ungumming later.


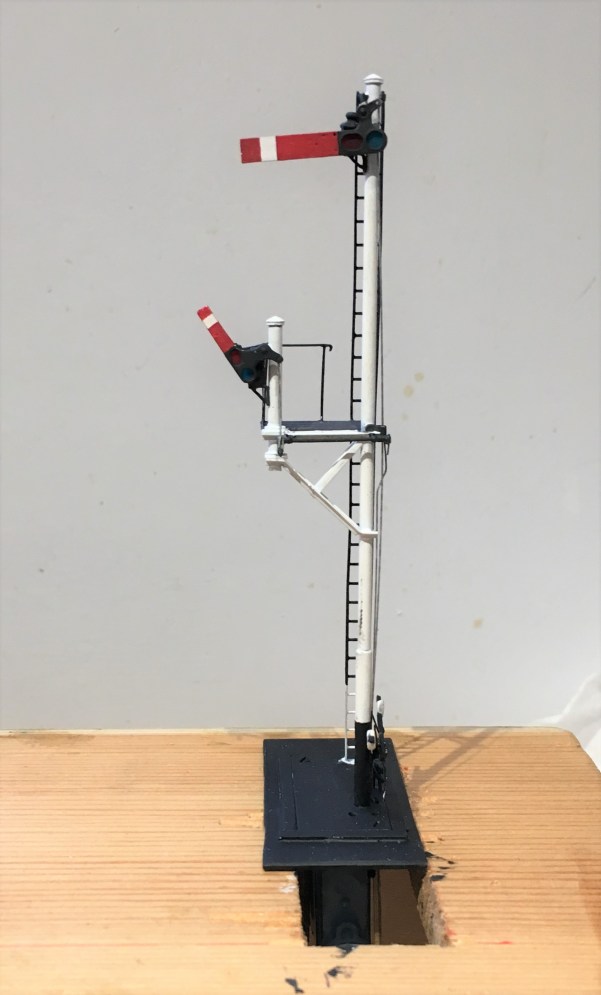
The brackets are then offered up from below, with scrap etch forming the bearing plates to pick up the transomes. In the etch I also included smaller brackets to pick up the free end of the landing, along with the landing itself. This gets you to the stage shown above.
But this is not the half of it on a signal, there are the finials, lamp brackets, lamps, cross stays, access steps, access ladders, pivot plates, handrails, operating cams, safety hoops and ladder still to do………..
 .
.
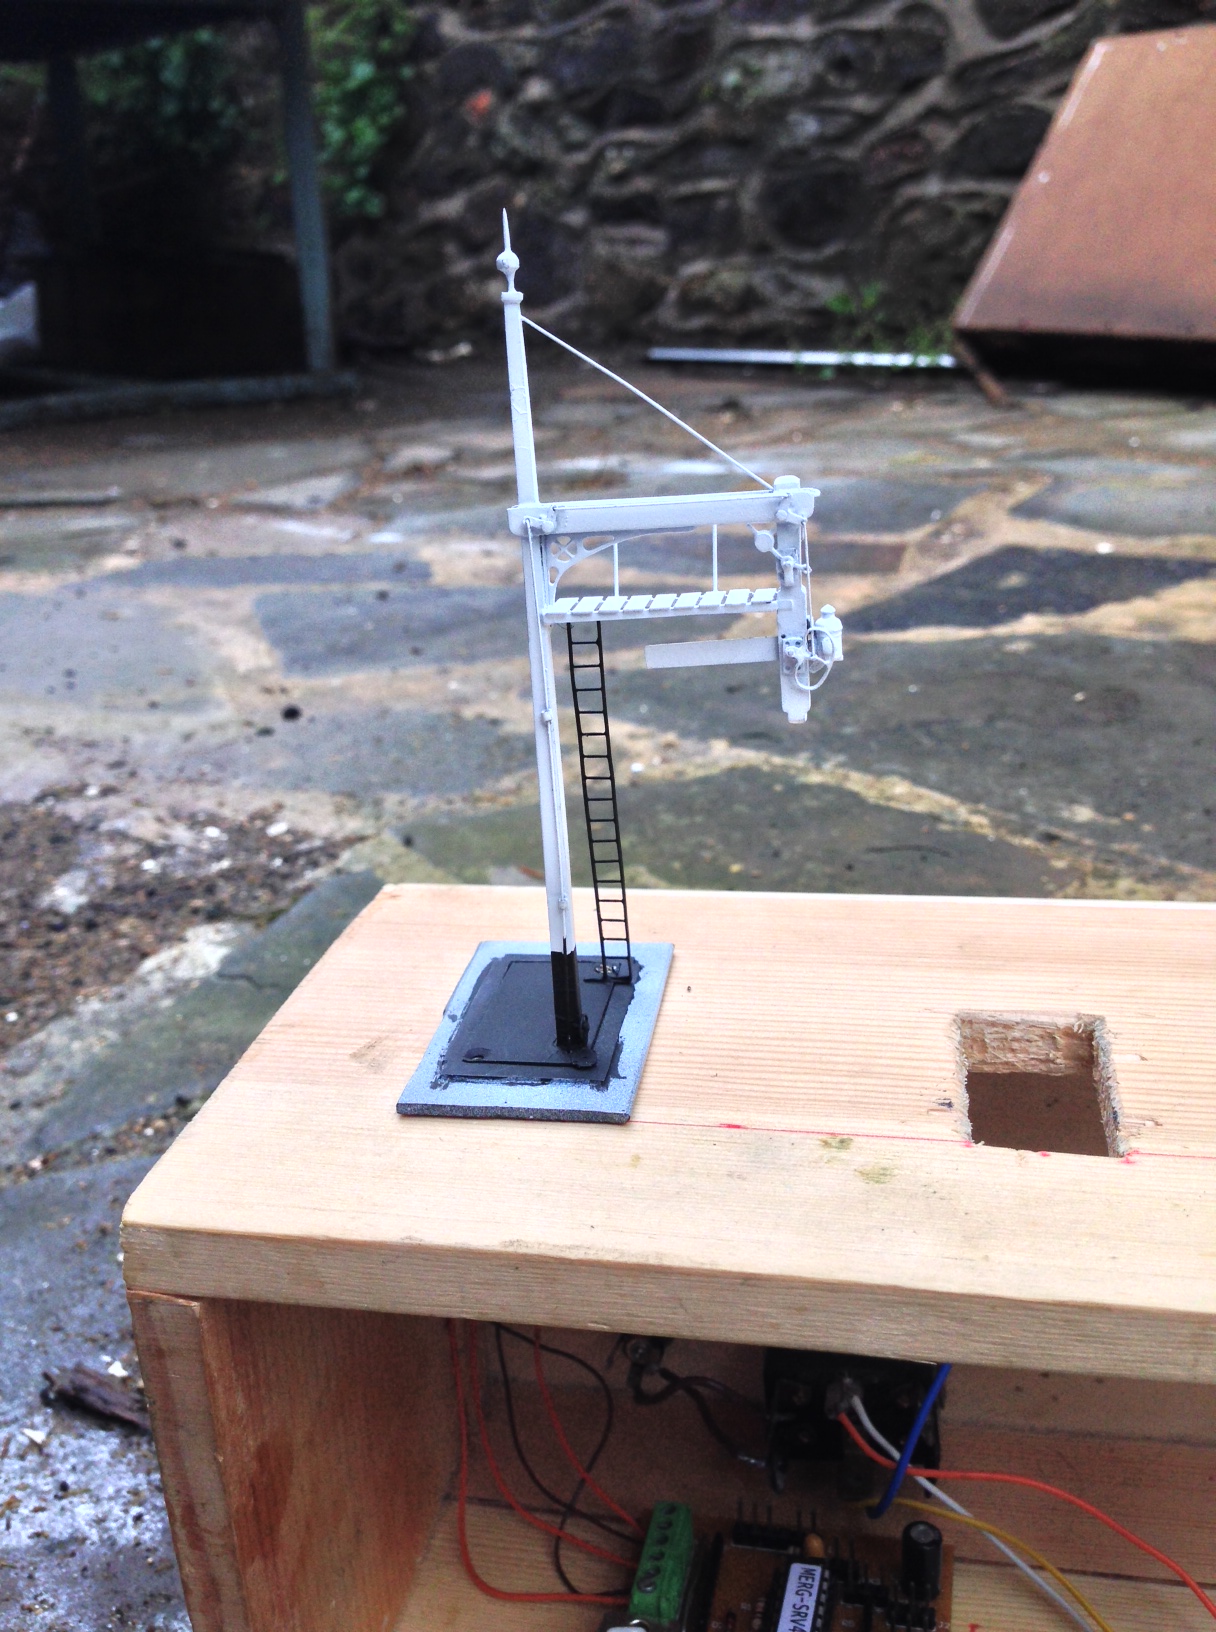
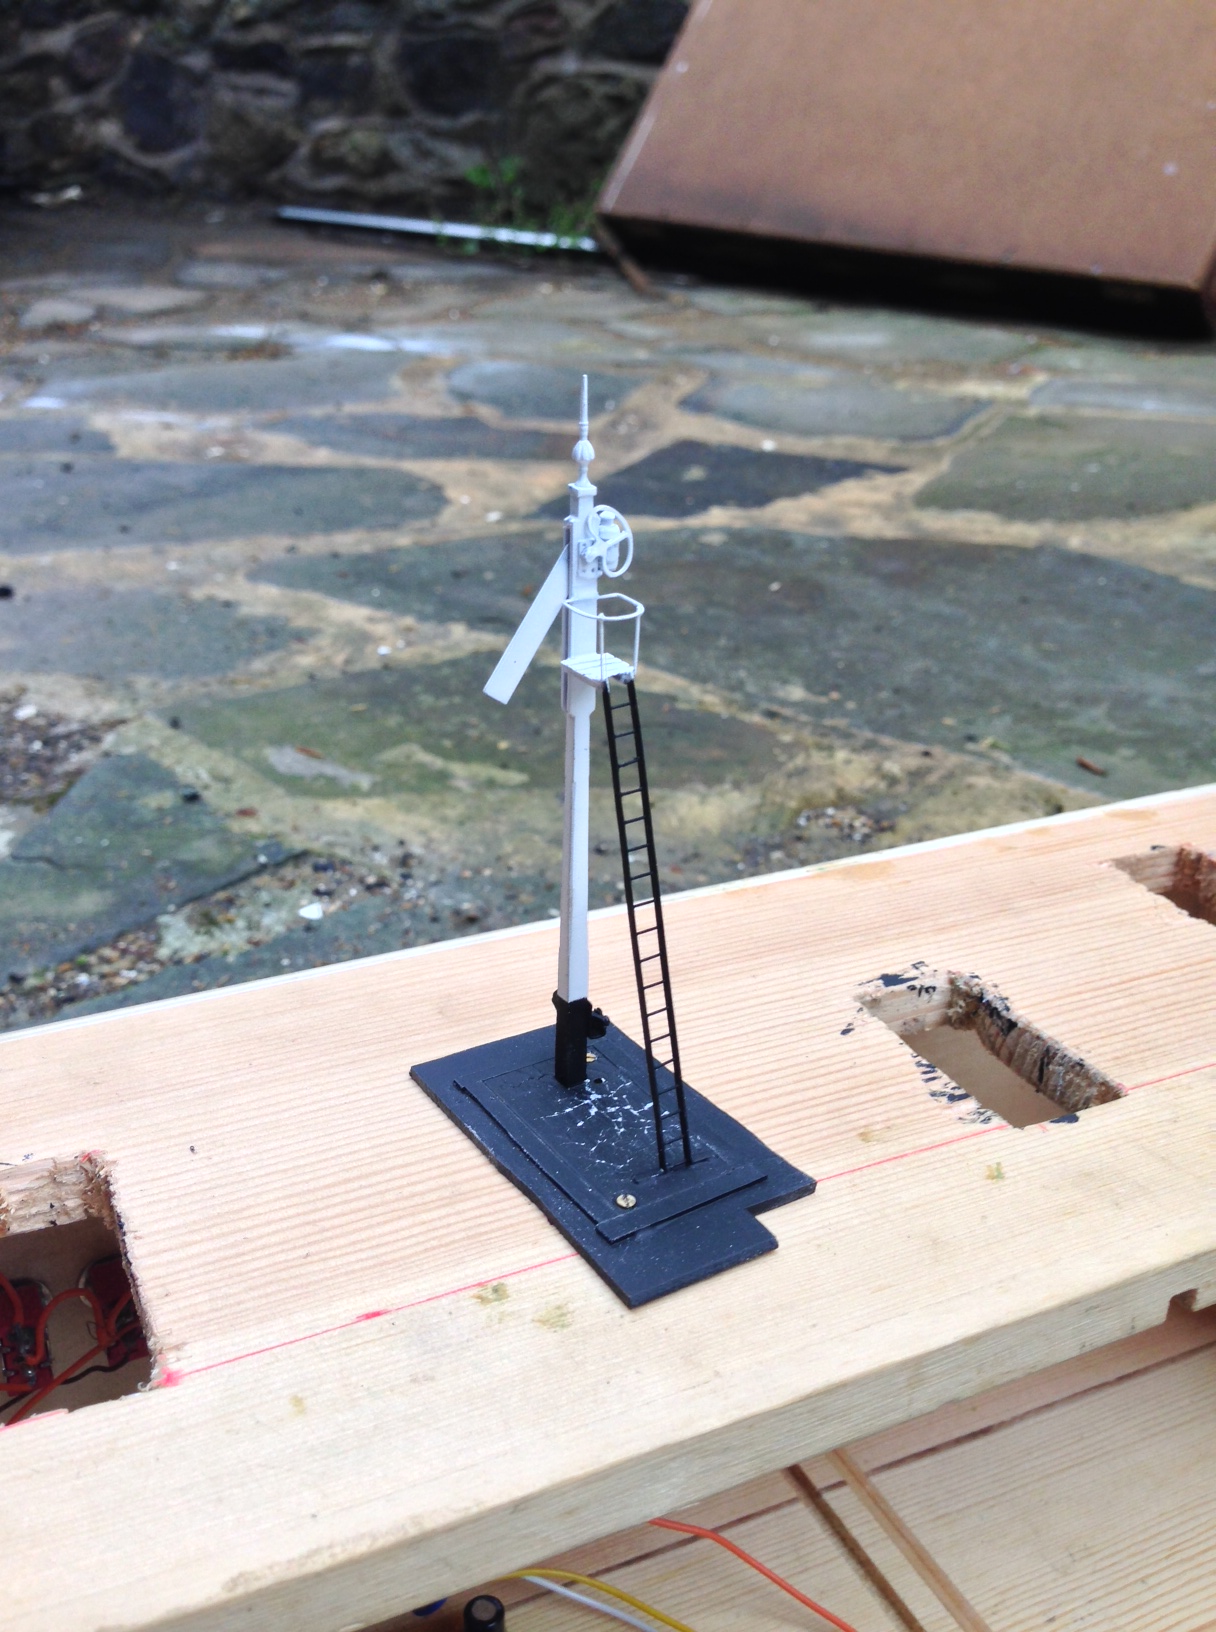
In a departure from my previous practise, I made the main ladders detachable (they will be held with the wire that can be seen in the pictures being turned over in secret pockets. I am also going to paint this prior to the final assembly; which will mean some touching uo of the painting later but I hope will make it easier.


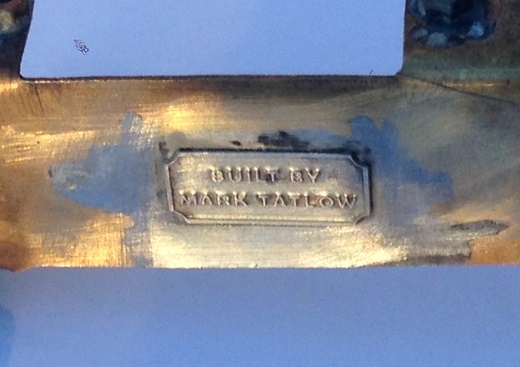
And of course, I had to sign them with these rather nice custom name plaques from NBR 4mm Developments.
This is the first time that I have used the brackets in signal making and I was pretty chuffed with how they have come out. This is where things presently stand and we head for the paint shops tomorrow…….


Benfieldside and her Signals
This weekend I braved the traffic heading to the Festival of Speed in order to complete the building of a replacement fiddle yard for Portchullin (of which more another day) with Tim & Julian. Once complete, I stopped by to see how Benfieldside has been getting on and in particular what my signals looked like in thier proper home.
First up the gallows signal (which has dropped a bit low on its swing).


And then the twin and three doll brackets.


All the above signals were restorations (although not so much was retain on the two doll); the single posts below were made afresh.


And having inspected the signals it was time for a play with the layout and take some pictures to share with you. So here we go:


The guys are still building up sufficent stock for it so it won’t be out on the road for a year yet but I understand that the layout should be at the South Hants MRC show in November 2017. So hopefully I will see you there?
Benfieldside’s Signals – An Update
We have not had an update on the signals for Benfieldside for a bit. The first four of these, including the three that were restorations (although in respect of the twin doll signal, very little was reused indeed) are complete. This is what they look like (with thanks to Phil Hall & the Scalefour Society for the pictures):
The three doll is a restoration from John H Wrights work, so too is the other in theory but the only components reused were the slated deck for the landing and the curved metal that formed the brackets!
Gallows bracket to the right, restored from the John H Wright original. The simple post signal is all mine!
The gubbins for operating these is not shown in the views and I will write up a bit more on this at some point but an article I wrote for Rail Express on the signals I did for Elcot Road can be found here. A few of you may have played with these on the MERG stand at Scaleforum too, as I understnad it they kept people amused. There is more Benfieldside signal updates to follow, when I can get my camera out in the light to take some piccies.
A new website for Miscellany Models
I will be making at least some of the items that I have been developing available for sale.
Therefore, I have set up a separate website entitled Miscellany Models that shows what is available, how to get them and (when I get some time to do it) will become a repository for prototype information that I have on the items I have made, construction/finished photographs and instructions.
You can find this website here. If you look hard, you will see some hints as to what other things I have been working on and are expected to be made available in due course.
Progress on Benfieldside’s Signals
Back in February (where does the time go?) I put some pictures up of some signals I was restoring for Benfieldside.
Matters have progressed; although I did find that one signal was beyond repair and both of the remaining needed quite a liot of work to do to them as all of the landings, ladders and in some cases balance arms/finials had dissappeared over time. They are not quite finished, as the final painting, weathering and installation of the spectacle plate glass is still to be done. However, this is what they look like:

In addition to the three signals to be restored, I have a number of others which were missing altogether. Here is the first of them:
More on my casting and etching
We haven’t had an update on the etching and mastering that I have been doing for the signals for a while.
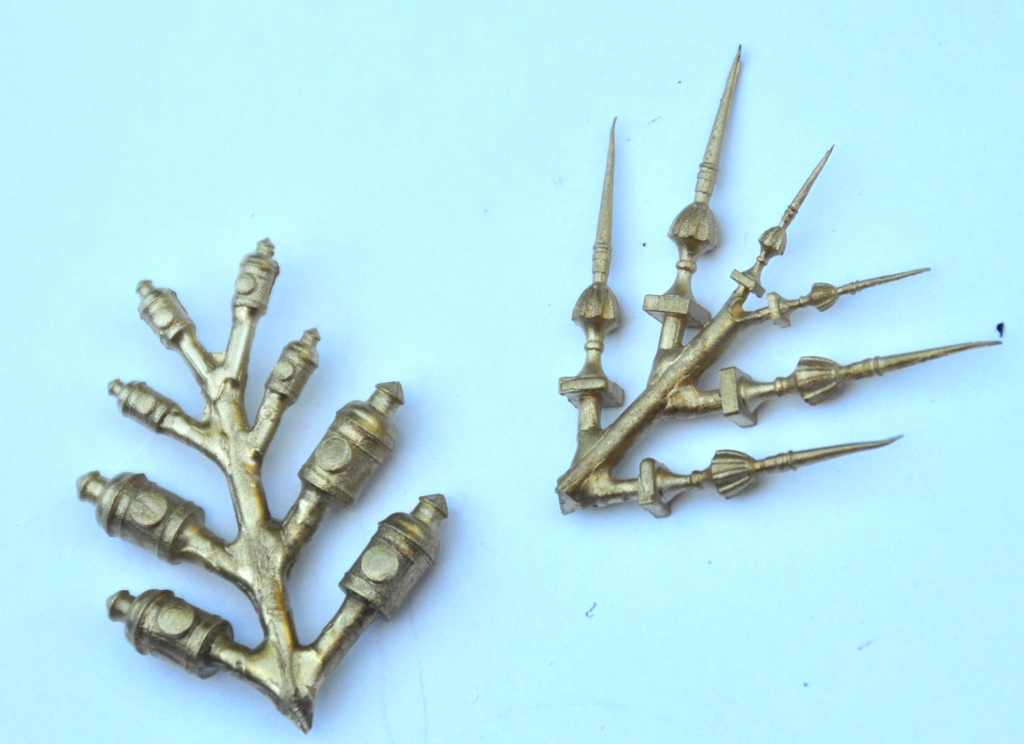
Well, I have had both the rapid-prototype masters and etching in. Using the former, I have also had my first set of lost wax casting done – in this case for the lamps and finials. This is what they look like – which I think is pretty good and a lot better than the white metal ones from MSE.
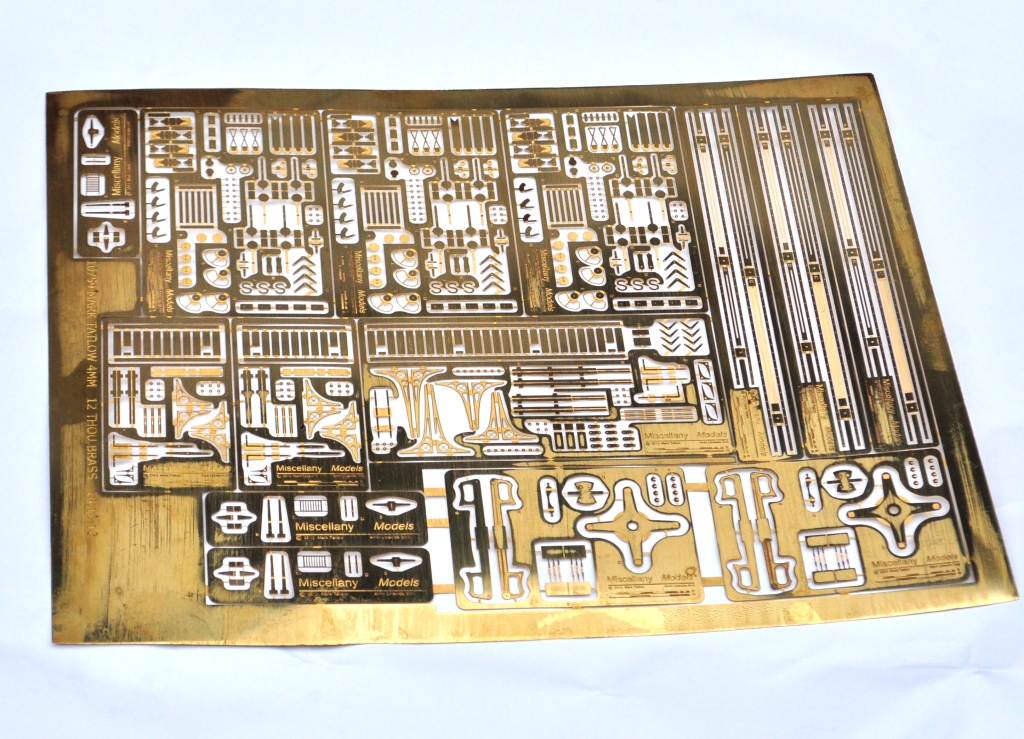
and the etching looks like this – brackets, arms, ladders and a few other bits and pieces.
So it was time to make a signal – in this case a fairly simple single arm Highland signal. So using a post from Lochgorm and then my parts for the arms, spectacle plates, windlass, balance levers, ladders, finials and lamp, this is what it has come out like:


and the castings close up looked like this.
So all in all, I am pretty chuffed!
It does mean that I think there is some more signal building to come on these pages……….
One good turn leads to another…………
I managed to get most of another day in Tim & Julian’s joinery workshop. With the assistance of Tim, we managed to get the three boards assembled with pattern maker’s dowels; along with the beginnings of the ground profiles.
A start was also made on the last of the four boards that will form the main station area. I didn’t want an ordinary square board on the corner as the layout will be viewed both front on and from the end. Therefore, we have had to profile the corner piece around a mould.
But all this help does have a price……………………. Tim and Julian have recently acquired Benfieldside. This rather exquisite layout was built by Martin Wright and was subsequently owned by John James. If you want to see how good it is, find yourself MRJ 38 and you will see what I mean!
Over the years, the layout has suffered some damage so it is going to need to be restored. This is where the use of Tim and Julian’s joinery shop ceases to be free – there are a number of damaged signals and even more that are missing altogether. My brief is restore those that still exist and to set them up for servo operation. Here are the first three; all of which have different issues.
This one has a shattered post and is missing its access gantry/ladder. In addition, the signal arm has become detached and as the signal is slotted (ie the arm is within a slot in the post), this is going to be quite difficult to fix in situ.
This one also suffers from problems associated with the slotting – when Martin made this he only used lattice work for the front and back in order to provide a slot for the arm. This however has made the signal very weak. In addition, the gantry and ladder are missing.
One of the arms us detached from its operating arm, its ladder and finial are also missing.
Fortunately, the North Eastern used Mackenzie & Holland as their signal suppliers as well as the Highland. Therefore, I will get to use my etches! Anyway, the signals have been stripped and restoration has started; a post next week will show how they are coming along.
Test Etches and Prints
I have had the test etches back for some time and have had a play with them. This is what they look like back from the etchers:

I did find that I had made a number of the components to fine. I had prototype information, so I had made things like the balance levers to absolute scale and this is too delicate, certainly for 4mm. So they look beautiful in the etch but would not survive on a layout. Fortunately, I had also done an etch of the arms and signal components in 7mm, so I was able to do a little bit of 7mm modelling. This used a Lochgorm Models etched post and my design of base is where it gets too (sorry, slightly fuzzy picture):

I also got the first of the 3d prints back from Shapeways and these are very good indeed, so I am well chuffed with them! They are slightly difficult to photograph but here is what these look like:

I need to make a couple of tweeks to these and get a revised print done of them. I have a miniature etch for the handles done, then I will make a few resin copies of them and they are done!
I also had the finials and lamps printed; the lamps worked fine and so did the finials in 7mm but they proved far to fragile in 4mm – so again I need to make a few key elements overscale to be able to use it.
