Blog Archives

Benfieldside and her Signals
This weekend I braved the traffic heading to the Festival of Speed in order to complete the building of a replacement fiddle yard for Portchullin (of which more another day) with Tim & Julian. Once complete, I stopped by to see how Benfieldside has been getting on and in particular what my signals looked like in thier proper home.
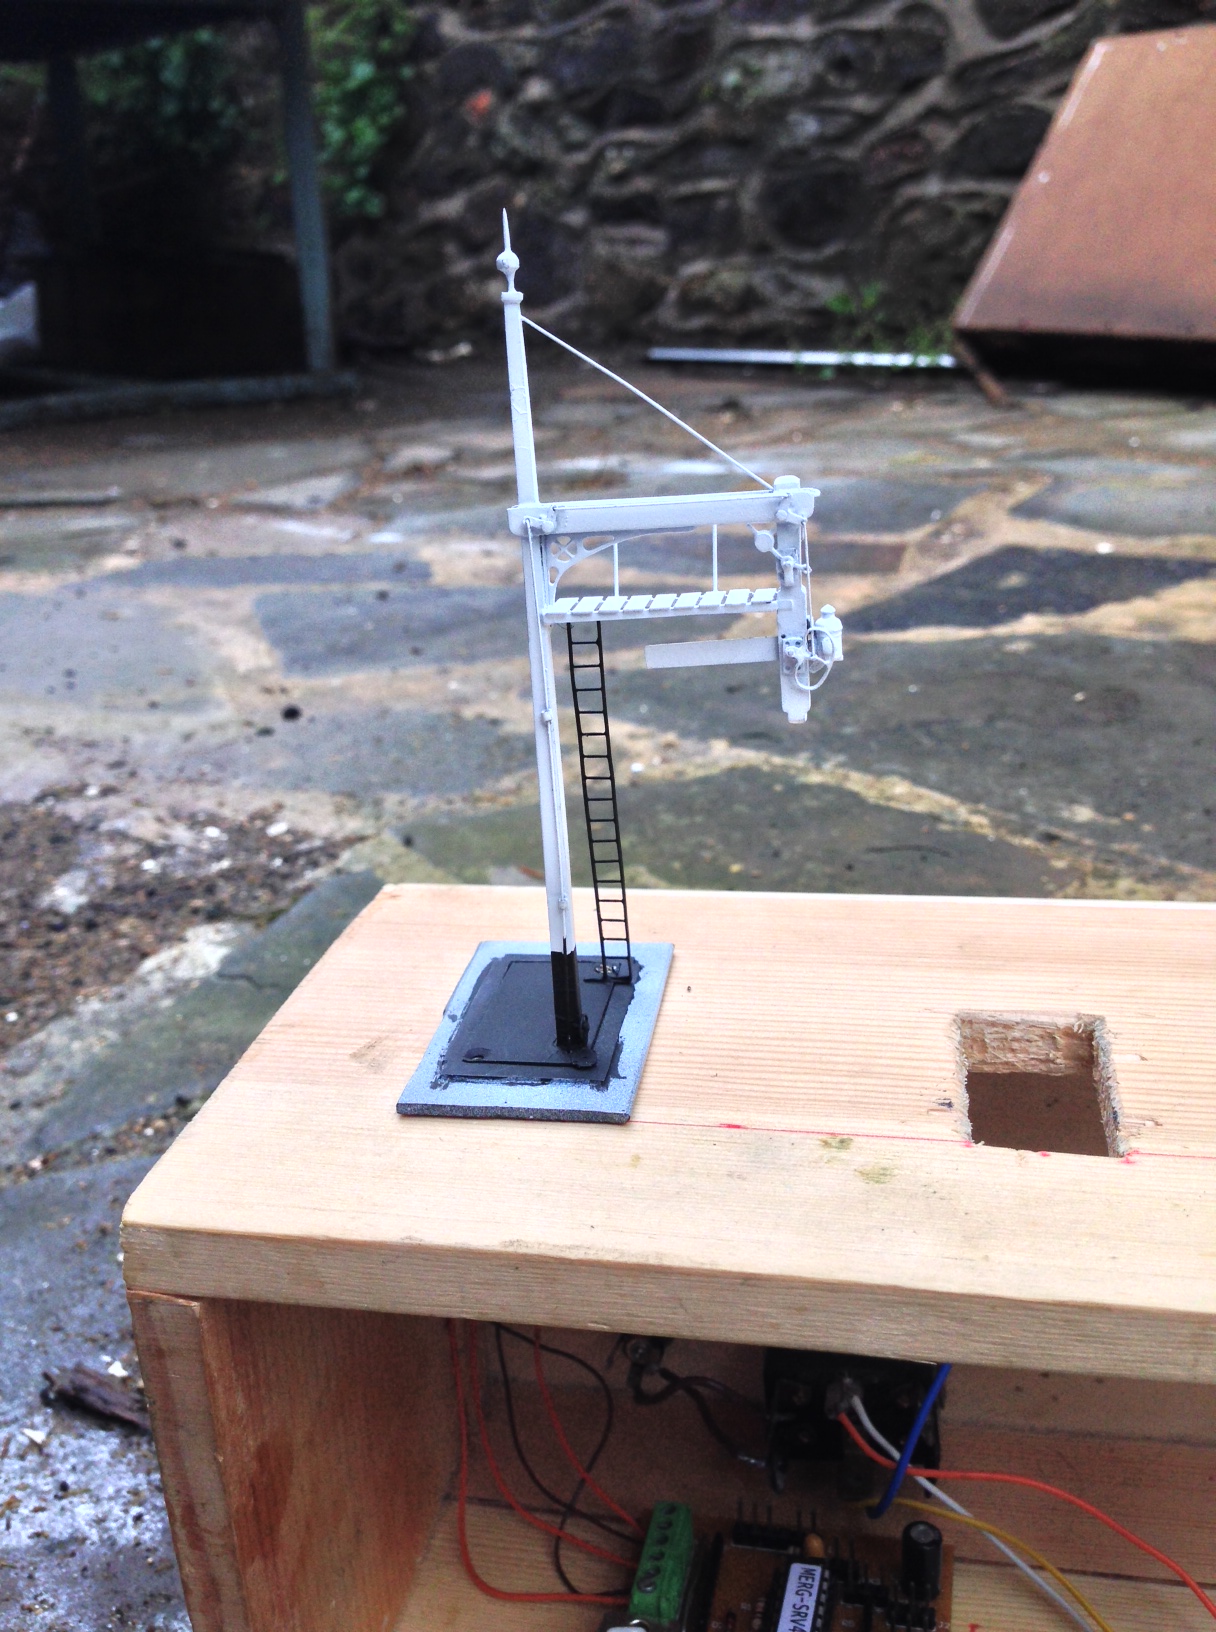
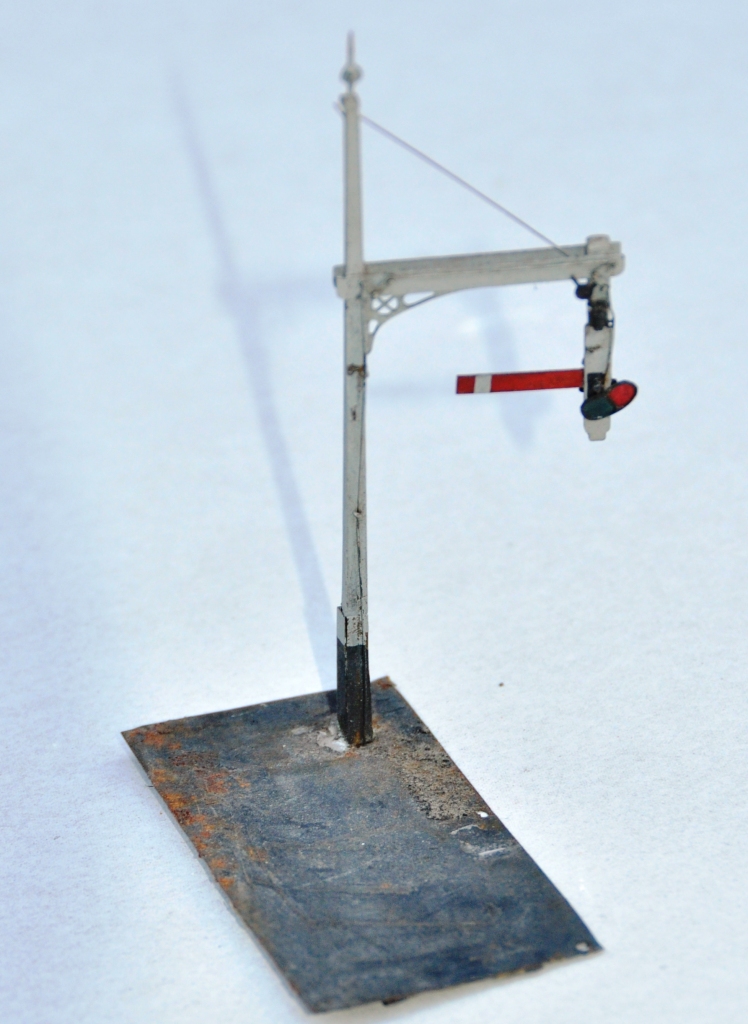
First up the gallows signal (which has dropped a bit low on its swing).


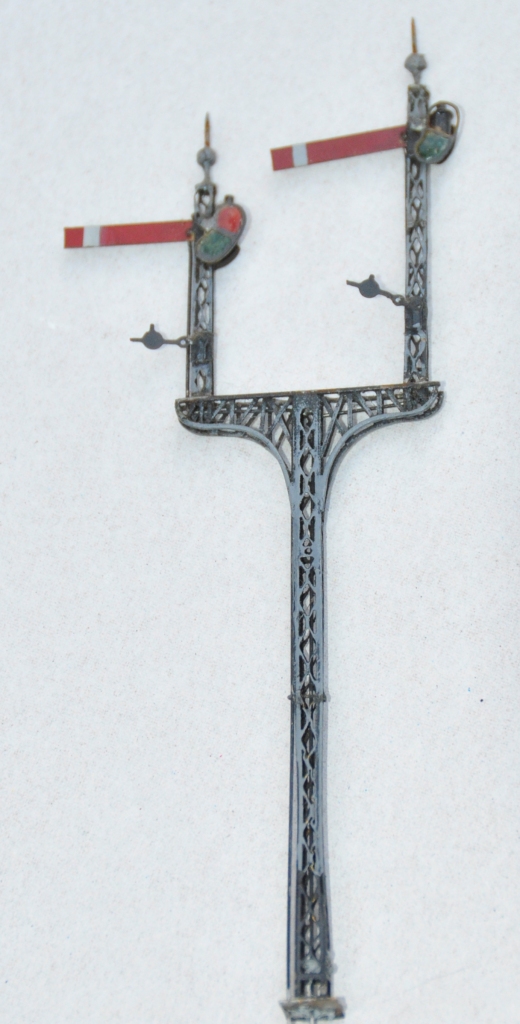
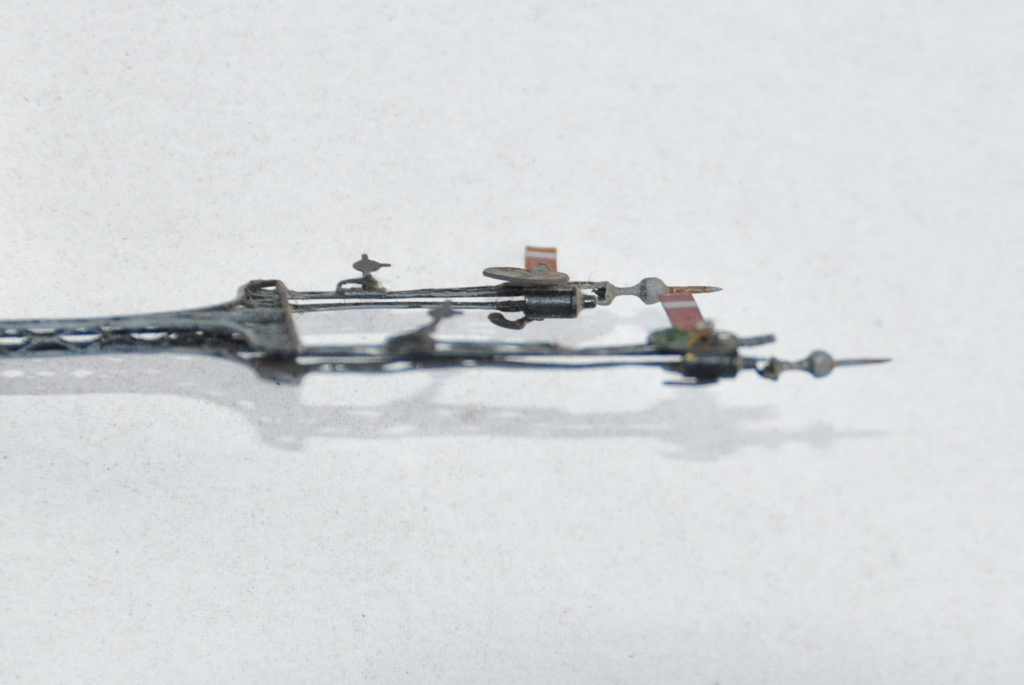
And then the twin and three doll brackets.


All the above signals were restorations (although not so much was retain on the two doll); the single posts below were made afresh.


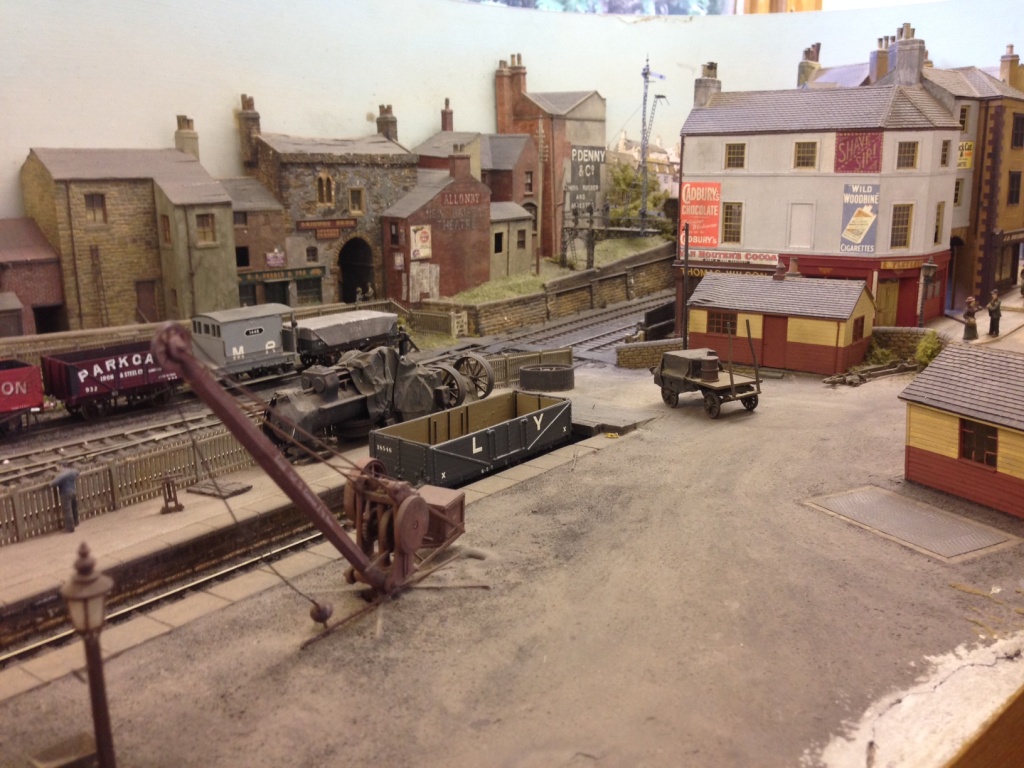
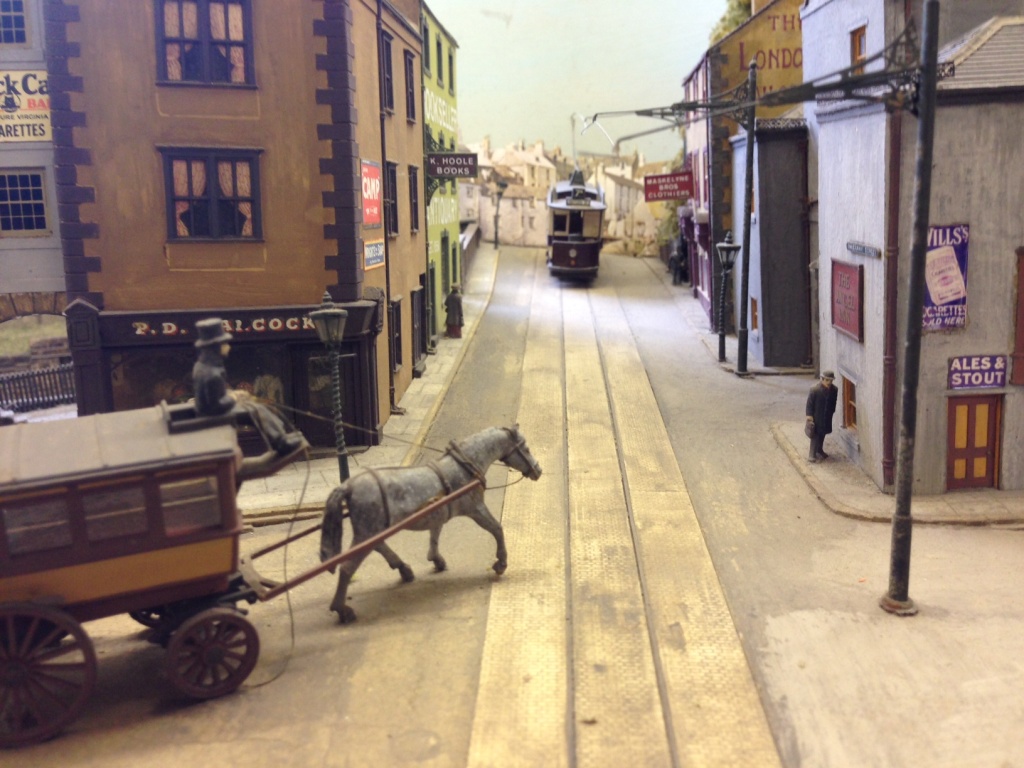
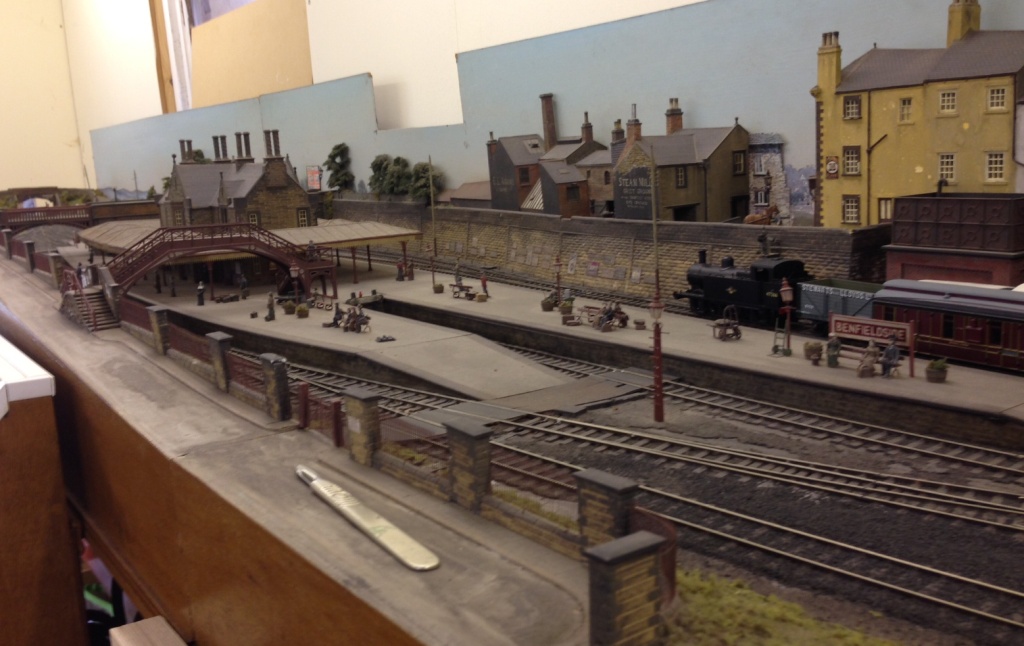
And having inspected the signals it was time for a play with the layout and take some pictures to share with you. So here we go:


The guys are still building up sufficent stock for it so it won’t be out on the road for a year yet but I understand that the layout should be at the South Hants MRC show in November 2017. So hopefully I will see you there?
Missenden Adventure – Part 1
Most years I attend the Missenden Railway Modellers Spring Weekend and have just returned from this year’s. The weekends have some 70 or so railway modellers congregating for a residential retreat to both learn some new skills, enjoy the company and get some quality modelling time in. The participants split between different groups depending what they wish to do; trackwork, weathering, painting/lining, DCC sound control, backscenes and, in my case, loco building.
In my case I started a new loco (of course…..), but not a Highland one. This is a North Eastern 2-4-0 “Tennant” produced by Arthur Kimber. I am building this for Tim & Julian for them to use on their layout, Benfieldside. Thus it is going to be in EM, but I am going to put in clearances sufficent to convert it on to P4 if this ever takes my fancy, and it will be in NER green – so it should look rather fine. Indeed, it should look a bit like this (:only hopefully at a higher resolution!):

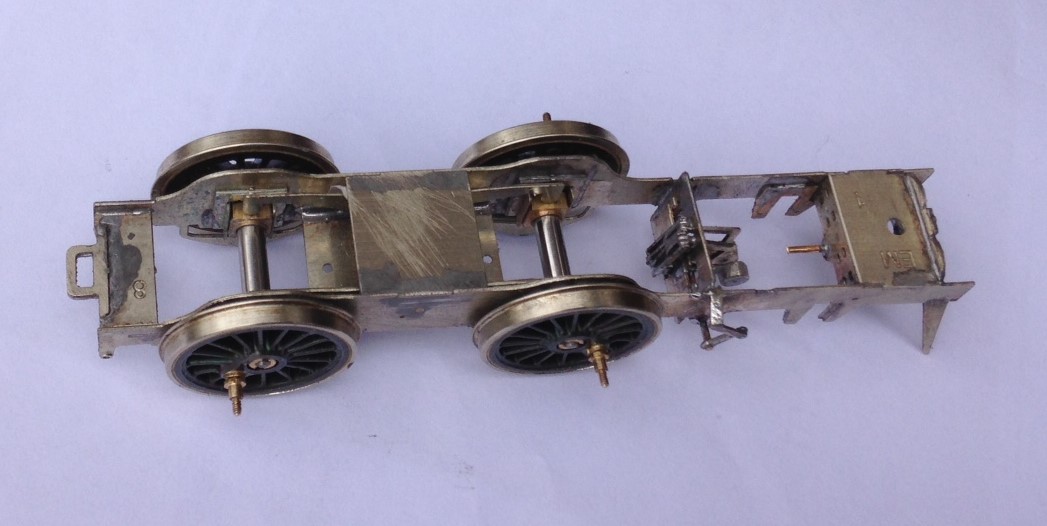
Slightly annoyingly, the kit was conceived to be built to P4, so instead of converting OO/EM kits to P4, I am converting a P4 kit to EM!! However, at least it is all the same skills and cutting bits off to make them narrower, is easier than splicing them in! One small departure has been to use some Markits wheels to act as some test track dummies for the build. The idea is that they are capable of being taken on and off without damage, are not steel (so are not going to corrode) and also that they automatically quarter themselves. This is they in the largely completed chassis (which is a rolling chassis, even if I have not yet fitted a motor). Also of note is the valve gear (dummy, life is not long enogh to making working inside gear – and nor am I a good enough modeller!). At present the slide bars and pistons are not yet fitted.
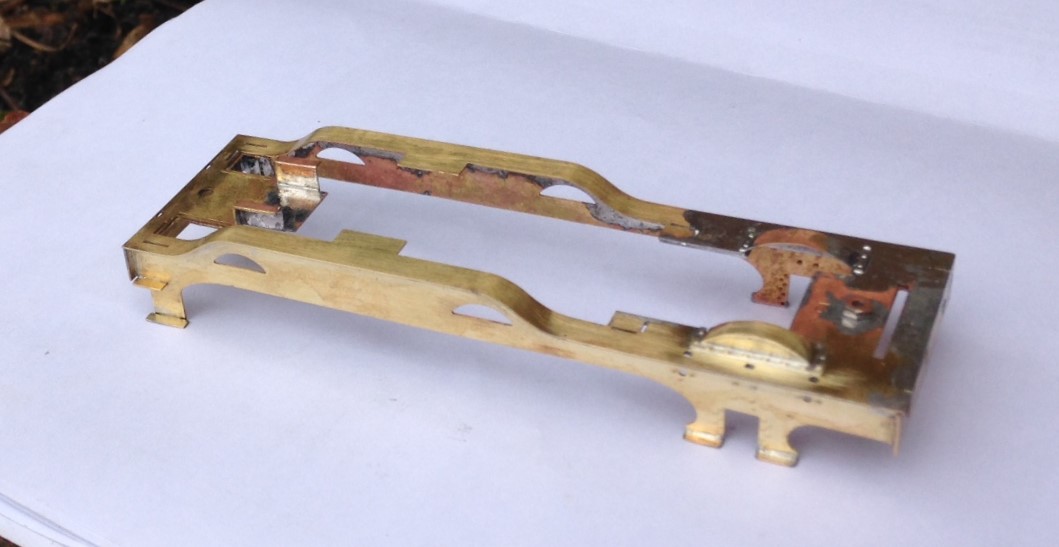
Unlike Highland locos, the running plate and valancing has high swept up sections and really nice flowing curves. This took quite a lot of care to form and I found it necessary to clamp both the front and rear in place initially, after the shape had been bent. Once, however, one end was soldered in place, the second end need to be released so that the thermal expansion did not distort the running plate.
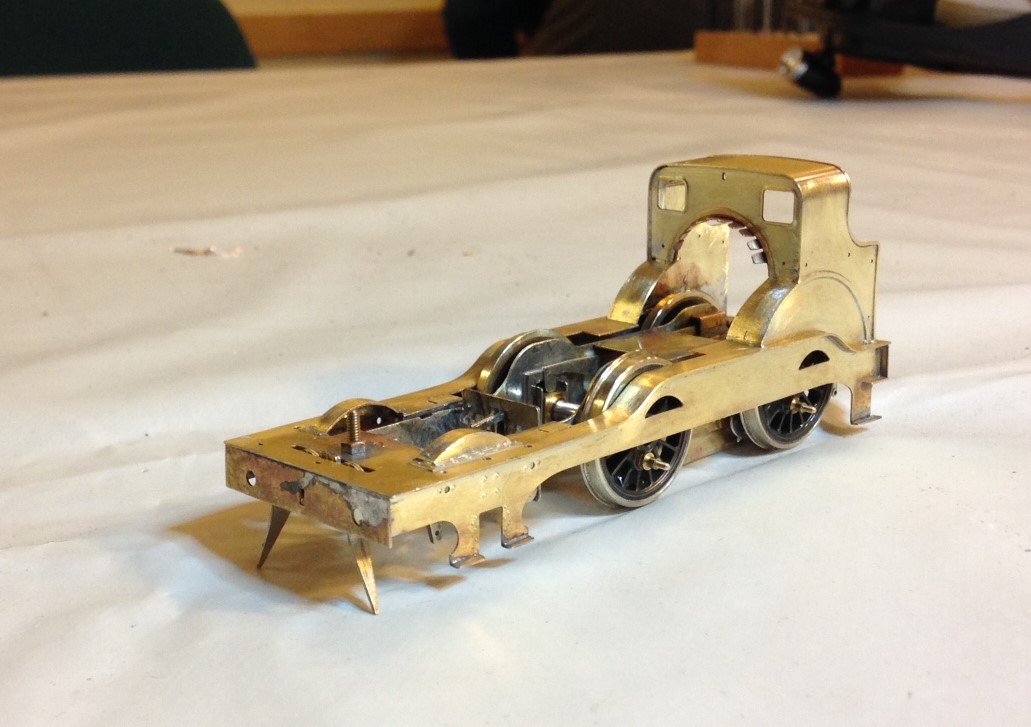
There are more of these sweeping curves to the cab, which also give rise to some tense moments as it is formed. So long as the folds are made at the right locations and around a former the curves formed quite well. When this is added to the running plate, it starts to look like a locomotive.
The boiler comes pre-rolled, with all of the cuts for the wheels and holes already formed. The smokebox is a seperate part that is secured onto the boiler by a bolt and nut. This is quite effective and may well be something that I mimic in the future. The boiler does not come with boiler bands, so I will have some fun putting these on. It also appears to be about 1/2mm too long, so some cutting and filing is going to occur.
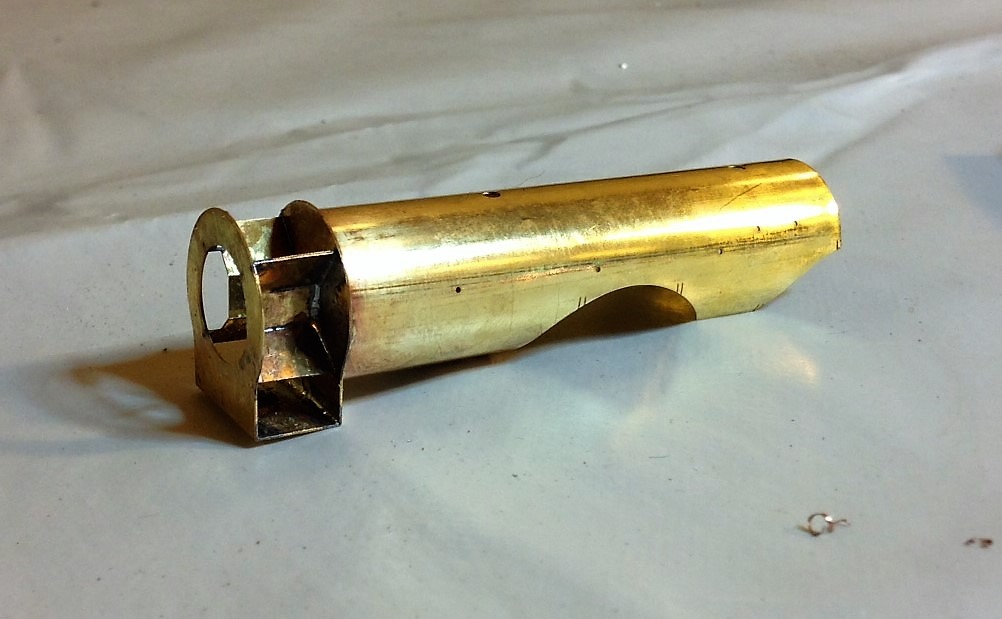
This is what it looks like with the boiler plonked on it (as I said, it is a bit too long so is not sitting down properly – however, it does look good and very different from anything the Highland had!
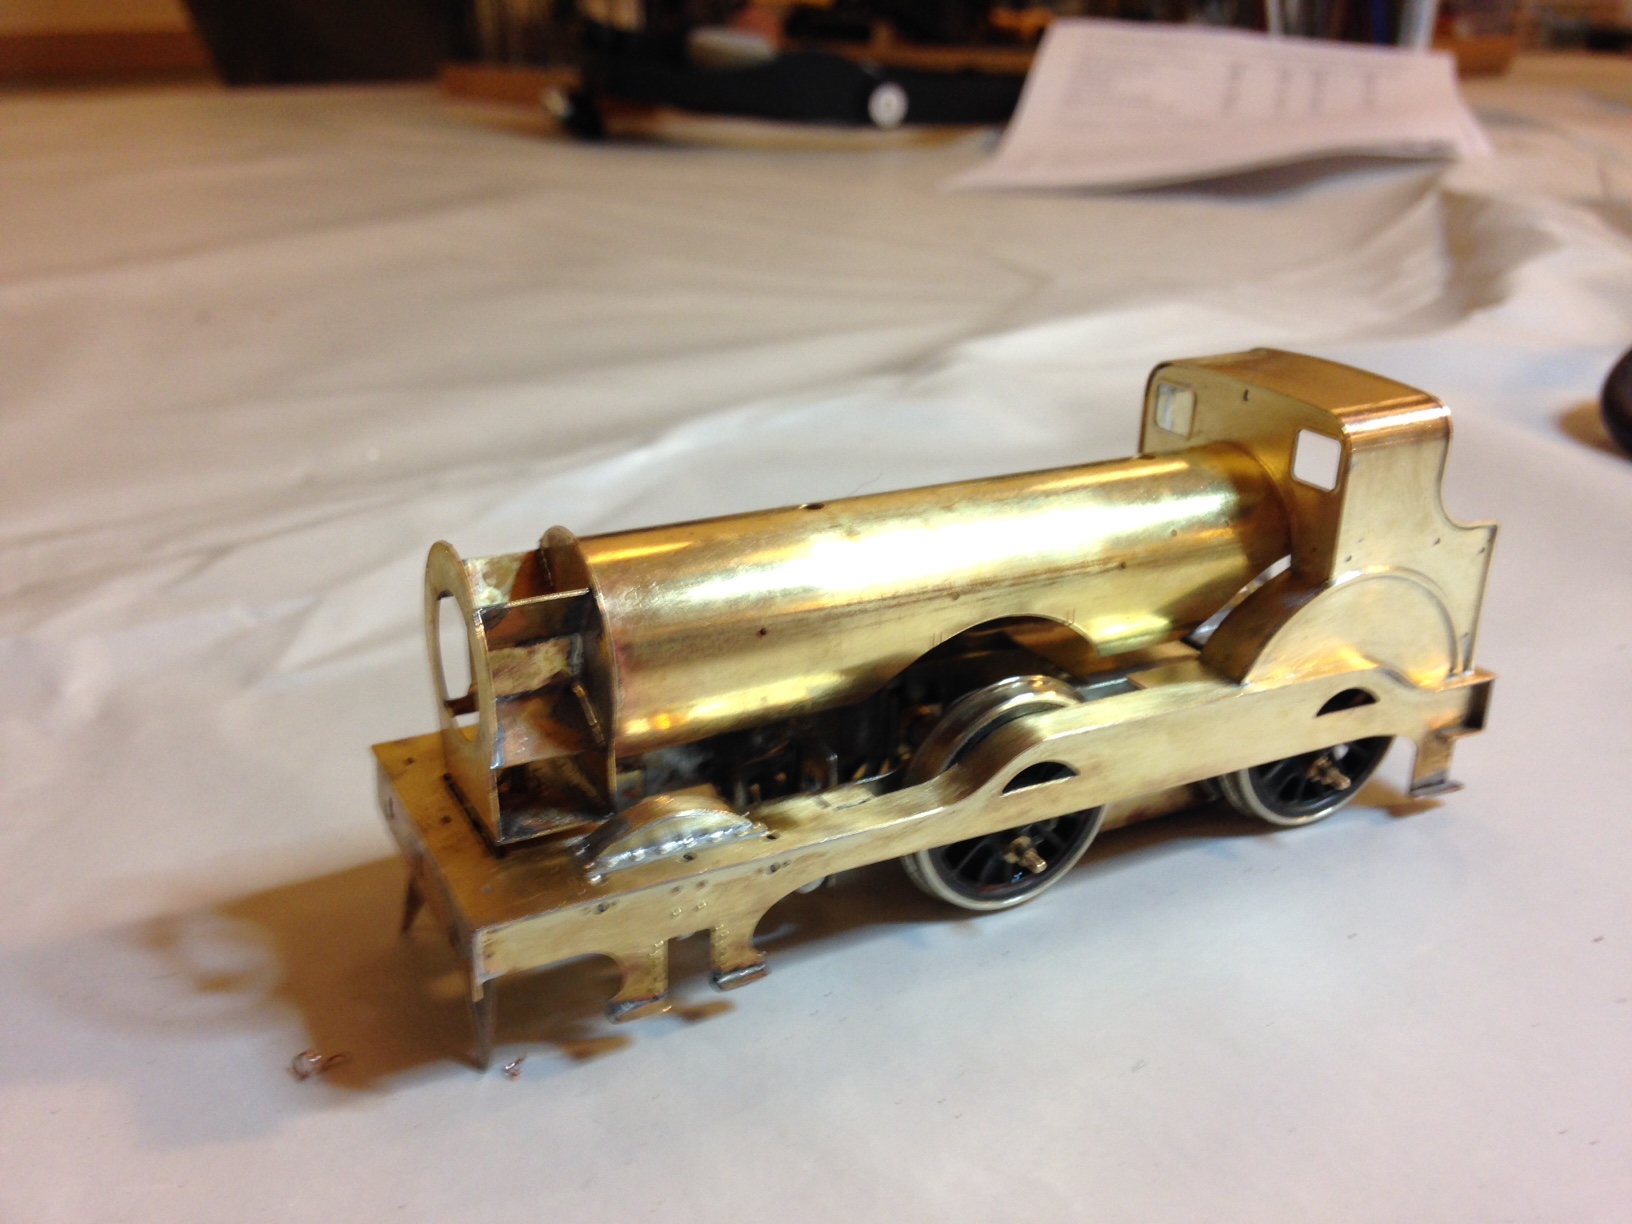
Sorry if it looks a bit silly on its reduced size wheels! This will get explained and corrected nearer the end of the build.
NER Hoppers – Part 2; liveries
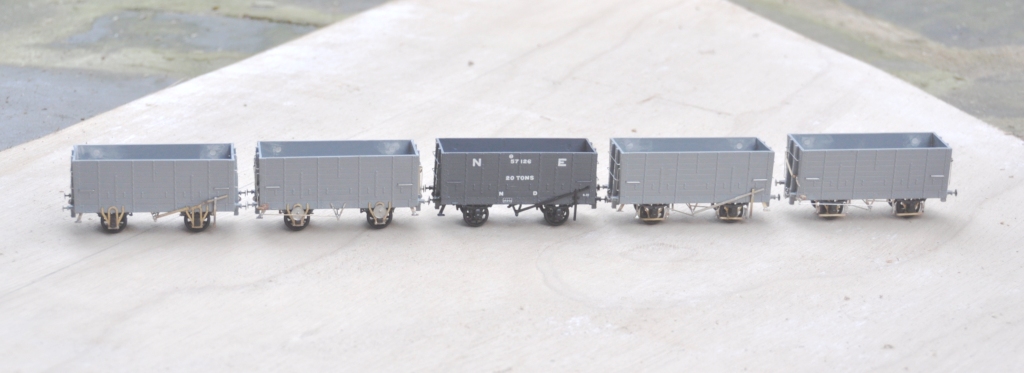
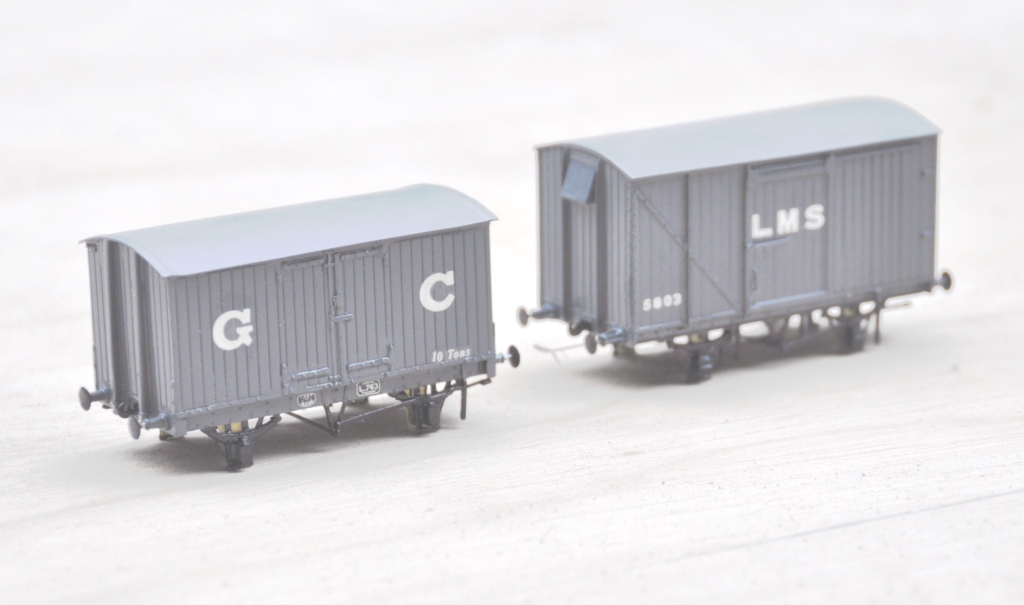
I have made more progress with the hoppers, having completed the main paintwork of these and also the lettering.
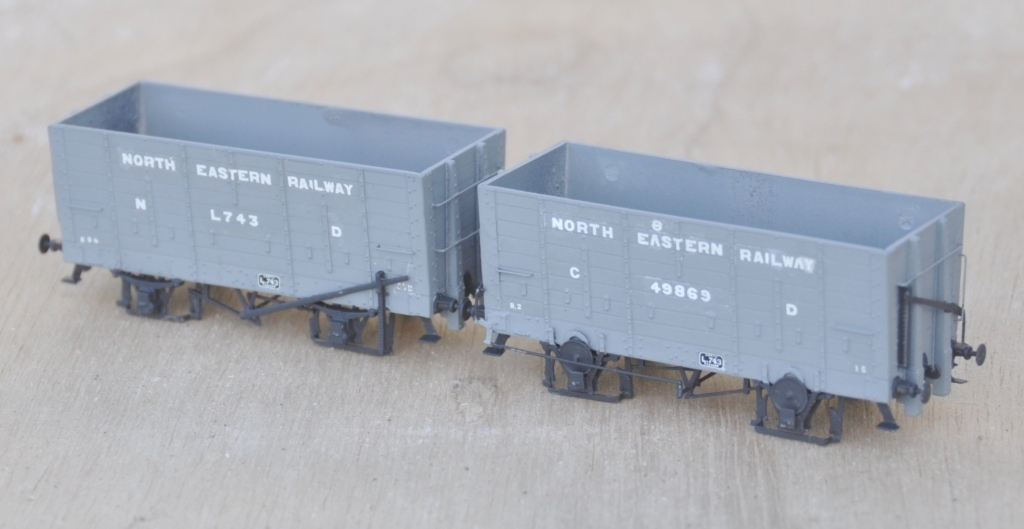
Both the livery and the lettering offer further opportunities for variety, which I have taken. First up are a pair of wagons lettered with the full legend “North Eastern Railway”; a livery applied on some of them upto 1903. This was a fair pain to create, as the full words had to be spelt out from an alphabet; even now I am not totally happy with this and a few tweeks to some of the letters is possible.
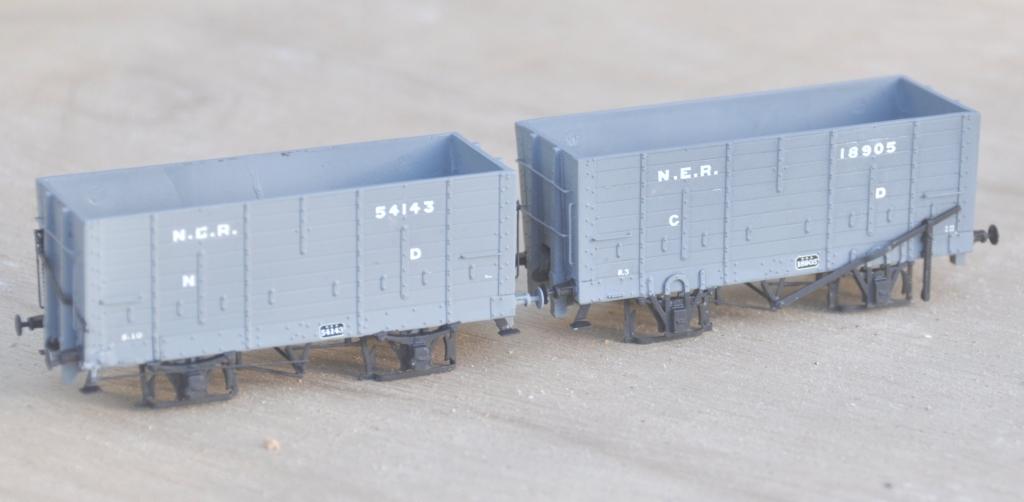
The most common livery for the period that Benfieldside is set (just prior to the first war), was the livery applied between 1903 and 1911 and the legend NER was used.
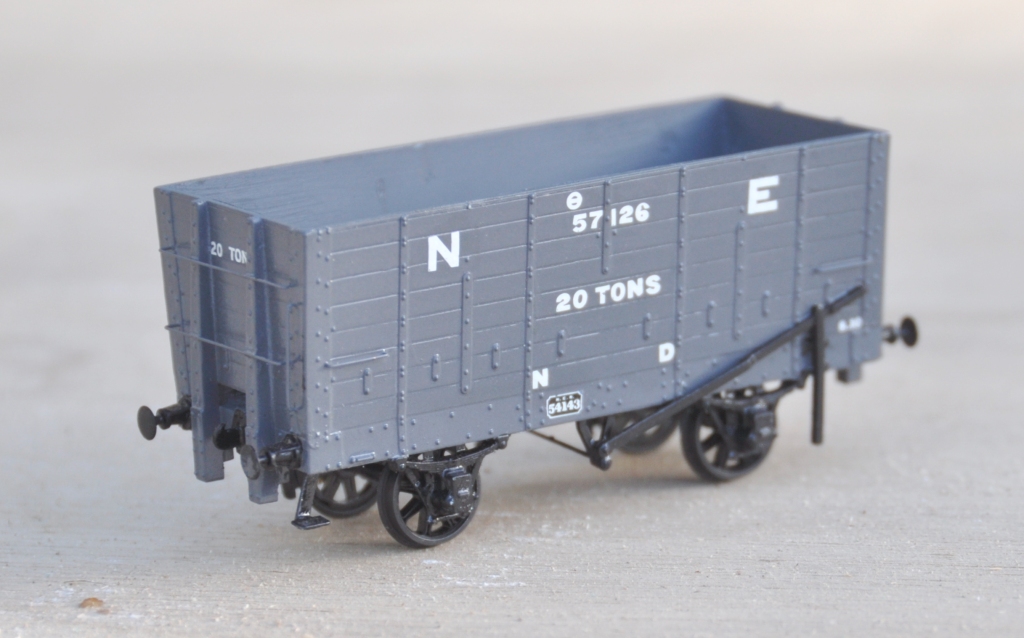
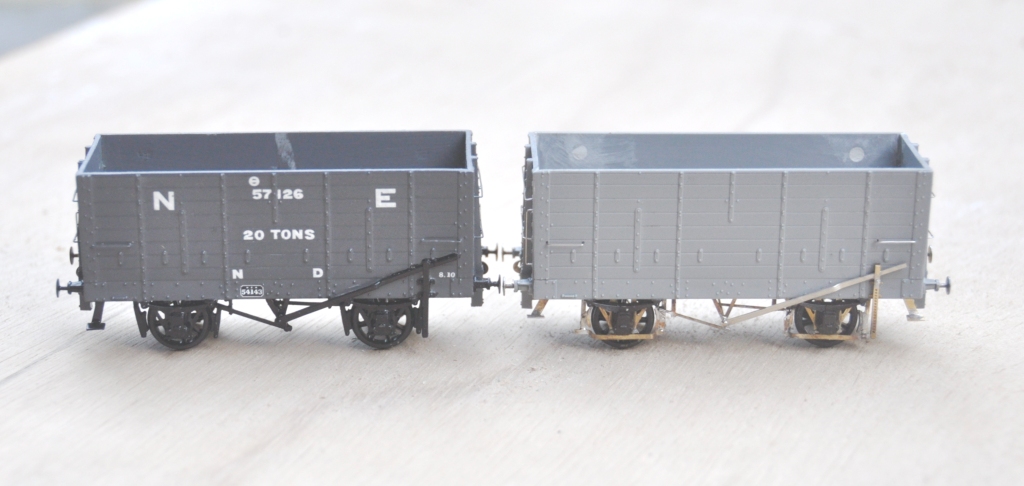
The final livery was on a darker grey and NER was dropped and replaced with a mere NE. This vehicle had a load designation on its end too, which appeared to be an occasional feature.
Once I have had a chance to tidy up the lettering, I will paint the interior a dirty black and speckle it with coal dust. I will also make a coal load. Then these need the application of grunge as I can’t believe that coal wagons were kept particularly well!
NER Hoppers
I am presently cracking on with a batch of NER hoppers for Benfieldside. Having acquired the layout, Tim and Julian have very little stock to run on it, so as part of the repayment for the use of their facilities and expertese on my boards, I thought I would help to correct this shortfall.
The origins of all of this present batch of hoppers all go back to the Slaters’ injection moulded kit, which is of diagram P7 wagon. There were around 17,500 of these wagons at the time of the grouping and the LNER carried on building them for some years thereafter with only subtle differences; so not unsurprisingly there were quite a lot of variants. Thus, I have been doing a lot of modifying!
In each case, I replaced the very clunky W irons with Bill Bedford replacements; even though these were to be to EM, I felt that they would improve their performance. The first examples were essentially built as the kit was intended with fairly traditional brake gear (which was to one side only). However, having built my first one, I decided to refine the brake gear by drawing an etch for replacement steps, V hangers, morton brake mechanisms and brake levers. This (along with a comparison with the plastic equivalent – the painted wagon), is below:
However, a significant proportion were modified with end levers that operated a crank that was connected to the Morton gear. At the ends, there was a much more chunky ratchet arrangement to retain the lever in position. Again, I drew this up on the etch, and the arrangement looks like this:
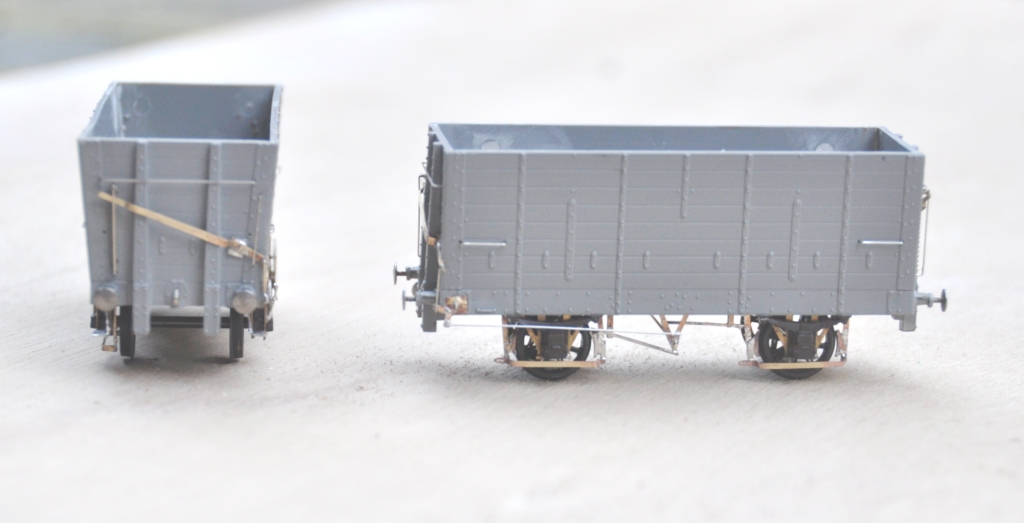
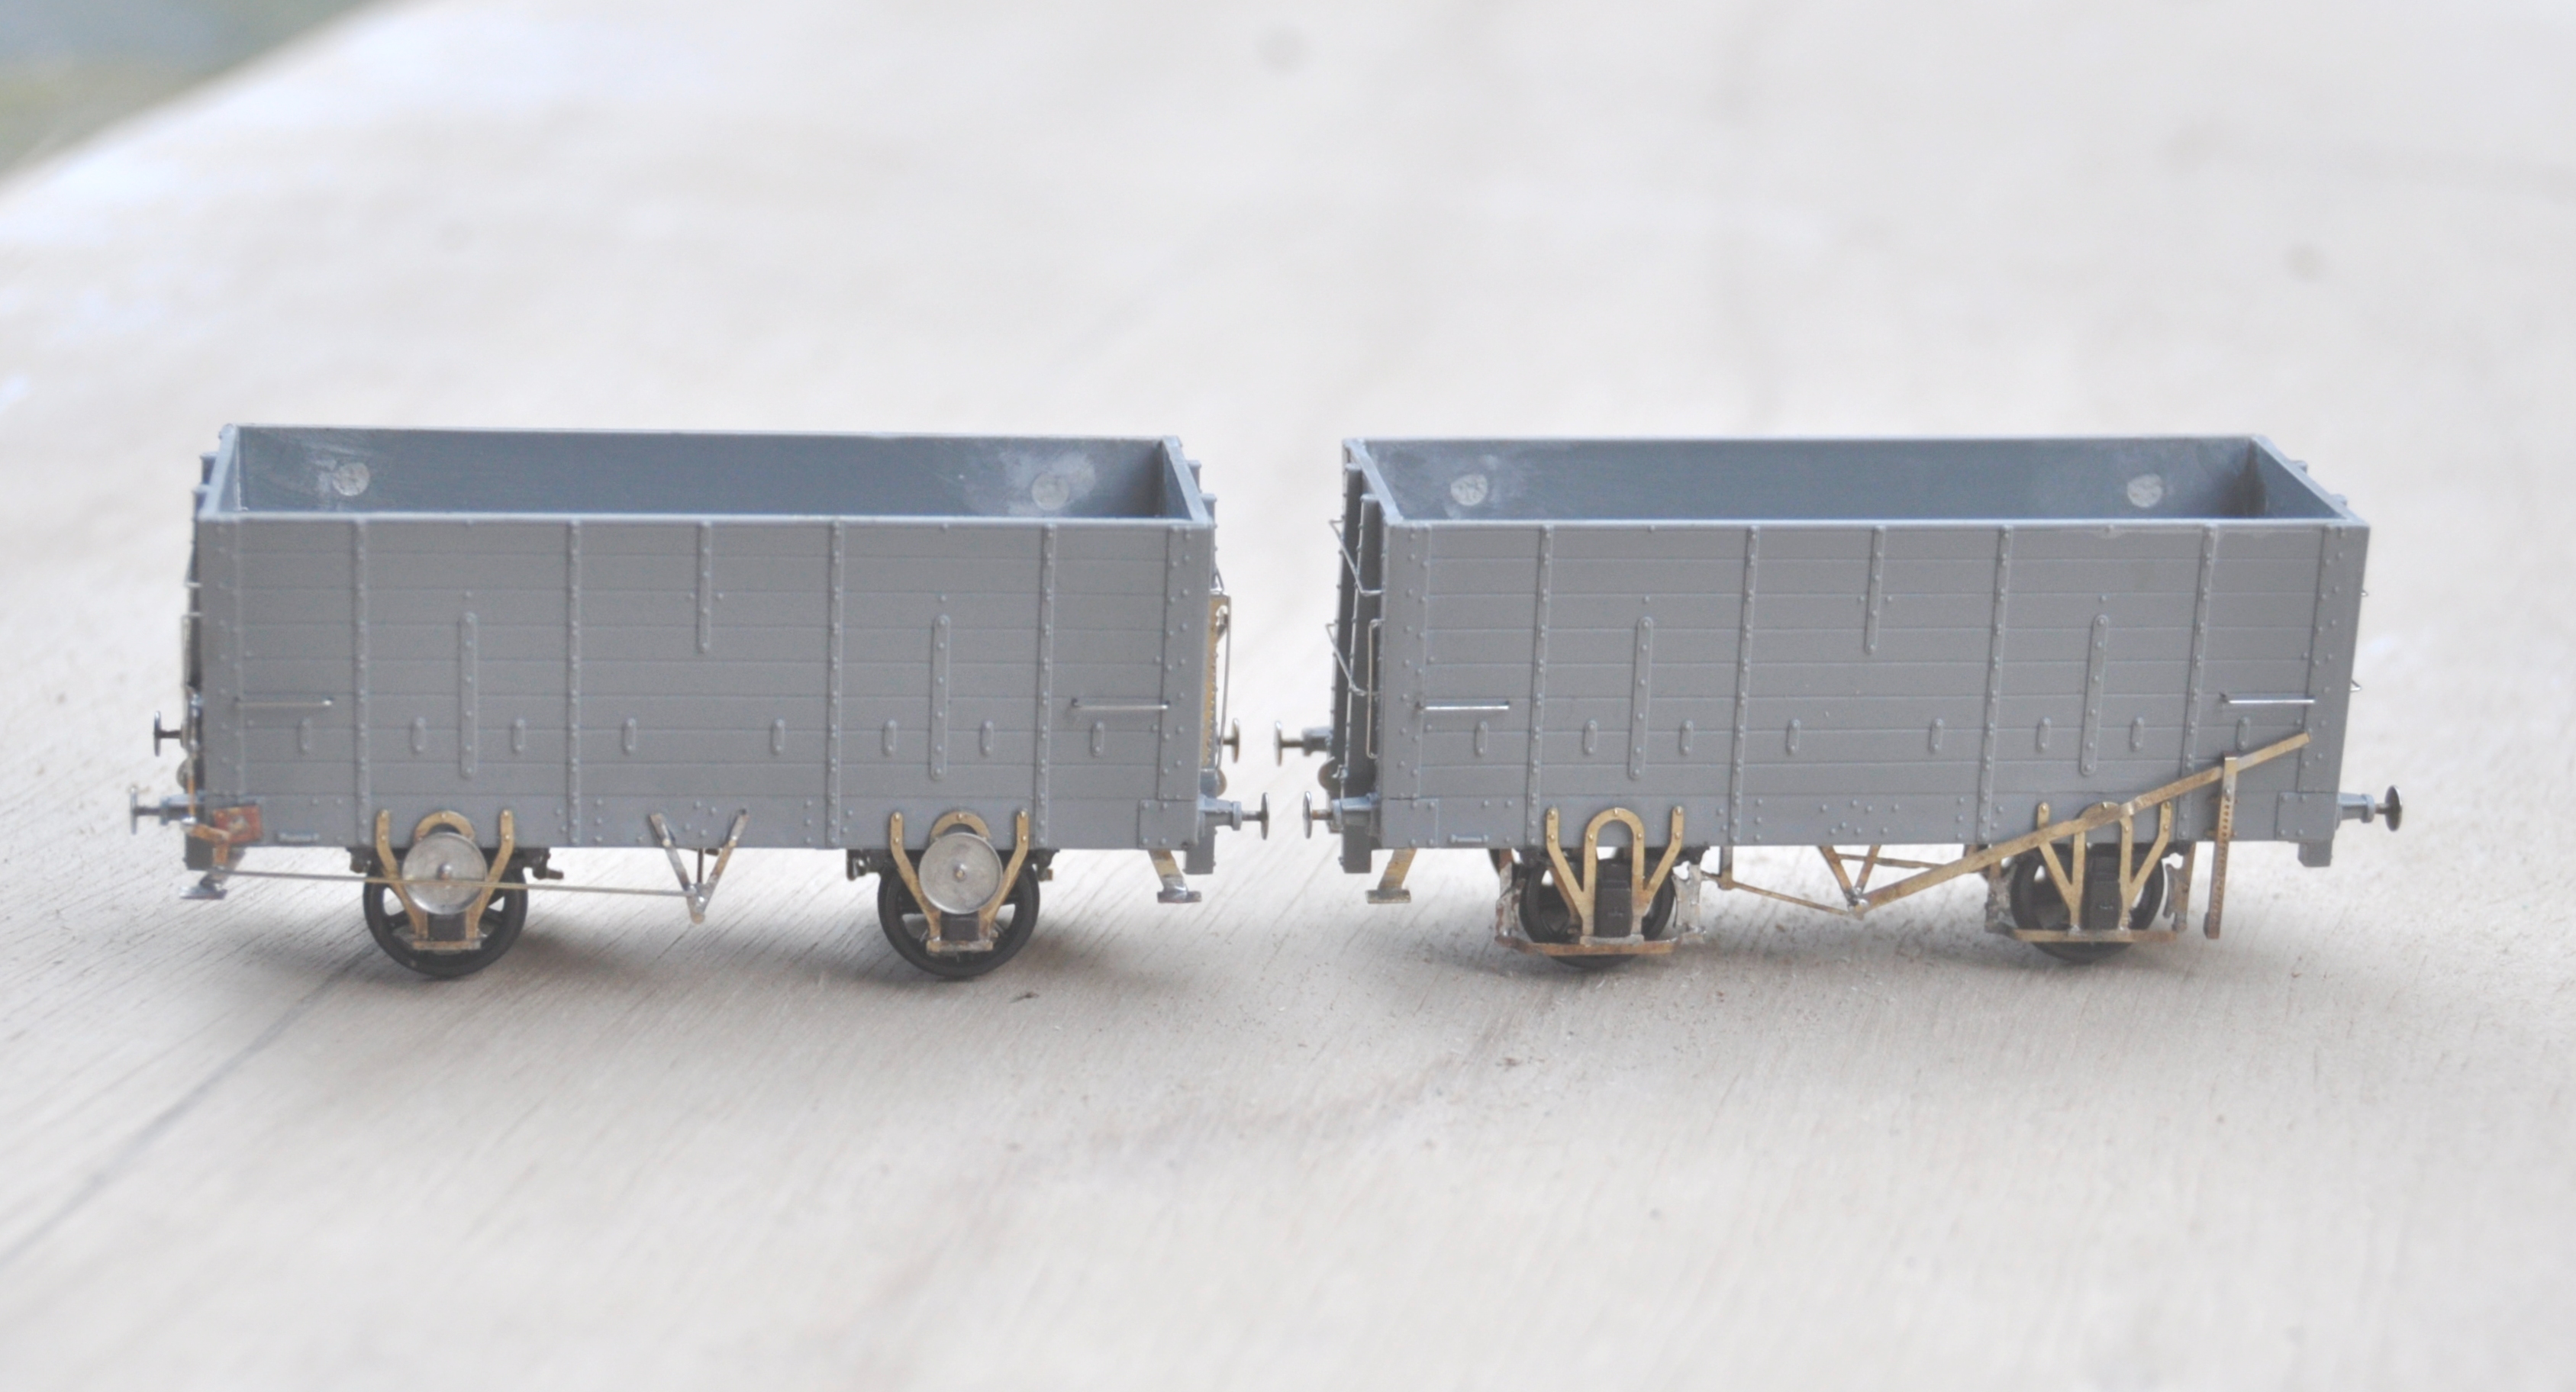
The NER undertook a number of experiments with these vehicles to attempt to reduce rolling resistance and this was the subject of my next modification. On the right (below), shows the provision of a second outside set of W irons. This was to add stiffening to the axles. There is a set of Bill Bedford W irons to cater for this, but I chose instead to create a fresh set on the etch. On the left is a further variant, where an anti-friction bearing was added in addition to the outer W irons. This was a wheel that ran on the top of the axle and I presume the idea was that as it rotated less, there would be less friction. I suspect that the introduction of an open bearing surface that would instantly get contaminated with coal and grot would actually have the exact opposite impact – as these were removed by the grouping era, I may well be right!
The final variation of construction that I have modelled was a slot cut into the ends, which appeared on some vehicles. The NER used these on vehicles that were hauled up rope inclines – of which they had many. A plank of wood was inserted into the hole and wedged such that it was secured behind the end posts to ensure that the haulage point was close to the centre of the wagon. They found without this that there was a tendency to pull the end posts loose due to the uneven point of pressure.
Next up will be the painting and lettering of these; where I have three eras to chose from that would have all been apparent immediately pre- first war, which is when Benfieldside will be set. More on this in a future post.
If there is a desire from anybody for the etches, I would be able to offer them; so drop me a note?
Benfieldside’s Signals – An Update
We have not had an update on the signals for Benfieldside for a bit. The first four of these, including the three that were restorations (although in respect of the twin doll signal, very little was reused indeed) are complete. This is what they look like (with thanks to Phil Hall & the Scalefour Society for the pictures):
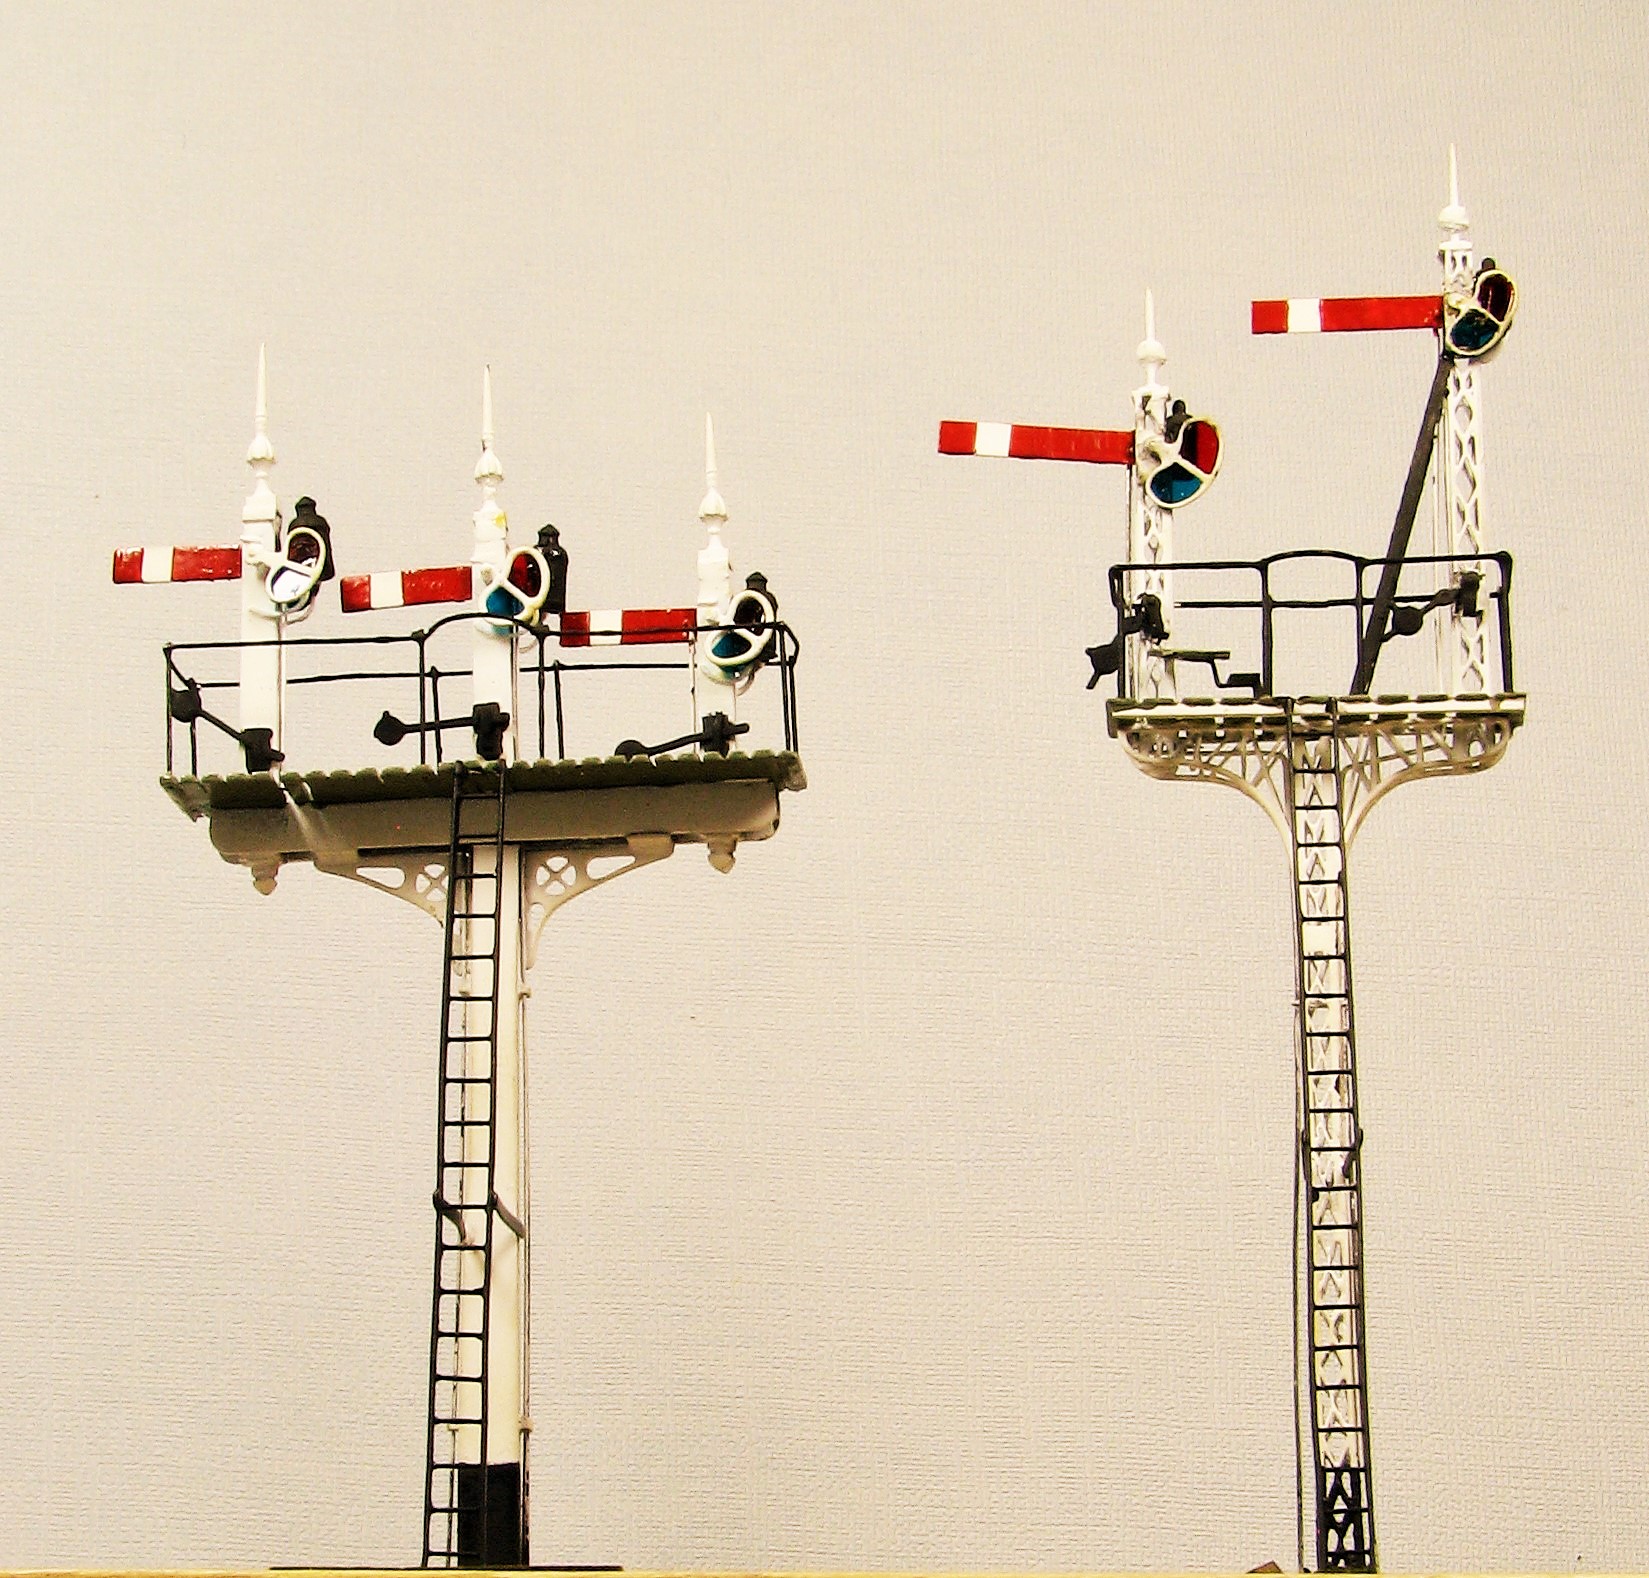
The three doll is a restoration from John H Wrights work, so too is the other in theory but the only components reused were the slated deck for the landing and the curved metal that formed the brackets!
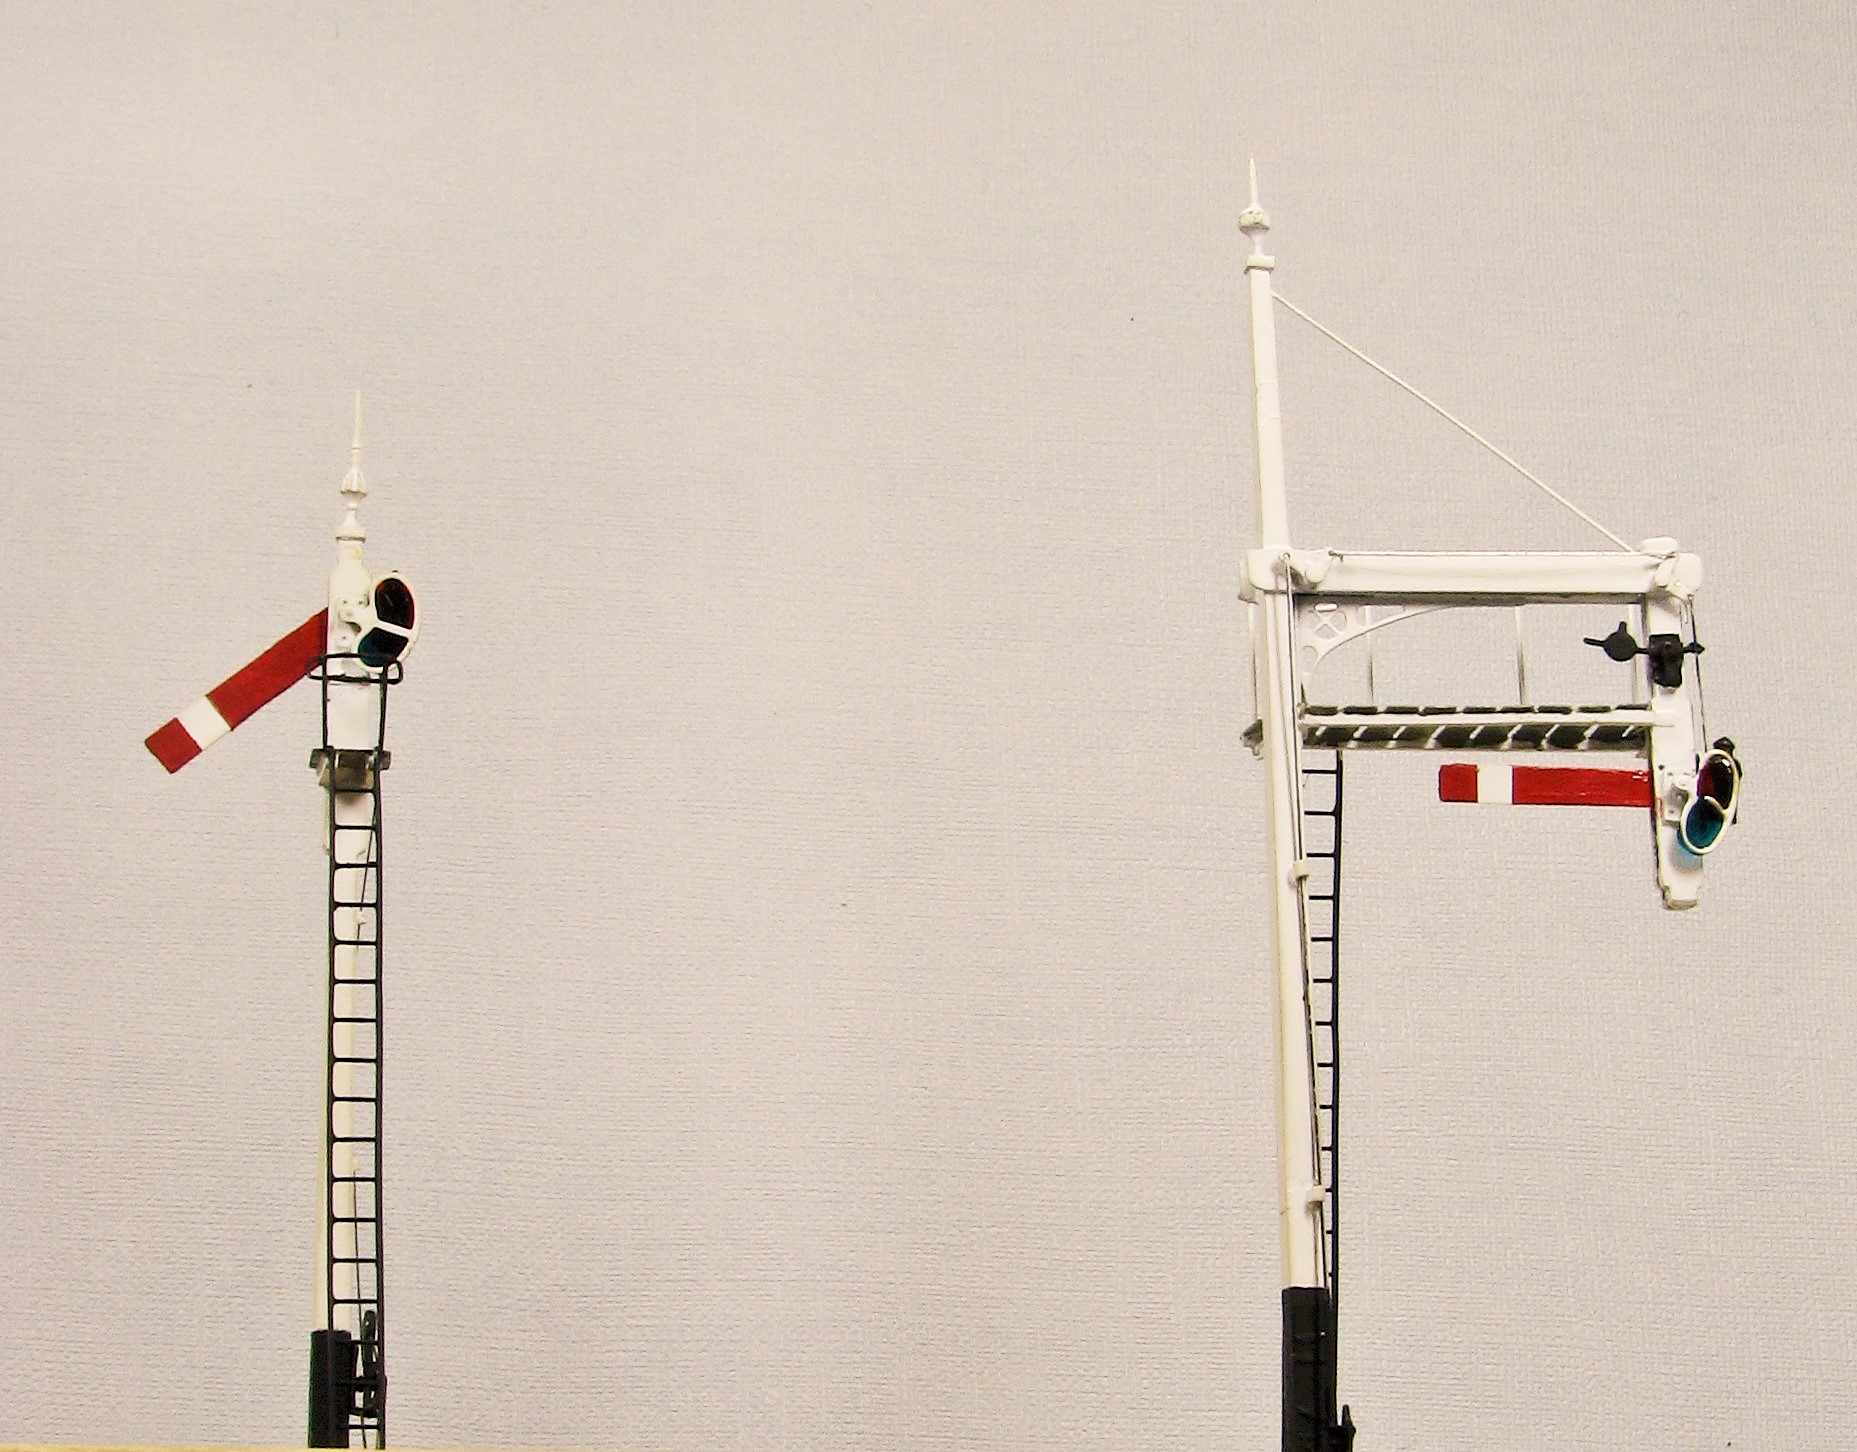
Gallows bracket to the right, restored from the John H Wright original. The simple post signal is all mine!
The gubbins for operating these is not shown in the views and I will write up a bit more on this at some point but an article I wrote for Rail Express on the signals I did for Elcot Road can be found here. A few of you may have played with these on the MERG stand at Scaleforum too, as I understnad it they kept people amused. There is more Benfieldside signal updates to follow, when I can get my camera out in the light to take some piccies.
Progress on Benfieldside’s Signals
Back in February (where does the time go?) I put some pictures up of some signals I was restoring for Benfieldside.
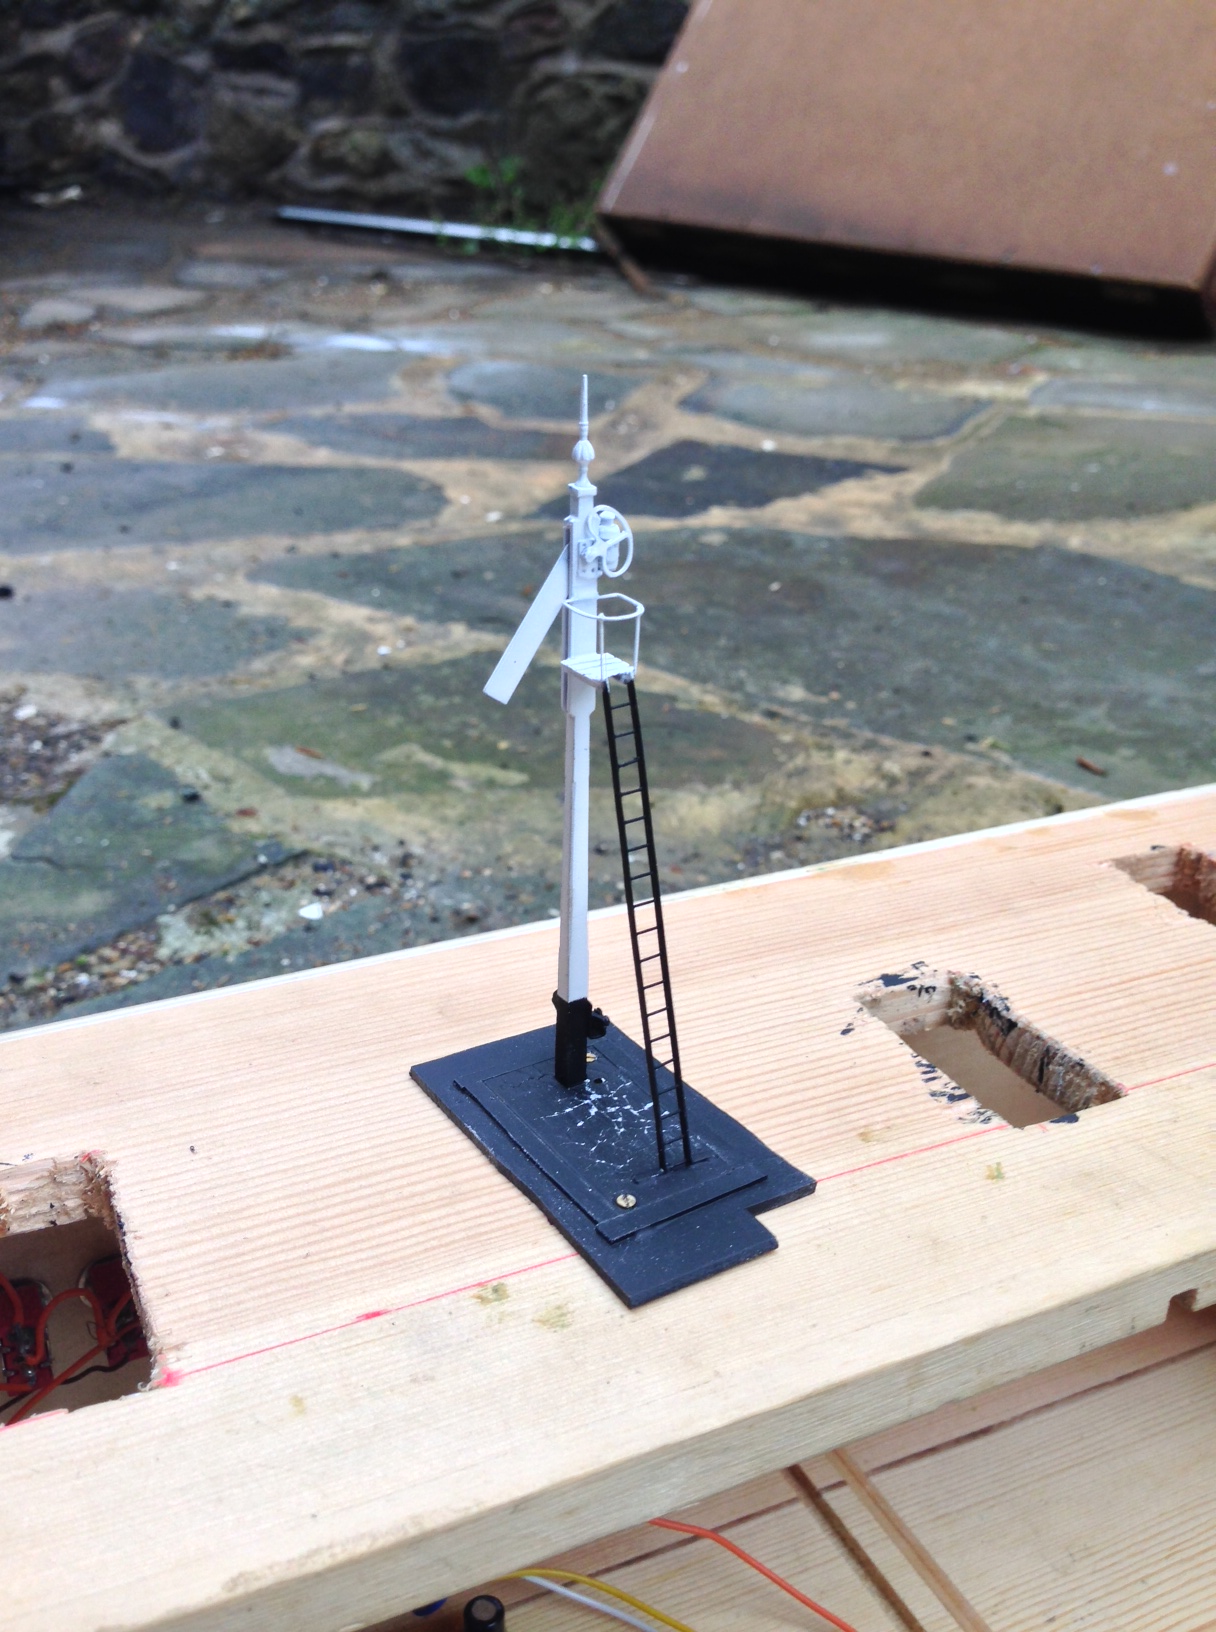
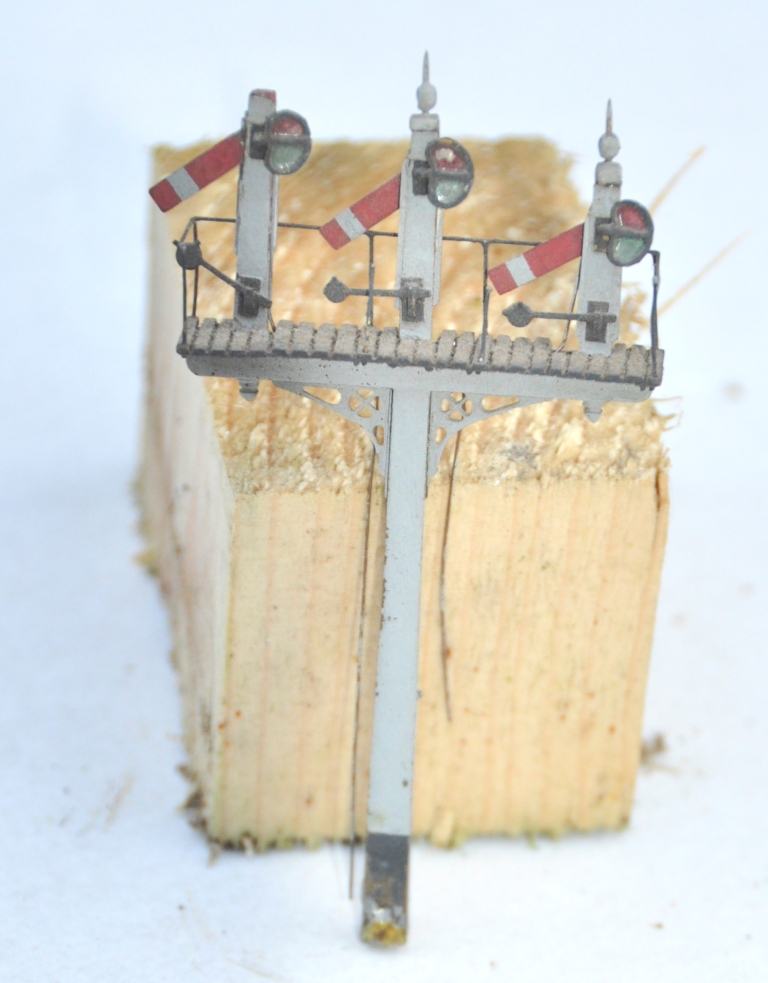
Matters have progressed; although I did find that one signal was beyond repair and both of the remaining needed quite a liot of work to do to them as all of the landings, ladders and in some cases balance arms/finials had dissappeared over time. They are not quite finished, as the final painting, weathering and installation of the spectacle plate glass is still to be done. However, this is what they look like:

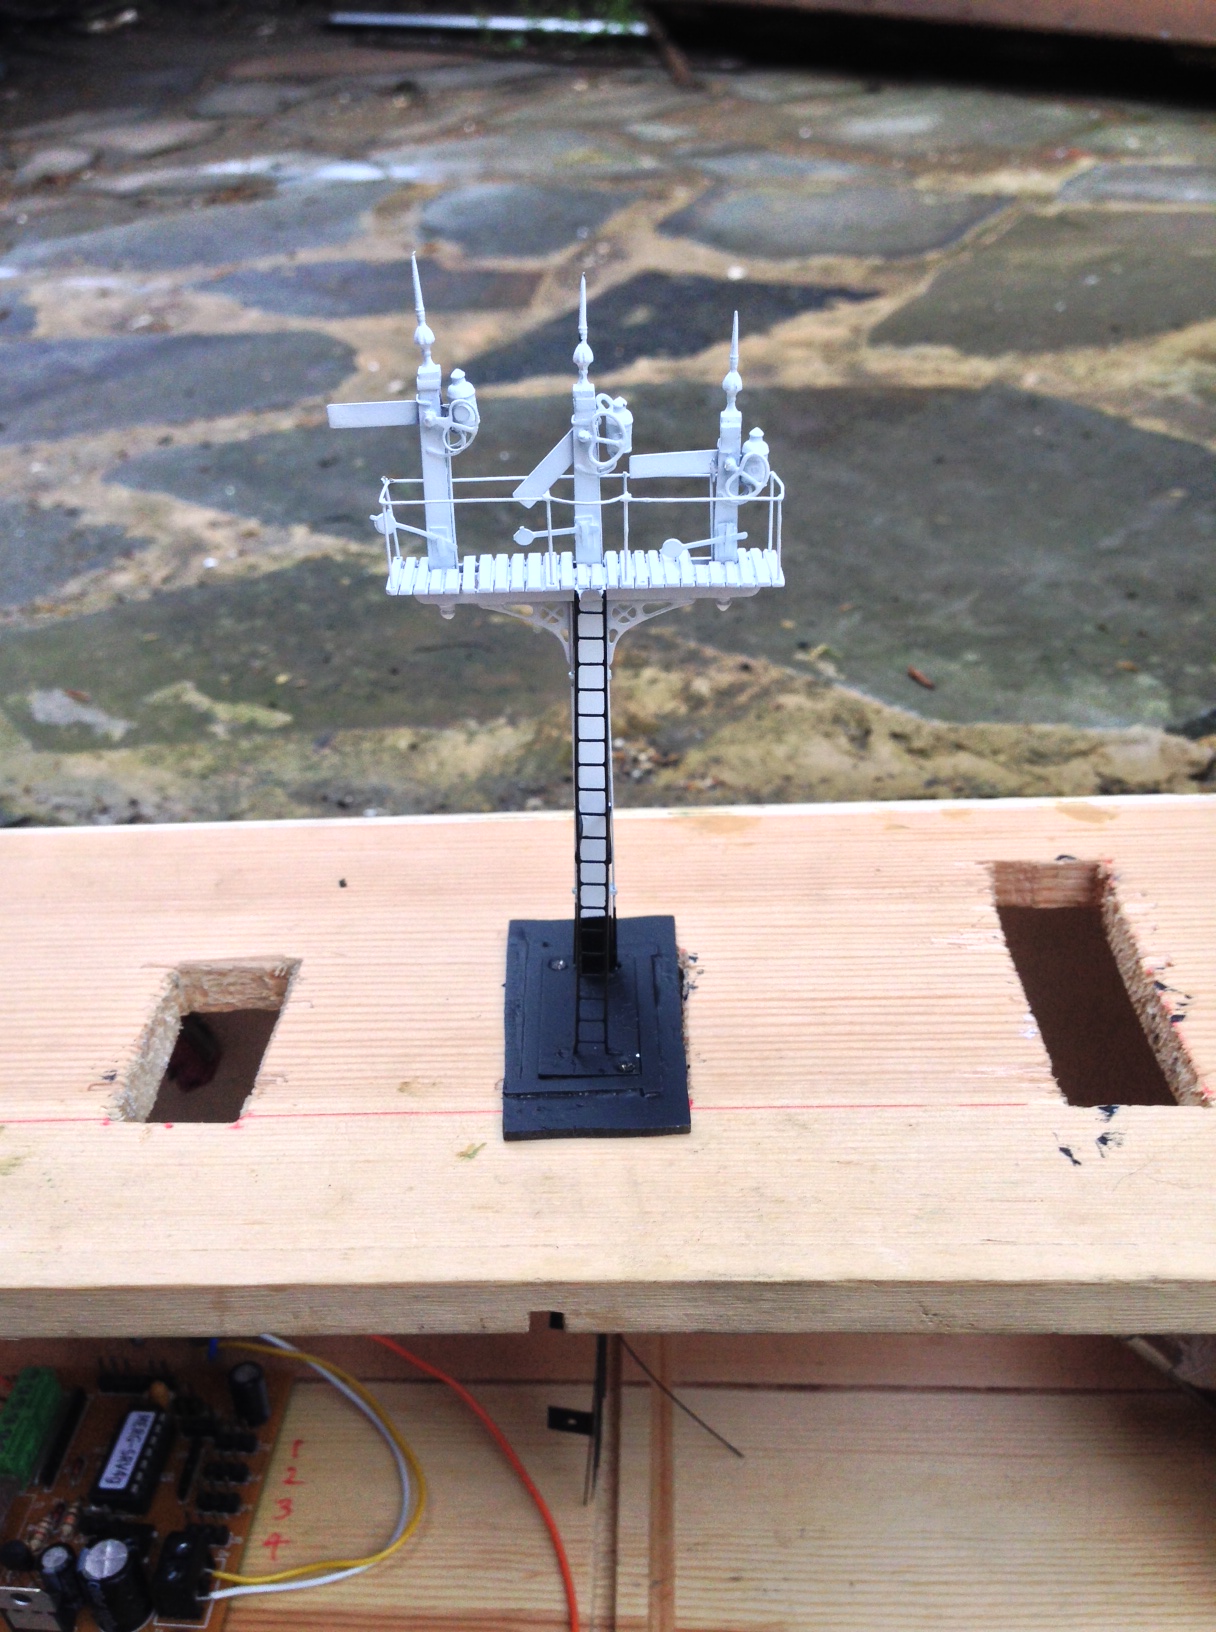
In addition to the three signals to be restored, I have a number of others which were missing altogether. Here is the first of them:
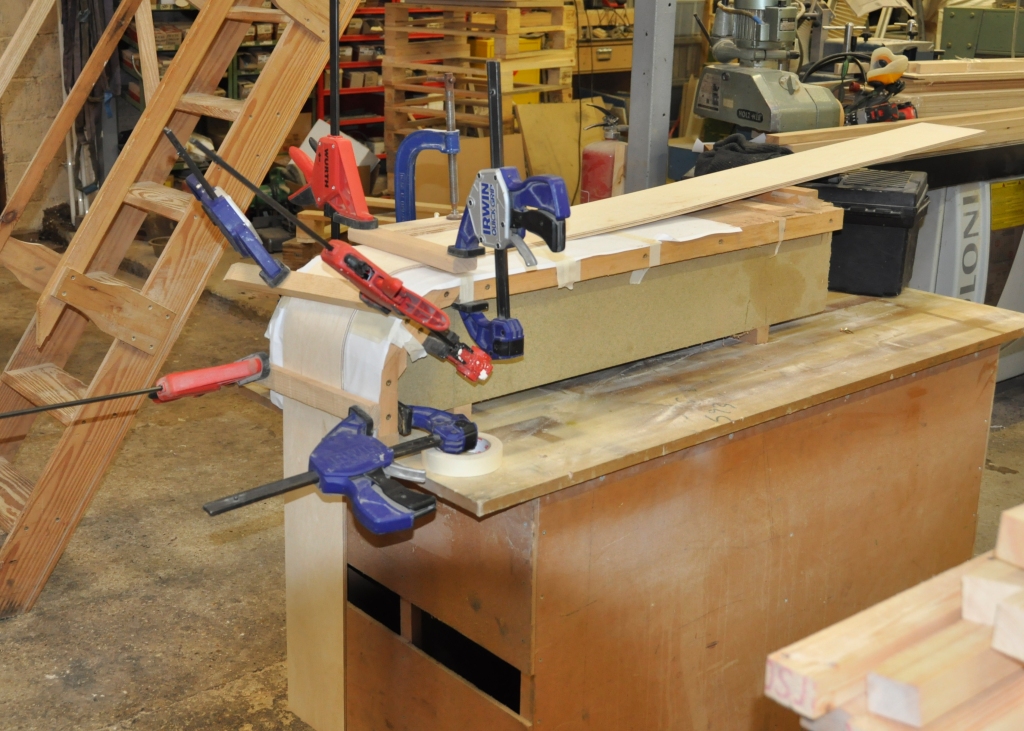
More Baseboards and A Peek at Benfieldside
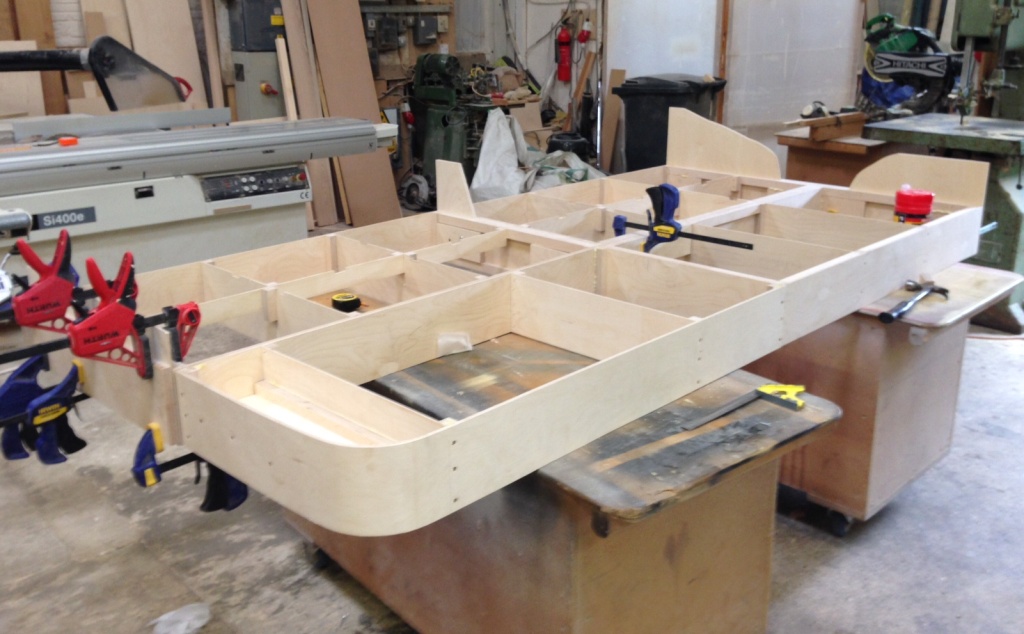
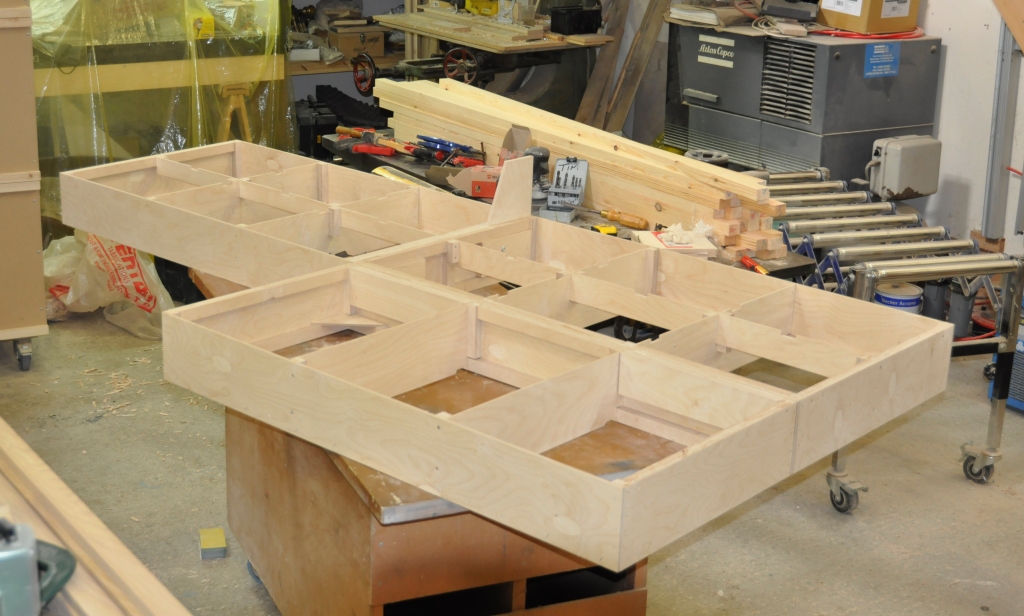
I managed to get most of another day done on the baseboards at Tim & Julian’s workshops. The bulk of the first four are now done; although the decks are still to be put on these. A slightly fuzzy picture to show the progress is below:
In addition to this, I had a look at their layout Benfieldside. As noted in past posts, they have recently acquired this from John James, who was the custodian of it for some years. Its original building was John Wright.
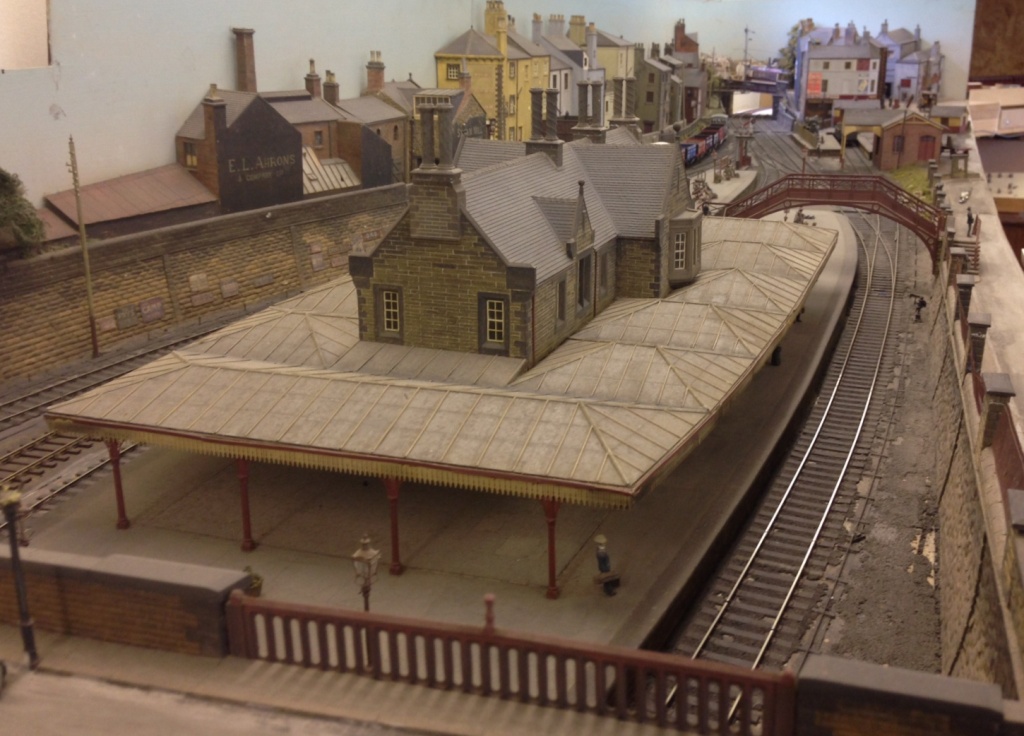
A great layout; I think anyway!
I have managed to restore the first two signals – well entirely rebuild one! I will post some pictures in the next few days with a bit of luck.
One good turn leads to another…………
I managed to get most of another day in Tim & Julian’s joinery workshop. With the assistance of Tim, we managed to get the three boards assembled with pattern maker’s dowels; along with the beginnings of the ground profiles.
A start was also made on the last of the four boards that will form the main station area. I didn’t want an ordinary square board on the corner as the layout will be viewed both front on and from the end. Therefore, we have had to profile the corner piece around a mould.
But all this help does have a price……………………. Tim and Julian have recently acquired Benfieldside. This rather exquisite layout was built by Martin Wright and was subsequently owned by John James. If you want to see how good it is, find yourself MRJ 38 and you will see what I mean!
Over the years, the layout has suffered some damage so it is going to need to be restored. This is where the use of Tim and Julian’s joinery shop ceases to be free – there are a number of damaged signals and even more that are missing altogether. My brief is restore those that still exist and to set them up for servo operation. Here are the first three; all of which have different issues.
This one has a shattered post and is missing its access gantry/ladder. In addition, the signal arm has become detached and as the signal is slotted (ie the arm is within a slot in the post), this is going to be quite difficult to fix in situ.
This one also suffers from problems associated with the slotting – when Martin made this he only used lattice work for the front and back in order to provide a slot for the arm. This however has made the signal very weak. In addition, the gantry and ladder are missing.
One of the arms us detached from its operating arm, its ladder and finial are also missing.
Fortunately, the North Eastern used Mackenzie & Holland as their signal suppliers as well as the Highland. Therefore, I will get to use my etches! Anyway, the signals have been stripped and restoration has started; a post next week will show how they are coming along.
