Blog Archives

Two Steps Forward and One Back
Having taken a few days off to make a long Easter break and absent the family for a few days, I have set about the wiring of the layout as it has laid untouched for too long!
First things first was to mount the control panel and rather smart it looks too……….
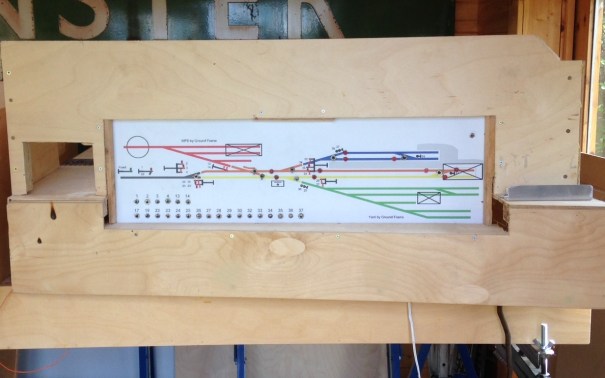
Control panel mounted in situ; a gap for the controller to the left and the aluminium strip to the right masks the power district switches.
Then onto the wiring itself, which takes a surprisingly long time…………….this is only about 50% finished!
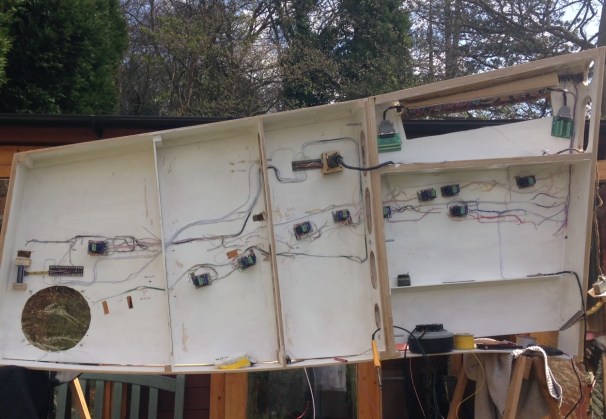
The two key boards to the station throat
One of my slightly better ideas (you’re about to find out about a less good ones!) has been to make up mounting pieces for the DCC Concepts Cobalt point motors. These are inspired by those designed for the Tortoise units and work on the same principal; they have a uniform mounting arrangement so once set up the actual point motor can be swapped over if need be without disturbing the set up. This is what they look like:
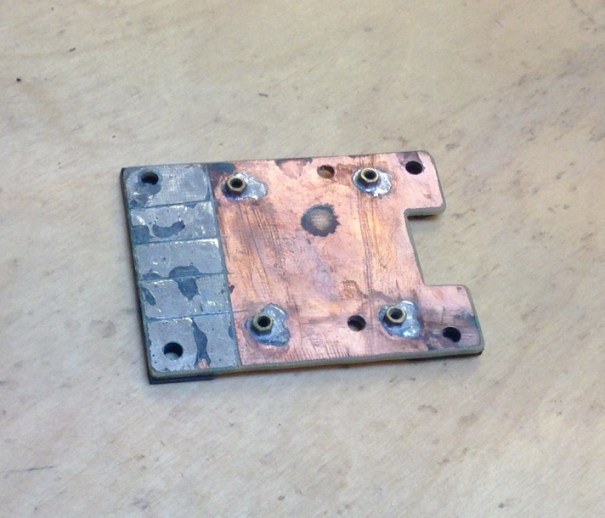
Cobalt Point Motor Mount
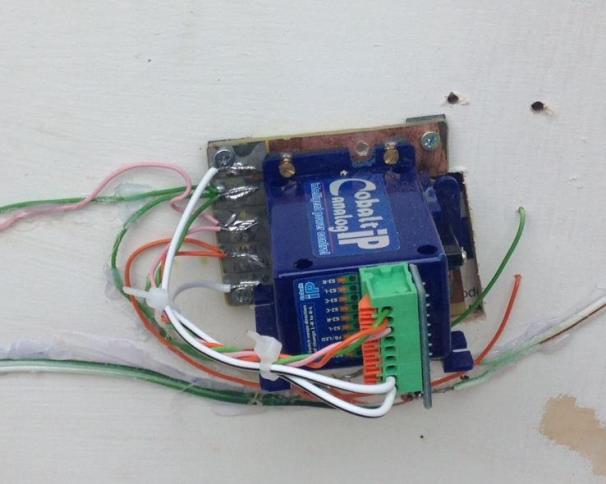
Nothing too revolutional, but I hope it will make changing these at exhibitions a lot easier as this is the absolute devil on Portchullin.
And the less clever idea? Remember the multigang sockets I had used on the control panels (link here) well they are not rated at a sufficient capacity to operate the point motors. I think this is because Cobalts operate on a stall basis (the motor doesn’t turn off, it just stalls when it reaches the resistance of the physical stop). My guess is that this results in quite high ampage draw and has led to the following:
The multi-gang sockets with burnt out sections to the left.
Ooops! Back to the drawing board (or rather traditional tag strip) for the linkage of the control panel to the board.
There have been other problems too; the carefully recorded wiring lists proved to be wrong on occassions so I have had to prove each cable run (dooh!) and I found one of the power district switches was defective (but only after a couple of hours of trying to trace the fault!)
So things are getting there, but we are still not at the stage of the first wheel moving!

Control Freak
I have been back onto the layout of late, with a view to get the first wheel turning on it before too long. That means attacking the electrickery things, beginning with the control panel.
I made a start on this by drawing up a diagrammatic representation in MS Paint and then using this to get one of the online firms (Vistaprint) to print me up a poster board to form the basis of the control panel. I am not sure I chose the right material as it turned up on a light weight foam board and I had to mount a sheet of aluminium behind for it to be stiff enough to be useable. But it did look pretty smart I thought………….
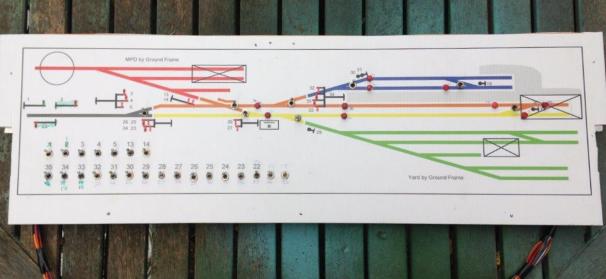
The control panel deals with all of the signals and turnouts that the cabin will have controlled, with local ground frames (which will be located on the boards locally) to be used to control the goods yard and the MPD. The latter will be arranged such that it can be located either to the front or the rear, to allow some flexibility in operation.
I have got to the point where the full extent of switches have been wired in and I am just completing the jumper leads. I took a lot of care to plan the wiring prior to any construction – despite the locos being DCC controlled, there are an awful lot of wires. This is because I have stuck with traditional control for the turnouts and signals. There is further complication as a result of the desire to incorporate some bells and even a block instruments (well maybe, at the moment it is just the wires!). So in all, there are 90 odd wires doing something or another on the layout.
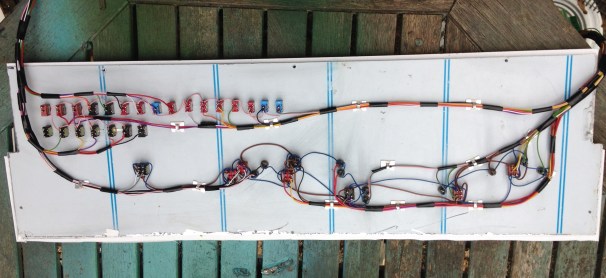
Somewhat in contrast to Portchullin, I have sought to keep the wiring as tidy as possible; everything is neatly collour coded and even labelled (to be fair it was labelled on Portchullin, but in a non colourfast ink………..!). I am hoping that this will make the wiring easier to debug at the start of the matter and repair if it does get damaged.
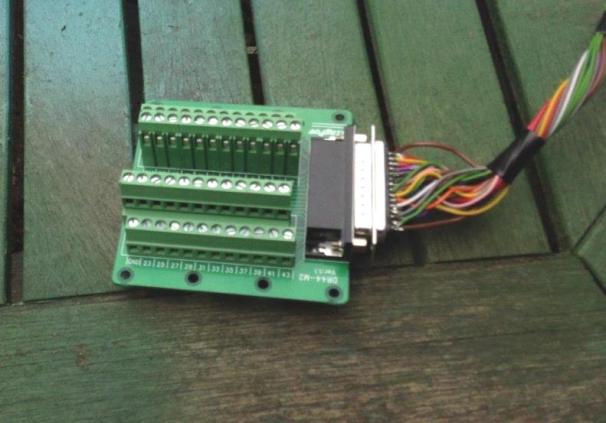
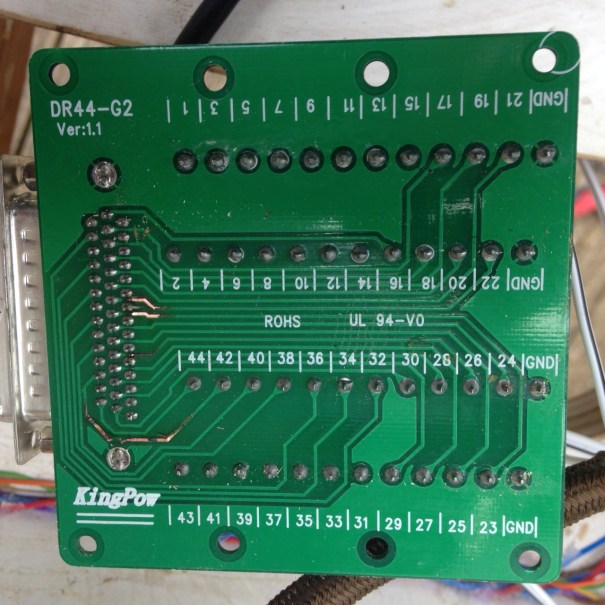
I am proposing to use a variety of connectors between boards and to the control panel, including this rather nifty varient of the D-sub range that is wired directly onot a cheeseblock wireless connector. Available to a variety of types from ebay including from this seller.