Control Freak
I have been back onto the layout of late, with a view to get the first wheel turning on it before too long. That means attacking the electrickery things, beginning with the control panel.
I made a start on this by drawing up a diagrammatic representation in MS Paint and then using this to get one of the online firms (Vistaprint) to print me up a poster board to form the basis of the control panel. I am not sure I chose the right material as it turned up on a light weight foam board and I had to mount a sheet of aluminium behind for it to be stiff enough to be useable. But it did look pretty smart I thought………….
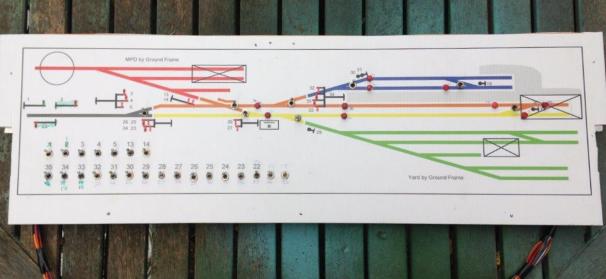
The control panel deals with all of the signals and turnouts that the cabin will have controlled, with local ground frames (which will be located on the boards locally) to be used to control the goods yard and the MPD. The latter will be arranged such that it can be located either to the front or the rear, to allow some flexibility in operation.
I have got to the point where the full extent of switches have been wired in and I am just completing the jumper leads. I took a lot of care to plan the wiring prior to any construction – despite the locos being DCC controlled, there are an awful lot of wires. This is because I have stuck with traditional control for the turnouts and signals. There is further complication as a result of the desire to incorporate some bells and even a block instruments (well maybe, at the moment it is just the wires!). So in all, there are 90 odd wires doing something or another on the layout.
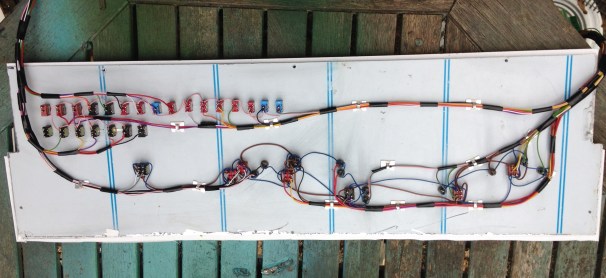
Somewhat in contrast to Portchullin, I have sought to keep the wiring as tidy as possible; everything is neatly collour coded and even labelled (to be fair it was labelled on Portchullin, but in a non colourfast ink………..!). I am hoping that this will make the wiring easier to debug at the start of the matter and repair if it does get damaged.
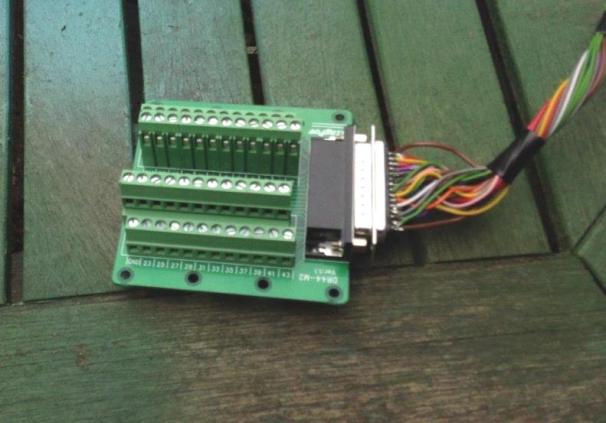
I am proposing to use a variety of connectors between boards and to the control panel, including this rather nifty varient of the D-sub range that is wired directly onot a cheeseblock wireless connector. Available to a variety of types from ebay including from this seller.
Posted on October 25, 2016, in Glenmutchkin, Uncategorized and tagged Control Panel, glenmutchkin, Highland Railway, layout, Model Railway, p4, Wiring. Bookmark the permalink. 5 Comments.

Looking forward to having a go on it!
That’s interesting Mark. Is 1a per pin enough for a DCC system? I’m not an electrician but I am just starting wiring Cheddar and I’m having very similar thoughts. They’re a very neat solution.
Actually, the D-subs are on the control panel that only runs turnout switches, signal switches and switches for the electro-magnets. As such, no DCC power is passing through them.
Having said this, I do use a pair of them on Portchullin without problems related to the rating. I have had a broken connection between the cable and the fitting. Fortunately, I had a few spares so simply swapped it over.
One other thing to mention is not to use the three teir fitting (I not with more than two rows of pins). It is difficult to solder the inner pins to the wires and I managed to flood a pair of them with solder such that they were electrically united.
The main connections on the layout are amphenol connectors. Easily available on the web but very expensive. Fortunately a long time ago I stripped down some lab machinary from where I then worked and these found their way into my bag!
Thanks. I’ve ordered some 5a rated d plugs from squires. I’ll stick with them for the time being.
Pingback: Two Steps Forward and One Back | highland miscellany