Blog Archives
Testing Times with Terribly Troublesome Turntables
A decade or so ago, I did start a MPD type layout and got some way with the building of a working turntable but had lots of trouble with it and this did rather kill off my enthusiasm for the layout – with inevitable consequences…………
The difficulty was to get it to operate smoothly, with any level of reliability, and to stop with sufficient accuracy to enable P4 wheelsets to enter and leave the turntable without derailment. Well, Glenmutchkin needs a turntable, so it is time to confront that particular demon again – and he has not gone away in the meantime! However, I think I have put the blighter back in his box with the help of the Chatham Turntable Drive, a chunk of scratchbuilding and a dose more cussing………..
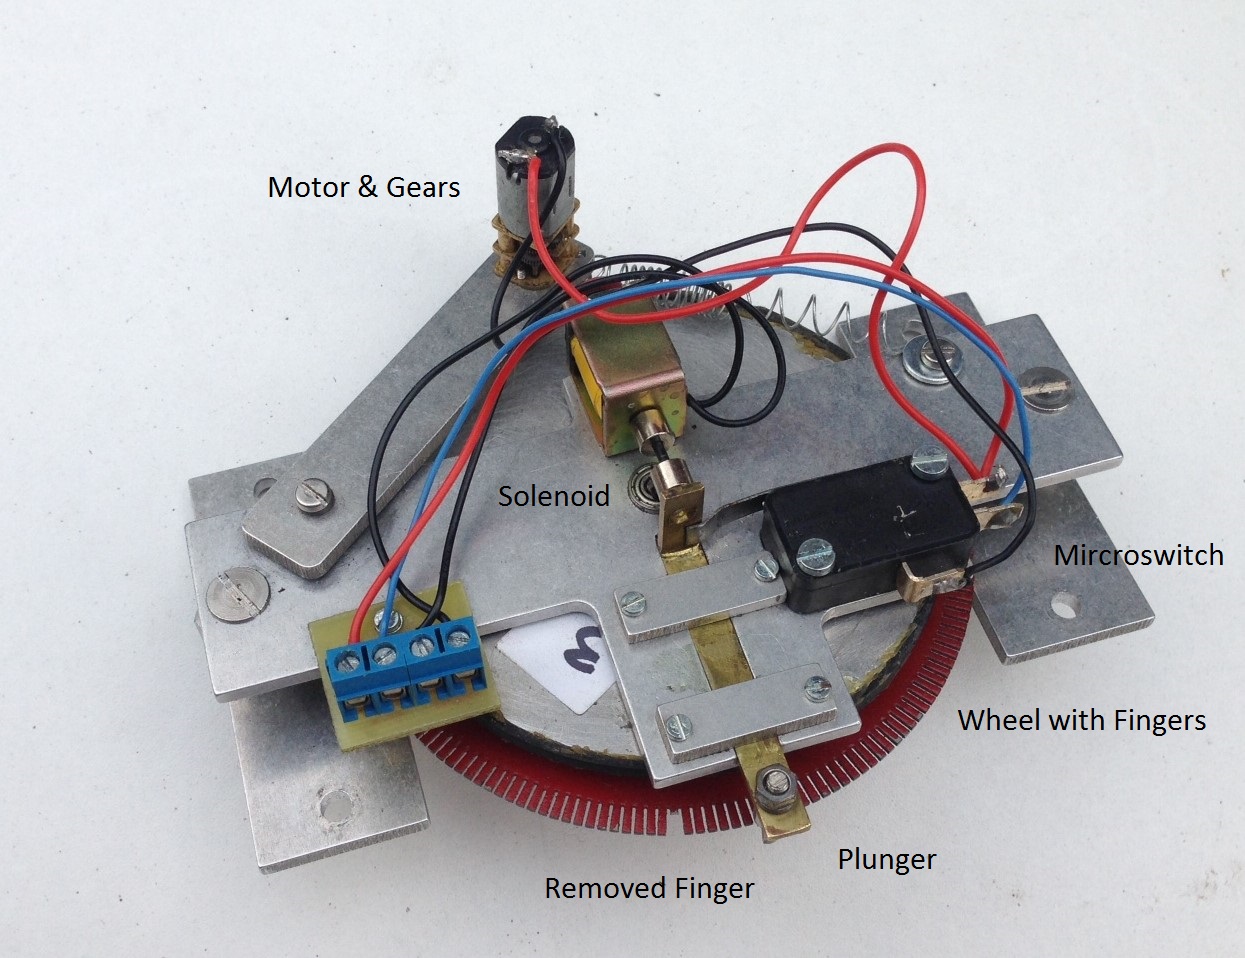
The Chatham turntable drive is named after its originator and is supplied in the UK by Model Railway Developments – not a great site listing I know, but there is a better Youtube video. The attraction of this particular drive was the mechanical locking arrangement – this means that it both stops consistently and then holds the turntable deck firmly there until activated again. The basis of the drive is a large wheel that has numerous fingers cut into it – the user then takes a finger away for the positions at which it is desired that the turntable will stop. When operated, a plunger runs across the tips of the fingers but where it encounters a gap, the plunger is pulled into the gap and cuts the power at the same time. To operate it again, the plunger is pushed free of the gap by way of a solenoid and the power to the drive reactivated.
The concept is great but there are some issues. The first was that the solenoid did not fully operate when activated. I found two problems with this; the first being that the control box seemed to send a less than full voltage to it. This was fairly easily dealt with by bypassing the control panel with the push button. The second problem related to the microswitch that alternates the power between the solenoid and the drive motor. The spring to this, even though it is quite light, was sufficent to offer to much resistance for the solenoid to overcome. I managed to overcome this by making sure that the rest of the plunger is as smooth as possible by rubbing all the parts down with fine wet and dry and a touch of oil. This takes a degree of care to set up to get the balance right and I am worried that it will be a source of problems for the future but for now it works.
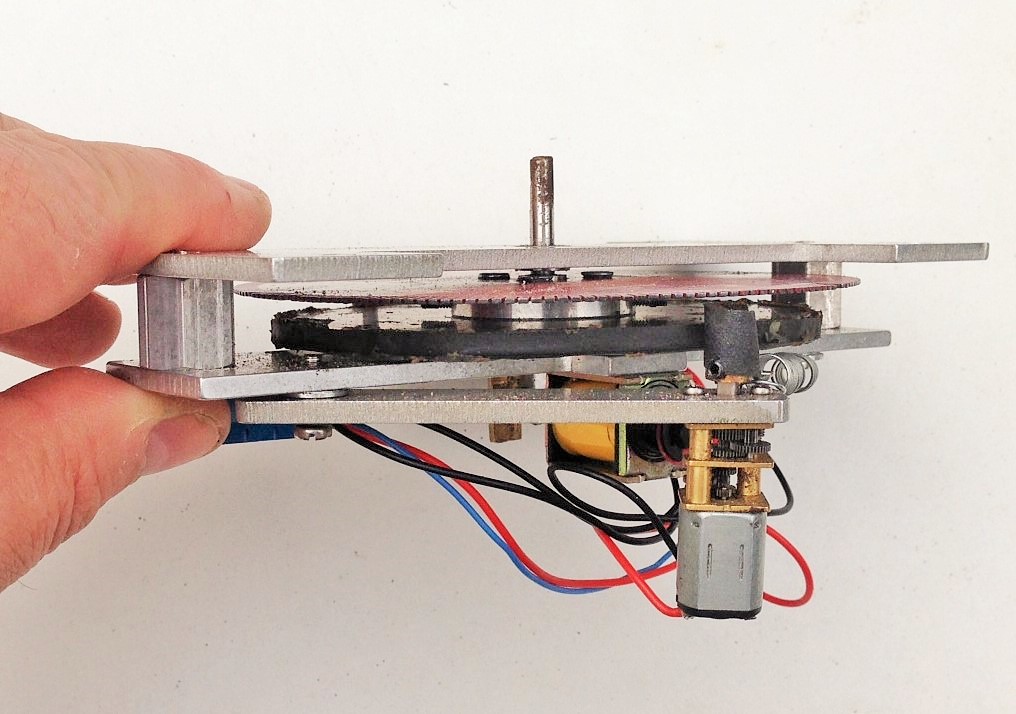
The next issue, is that the motor is not engaged to the drive wheel by a mechanical set of gears and instead has a brass wheel that runs on a rubber rim. This is probably designed as a safety feature to stop the motor burning out when a problem is encountered but it is prone to slipping rather too much. I have sought to overcome this by way of wrapping the motor wheel with sandpaper but this has only been partially successful. There are still more tweeks to do but I have found that it works rather better in one direction than the other, so this may be the ultimate solution!
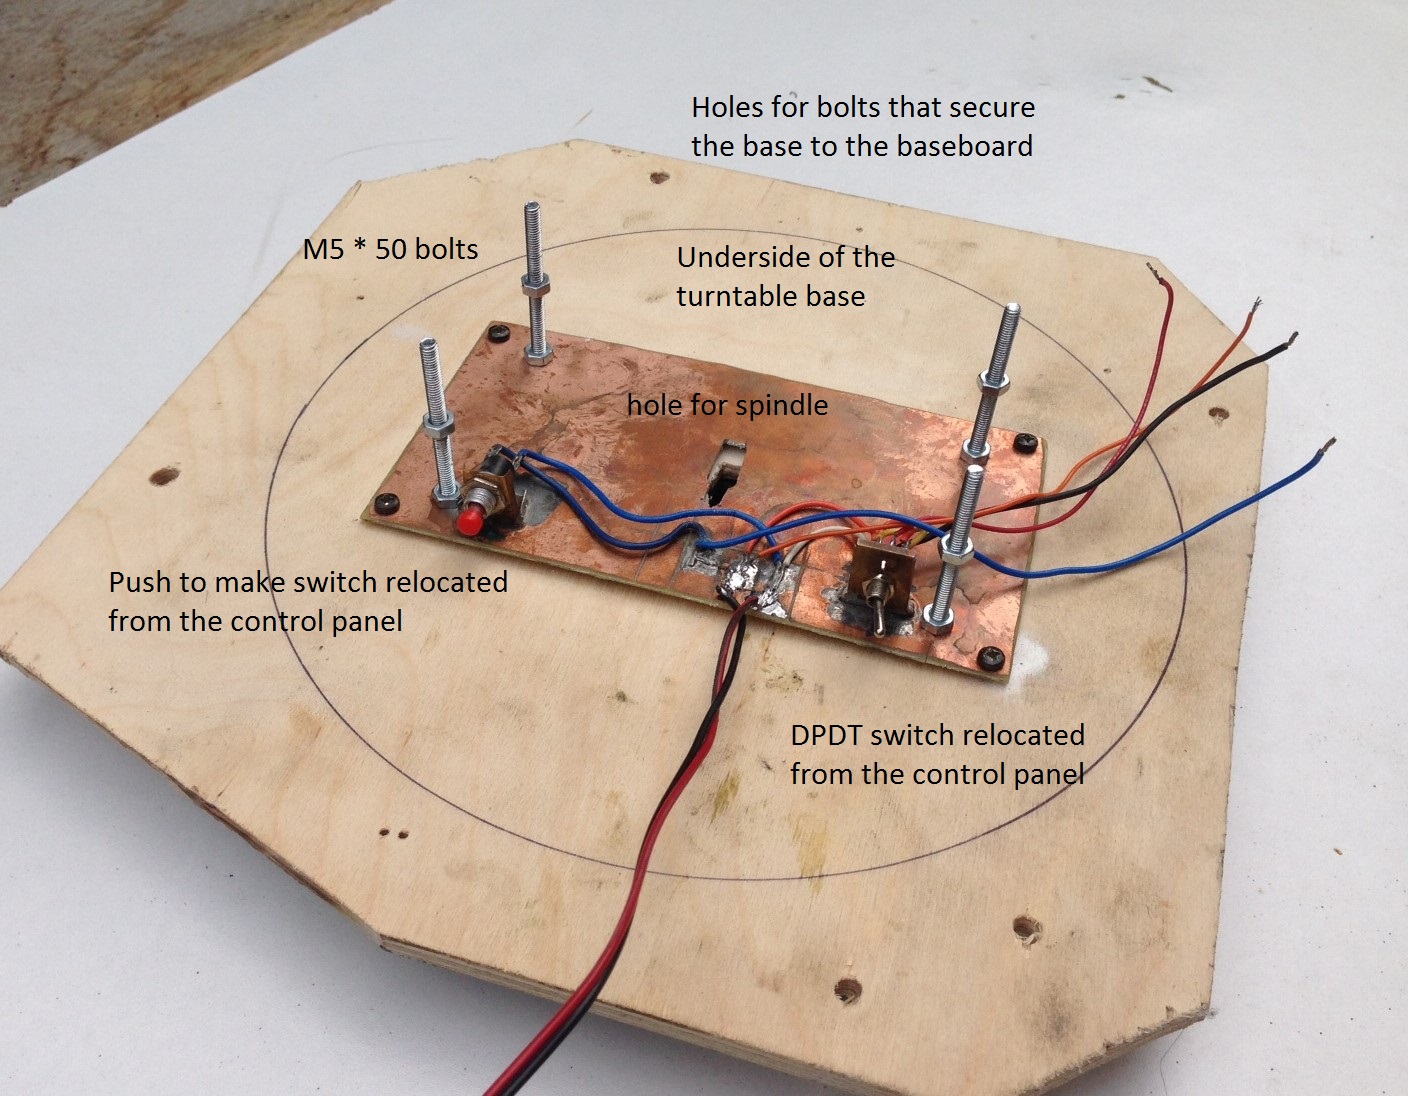
The next issue was to set the ride height of the turntable deck up correctly. I found that this had two aspects to worry about; the height of the deck relative to the rails that it runs on and then the height of the deck relative to the approach trackwork. I found that it is not sufficient to simply seek to try and get the deck set up correctly with fixed construction – it was simply too sensitive to minor errors. Therefore, I made up a mount with 50mm M4 bolts. By threading on a pair of nuts onto this, it was possible to adjust the exact positioning of the drive relative to the deck and then the entire assembly with the baseboard. The first of these nuts is shown on the above picture and once the drive unit is in place. the second set is tightened from above to hold it all in place. I am concerned, however, that they will loosen over time – so some “nut-tight” has been added to the shopping list!

I connected the shaft of the drive unit onto the turntable deck by way of a small piece of tube. This had grub screw clamps onto the drive unit shaft and a permenantly attached bolt on the top (bottom in the picture). The rod to the base of the turntable deck was reduced in diameter slightly such that it would rock just a touch and take up any inconsistancies in the turntable well. However, I ensured that the bolt was tight in both the rod and tube, so there was limited backlash.

Next up was a turntable well; which was another area where the gremlin made itself felt last time. Most of this had to do with trying to get the turntable deck to sit squarely and equally in the well. As already noted, I adopted the oppisite approach this time and built the well to fit the deck and simply relaid the rail afterwards so that it was exactly above the pivot – it has proved to be a whole lot easier and could have saved a lot of frustration last time!
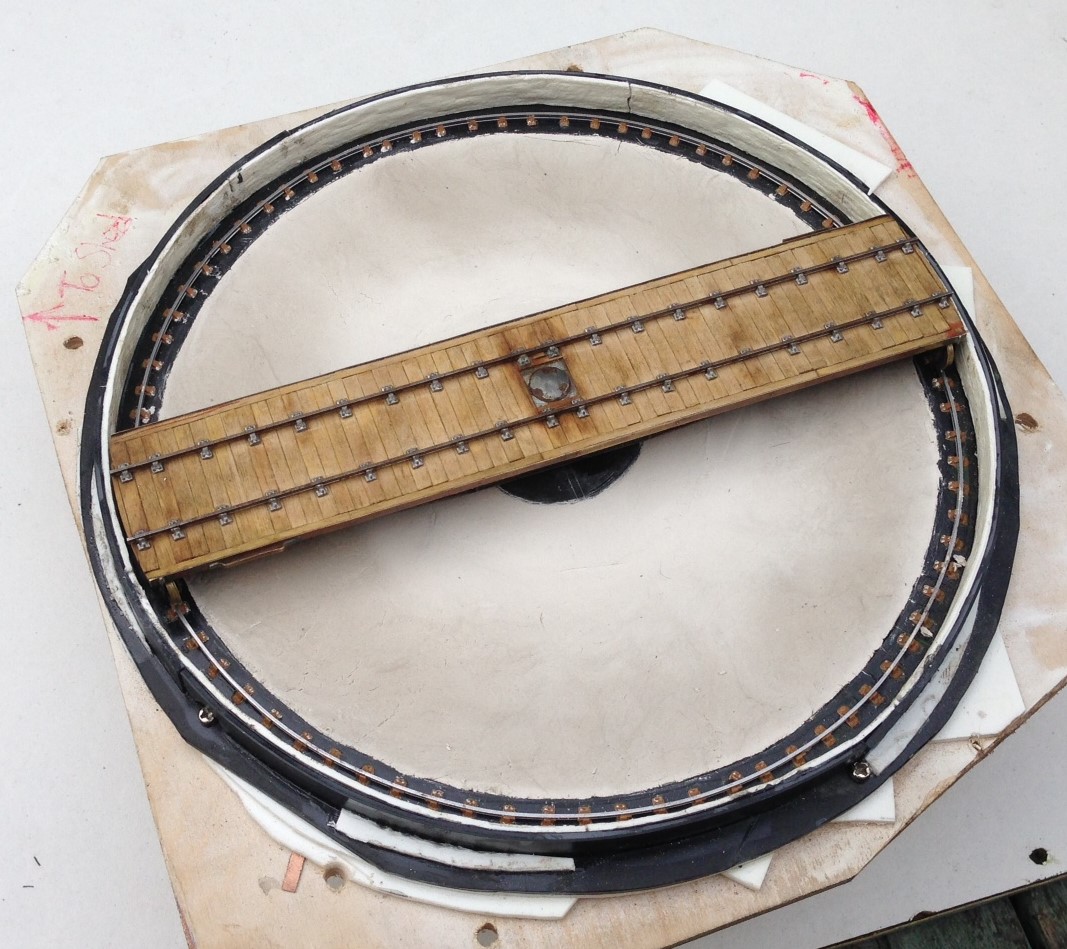
The well walls were formed of Will random stone sheet, as I did not think that they would have used anything particularly fancy on a turntable well. However, to stop them springing out of the curve, I laminated this with a chunky thickness of plasticard and also secured them to a plasticard base – this also formed the base for the rail, which is secured in turn with Exactoscale chairs. One thing I did notice when studying prototype photos is that the chairs on the turntable rail are quite closely spaced – presumably because a relatively limited number have to support the entire load of the engine (much less in number than in plain track due to the deck carrying the entire weight of the loco onto only four points). I have replicated this on my deck.
The dish to the well was, I have decided, merely ash ballast in the pre-group era (neat concrete was a much more recent approach), so I formed this with Das pressed into place and made as smoth as I could make it with fingers. This never gets crips and “machine made” so represents what I think it will have looked like.
I will look at the deck in the next post, after which hopefully it can be shown fully working and in situ! However, here is a peek:

….alliteration with thanks to Mrs Bennett; I really do remember Magistrate Maskew of Moonfleet Manor……..!
