And now a Midland signal…..
Whilst the NER signal from my last post gets itself painted, I turned my attention to the next few signals – in this case these will be Midland lower quadrants.
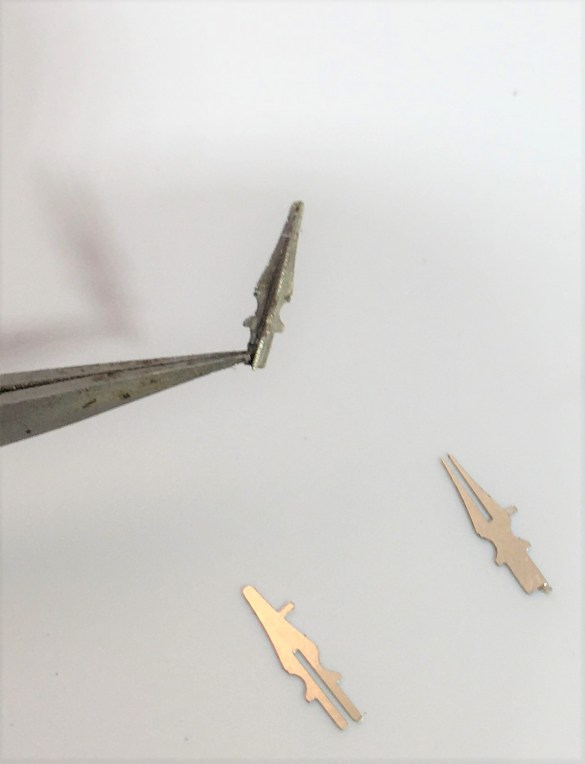
A lot of the character of a signal is in its finial and if this isn’t right then the model won’t convince. In addition, they are also very vulnerable so need to be durable. Therefore, my conclusion is that white metal finials do not cut the mustard – they are too delicate and too clunky. Thus, in this case I decided to make my own – I came up with this which starts with with some interlocking etches:
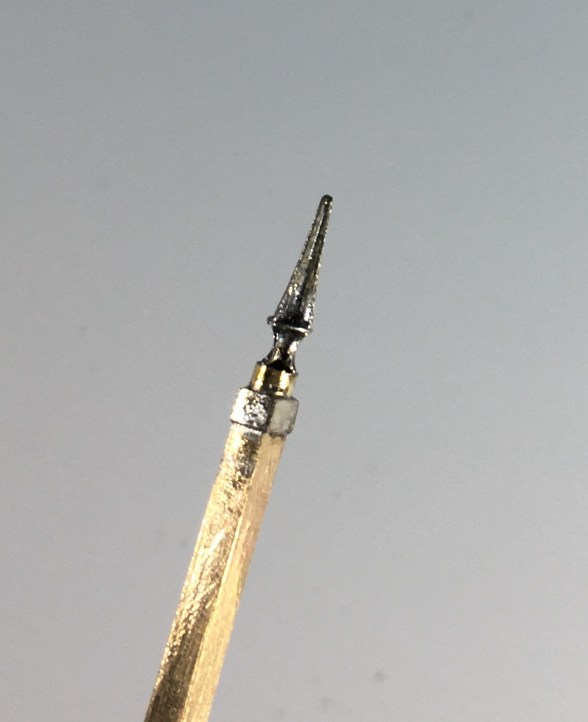
And then a bit of brass tube as a collar at the base
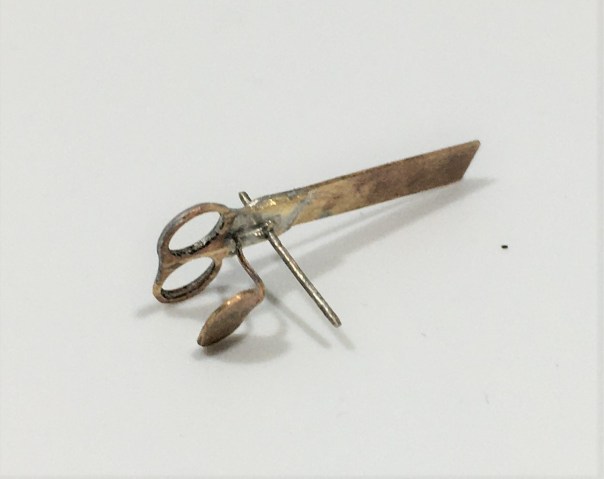
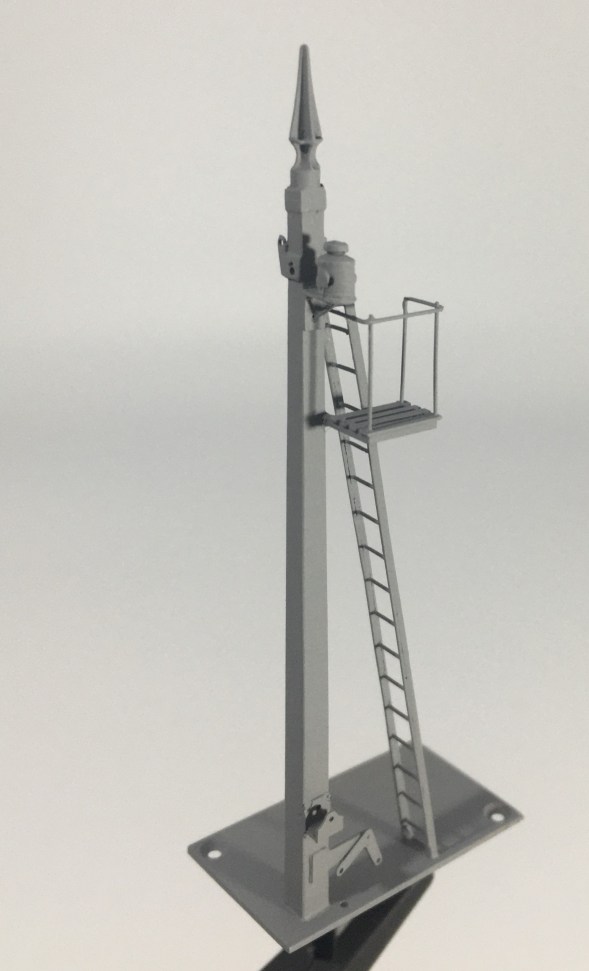
The Midland’s style of signals do have a few idiosyncrasies; one of which is the way that blinders are fixed. Instead of being fixed to the spindle these are secured to the arms and wrap around the lamp. This can be more clearly seen in the photograph below.
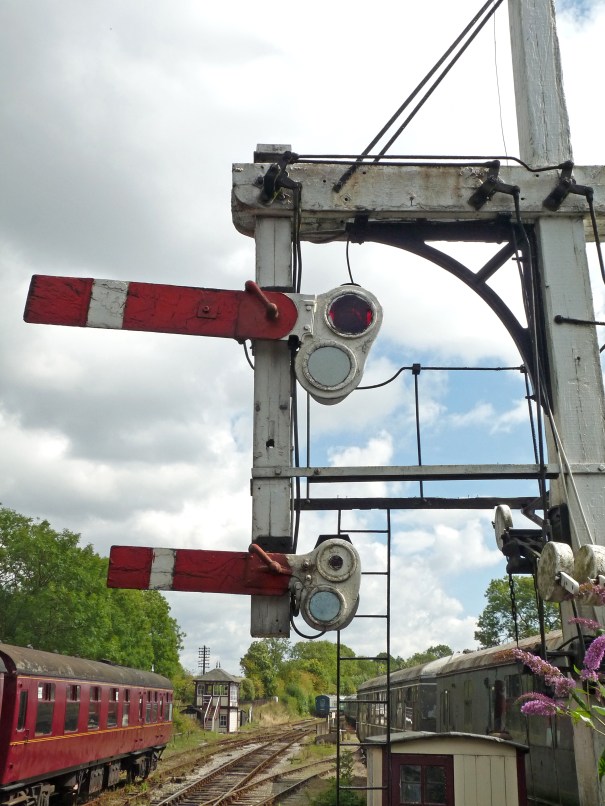
The other key change was in the manner in that the arms are secured to the posts. Instead of being pined through the arm and secured at the rear, the Midland used a bracket to the front of the post with a plate that wrapped around to the front of the signal to support the arm to the front. This can be seen in this view of a rather nice gallows signal at Butterley.
The bracket can be seen in this view below and I then created a pin that fitted into the bracket and slotted over the spindle.
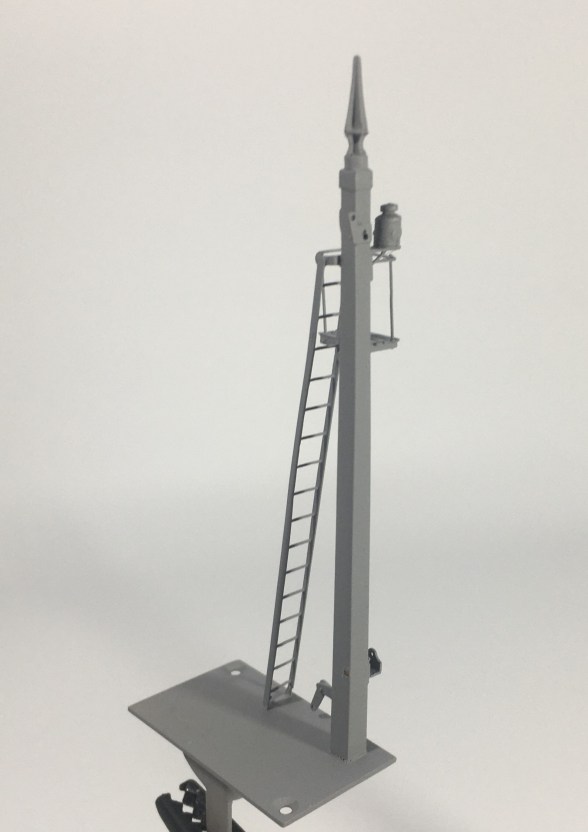
I have bought a new light box for taking photographs in. Whilst I am still getting to grips with it, when it works it does produce much improved pictures of models. These almost look like an images of a 3D model on a computer screen. The pliers at the bottom of these views do rather give the game away!
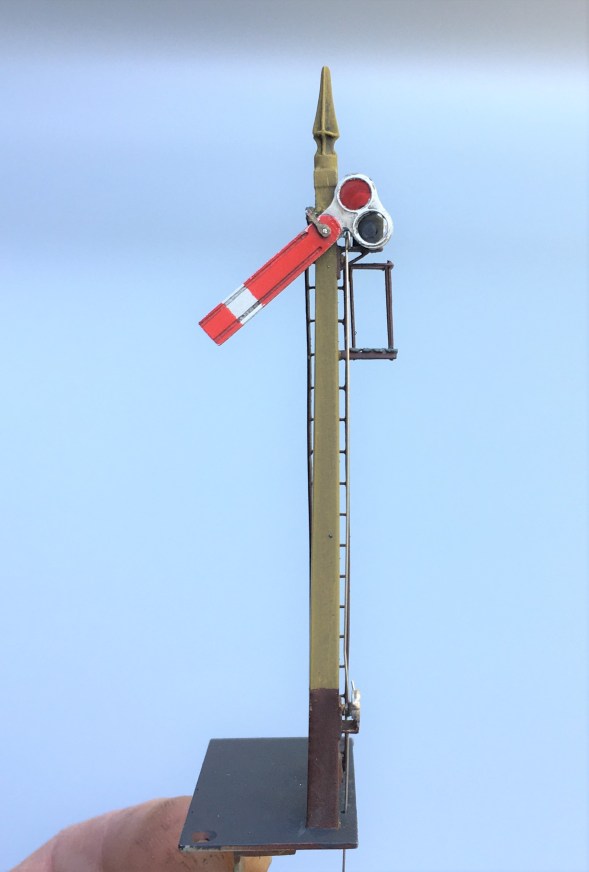
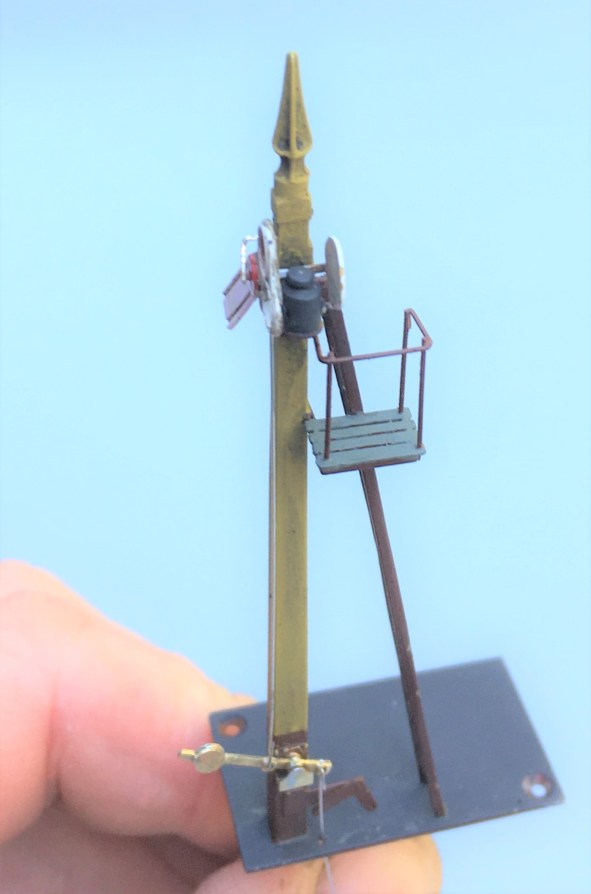
The Midland were a bit odd in their choice of colours for their signals. The posts were “primrose yellow” but this quickly dirtied to something akin to cotswold stone is what the book says, so this does give something a little different. This is my representation of this with a decent dose of smokey dirt – when you look at contemporary photographs many signals were not only dirty but entirely smothered in smoke. I haven’t gone that far yet, but its going to need to be done!
As can be seen, this still needs connecting to the servos and the touching in of the paint on the parts that I fit after the main assembly (the balance lever and the plate that wrapped around the signal arm).
Posted on May 5, 2020, in Benfieldside, Workbench (other) and tagged Butterley, EM, Midland Railway, Midland Railway Centre, Model Railway, MR, Scratchbuilt, signals. Bookmark the permalink. 6 Comments.

What a lot of fiddly bits! It’s as if the original designer wanted to discourage future modellers. Well done!
Whos signal ladders do you use? They look marvellously realistic.
Who’s signal ladders do you use? They look marvellously realistic.
Hi there.
I form my ladders in one of two ways
– by using the 51L / MSE jig built ladders – these are etched and provide the side rails of the ladder. The rungs are then formed by inserting thin brass wire and soldering it in place. As you imagine, this takes a long time given the number of rungs on the average ladder!
– by using the 51L / MSE instant ladders and then soldering a thin brass wire front and back to the side rails. This still takes some time as it is necessary to file the sandwich of wire and etch to make the side rail look flat
I don’t recoomend using the instant ladders without these extra bits of wire; they get bent and look all wobbly!
Mark
Thank you for the explanation Mark, much appreciated!
I can’t get a clear picture in my head of method 2 using the instant ladders and wire – might have to give it a go as an experiment!
Next time I do some I will pop a picture up but it is pretty simple, but needs a bit of cleaning up after.
The laminating of the wire beads front and back both gives the side rail a more prototypical depth but also stiffens the ladder lots, so it does not go all wavey!