Blog Archives

More Filthy Wagons
Weathering is not something that I find comes easily to me, especially where it needs to be subtle. However, what the OTCM lads have taught me is that unsubtle weathering is easier and a lot more fun! So I have been unsubtle and making a few POs filthy; I wanted to leave the impression that they have seen few decades of hard work and I am really pleased with the results.
All of these have origins in Bachman RTR minerals but with replacement chassis from Colin Welsh’s range (available via the Scalefour Stores – members only I think, so why not sign up!) and some replacement axleboxes from Rumney Models.
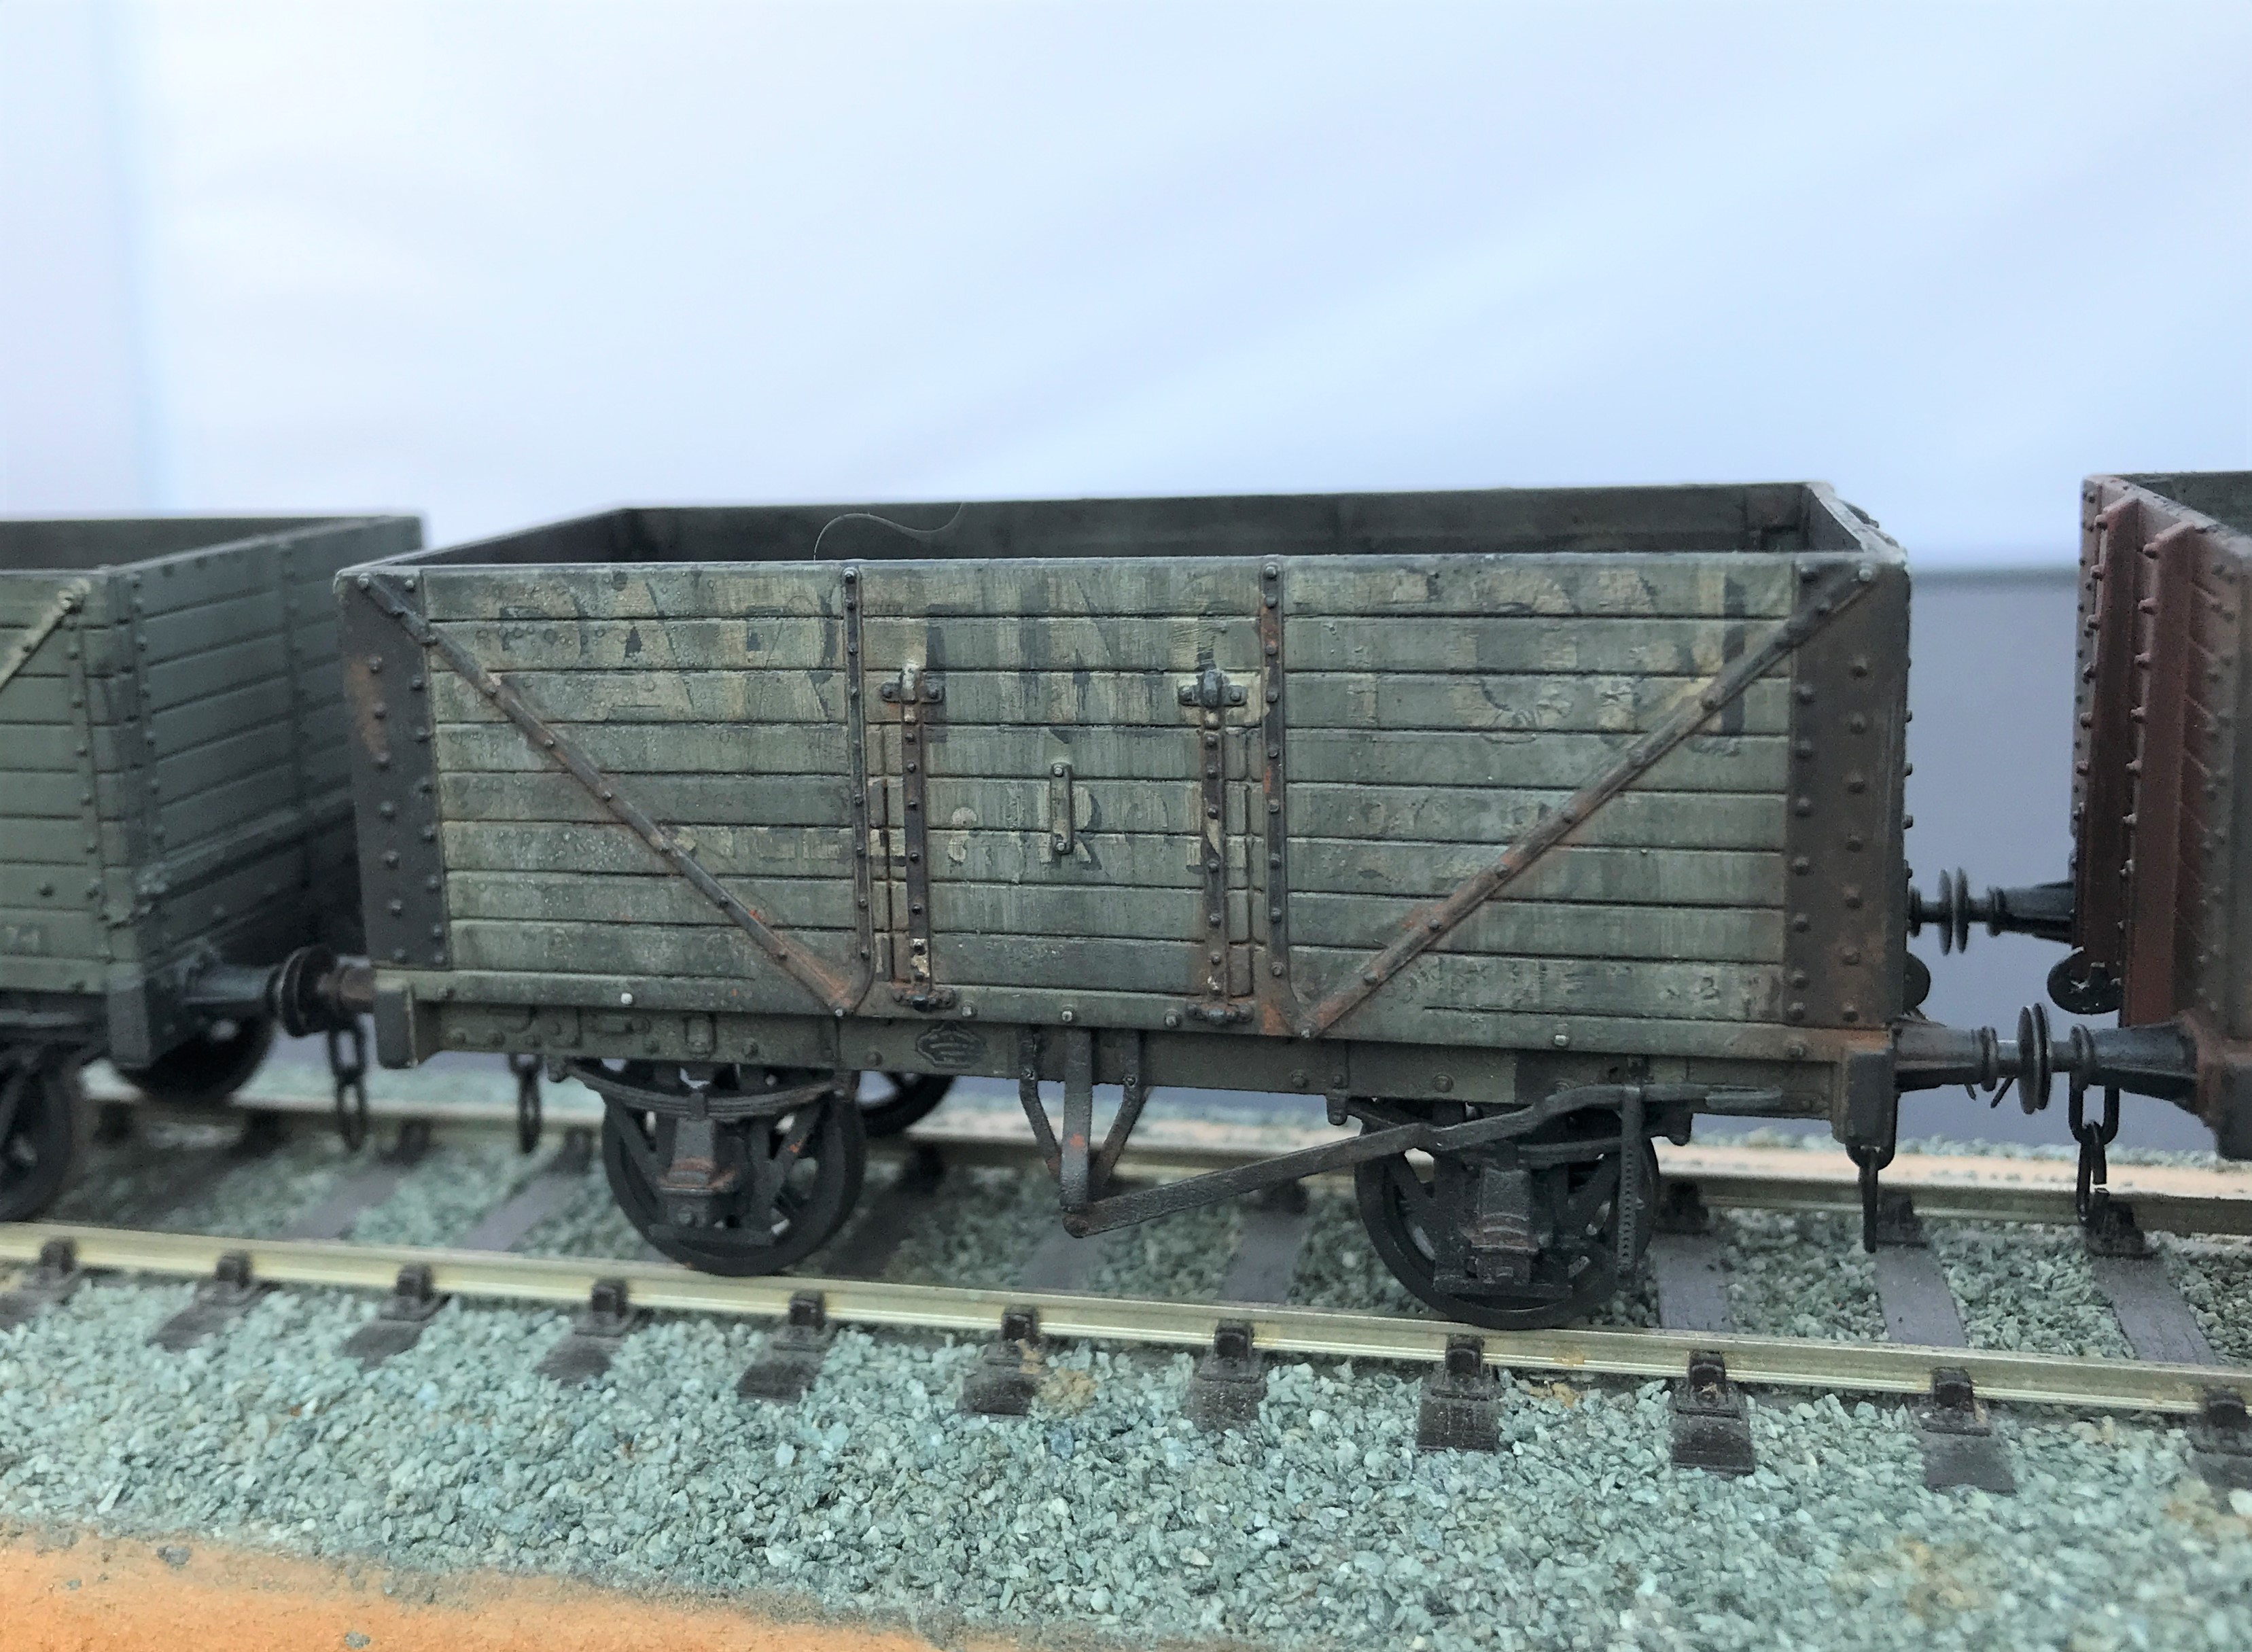
I started with the fibreglass brush to thin down the lettering to give it the feel that it is close to wasted away. Then I sought to represent plank replacements by painting out a few of these with a grey and then added a little texture with dry brushing with track colour (although ultimately the weathering was so heavy this subtly was not worth the effort). The same was undertaken to the insides of the wagon.
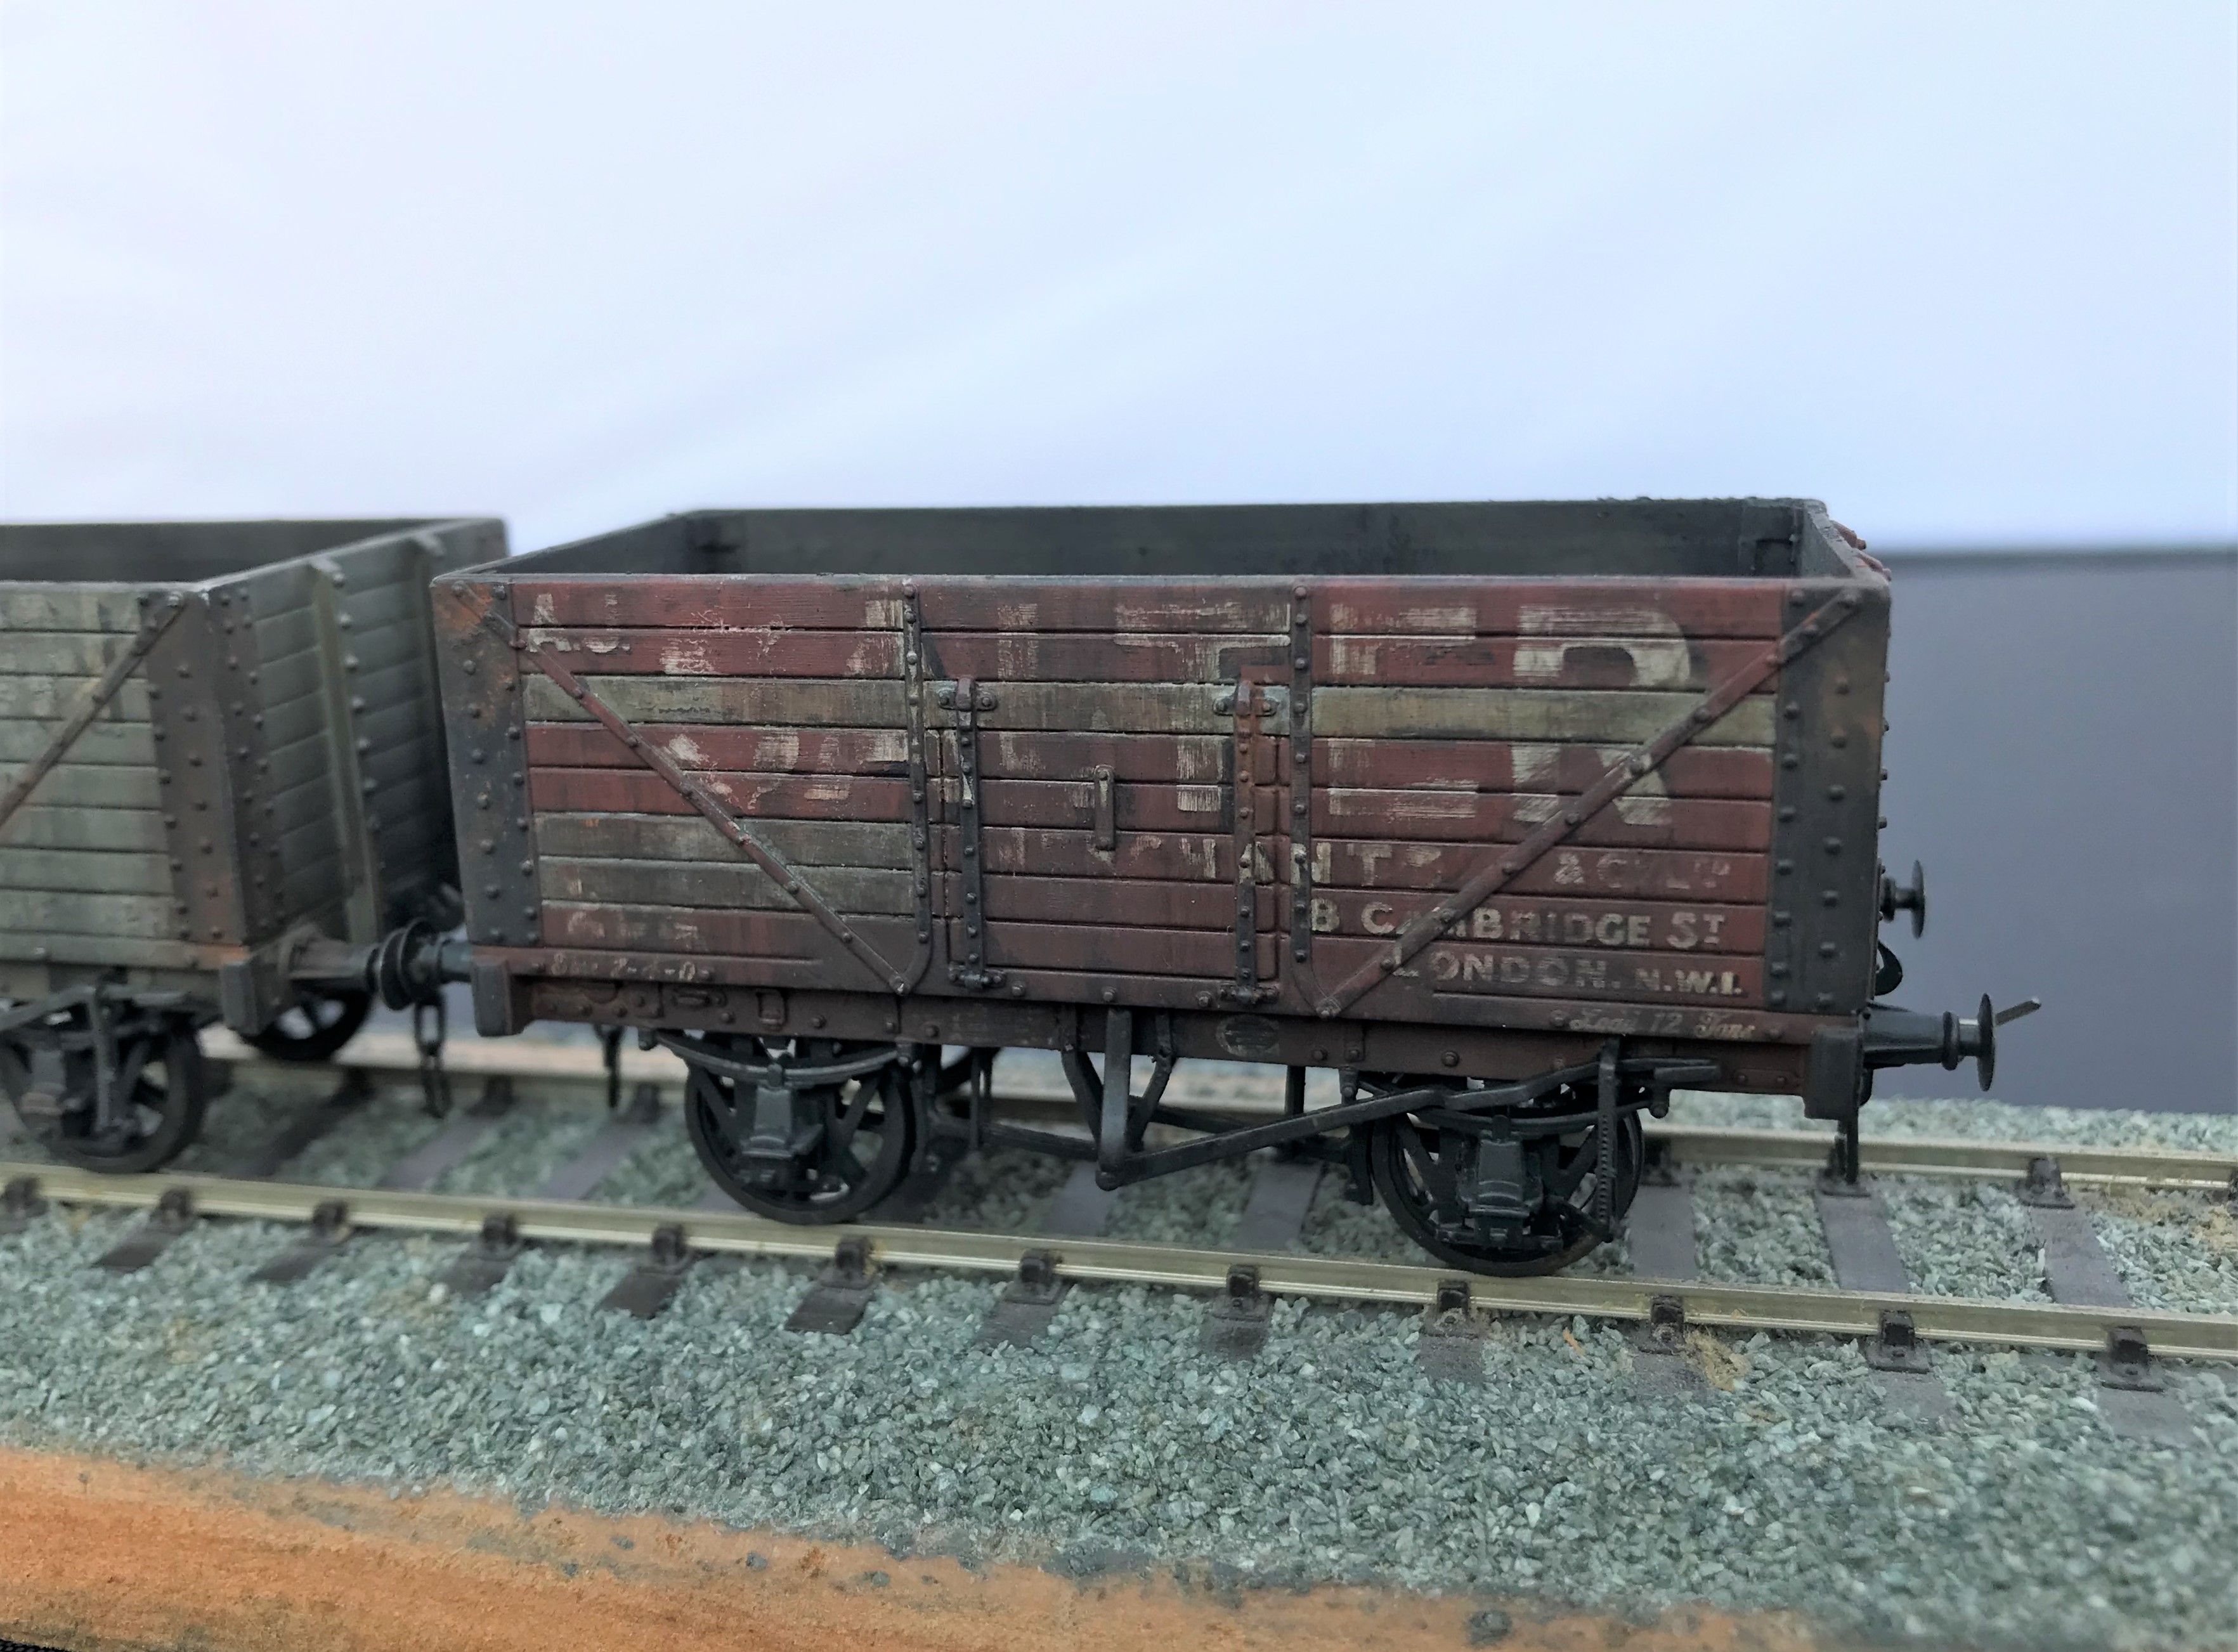
The weathering was completed by a mix of enamel paints; based on black and leather. I started with a lighter colour mix of 2:1 leather/black but then darkened this as I felt that a coal mineral would be a much darker mucky colour so reversed the proportions.
I did these over multiple coats under a very bright light, as otherwise you don’t really know whether you have put much paint on when it is deliberately so thin. The streaking is achieved by using a relatively large flat and stiff brush dipped in thinners. Don’t apply this straight into the model, rub it on the back of your hand to remove the bulk of the thinners and get it down to “slightly moist” before applying it to the model. Make sure it is drawn down vertically, to mimic the movements of water running down the wagon sides.
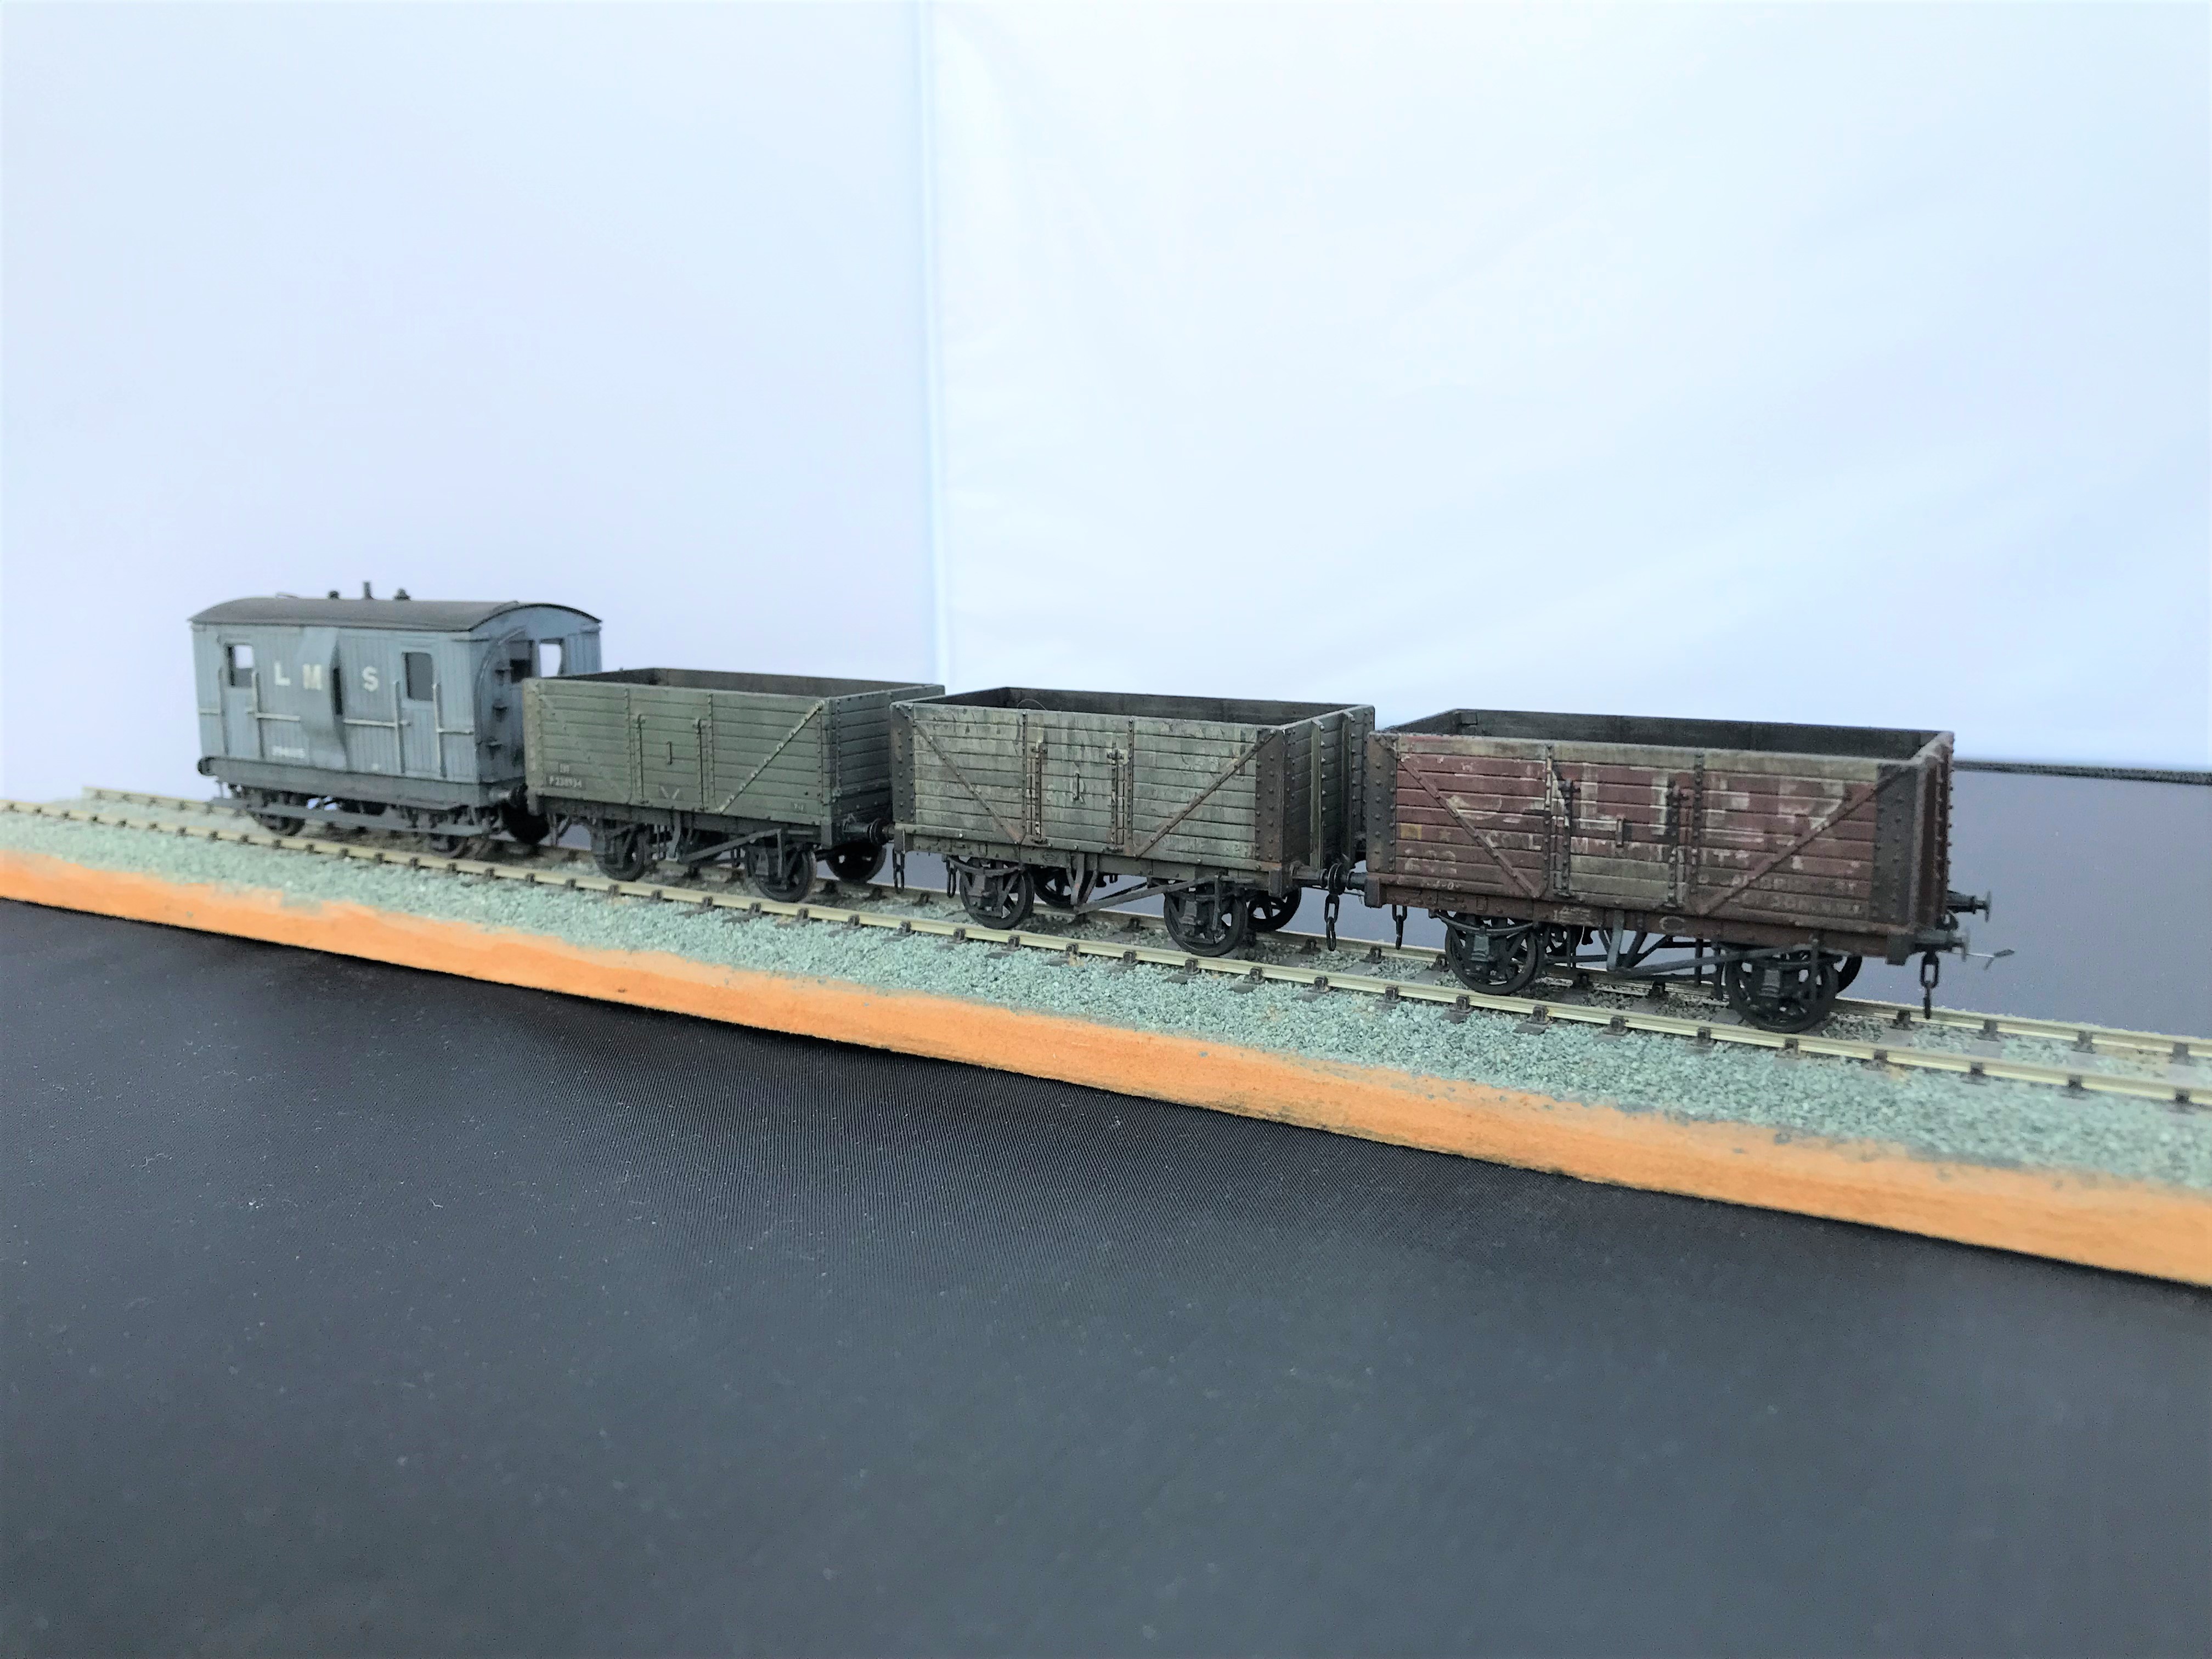
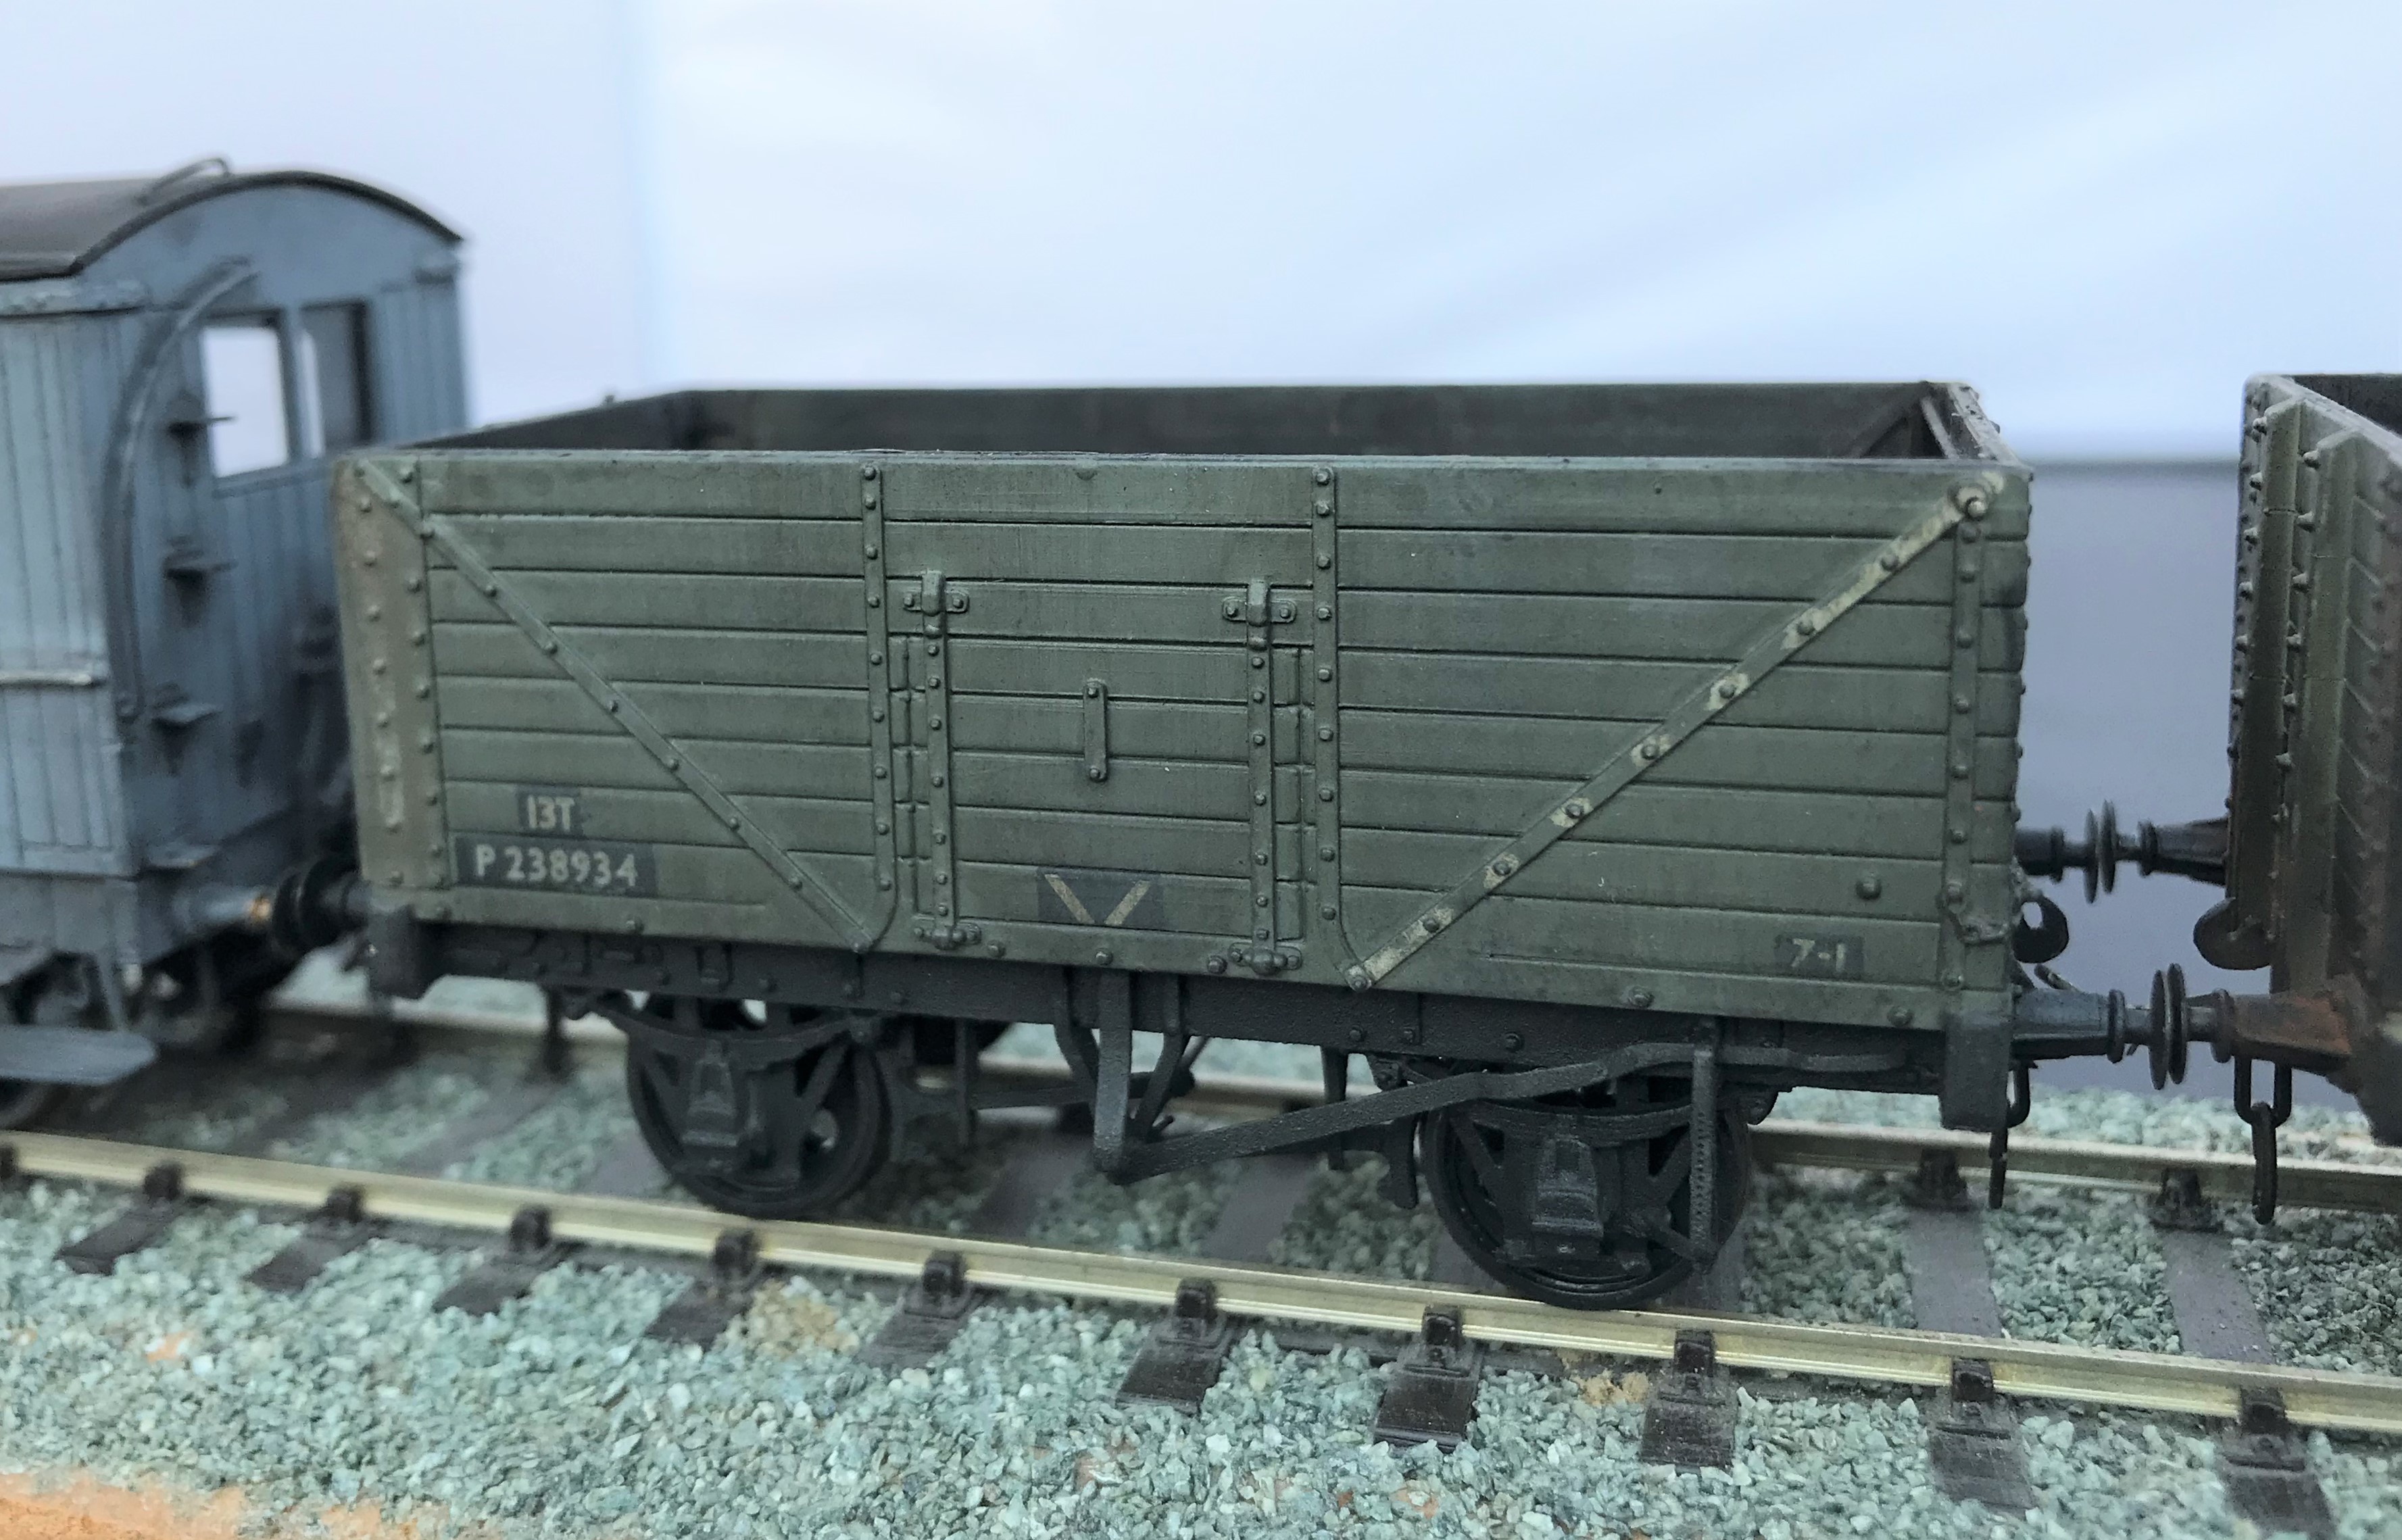
The final stage was then to use weathering powders, rust on the metalwork (mostly on the Partington grey wagon) and black soot. Very small amounts are put on the brush and then speckled on the model with the lightest of pressure because if you blob it straight on it tends to be rather heavy in the points of contact, so it gets a bit blotchy as a result. However, if this is the effect that is required – for example on the top of the buffers for me – then blob away! The powder is then spread across the model with the brush, the more pressure tends to deepen the colour but throughout the powders matt and draw together the underlying colours.
The coal effect in the interior was completed in a similar manner, but with a lot more powder is used and laid on the base a small amount coal dust secured on a matt varnish to leave the impression of a not quite well swept floor from the previous load.
A Ransome & Rapier Crane
Readers of this blog will recall that my father has a significant interest in breakdown cranes; he has published a series of books on them and is the honoury president of the Breakdown Crane Association. As a result of this, a few years ago, he took a call from Bachmann when they started to research the possibility of filling a gap in the ready to run scene for a accurate breakdown crane. He delighted in being sworn to secrecy on this until the model was announced and now, some five years later, it has finally arrived on the shelves.
So after a somewhat unsatisfactory retail experience with Rails of Sheffield (which I won’t be repeating, there are plenty of other retailers out there), an example of a Ransomes & Rapier 45 ton crane arrived not much more than a couple of hours spare so that it could be parcelled up in its Christmas wrapping for my father. Now that it has reemerged, it is time to take a look at it.
Prototype
The prototypes originate from the early years of the last world war and were initiated by the British Government; in part in anticipation of a lot of emergency repairs being required following enemy action and also for use on the continent once a toehold had been achieved. Initially a total of six were made, going to the SR and GWR but subsequently a further order of nine were made, mostly for the military but with a couple for the LNER and another for the SR. The example I bought being from the latter batch, being initially based in Gorton on the ex GCR system.
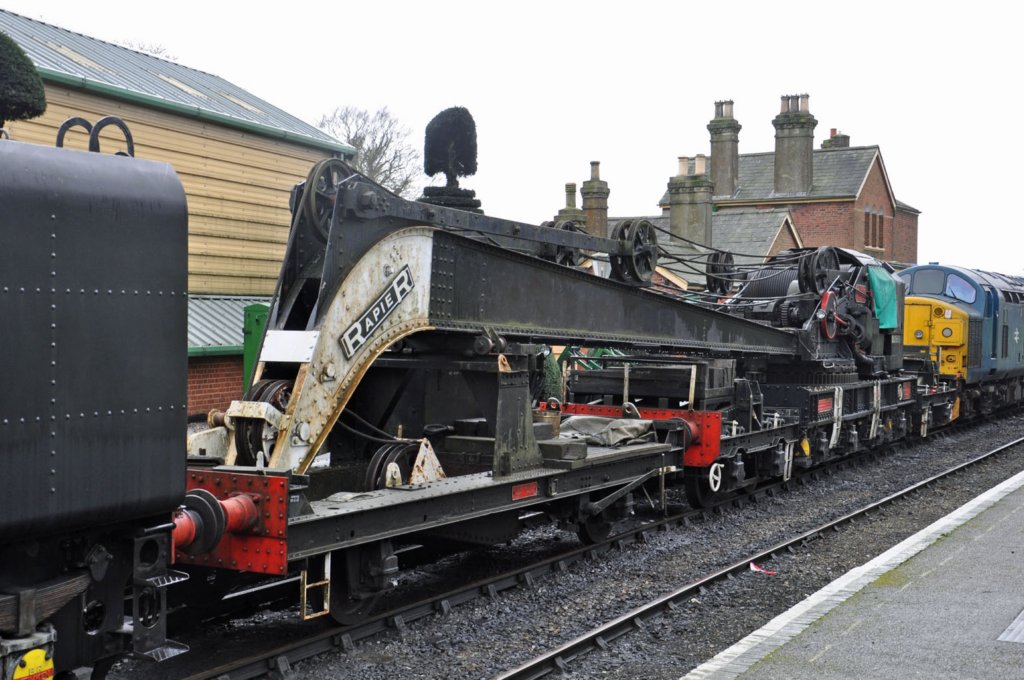
There were detail differences, with many of the railway company vehicles utilising standard components from their eventual owners. The valve chests for the cylinders moved to the exterior in the later batches and the operation of the loading of the relieving bogies became hydraulic latterly. The biggest changes, however, related to the match wagons where there was both variety of arrangements of tool boxes at the time of building and generations of modifications thereafter.
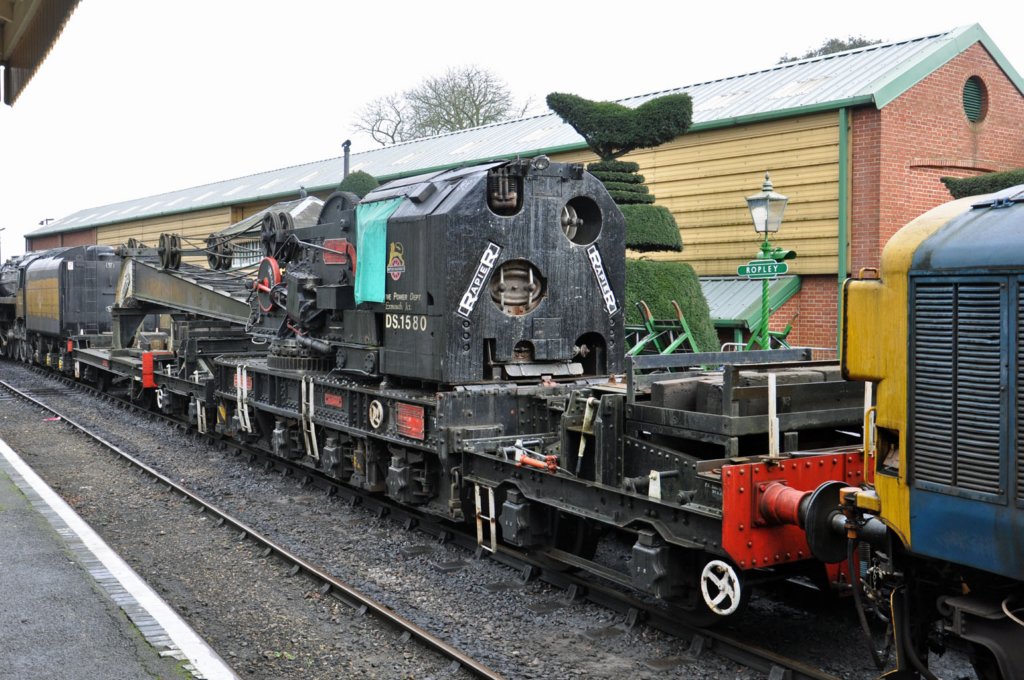
The cranes lasted until the mid 1980’s and a number of them survive in preservation, so if you want to see the real thing you might want to head to the Midhants Railway (on which the prototype photographs were taken and reproduced with kind permission of Carl Watson), the Bluebell Railway, the Great Central Railway, the North Yorkshire Moors Railway or the Swanage Railway. Below is a link to a video of the Midhants crane in action:
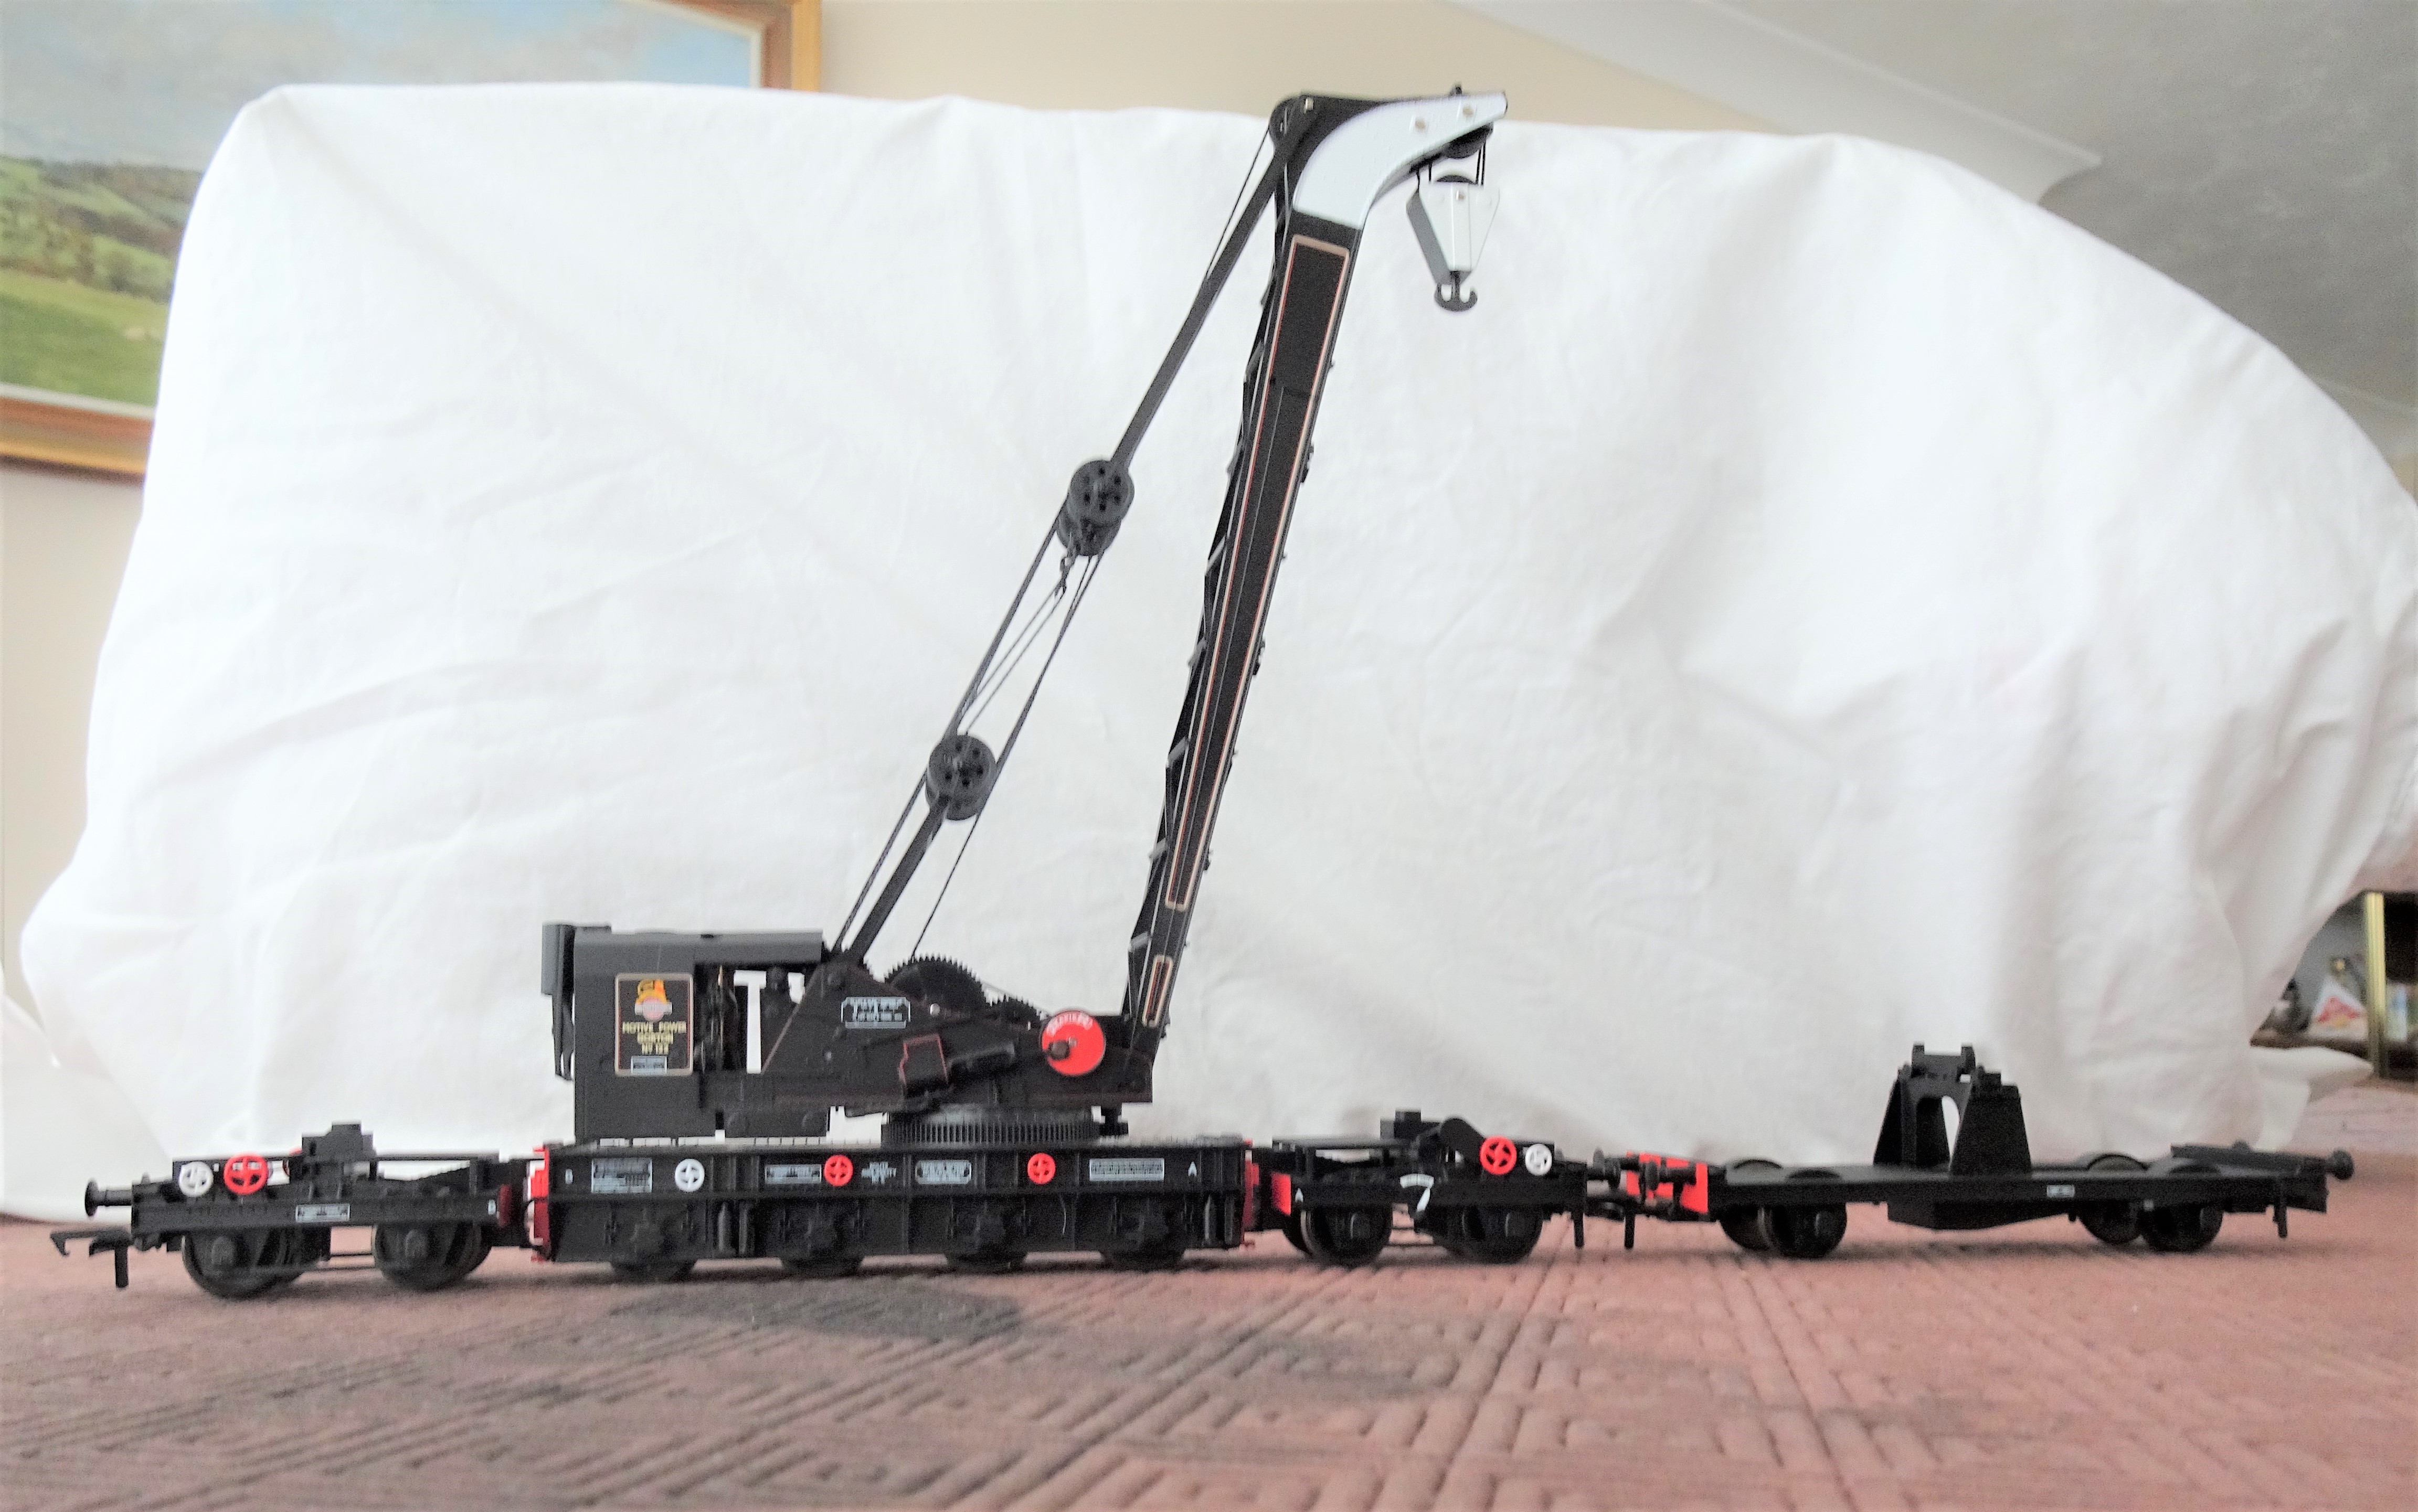
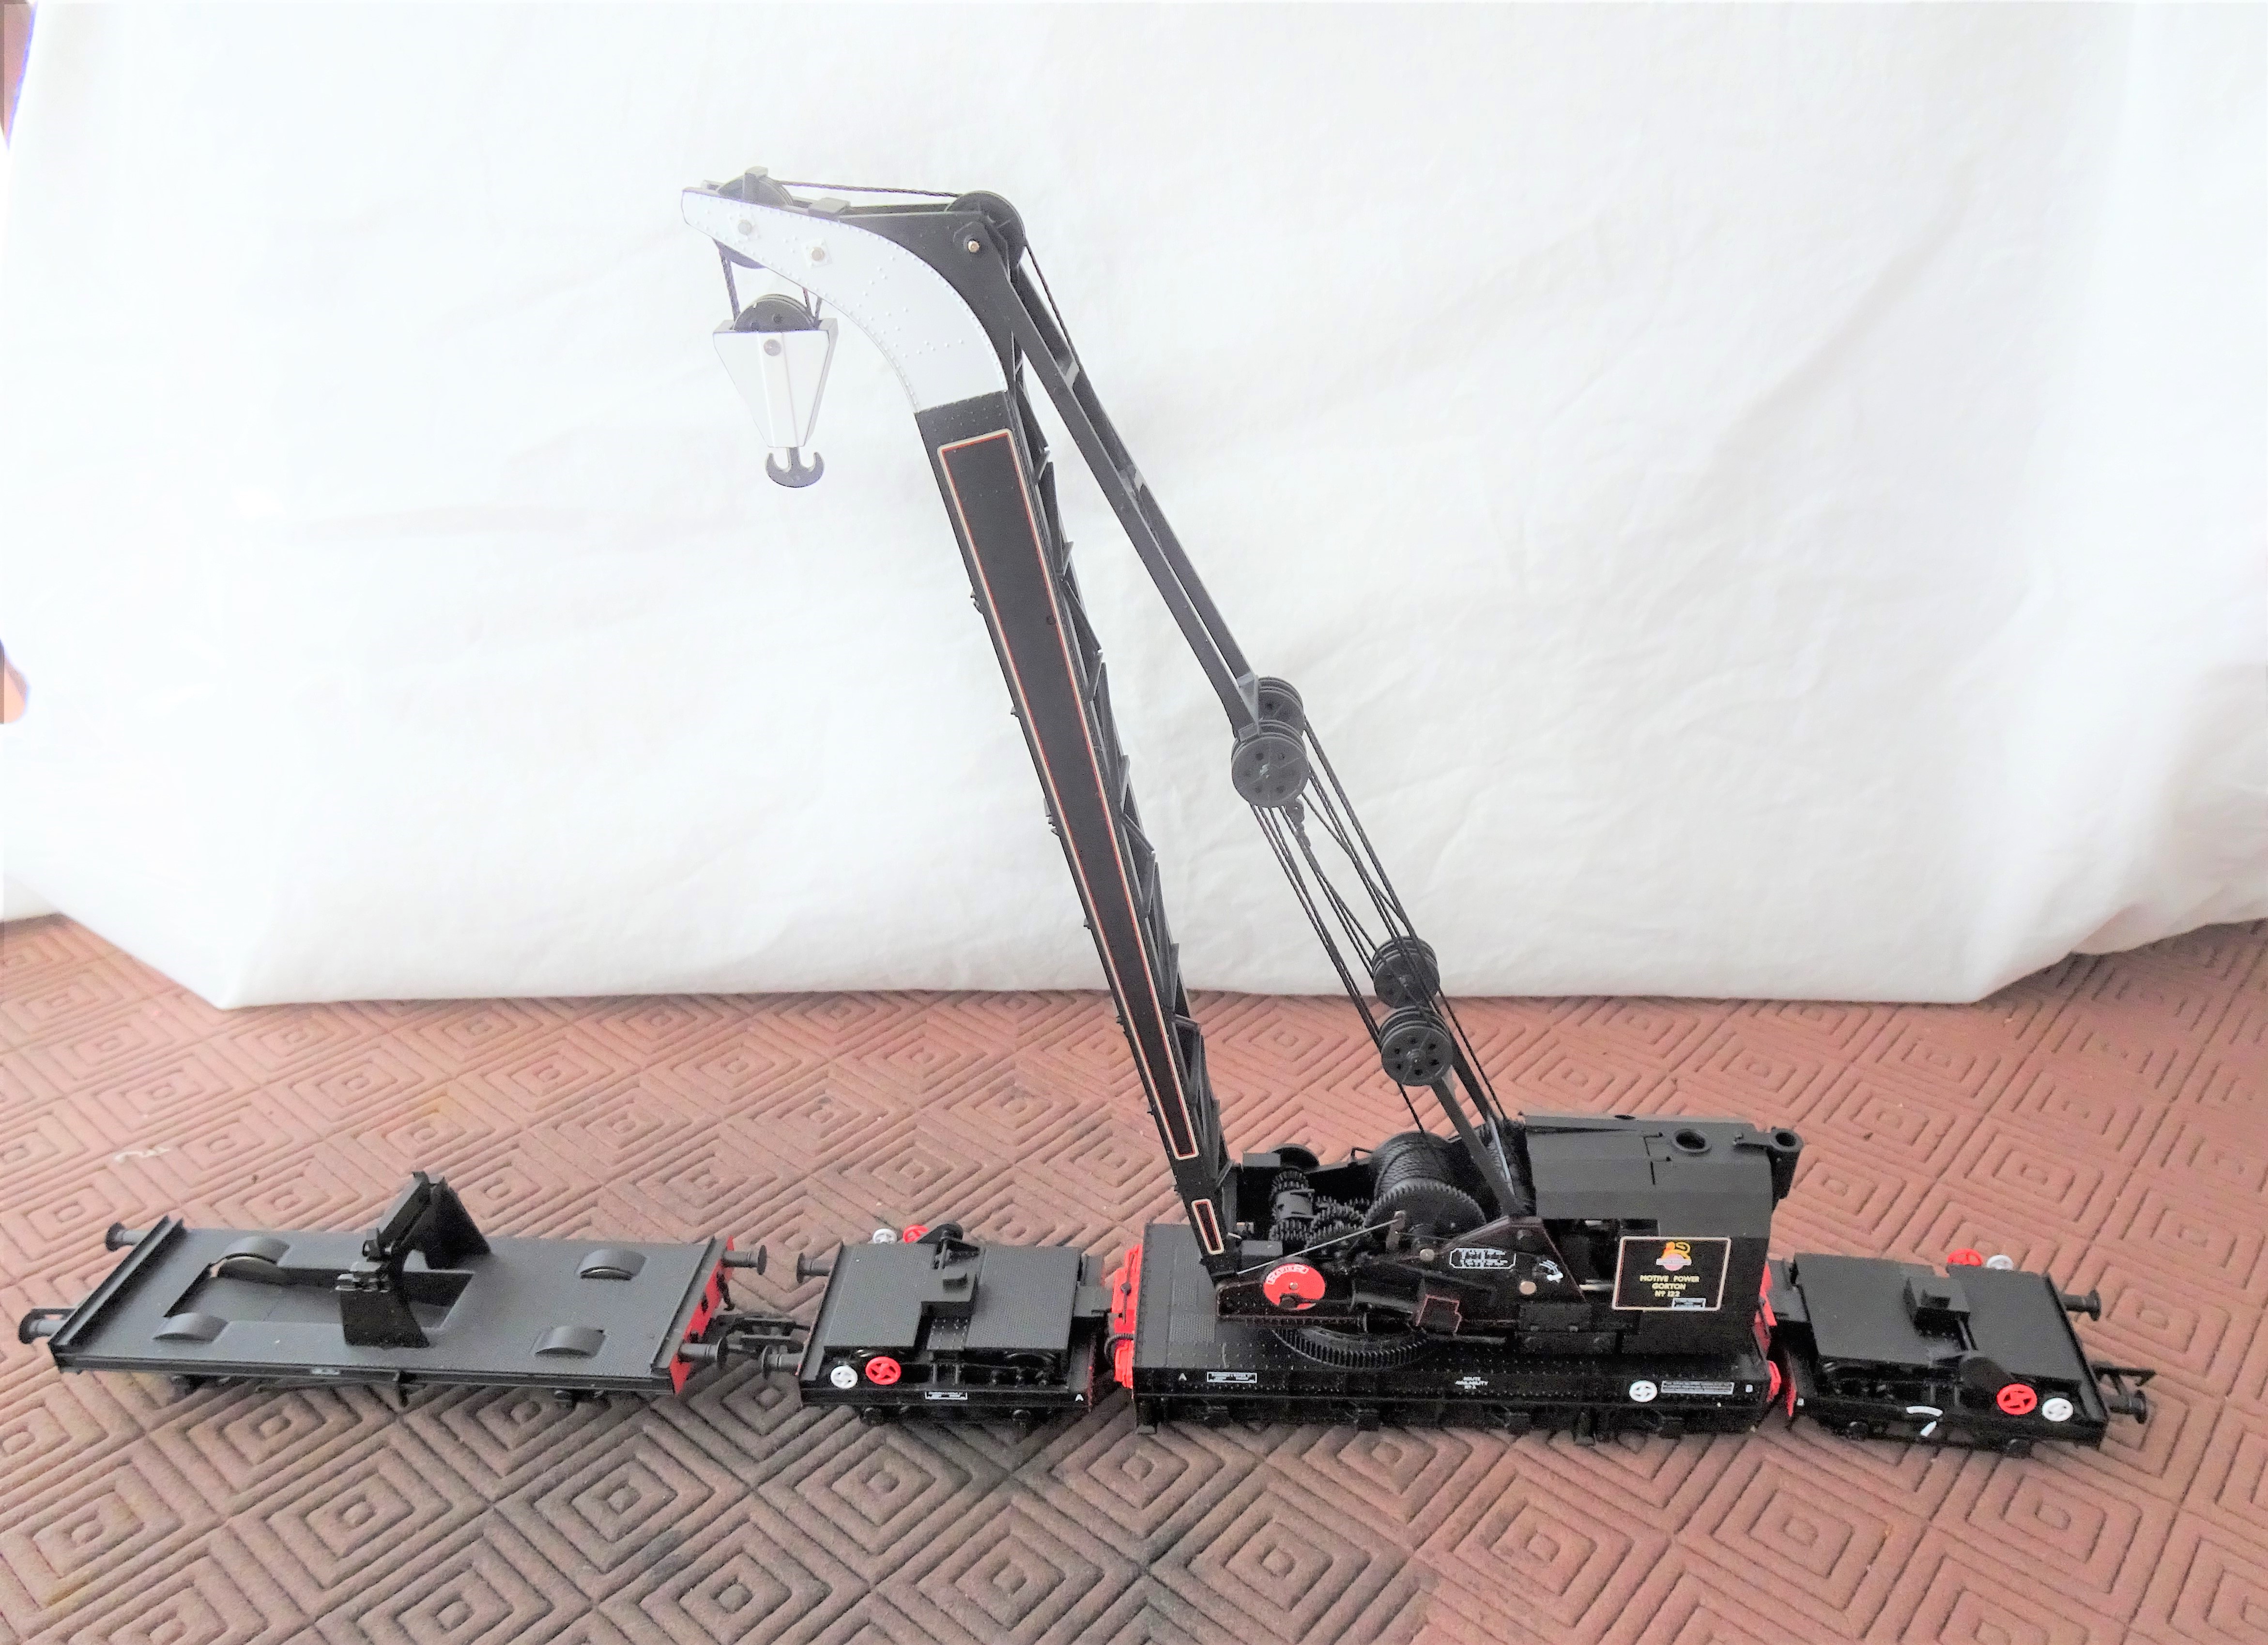
Model
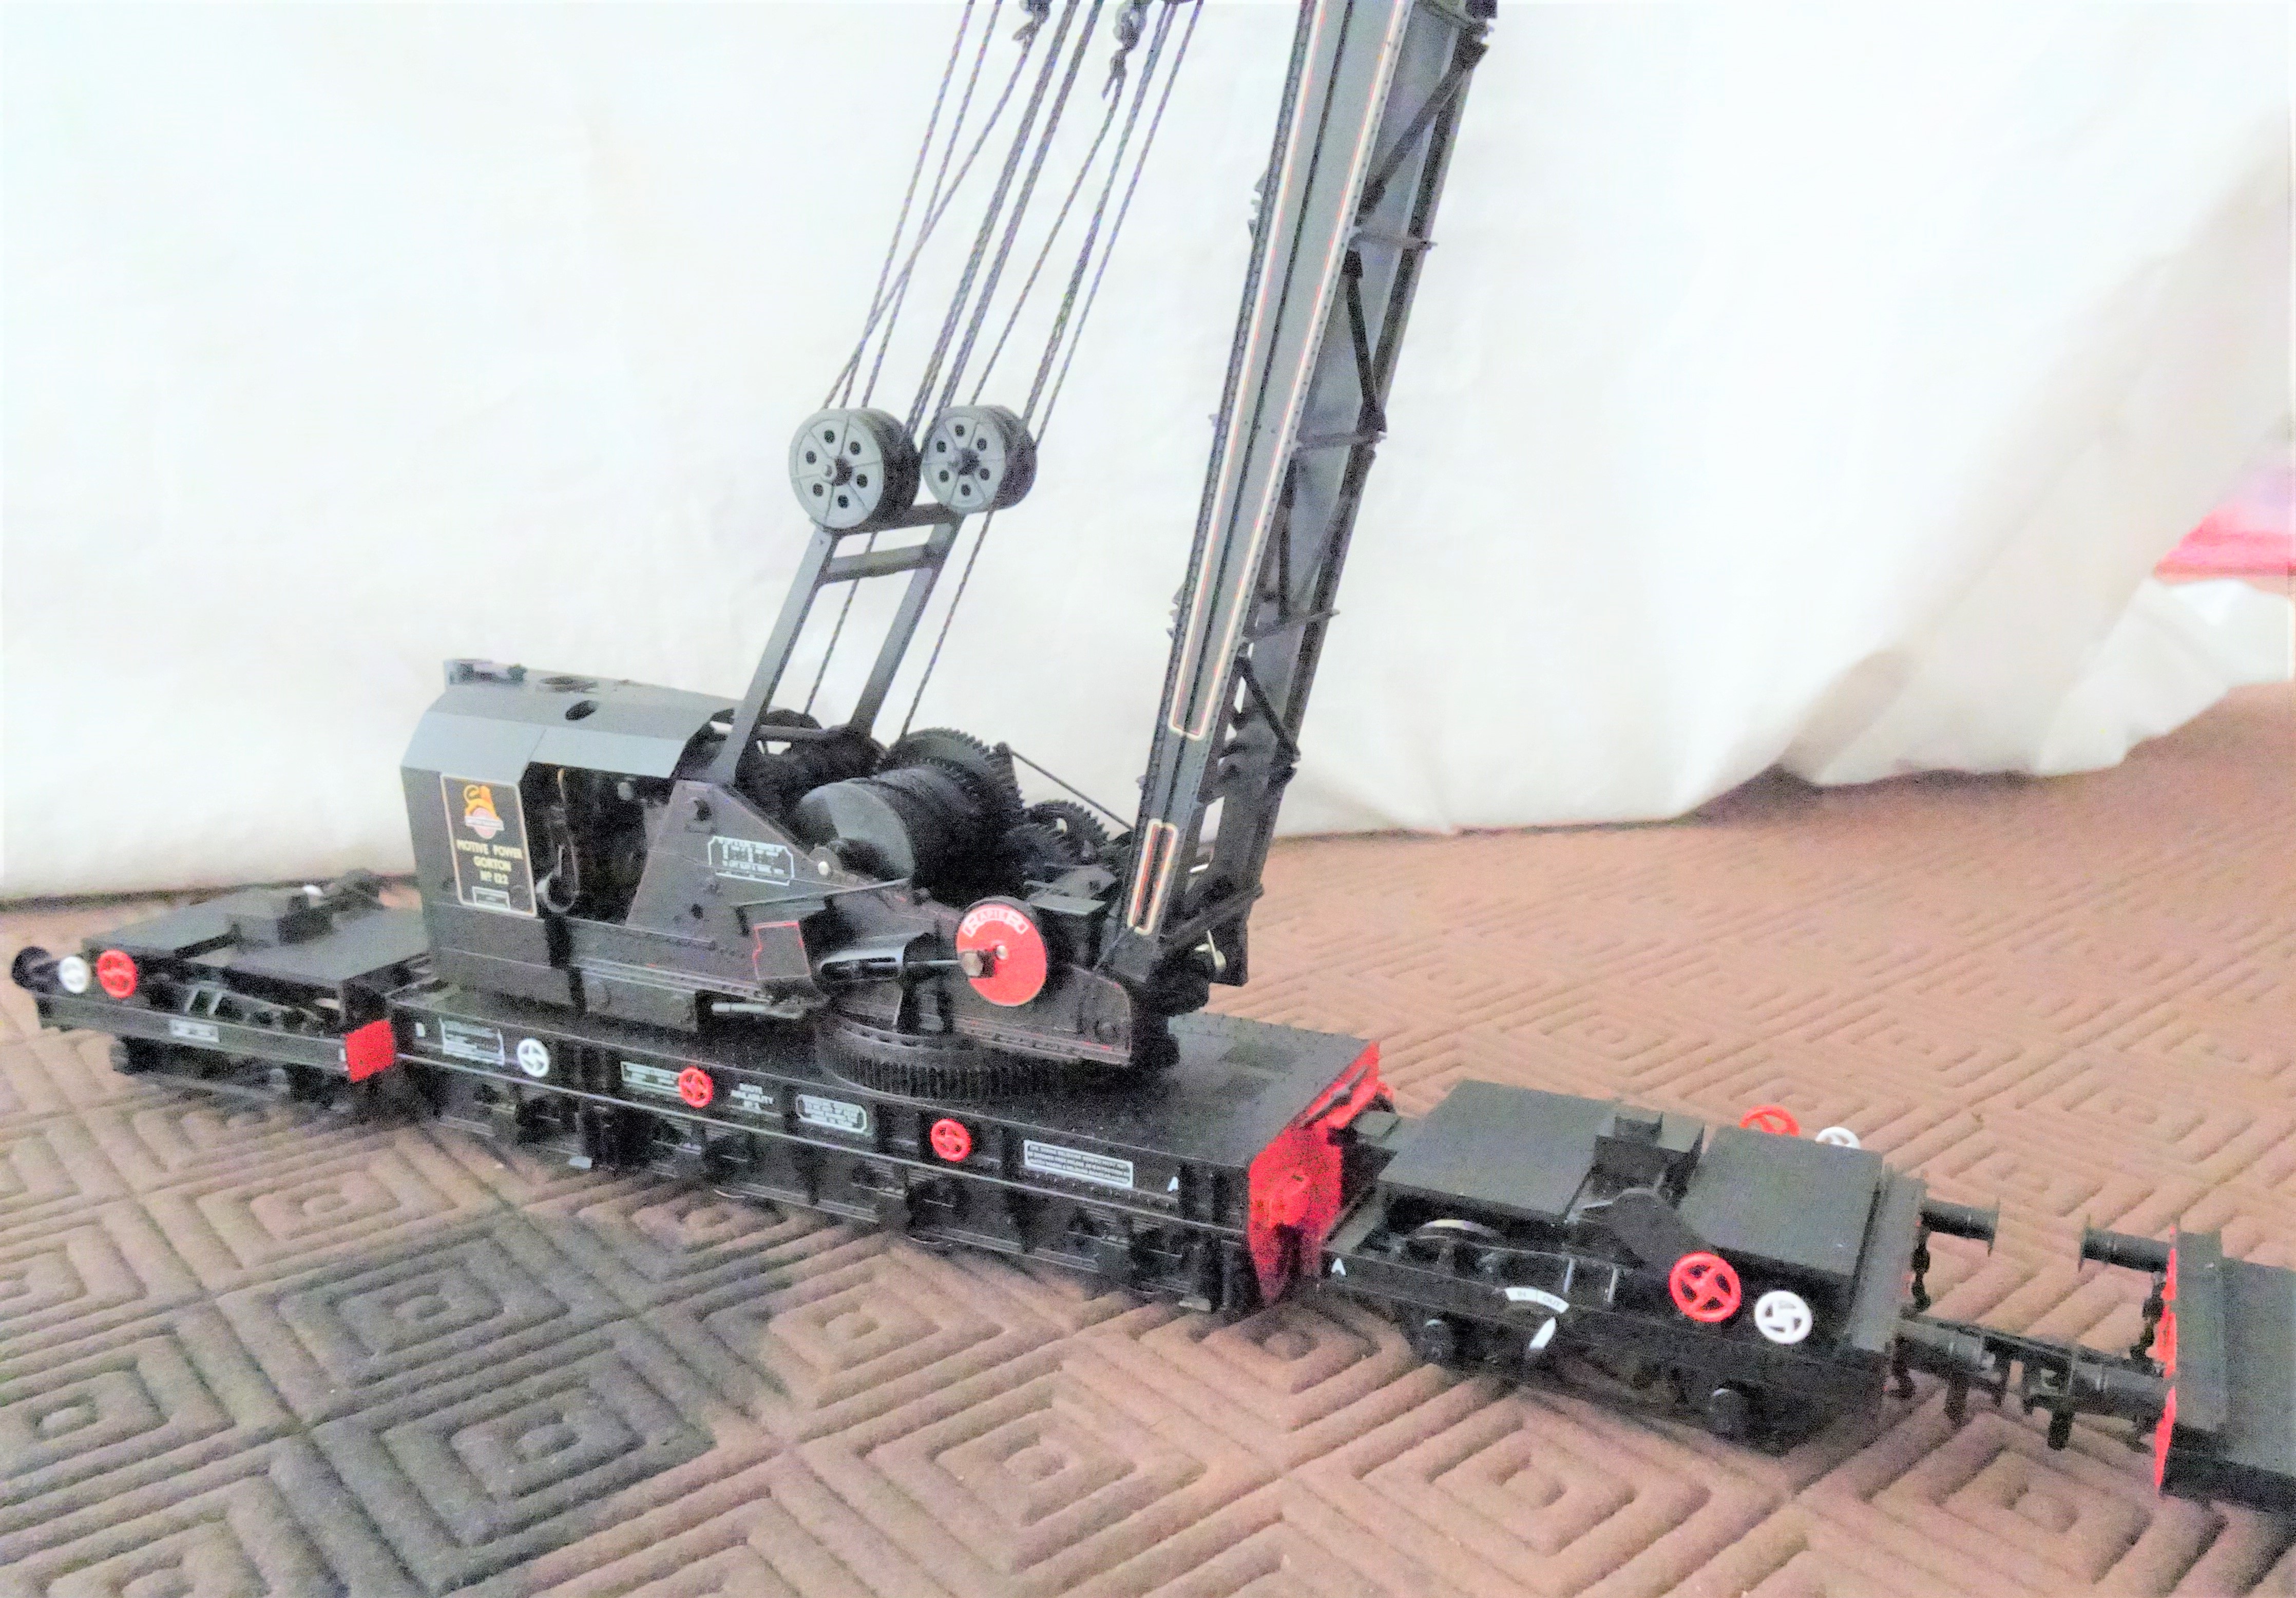
The first thing you notice with the model is that it is some way from the toy train end of the model train market. The prototype is smothered in detail; with the fine bracing between the sides of the jib, the gear trains, axleboxes and flywheels all being a bit out of the ordinary for the ready to run market. Bachmann have had a really good go at this and for the greater part they have got it right – very few could model a crane as well as this. There are, however, several compromises made to enable them to be operable. This particularly shows at the bearing points at the head of the jib (exposed metal when they shouldn’t be visible) and on the crankpin nuts to the flywheels (way too big and hexagonal). I understand why this was done, but it sticks out to my eyes! Some touching in of paintwork will help (but not be perfect) and the replacement of nuts with something more subtle should be possible.

The detail is very delicate and the model needs to be handled very carefully as a result. Even the most careful (and I don’t count myself in this group) are unlikely to keep all the detail in place on any model that does not merely sit in the display cabinet. With a recommended retail price of £250, substantially more than any other product that is not filled with motors & electronics, it is doubtful that too many will end up in the hands of children – maybe that is just as well!
The model I bought, the early BR model in black – Bachmann ref SKU: 38-802, has a match truck without tool boxes. This is correct for the specific crane post the early 1950s but what is not is the missing insides to the splashers. This seems to be a compromise to accommodate OO wheelsets without making the splashers excessively deep. It is easy enough to fill in the open spaces if you model in one of the wider gauges and it will make a big difference.

The painting and livery is particularly fine on the model. Even better there are some exquisitely delicate etched plates that can be applied on top of some of the plates. I suspect I see the shadow of Mr Hanson on them.
Options
It looks realistic to get P4 wheels into the crane underframe and definitely so for the runners/match wagon. I would, however, be concerned as to whether a four axle vehicle could survive all but perfect track in P4 and how many of us have that? I suspect that it will all be very tight too, so some pretty large radius curves would be needed if a P4 model can get around them. Of course I will have a go, but it is not high on the to do list at the moment!
I think it is only a matter of time before someone looks at trying to motorise the crane. I think I will say good luck to them! Getting micromotors in might be possible for at least movement along the track but that still leaves slewing of the crane deck, raising of the jib and raising of the hook to go – getting another three in looks pretty difficult to me! The model does include internal hand operated mechanisms for the latter two movements – there are access panels that pop out to reveal a socket to receive a hand wheel. Thus, it is realistic to stage scenes, but not (in my eyes anyway – I really do look forward to someone having a go!) to make a fully operating model.
What is a must though is to add the paraphernalia of clutter the real cranes acquired in operation. Photographs show that they typically attracted lumber sections, jacks, chains and tarpaulins as if they were magnets. Cranes, not being front line stock in the public eye, tended not to suffer repaints very frequently and as they stood outside, they did weather and pick up corrosion spots. So any self respecting modeller needs to do something about how clean they look.
Although there is a very long in the tooth model crane from Hornby, it is somewhat of an uncomfortable marriage of several different cranes (the really old Hornby Doublo diecast version is better but quite crude), so does not cut the mustard. There are a limited number of kits for other cranes – notably the D&S Models Cowen Sheldon 15 ton breakdown crane (an example of one might grace these pages eventually!) but these are full on kits. Thus Bachmanns cranes are not only attractive models in their own right but they have a field fairly clear of competitors.

If you want the book on the prototype you need volume 2 of my father’s book – at present it is out of print but it is hoped with a bit of pressure on the publishers, Crecy, they can be persuaded to do a further print run.
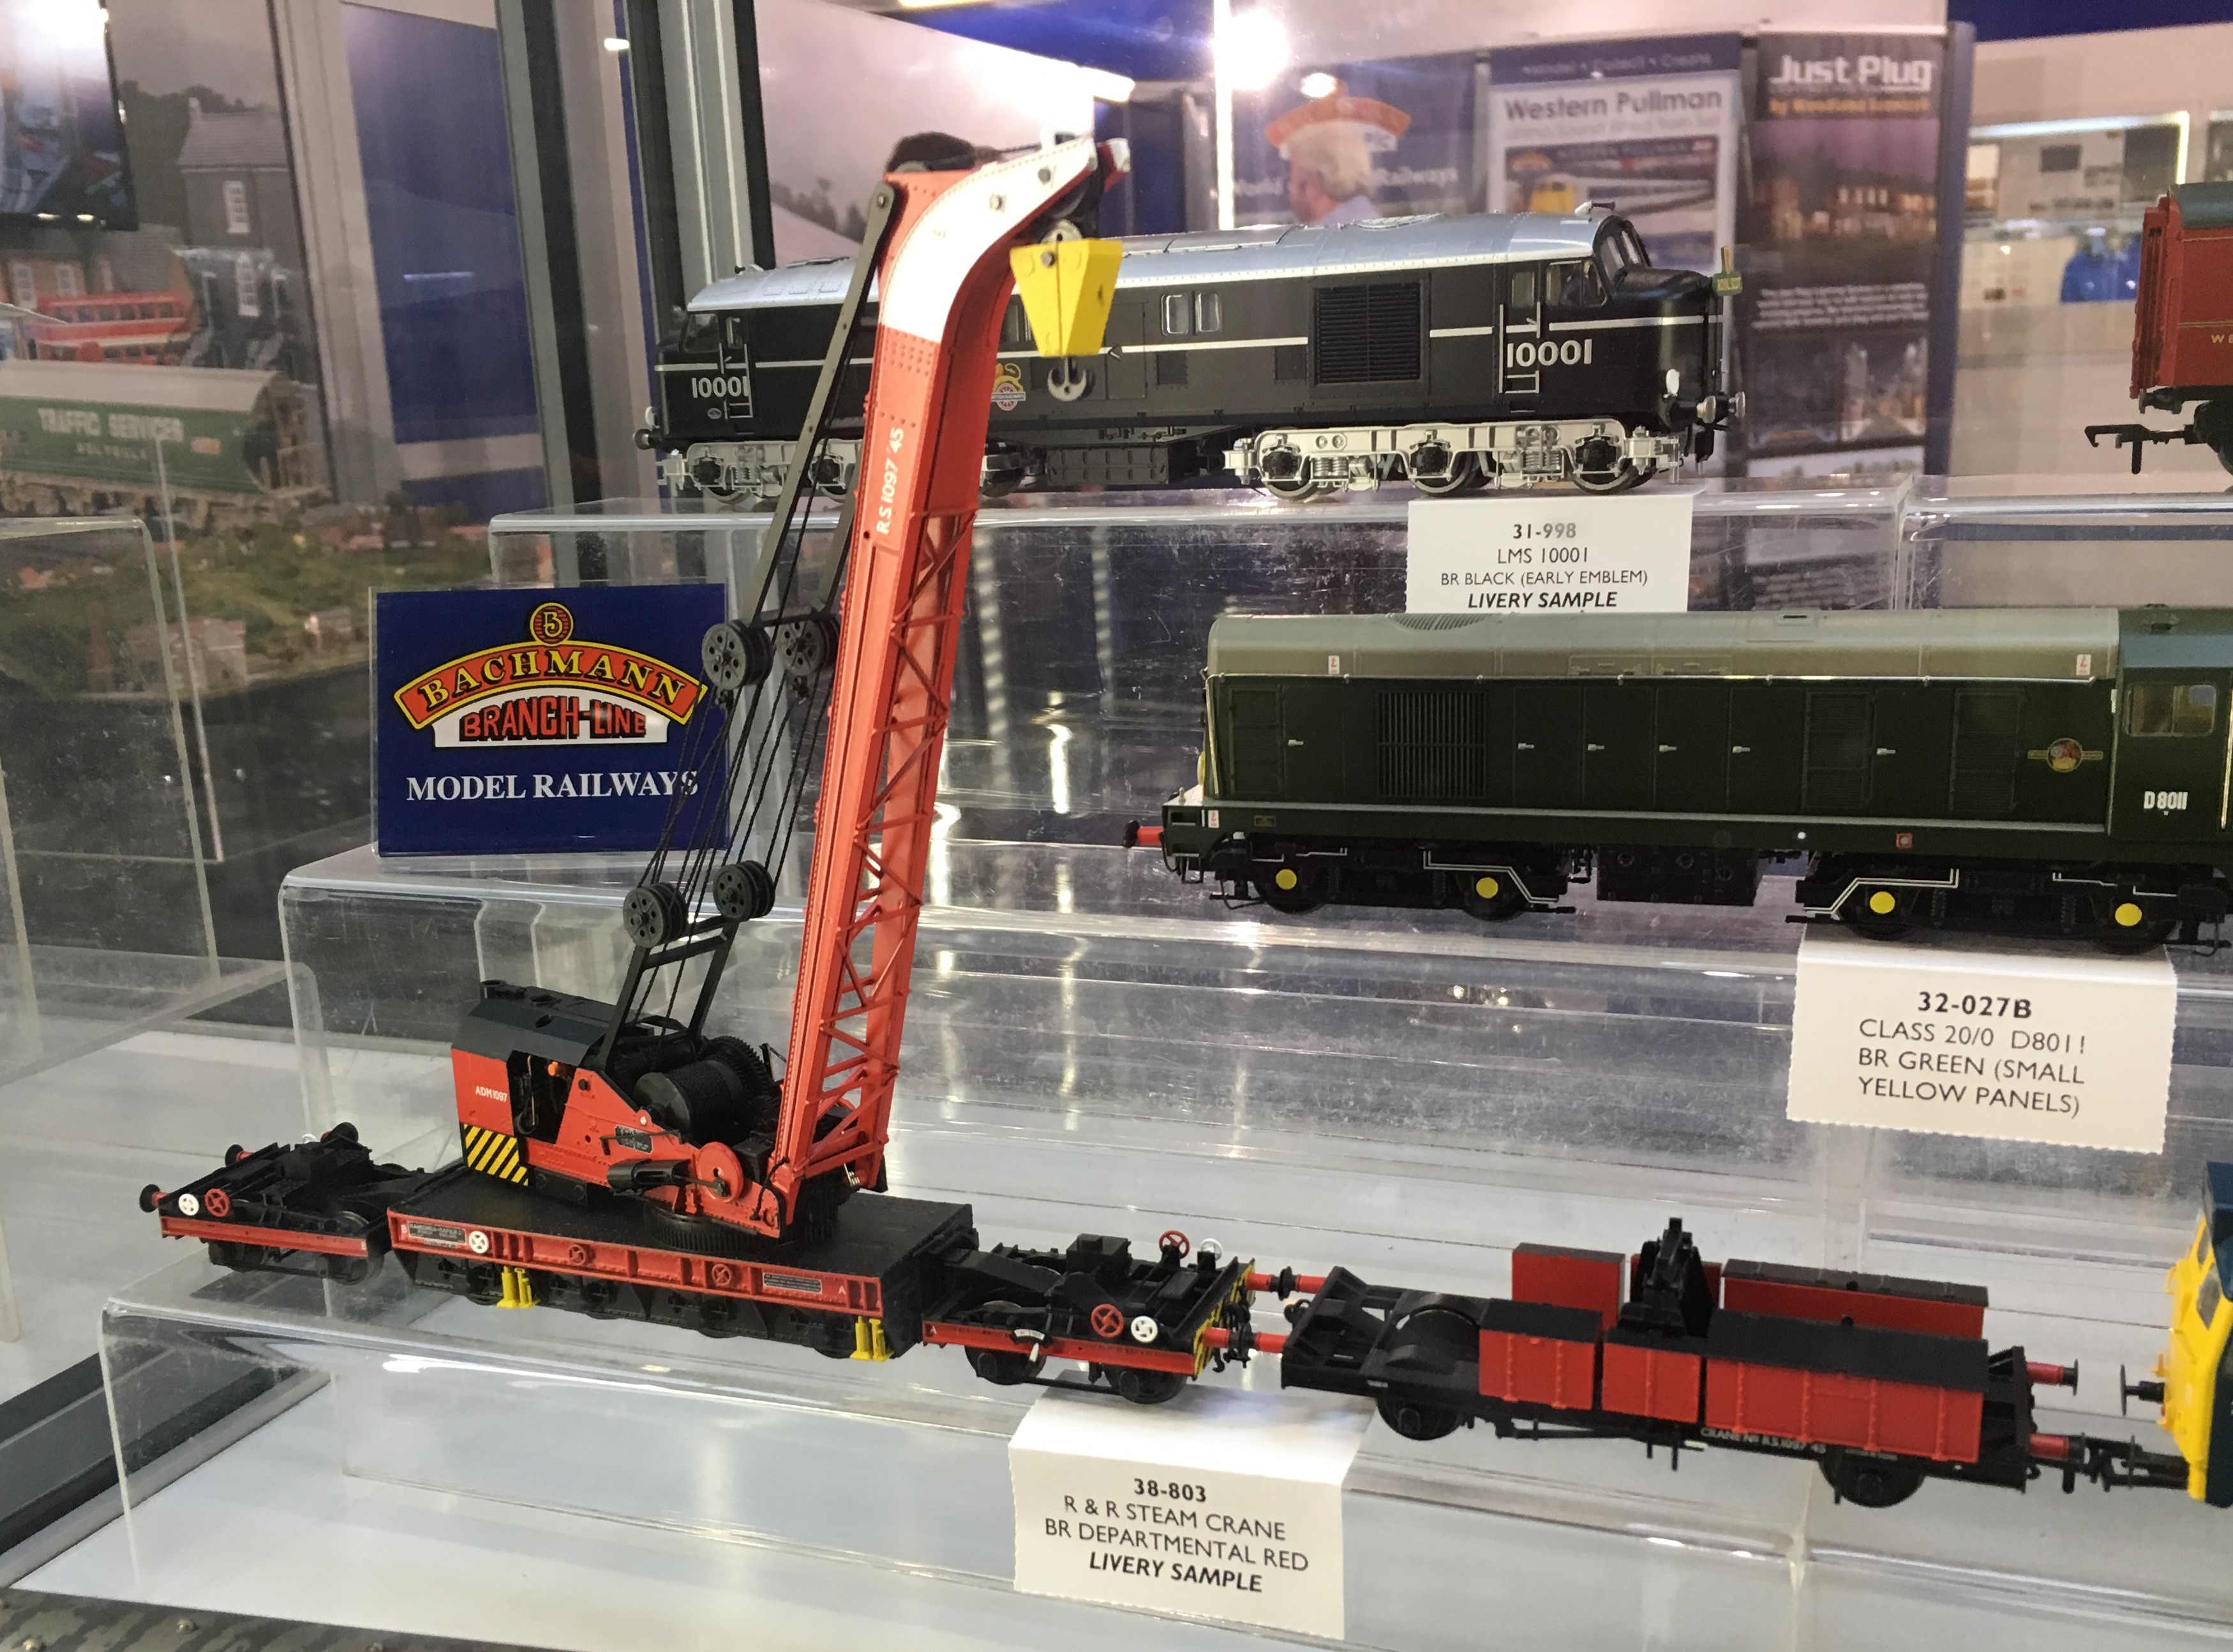
The Bachmann crane is presently available in an SR livery, a GWR livery and then a pair of BR liveries – the 1950s livery shown above and a later gulf red livery. An example of the latter is below:
More Weathering Results
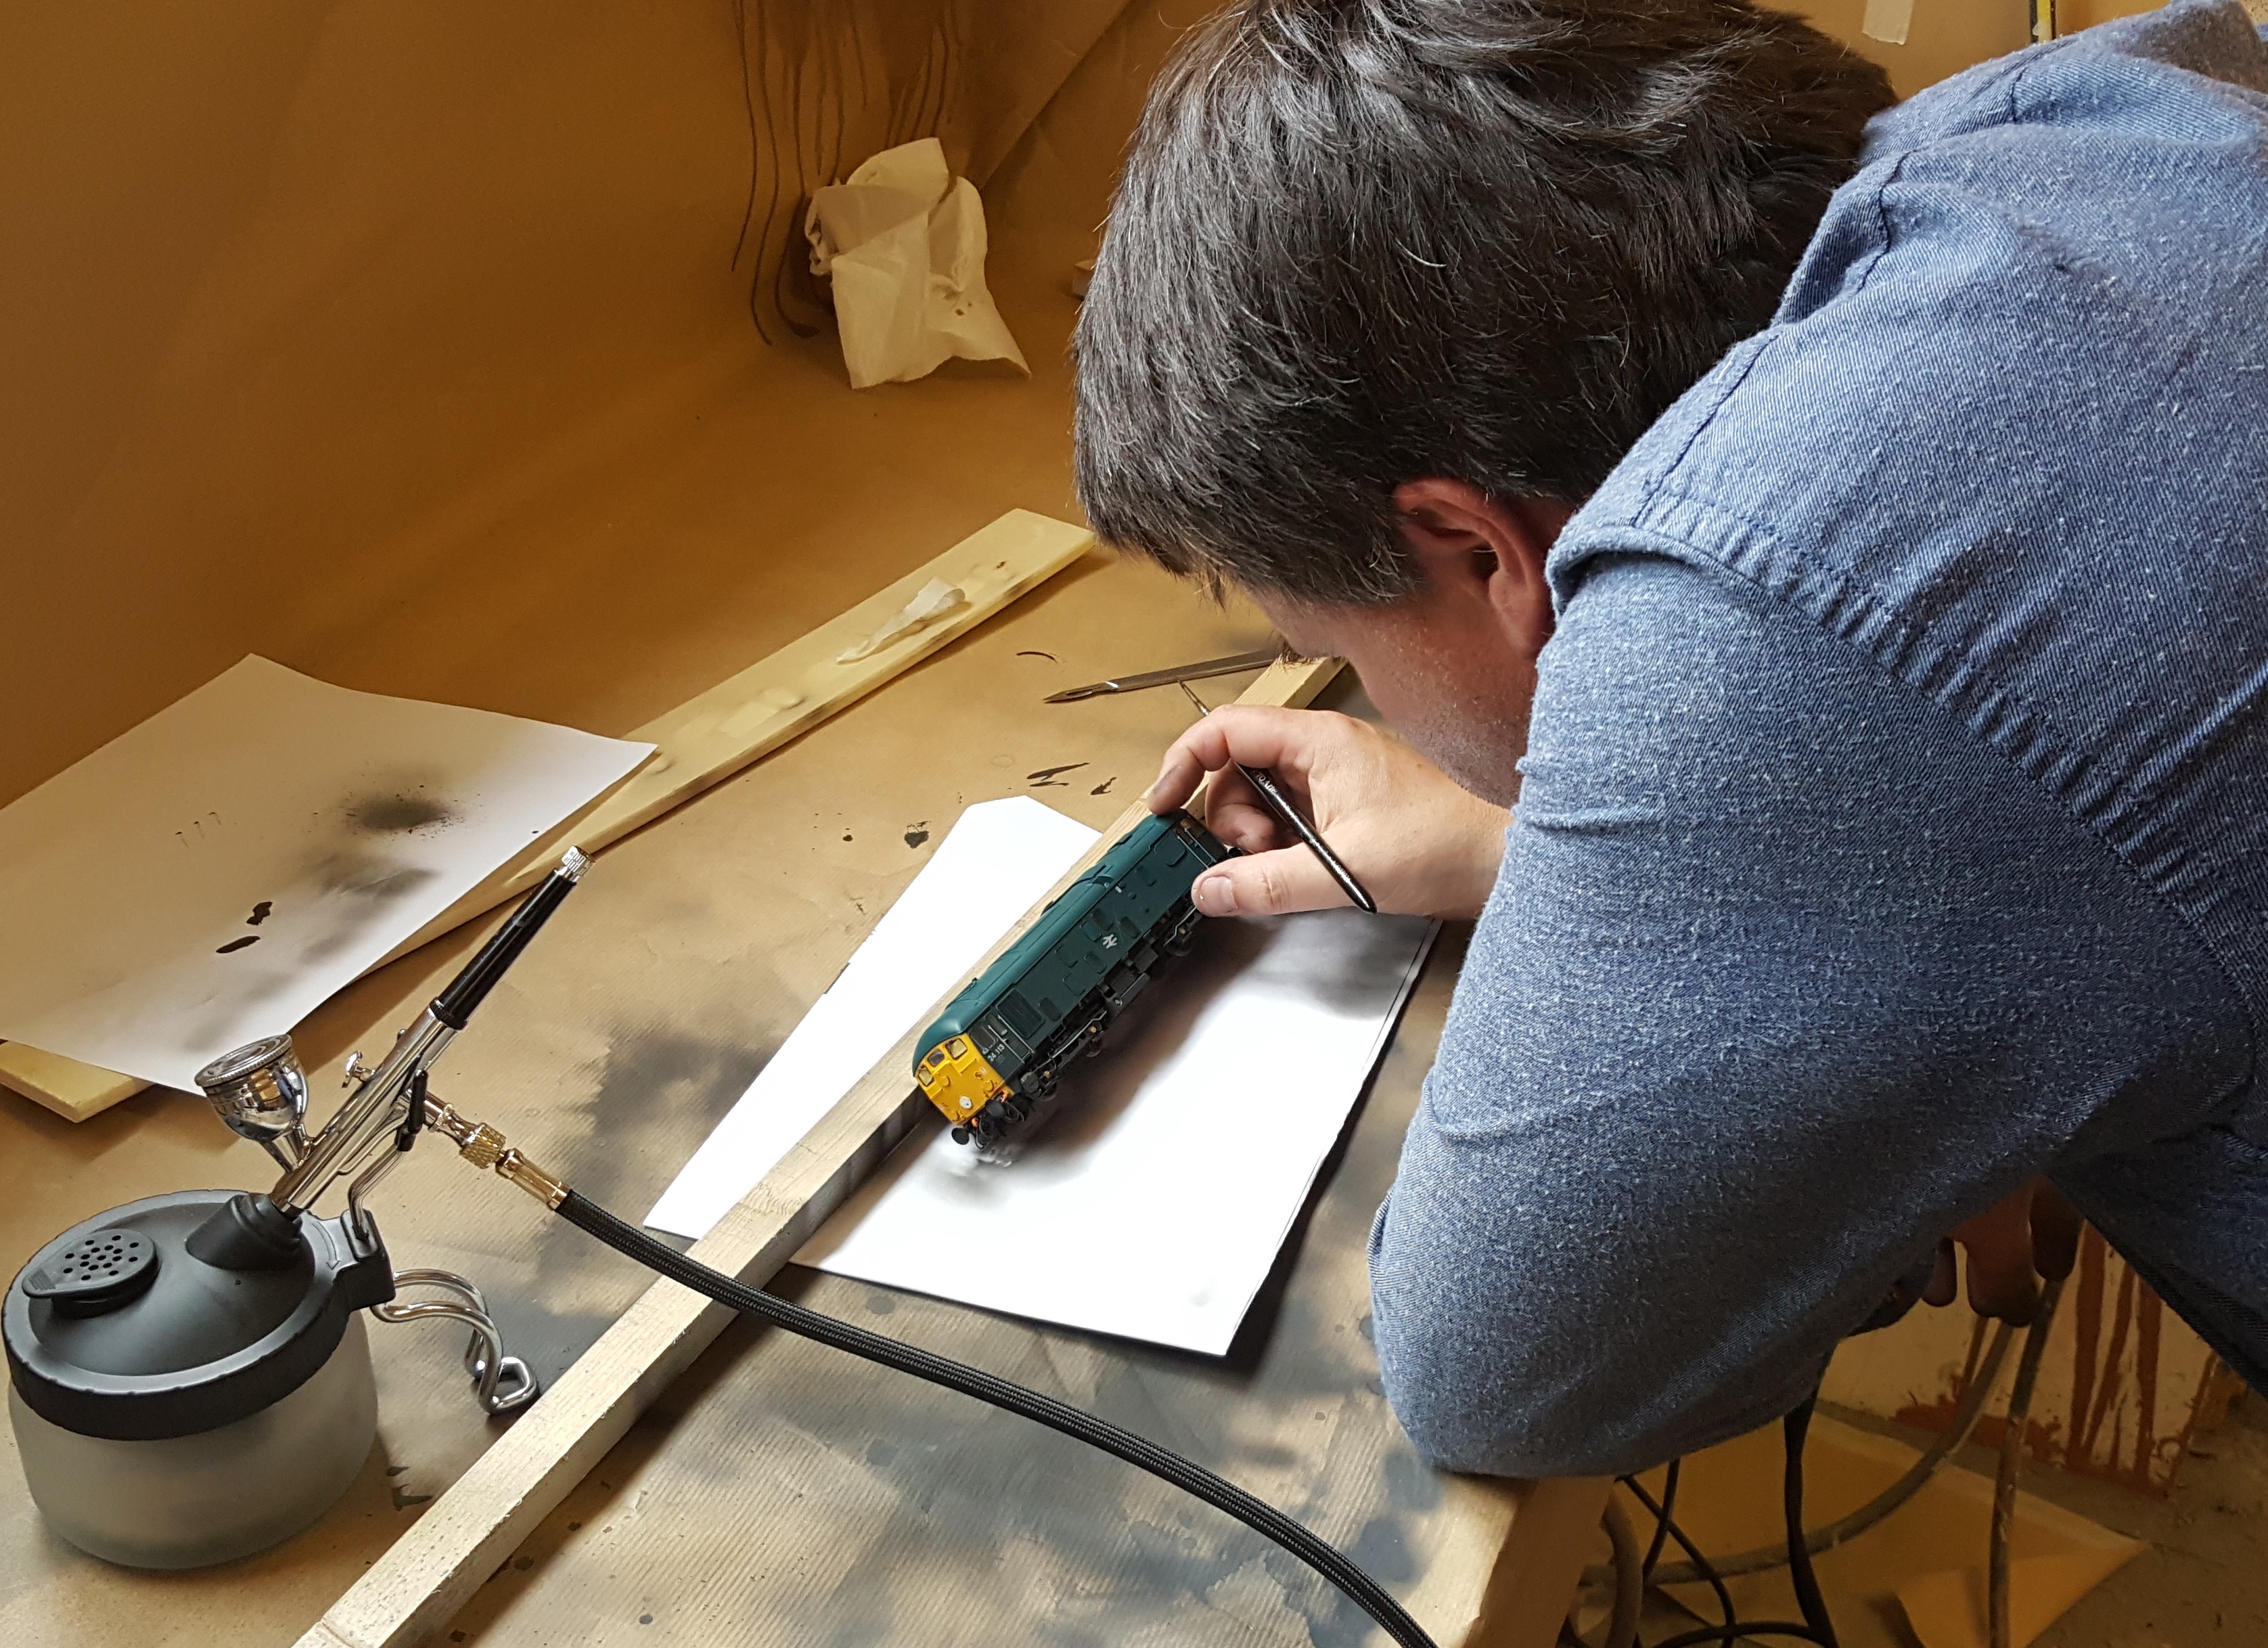
The class 24 skinhead was not the only output from the weathering day last weekend – indeed, it was a very busy day!
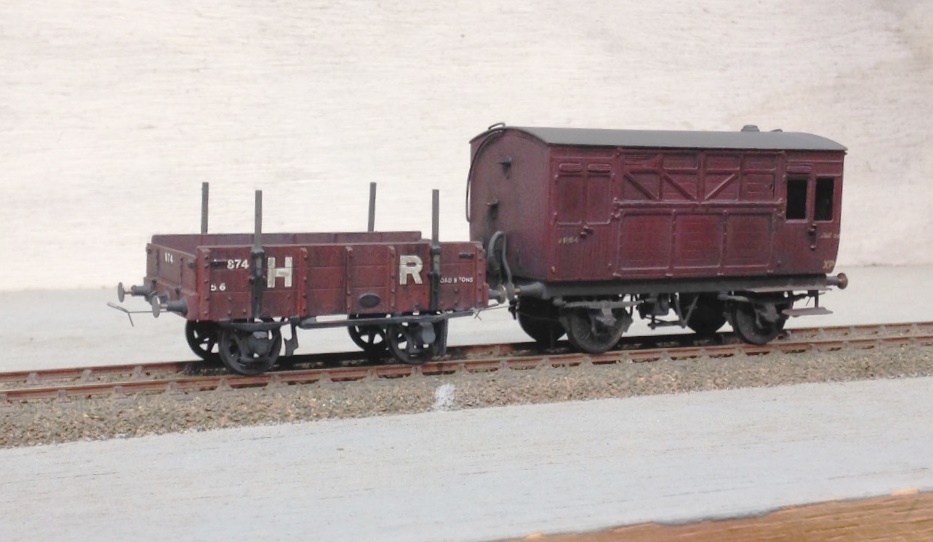
First up were some of my 1920’s rilling stock – both Highland, a timber truck from a Model Wagon Co whitemetal kit and a horsebox from a Lochgorm etched kit. Both are now close to finished – a load is requird for the former and some glass for the latter (and probably a light colour inside the groom’s compartment.
Neat vehicles though and I am pleased with them – less so than the brakevans that I managed to dislodge the lettering upon and may well need to be stripped – as you would imagine, no photos of these and nor any photo’s from today’s efforts with paintstripper!
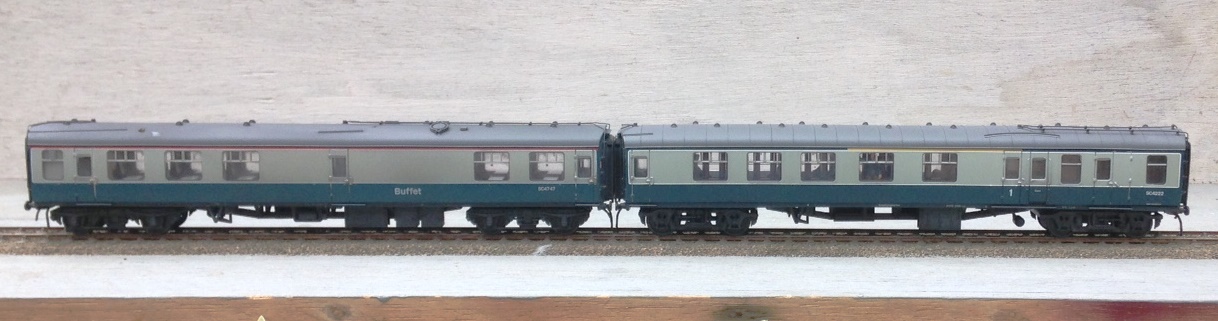
But the main additional output was some more coaches for Portchullin. I managed three and Peter Bond looked close to finishing his third as I left, so we had a proper little production line going!
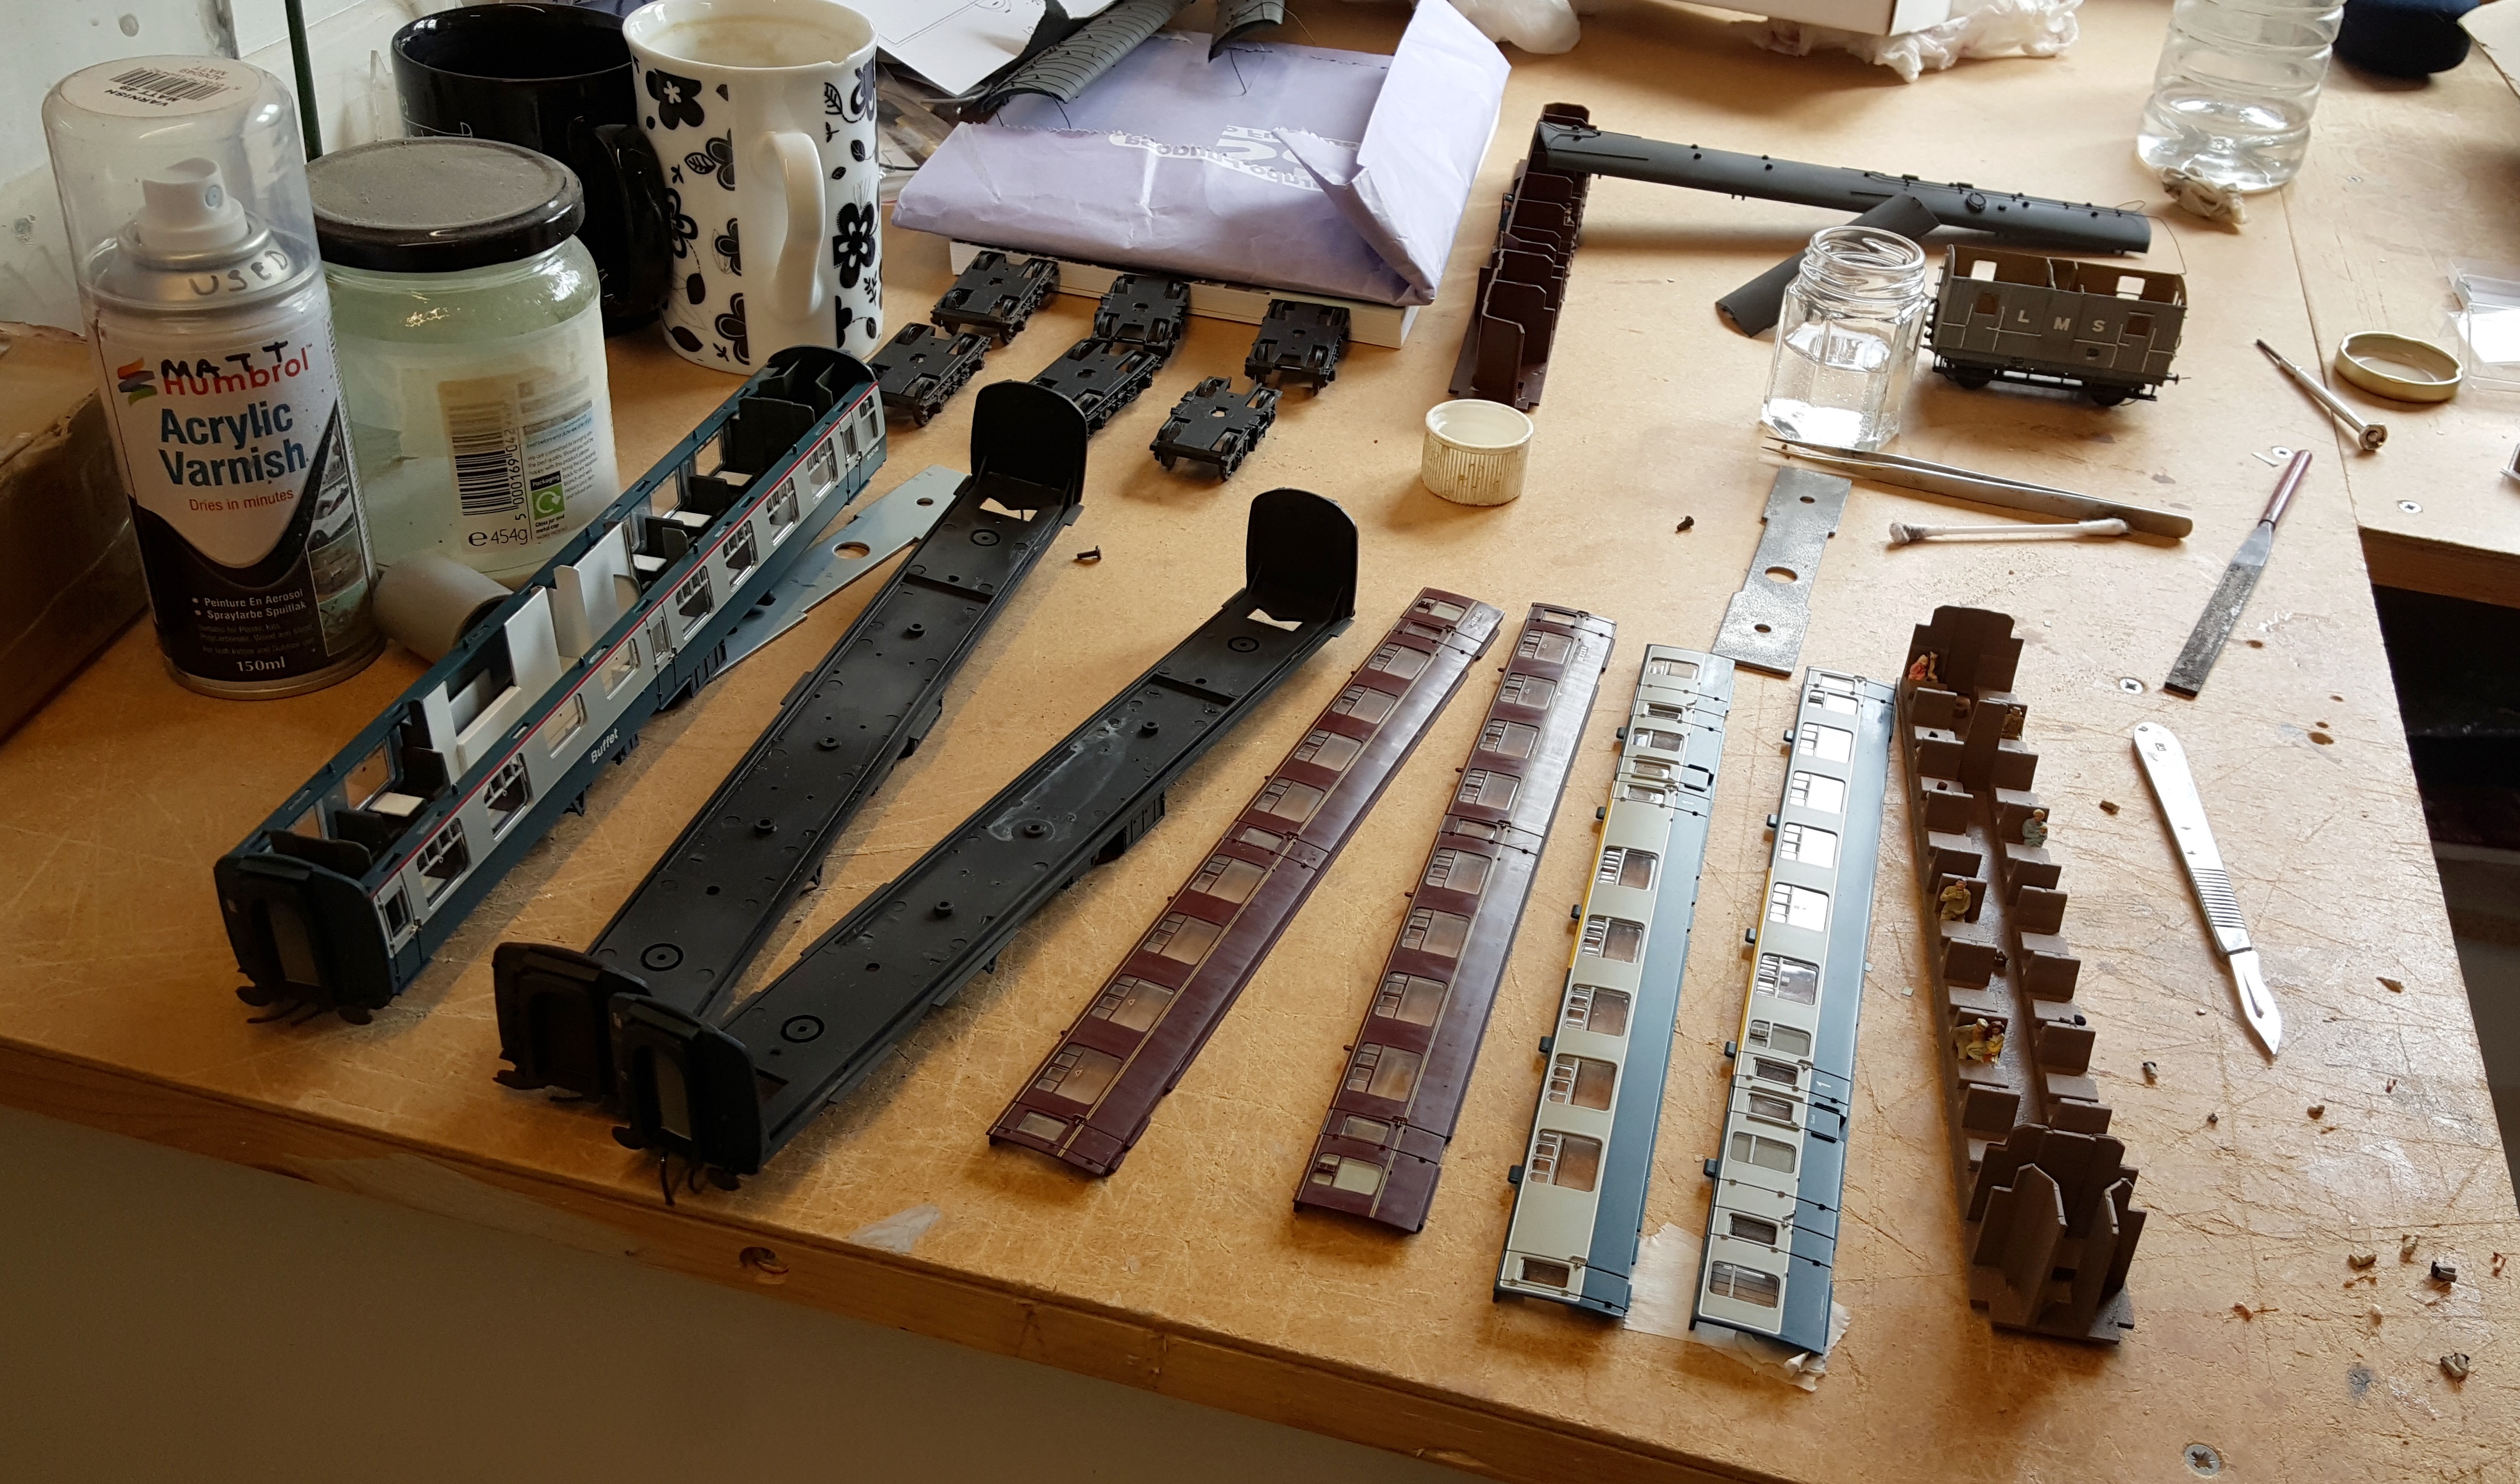
The technique was essentially the same as I described for the class 24, although as you can see the model was broken down rather more (in part to populate the interior of the carriages – I do hate seeing trainloads of empty coaches on model railways!). However, for the maroon coach, rather than using thinners to take back off the paint, T-Cut was used. This is an abrasive so does not work in quite the same manner but acheives broadly the same effect except that it also polishes the paint. I did not think this was right for the blue/grey coaches (they were finished in satin in reality) but the maroon coaches were in a gloss finish and the T-cut gives a slight sheen without actually getting to gloss. I did eventually think it was a bit too shiny, so did waft over with the finest of sprays of the “gunk” again just to take it back a touch.
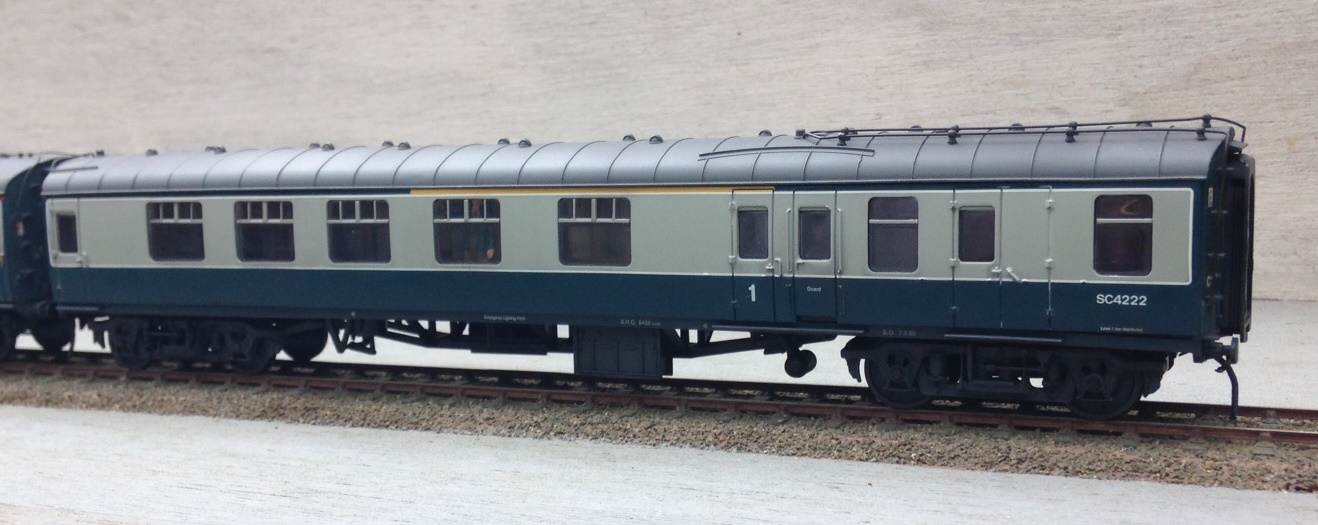
The Bachmann Mk 1s are very good models that have stood the test of time well. They are a doddle to convert to P4; taking maybe 60-80 minutes a go. There are a couple of things to look out for – firstly is that the side frames are a touch to tight for true guage wheels and need to be filed back. The plastic is quite flexible and does create burrs fairly easily, so once the filing has been done some work with a sharp scalpel is required to clean this up.
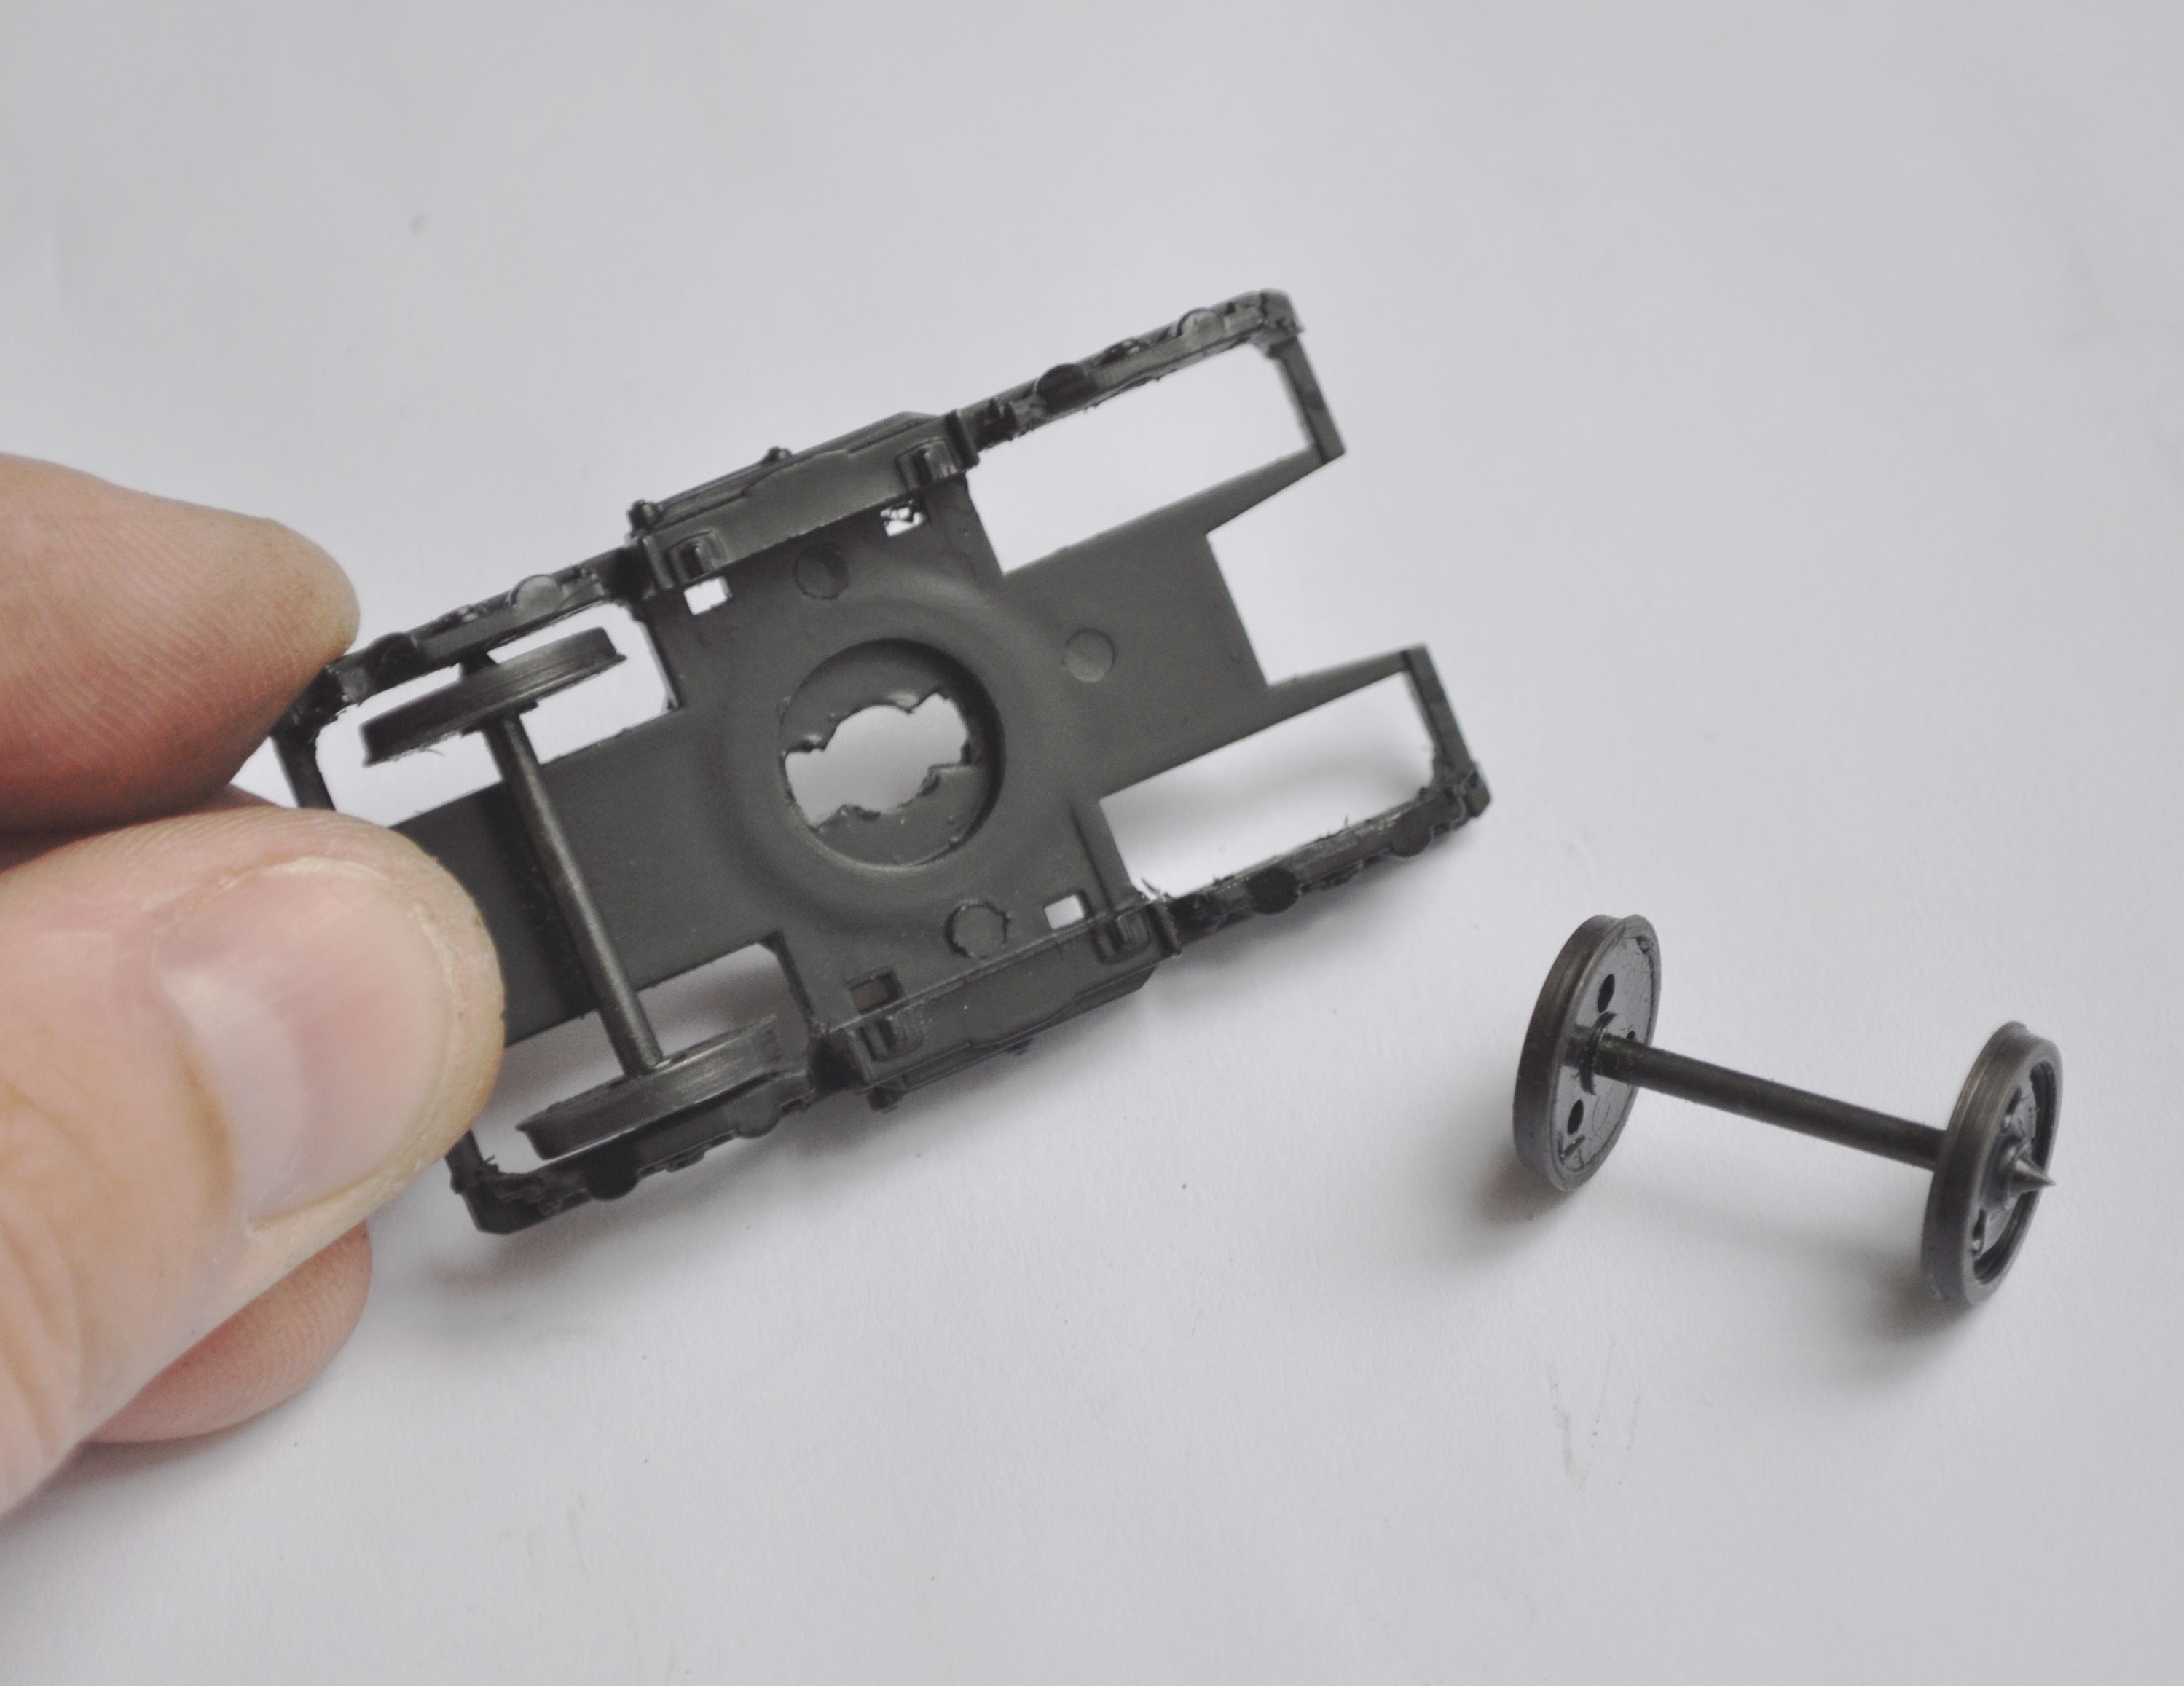
The next caution is that the bogie mounts are not always parallel with the rail head, meaning that the bogie can lean forward or backward. This is caused by the chassis being screwd a little over-hard onto the body, causing it to flex slightly. You are just as likely to have done this as the manufacturers and I get around it by making it rock slightly with some thin (20 thou) strip like this.
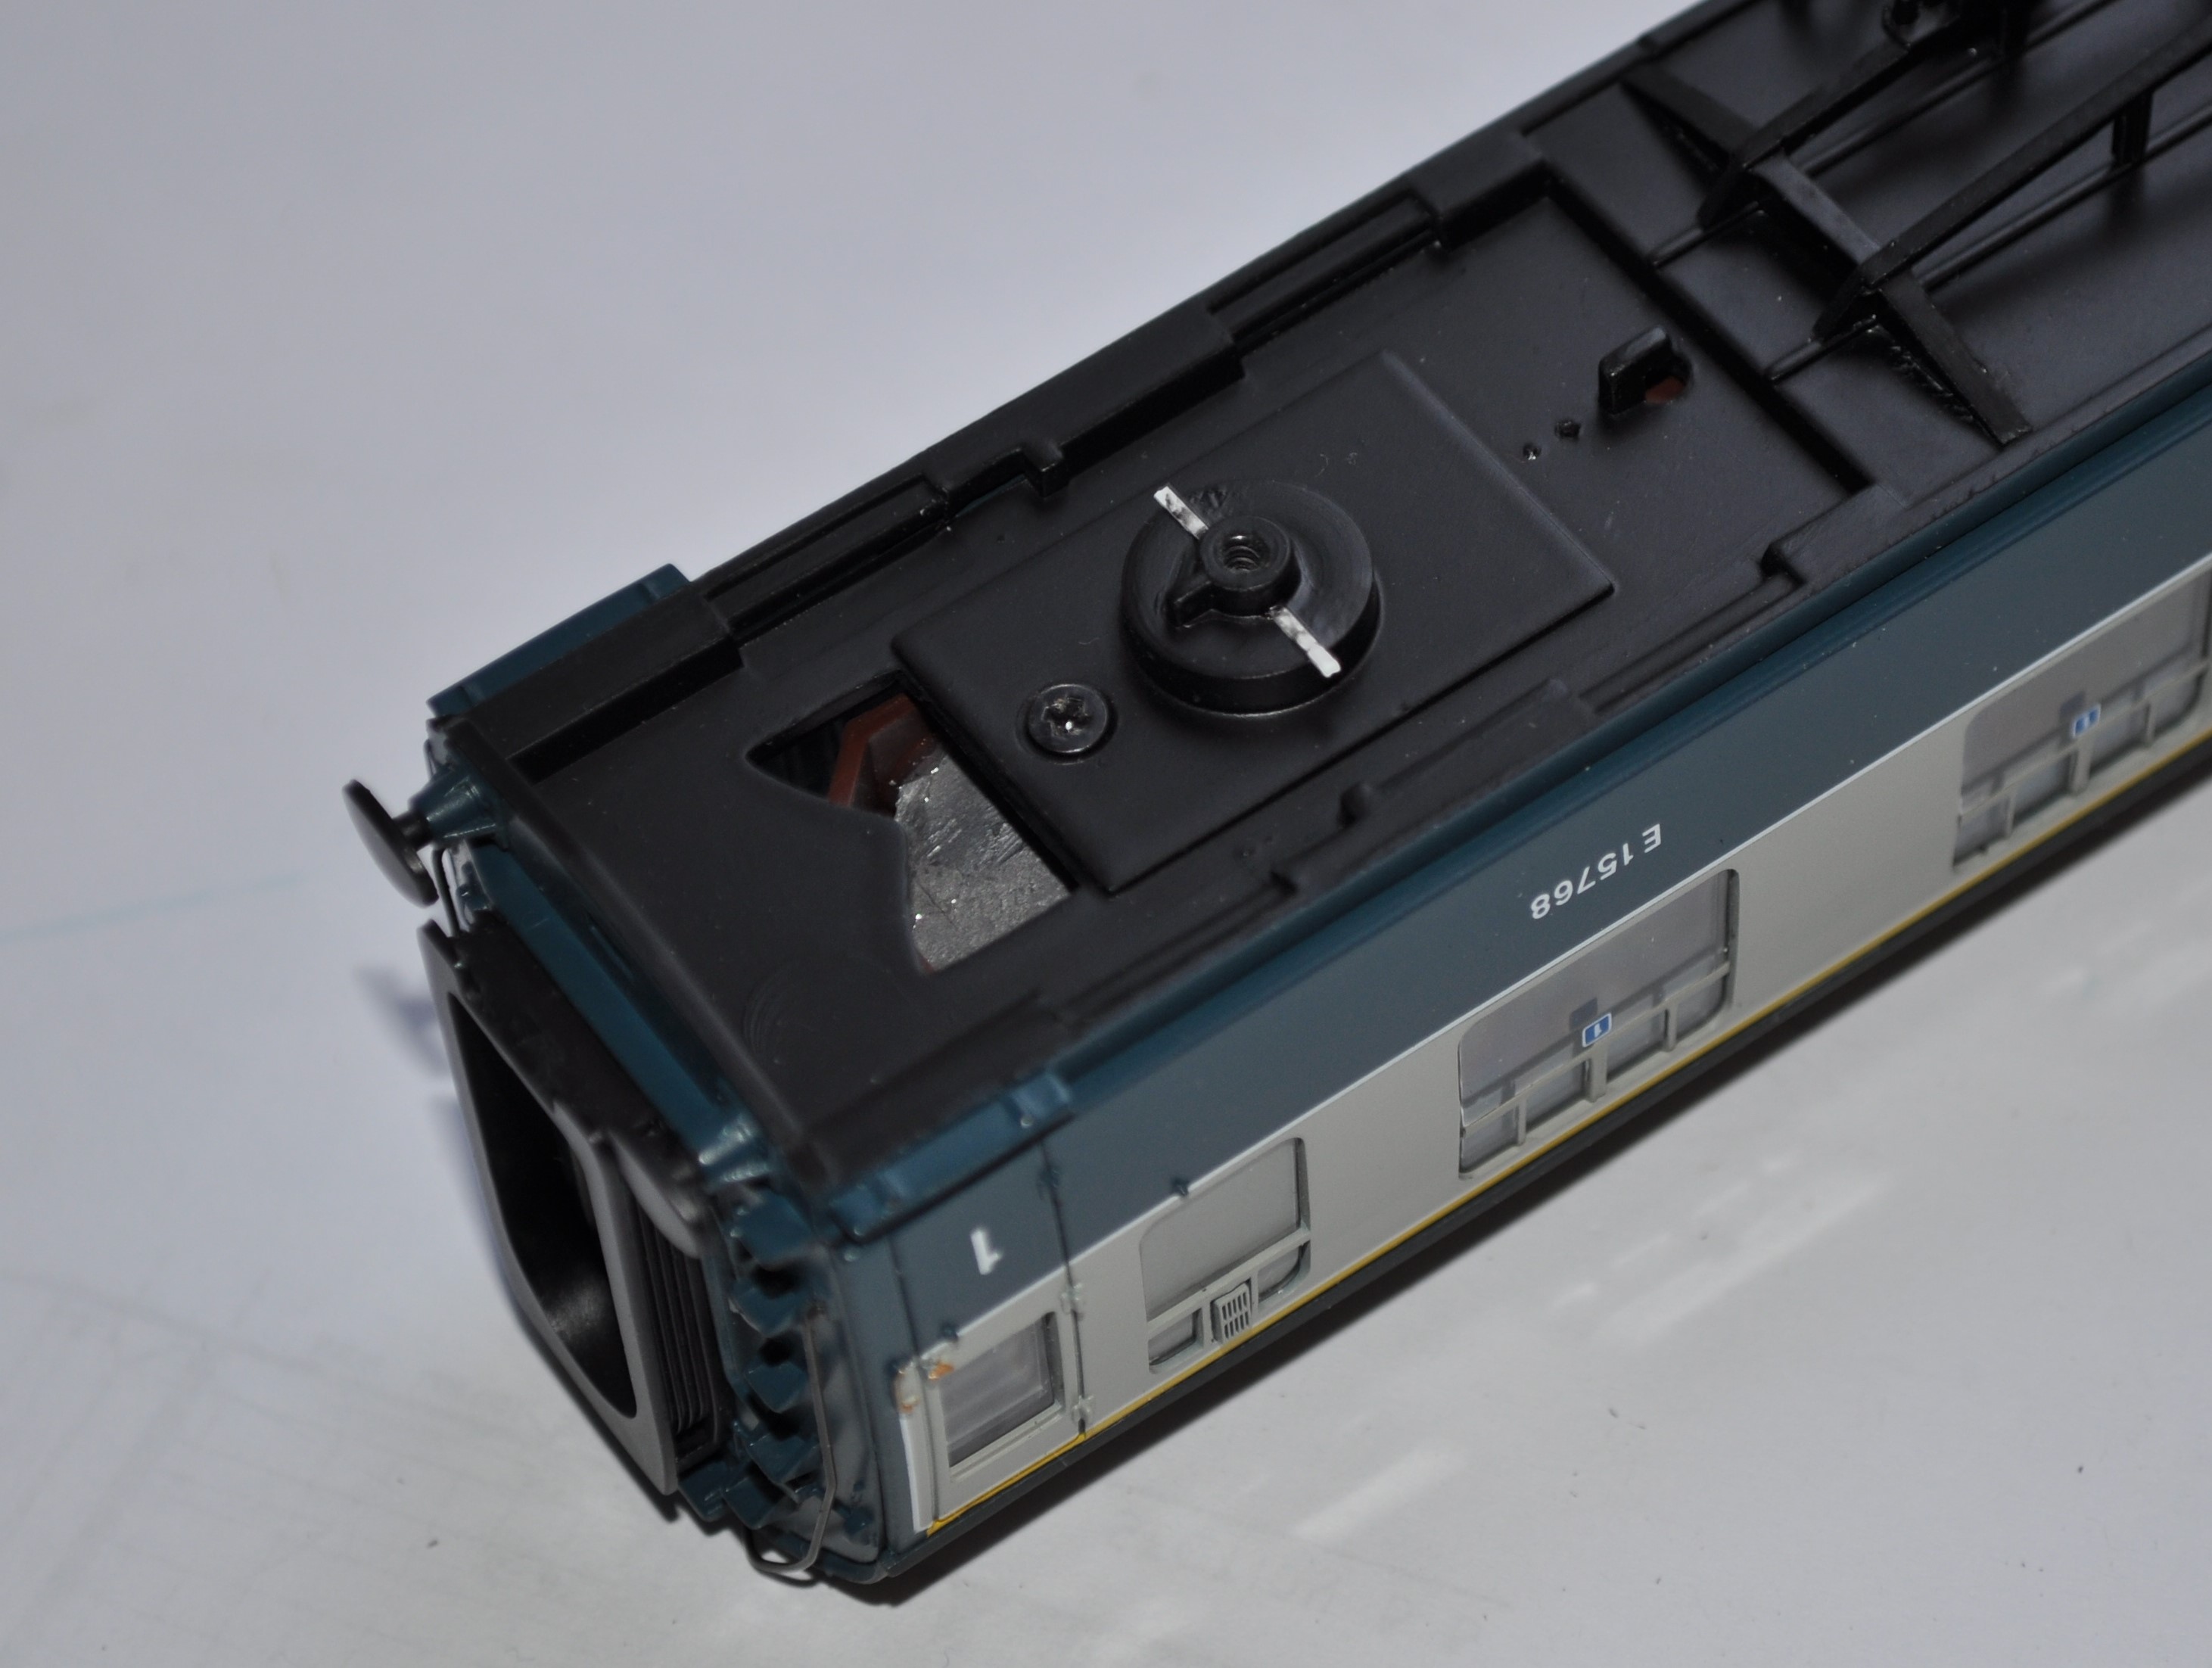
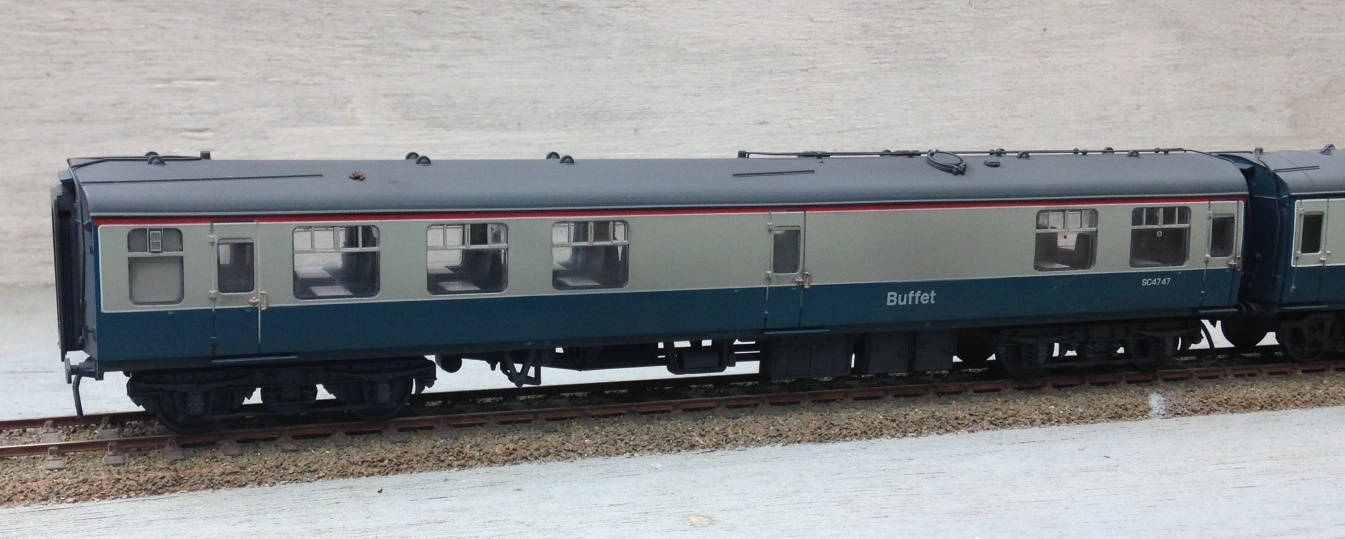
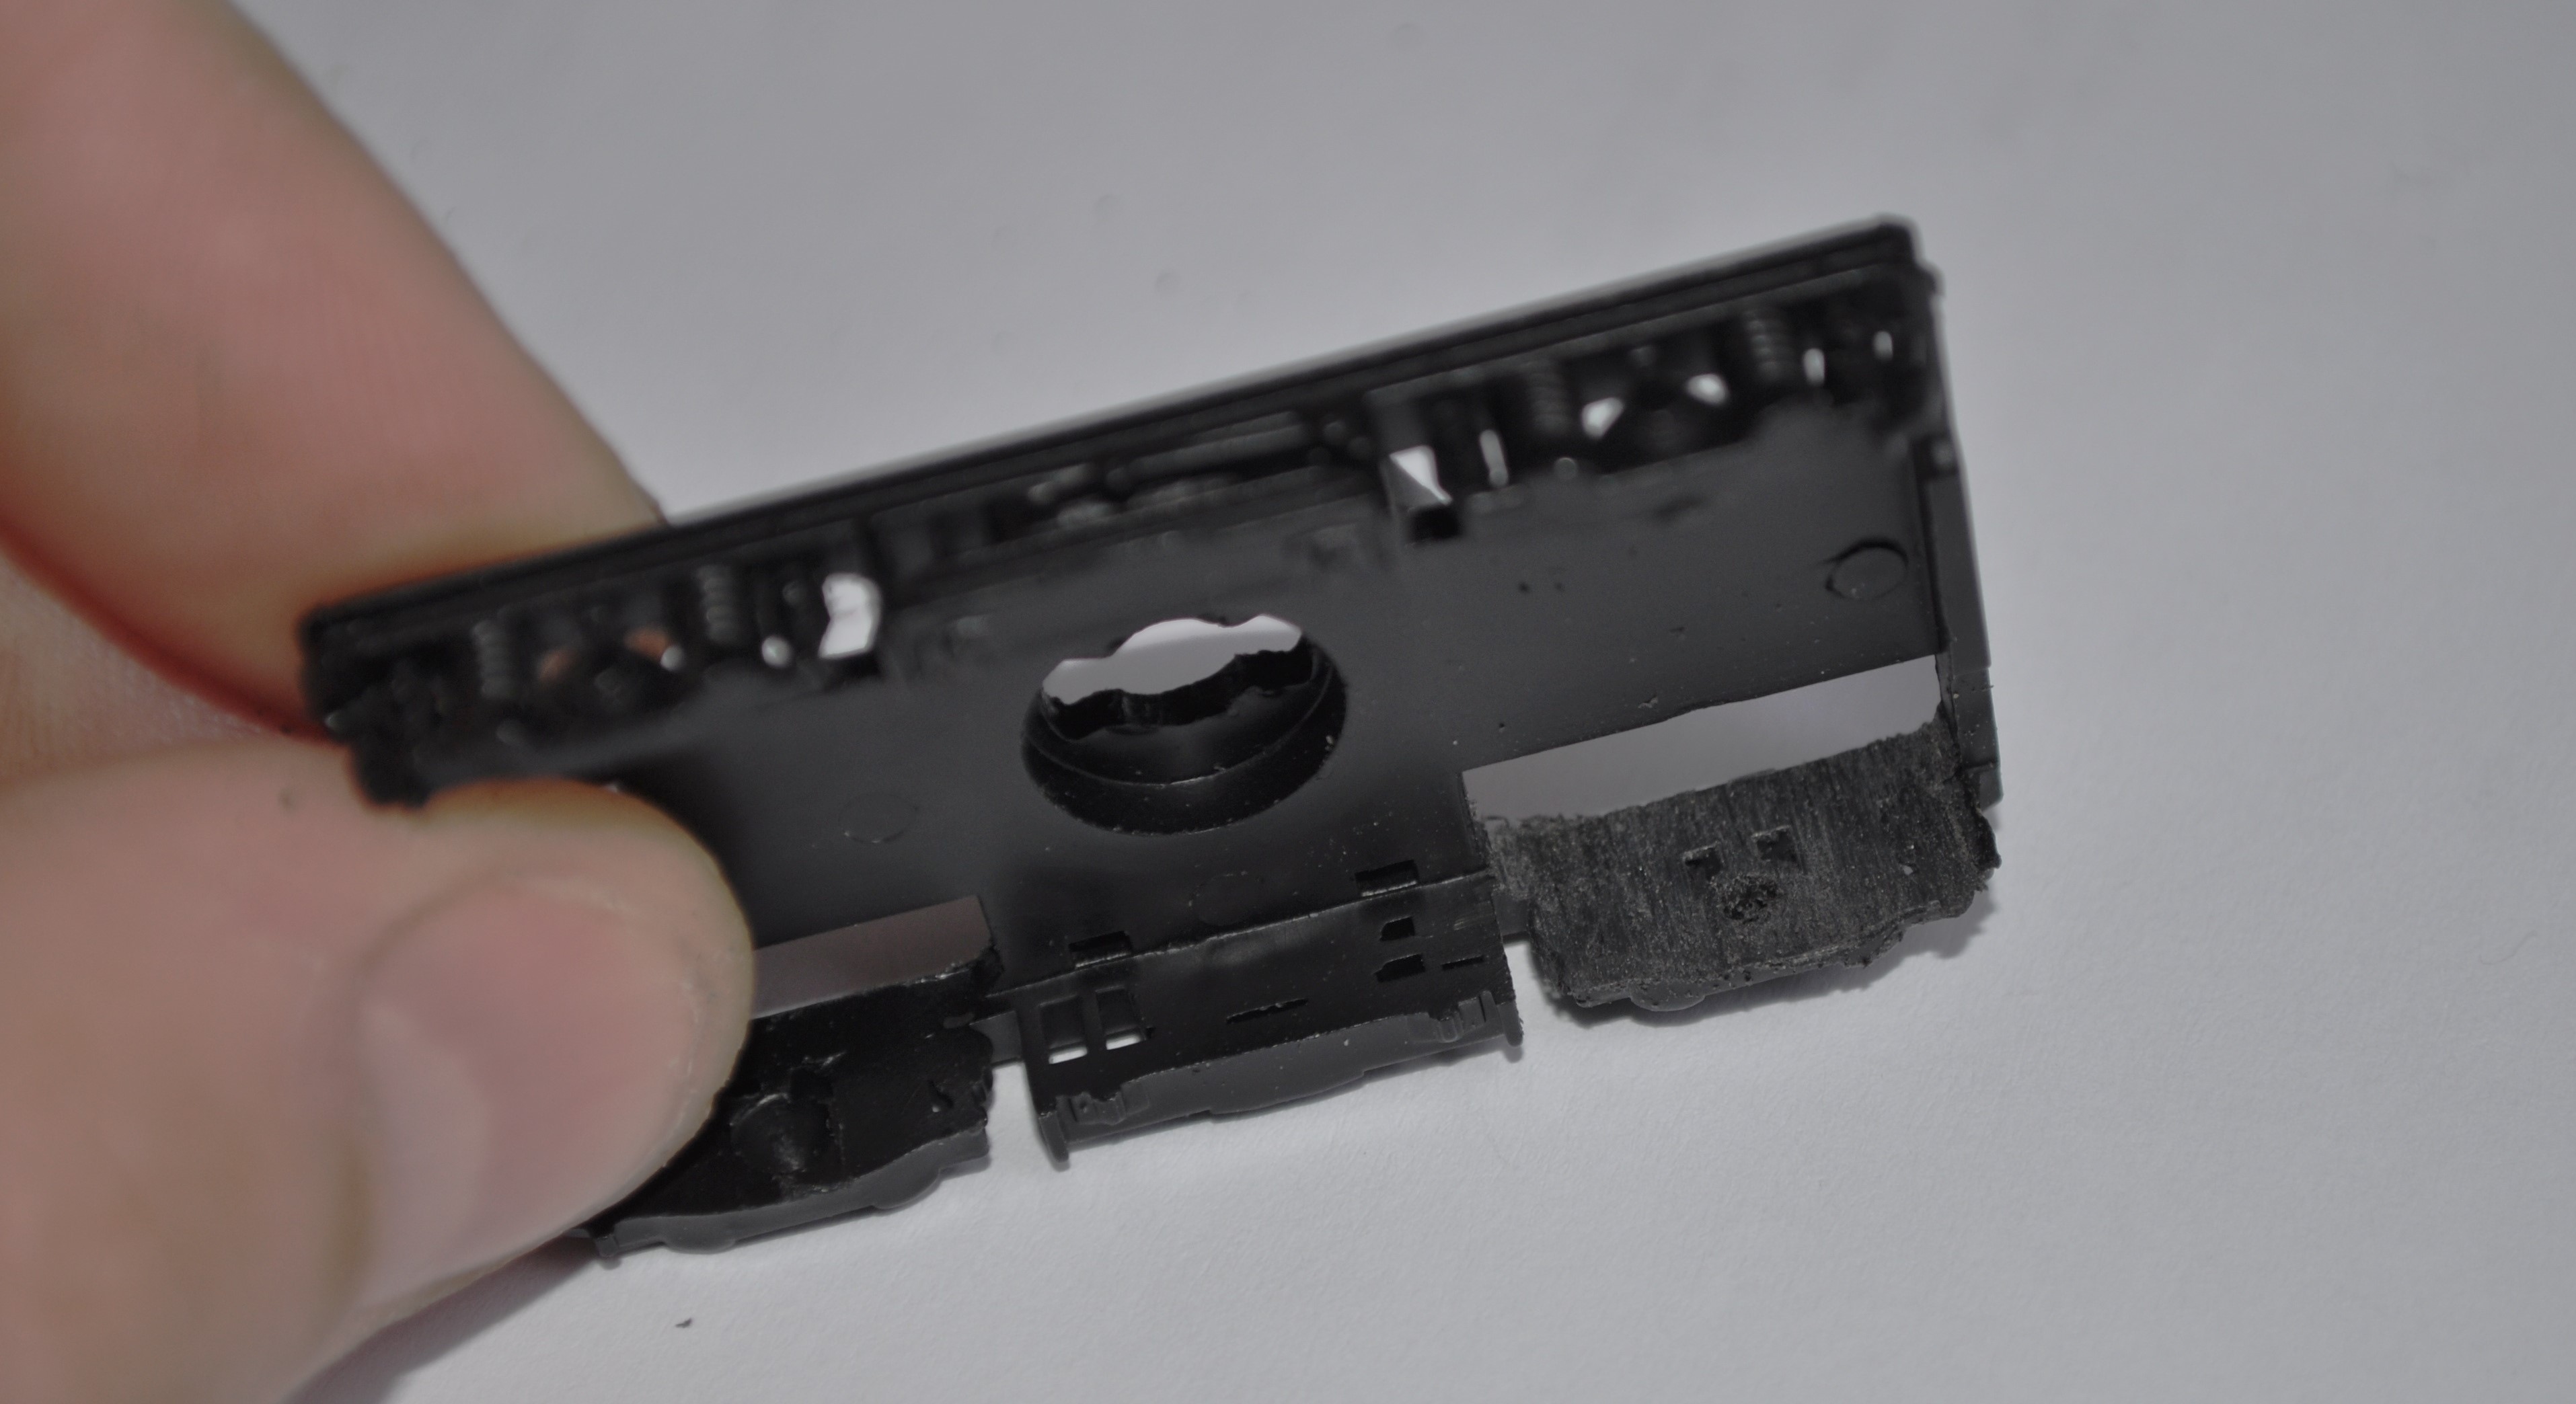
Arguably one of their weaknesses is the corridor connection which is a tad toy-train (well it is a toy train!). A dodge that I have started to do is fit a few of my vehicles with some black foam in the door jambs. Make this so that it sticks out 3-4mm and engages in the equivilent of the adjacent vehicle to block out the light. A simple dodge that makes a big difference. It does mean that the vehicles that are fitted thus have to be in the centre of the train (as the foam looks crude where it is exposed) but this can be done with care – for example a buffet would nearly always be in the centre of a train, so this is the vehicle of the two I fitted with this.