Blog Archives

The Polytechnic Special Excursion Train
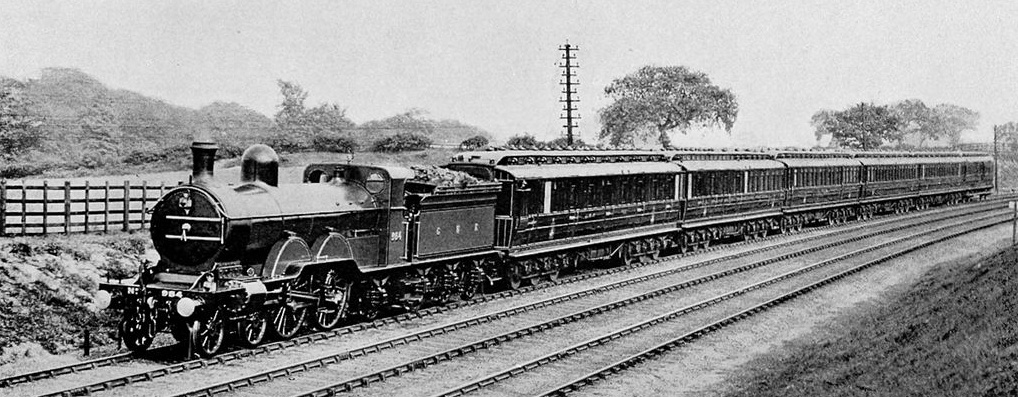
From time to time, I see photographs that are intriguing or catch the imagination. This week generated one such example that I felt was worth sharing. In addition to being a rather wonderful timepiece of Edwardian travel, this view of a Highland Railway series 1 castle on the viaduct at Killiecrankie prompts a number of interesting discussion points.
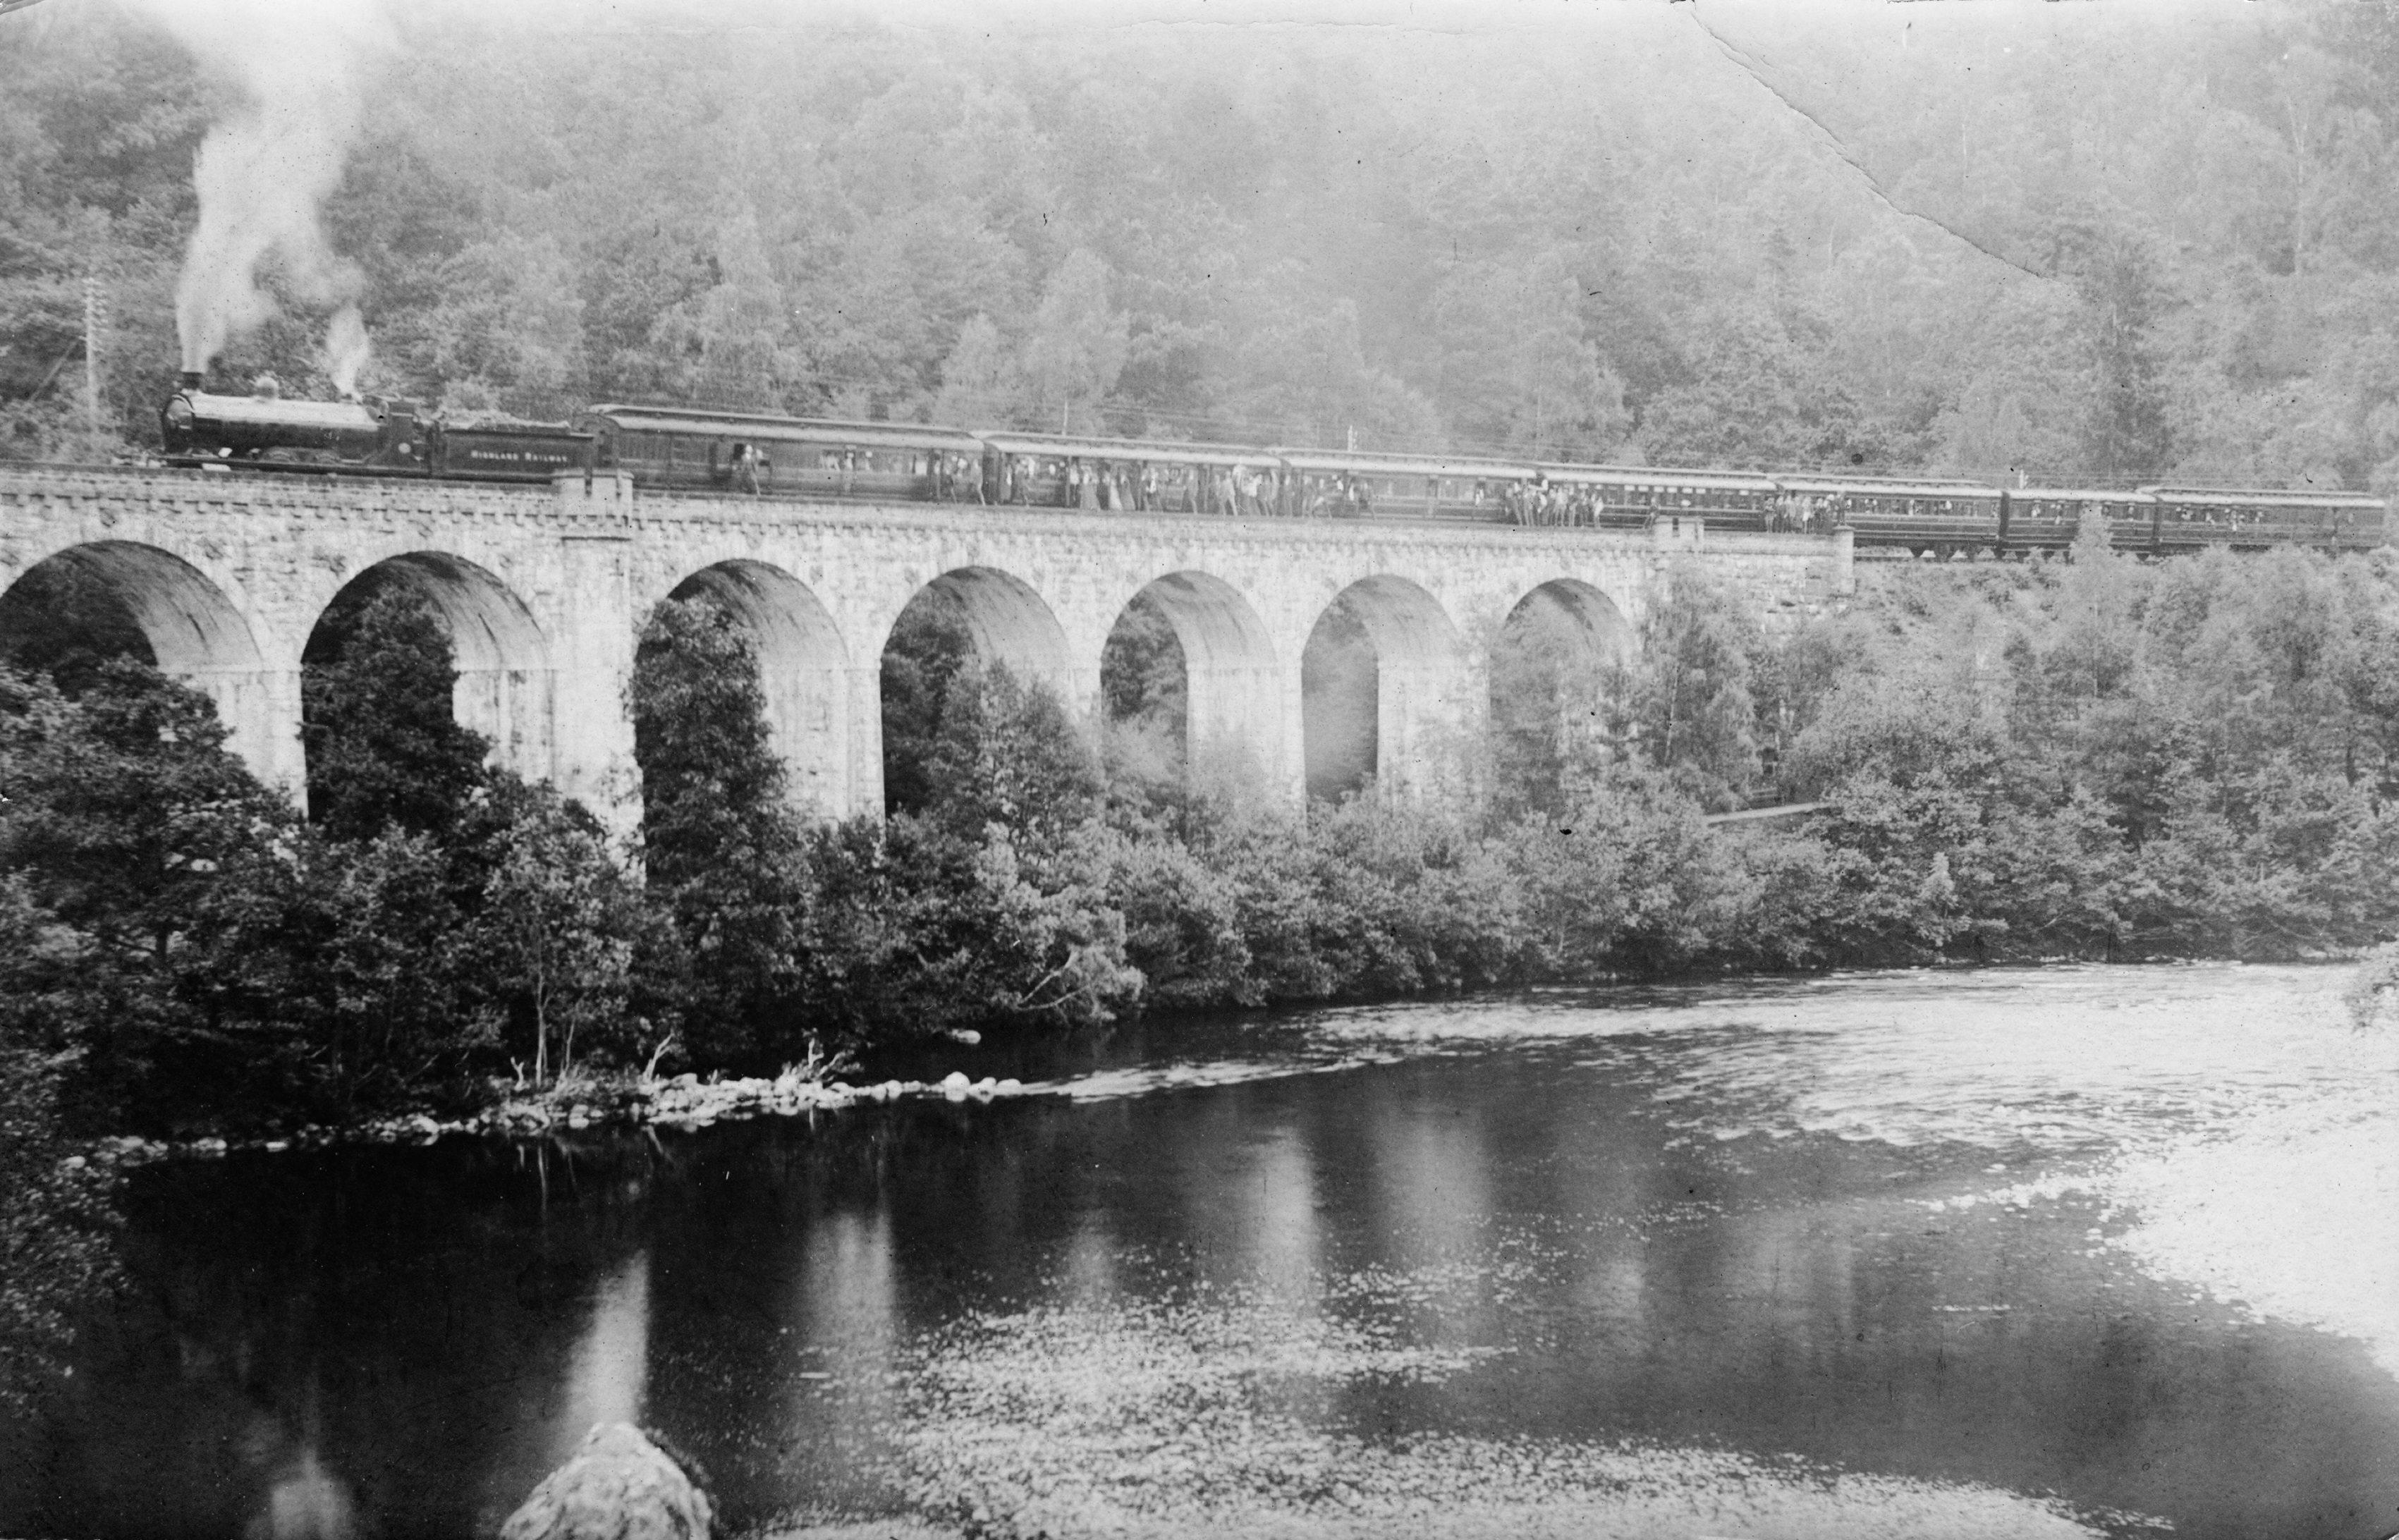
Dealing with the purely railway one first; the constitution of the train. This is largely made up of East Coast Joint Stock coaches from the early part of the last century, supplemented by a Great Northern dining car and one NER coach. The East Coast Joint Stock Co was a joint undertaking of the three companies that made up the east coast route from Kings Cross to Scotland to provide coaching stock that could run across three company’s lines. Back in 2016, I showed my part build of a very similar coach to those on the viaduct for you to compare. By the way, before long there will be a further instalment in this series, as I have made progress with it and have a pretty much finished coach.
What initially surprised me was that all of the stock was third class; which was very unusual for trains of this time when railway travel was proportionally much more expensive and thus attracted the “monied classes” rather more than today. My colleagues in the Highland Railway Society of course not only had the answer for this but there was even an article on it in their journal a few years back written by John Roake. The train is obviously a special rather than a day to day timetabled service and it transpires that it was one of a series organised by the Polytechnic Touring Association in the beginning of the 20th century. This organisation had its origins as a travel society of the Regent Street Polytechnic (which has developed into the University of Westminster) who arranged tours within the UK, Europe and further afield for its students before subsequently becoming and independent business in its own right. In time, it became a fully fledged travel business and once it had merged with a firm called Sir Henry Lunn Ltd, became a household name to people of my generation – Lunn Poly (now part of Tui).
From around 1901 rail tours of the Scottish highlands were organised in specially commissioned services across the summer season. These were advertised as “a week in bonny Scotland for three guineas“. This was equivalent to a month’s average wage at the time, so even though the service was not in luxurious first class, it was hardly for the masses either. This is rather evidenced by the finery of both the ladies and gentlemen that are visible in the picture. The tour visited a number of Scottish beauty spots, often combined with a steamer trip to complete a round circuit or, as in this case a walk through the scenery to Dunkeld. Dunkeld is 16 miles from Killiecrankie, so they got a fair share of exercise!
The picture is a posed shot and is likely to be an official view for publicity purposes and what caught my eye was the participants standing on the viaduct’s parapet. The viaduct is 54 feet high, so these people are standing about seven stories up on an ledge that is a foot or so wide! Can you imagine the health and safety police sanctioning that now? Mind you, when you look closely at the picture you can see that many of them are leaning gingerly back on the carriage stock – so it appears that they were not oblivious of the fall!
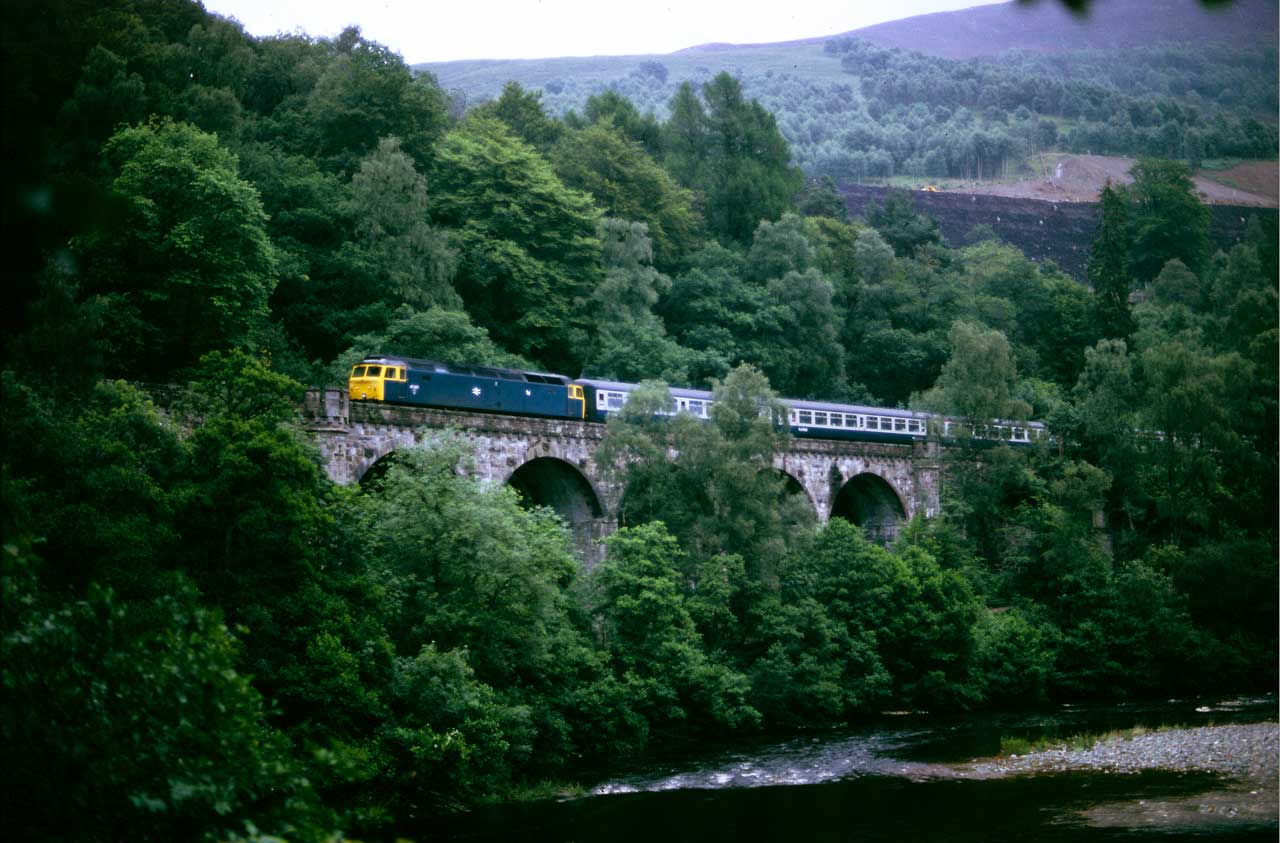
And to sign off, this is an image from about the same place approximately 80 years later in July 1985; a class 47 on what is probably the northbound Clansman service from London Euston (photo by Eastwood 4117). The trees have gown up somewhat in the intervening years – as they have since, the view is largely obscured now but the walk along the river is still worthwhile if you are in the area.

Going Long – Part 2; Bogies Most of the Way There
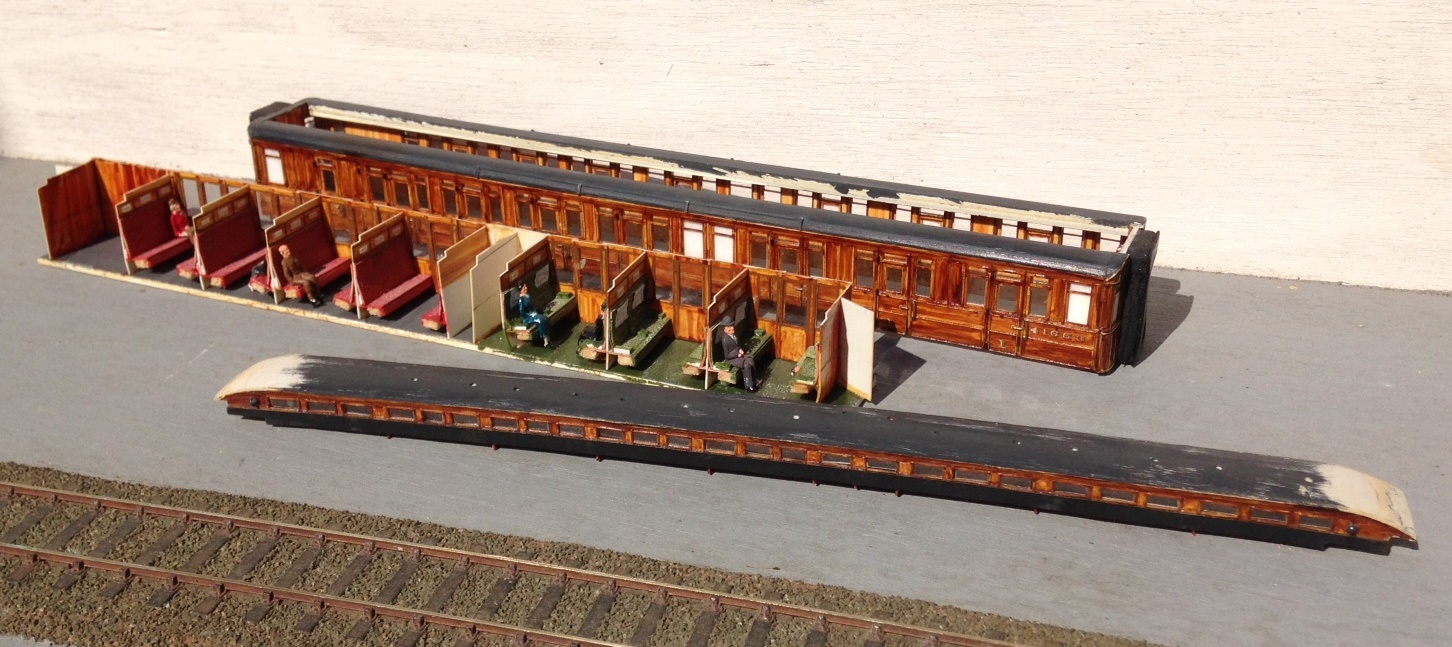
As originally conceived by Barry Fleming, the floor was to be permanently attached to the body sides and so too were the lower roof sections. The only access internally, therefore, was to be the clerestory roof/sides to the centre of the roof. In addition to being very restricted, over time there was a little distortion of this section relative to the more chunky body, such that it has developed a bit of a bow – see the final picture of this post. I have been building a few coaches of late and have arrived at the view that it is desirable to have the underframe detachable from the body and if at all possible the roof too. In this case, I am going to give up making the roof detachable but will keep the underframe as a separate piece and arrange for the floor and interior to slide out of the body. In order to provide a mount onto which I can secure the securing bolts to retain the two parts together, I came up with a metal bracket that has been glued into the coach vestibule where it is hidden as below.
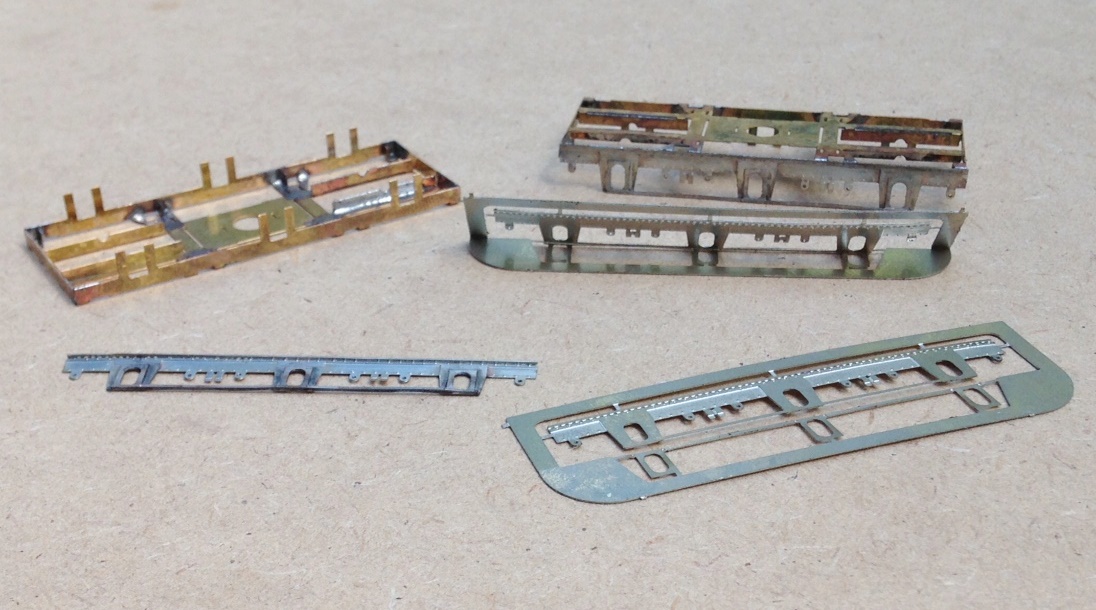
With this completed, I turned my attention to the bogies. These are based around the Bill Bedford sprung bogies, now supplied by Eileen’s Emporium – there is one with the right dimensions for the ECJS bogie. These are only the sprung assembly and offer no detail of the real bogie at all and these were quite characteristic riveted plates. I am not aware of any offerings from the trade for these, so I have had to create my own – out comes the CAD machine again! Actually, they are quite easy to draft and there was a fairly good drawing available. As with some of my other etch designs, I have used folding jigs to ensure that the layers come together correctly without bother. In the photo below you can see the basic Bill Bedford sprung frame on the left upper, the basic etch to the bottom right and the finished side with the layers laminated to the bottom left.
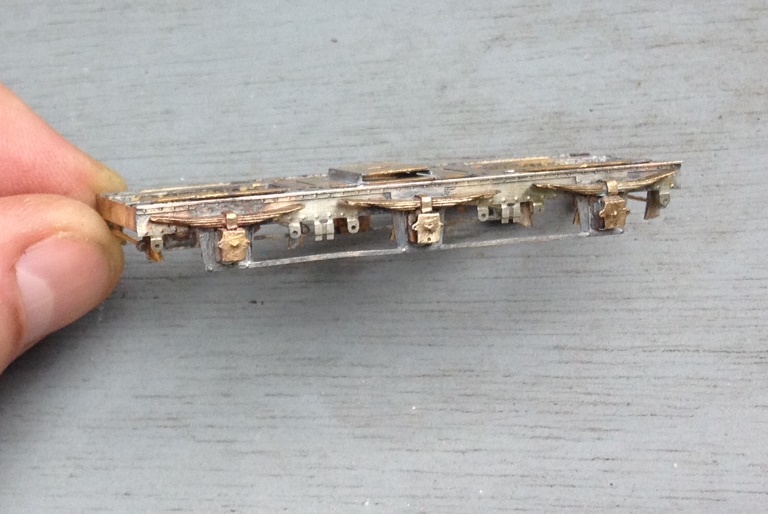
And this is a close up of the bogie sides fitted and some of the brake hangers fitted.
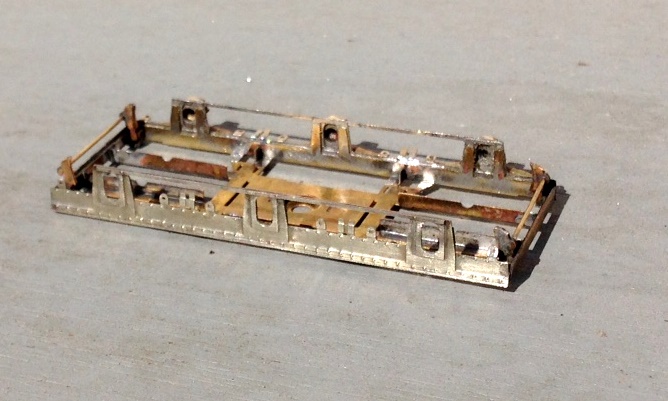
After searching around, I decided that the best means of making the axleboxes and springs was to use the Drummond pattern axlebox/spring assembly from Lochgorm Models. These are really nice but the springs are too long such that the hangers are a bit far out for the six wheeled bogie – hence I formed a hanger point as part of the etching, which you can see yet to be folded down on the above picture. The intention will be to insert a brass rod through the hole in this and to then mount small washers on it to give the impression of the springs. A similar rechnique is used on some of the 5522 models bogies and is quite effective. With this representing the hangers, those to the casting could be cut away.
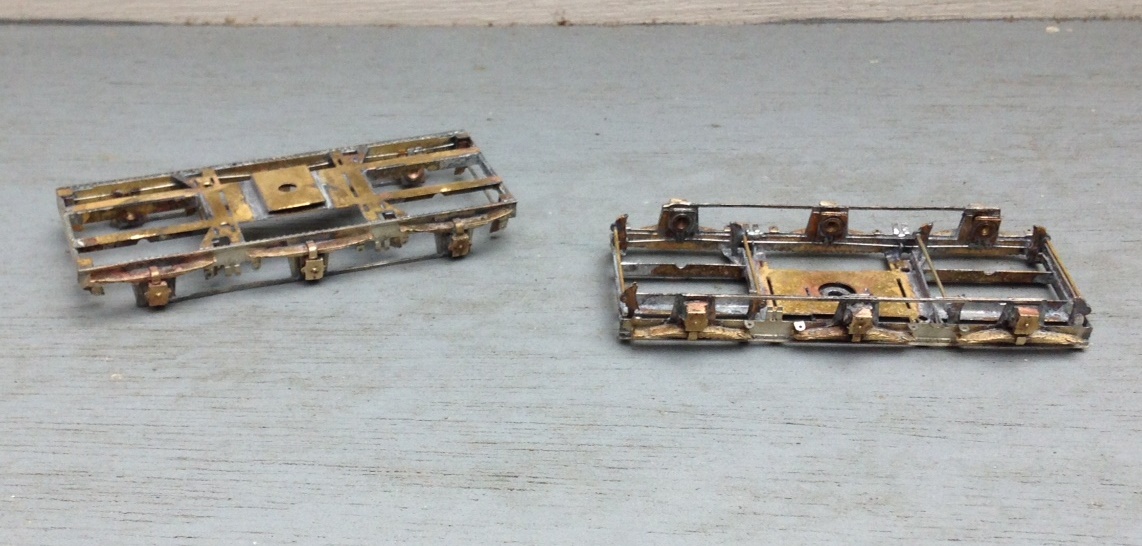
The axleboxes are rather nice, as you will see, and are of cast brass. The bad news about this is that they are really hard and quite a lot of work is required with a dental burr to open out the rear to be free of the bearing.
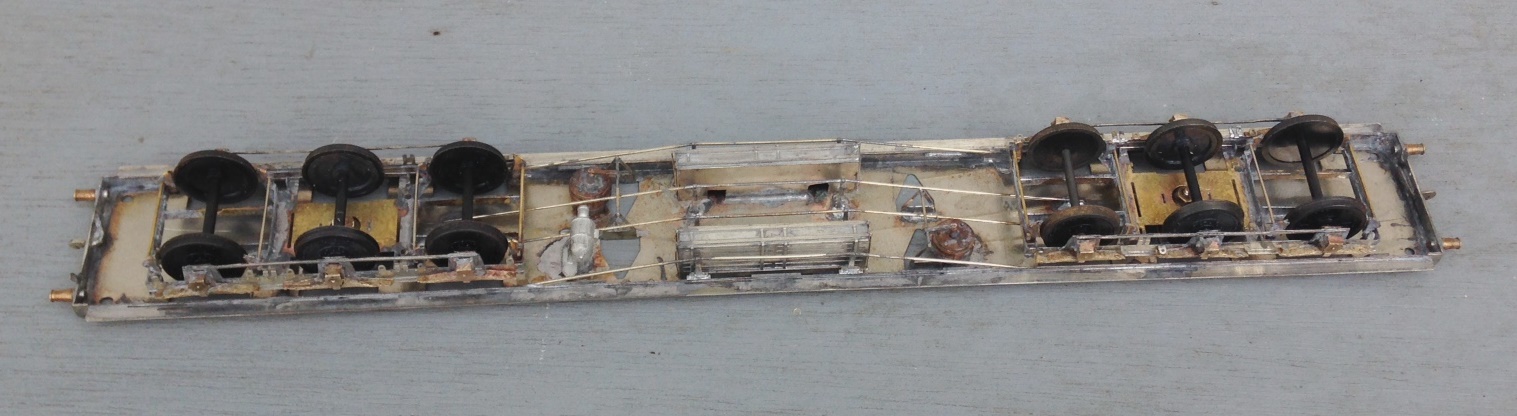
And a look at both bogies together, now with the bearing spring hangers in place along with the brake hangers and rods.
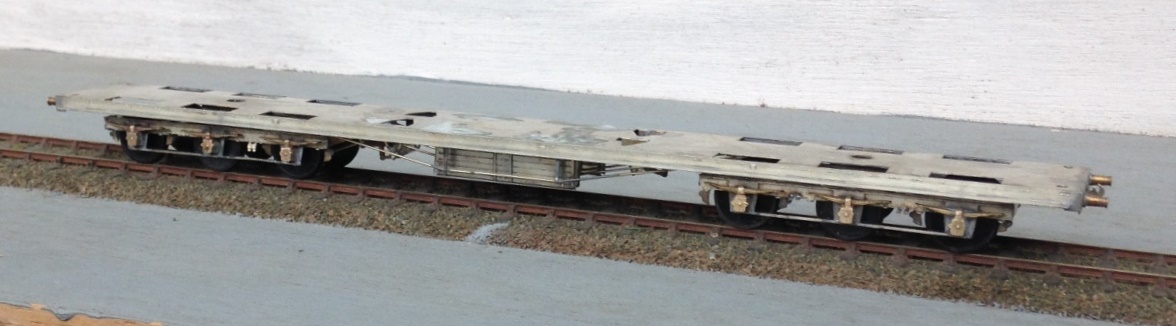
A key feature of these bogies was the transverse bolster springs, which are apparent between the axle spacings. I did come up with a scheme to form these but they have not proved to work. I think I can cut and paste a pair of the bolsters from what I have produced (ie half the number I need) so I am going to have another bash and if not, it is back to the drawing board! So whilst I work out how I am going to wrestle with this (I do have some ideas, I just need a bit of time to implement them!), lets at least admire what the coach looks like in its semi-complete state:
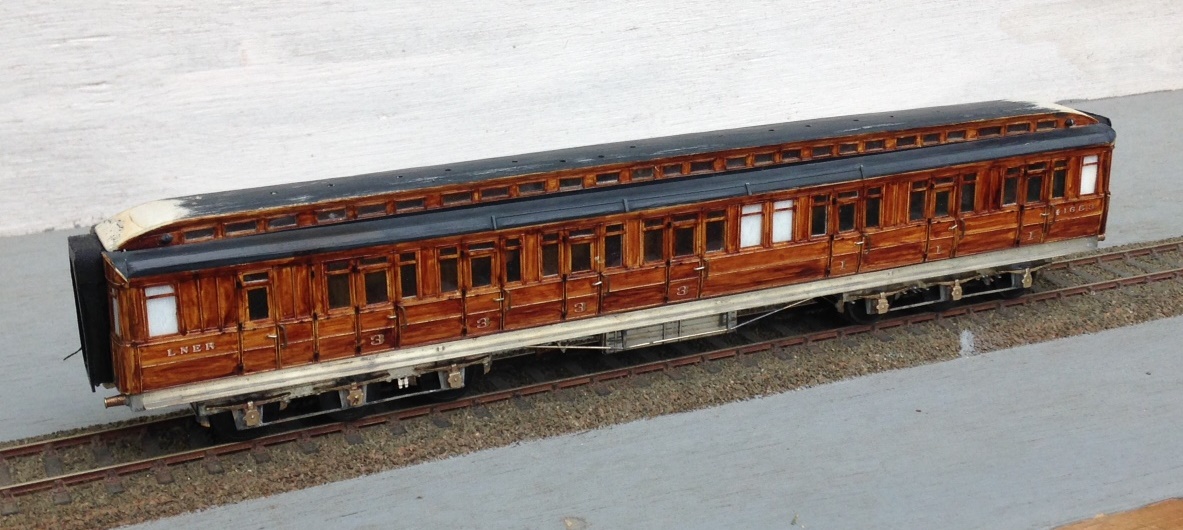
There are other things to do with the coach; the centre part of the roof has a bow, there is various detail missing from the underframe, roof and ends yet to go – but it does look the part doesn’t it?
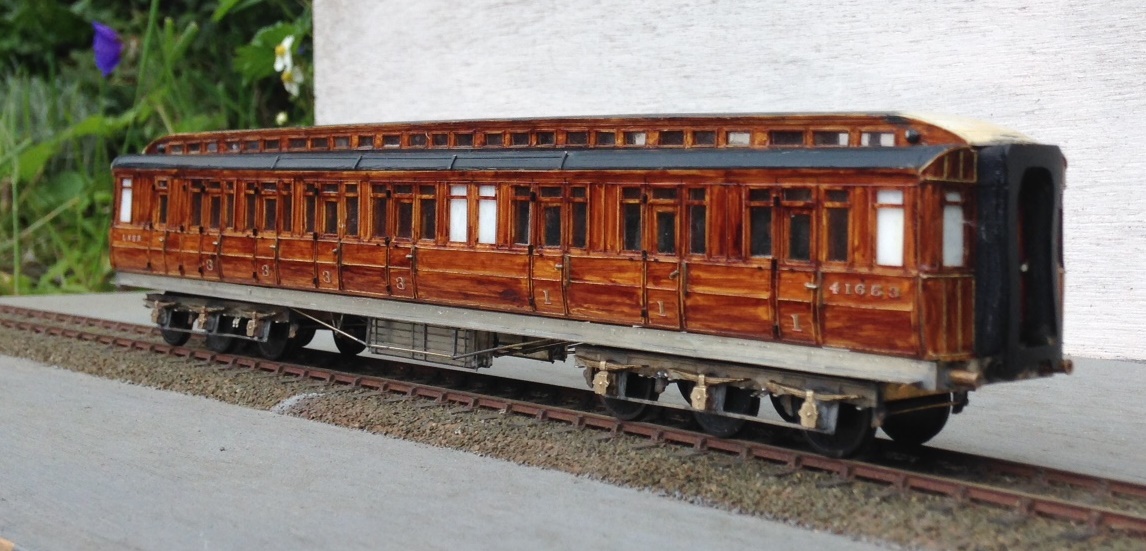
In response to the first part of this blog, Bill Bedford did contact me to help with some prototype details. He was able to tell me that the buffers that I used would only be correct for the brakes and that the udnerframe only had two trusses, not the four that I have modelled. So some corrections will be required……………but first those transverse bolster springs and maybe give the carriage a bit of an outing (I will bring it to Scaleforum for that).

Going Long…….Part 1; the Underframe.
In comparison to the coaches that I use on Portchullin, most coaches from the 1920s (my chosen period for Glenmutchkin) are shorter and in many cases, even without considering the six wheeled vehicles, a lot shorter. This was driven by the technology and in particular the materials available to the railways of the time. There were exceptions though, and my present build is dealing with one of these – an East Coast Joint Stock 12 wheeler.
In the early 1890’s, the journey north was all about speed and culminated in the Railway Races to the North where the rival east and west coast companies competed to get their services to Aberdeen first. This came to an abrupt end in July 1896 when a west coast train took curves too fast at Preston and left the rails. Although the loss of life was relatively limited (for the time), excessive speed as a result of the desire to “speed to the north” was firmly blamed. As a result, the competing companies agreed no longer to race each other and instead sought to compete on the basis of the quality of their service and the luxury of their trains.
A GNR small altlantic hauling an ECJS express at the turn of the 19th Century made up predominantly of 12 wheeled stock
One product of this competition were some really fine 12 wheel coaches built for the East Cost Joint Stock Company (which was a joint company with the GNR, NER & NB contributing to the cost for trans-company trains). Built from 1896 onwards, these were several different lengths (this particular example was 66’11″) but all were long, seeking to use length and mass to iron out any track irregularity. To support this length of coach, six wheeled bogies were used, although these were rather infant in their design and used big transverse leaf springs as bolsters. In addition to being really characteristic and obvious – so they need to be modelled – I suspect they gave a somewhat bouncy ride!
Barry Fleming’s scratchbuilt body and part completed roof
I have been given a big headstart on this build by virtue of being given a nearly complete body/roof for a luggage composite (diagram 6 for those in the know). This was scratchbuilt by the late Barry Fleming in the 1980s and is a class bit of modelling! Barry gave it to my father, along with a couple of other coaches, to complete but as he has not managed to get this particular one, he has passed it to me to have a bash!
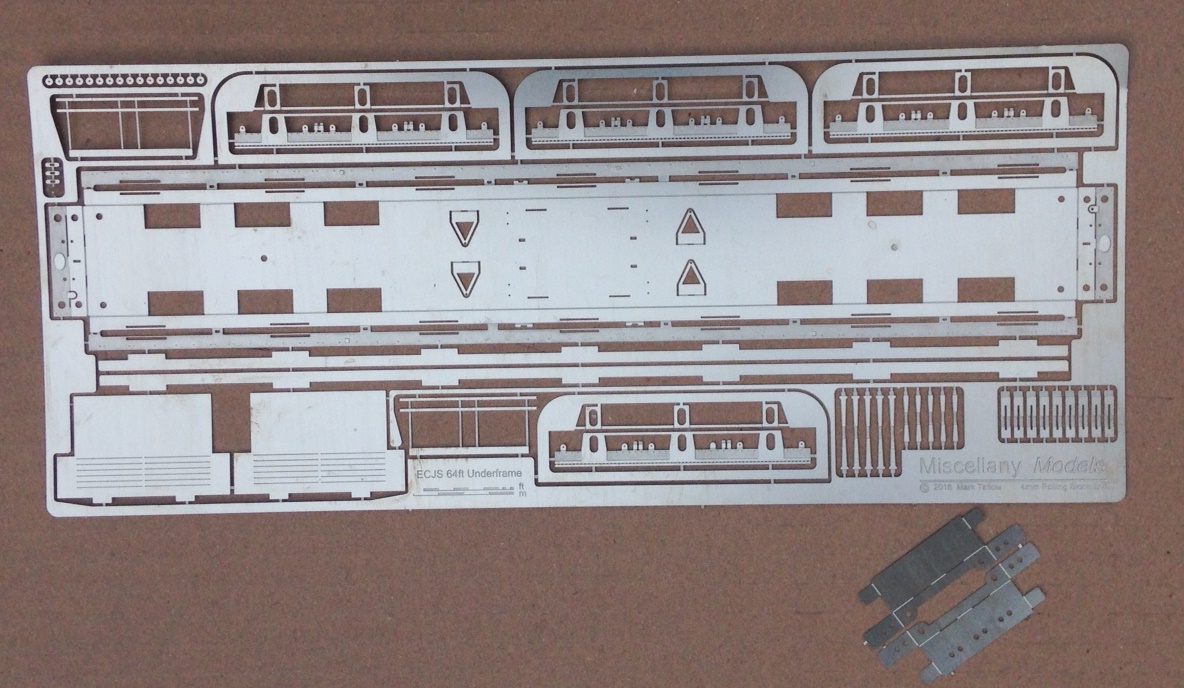
My etchings back from PPD
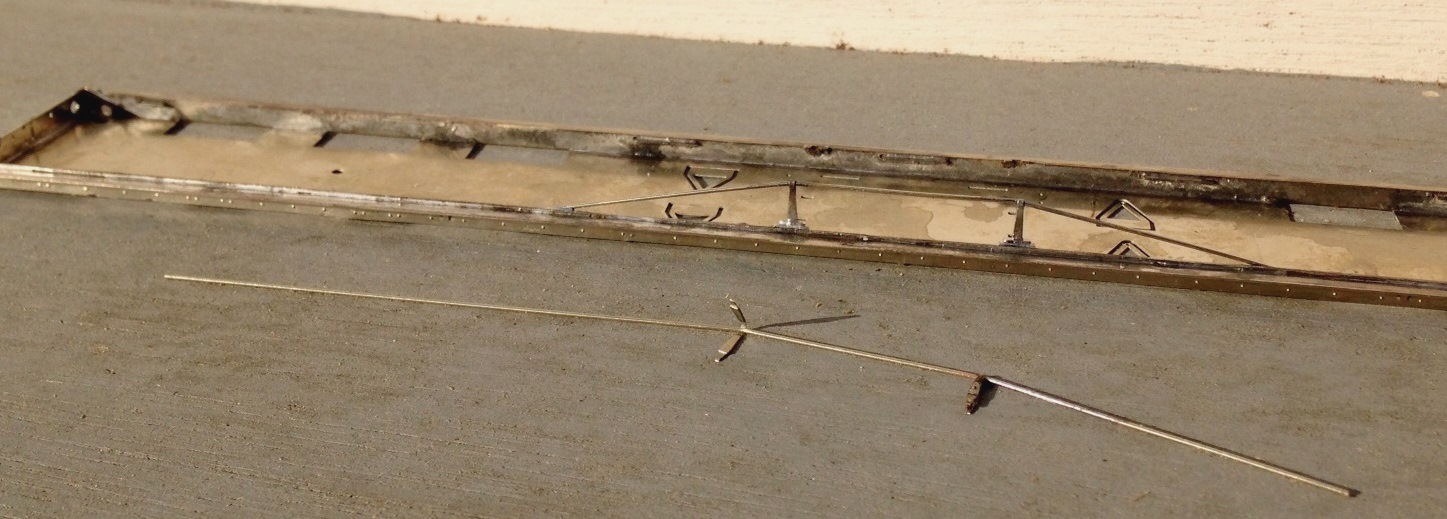
One of the reasons that this model was put to the back of the queue previously was that almost none of the parts required to complete it – in particular the bogies – were available, so it was all going to be a scratchbuild. As I was pouring over the drawings and pictures in the bible on things ECJS it dawned on me that the missing parts would be best dealt with as an etch and given my developing skills in etch designing, I might was well have a go. This is the product, an underframe, some cosmetic bogie sidesand some underframe details fresh back from the etchers.
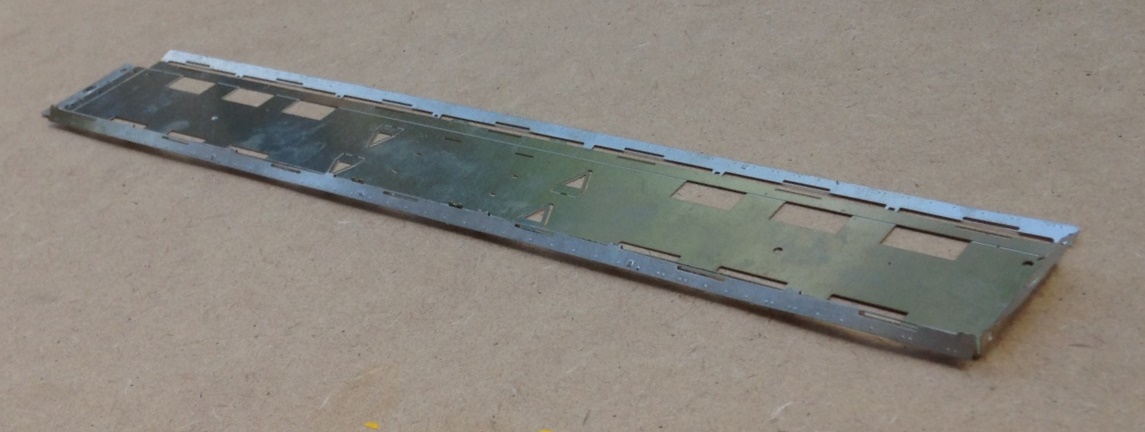
The basic underframe has fold up solebars and buffer beams. Each of these also has integral fold over layers to laminate on the cosmetic exterior. This just about worked for the solbars but definitely did not for the buffer beams which distorted due to their thinness. I will make these seperate pieces next time, but might use folding jigs.
Coaches of this era tended to have four truss rods, each with a pair of queen posts. Stealing an idea from Alistair Wright’s designs, I made the queen posts up by a long etch that has a half etch length to wrap around the wire used for the tie rod. By folding this over the wire and then laminating the two parts together, a robust and simple post can be created. As it is two layers soldered together, it has the strength to allow it to be filed to a round shape to create the appearance of the original.
Although originally gas lit, by the time I will be modelling this vehicle it was electrically lit. Whilst I probably could have bought cast batter boxes, I decided to include them in the etch and very pleased I am too – they have come out much more crisp than any of the castings I have seen and were really easy to both draw and make. The remainder of the fittings seen here were bought in castings though, typically from Comet Models (now distributed by Wizard Models).
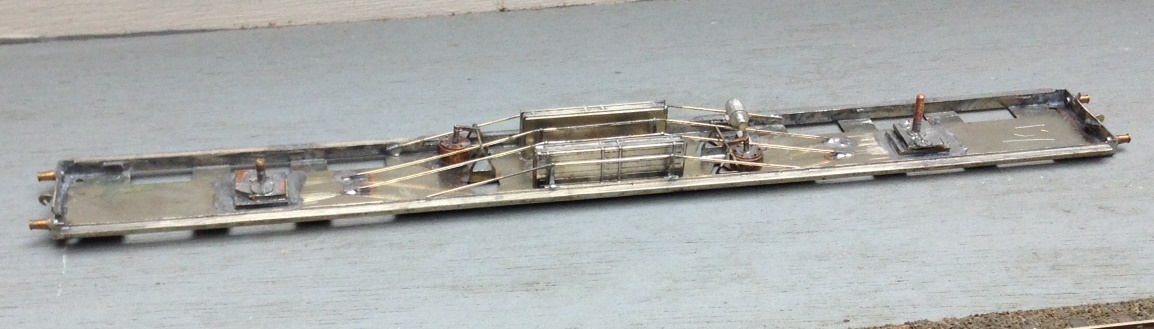
And this is where the underframe has presently progressed to.
I will describe the building of the bogies in the next installment, they are not for the faint-hearted!
