Blog Archives

Fuel for Thought
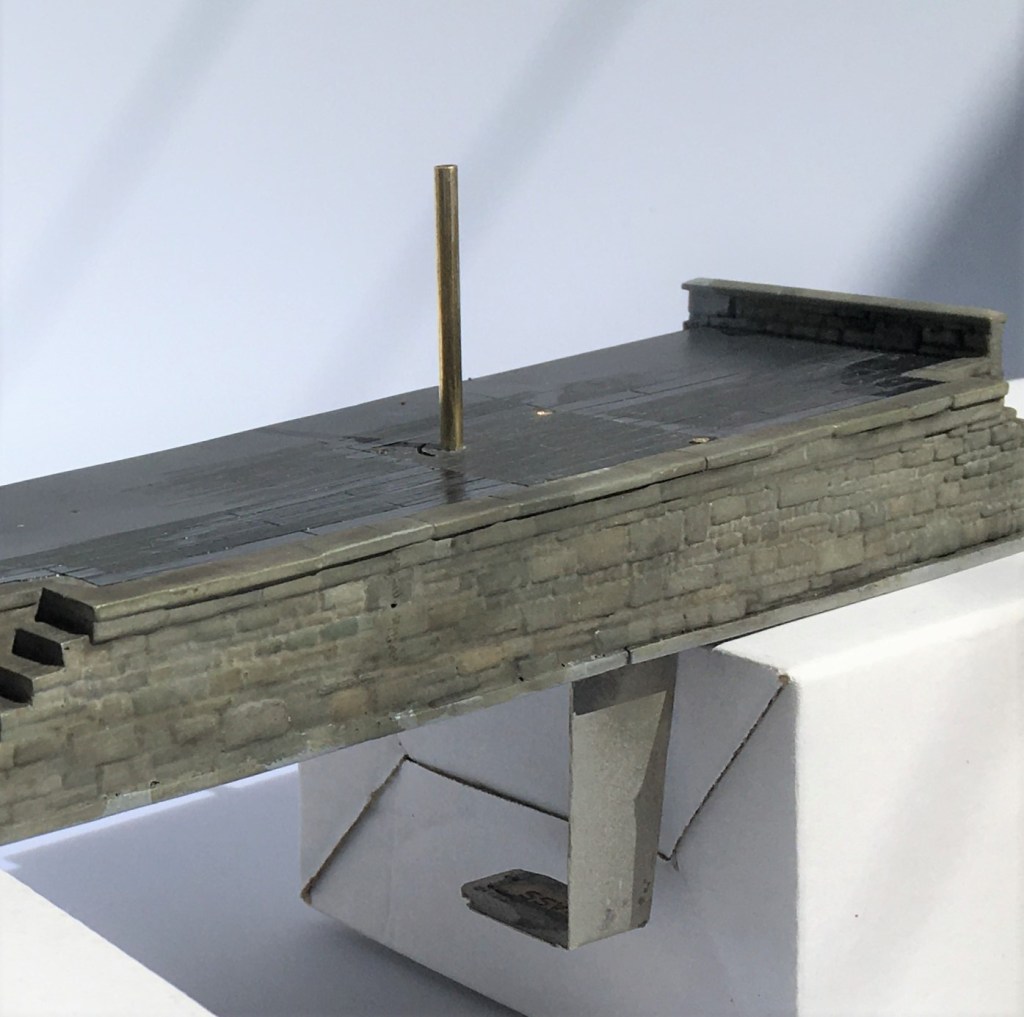
Obviously, where there is water in a locomotive yard, there really ought to be coal too.
The Highland, like many other railway companies of the time (certainly the Scottish ones), sought to stockpile coal. This was presumably insurance against coal strikes and allowed them to purchase coal at times when the price was favourable. Thus, quite substantial coal stacks where very much a feature of shed areas in the pre-grouping era. Typically, these were arranged in engineered stacks, with the sides formed in “dry-coal walling” and then loose coal behind. I can’t recall ever seeing this modelled, so I though I would change that!
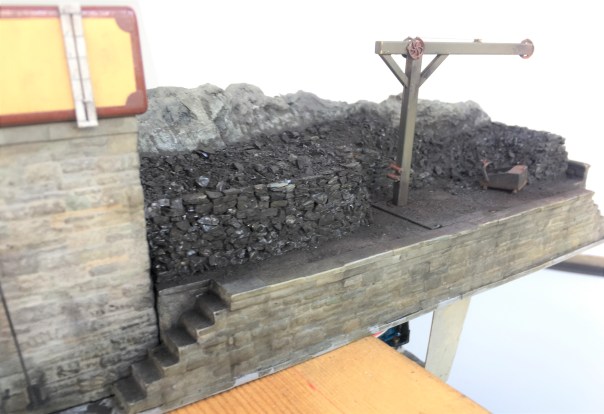
The actual structure of the loading bank was formed in plasticard and Wills random stone sheets, but with the mortar courses softened as I described for the water towers. The shape of the coal stack was formed with a piece of house insulation left over from a DIY job and then real coal used to form the effect of…..err……real coal. Actually, real coal does not look quite like real coal without a bit of effort. It does shatter into angular but irregular lumps like real coal (especially if lignite coal is used) but its glossiness does not scale down. However, a vigorous brush with generous amounts of soot black weathering powder takes the gloss back and the whole becomes quite convincing. You do feel as if you are going to get pretty filthy if you go up onto the bank – and until the whole is fixed with matt varnish, you would!
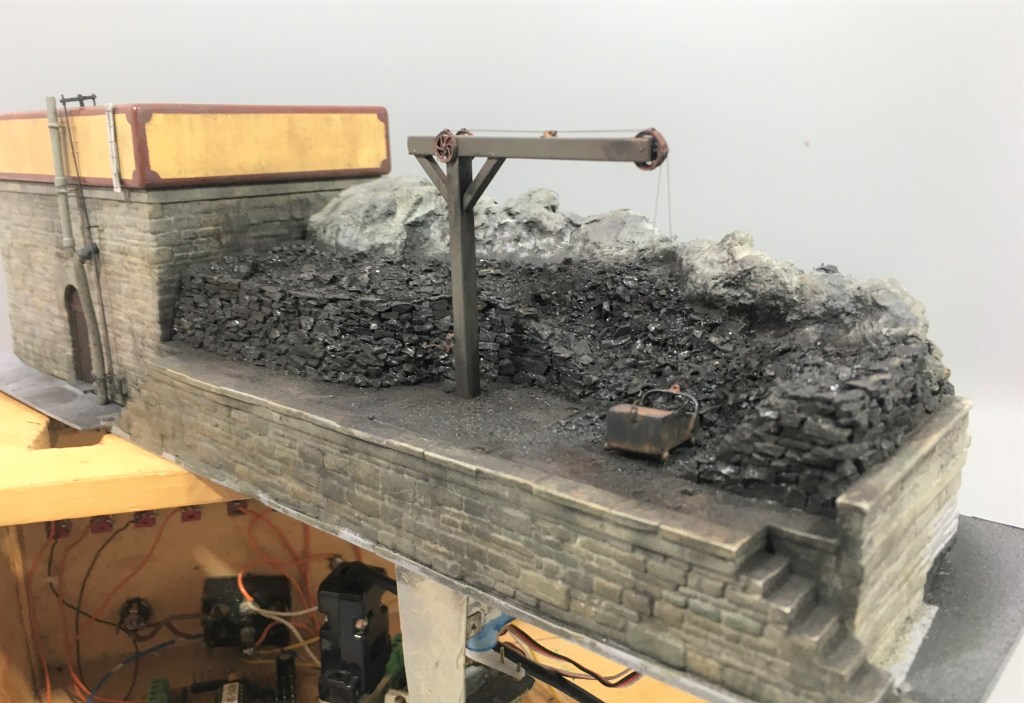
Individual coal chunks were glued in place to form the wall structure. To get the effect, it is not enough to simply scatter the coal onto a bed of glue each chunk has to be laid individually with care taken to lock it into the course below – just like a real dry stone wall. Thus, the vertical walls of this took about a day to complete, scattered over about 8 stints because it is necessary to let the glue dry after every couple of courses to stop the layers collapsing. It is then possible to scatter the loose material behind the walls onto a layer of glue – the above picture shows the contrast in effects between the two methods.
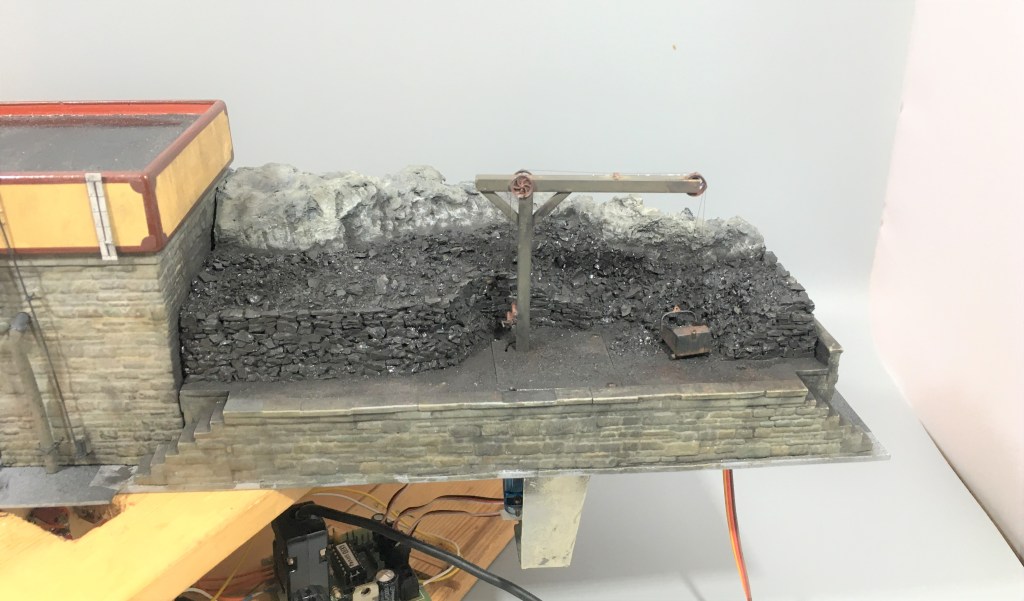
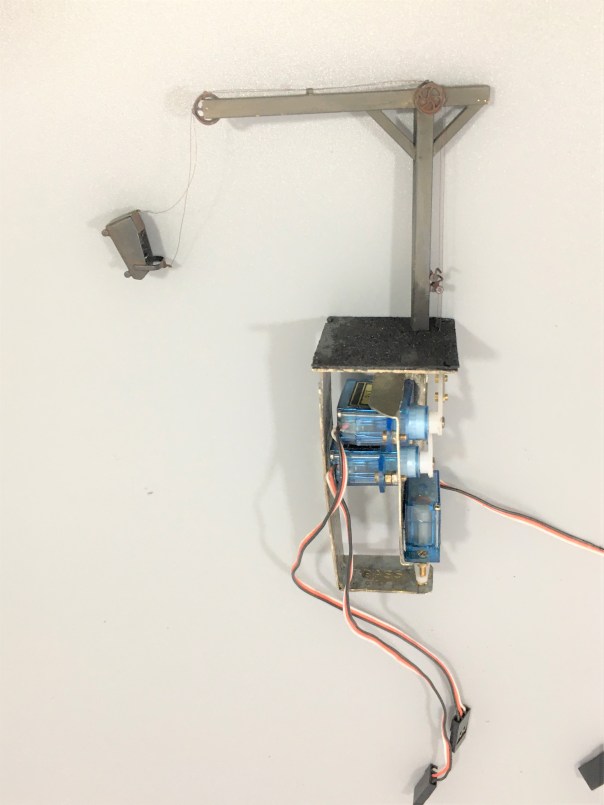
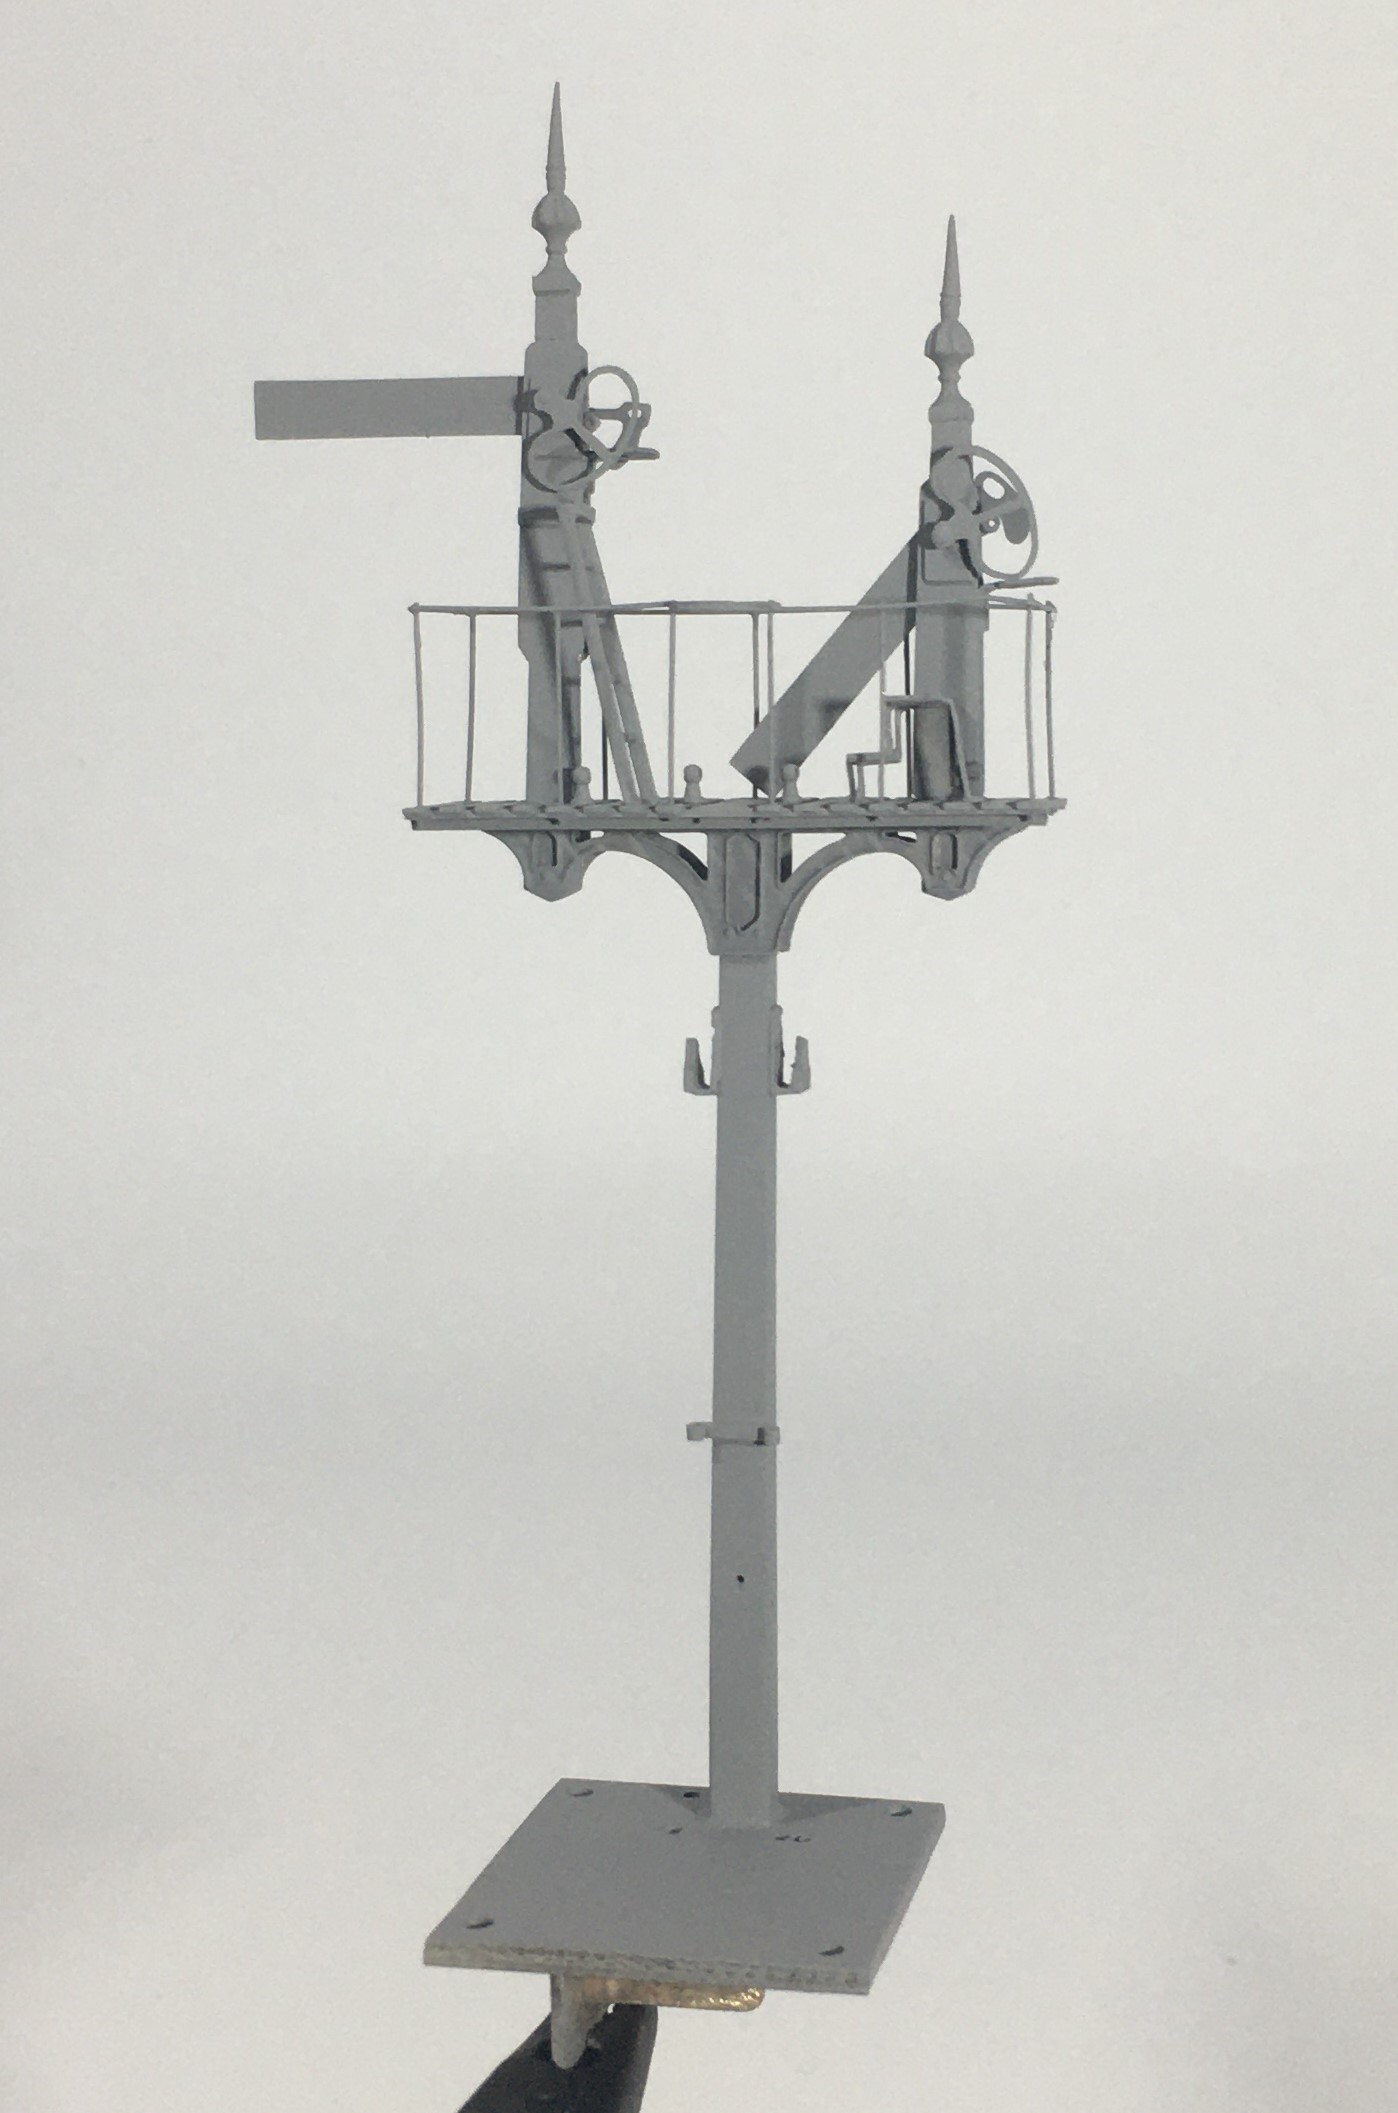
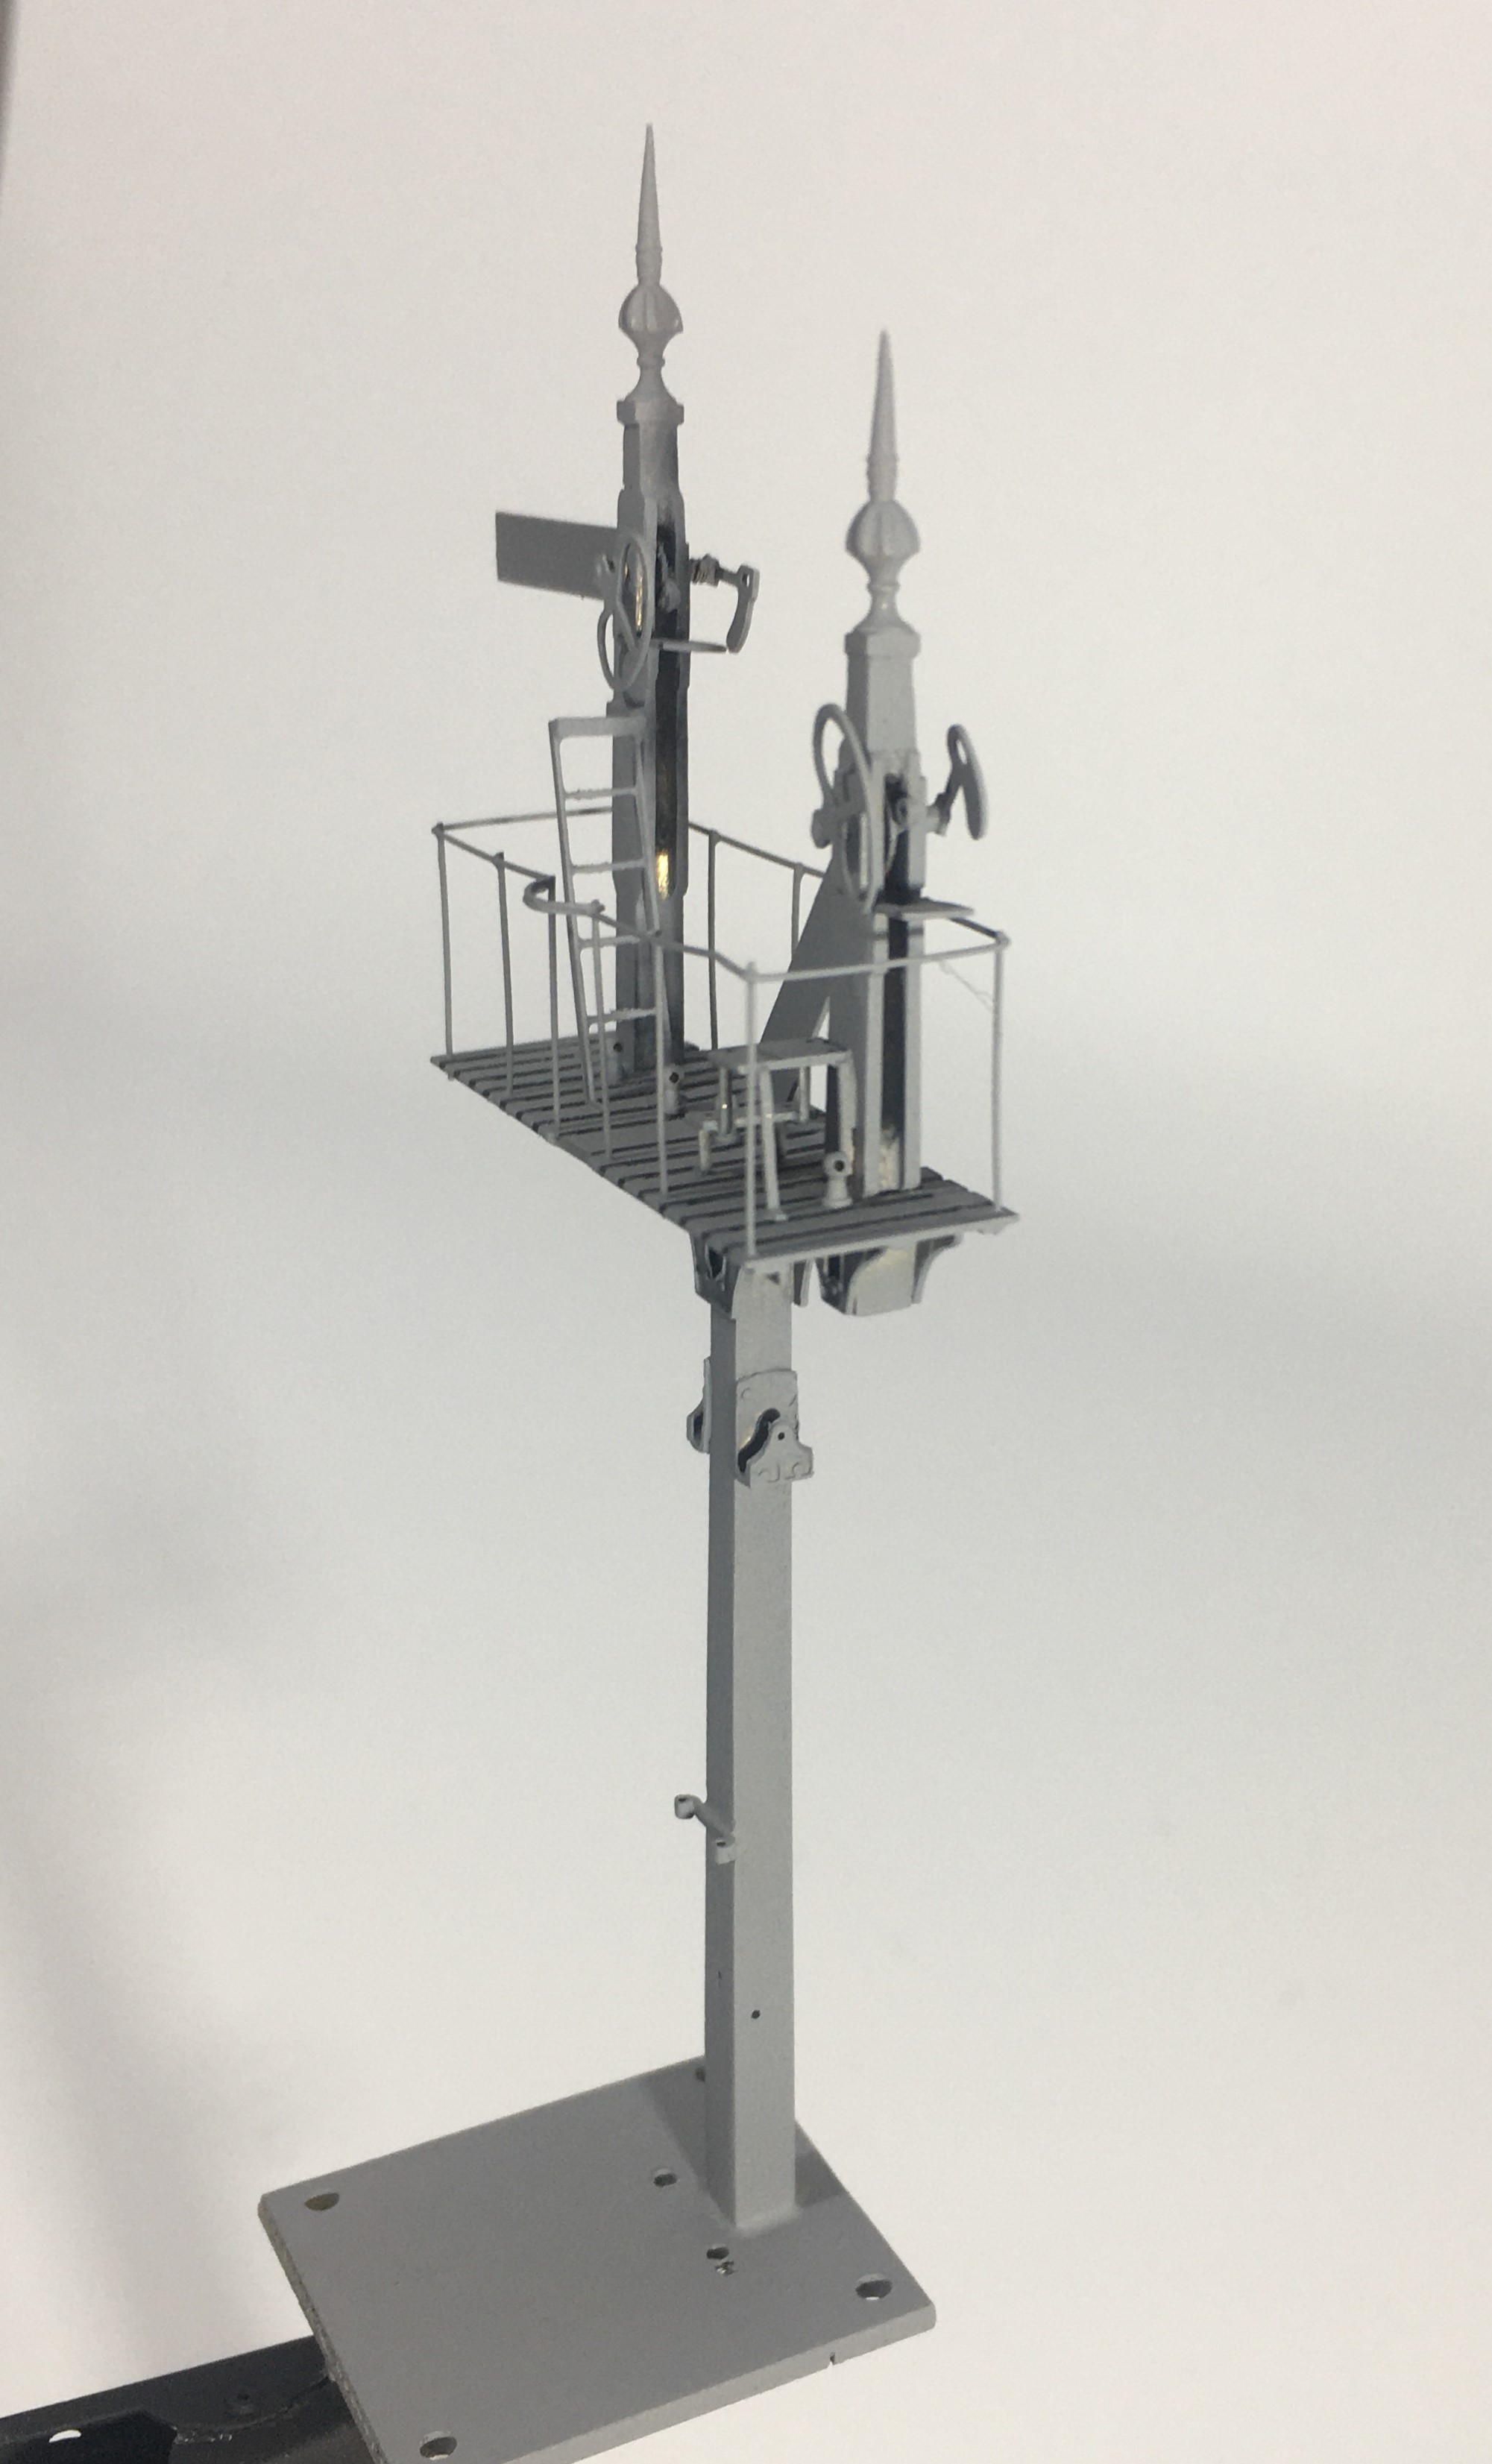
But it is hard work shovelling coal into tenders, especially as the locos got larger and their tenders higher. As befitting such an important place as Glenmutchkin, it has all the modern amenities for coaling engines, a hand crane and a large bucket! In this case, I have fitted servos to this so that it operates – partly as a bit of fun and also to slow things down in the yard to a more realistic pace without it getting too boring for the viewer.
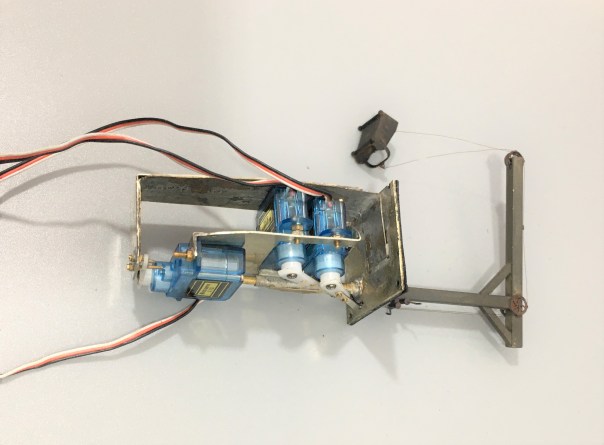
The crane operation was achieved by way of three servos – one to rotate it and then one each for the front and rear of the coal bucket. These are all mounted onto a cradle that is rotated by the former – thus as the crane rotates so too do all the servos and there is a quadrant shaped slot in the base to the rear of the post (just visible in the picture above) that allows the cables to rotate too without snagging.
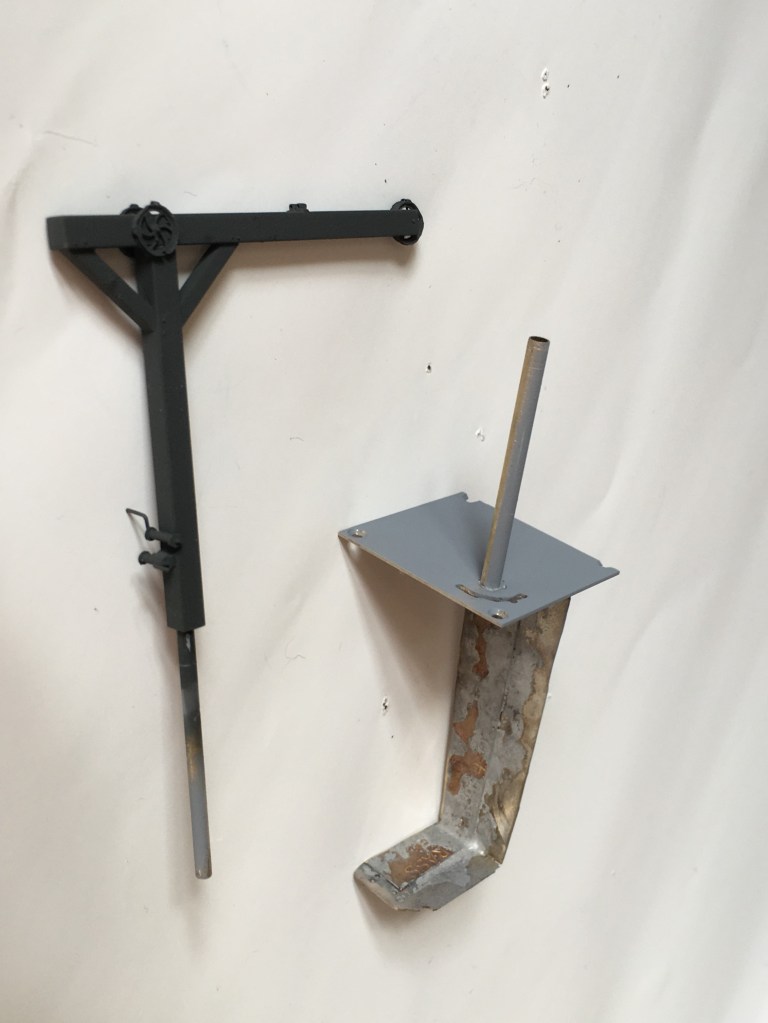
The cradle is mounted to a solid rod that is in turn secured to the actual crane. This then slides into the rod that can be seen projecting from the base in the picture above. This means that there is limited strain on the crane or the mount as I had feared it might otherwise snap with any heavy-handedness on my part (something I am prone to!). The rest of the crane was made with brass hollow section and pulley wheels from Bill Bedford. A series of guides were made of small section tube on the pulley wheels, at the winding drum and across the jib to retain the operating cables.
The bucket was fashioned from metal sheet and is filled with low melt solder to give it as much weight as possible. It is secured to the servo arms with invisible thread – which is a nylon seamstresses material used for making invisible stitches. It comes in both clear (which really is invisible) and black, I used the latter. It is much better than cotton thread as that has a furry finish that looks terrible after a time or if it is painted. It is, however, very fine and rather wriggly to knot, so using it involves a certain amount of cussing!
And this is what it looks like in operation…………
A little of the bouncing about of the bucket is caused by it sitting on my servo test rig, so the act of changing the switches imparts a little vibration. Hopefully, when mounted on the layout this will be less obvious.
I do still need to do the final detailing on this; tools, a bit of discarded debris and a couple of fellas from Modelu standing around doing nothing (because static people in animated poses look silly on a model layout!).
Only the printable words for this Wednesday!
Hmmmm……..
A signal imitating a Fresian cow was not the effect I was after…………..
Halfords etch primer is obviously not that etchy!…………….. So someone will be waiting a tad longer for their signal than I thought…………

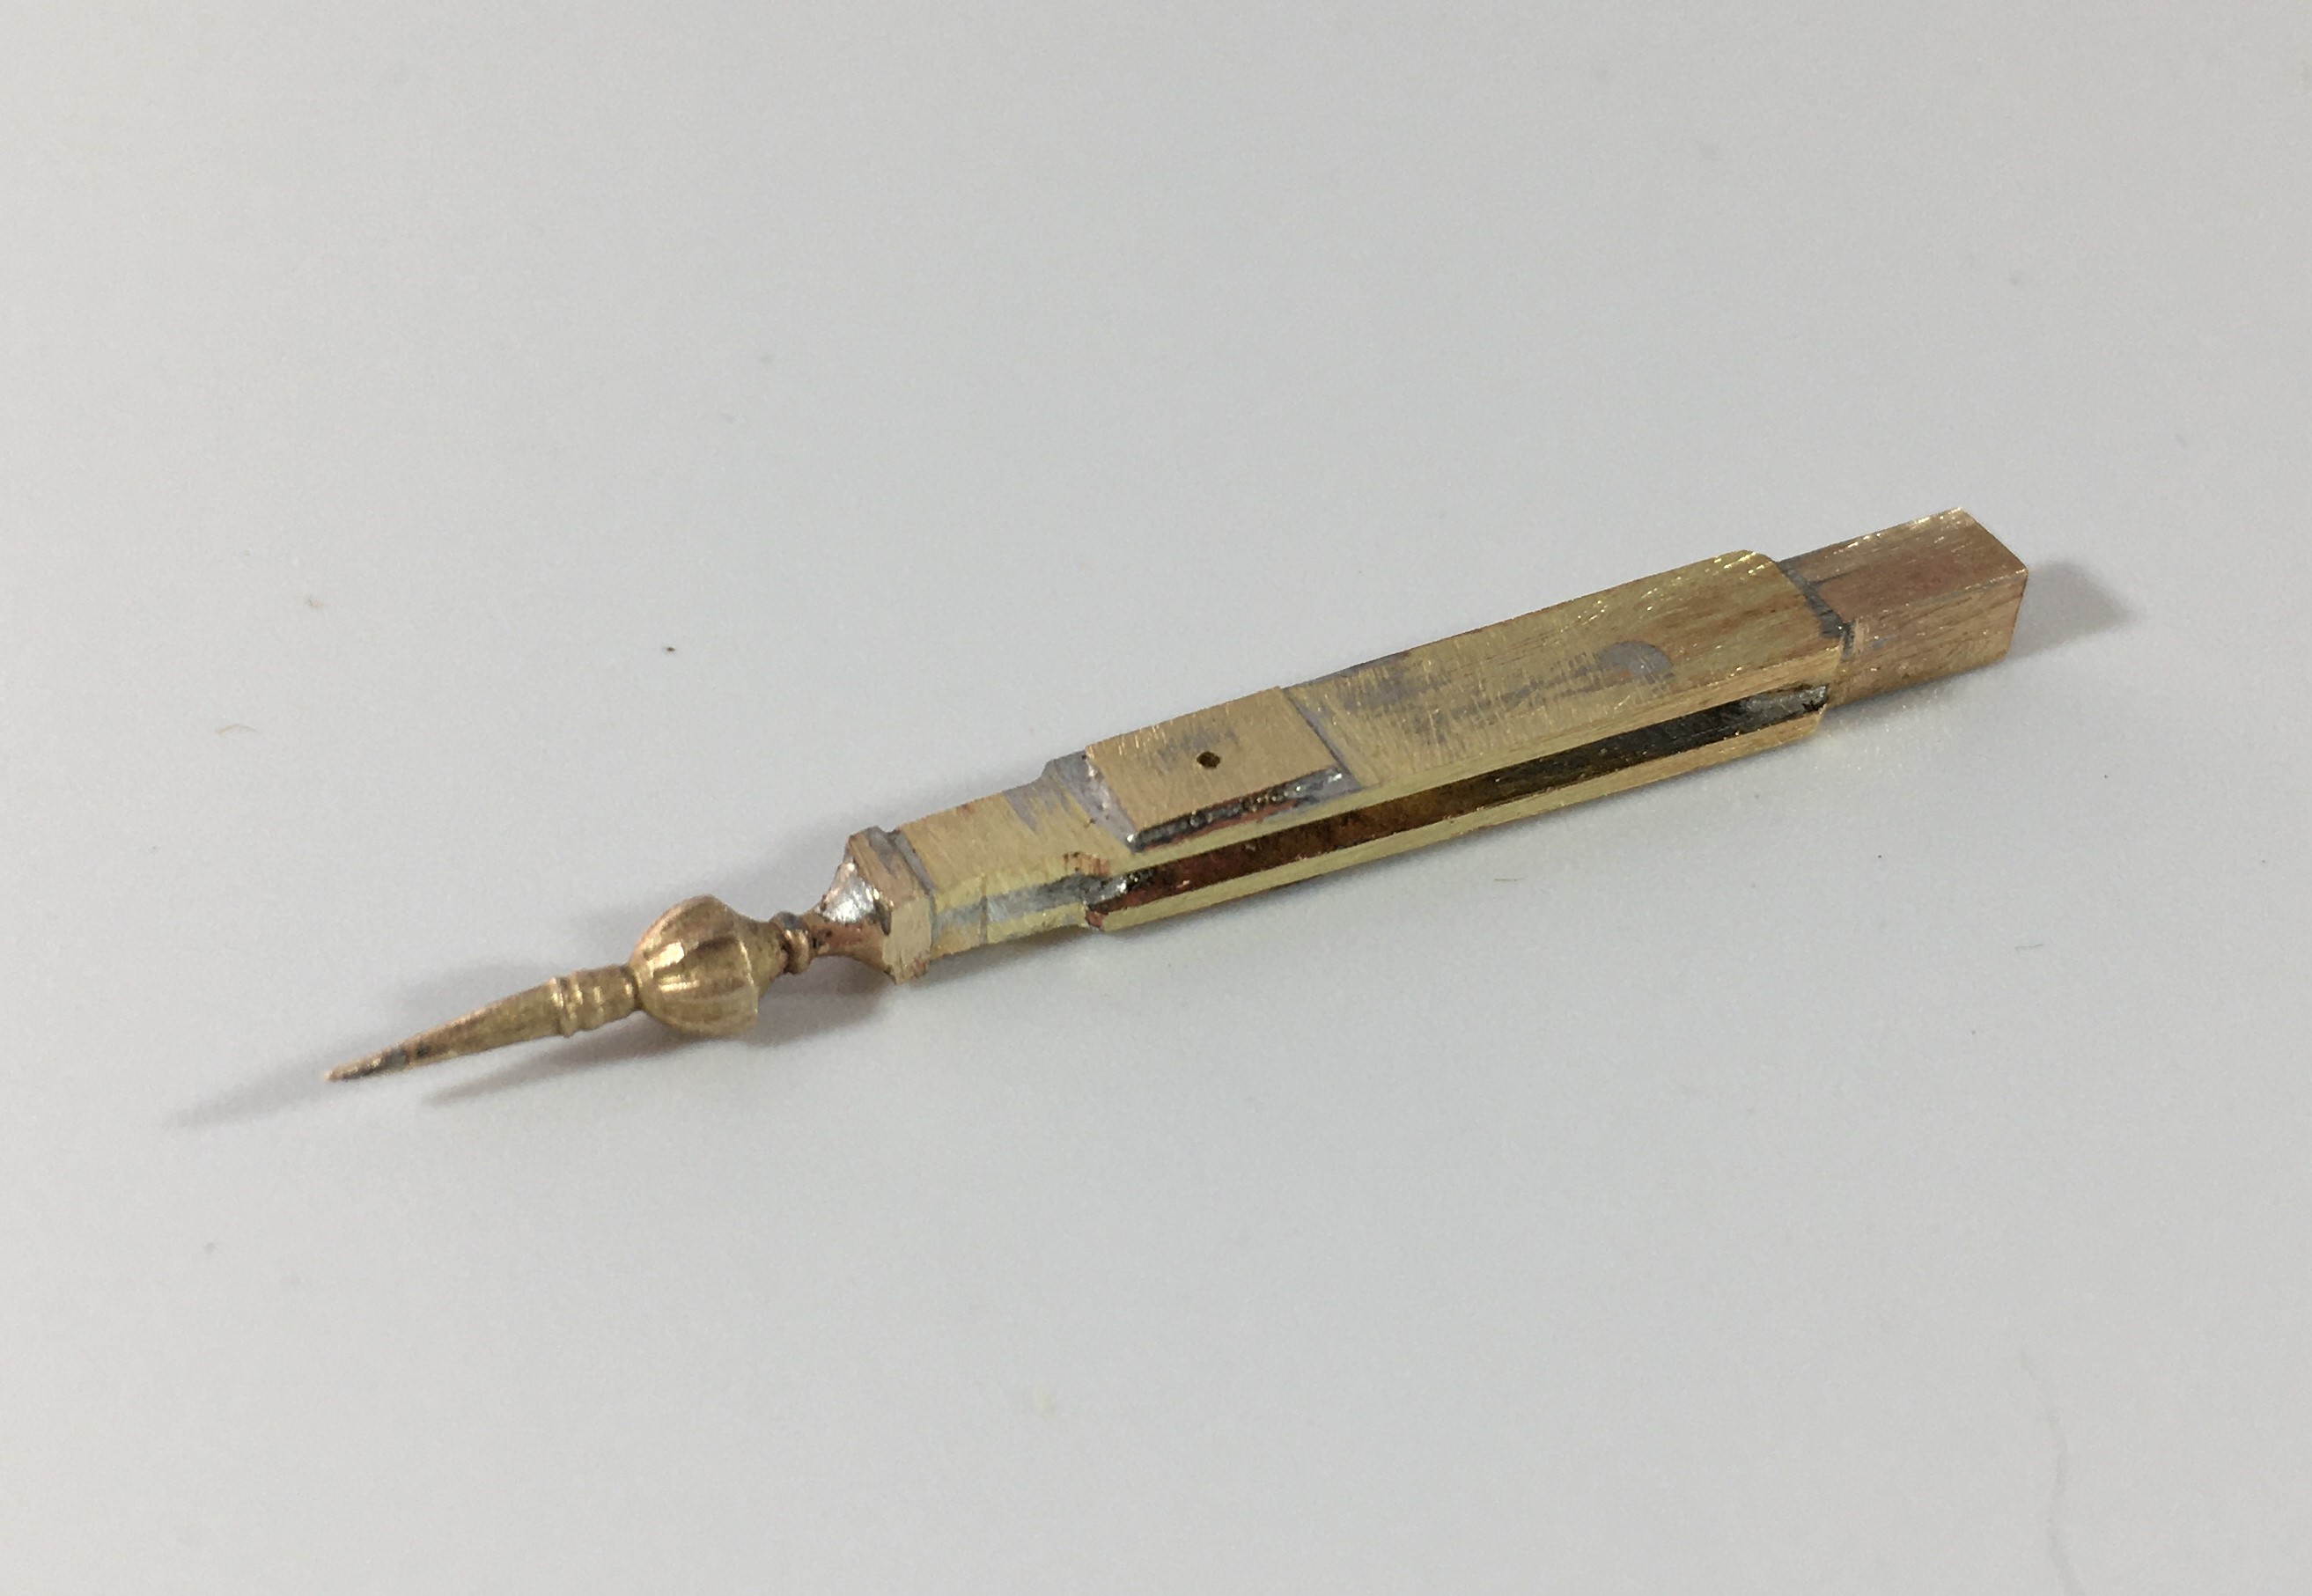
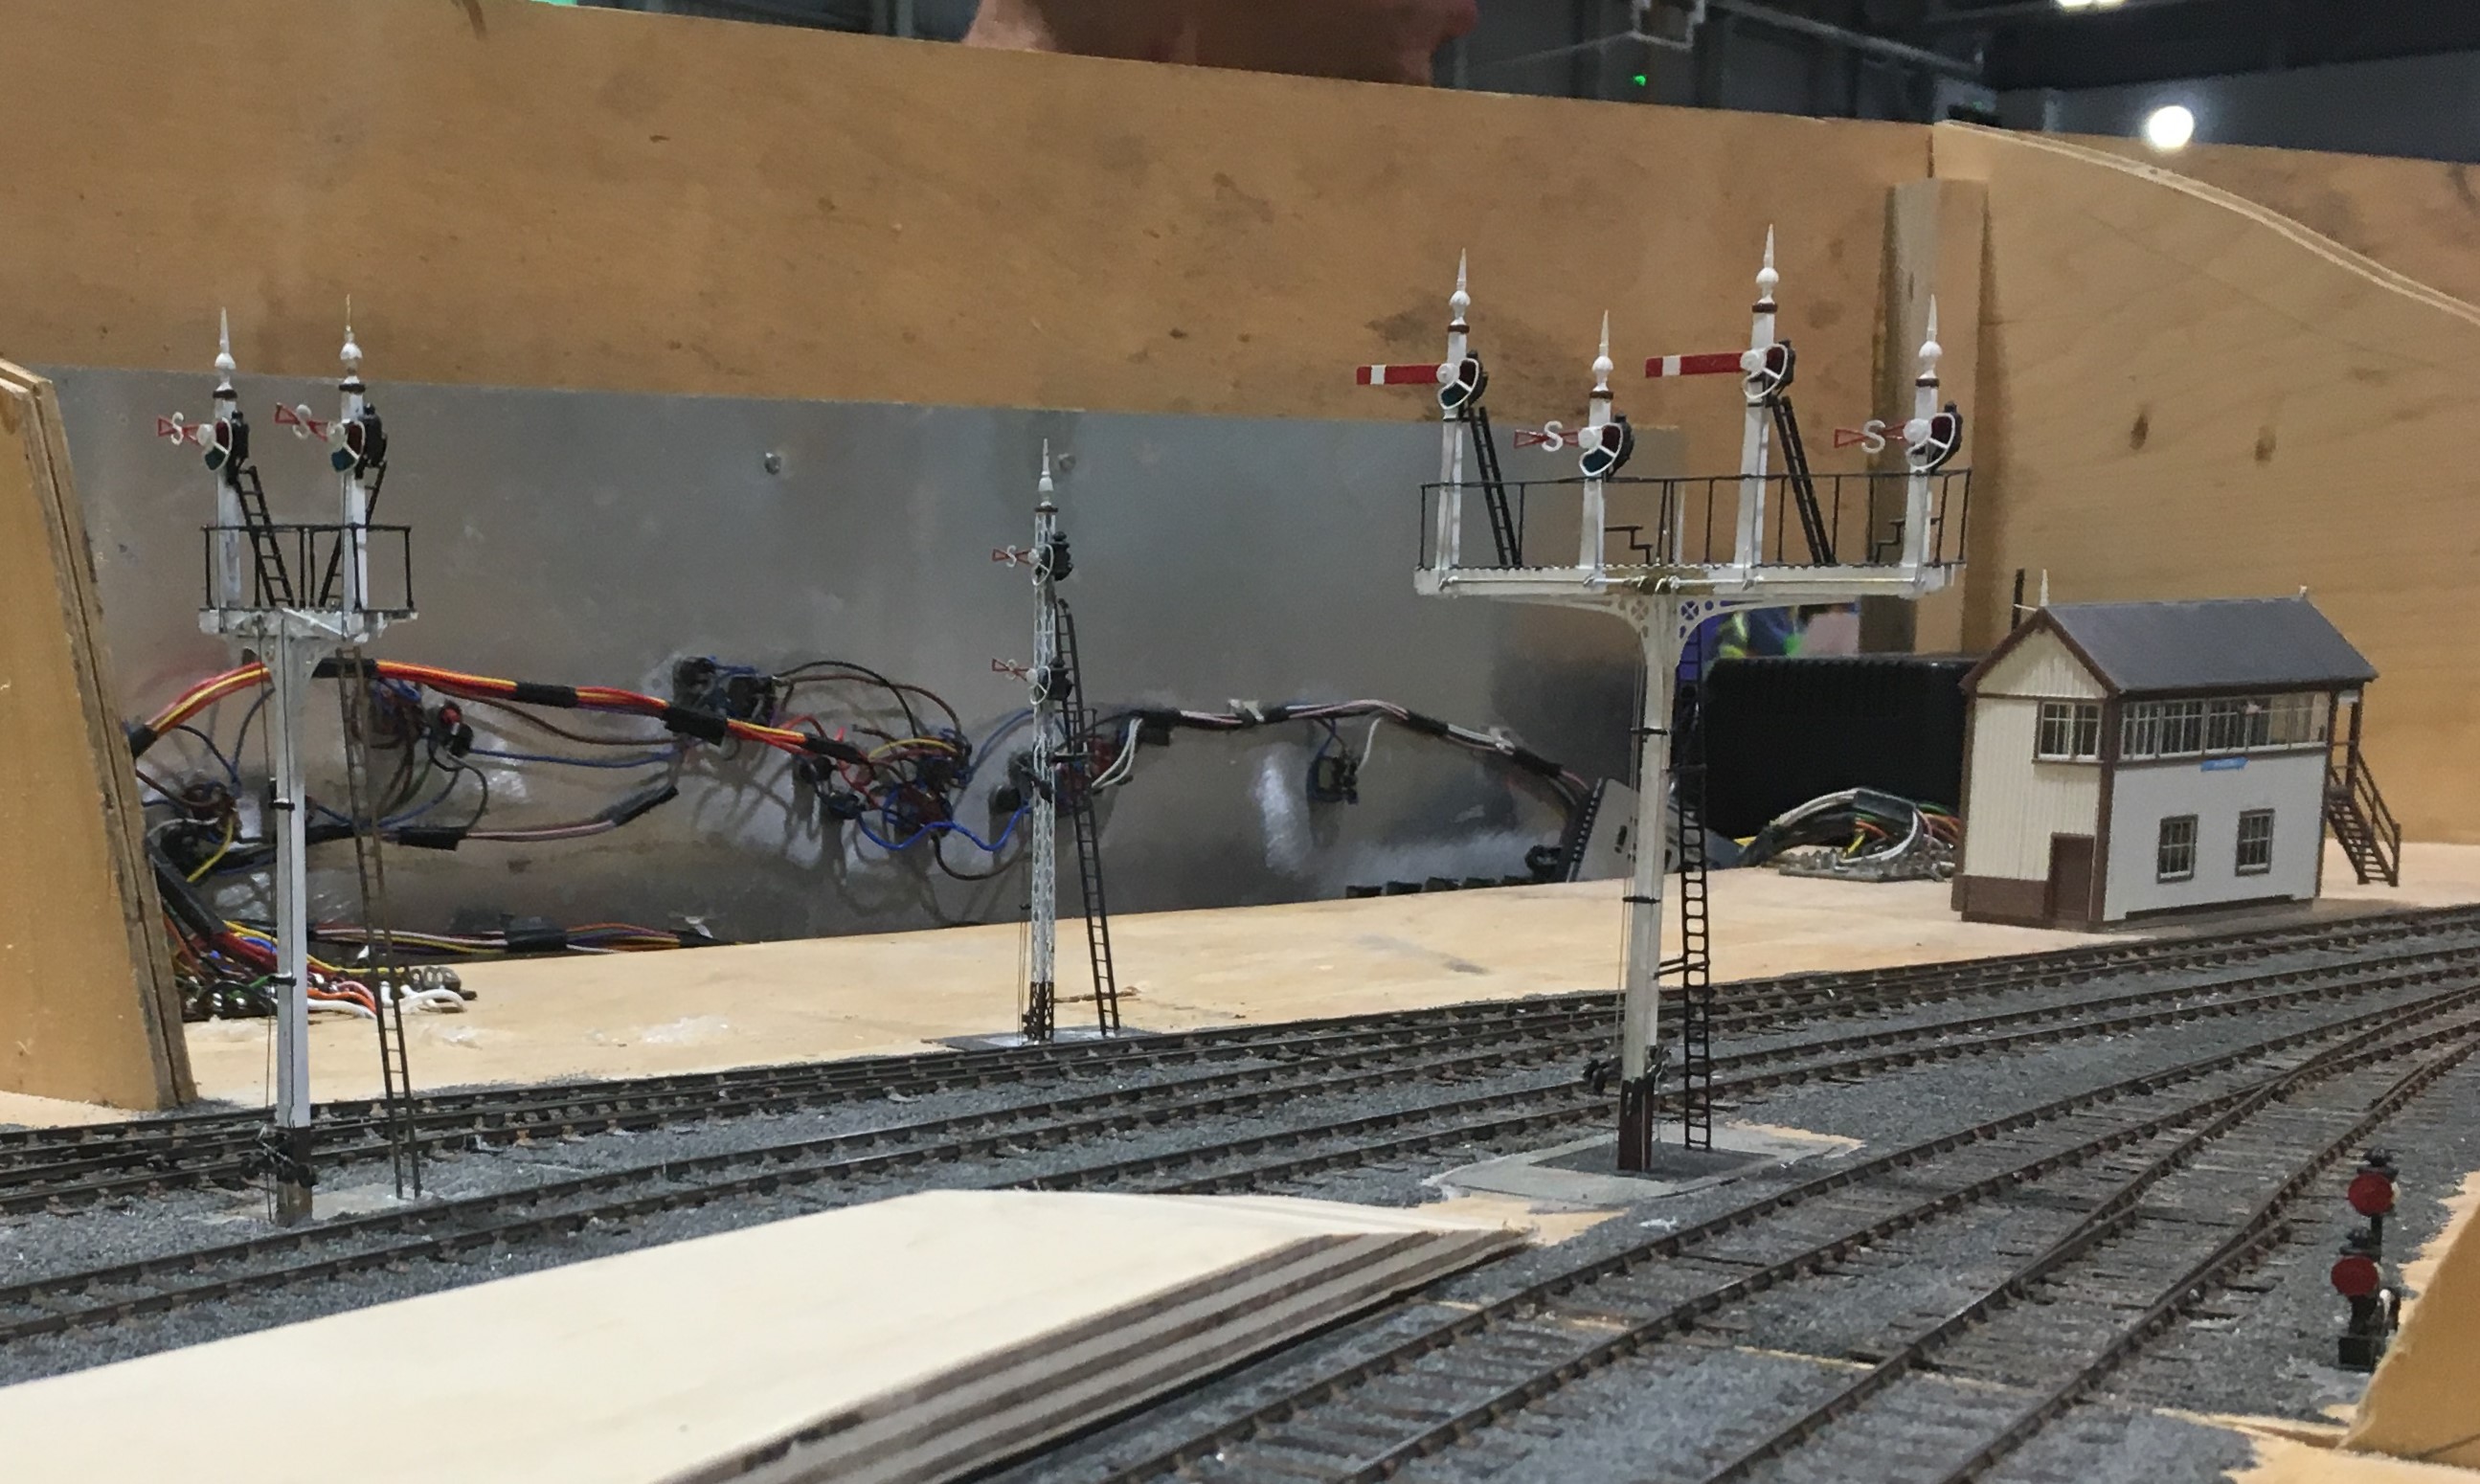
Benfieldside’s Missing Signal
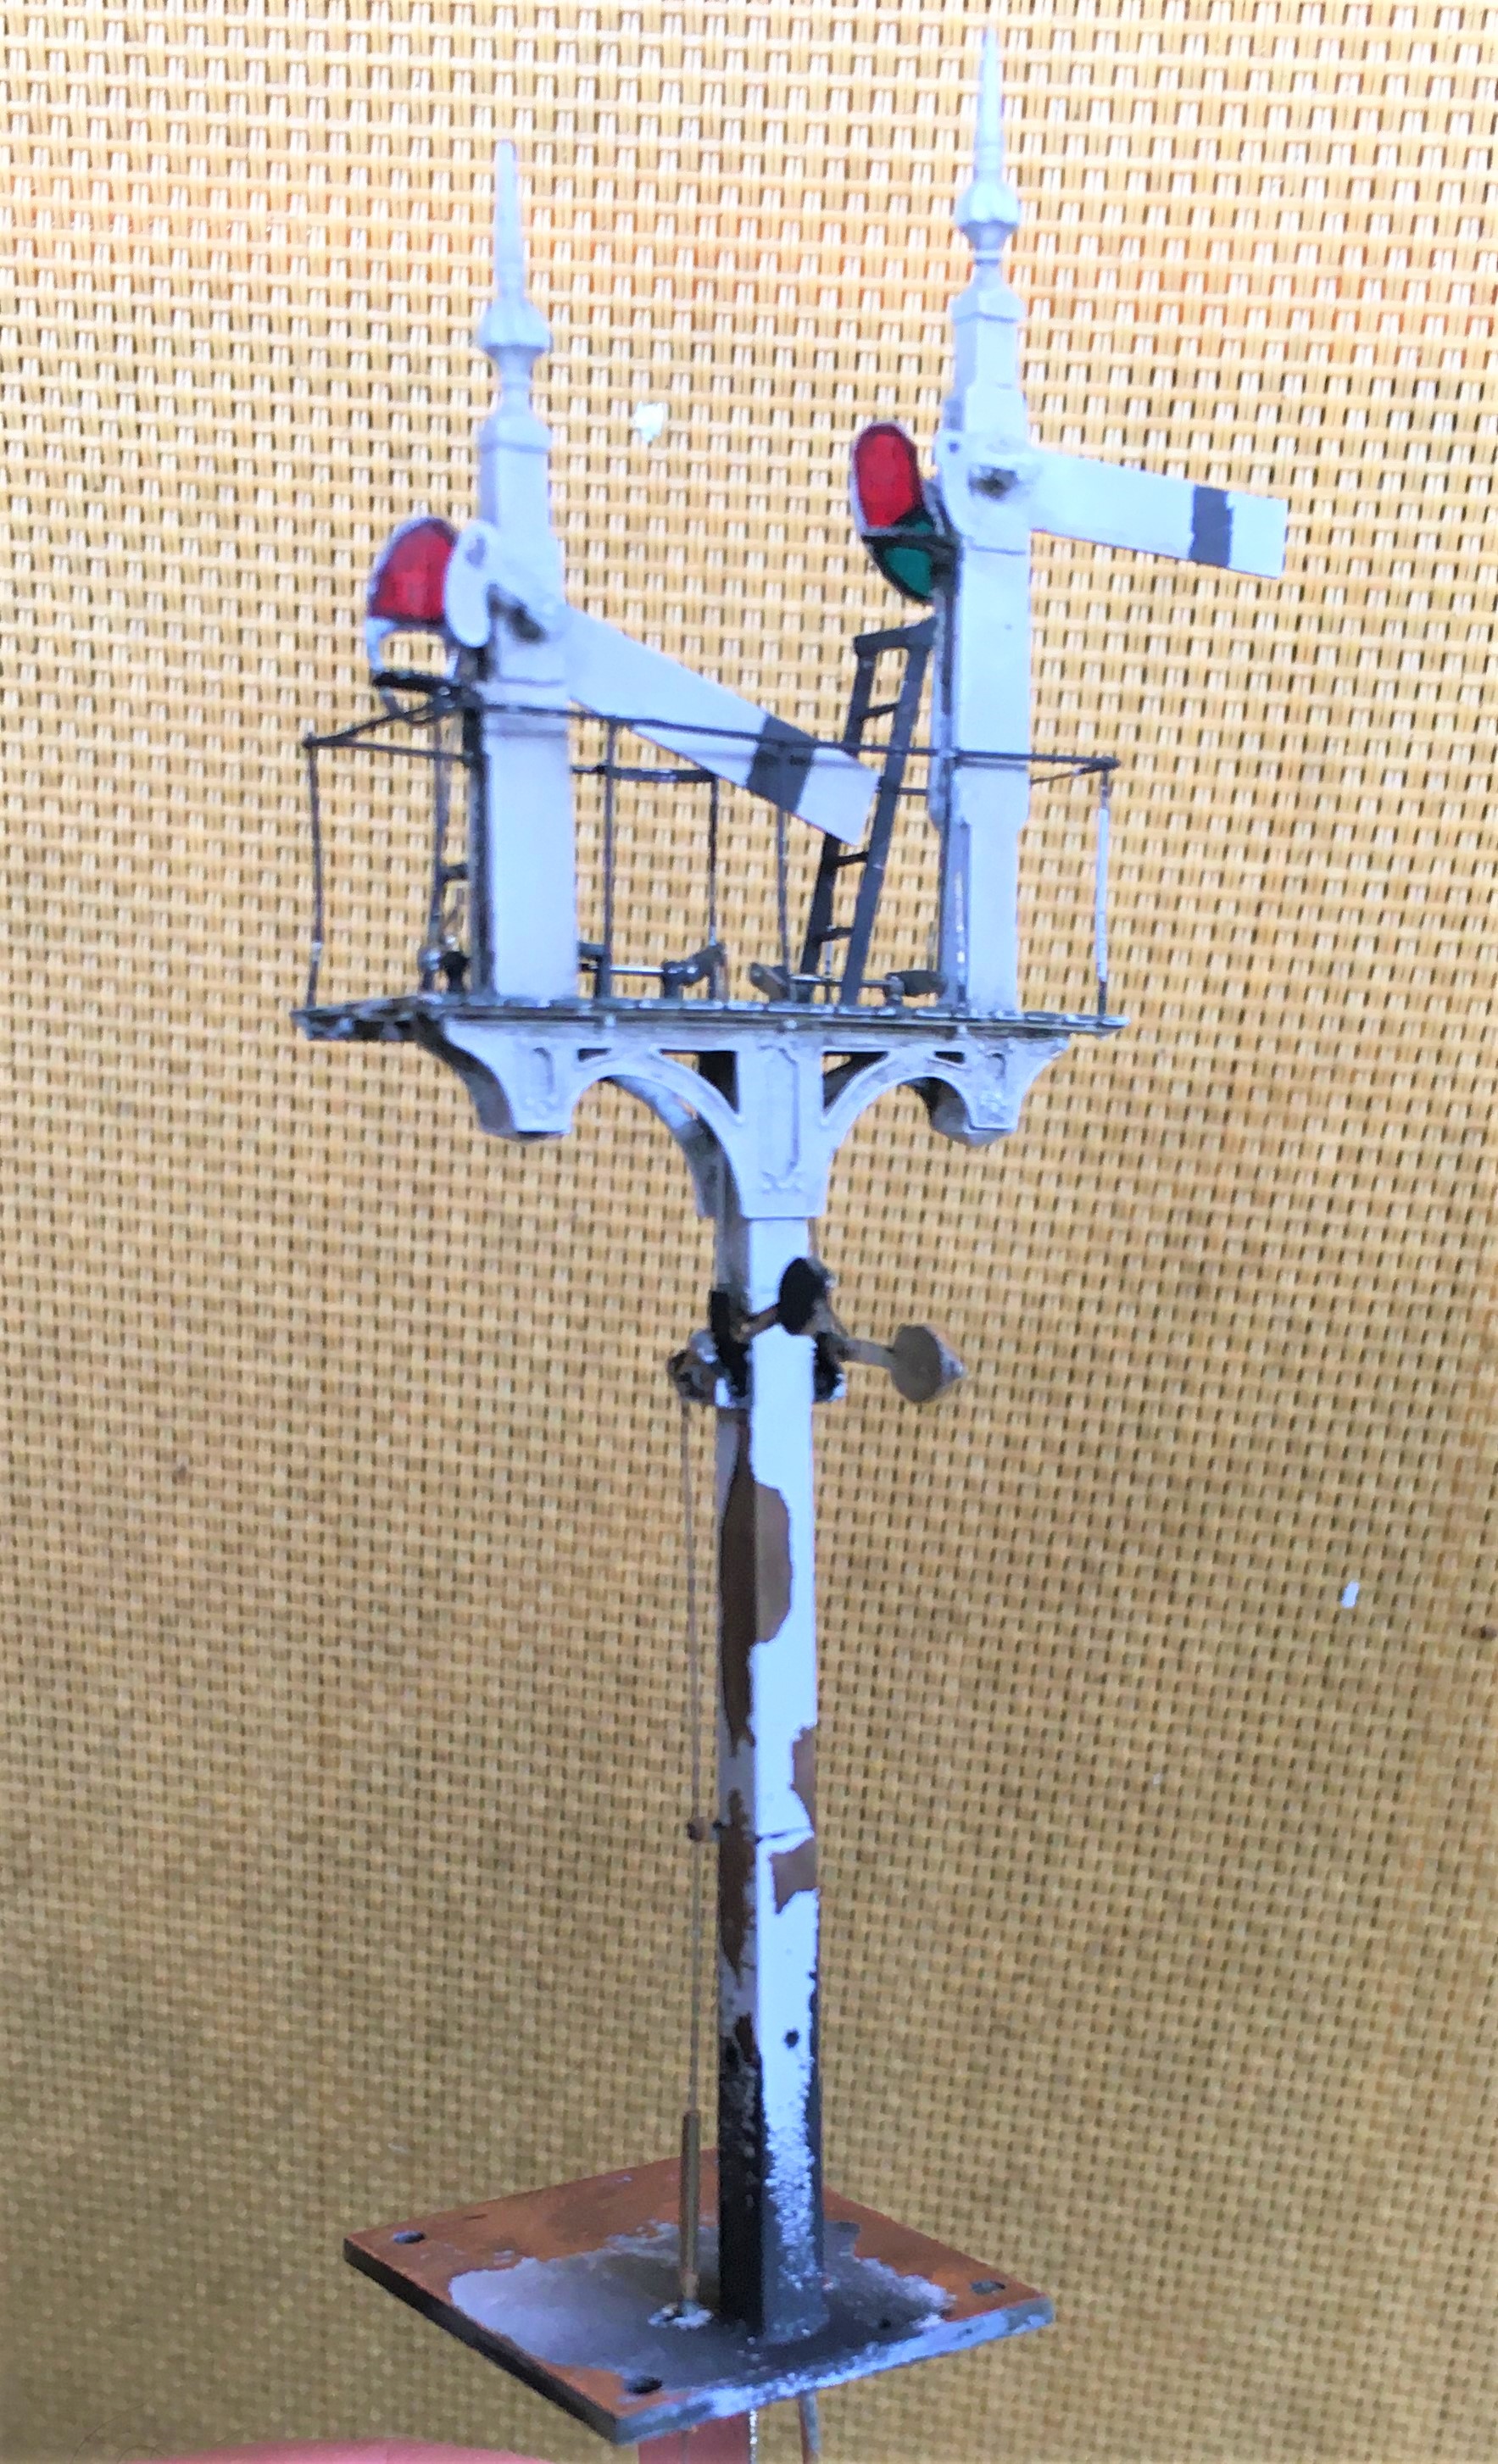
When my friends acquired Benfieldside, it had suffered a bit of damage, notably to its signals – in essence it was this that got me volunteered for their restoration! One signal that puzzled us, however, was the up starter which was missing altogether and we could not unearth any photographs of it. Ultimately, we decided that it should be a two doll signal to also control the adjacent bay (which did have a signal, albeit inoperative) – so I have set to in order to fill this gap.
The line is set in Cumbria and is an imaginary westward extension of the Newcastle & Carlise line. In theory, therefore, it should not have the heavy cast iron brackets that the NER used. However, in reviewing the NERA’s signalling book, it became apparent that there were quite a lot of strays of signal designs, so I had an excuse to build one!

As this particular signal is going to be platform mounted, I did not need to sort out a mount for it and moved straight to the post and bracket, the latter being by MSE which I had in stock.
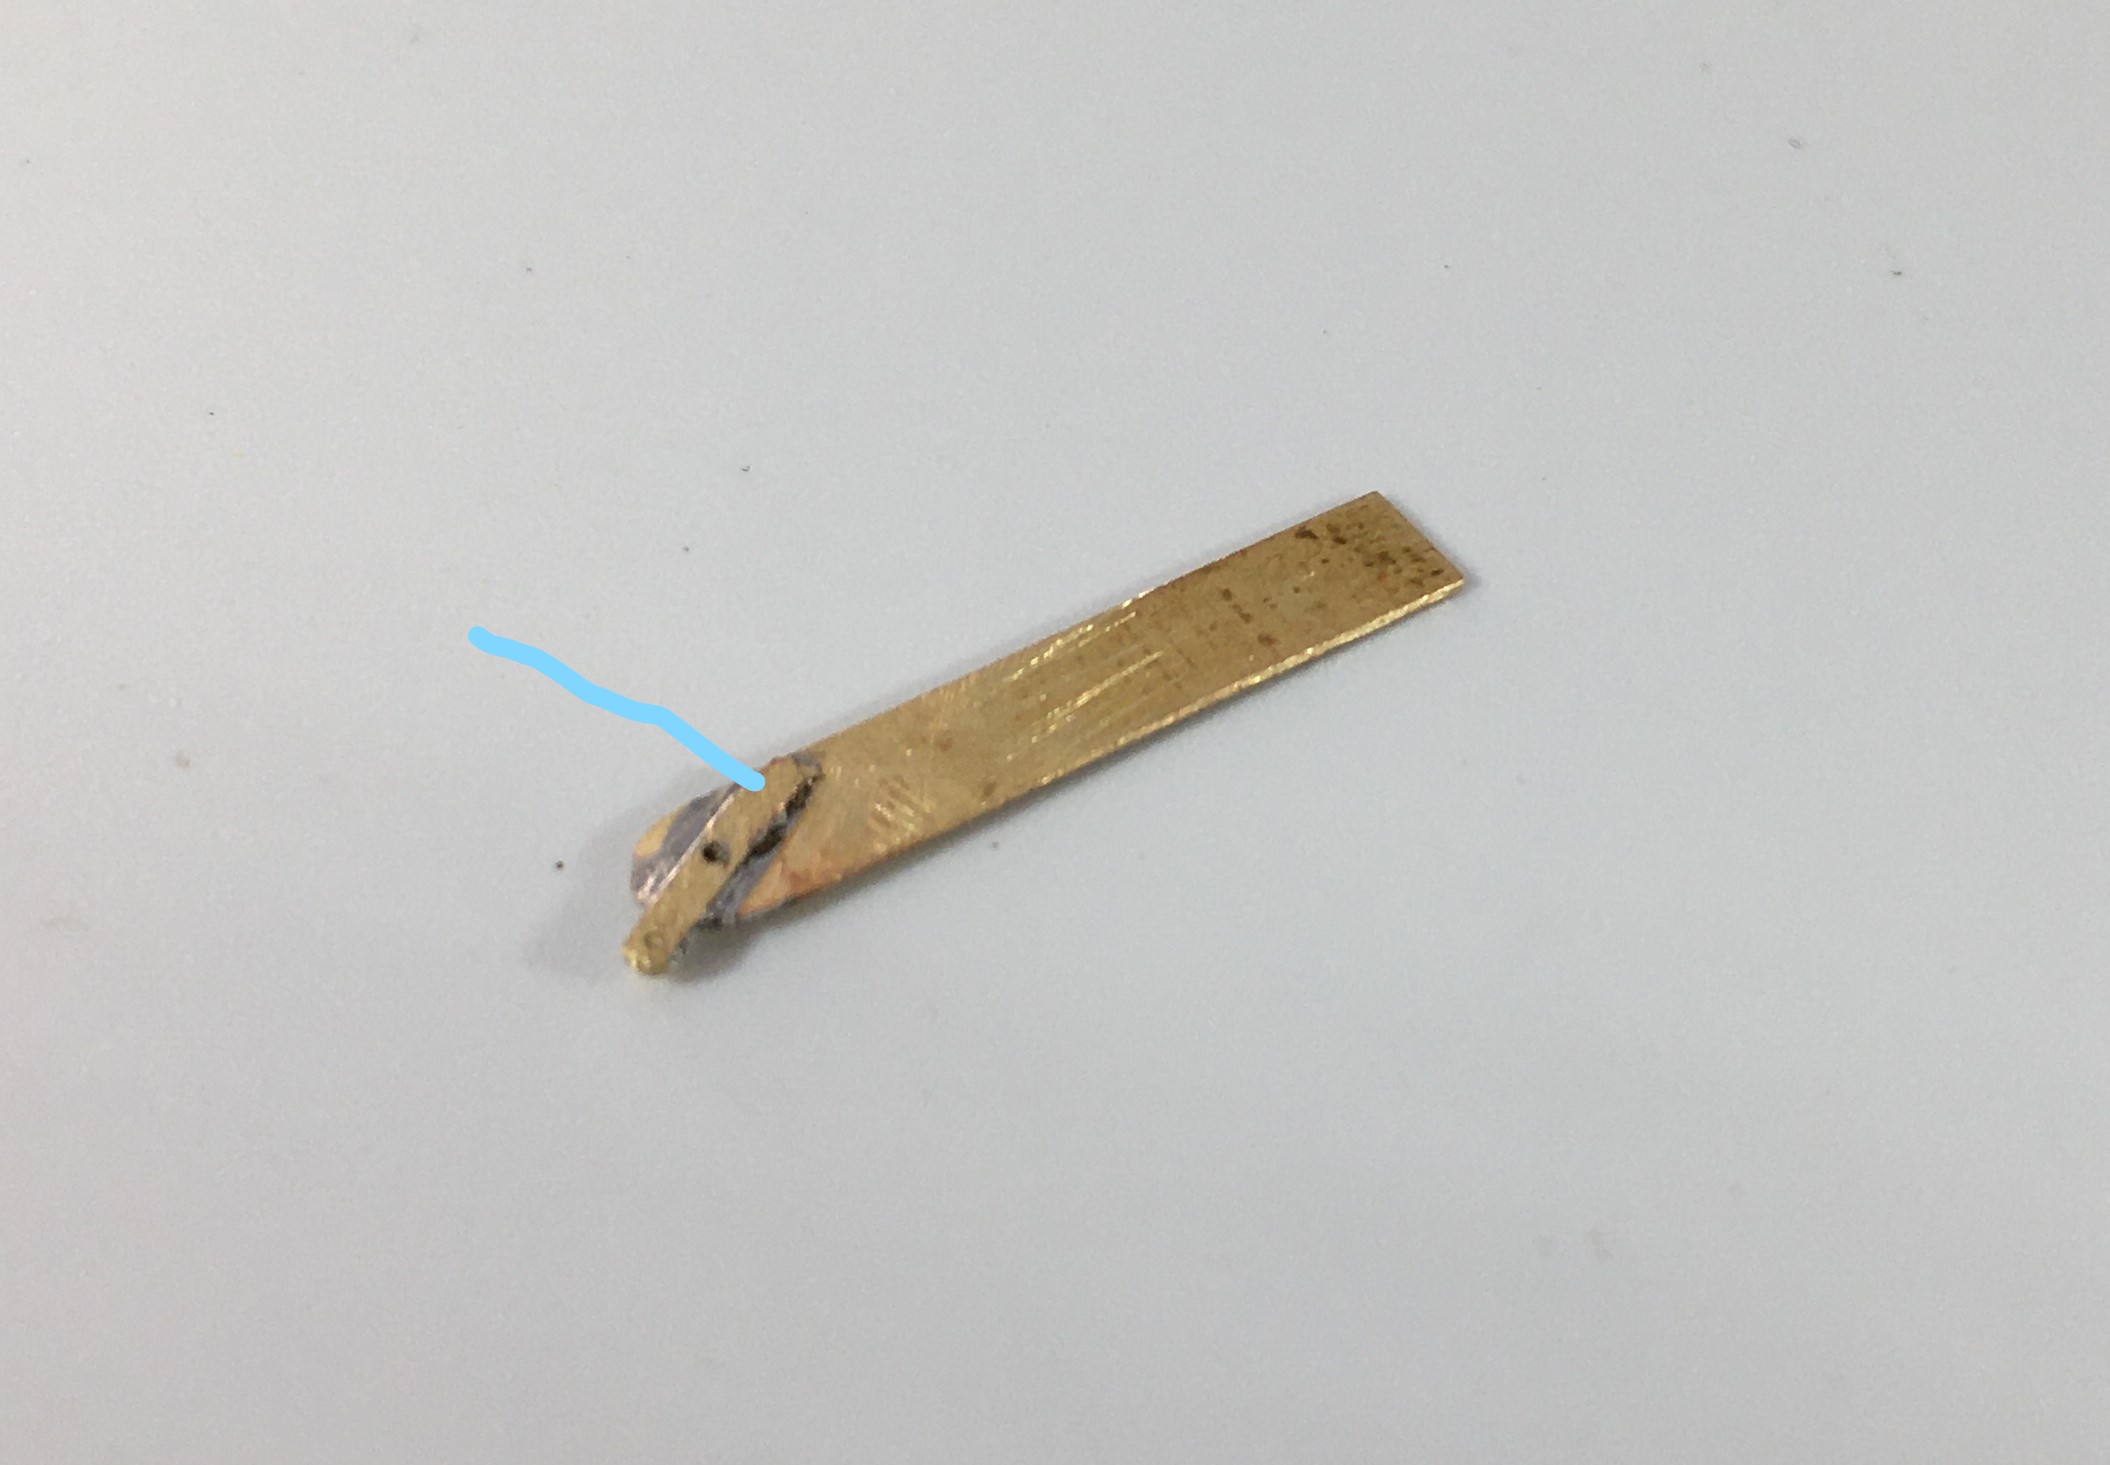
I then moved on to the prefabrication of a pair of dolls, each with slotted posts. This is made up of solid square section filed to a taper which is then cut and each end then has a tongue filed on it onto which flat plate is soldered either side to create the slots. I used a variety of temperature solders to ease this process but it was not easy – I did have one gum solid which resulted in a need to dismantle it and start again! As alluded to in the previous post, as these are slotted posts I had to depart from my usual practise of fitting the arms after painting as it is not otherwise possible to solder them to the spindle for the arm.
As mentioned in the last post, I came up with a bit of a dodge to successfully (well, in two of three cases!) to solder the arm to the spindle without gumming it up. By extending the ear that forms the point at which the operating rod attaches to the arm forward a bit (see the line below), it provides a point at which the soldering iron can be touched. If you use a slight excess of solder this allows the heat to transmit to the spindle and make the soldered joint.
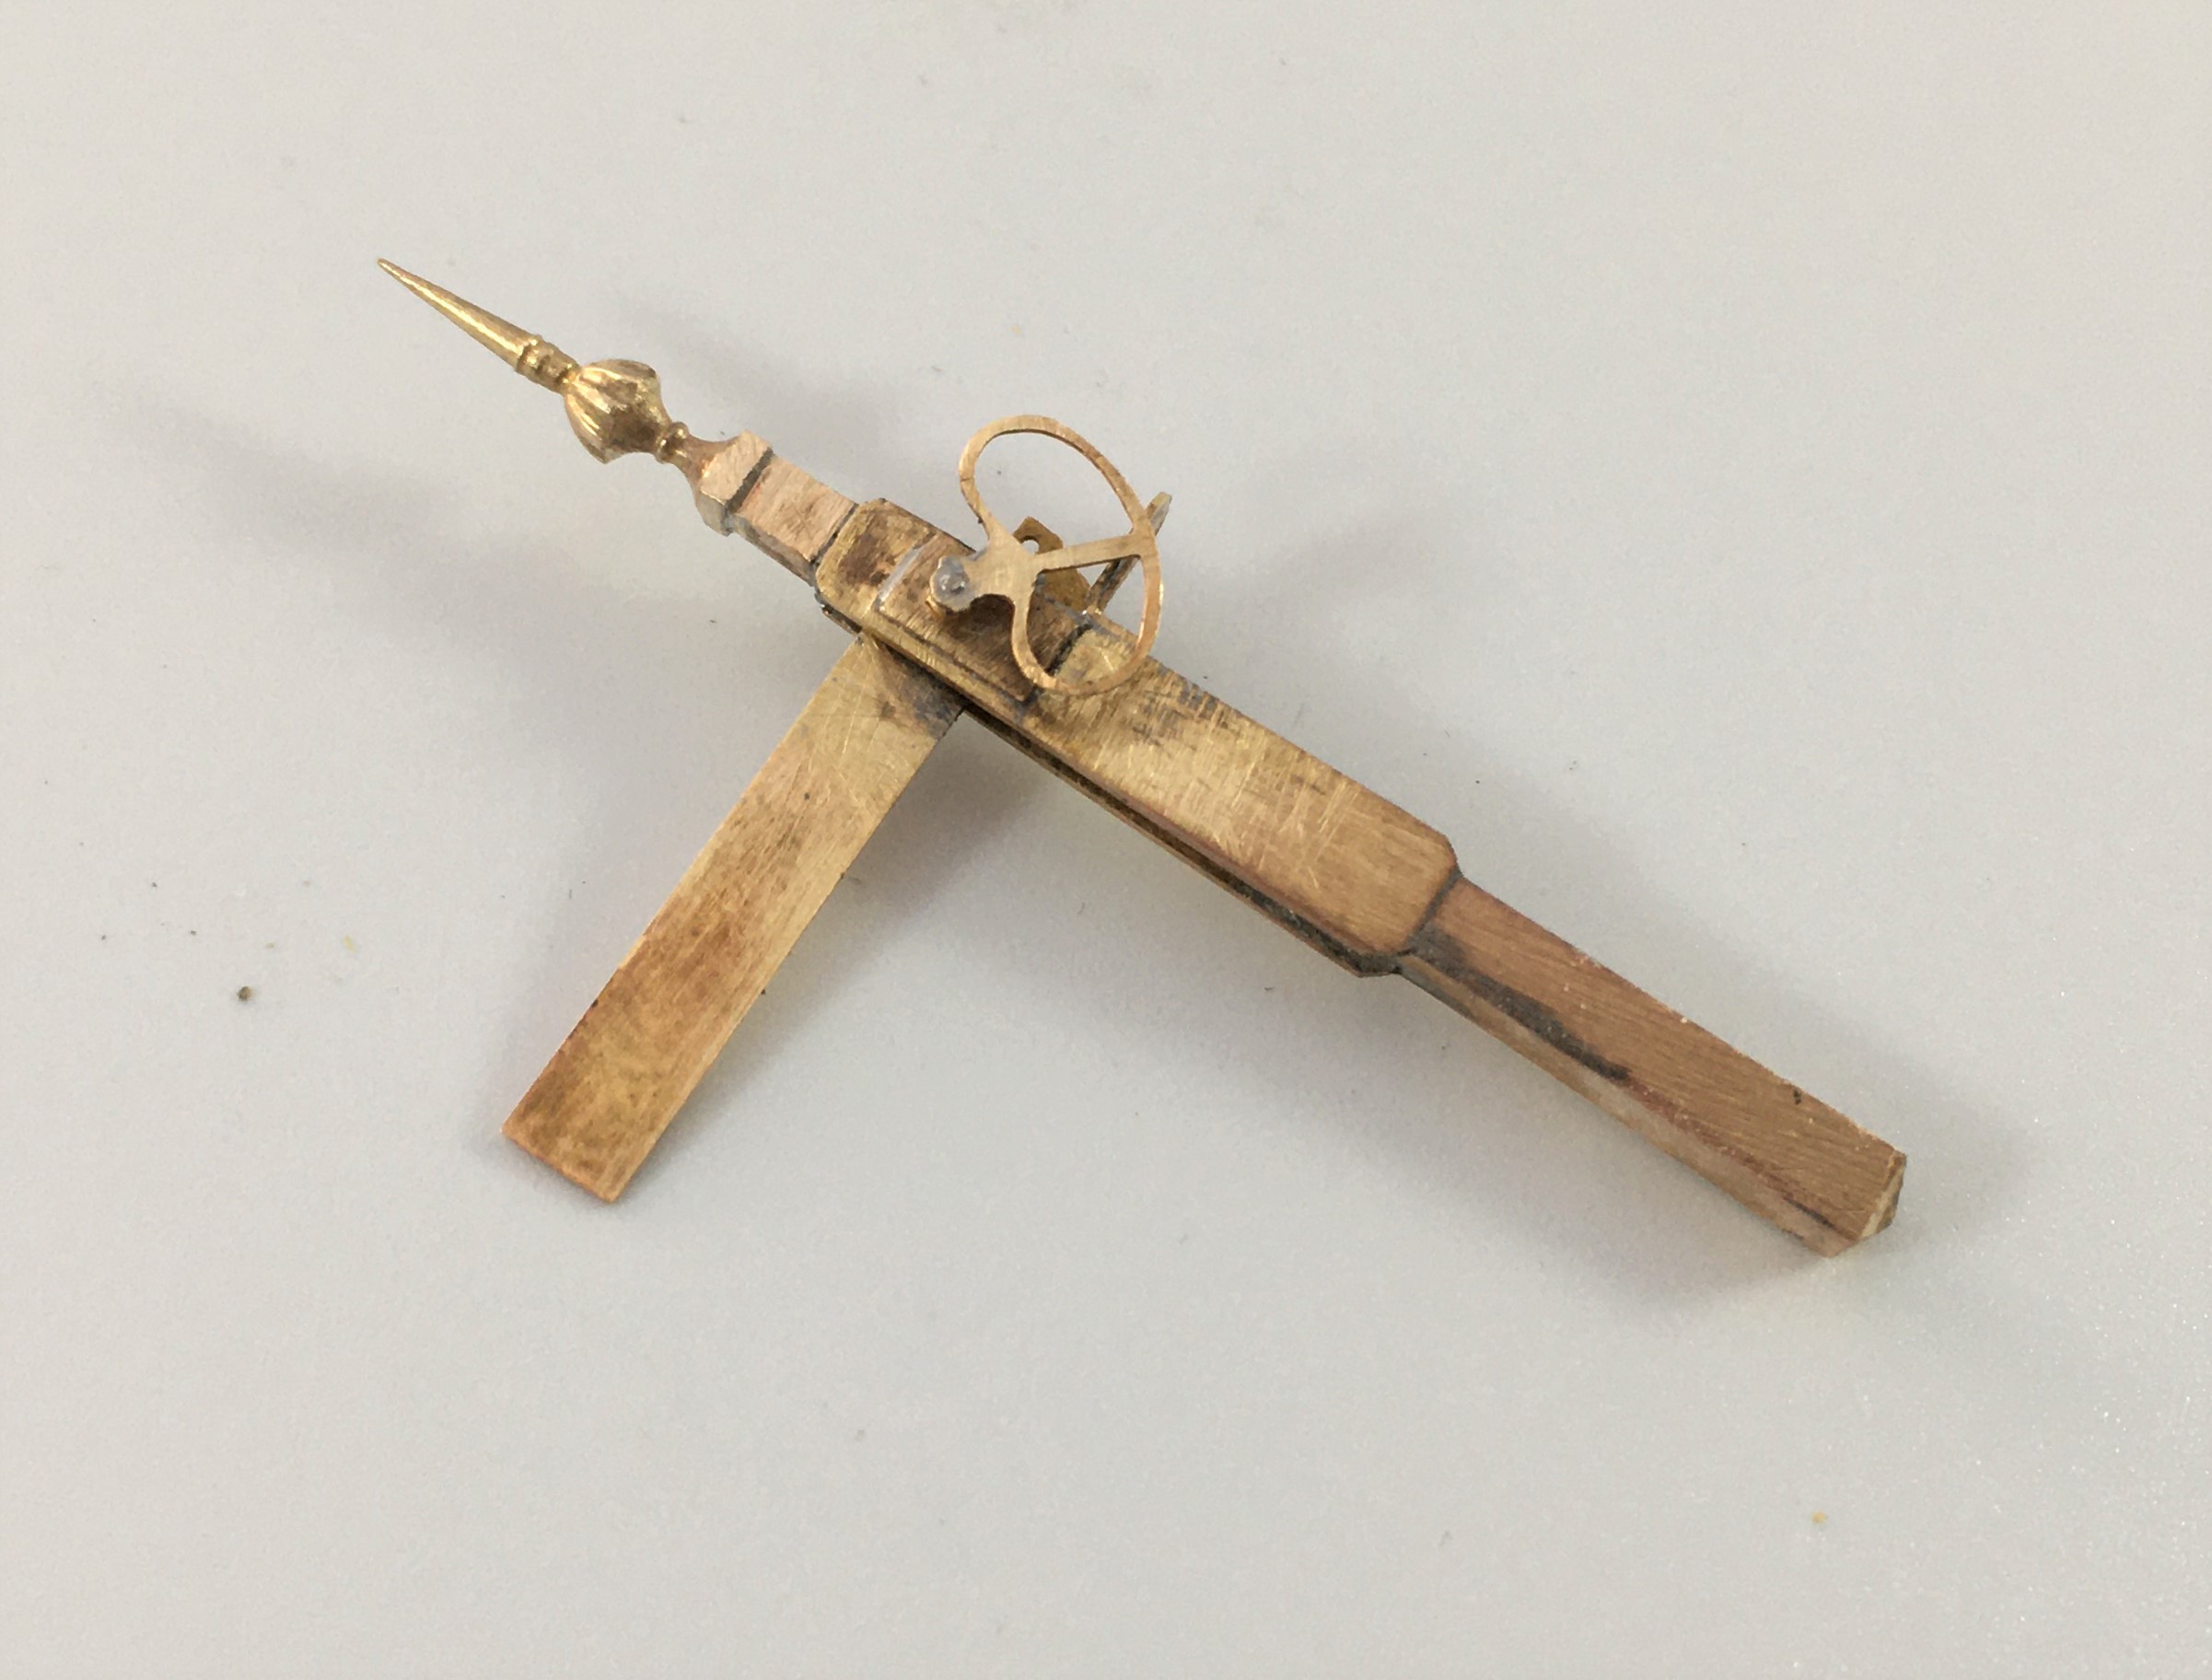
And this is what you get with a prefabricated doll, ready for the next stage of assembly.
And below of the pair of dolls now inserted to the landing.
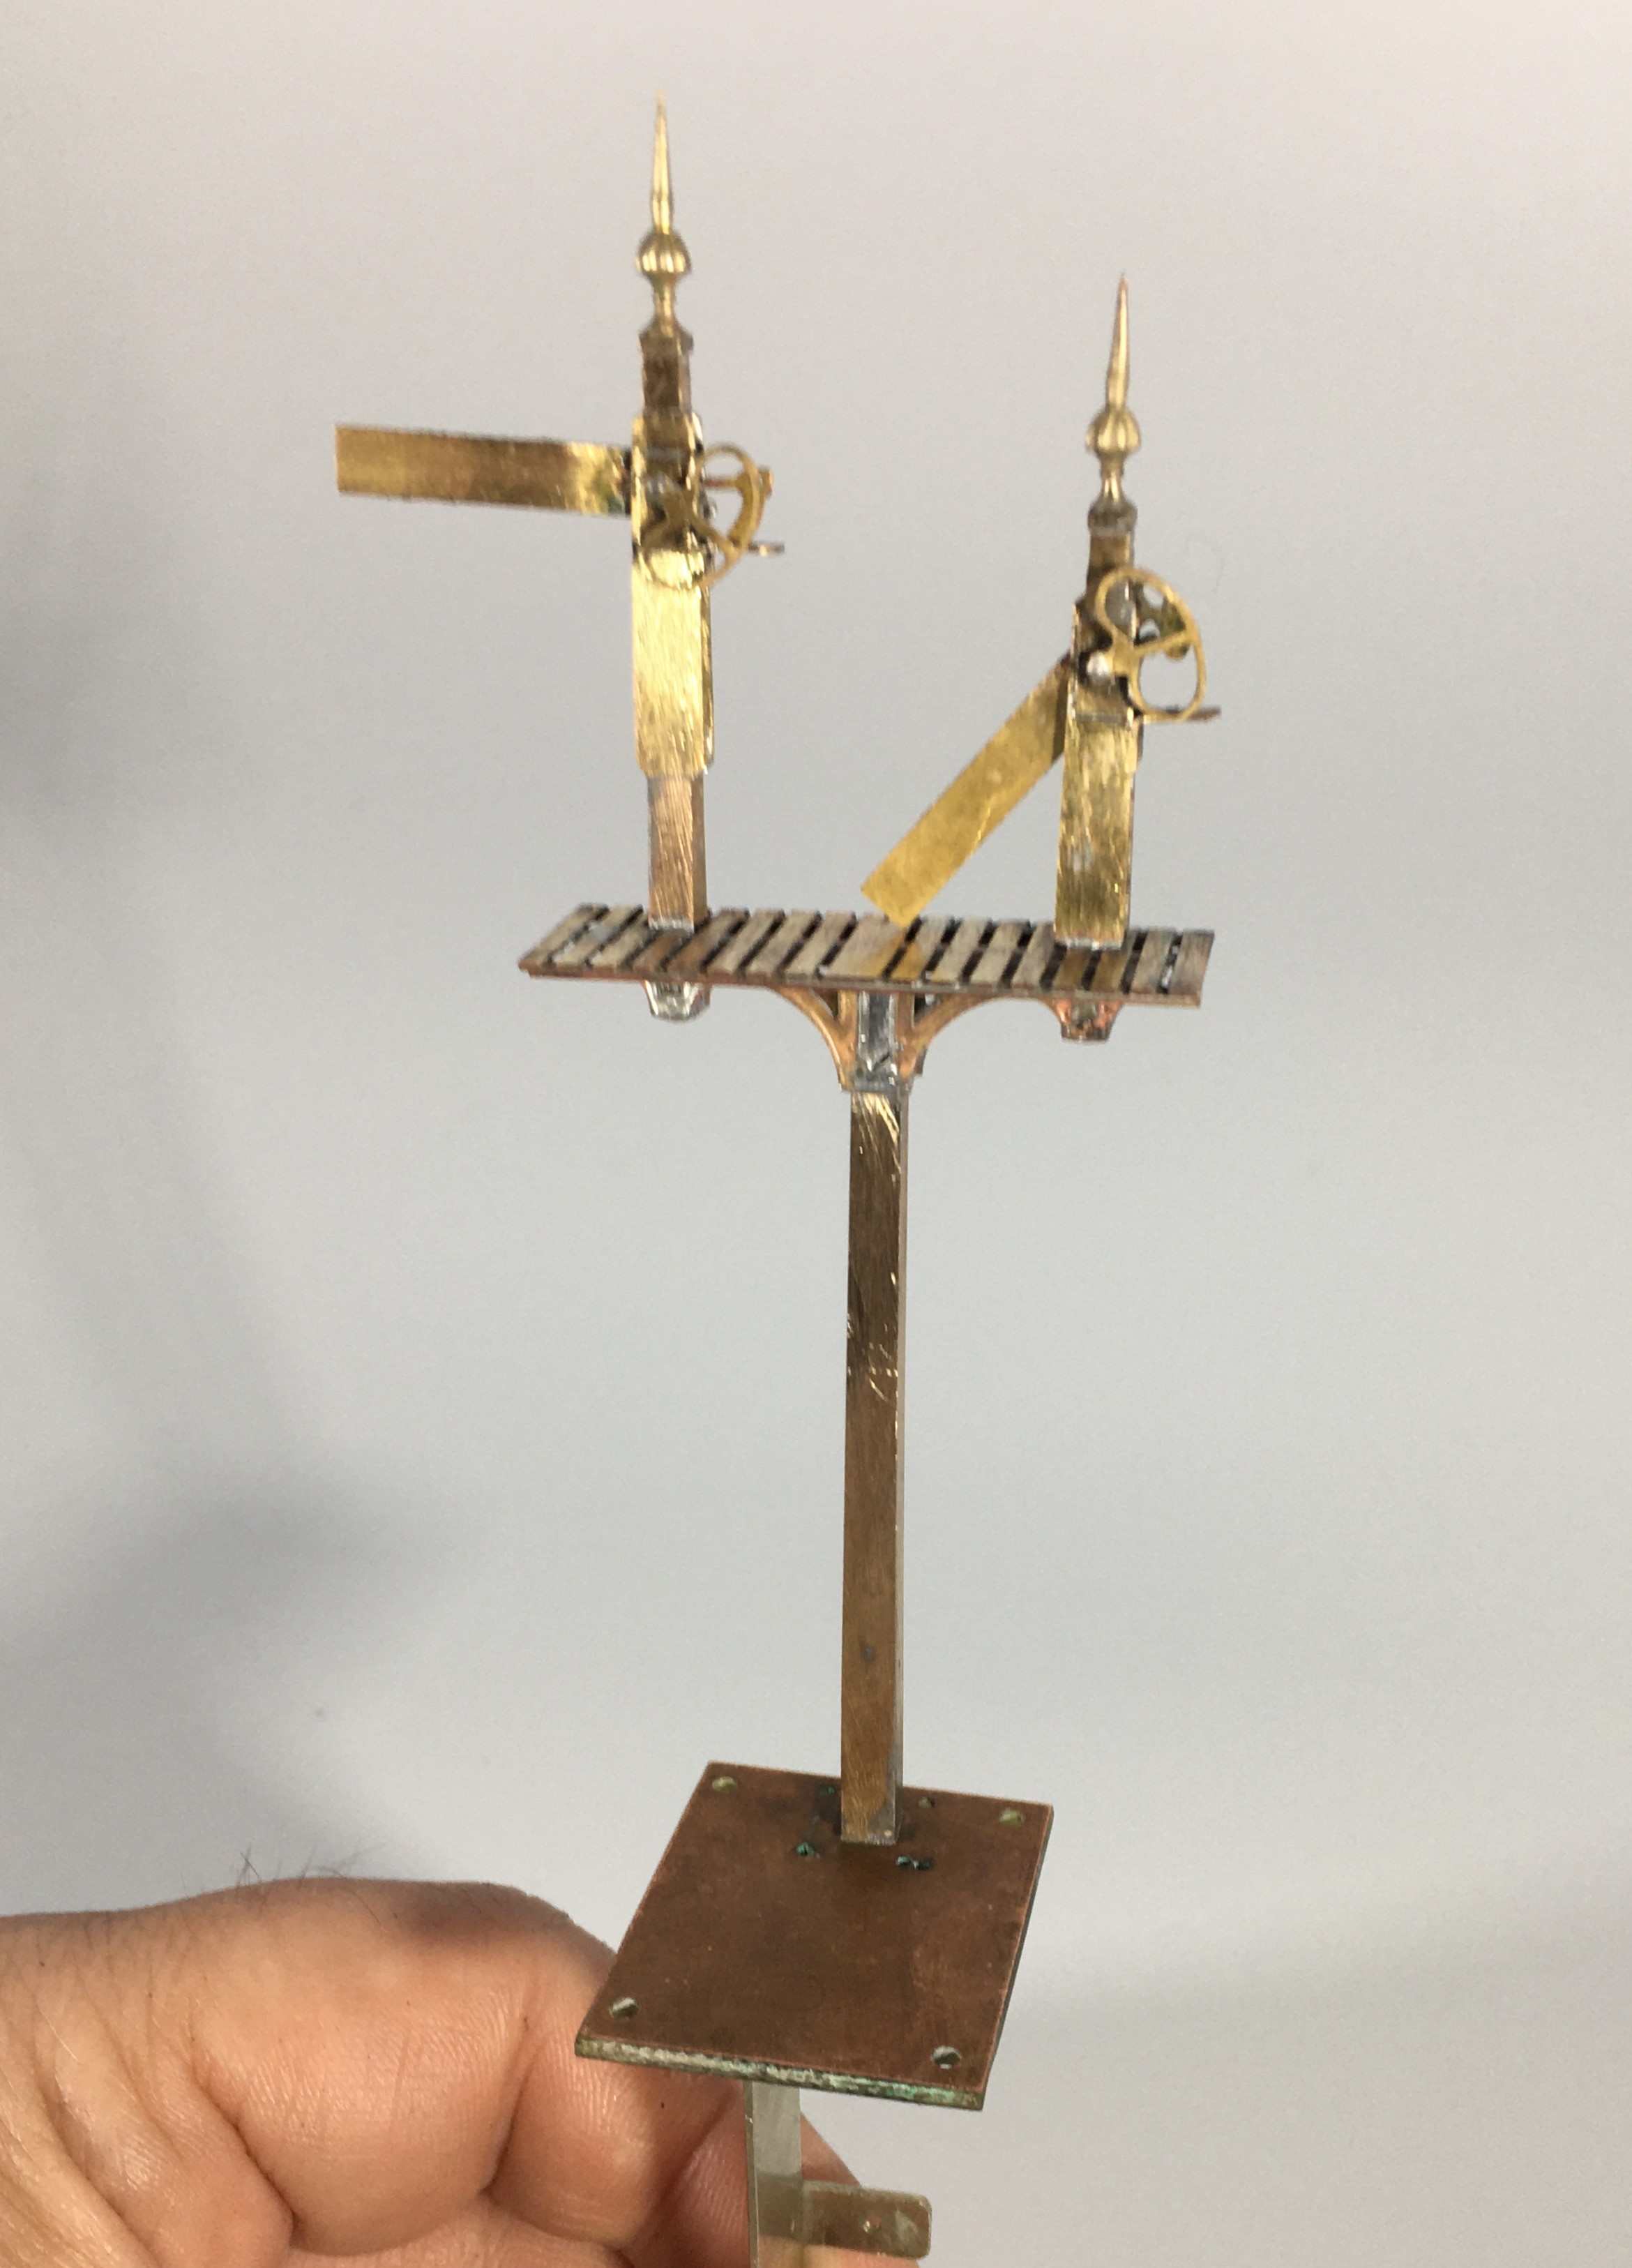
Even at this stage, there is still a lot of building to do as there are handrails, the main ladder, steps and ladders to the dolls, the operating mechanism transferring the movement to the dolls all to do. In respect of the latter(I used rocking cams in this case – you can just see the use of some handrail knobs as the bearings in the photos below, the cams will be fitted after painting.
Slightly peculiarly, the NER built their landings in front of the arms whereas all the other signals I have yet built have these in the rear (excepting gantries, which can be either or both!). This view shows this most clearly.
The main ladder is not visible in the views as I have made this detachable because it is much easier to spray paint these (and better, it is not easy to get a thin coat of paint by brush application and it thickens up the fine detail of a ladder too much.

The grey primer is pretty cruel to modelling efforts but on the whole, I am pretty chuffed with this!

Couldn’t Have Done It Without………3
Here is something that I have not seen anyone else singing the praises of; the cast brass version of Exactoscale’s fishplates.
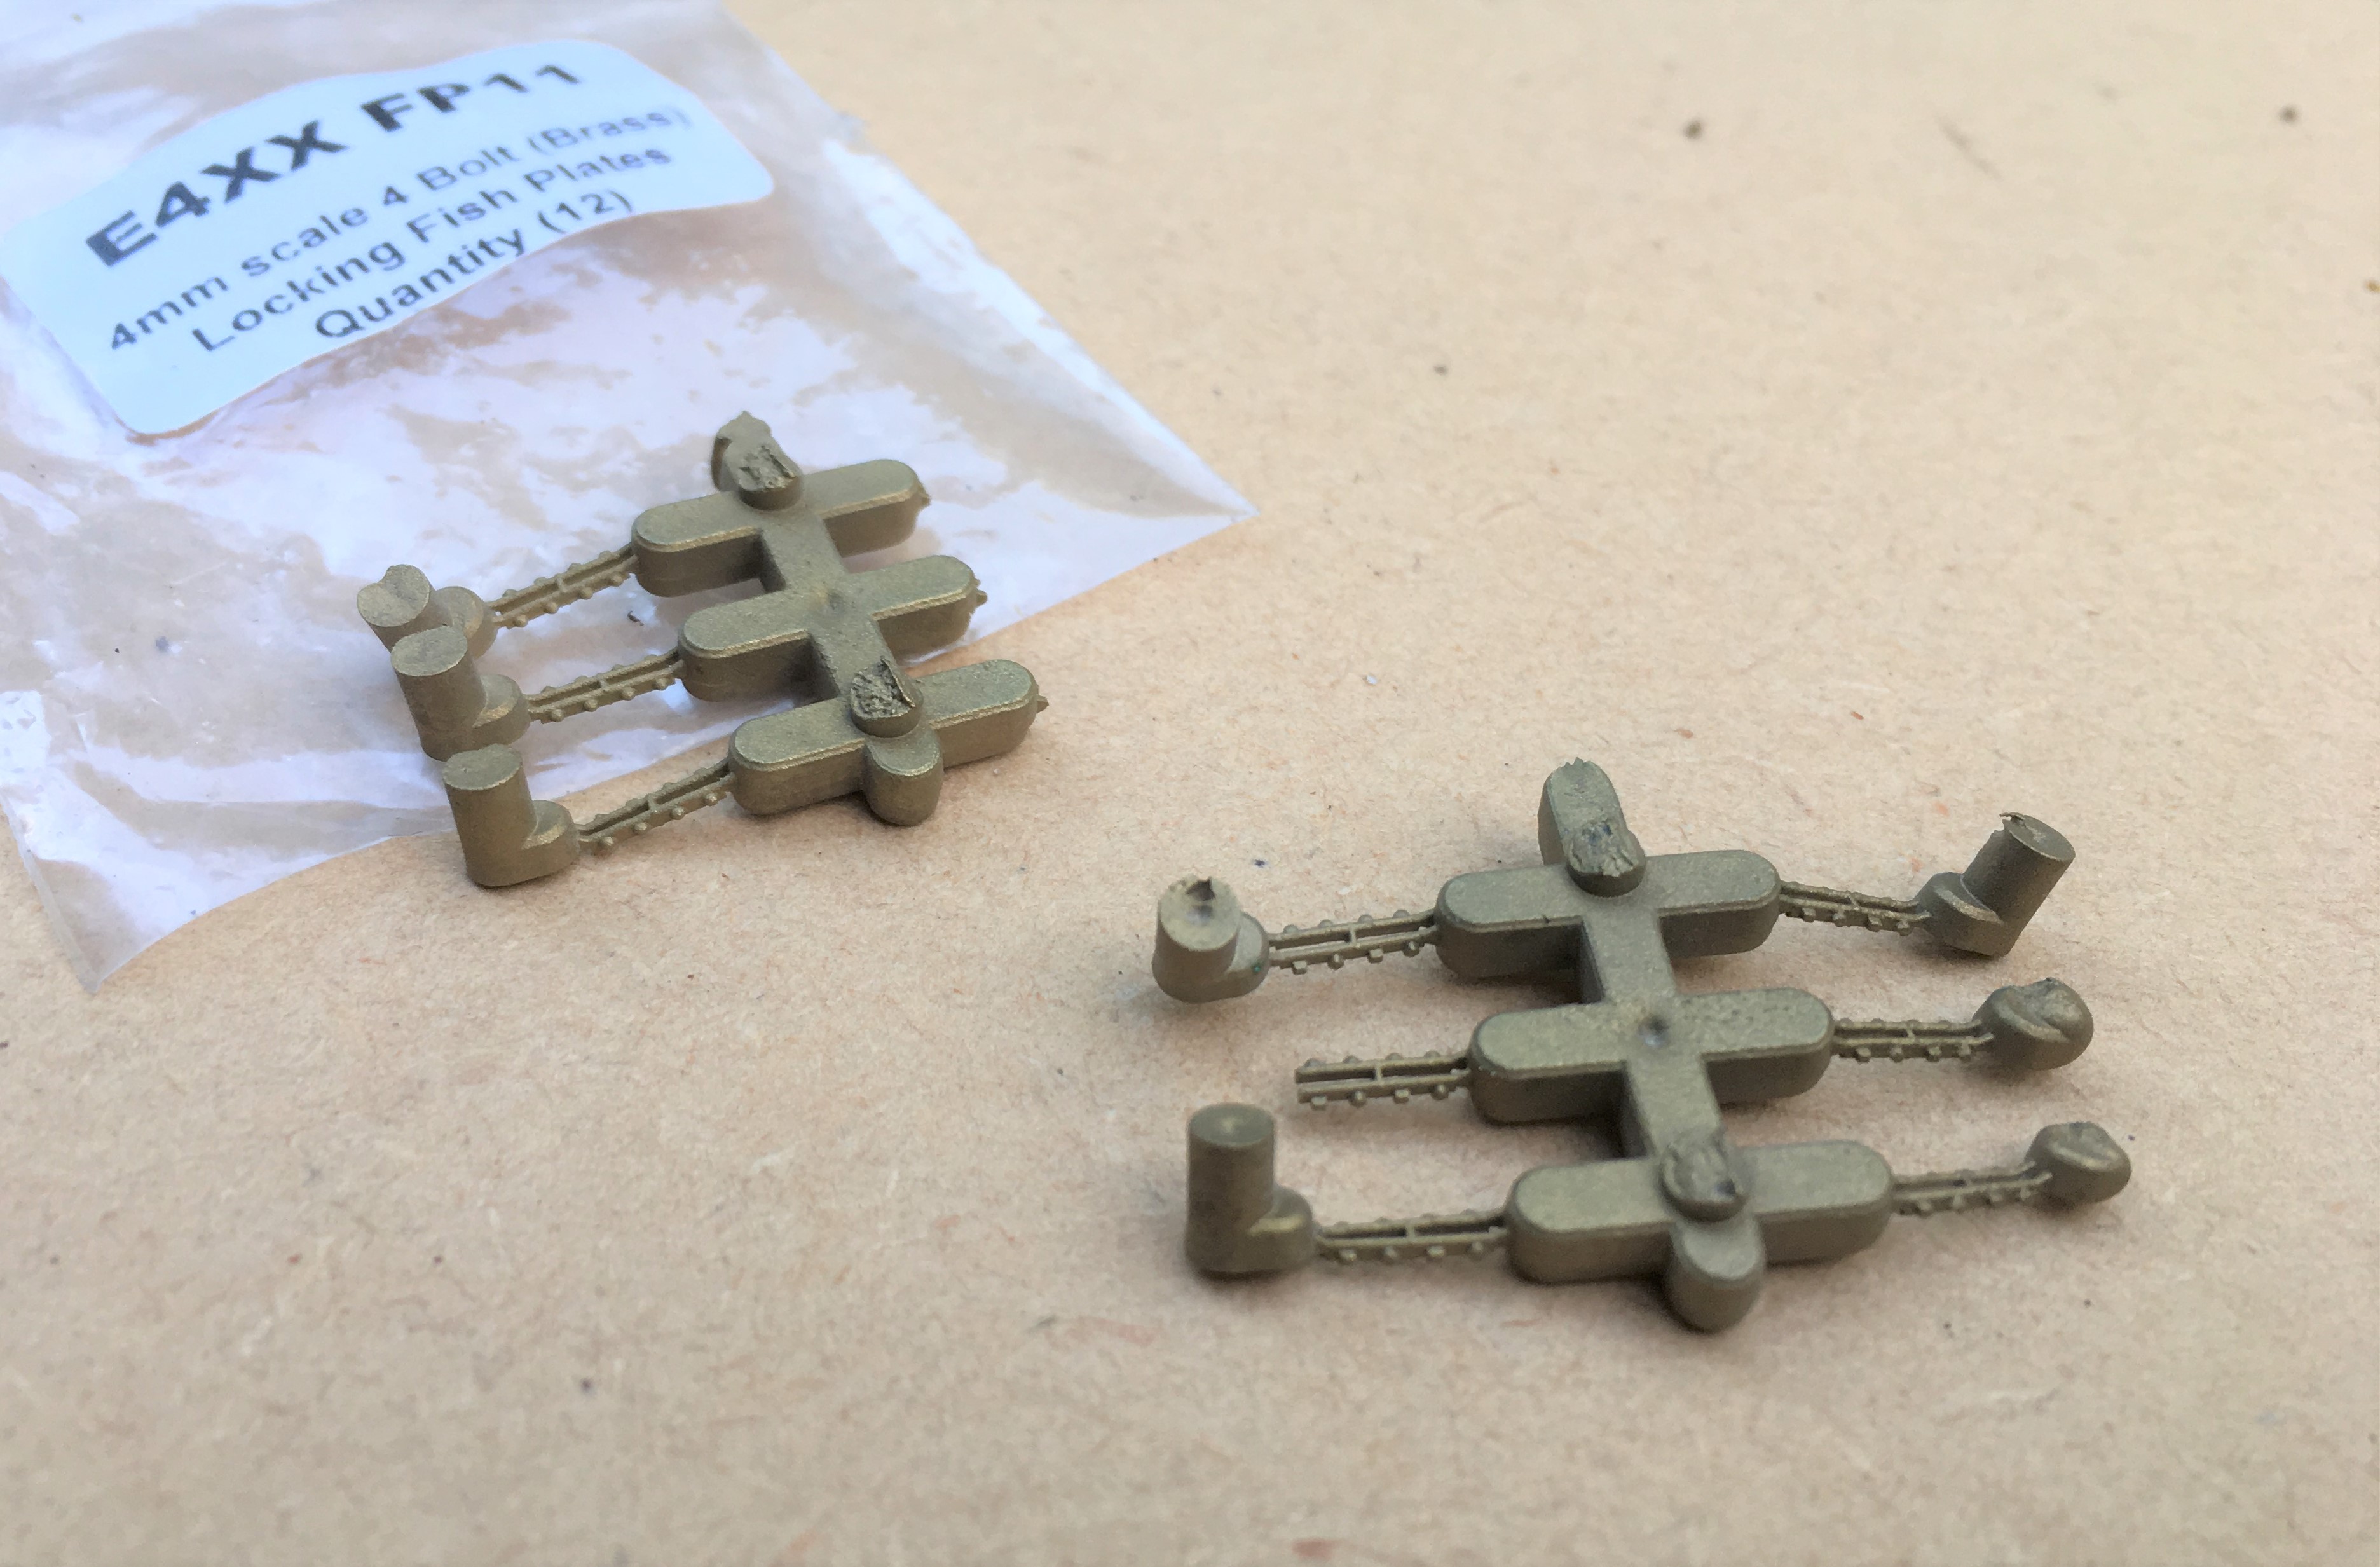
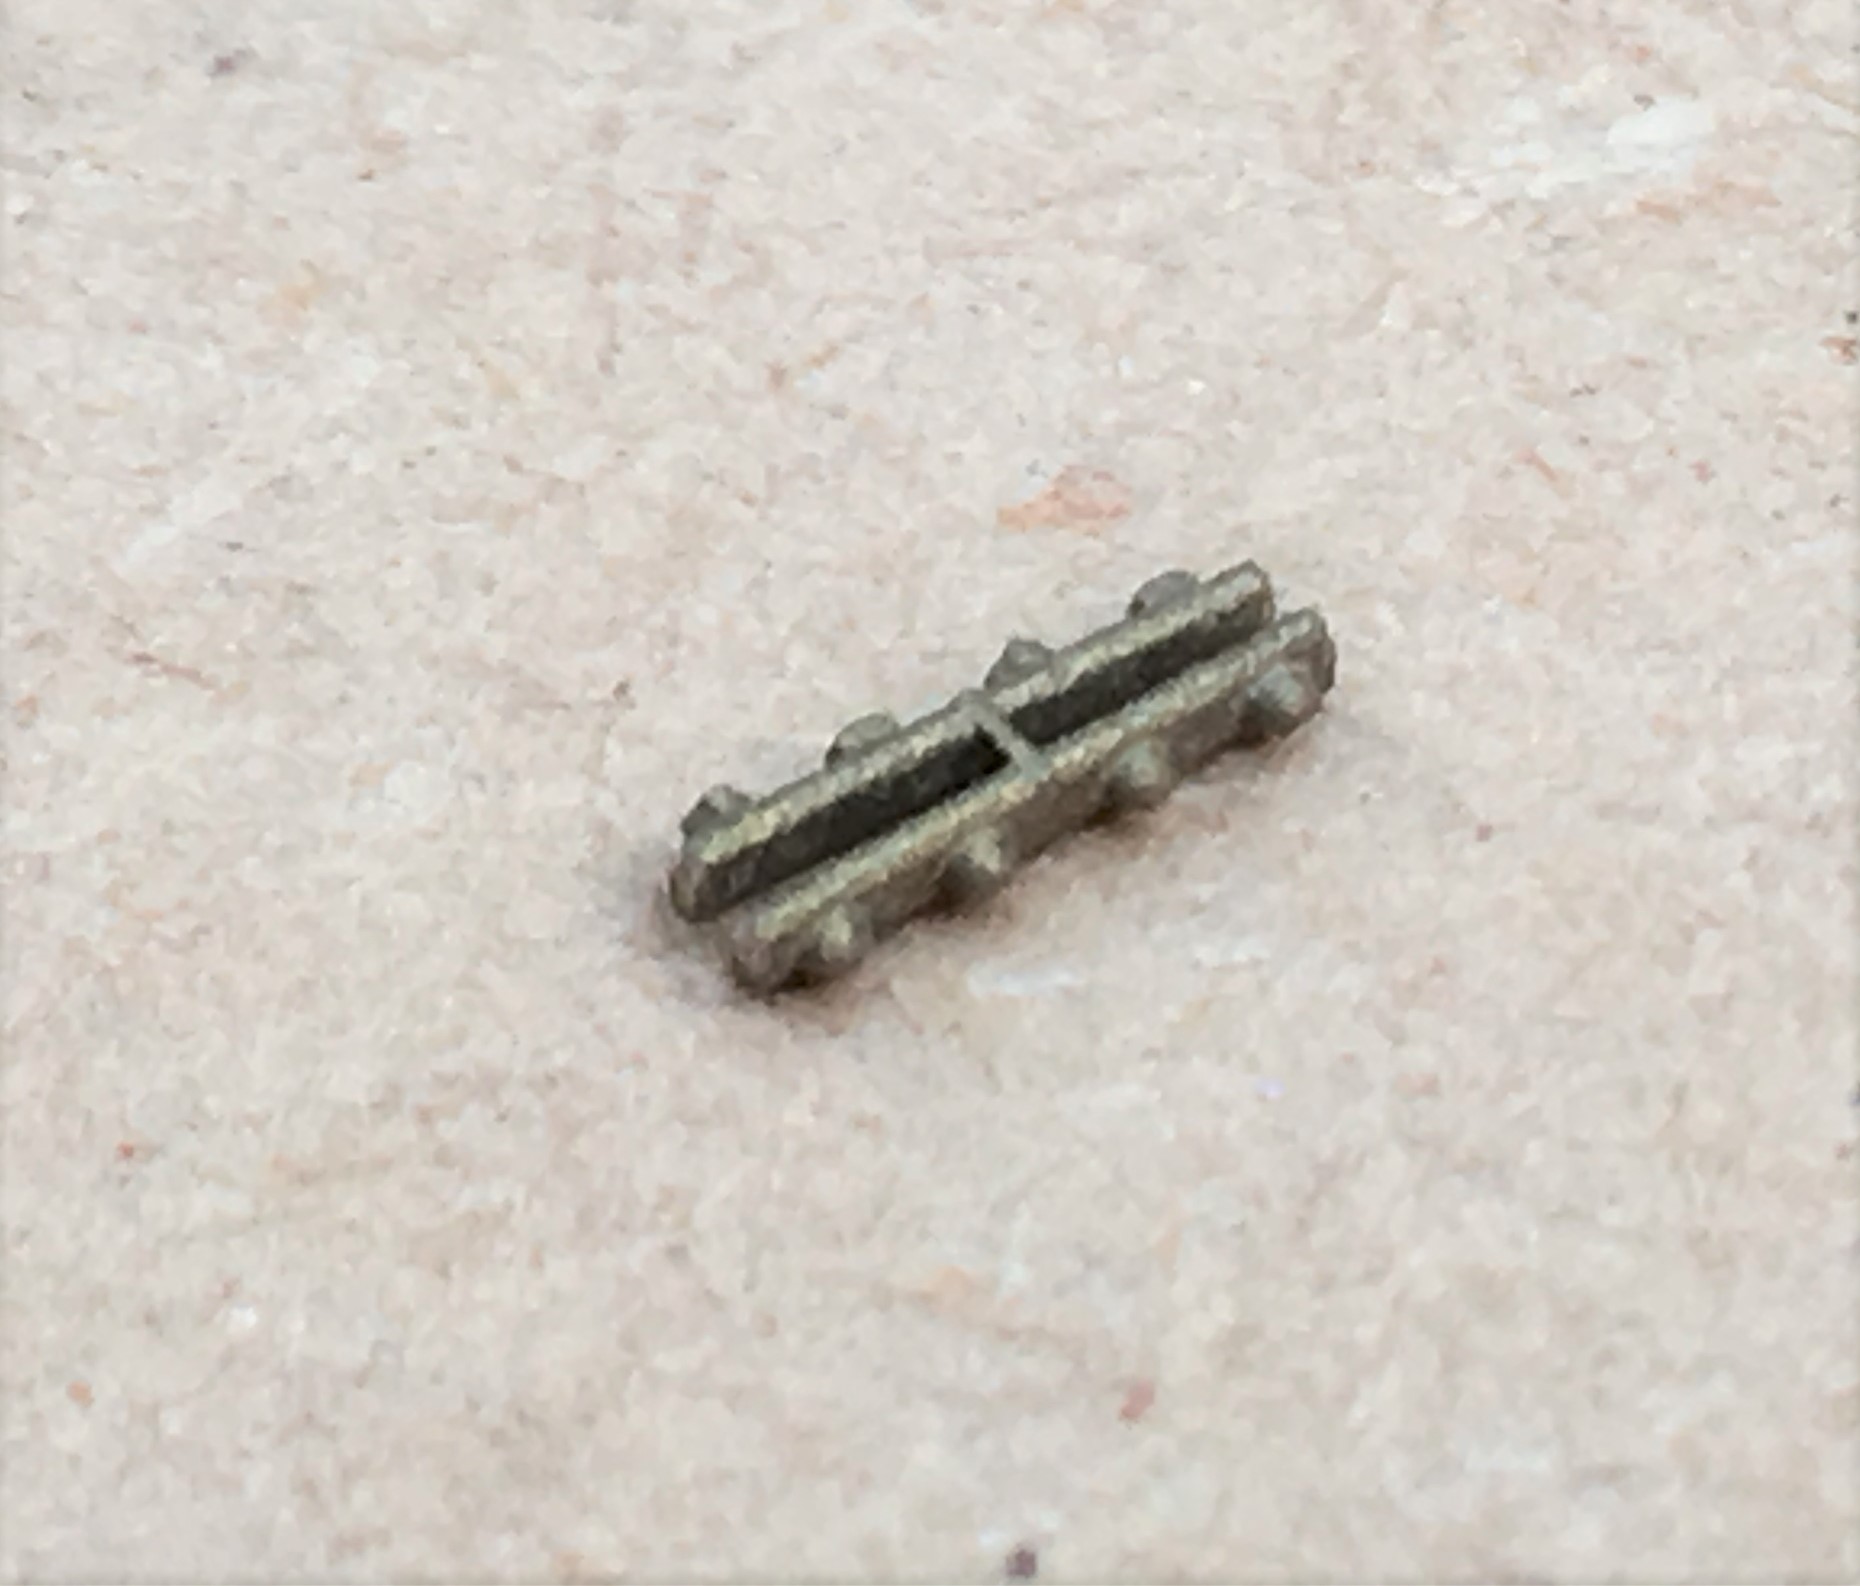
As can easily be seen, these are both cosmetic renditions of a real fishplate from the bullhead track era and can also be used to create a functional joint between rails. These are not that strong and can’t really be relied upon to firmly hold one piece of track to the other. However, what they are strong enough to do is hold one piece of track relative to the other.
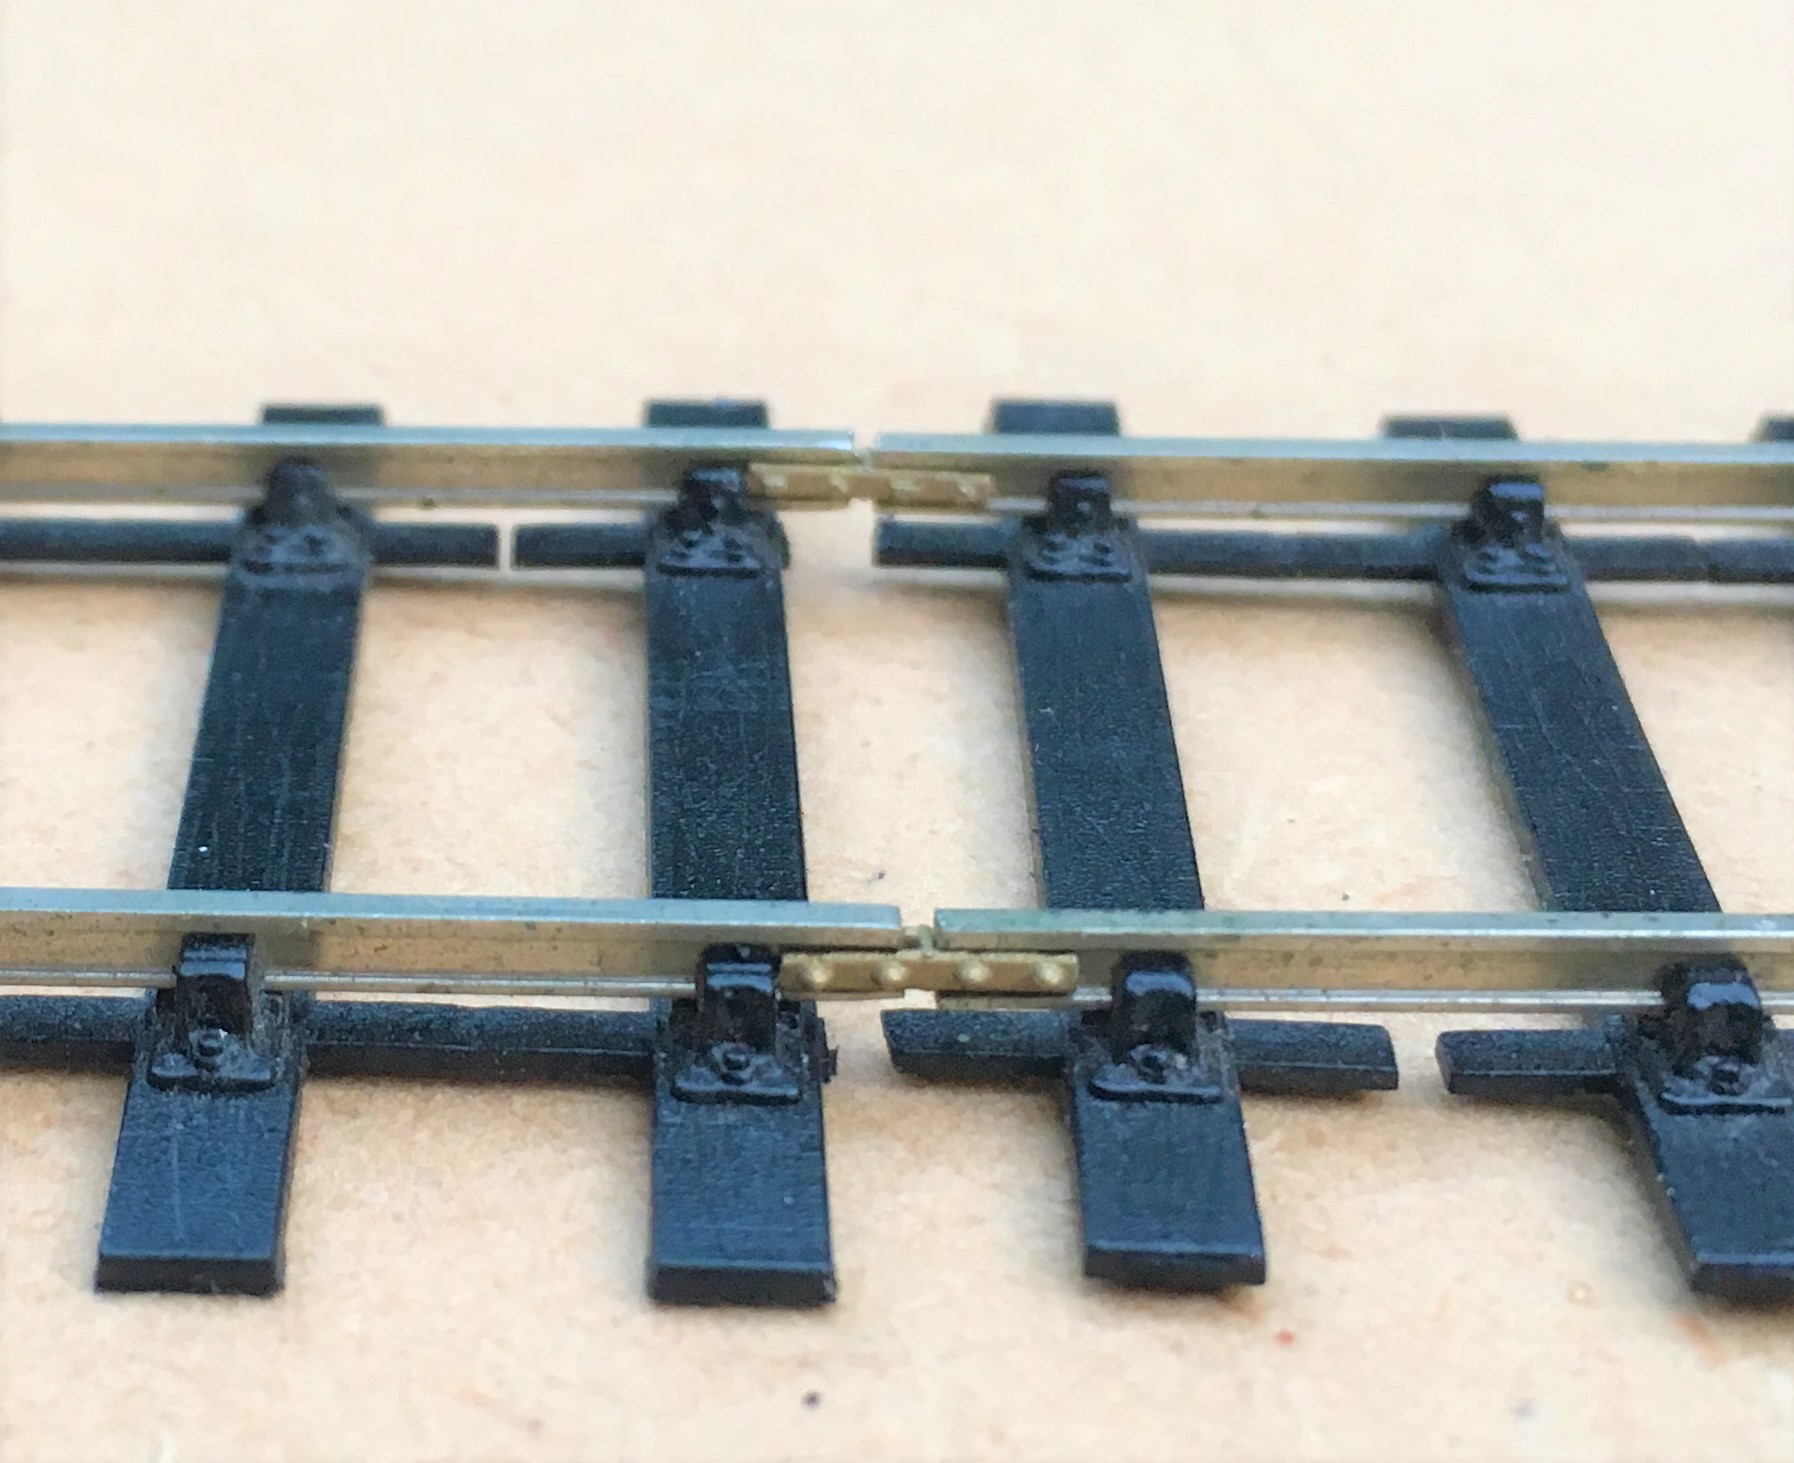
Therefore, they come into their own when track is being laid. Once one piece of rail is glued in place, it is necessary to ensure that the next is exactly in line with it and this is actually not nearly so easy to do as it might seem; especially when we a P4 modeller such as myself is interested in fractions of a millimetre and then makes life difficult for myself by covering the additional piece of track is them covered with weights. These are just perfect for this, they provide enough locational direction to ensure one piece flows to the next.
There is of course nothing new about using fishplates to join model train track together; it has been de-rigueur for Hornby & Peco since the dawn of time. What has happened is that the finescale fraternity have forgotten their roots a little and ignored the simplicity of some of the toy train solutions such as this.

That was the weekend that was….
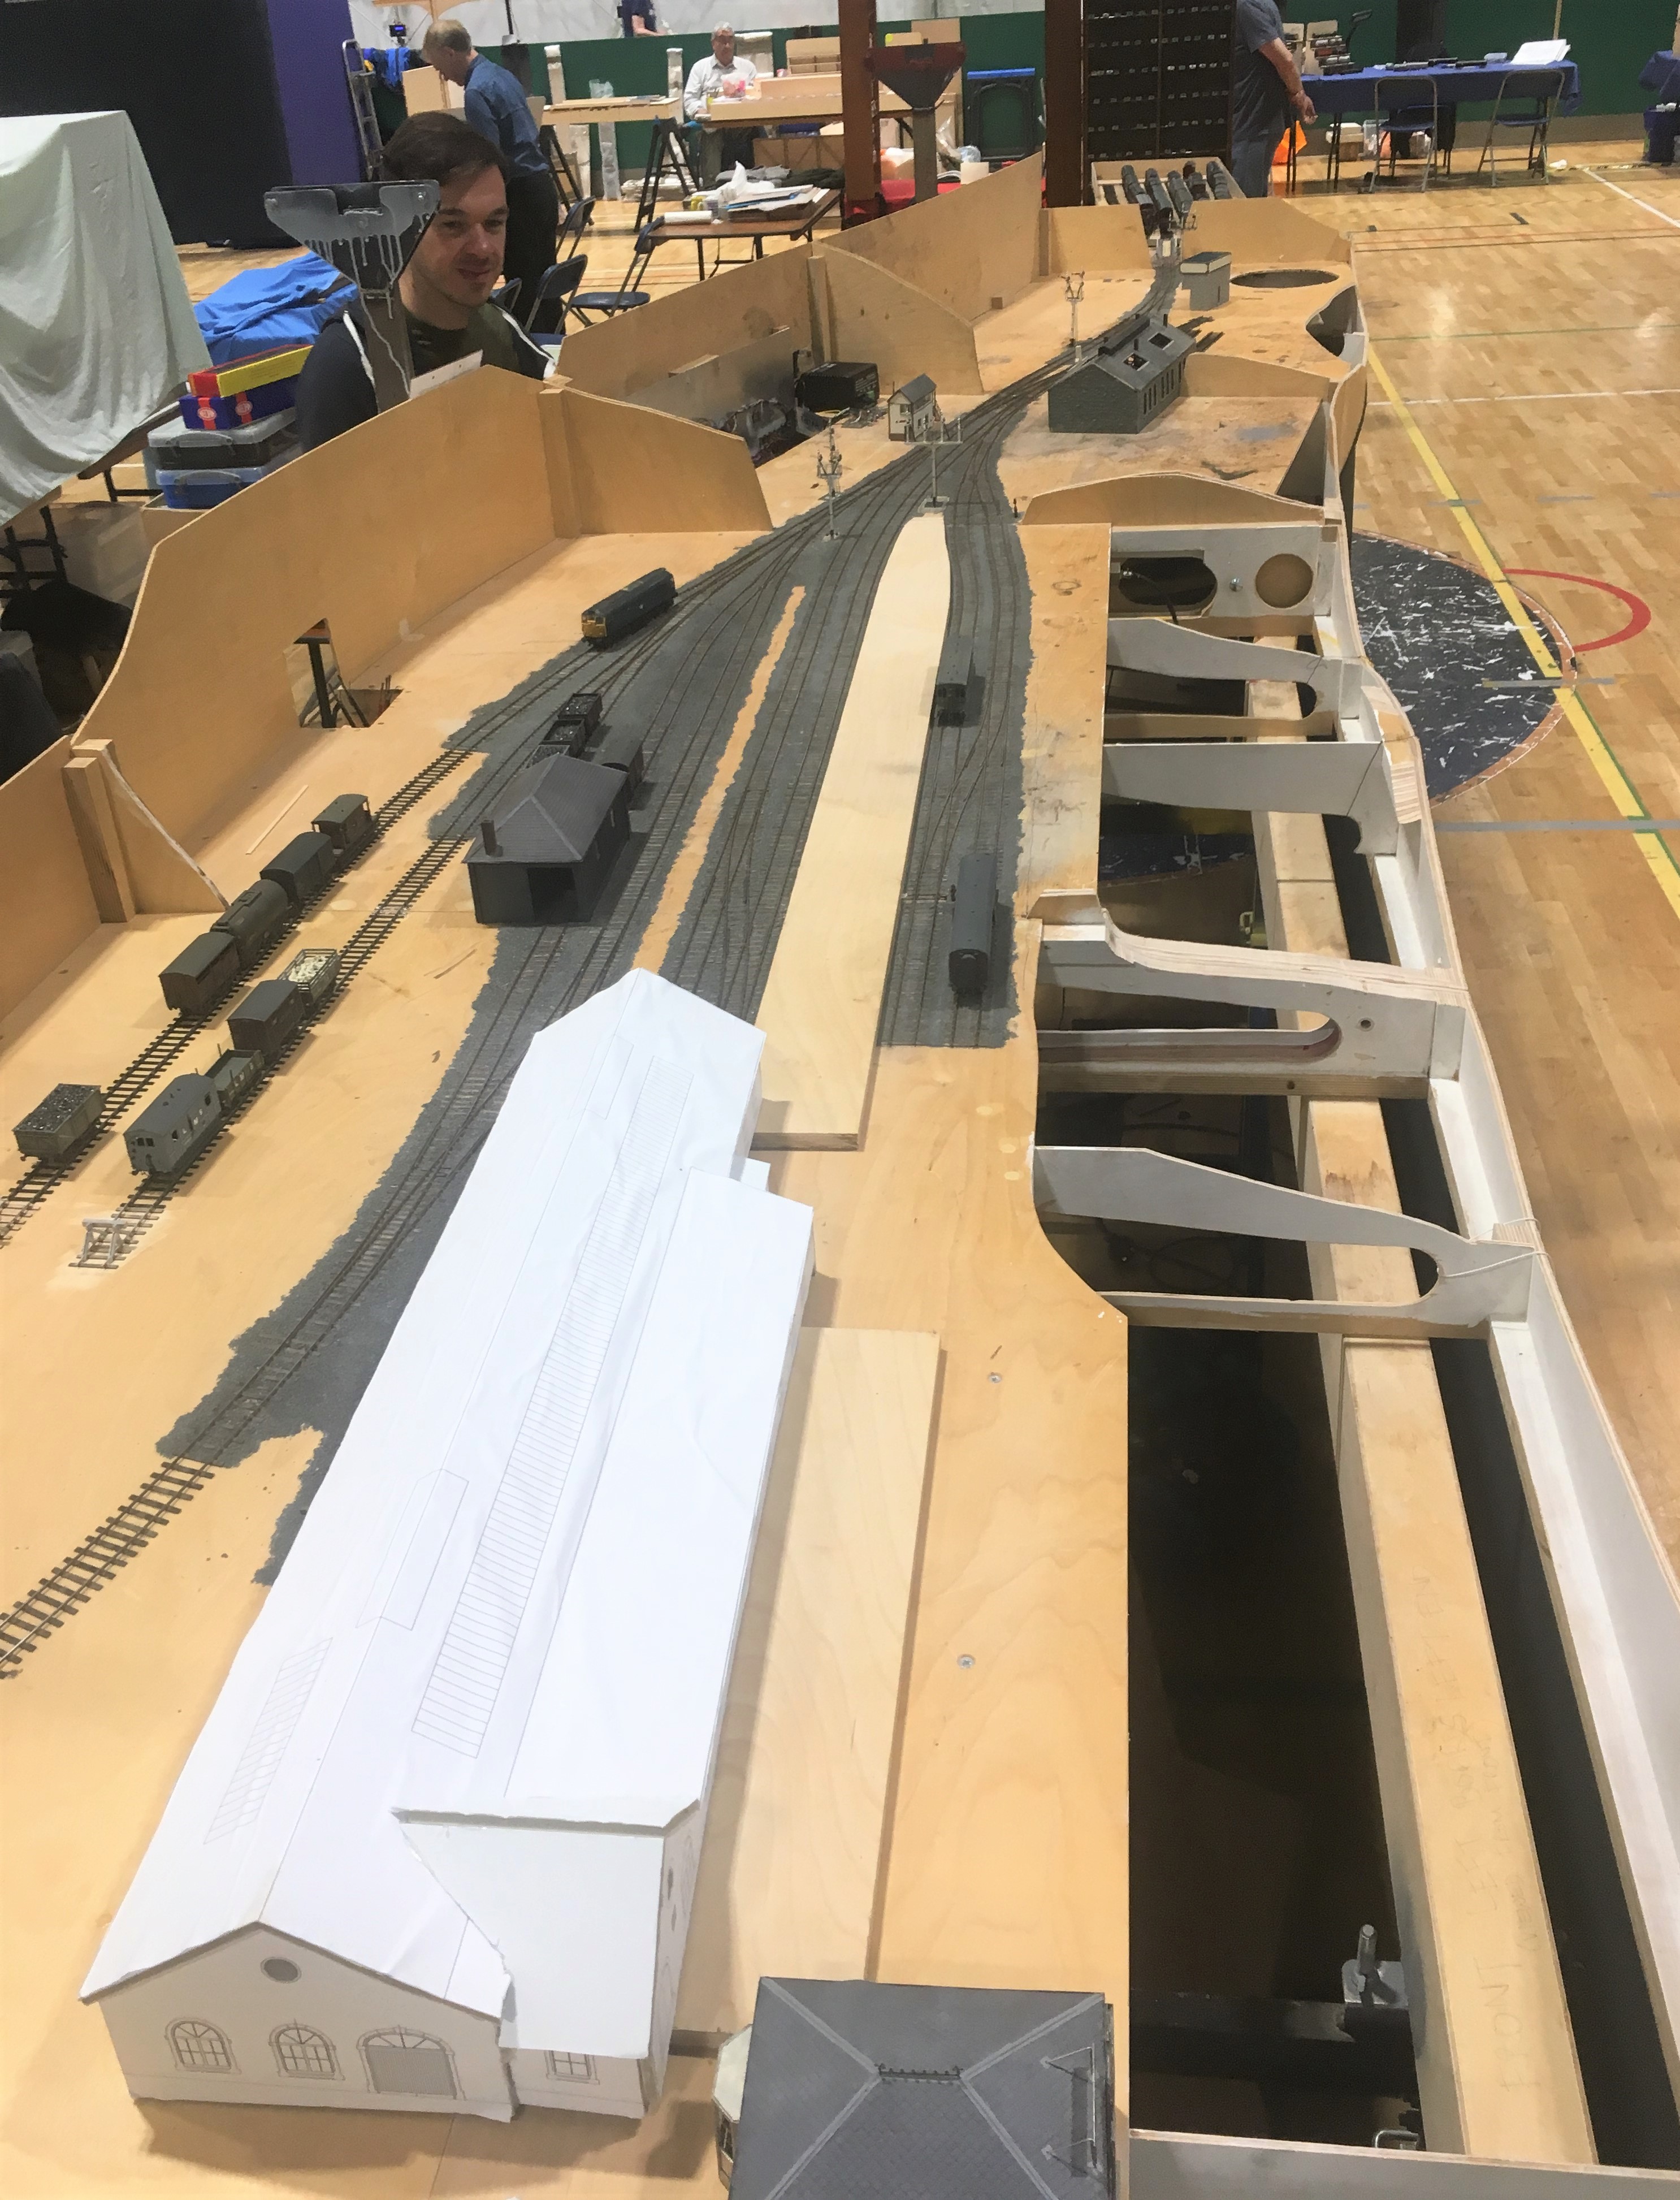
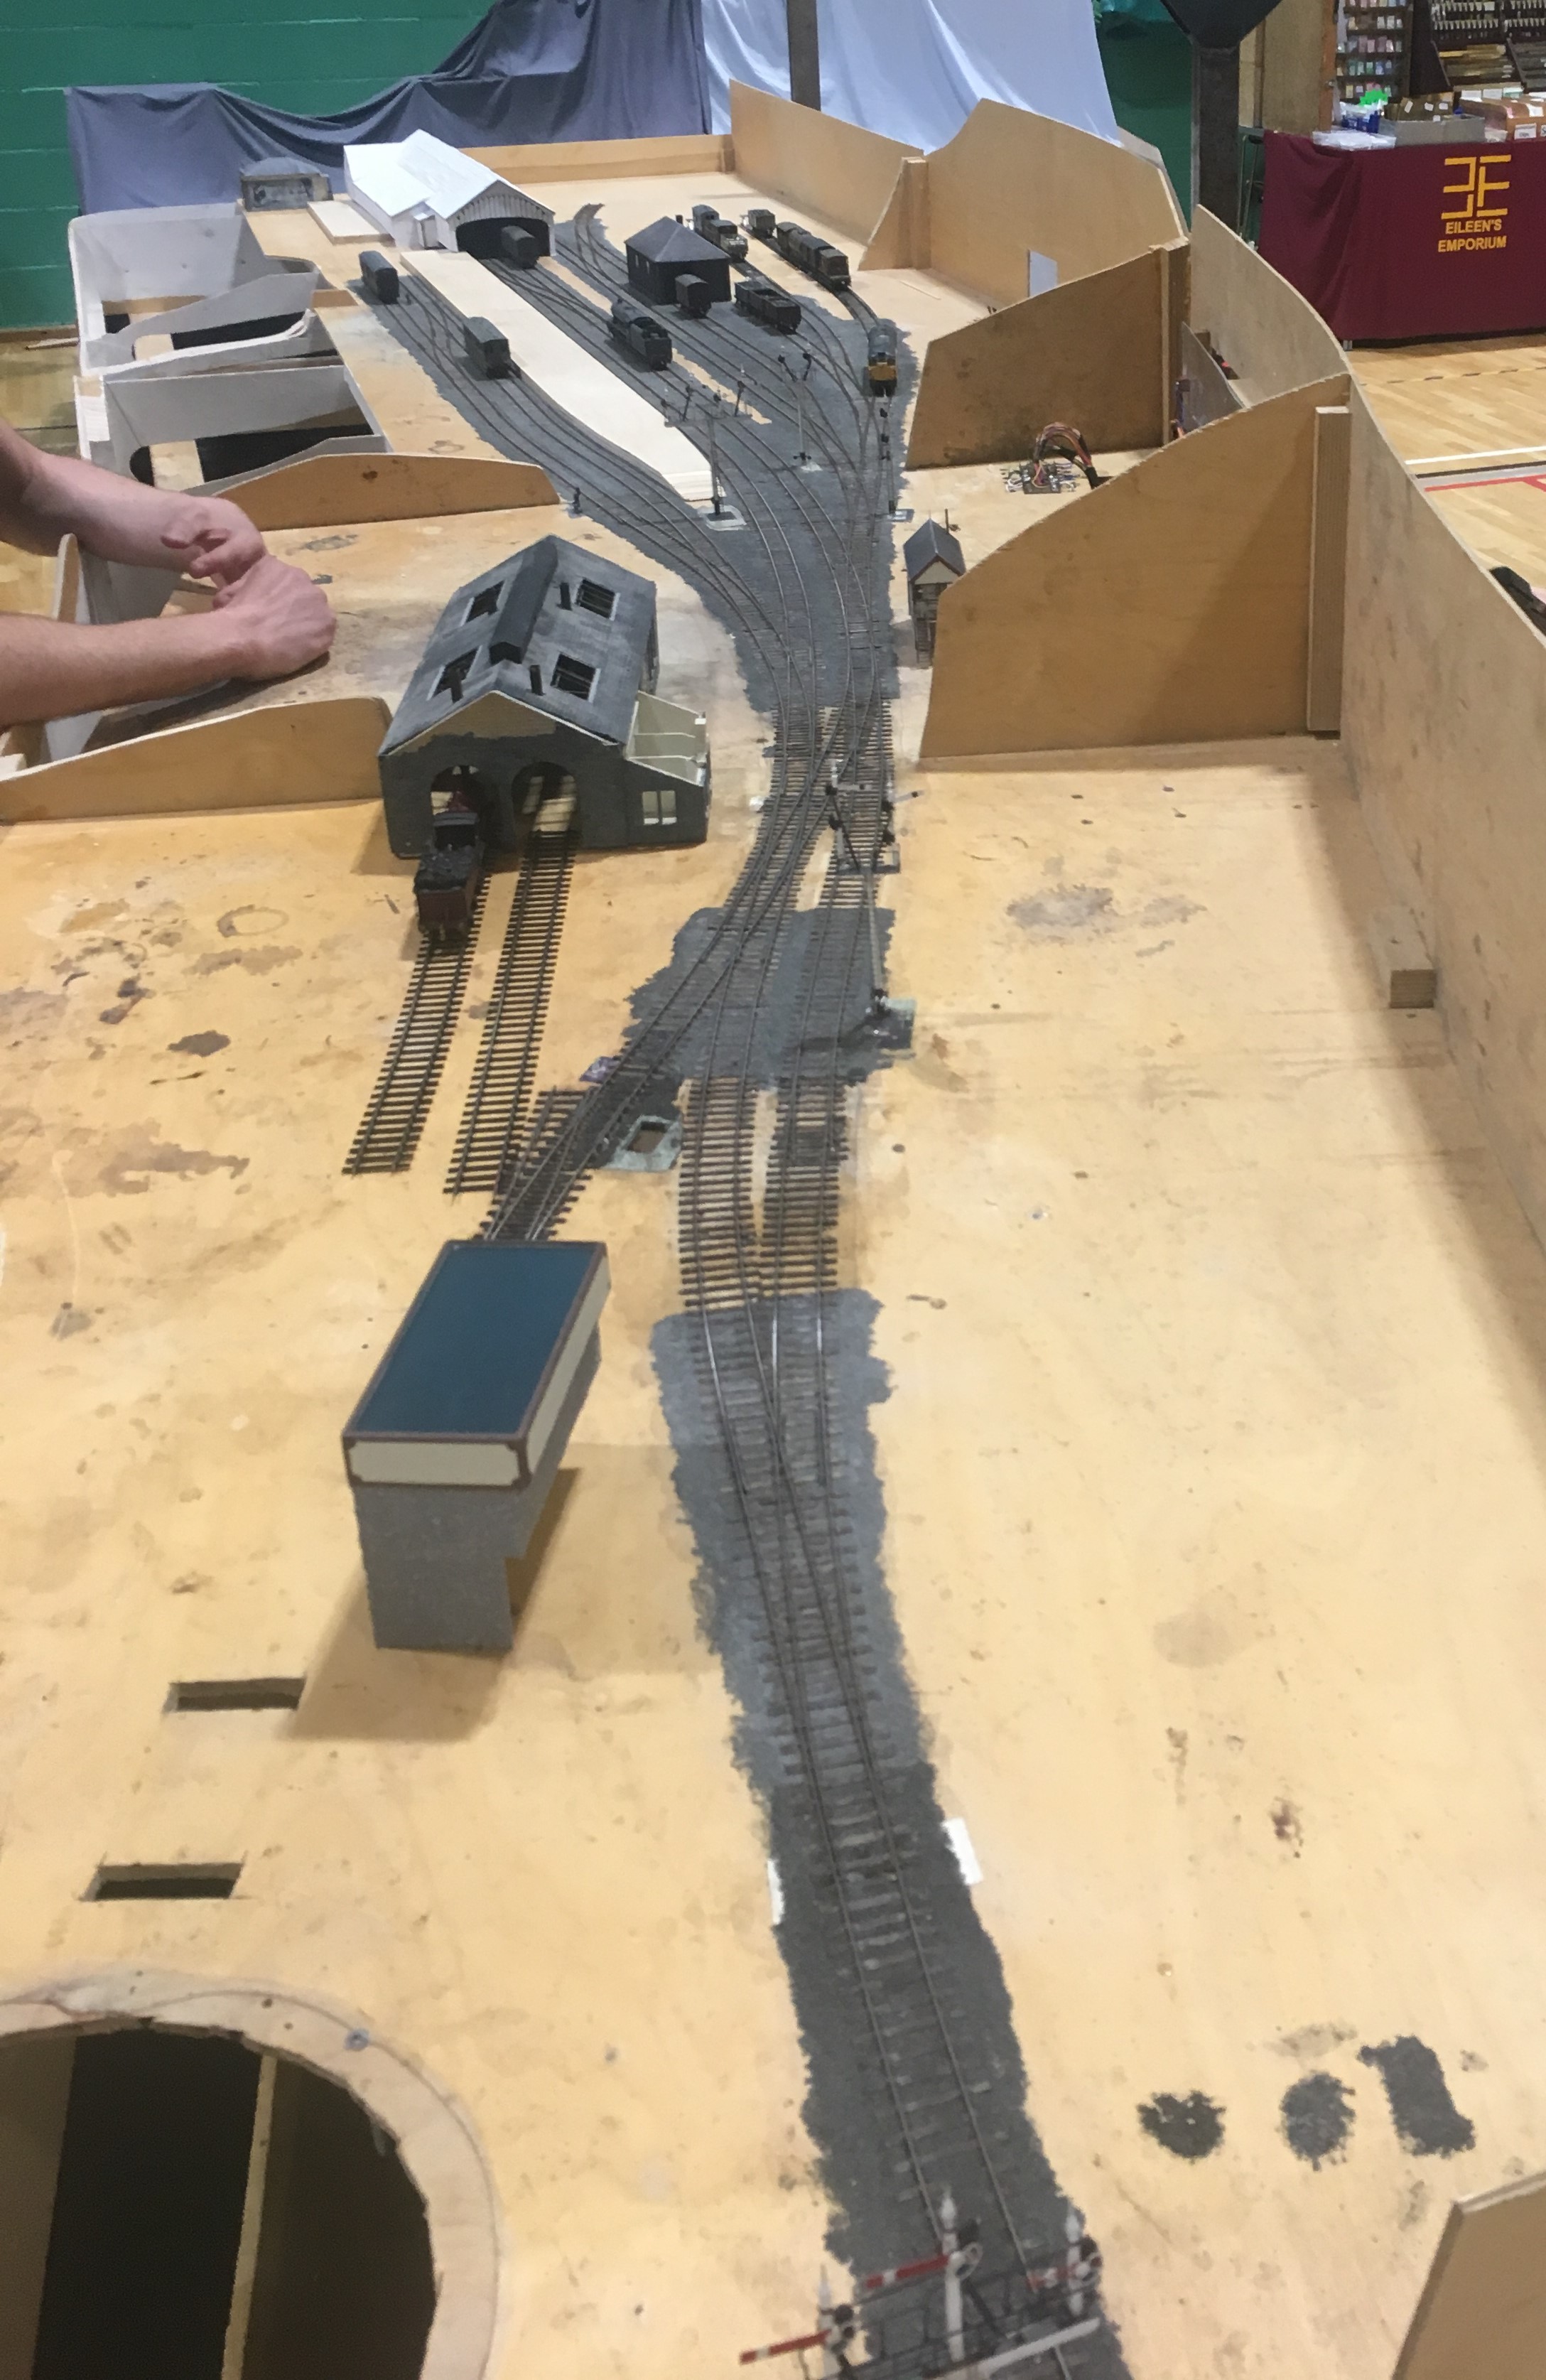
Well the layout made it to and from Scaleforum – possibly I did too!
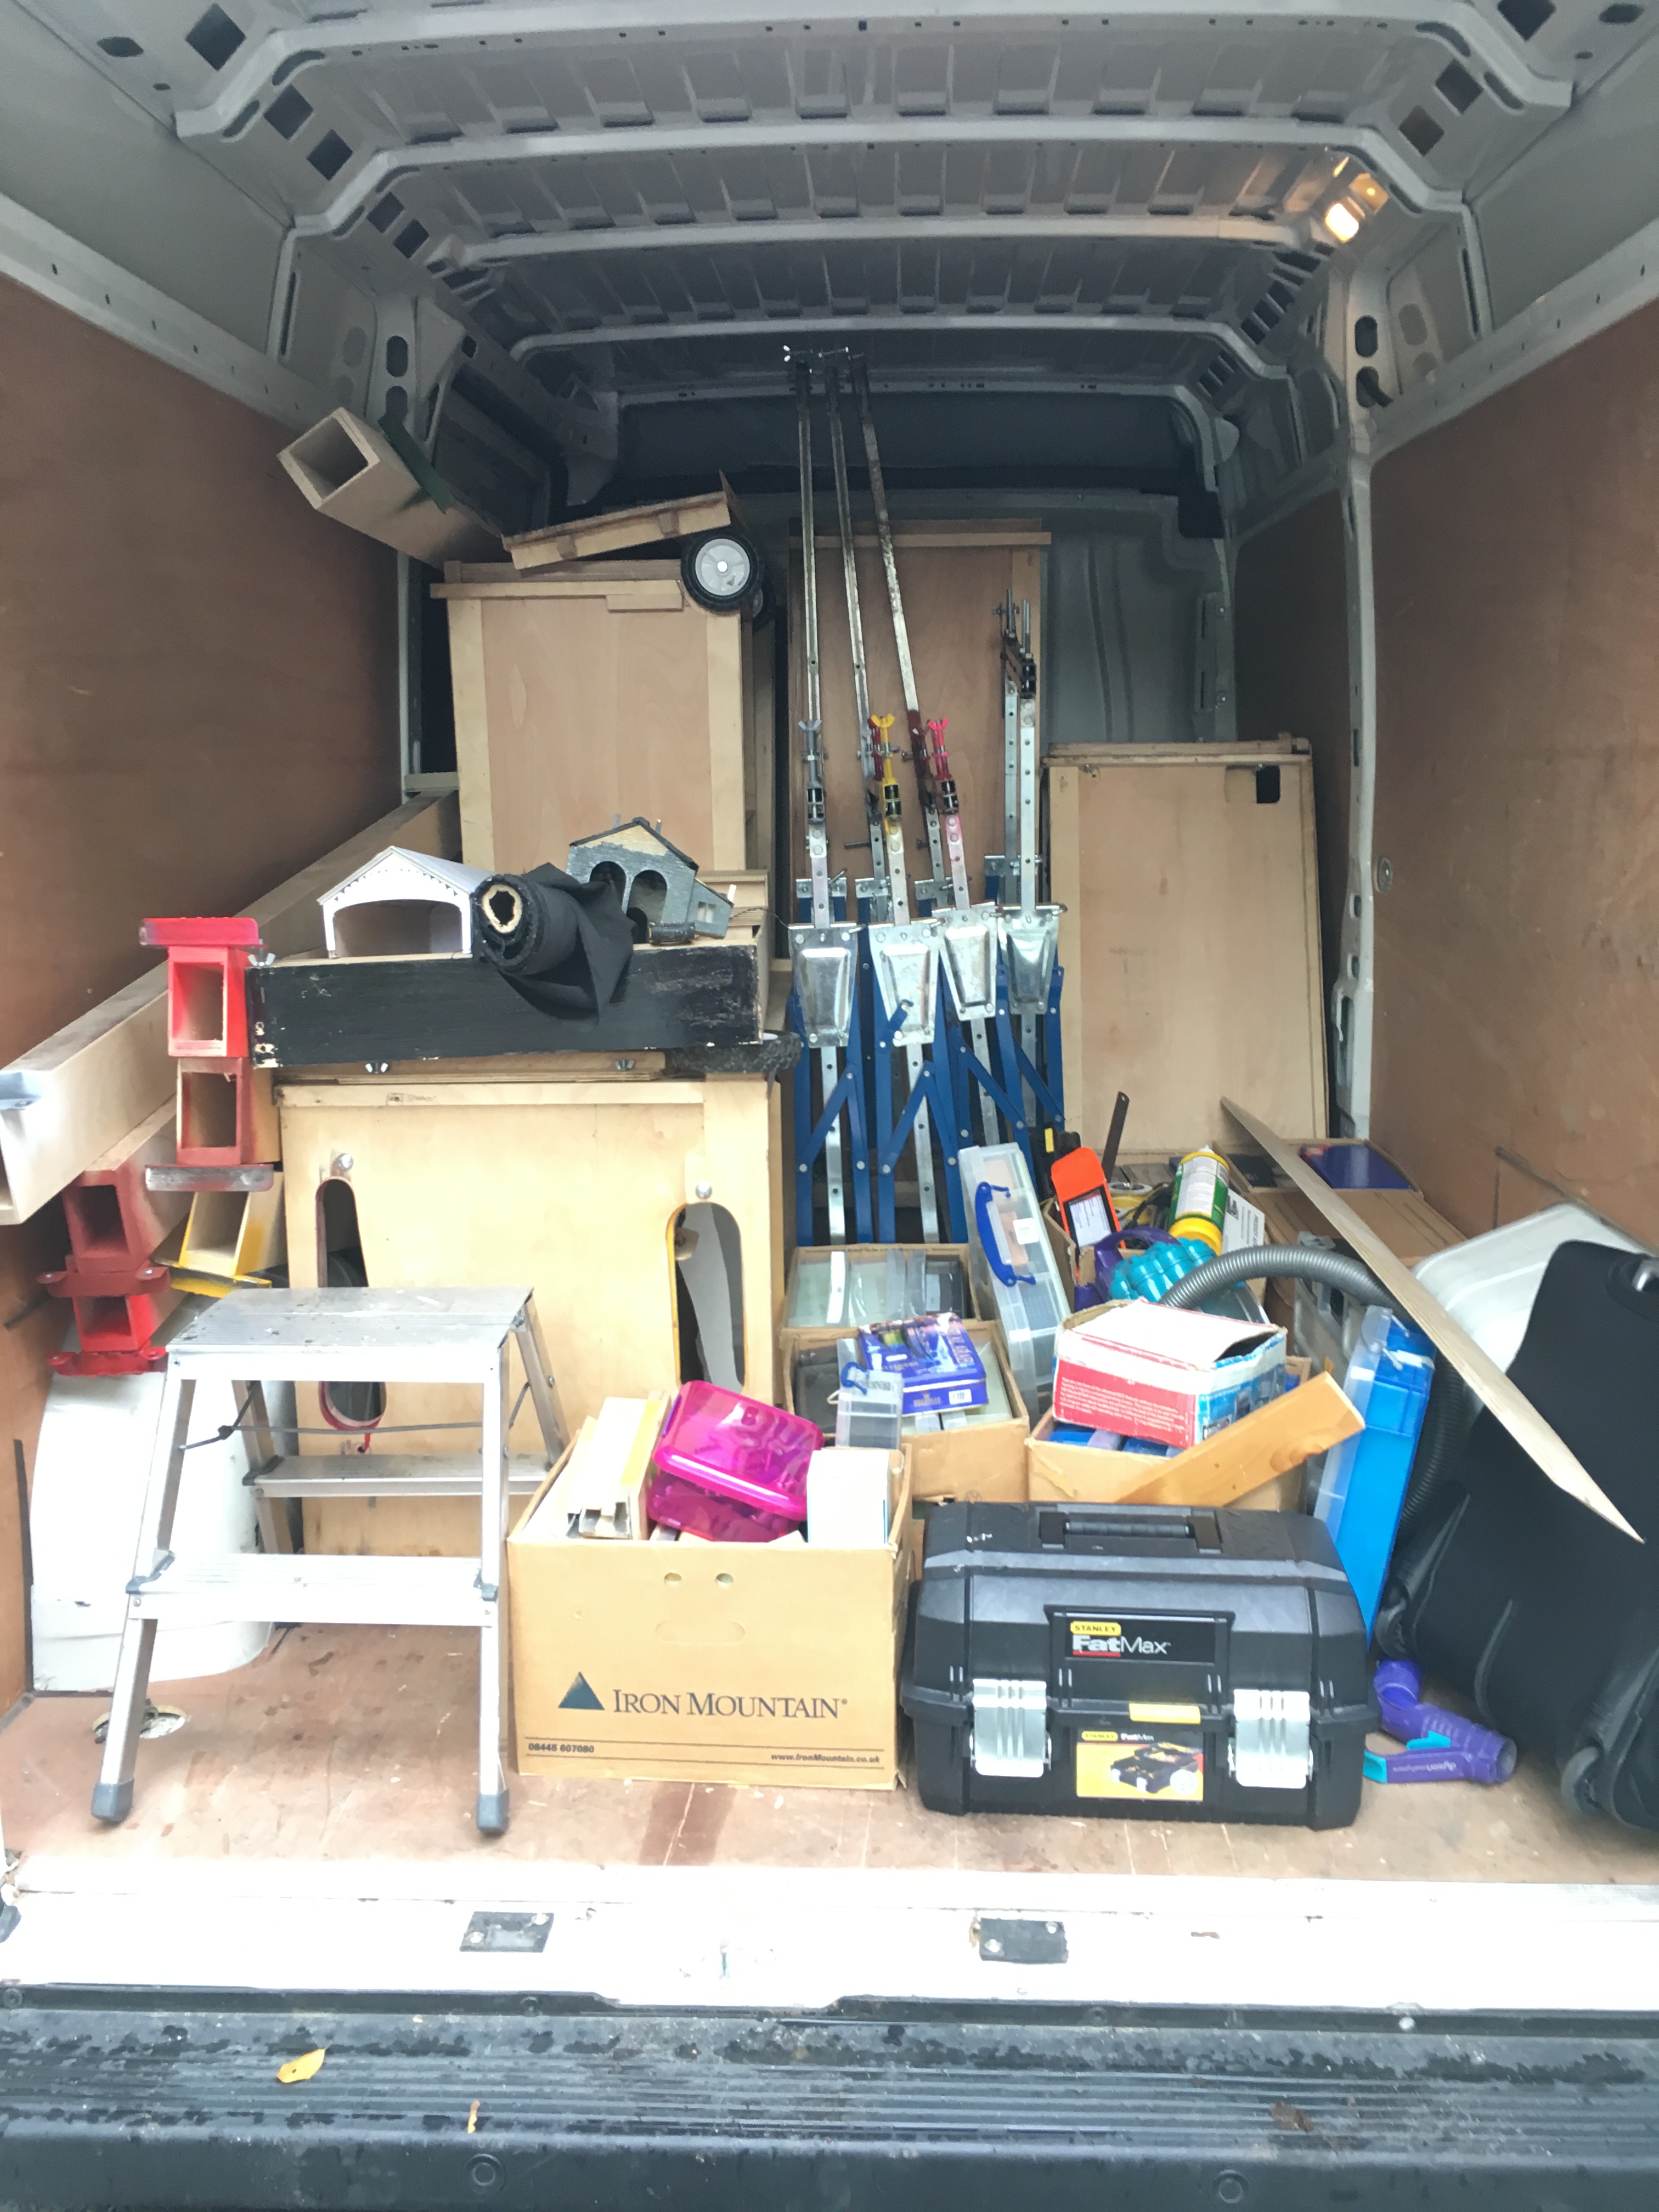
Last Friday, the inside of the hire van looked like this. Whilst the cases worked a treat, the dismantling of the layout from being set up on my own took a long time – much longer than I had hoped or expected.
Once at the venue, I was able to press gang some “volunteers” to erect the layout and this was much easier.
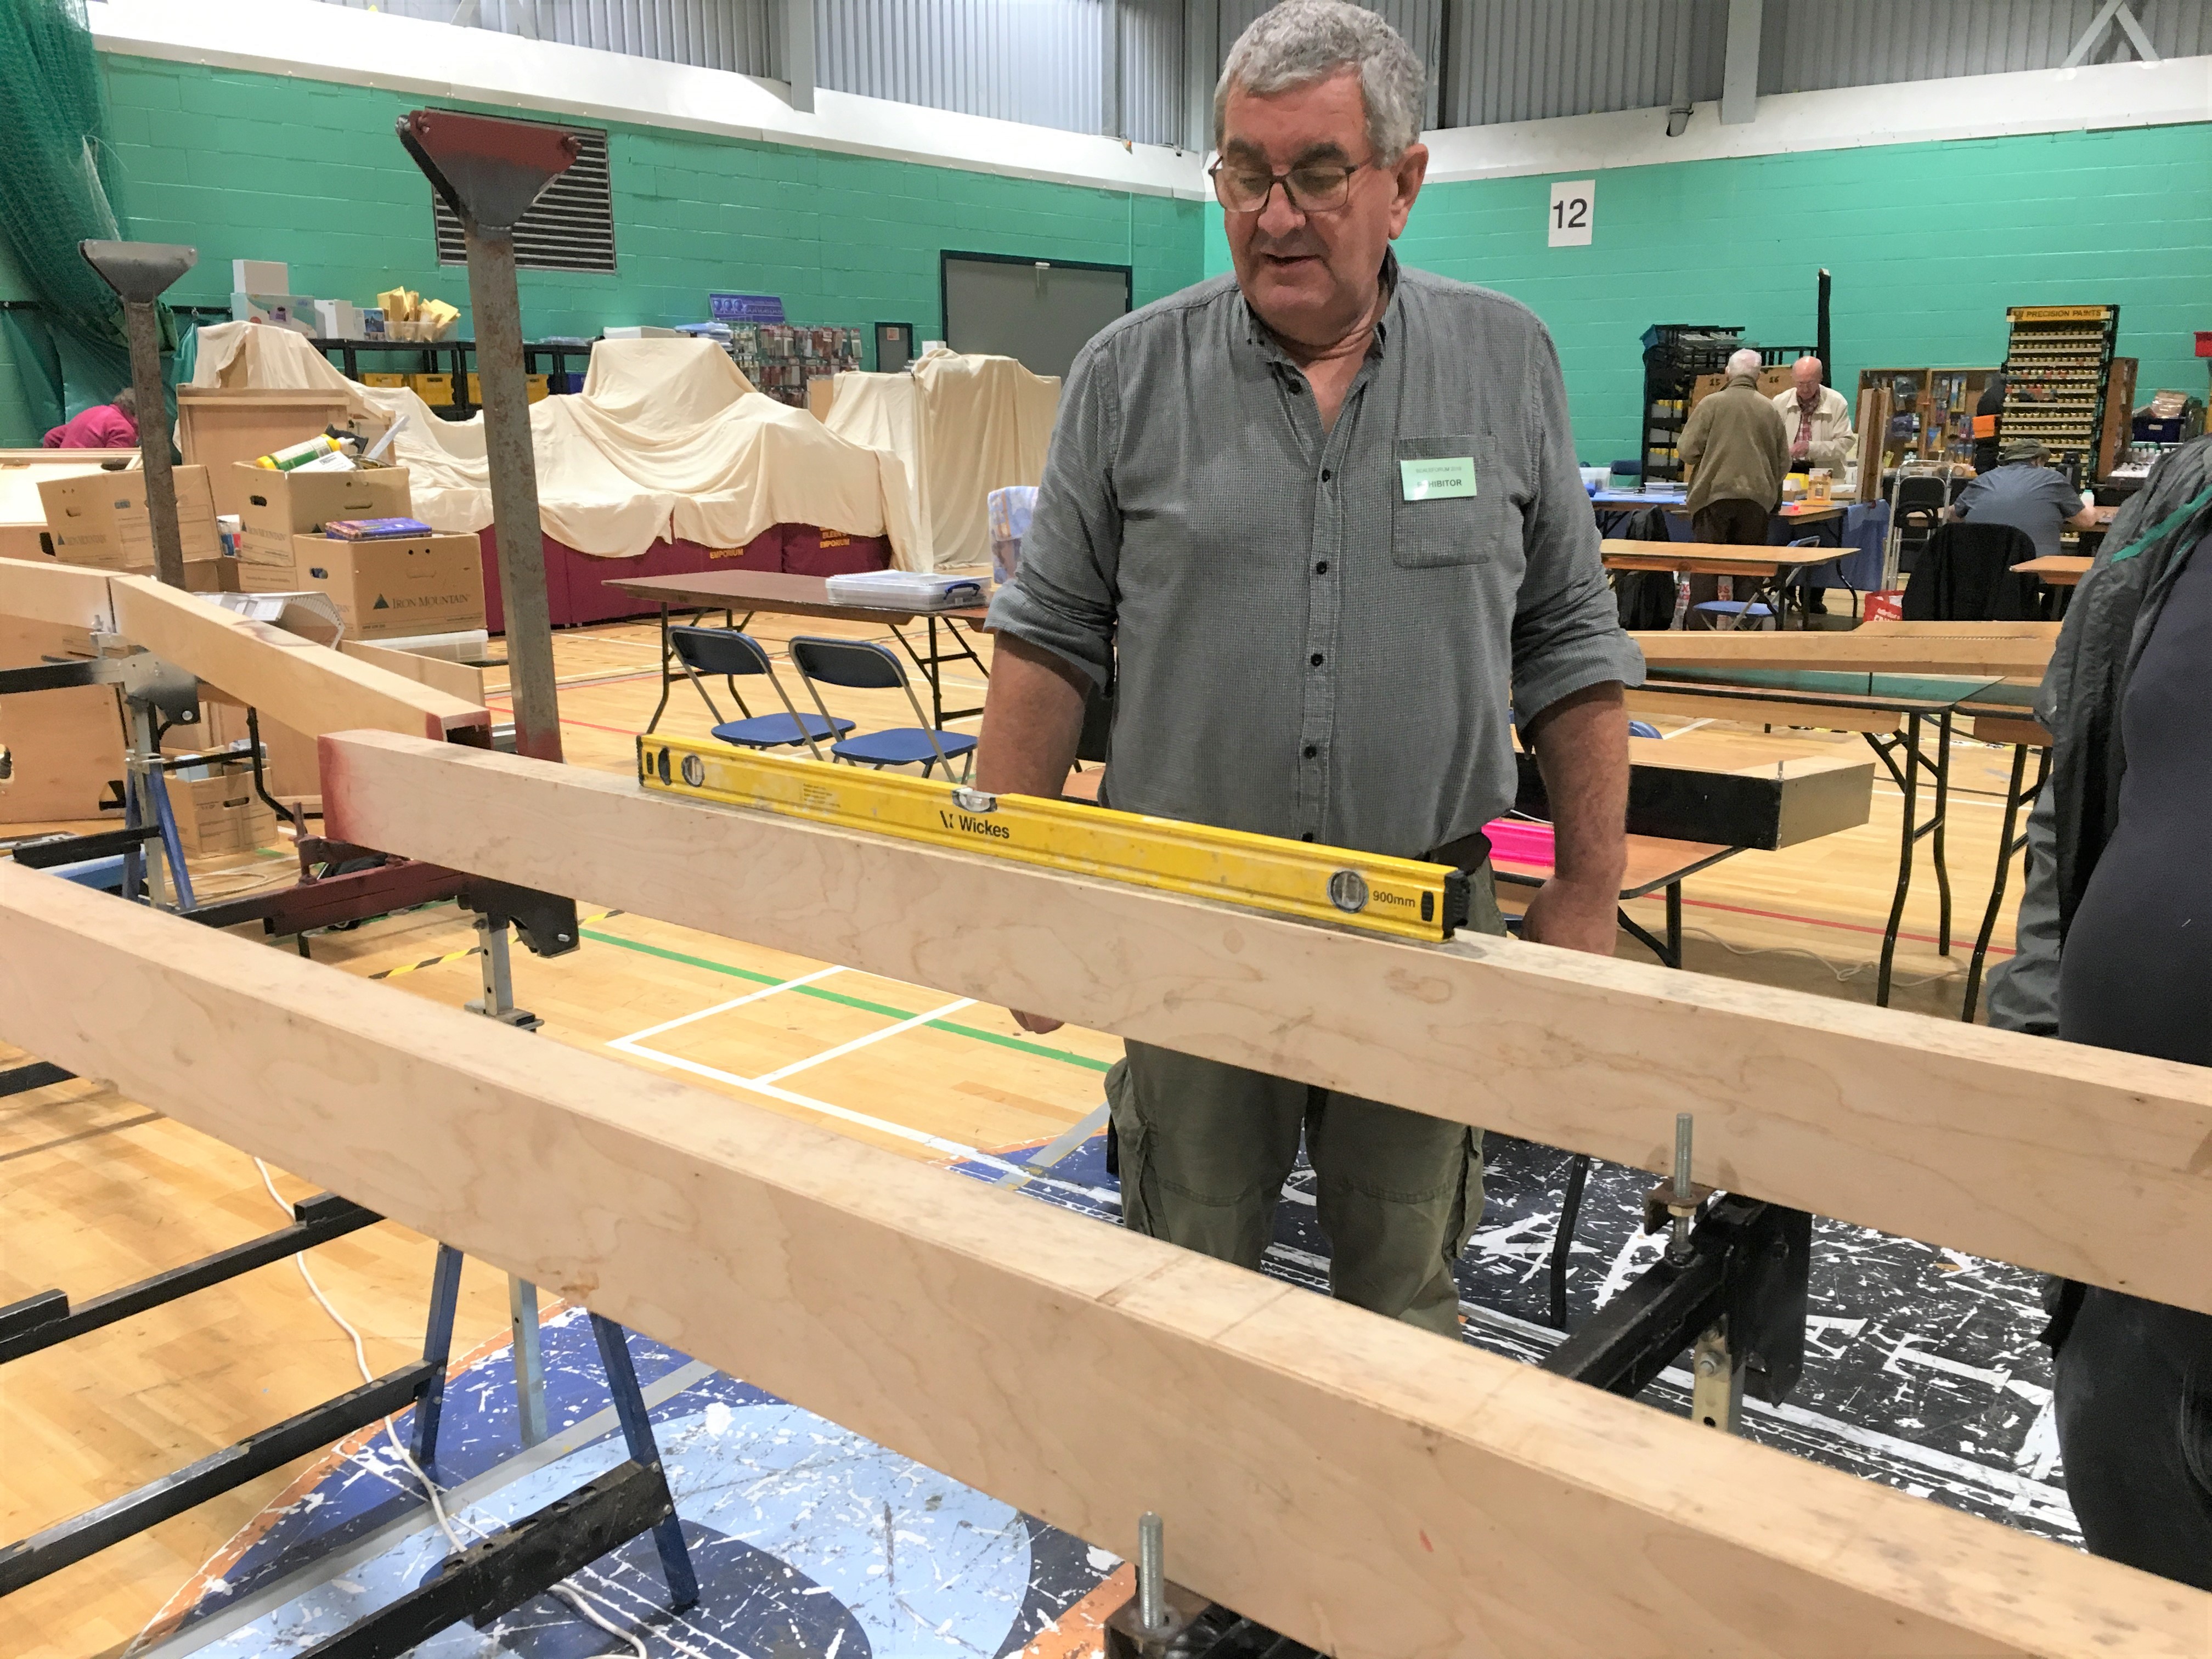
Getting the beams levelled up was speedy even though none of my press team had any experience of my logic! Indeed, with their help, it assembled itself quicker than Portchullin does although the jury is out in my mind as to whether this is simply because it as yet has rather less on it!
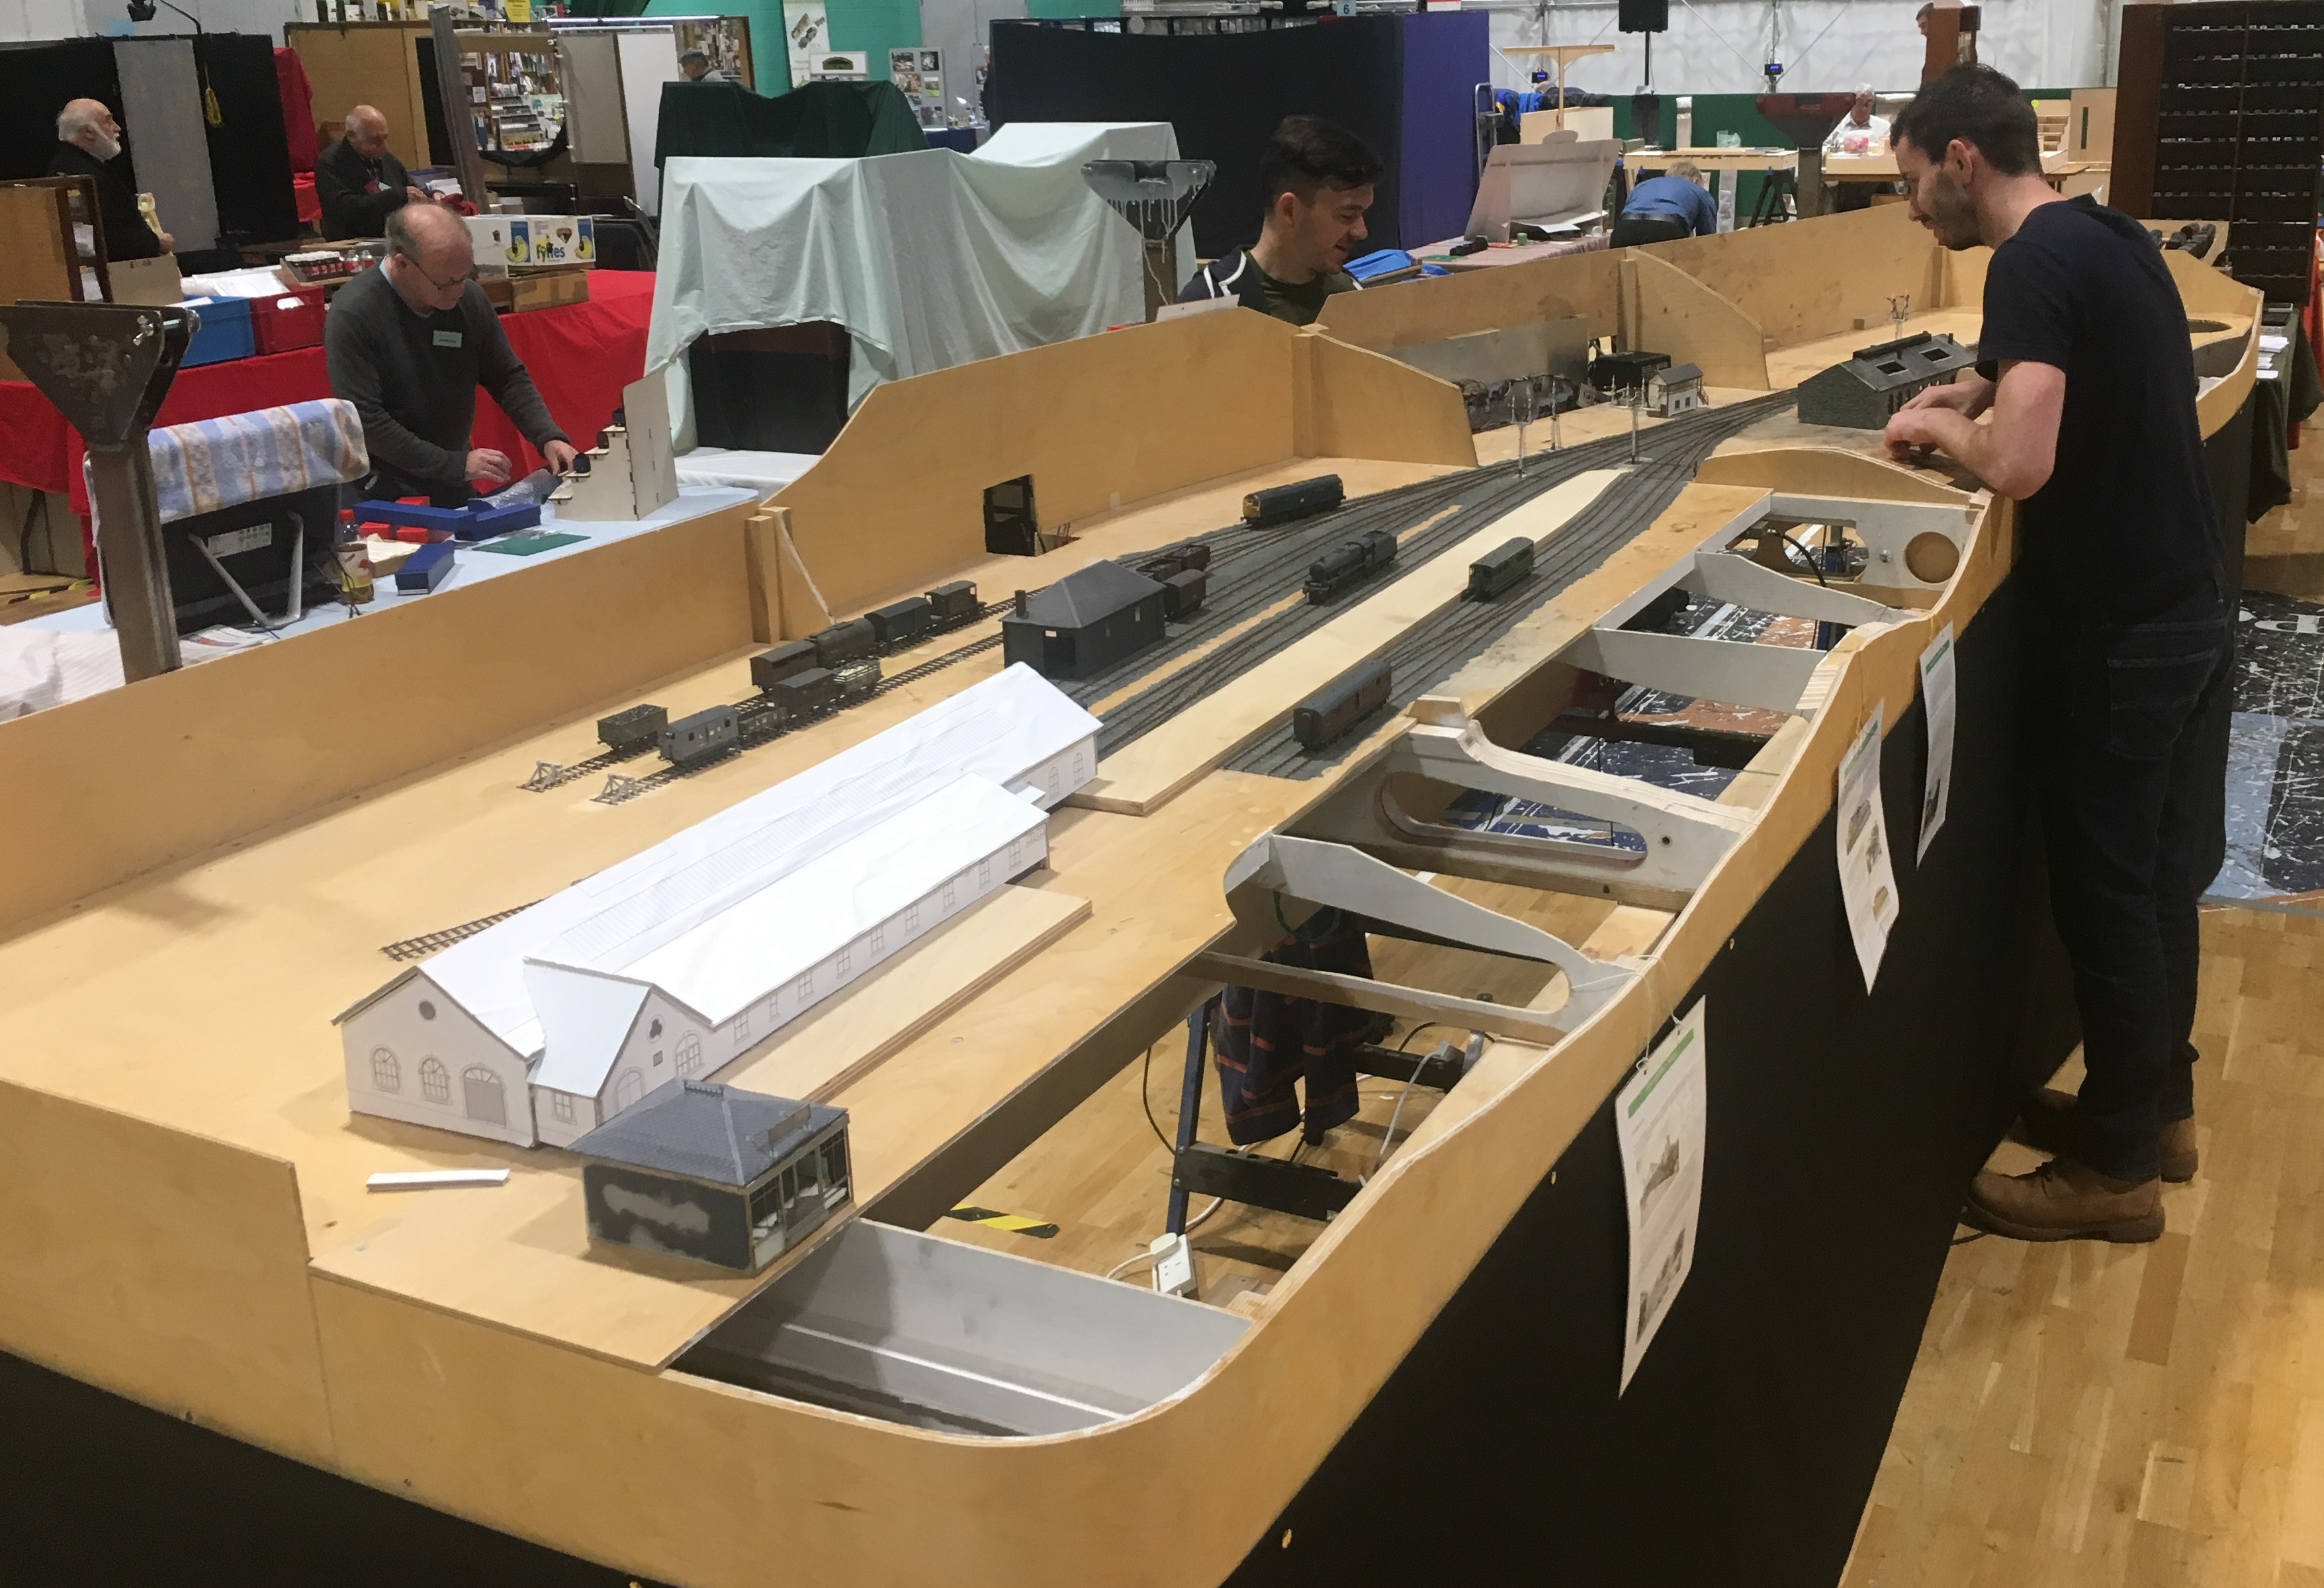
The layout’s size quite quickly became apparent; especially its depth – as can be seen here with Chris in the background for a sense of sale! Please don’t tell my wife this is actually quite big, I have been telling her it is pretty normally sized!
I did not manage to get front side all that often so I have only fairly limited numbers of photographs. Fortunately Samuel Bennett has come to my rescue and has provided a number of photographs to show what it looked like to the visitor.
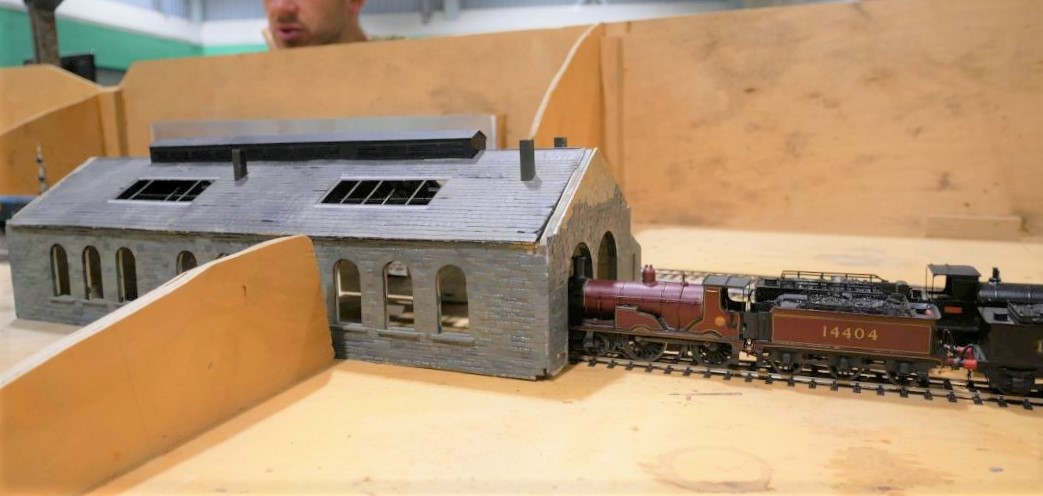
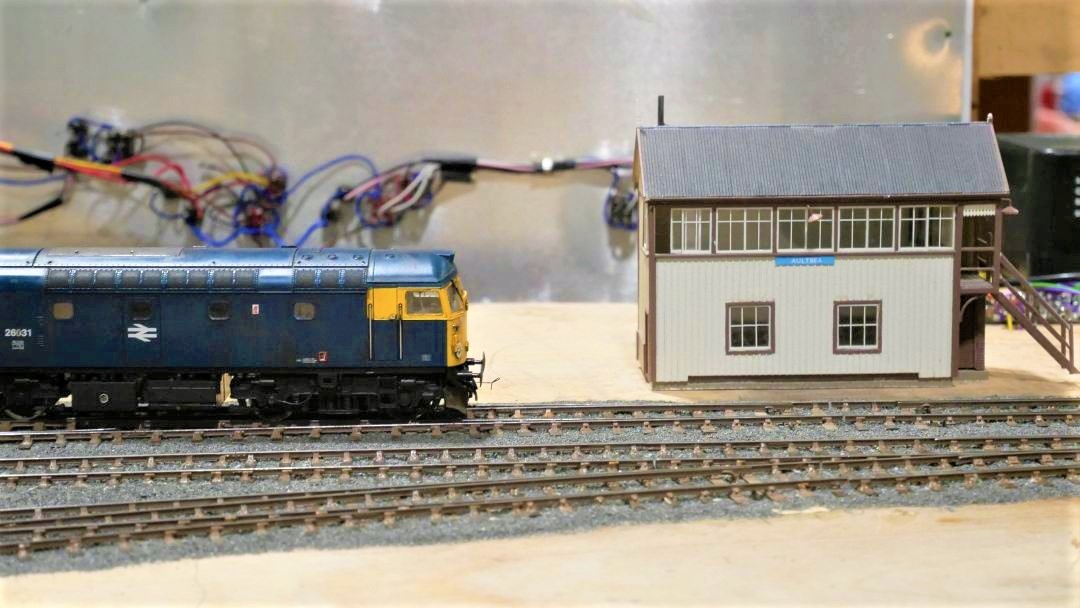
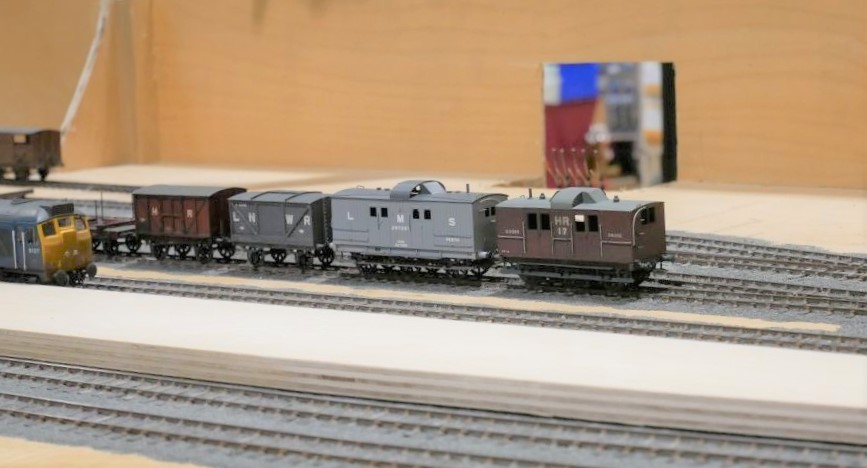
We only had three correct Highland locos chipped up (and one of these decided to sulk after a couple of hours!) so we did break out the blue diesels to make sure we had a fully operational layout. Above there are a few of the locos awaiting chipping on shed and below we have the scene 50 years later!
……..and below is simply confused!
Although the layout did not operate perfectly, it did behave much better than I (and my operating team) had feared! The two page list of faults and issues to resolve with the trackwork, wiring or stock is a fraction of the list that would have existed after Portchullin’s first outing (if I ever had one!).
The signals received a lot of comment, even if there was one missing because I managed to damage it as I was packing the layout. There’ll be another post on these soon.
It Lives Igor; the Monster, It Lives……
Well, it is twitching quite a lot anyway……………..
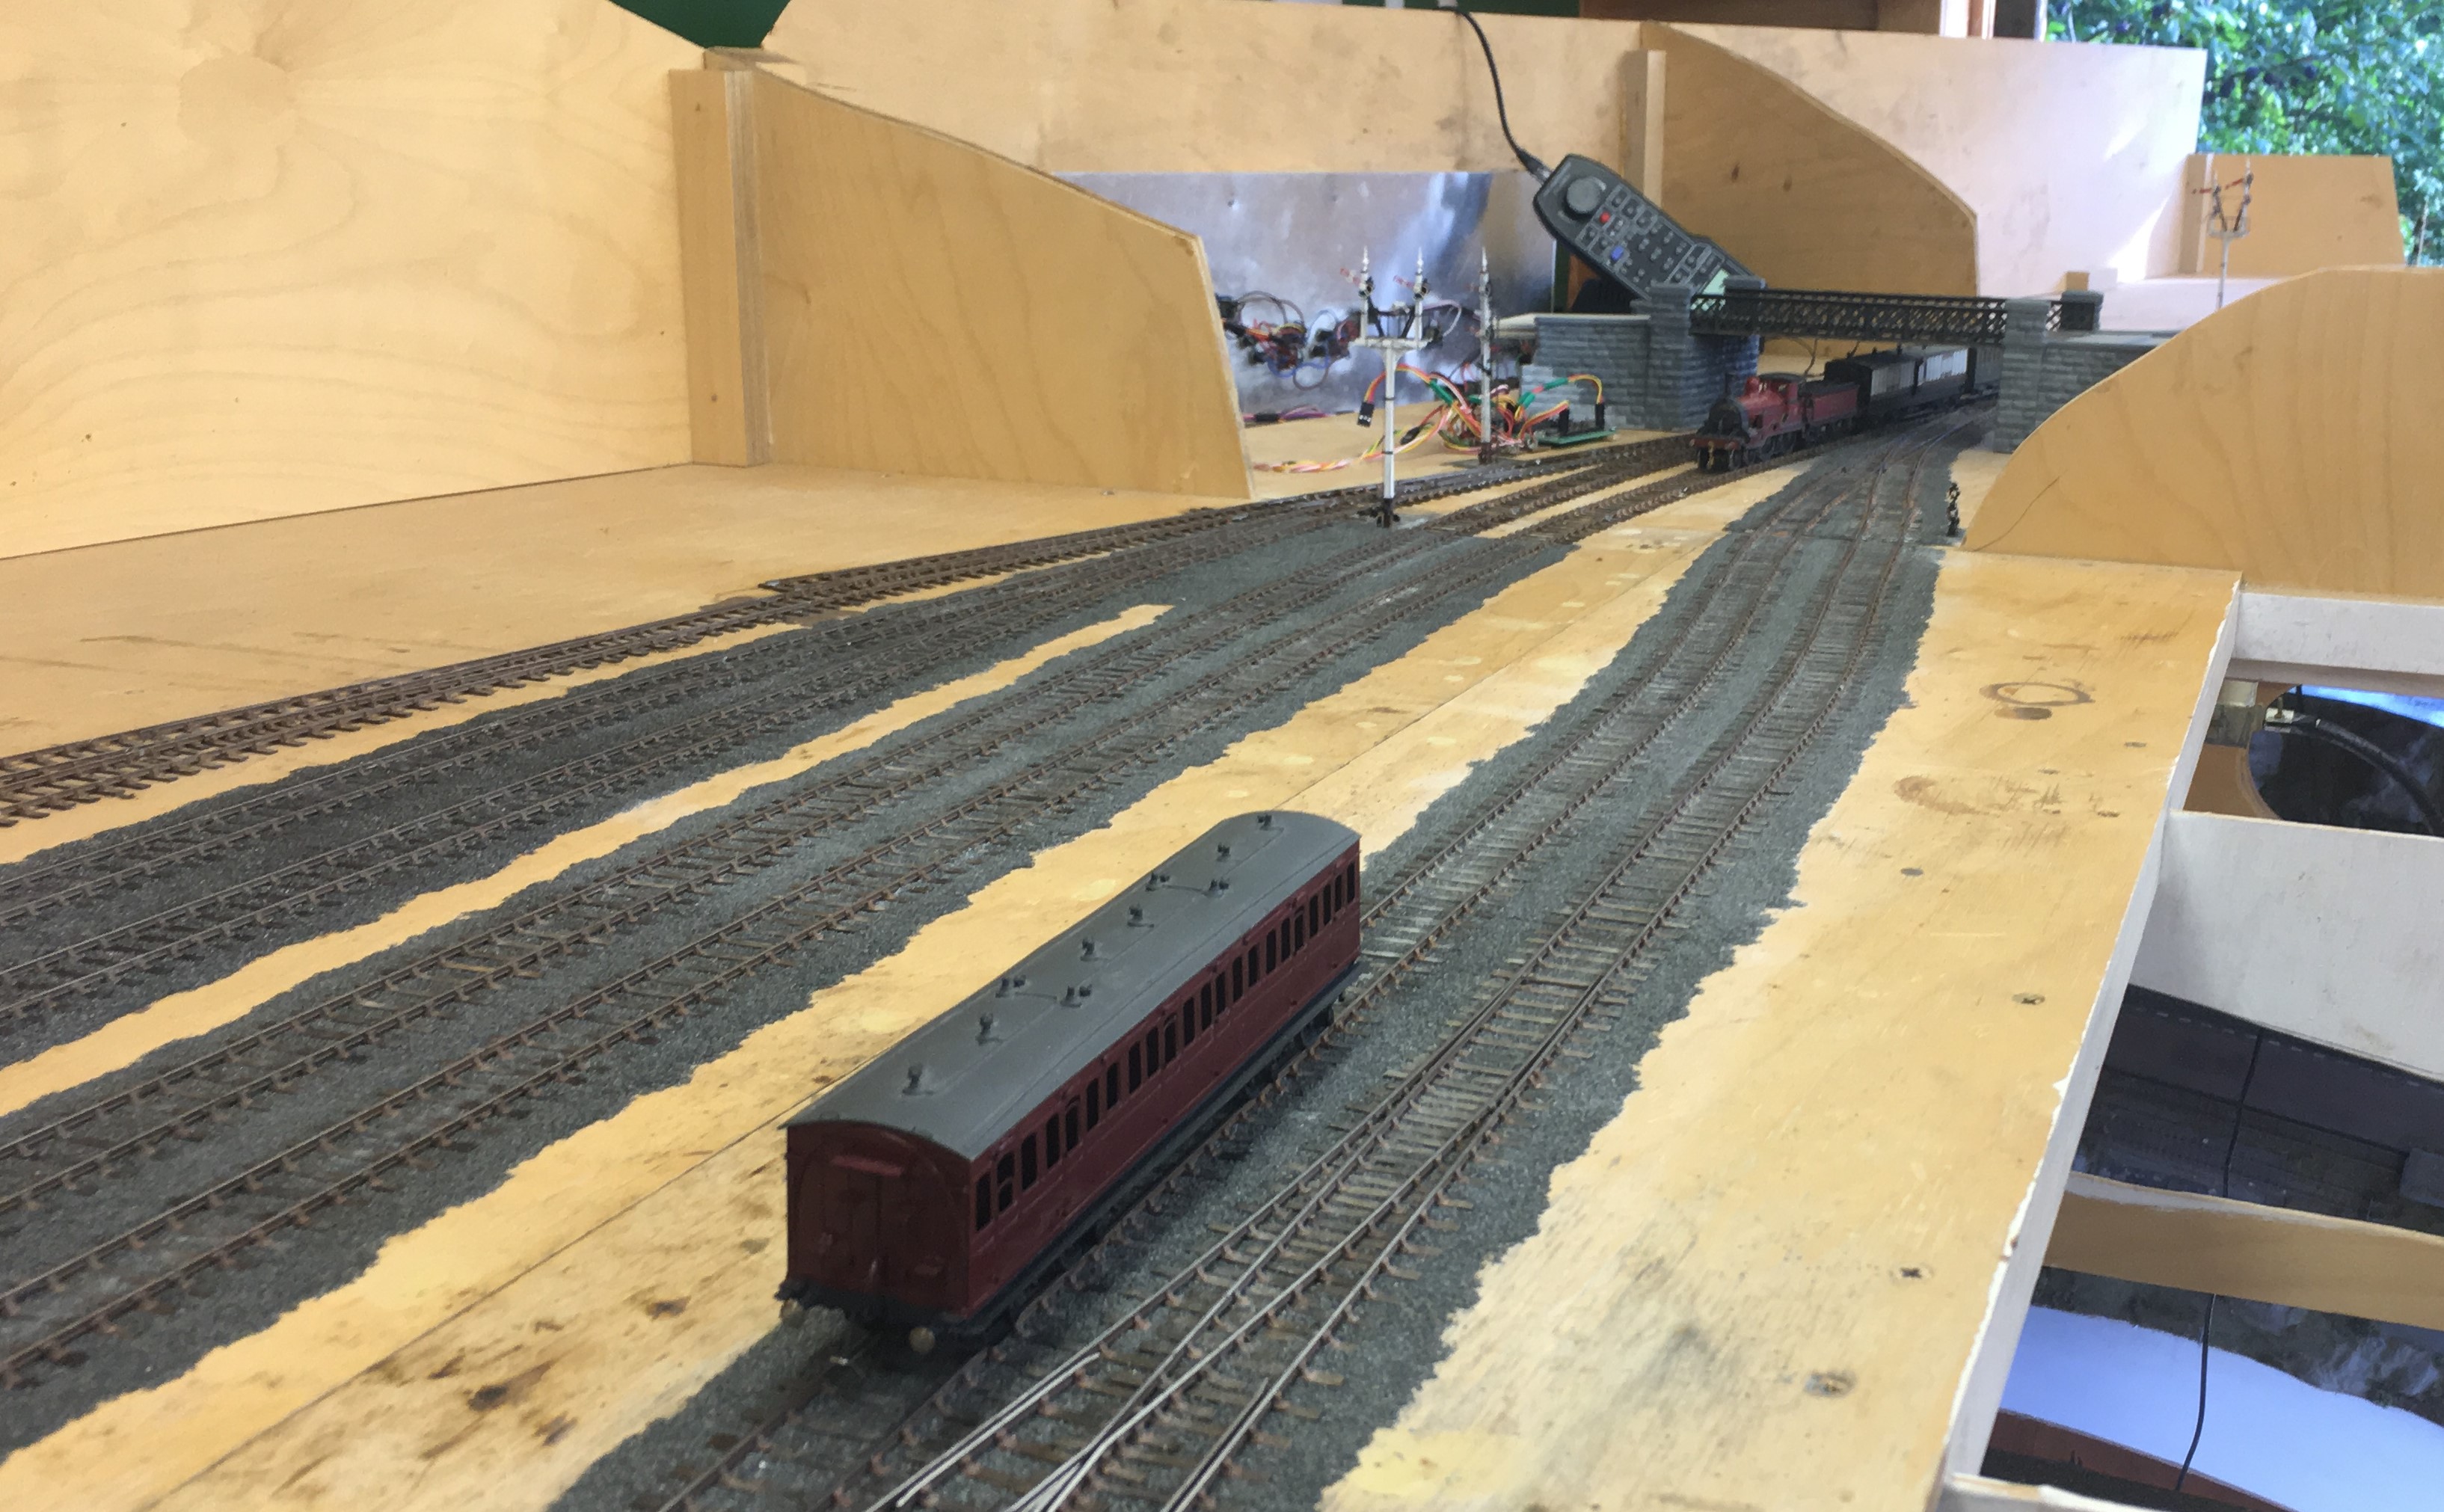
A significant day in the life of Glenmutchkin over this weekend, as I have got a significant proportion of the trackwork which has been laid operational. Admittedly I have an electrical issue in the branch bay (something is wired backwards!), the fiddle yard has not yet been linked to the layout and the single slip still has not be corrected but it works…………..
This is my Loghgorm Bogie (Clyde Bogie series) built by John James. The body is not quite sitting right on it, which is why there is a bit of bouncing; which is a bit worse when it runs faster as below.
Lots to do, but we are getting there! There will be a working layout for Scaleforum!

Calming an Exhibition Manager’s Nerves…………
So with nine weeks to go (a couple of which will be lost with a summer holiday) to Glenmutchkin’s first outing at Scaleforum, the state of progress is at the forefront my mind! It is probably rather more at the forefront of the exhibition manager’s mind!
So help to calm the Scaleforum’s exhibition manager’s nerves, here is a progress report and update photographs to prove that even if I have not been providing many posts, progress is being made on a number of fronts:
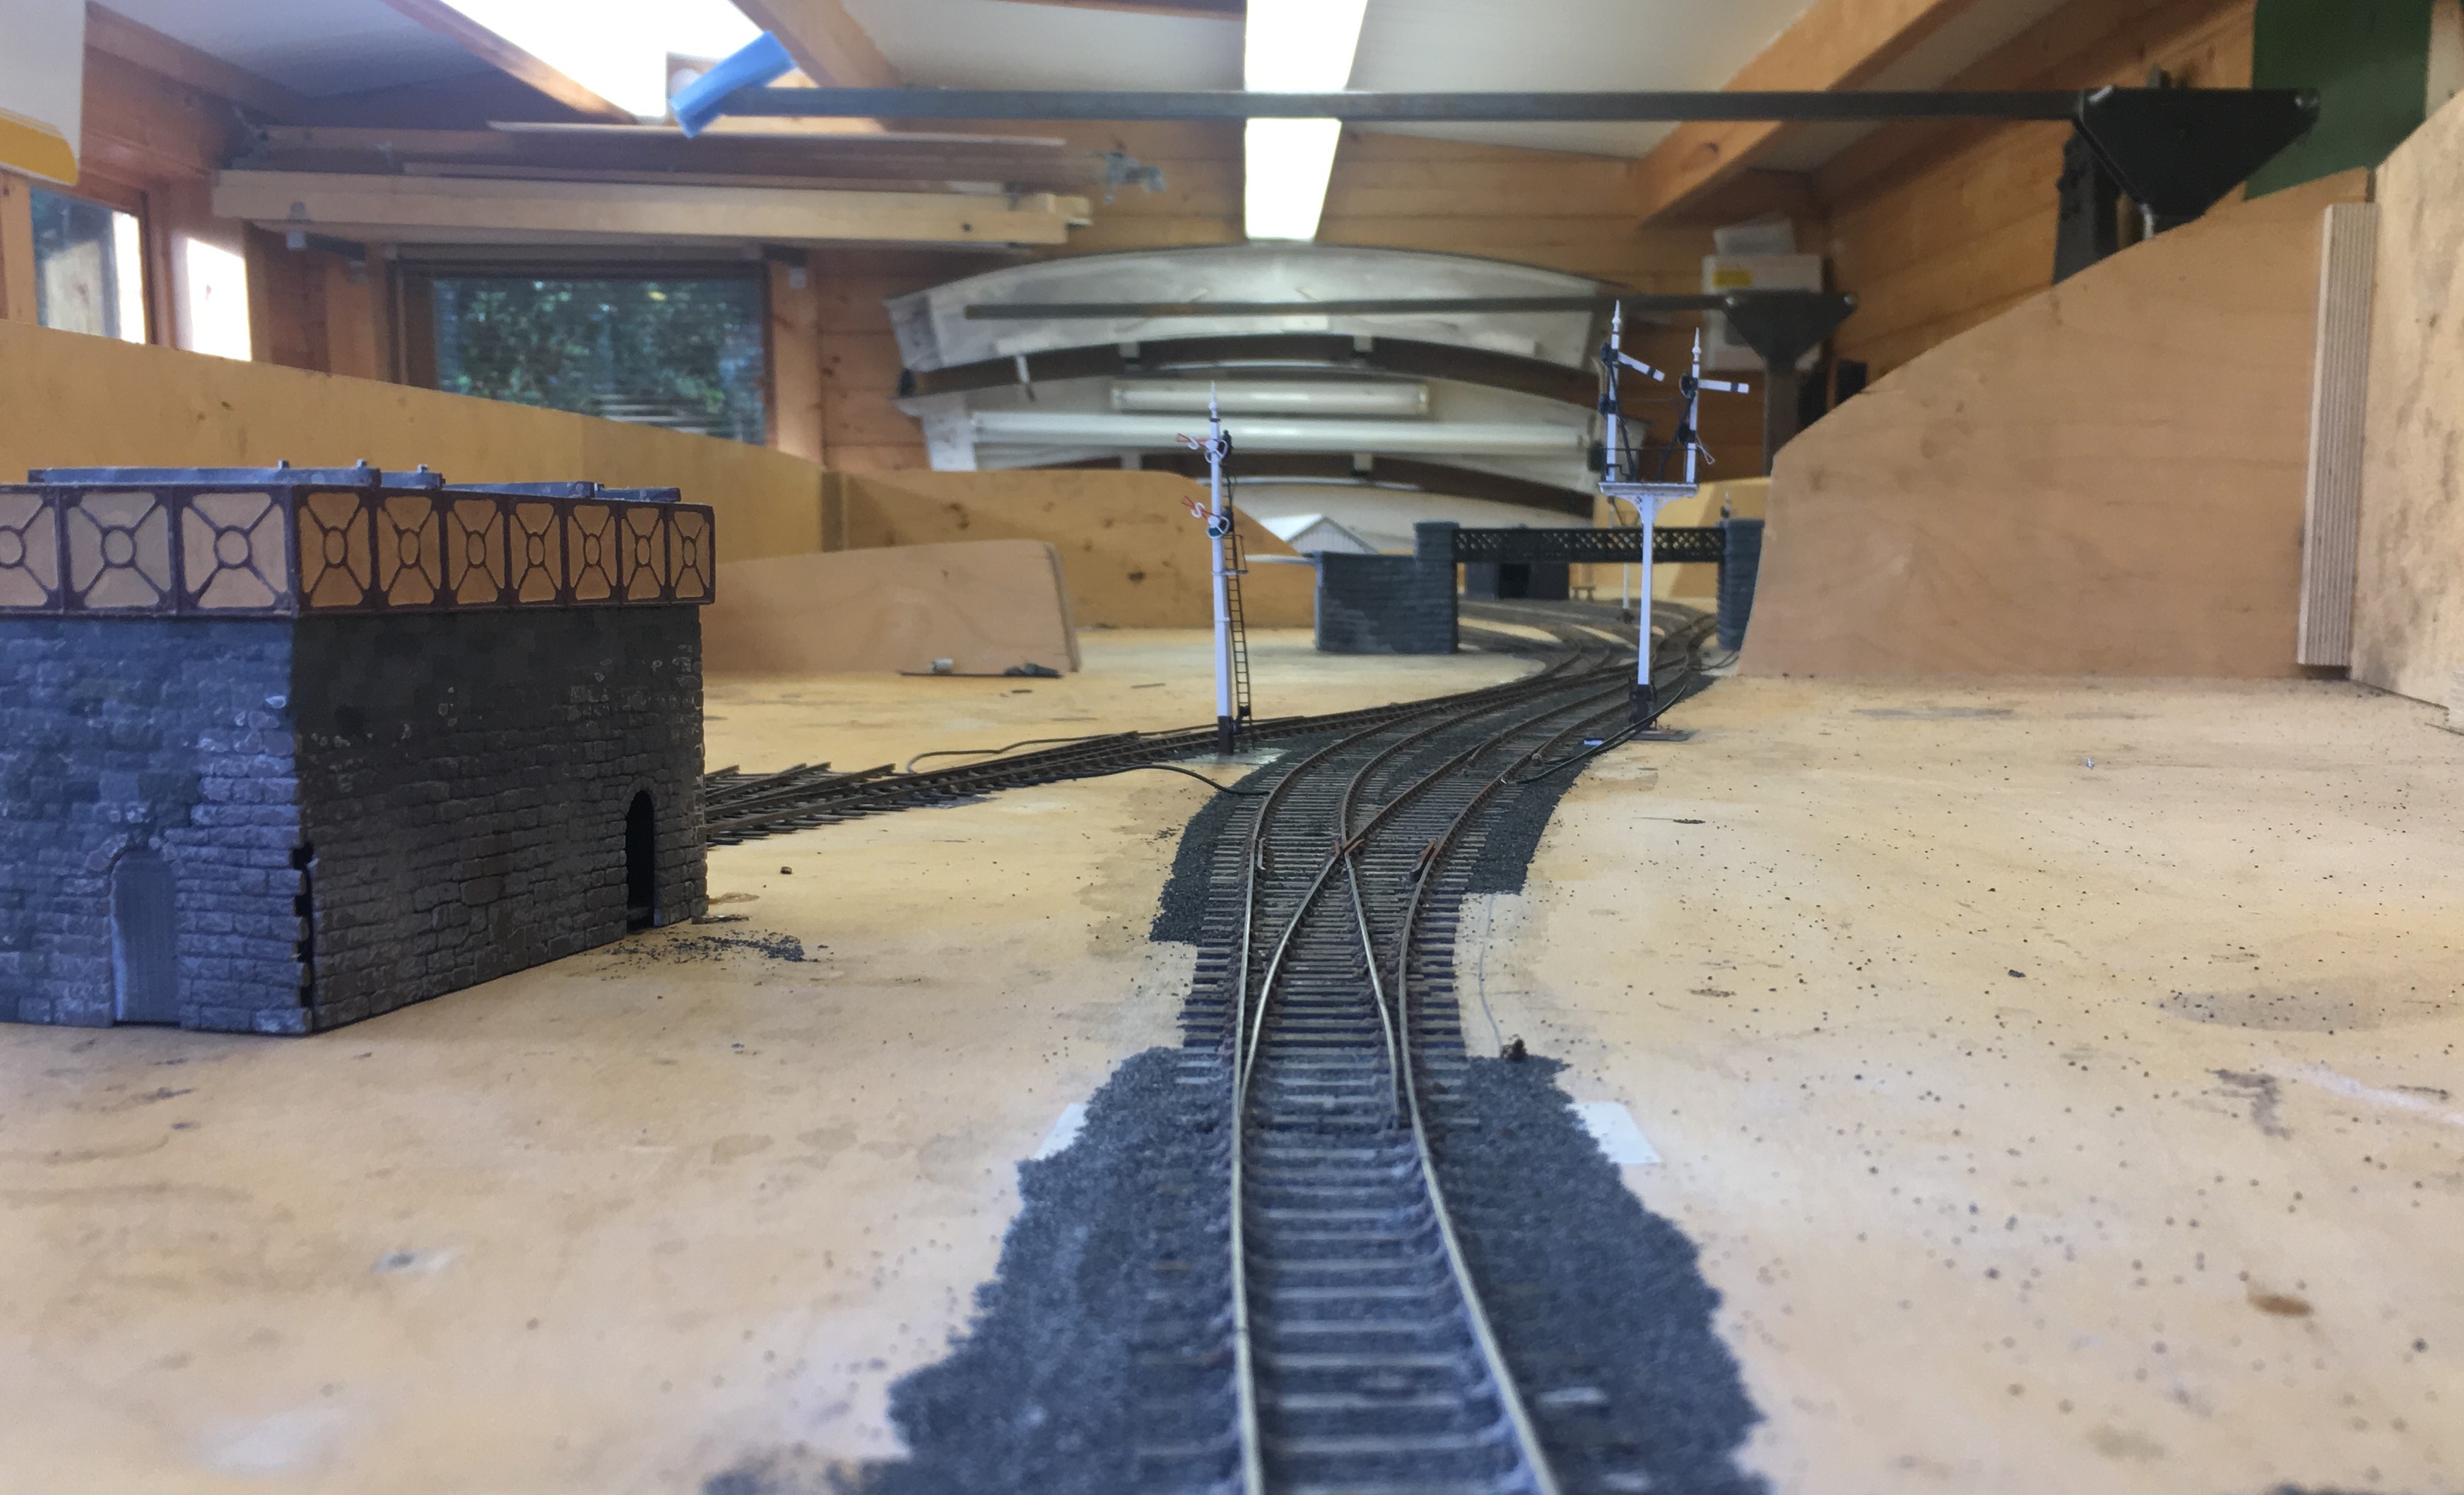
Most of the track is laid and wired; much of it is also ballasted, although it still needs colouring.
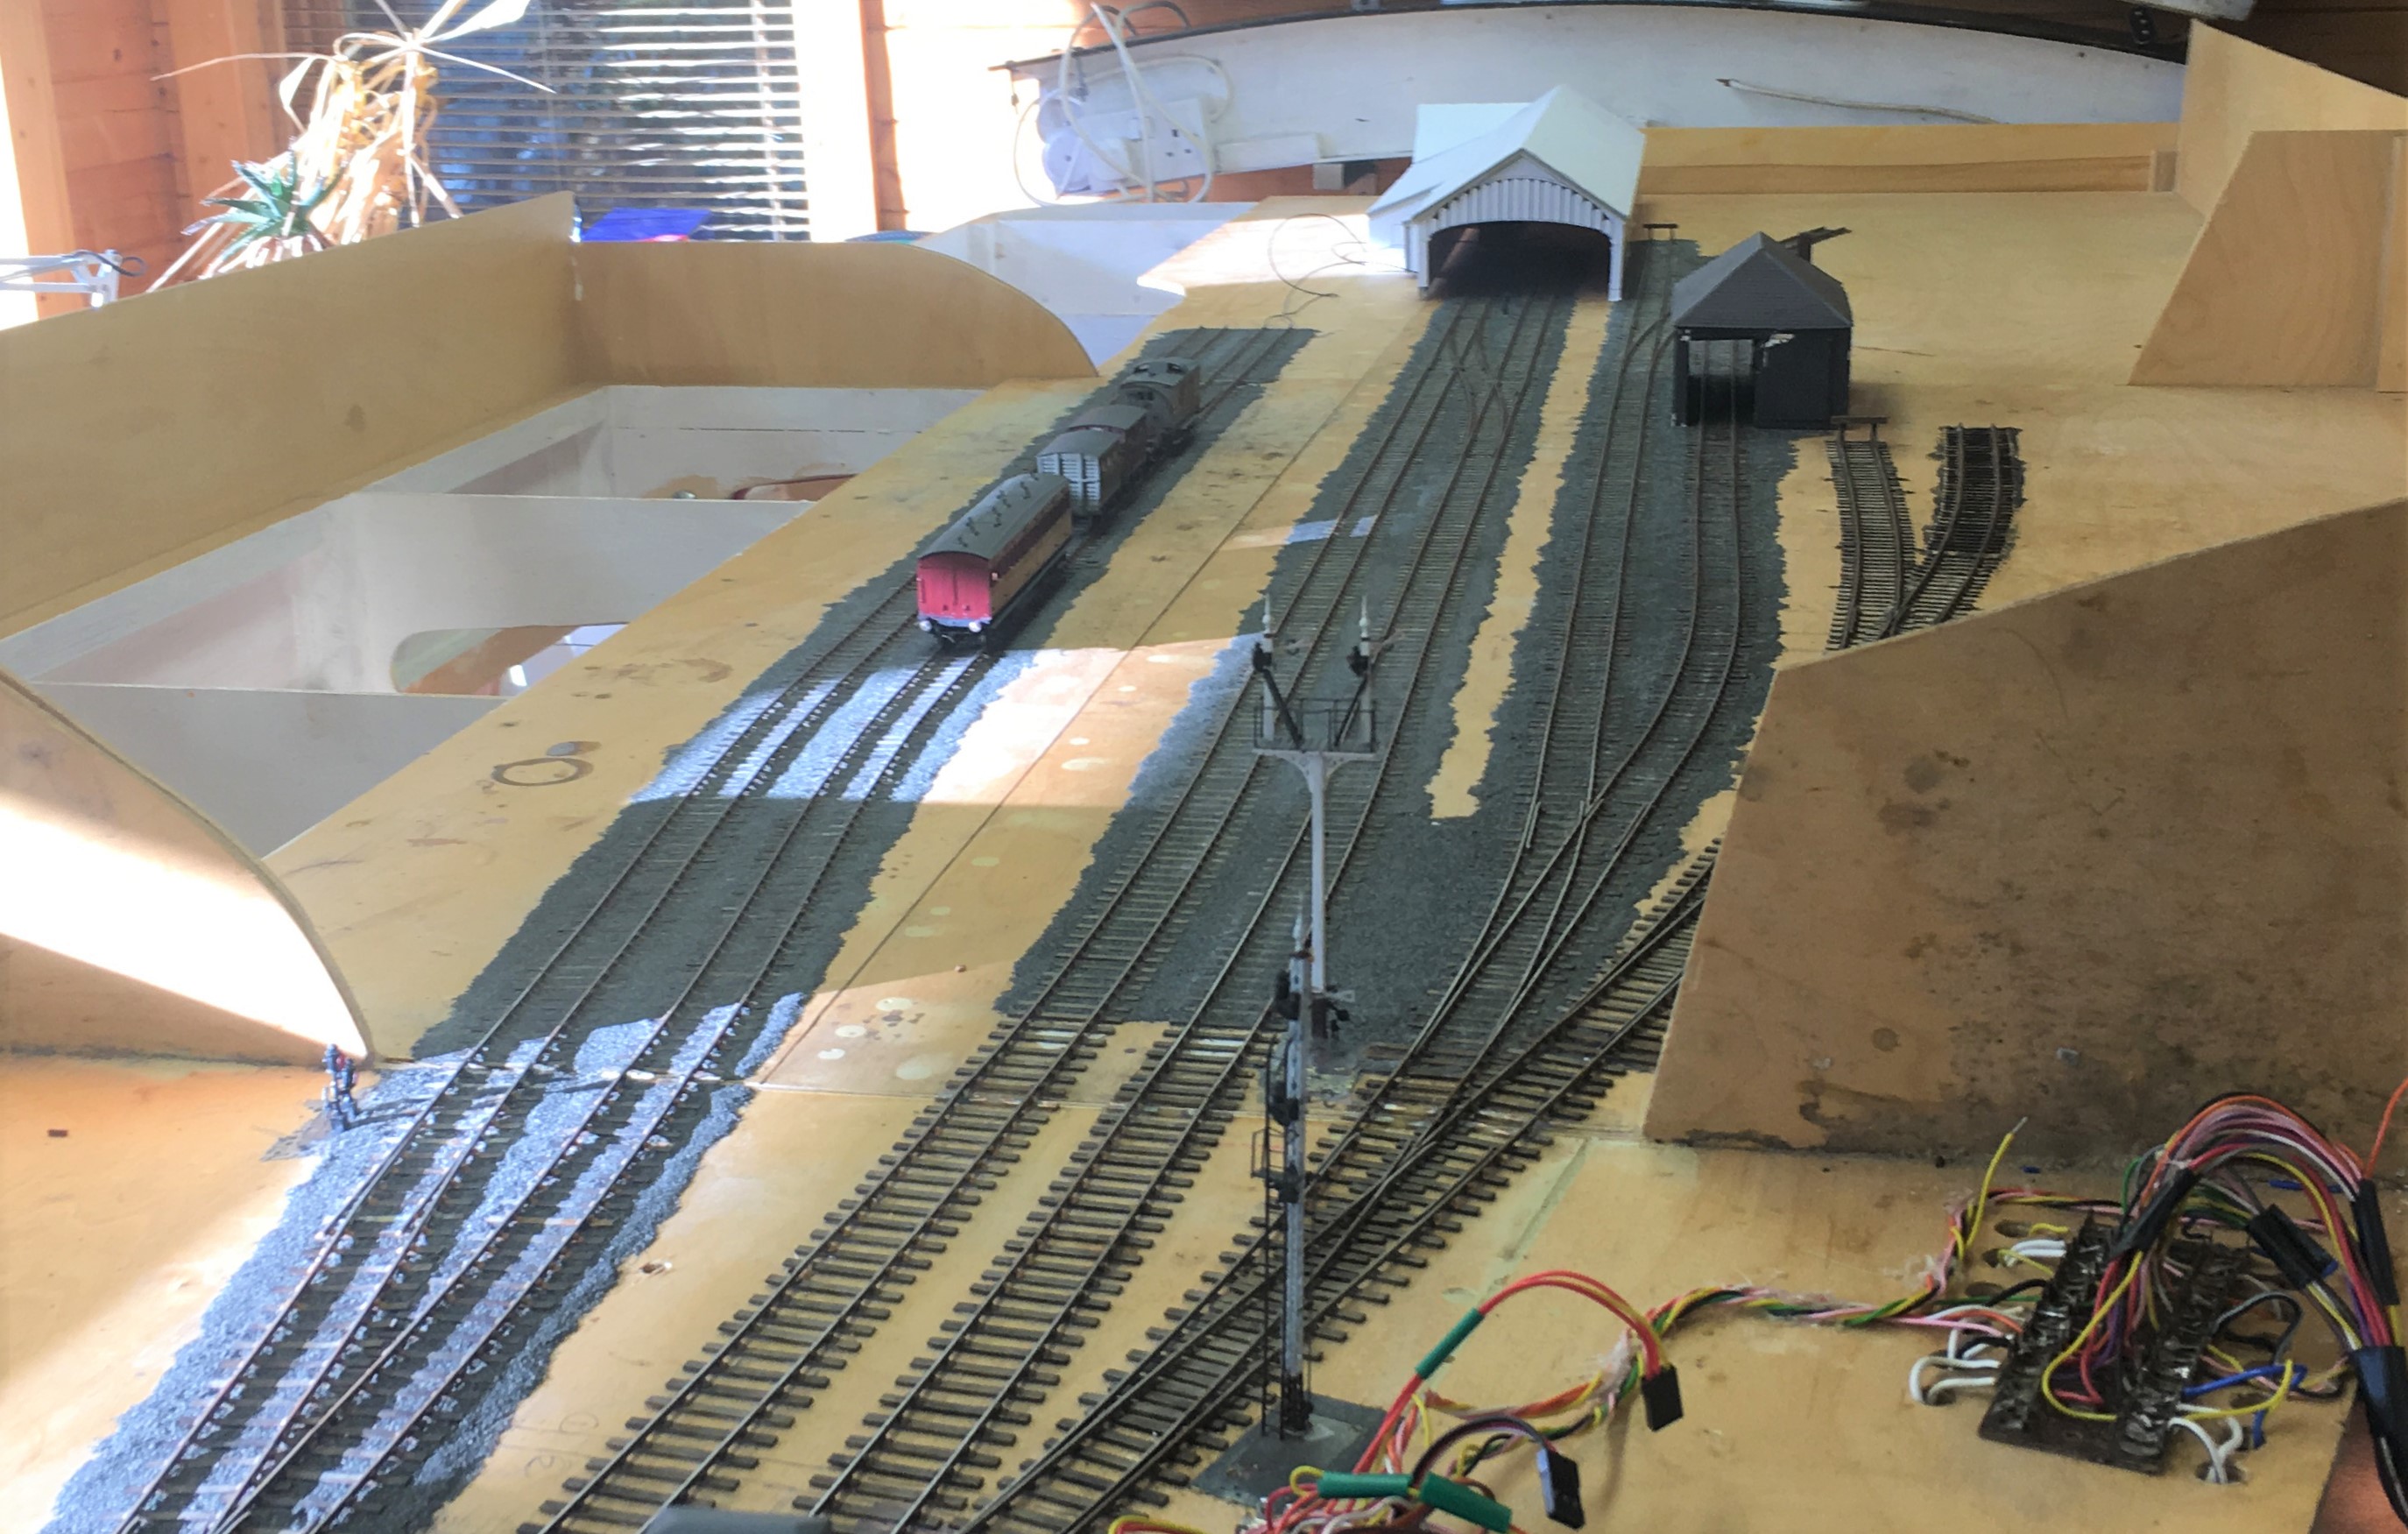
Most of the signals are finished but not yet linked up (which explains some of the droopy angles of the arms!). There will be more posts on this topic soon.
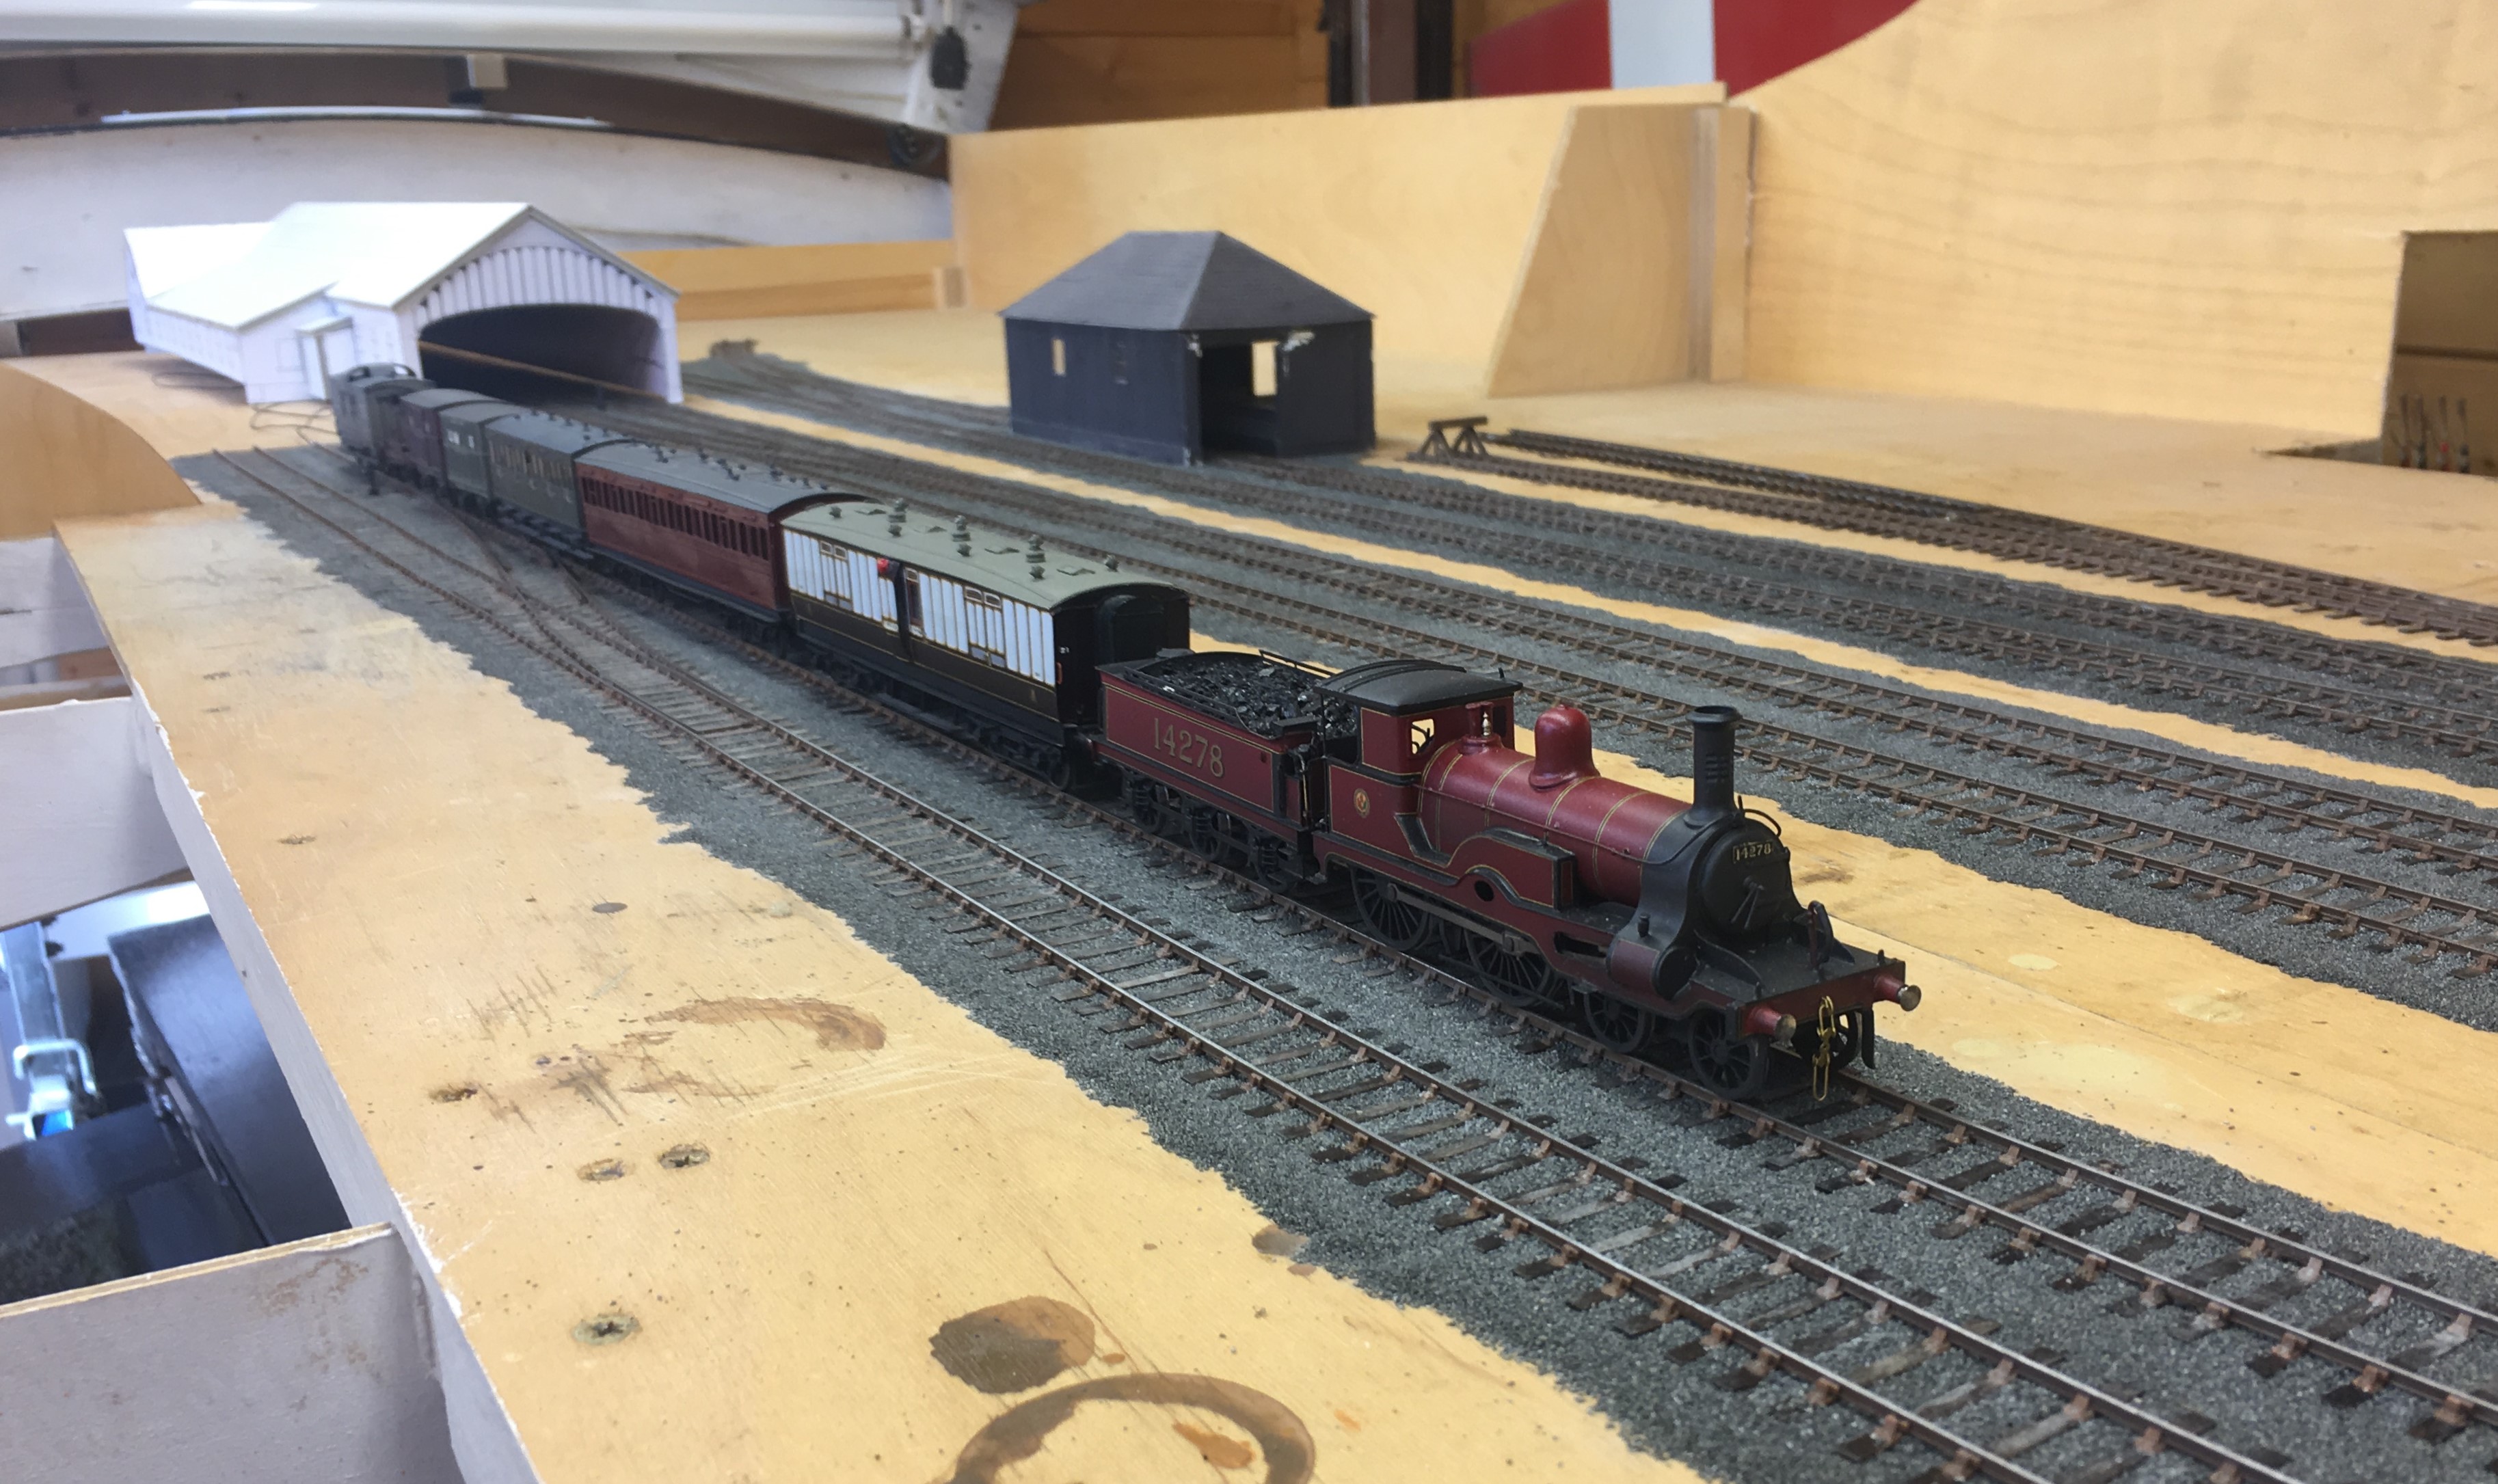
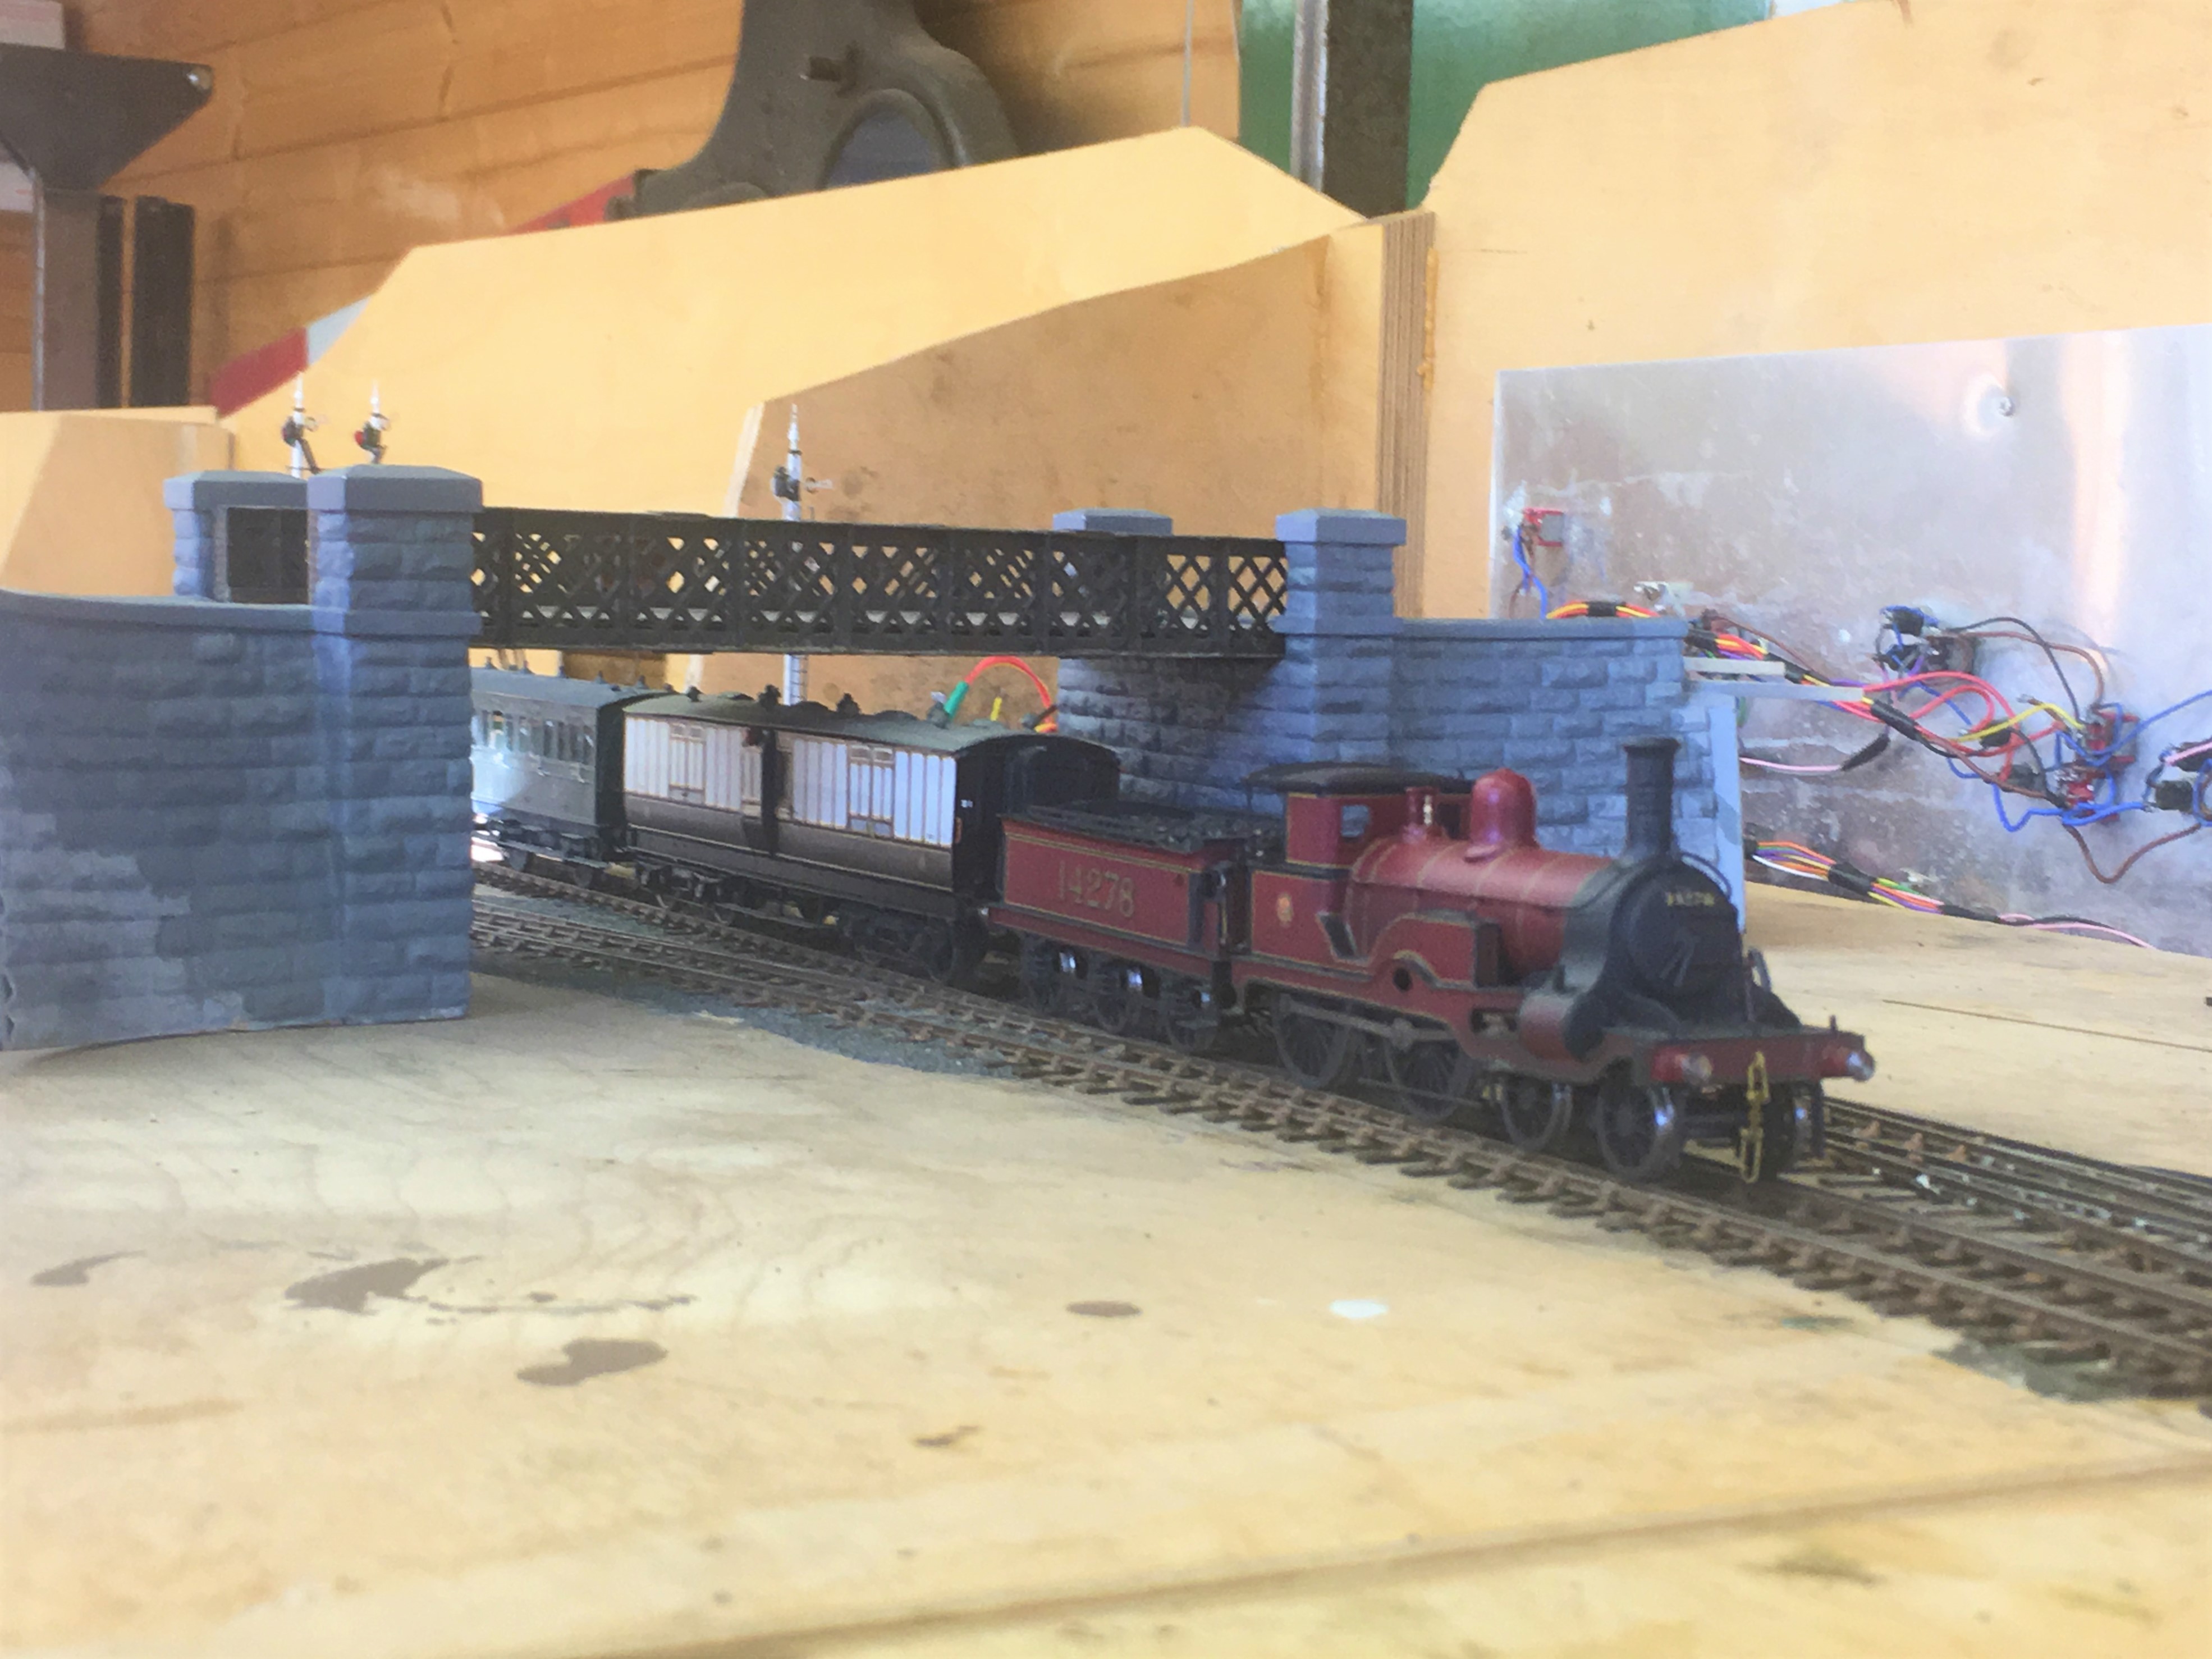
The principal bridge has been finished for a while, but it is looking a bit more “at home”.
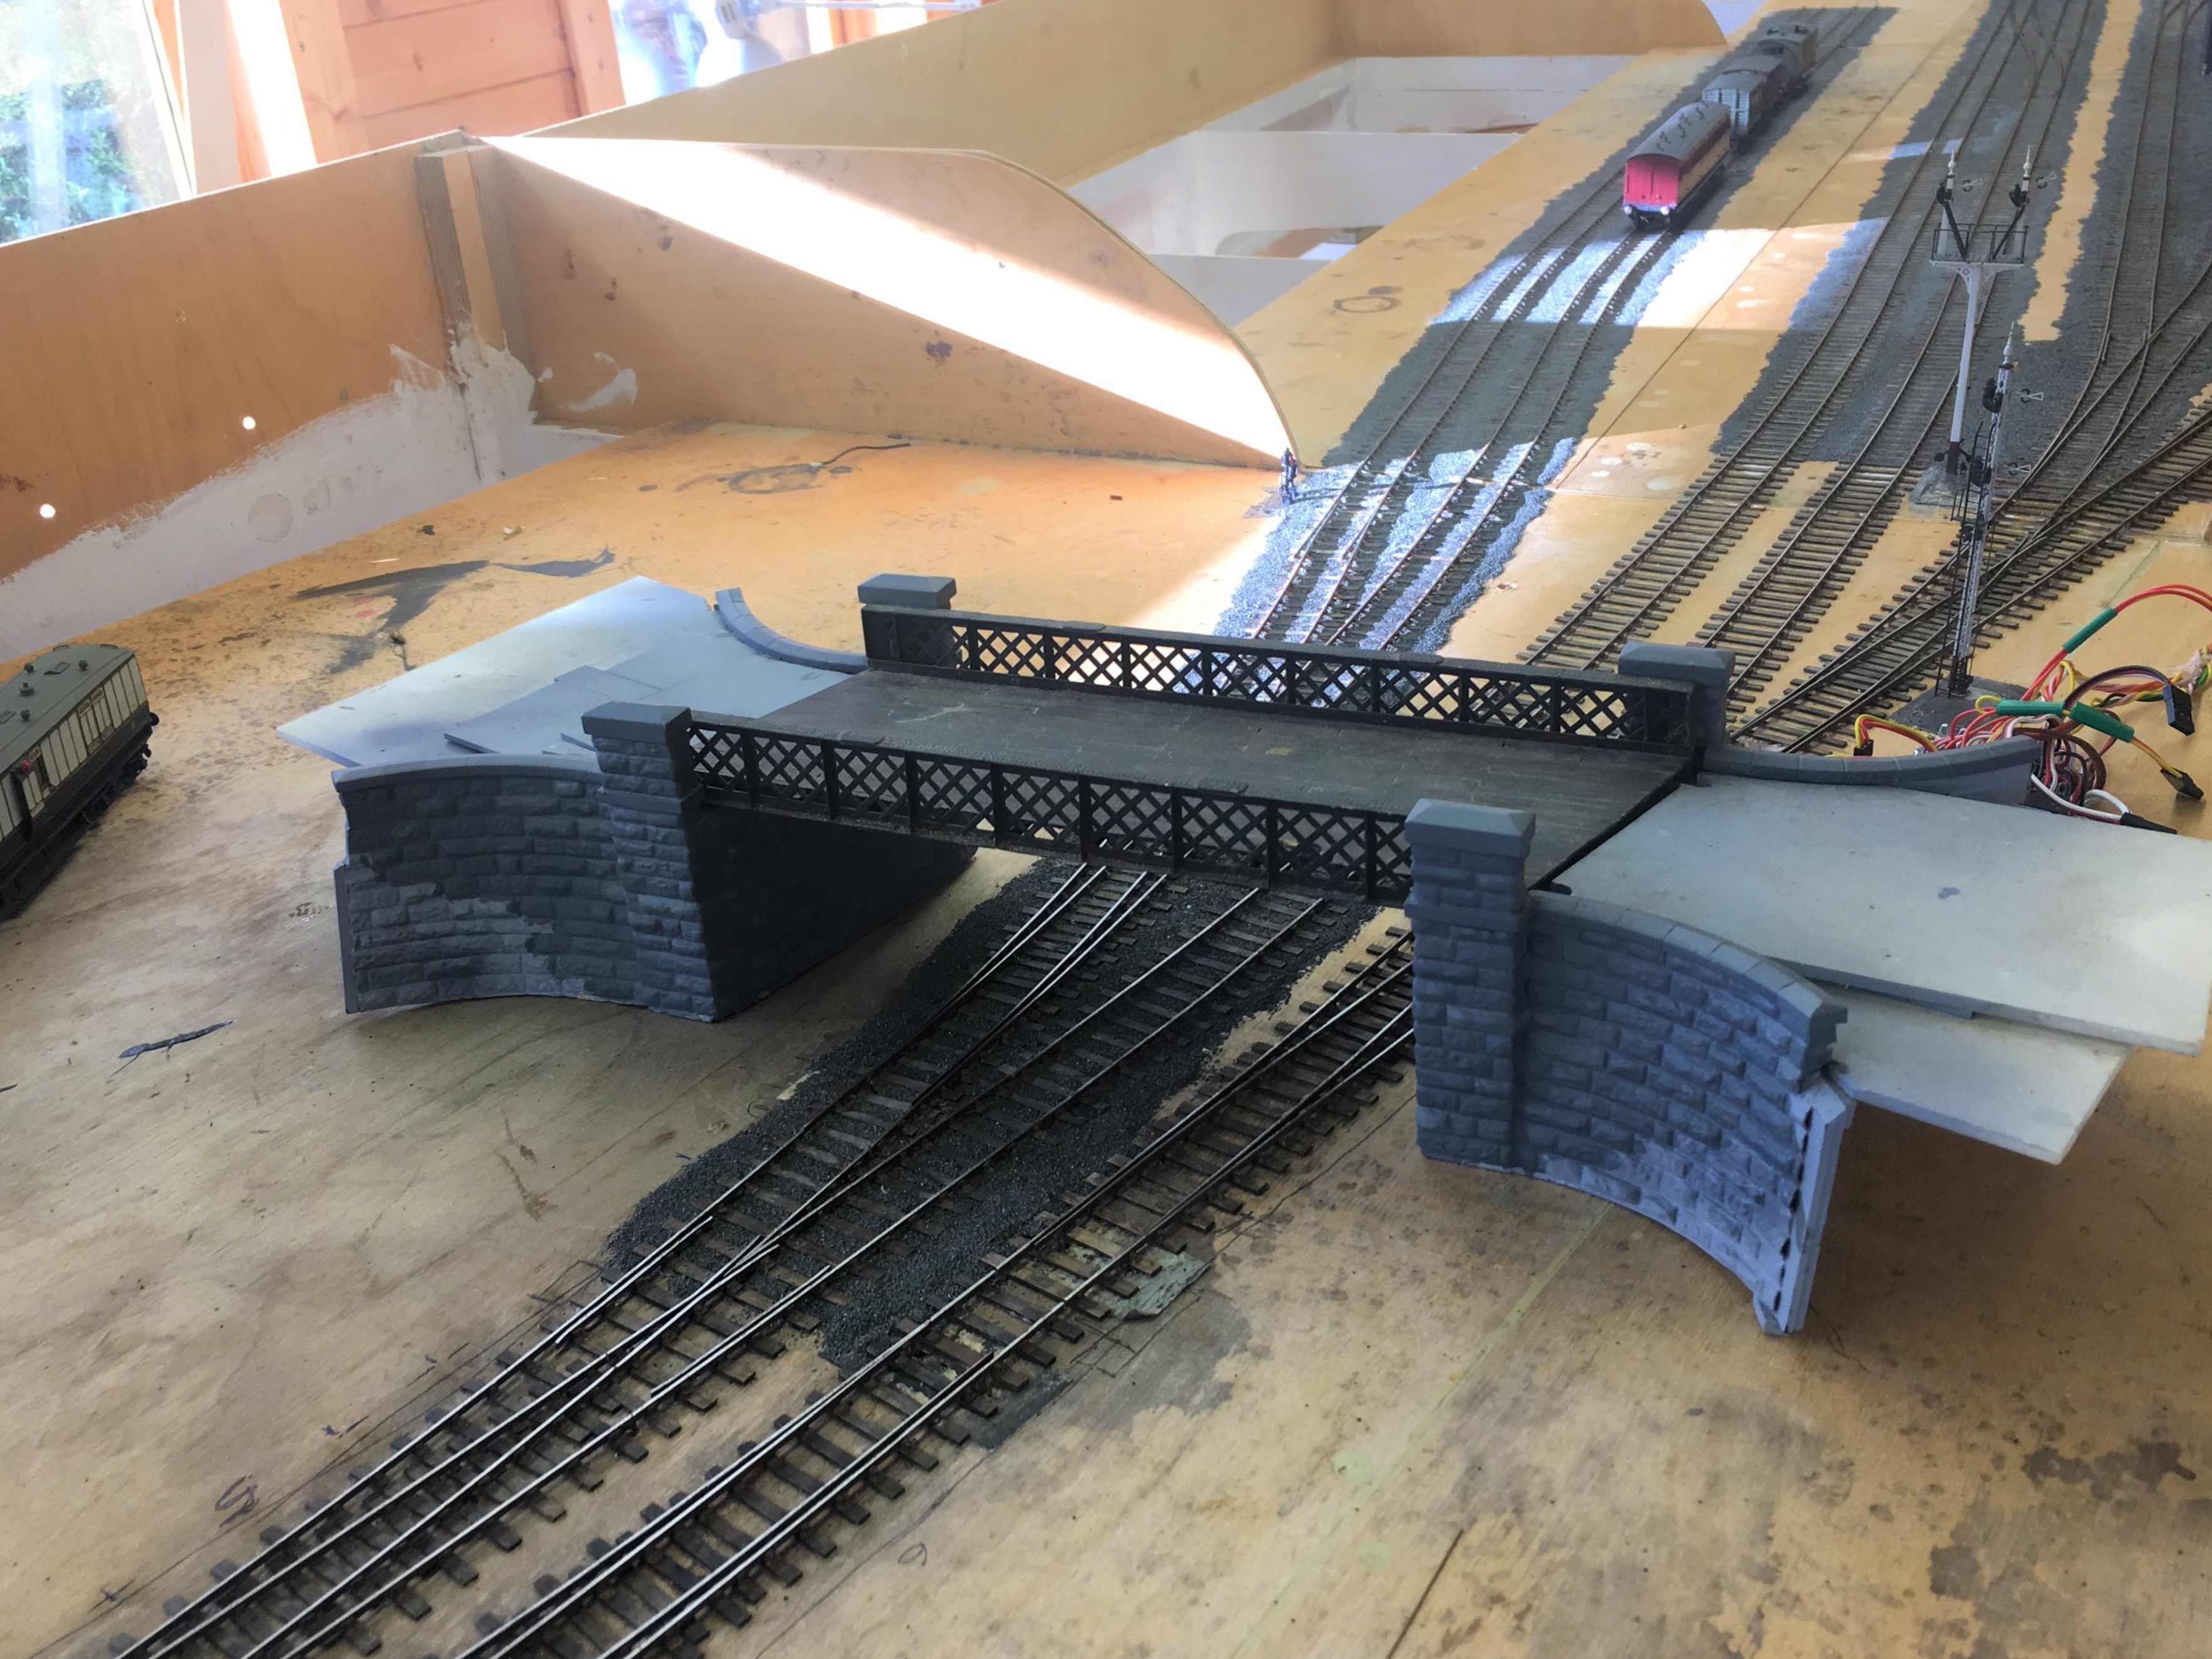
…..especially with a fine loco to set it off.

News from Miscellany Models
Followers of this blog will have noted that various test builds of my artwork coming together and I am now able to offer a number of these for sale under the name of Miscellany Models.
First up is a Highland Railway/LMS/BR diagram 51 full brake – priced at £48.00 for a 4mm and is suitable for OO, EM or P4. These were the last generation of full brake produced by the Highland, built with both cupboard doors and sliding doors as well as alternative forms of guards duckets (all of these are included in the kit). The kit inclusive of fully sprung Fox bogies (see below), roof, corridor connections (also see below) but all castings and buffers will need to be sourced separately. The castings for the bogies are proposed, but are not presently available.

As was common with many pre-grouping coaches these vehicles utilised Fox Bogies (£16.00) and these are being made separately to the remainder of the kit, These bogies have been developed in conjunction with Justin at Rumney Models and are fully sprung, with both the axleboxes and the bolsters sprung. They really do glide across track and look as if they weigh many tons rather than a few grams! They need castings for your favoured axleboxes/springs and bolsters but do include the foot steps and all of the bogies sides, brakes and details. Suitable for oo, EM and P4.
.JPG.3b26712c4490ad68695b10226612a0a9.JPG)
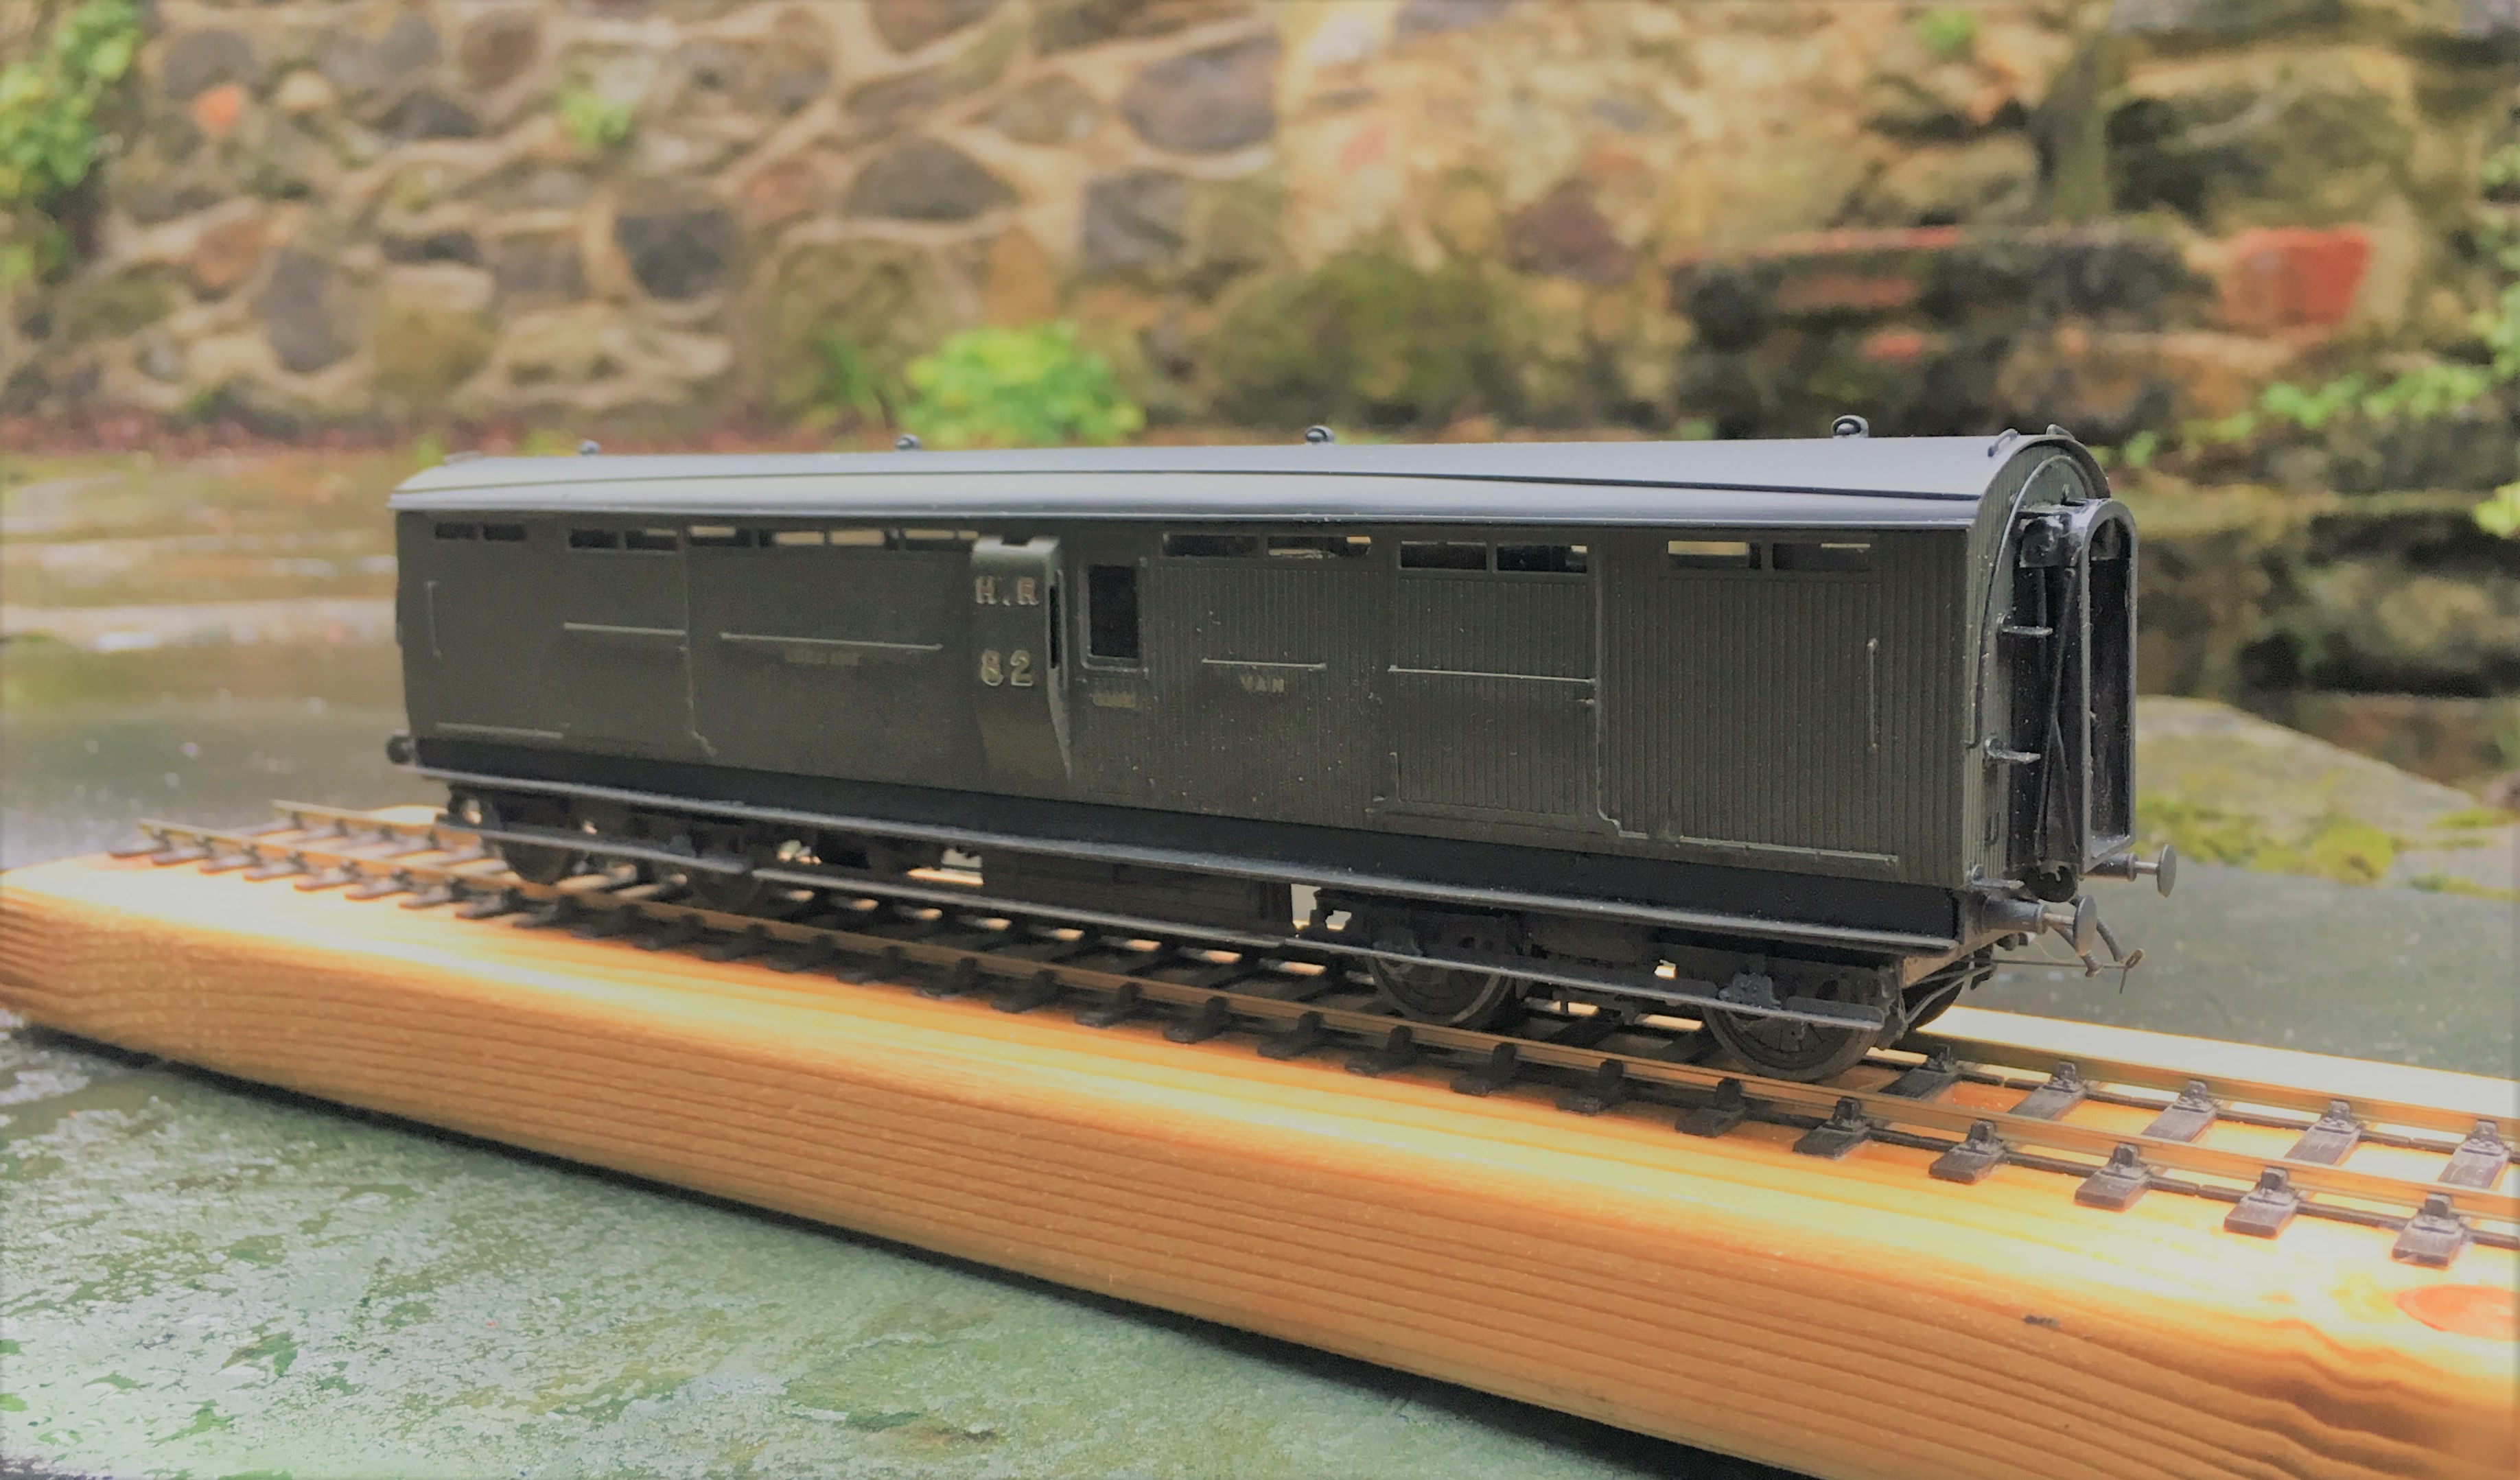
The second coach kit is for a MR/LMS/BR: Dia 530 Passenger Brake – priced at £36.00 in 4mm scale (suitable for OO, EM and P4). This prototype was built in some numbers and by the 1920s they were spread extensively across the LMS system. The kit is for full etches covering the roof, body, underframe and footboards plus parts for the sliding central axle included. It needs axlebox/springs (available from Branchlines or Coopercraft), gas lamps, buffers, brake and gas cylinders.
.JPG.1678157932a192d68328755d825c54f0.JPG)
On the wagon front, there is an etch to detail the NER/LNER/BR: Dia P7 Hopper Wagon – £13.50 4mm (sufficient for two wagons). They cater for a large number of the variants to this numerous and long lasting hopper wagon. Needs wheels and the Slaters kit P7 kit for the donor model. Variants that can be made include the end braked version, improved components for the Morton braked version, outside twin W irons and also the anti-friction wheel device.

All of these are available from my website https://miscellanymodels.com/ and in addition to this from the Rumney Models stand at the following shows – Scalefour North in April, Railex in May, Scalefourum in September and South Hants in November,
All of these have been extensively road tested by me with a couple of test builds for each of them. You can see this unfold on my blog and if you are interested in seeing how they go together do take a look!
Please remember that the availability of these models is an adjunct to my own hobby and this has to be accommodated within the constraints of my day job and general life! In particular I can’t get to post these orders until Saturdays so do please give me a little slack when it comes to getting the goods to you!
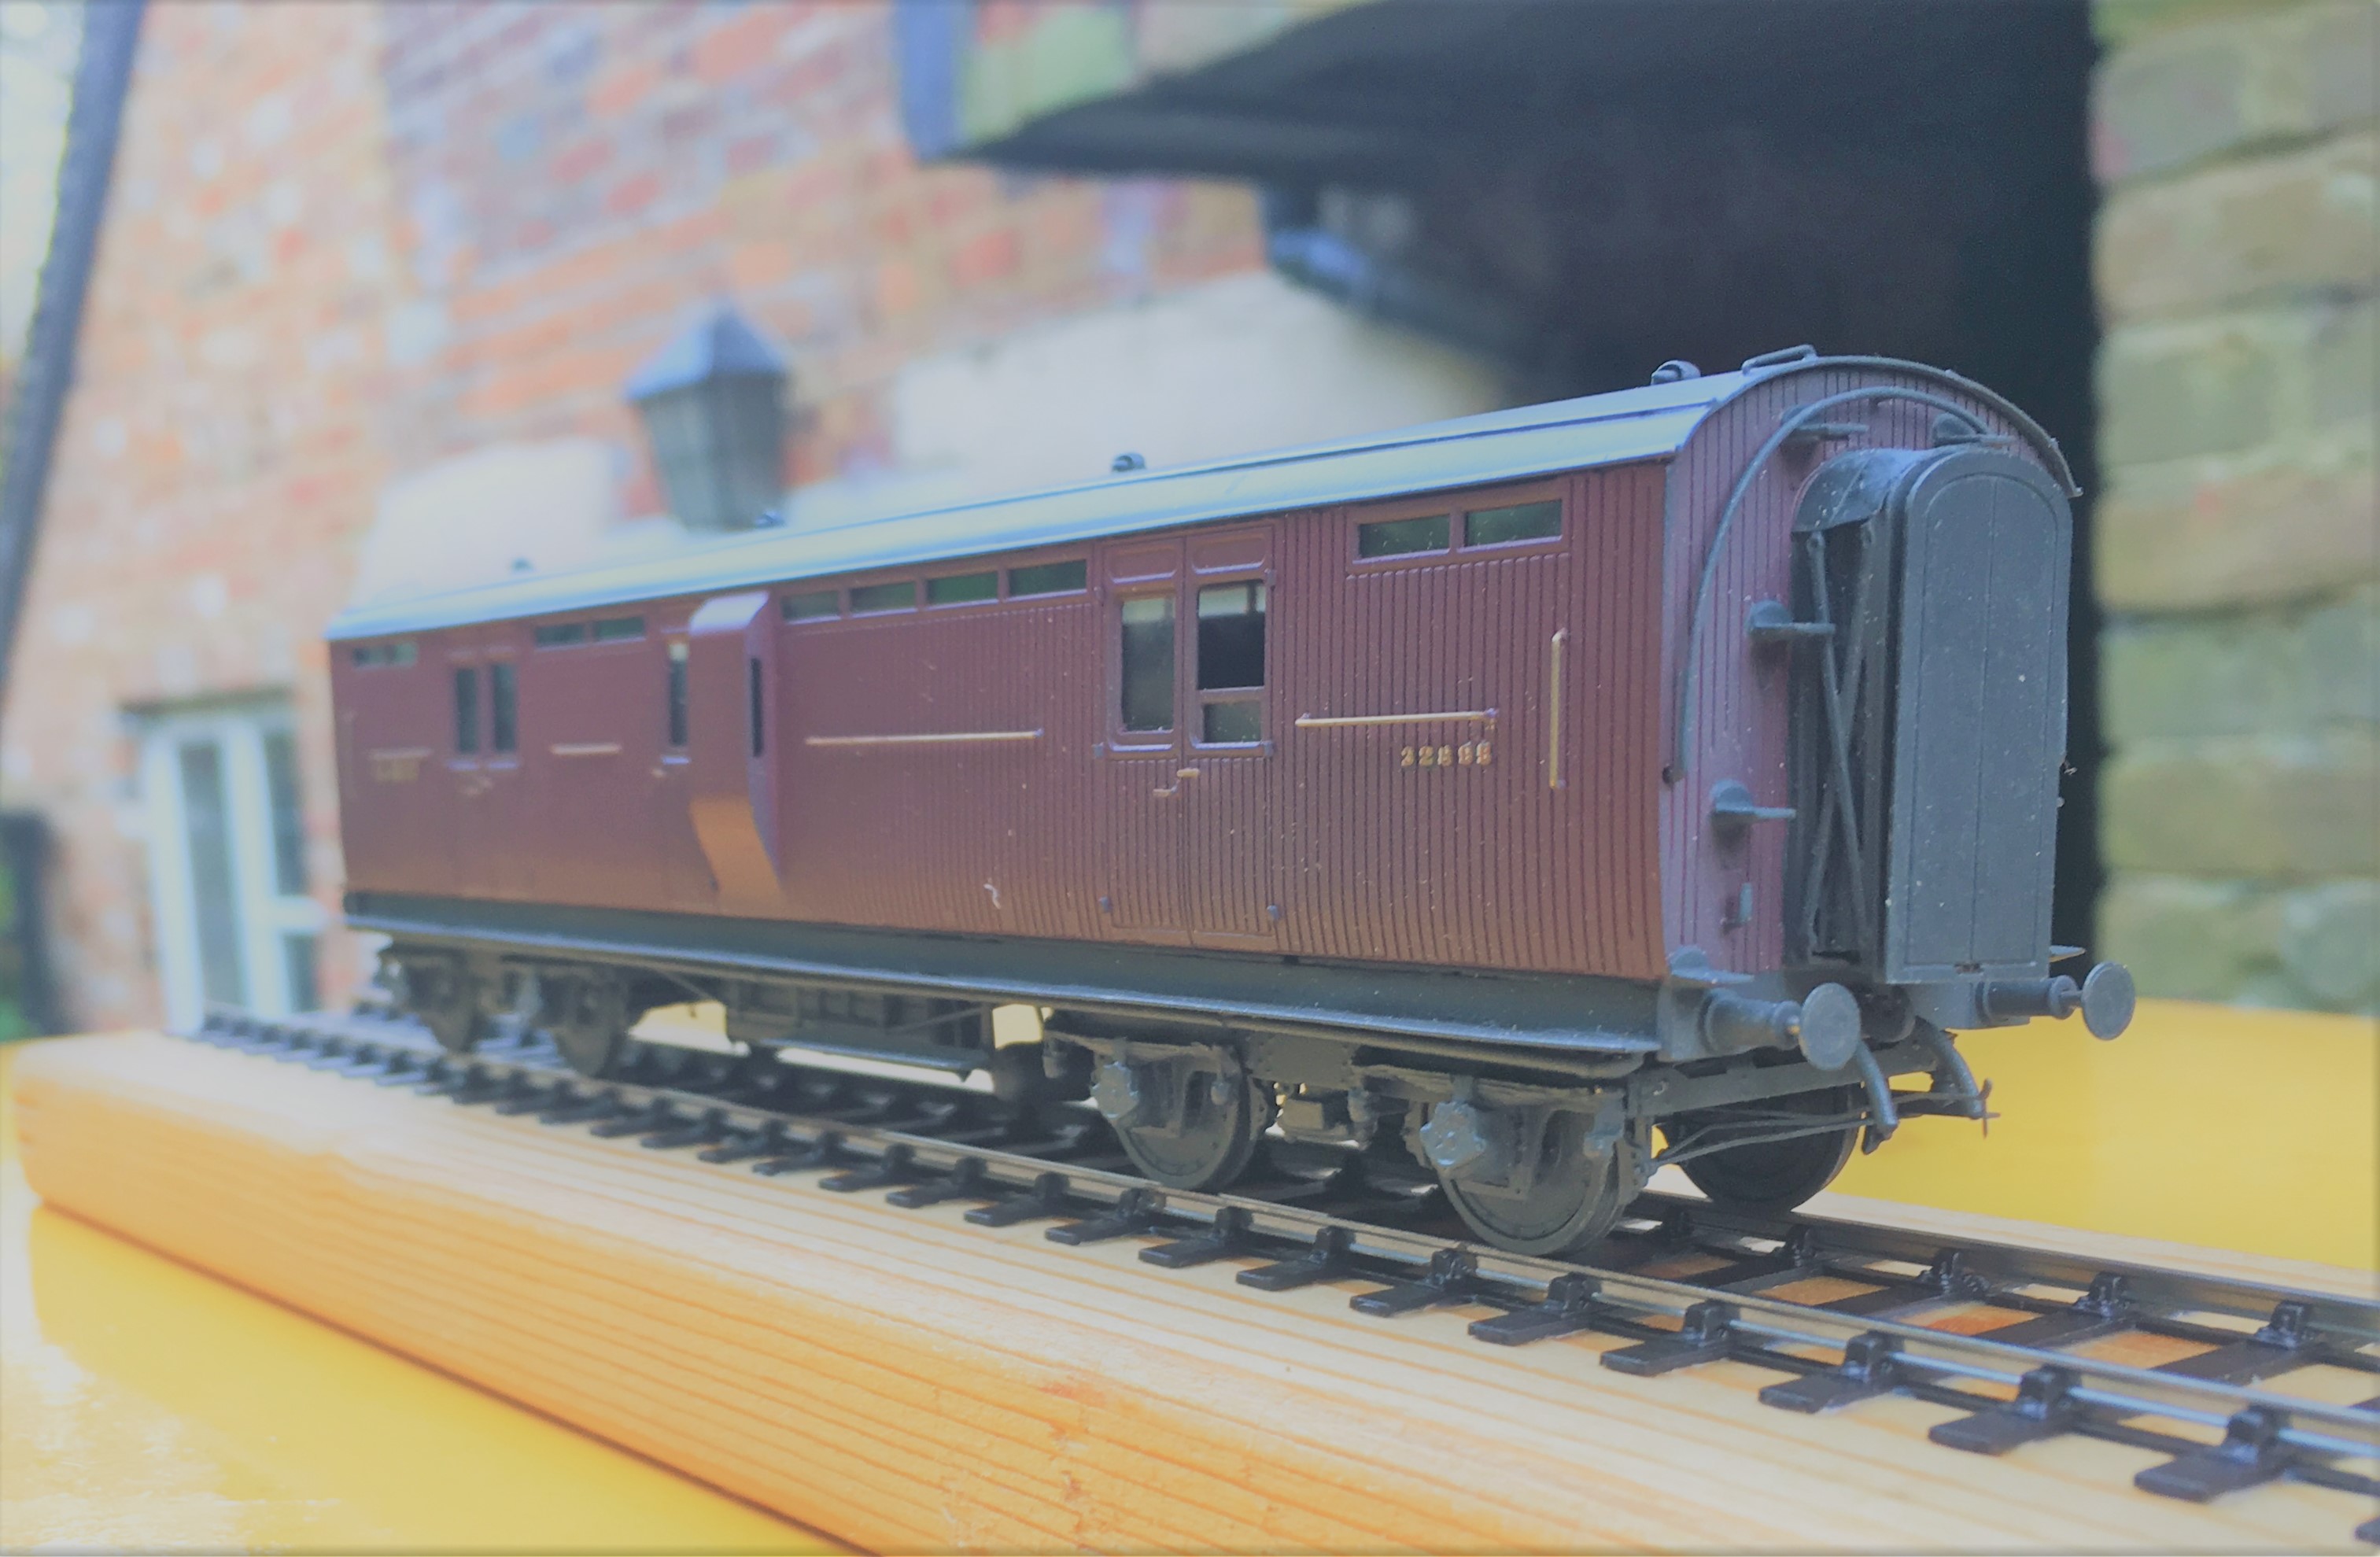
Diagram 51 Full Brakes – Test Build part 5; now in glorious technicolor!
The pages of this blog have charted the development of a proposed kit to build the Highland Railways dia 51 full brake; well finally it is finished and we get to see them in the flesh and painted up.
The kit can produce, with a bit of modification, two variants of door and I have now build both of them. First up the cupboard door version painted in crimson lake and minus full footboards.
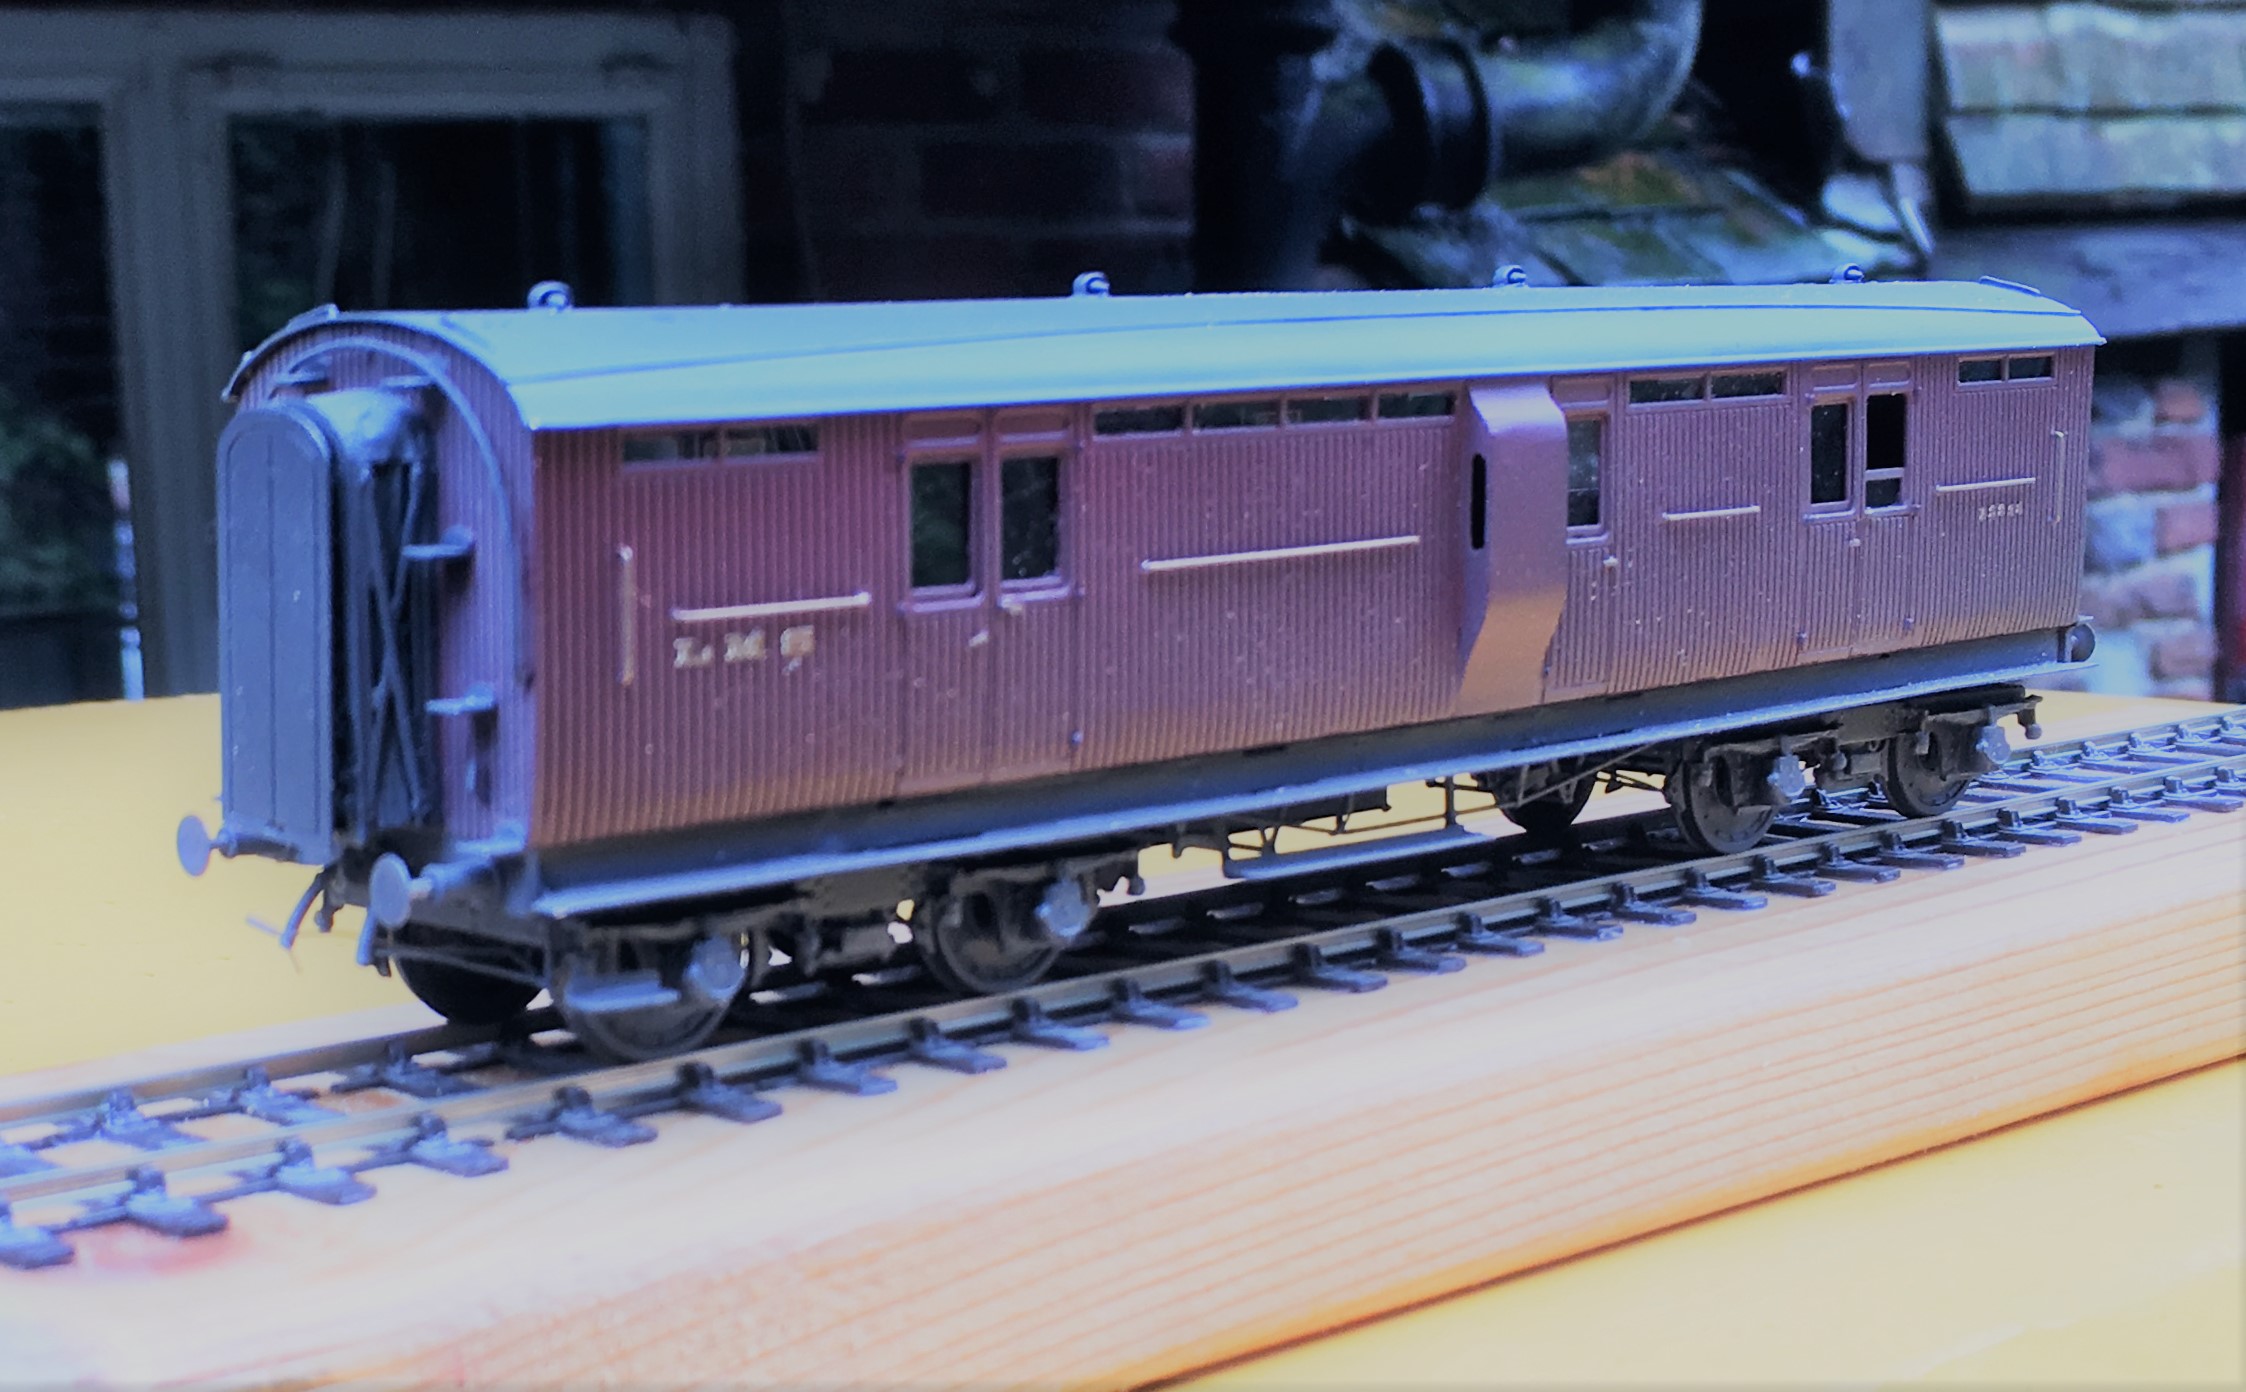
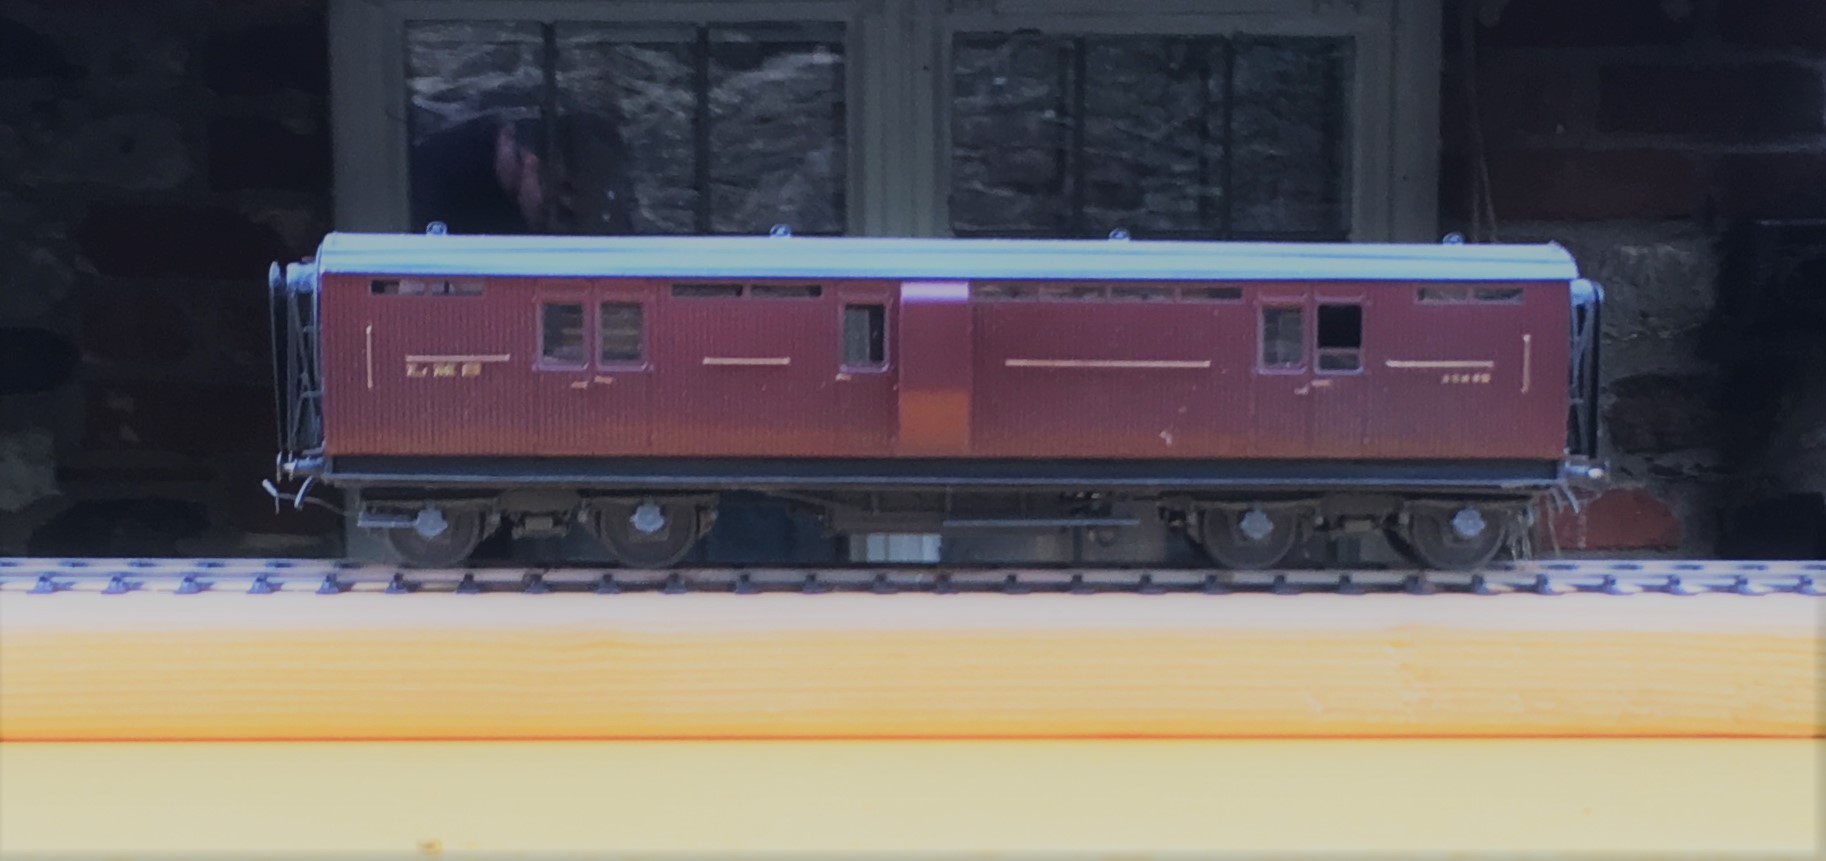
Second we have the sliding door version, this being modelled with full step boards and in Highland Olive green.
Apologies that the technicolor photos are a bit short on gloriousness; it is fair p*ssing down today and this is the most light that I could get to take any photos!
If you want to recap on the earlier blogs that show the development of the proposed kit, you can find them here:
Part 1 – getting underway with the body
Part 2 – drawing the chassis and roof to a conclusion
Part 3 – the build of the second vehicle (sliding door version)
Part 4 – details of the spring bogies that accompany these (and many other coaches)
I do now have a batch of these back from the etchers and I aim to conclude the instructions on Monday/Tuesday. I will then make a notification that they are available but at present I cannot provide the castings and those to the bogie are rather important. If you can scavenge from a Lochgorm kit some Iracier axleboes/springs, you will be able to complete the kit; if not then I am seeking to either source some of these castings or produce my own. So watch this space.

Cover Girl! ……..and a shameless plug!
Portchullin is a cover girl again, as it features on the front cover of the DVD supplement that accompanies the just available (perversely February 2019) British Railway Modelling.
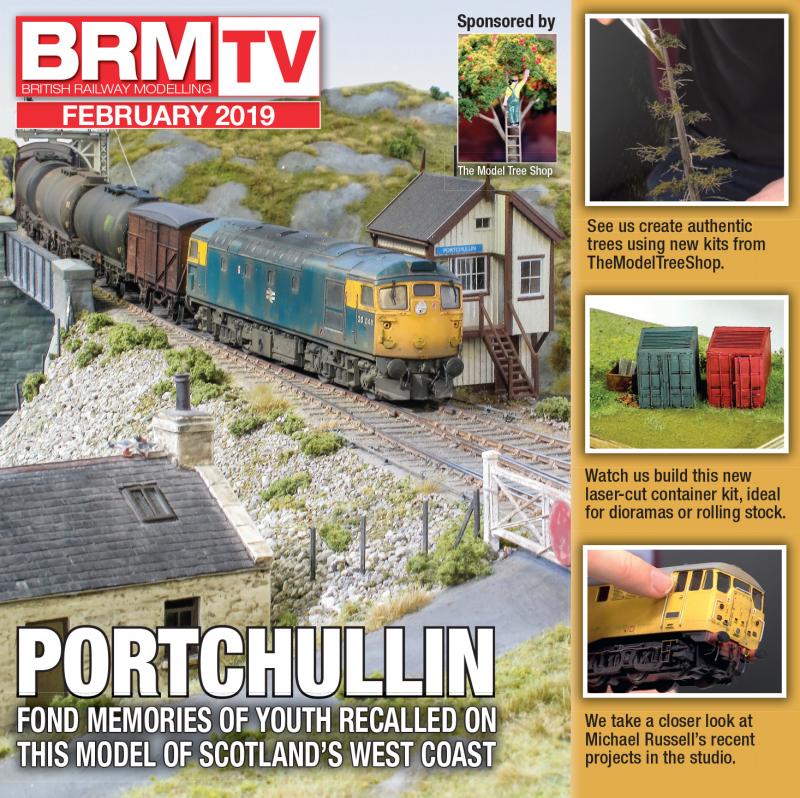
It features me blathering on about the inspiration for the layout, the origins of the real line and the prompting of its building. I even managed to remember to thank Peter for building the signal cabins this time, so hopefully he will not cold shoulder me for six months this time……………..
This DVD is only available with the subscription copy or if you take it in a digital format, so you can not rush down to WHSmiths to get it – I dare say that this is the publishers of BRM seeking to encourage you to take out a subscription!
In addition to this (and probably partially as a result), Portchullin has also got itself nominated into the BRM/RMweb’s 2018 British Railway Model Awards – click the banner at the head of their website here. It would be great to see the layout do well in the poll, so if anyone fancies doing a bit of voting, all contributions would be gratefully received!!
If you wish to see Portchullin in the flesh, its next outing is in May at ExpoEm in Bracknell. Look forward to seeing you there.
